

How to Configure a Business Mail account on Gmail
Updated May 27, 2026 · 3 min read
If you want to manage emails from another account within Gmail, you can do so by setting up POP and SMTP access. This allows Gmail to receive and send emails using an external email provider.
Follow this guide to learn how to configure a business mail account on Gmail with wxCloud MailBox to send and receive mail easily:
Step 1: Gather your POP Info
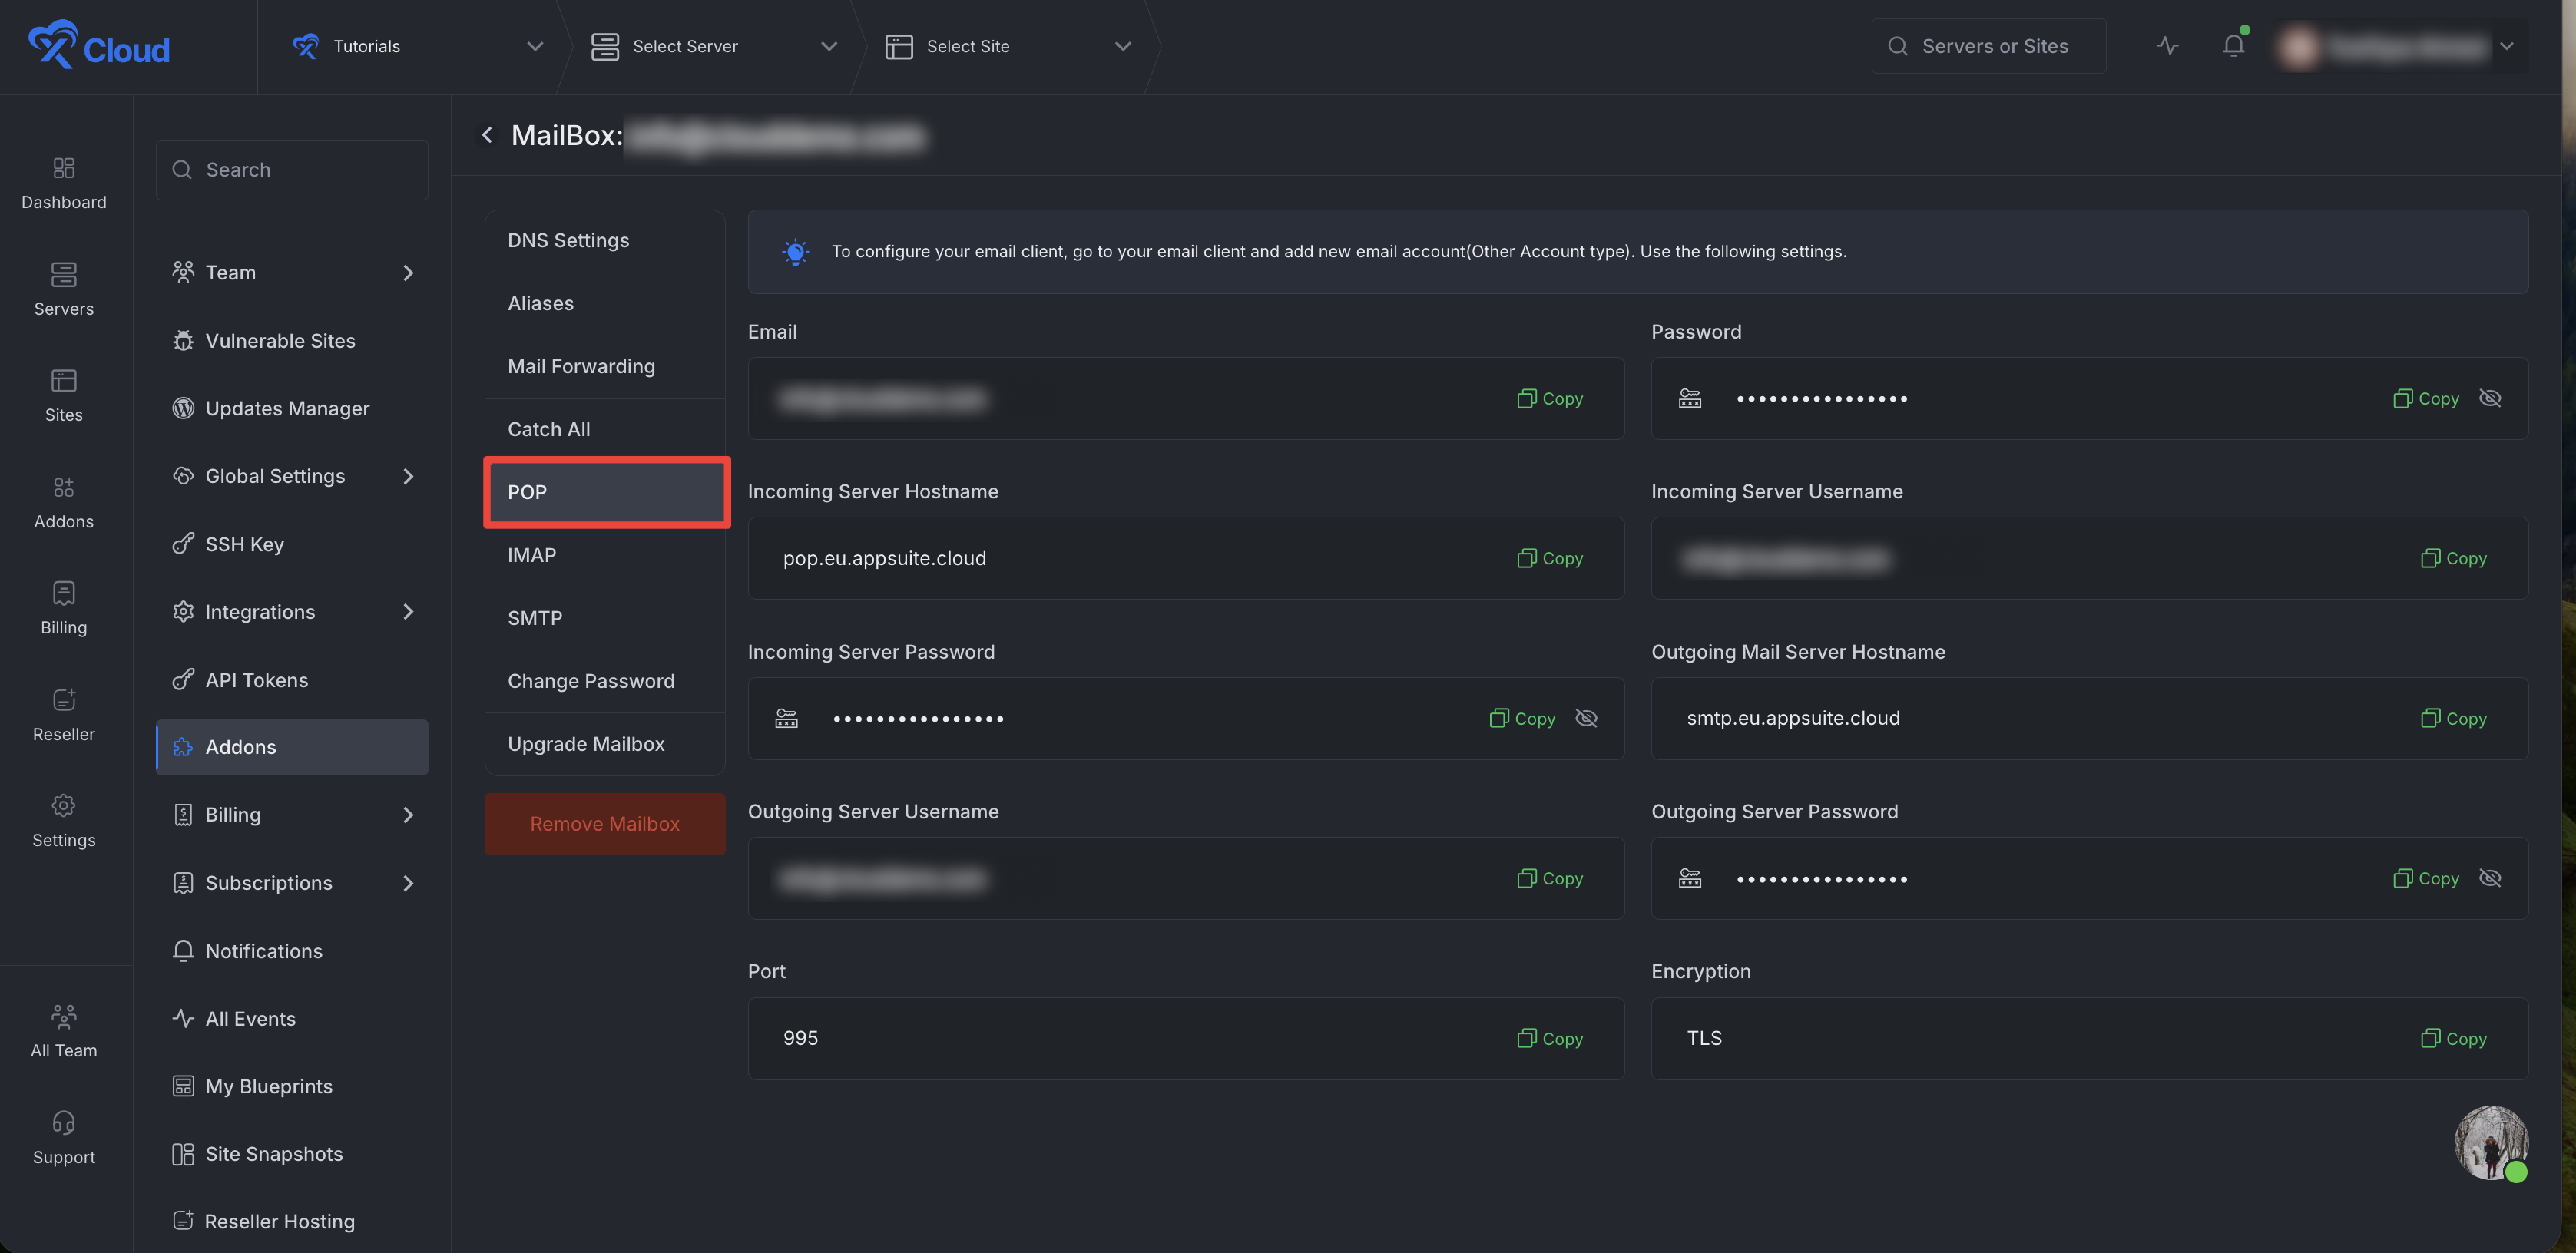
First, go to your MailBox, choose your mail, and head over to the ‘POP’ tab from the menu. Here you will find the credentials to set up the email client with Gmail.
Email: hi@yoursite.com
Password: ***********************
Incoming Server Hostname: pop.eu.appsuite.cloud
Incoming Server Username: hi@yoursite.com
Incoming Server Password: ***********************
Outgoing Mail Server Hostname: pop.eu.appsuite.cloud
Outgoing Server Username: hi@yoursite.com
Outgoing Server Password: ***********************
Port: 995
Encryption: TLS
Step 2: Go to Your Gmail Account
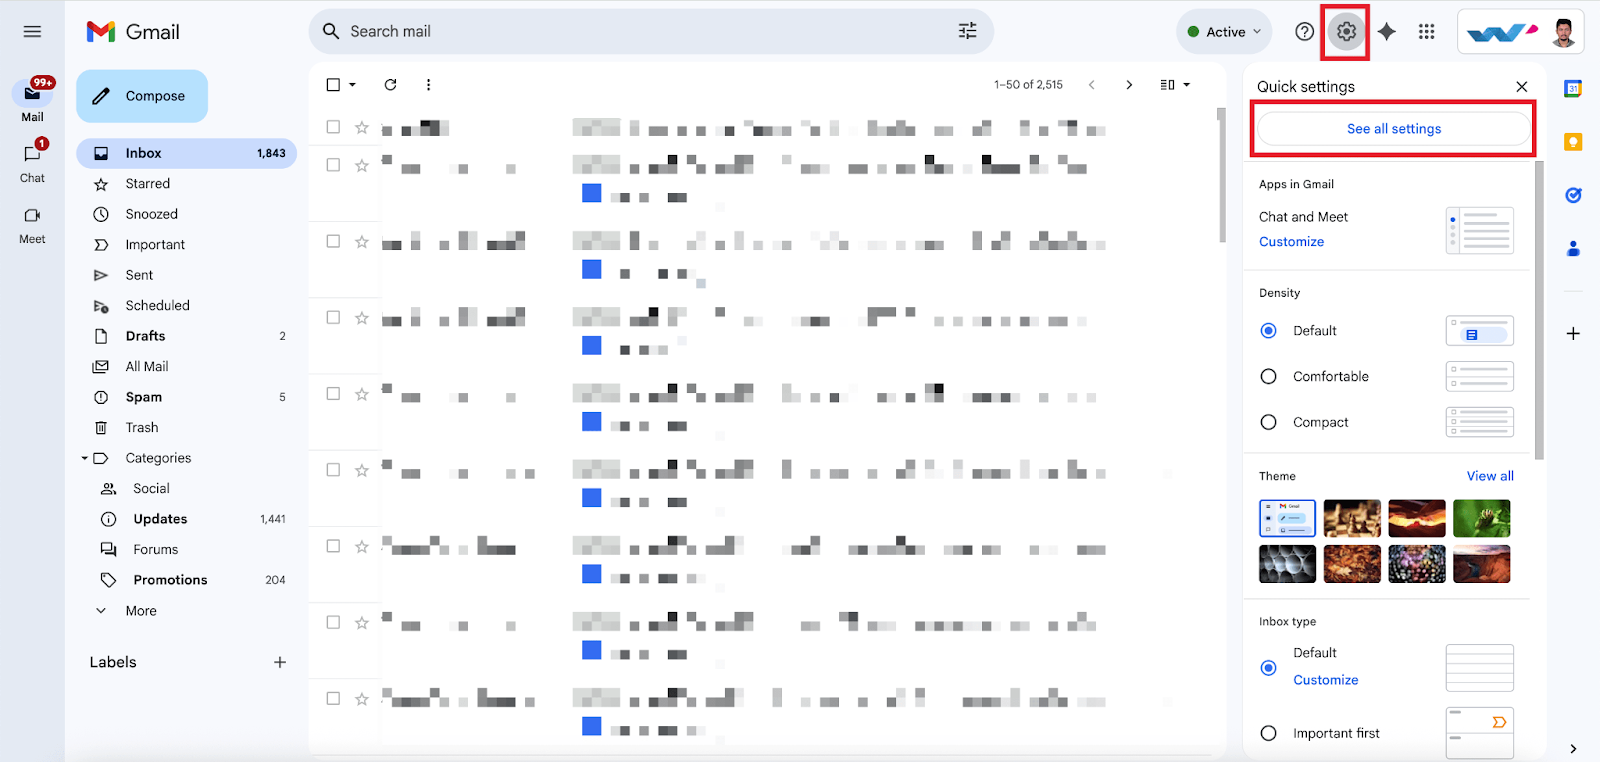
Start by logging into your Gmail account and navigating to ‘Settings’. From there, click on ‘See All Settings.’
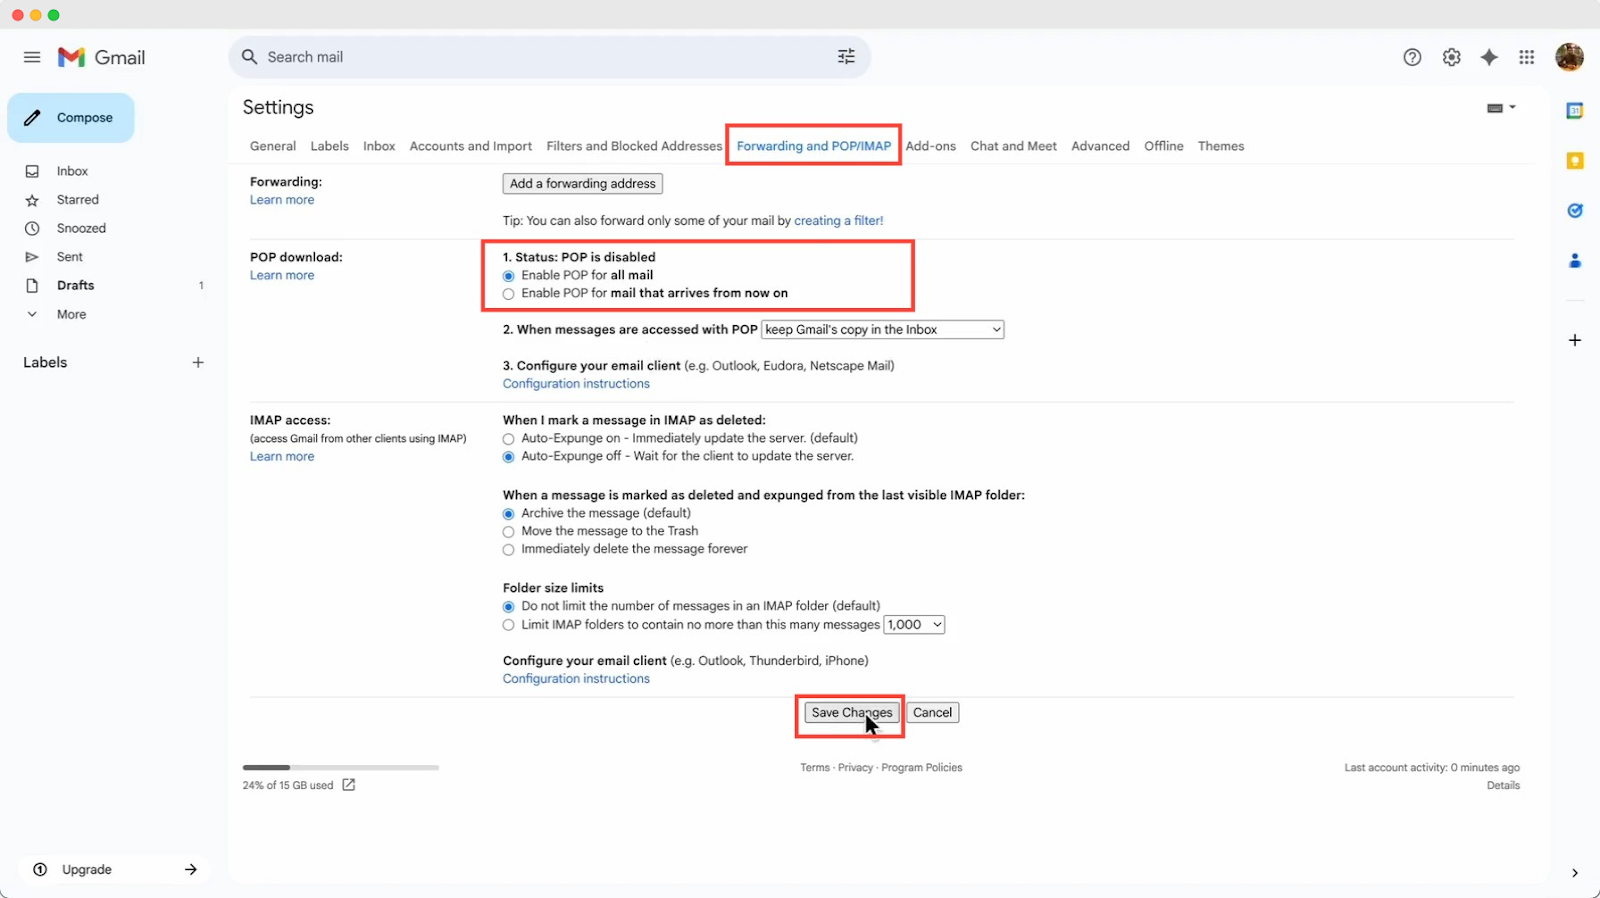
Then go to the ‘Forwarding and POP/IMAP’ tab and find the ‘POP Download’ option. Next enable the POP for all mail option and click on the ‘Save’ button.
Step 3: Add a Mail Account
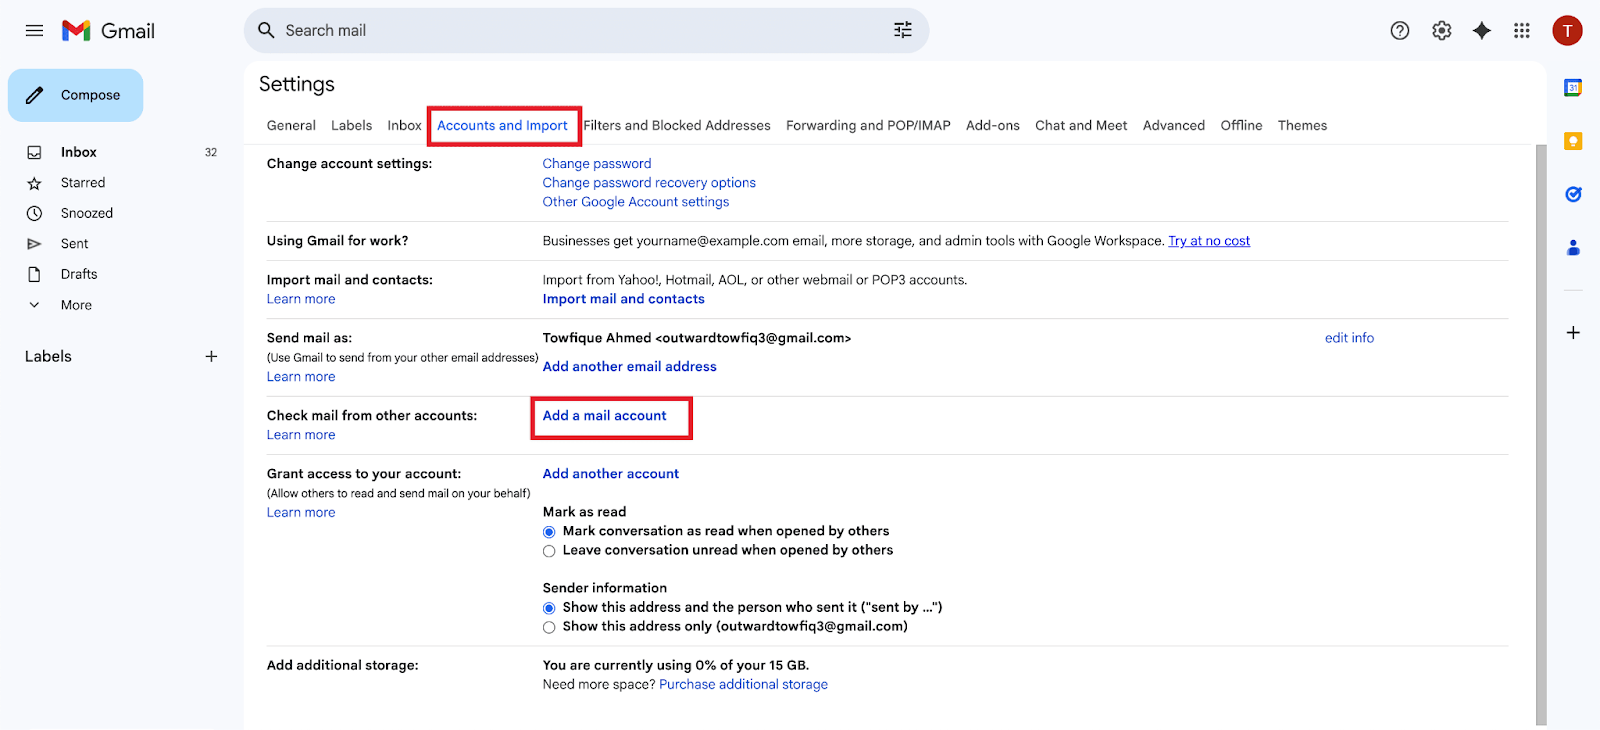
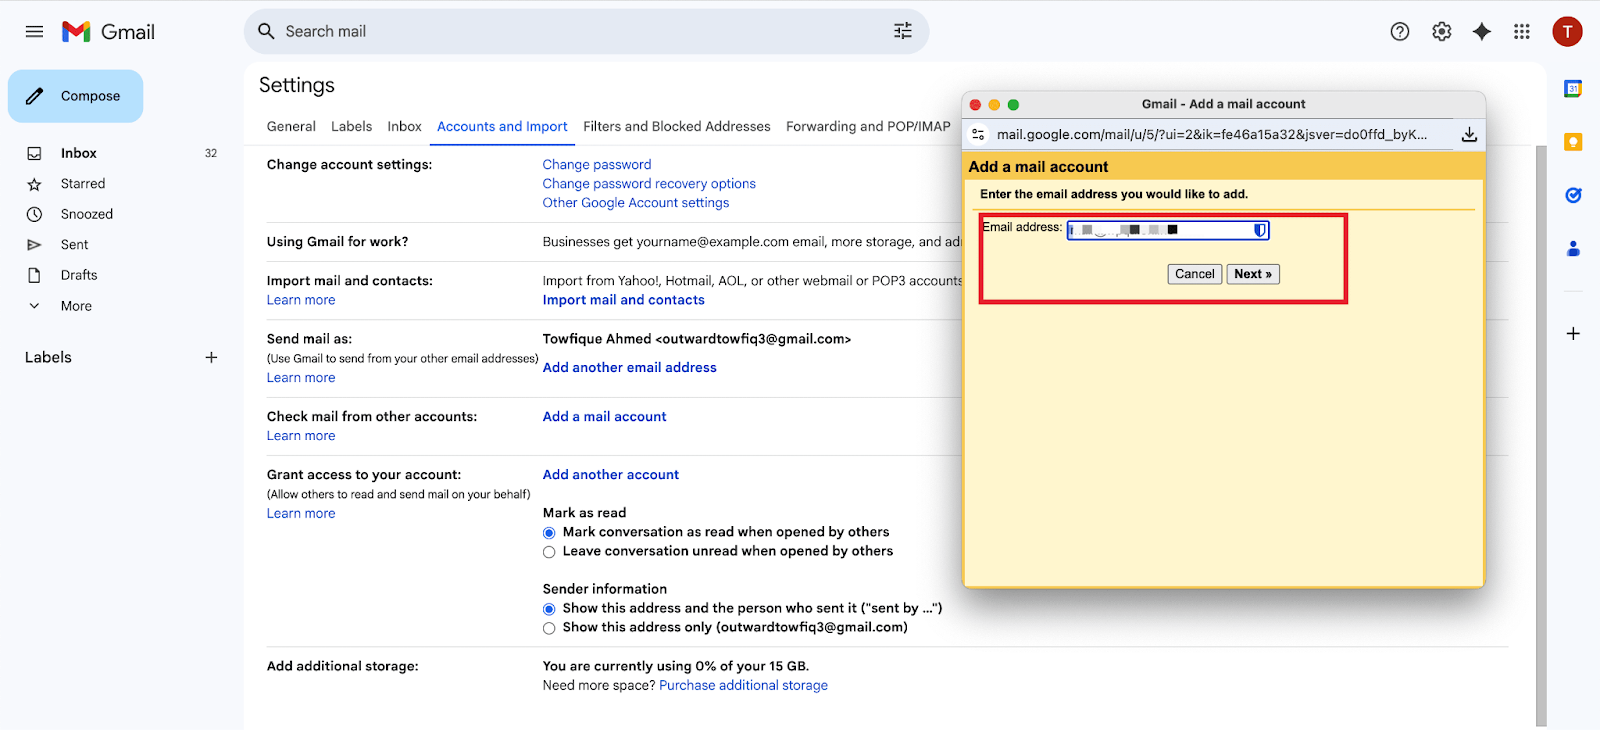
Then, go to ‘Settings’. From there, click on ‘See All Settings’ → ‘Accounts’ tab. Click ‘Add a mail account’, which opens a new window.
Then enter your ‘POP Mail’ in the ‘Email address’ field and click on the ‘Next’ step button.
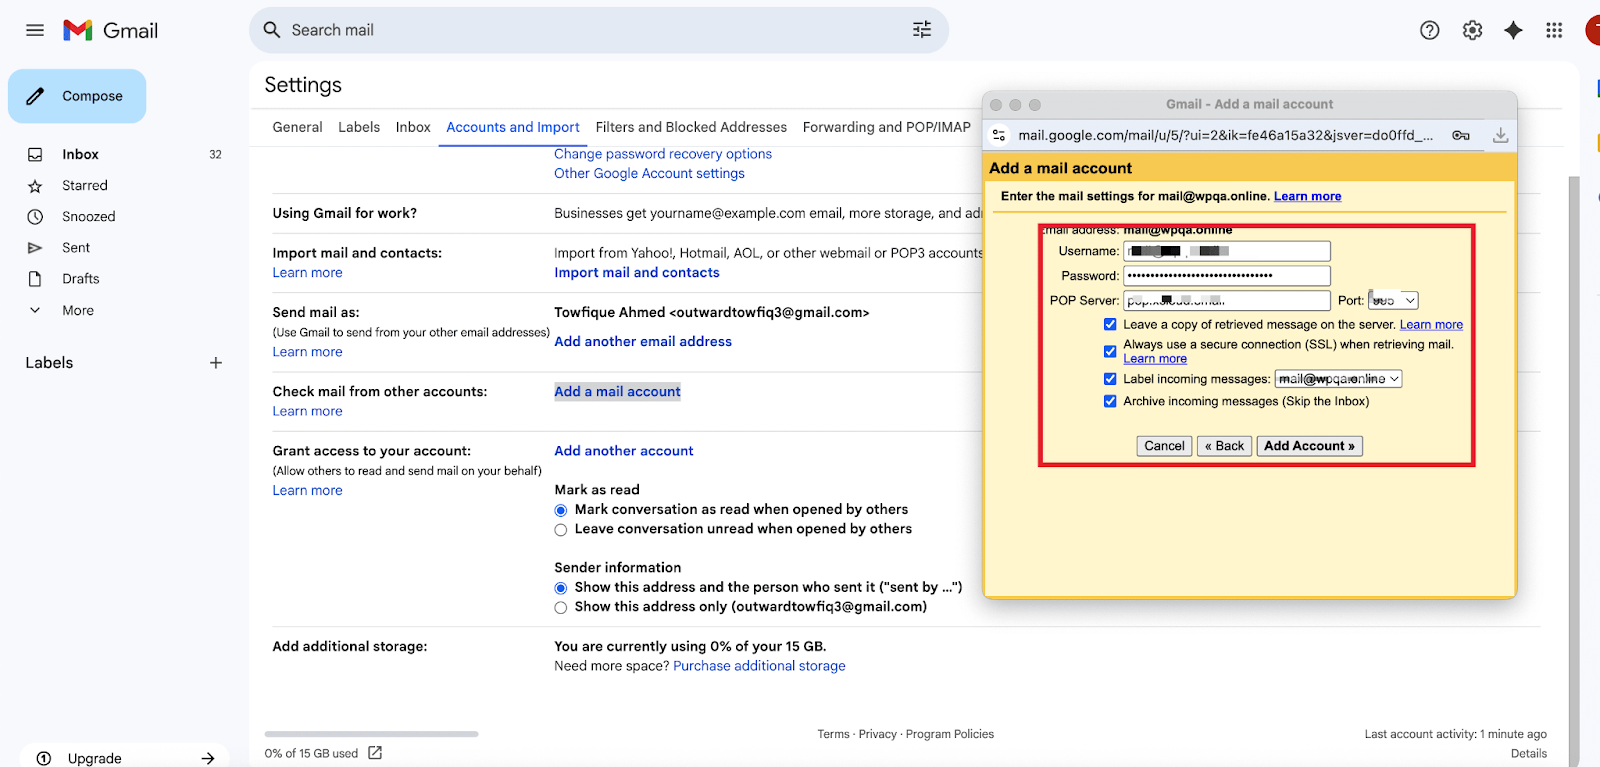
Next, enter the ‘Username’, ‘Password’, ‘POP Server’, ‘Port’ accordingly that you have copied from the xCloud MailBox dashboard and click on the ‘Add Account’ button.
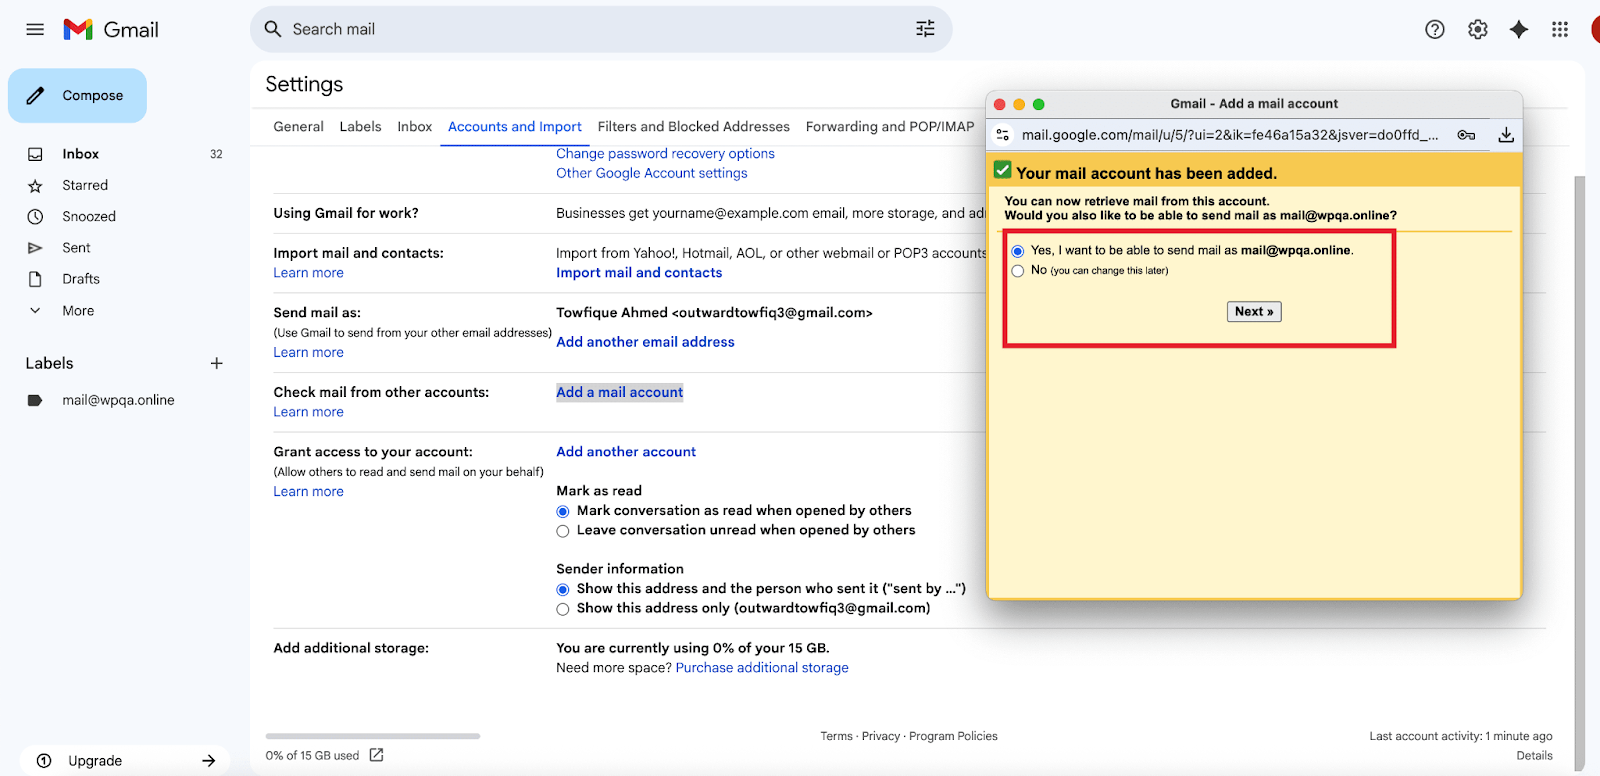
And your mail account has been added to receive emails. Now if you want to send emails from the Gmail account as well choose the option ‘Yes’ and click on the ‘Next’ button.
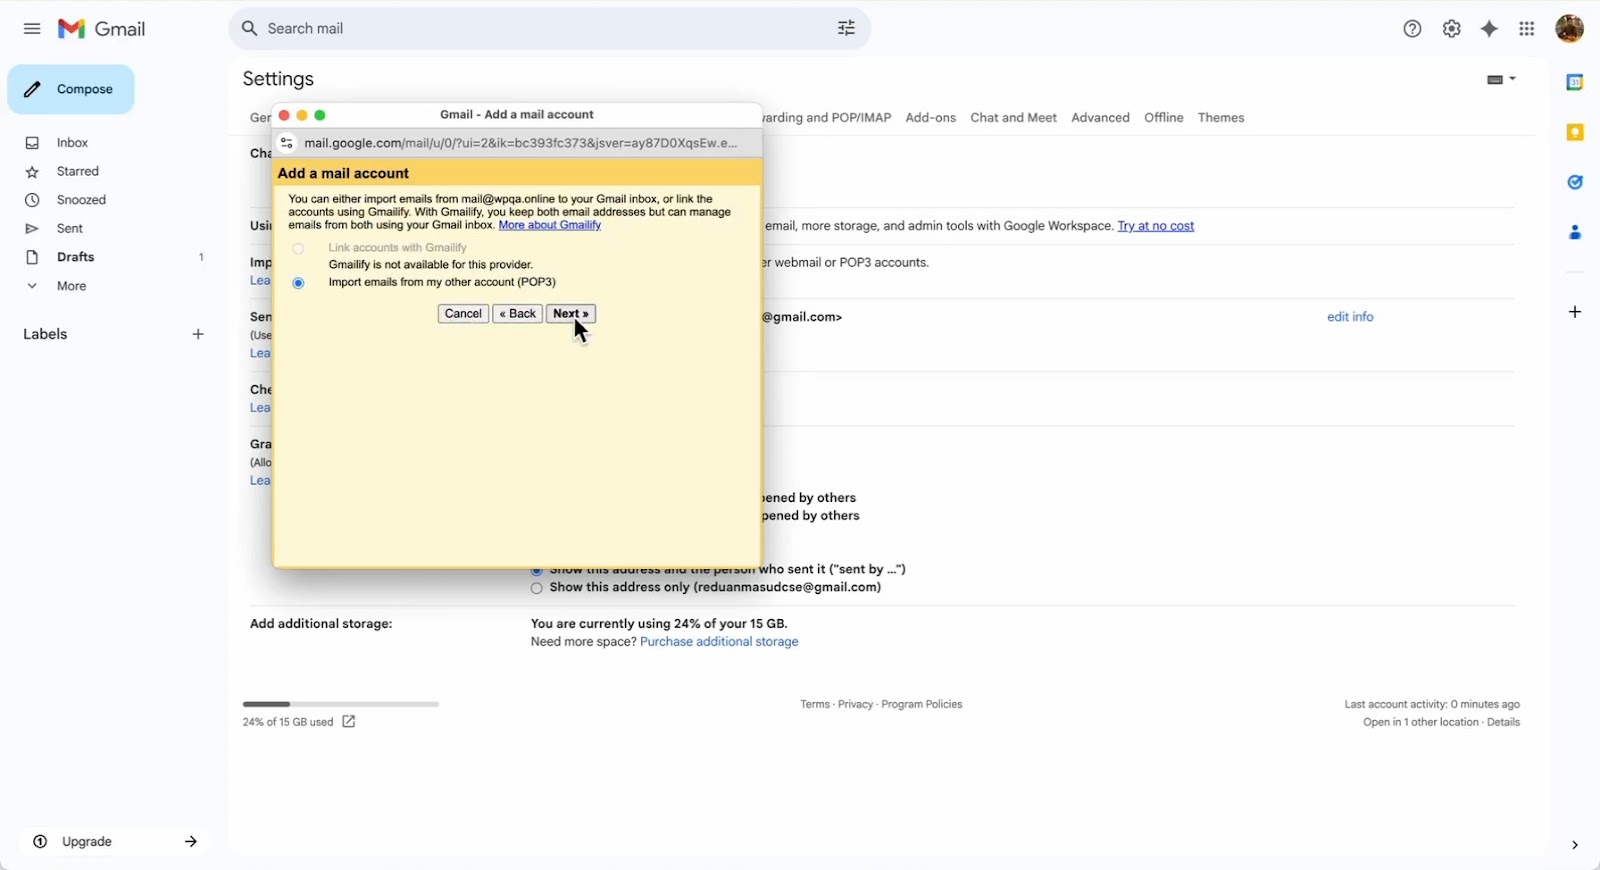
Next, you will see that an option ‘Import emails from my other account’ is selected, keep it selected and go to the ‘Next’.
Next, add a ‘Name’ and click on the ‘Next Step’ button to proceed.
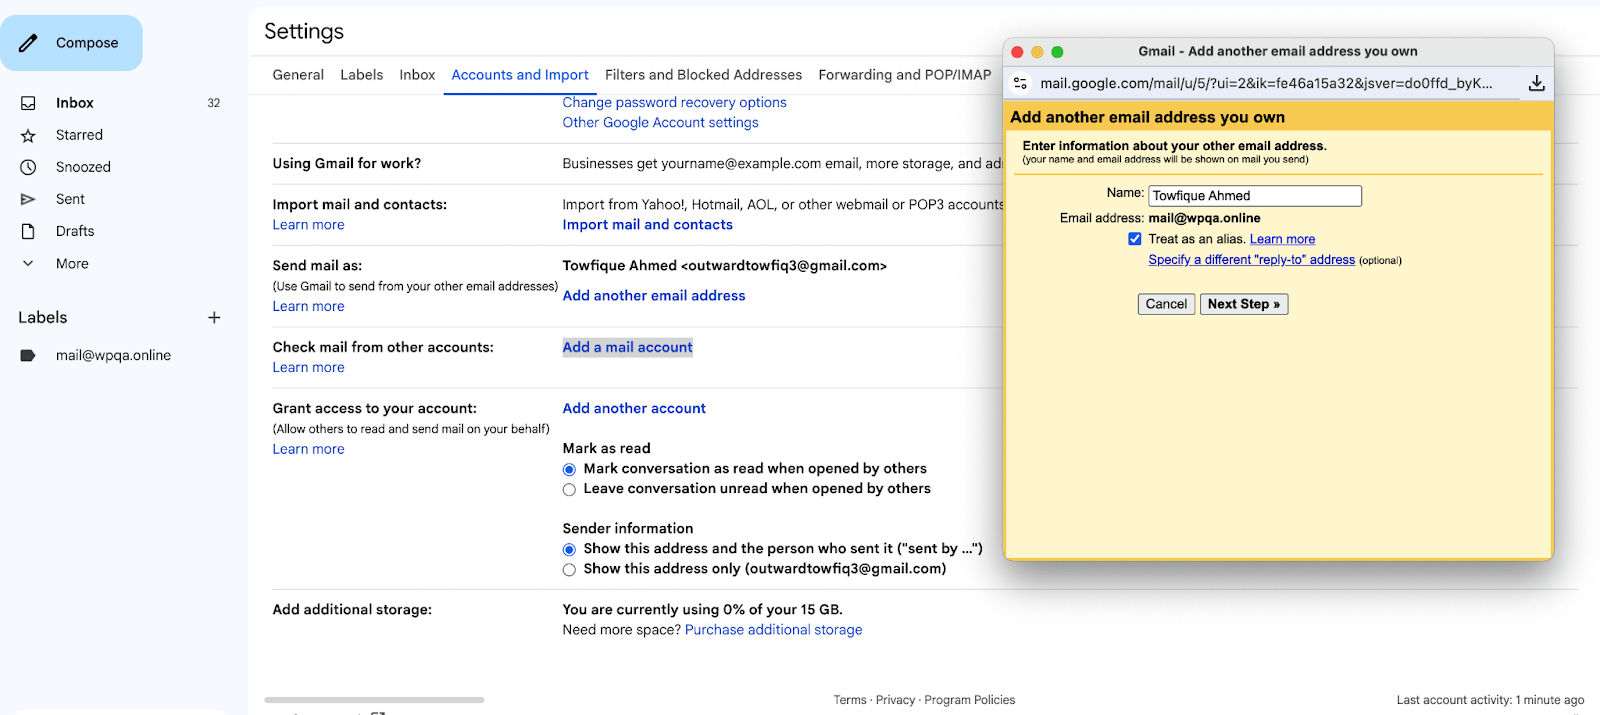
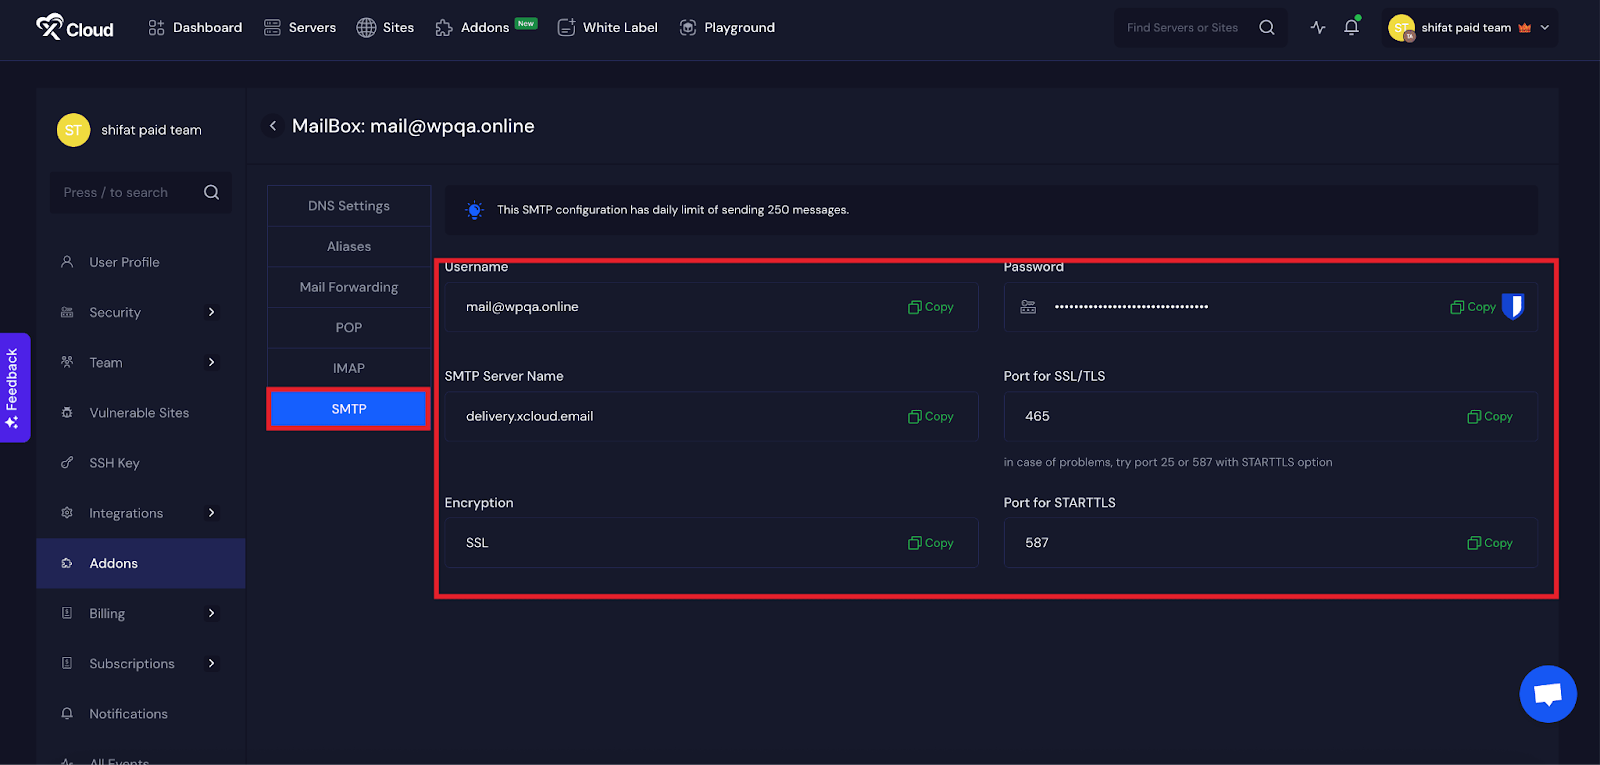
Then go to your MailBox dashboard again and switch over to the ‘SMTP tab from the dashboard and collect the credentials:’Username’, ‘SMTP Server Name’, ‘Password‘, ‘Port for STARTTLS’ and go to the email client setup process.
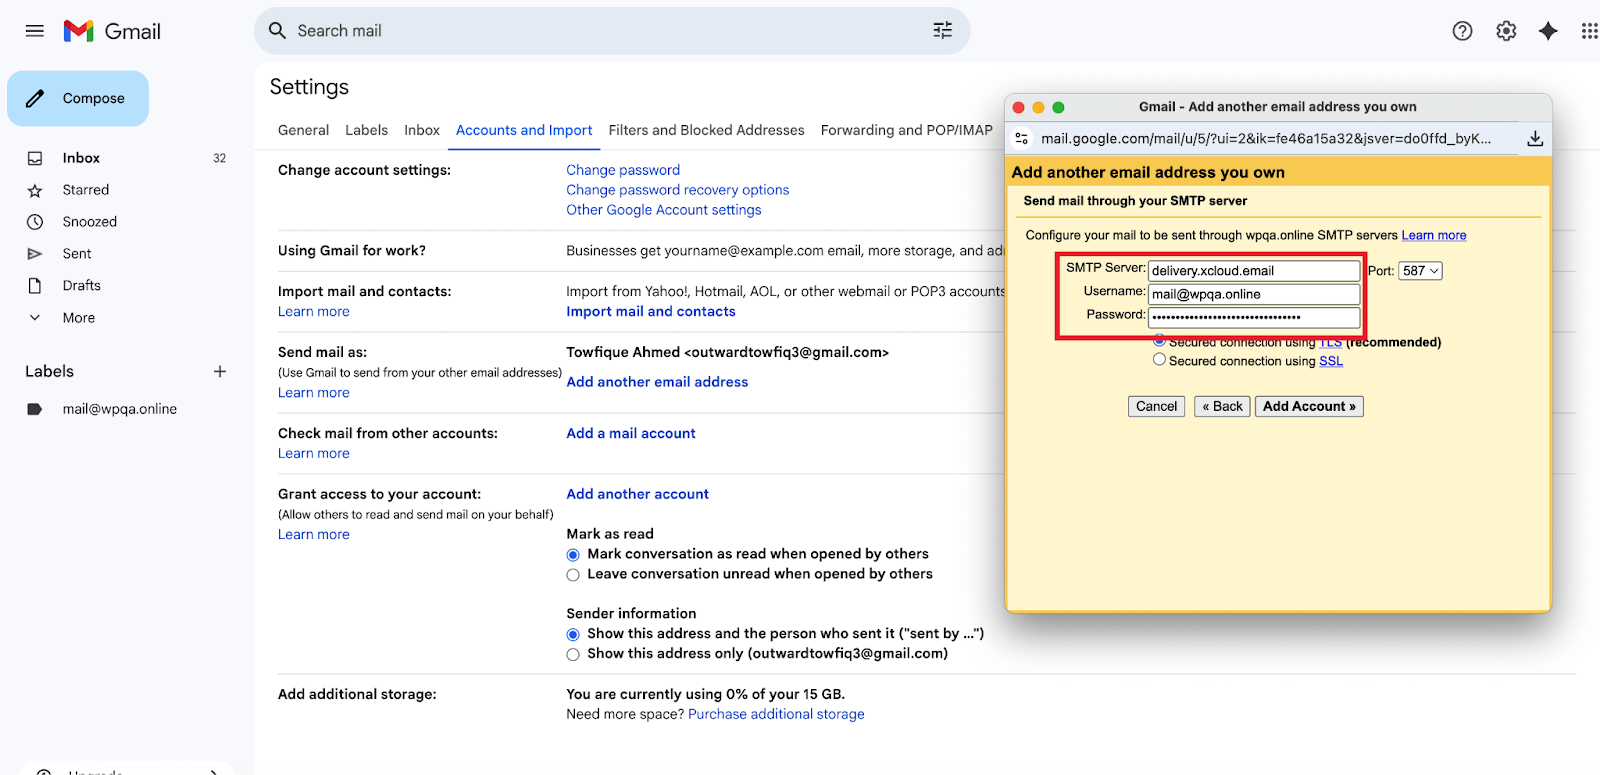
Now, enter the ‘Username’ ‘SMTP Server Name’, ‘Password‘, ‘Port for STARTTLS’ into the dedicated fields and click on the ‘Add Account’ button.
And you have successfully located your other server and verified your credentials. Next, just a verification email has been sent to your MailBox. Go to your MailBox and verify the email client setup with Gmail.
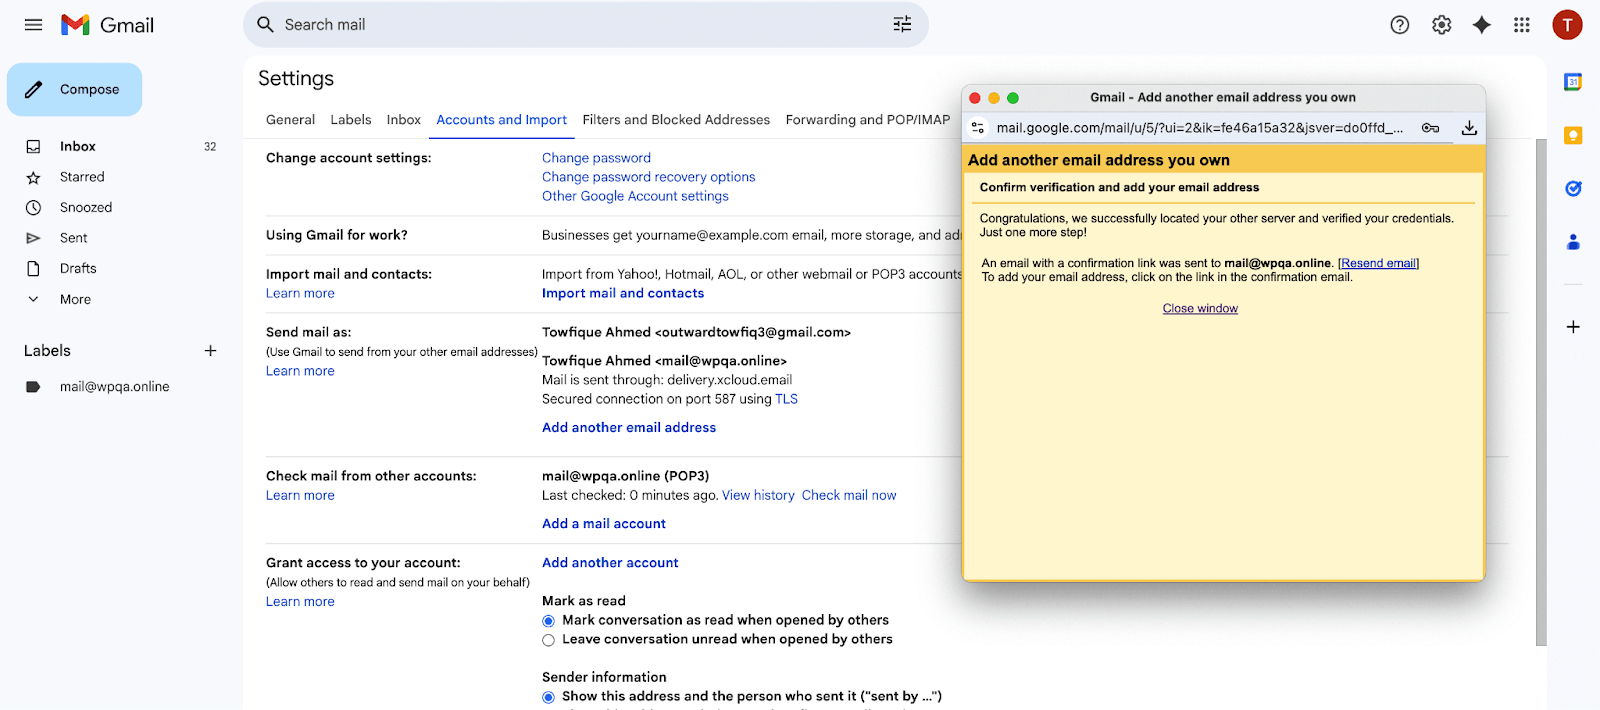
And that’s it, this is how easily you can connect your email clients account with Gmail.
Still stuck? Contact our dedicated support team for any of your queries.