


Creating custom blueprints helps you organise and simplify your workflows. This is especially useful when working with teams or setting up projects repeatedly. With xCloud, you can easily design blueprints that include specific plugins and themes to fit your needs.
Follow the steps to create your own custom blueprint in xCloud, which will allow you to deploy your preferred configurations faster and more efficiently.
Step 1: Go to Team Settings #
First, log in to your xCloud account and navigate to the upper right menu on the dashboard. Then, click on the ‘Team Settings’ option from the menu.
Step 2: Go to Blueprint #
Next, locate the ‘My Blueprints’ option and select it. Then, click on ‘Create New Blueprint’ to set up your custom blueprint.

Step 3: Create a Custom Blueprint #
Here, you will find a menu tab. Choose the ‘Custom Items’ option from the tab.
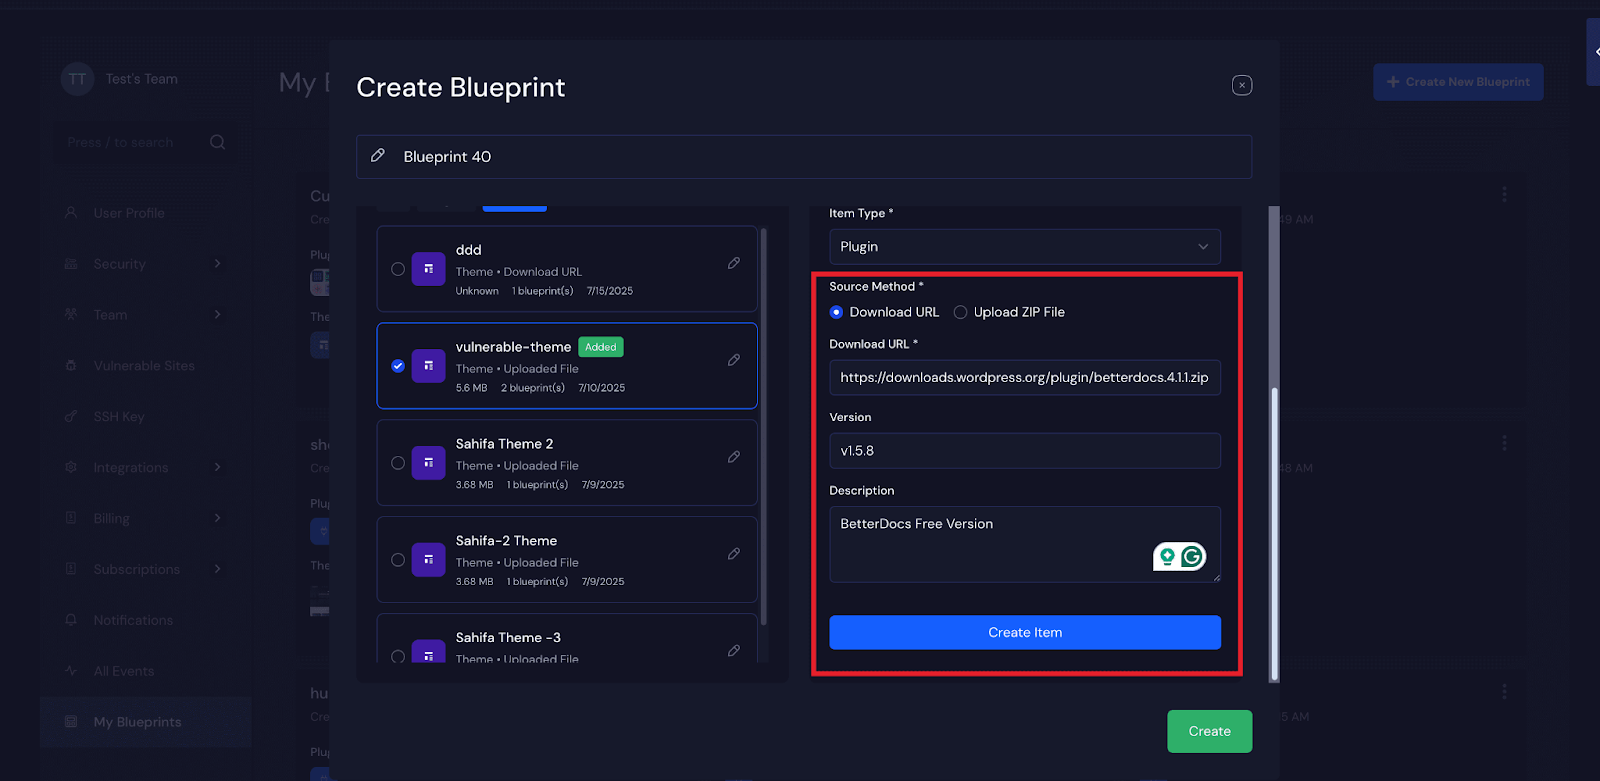
Give your custom blueprint a name first. Then enter a name for the item in the ‘Item Name’ field and choose the ‘Item Type’ as either ‘Plugin’ or ‘Theme’ from the dropdown.
Step 3:Create a New Item #
Then choose a source method from the ‘Download URL’ and ‘Upload ZIP File’ options
Method 1: Download URL
If you choose the ‘Download URL’ option, enter the ‘Download URL’, ‘Version’, and ‘Description’ into the designated fields and click on the ‘Create Item’ Button.
Method 1: Upload ZIP file
To upload a ZIP file, first select your storage provider from the dropdown menu. Remember, you need to connect an S3 storage provider to upload a plugin or theme.
Note: pCloud and Google Drive storage integrations will not work for Custom Bluprint
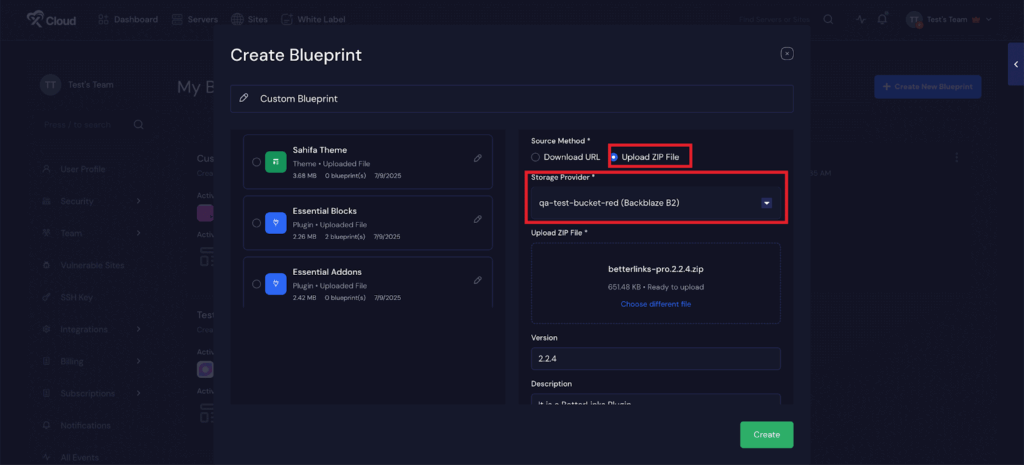
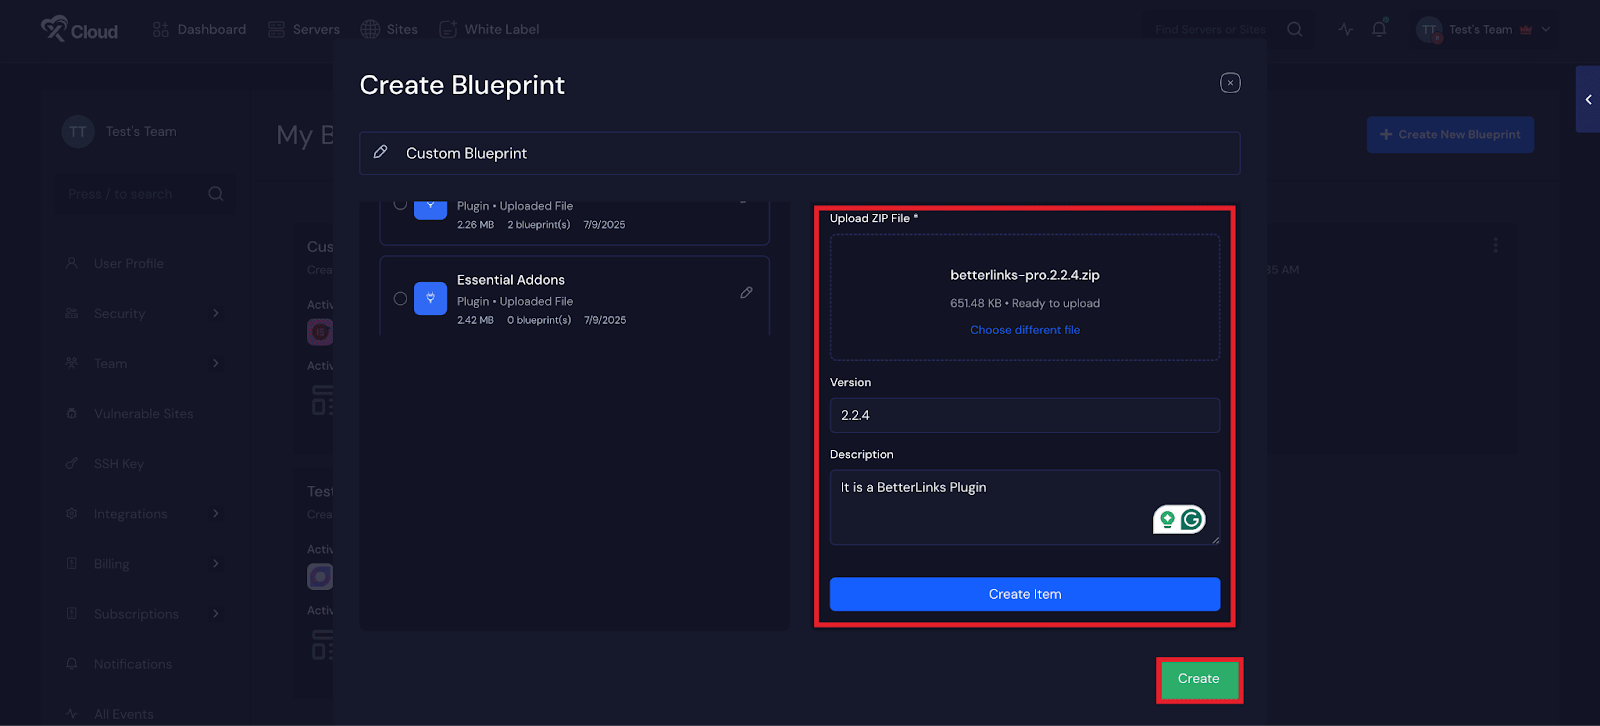
Next, go to the ‘Upload ZIP File’ section and upload your plugin’s or theme’s ZIP file. Then enter the version and a ‘Description’ of your file and click on the ‘Create Item’ button.
Step 5: Add a Plugin or Theme in the Blueprint #
If you have uploaded a plugin, you need to choose at least one theme to create this blueprint. Alternatively, if you uploaded a theme, you need to choose at least one plugin to create this blueprint. From here, go to the ‘Available Custom Items’ section and choose a theme or plugin that you have already uploaded. Then click on the ‘Create’ button.

Once this is completed, you will see the item in the blueprints list.
Step 6: Add a Post Deployment CLI Script #
You can add a script that runs automatically after all items in the blueprint have been installed. This helps you perform extra setup tasks. Go to the ‘CLI Script’ tab and enter the scripts or commands into the dedicated field. Then click on the ‘Create’ button.

And that’s it! You’ve successfully created a custom blueprint in xCloud. By following these steps, you can build reusable configurations that save time and maintain consistency across your projects.
💡Why Google Drive and pCloud Are Not Compatible with Custom Blueprints in xCloud #
When creating a custom blueprint in xCloud, you need to upload plugins or themes either by providing a direct download URL or by uploading a ZIP file from a connected storage provider.
Google Drive and pCloud are not supported for this feature because they do not offer direct public download URLs that xCloud can reliably access.
In contrast, S3 compatible storage providers offer stable and secure URLs that xCloud can use to fetch your plugin or theme files during deployment. This makes them the preferred option for working with Custom Blueprints.
If you want a simple and reliable solution, you can use Backblaze. It is S3 compatible and even offers free storage that works great with the Blueprint feature in xCloud.
So, if you want to use ZIP uploads in your blueprints, make sure you connect an S3-compatible storage account. This way, everything will run smoothly.
Still stuck? Contact our support team for any of your queries.


