


When setting up a new n8n instance in xCloud, you may want to enable email functionality for sending notifications, password resets, and workflow messages. To do this, you can configure SMTP using environment variables.
Follow the steps below to set up SMTP for n8n with environment so you can start sending emails reliably through your own mail server.
Step 1: Go to the Environment Dashboard #
Begin by logging into your xCloud account. Once logged in, navigate to your site dashboard and click on the n8n → Environment from the sidebar.

Step 2: Configure SMTP Environment Variables #
Once you are on the n8n environment, just add the following variables with your SMTP server details:
N8N_EMAIL_MODE=smtp
N8N_SMTP_HOST=host.example.com
N8N_SMTP_PORT=587
N8N_SMTP_USER=username
N8N_SMTP_PASS=password
N8N_SMTP_SENDER=admin@mail.com
N8N_SMTP_SSL=false
Note: The SMTP configuration will only work if N8N_SMTP_SSL is set to false. It will not function correctly if you set this value to true.

Step 2: Test Your SMTP Configuration #
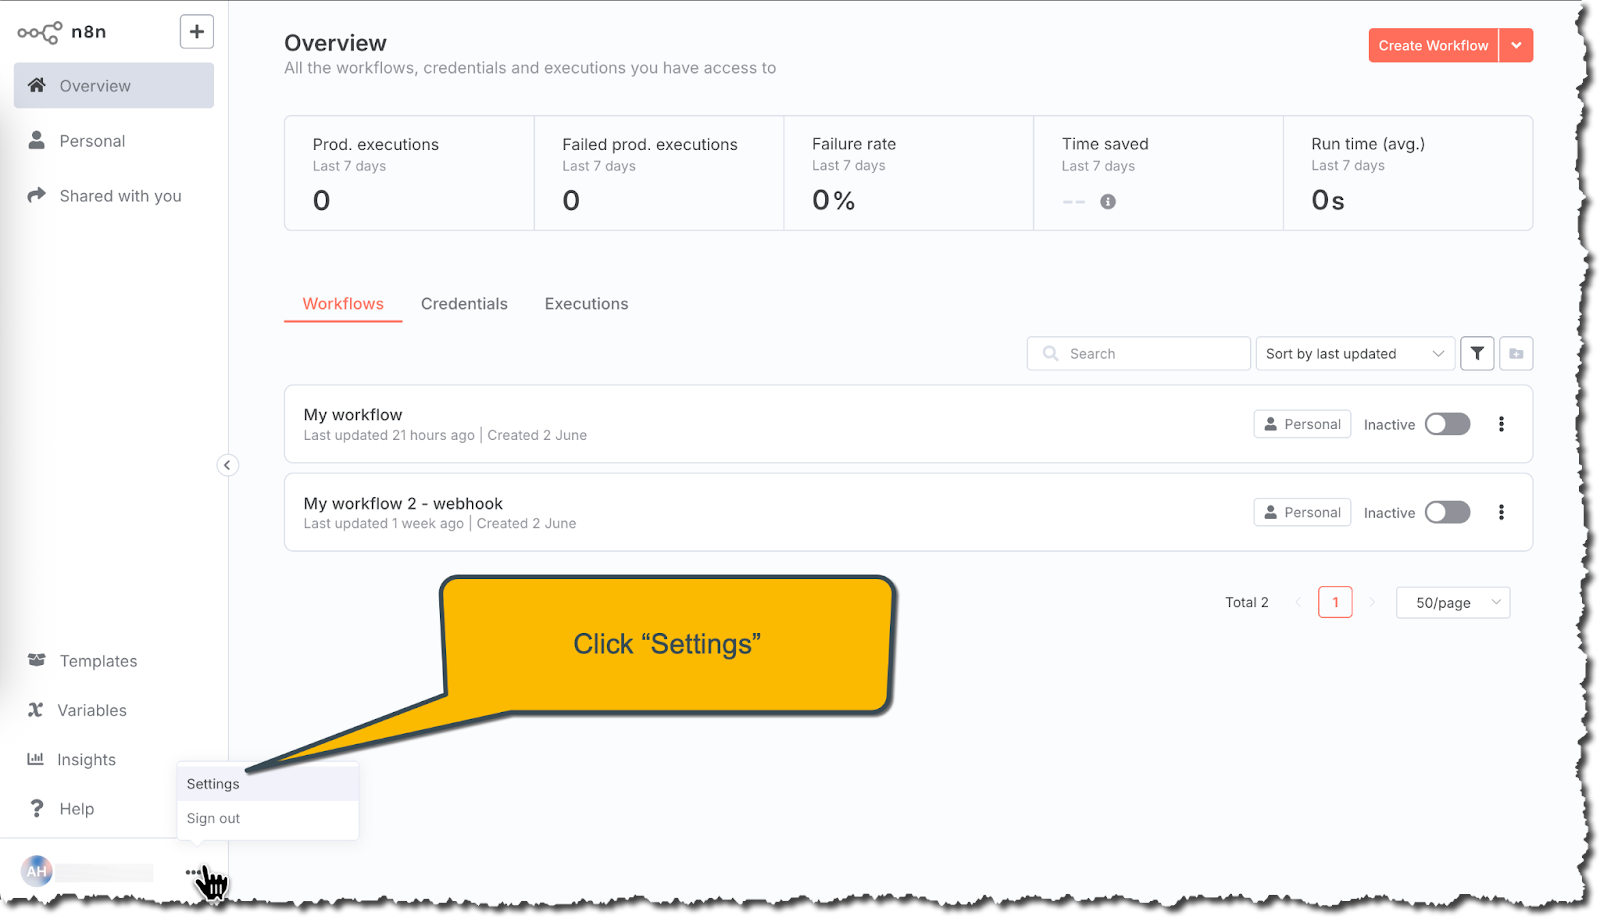
After saving the environment settings, open the n8n dashboard. Look at the lower-left menu and click on Settings.
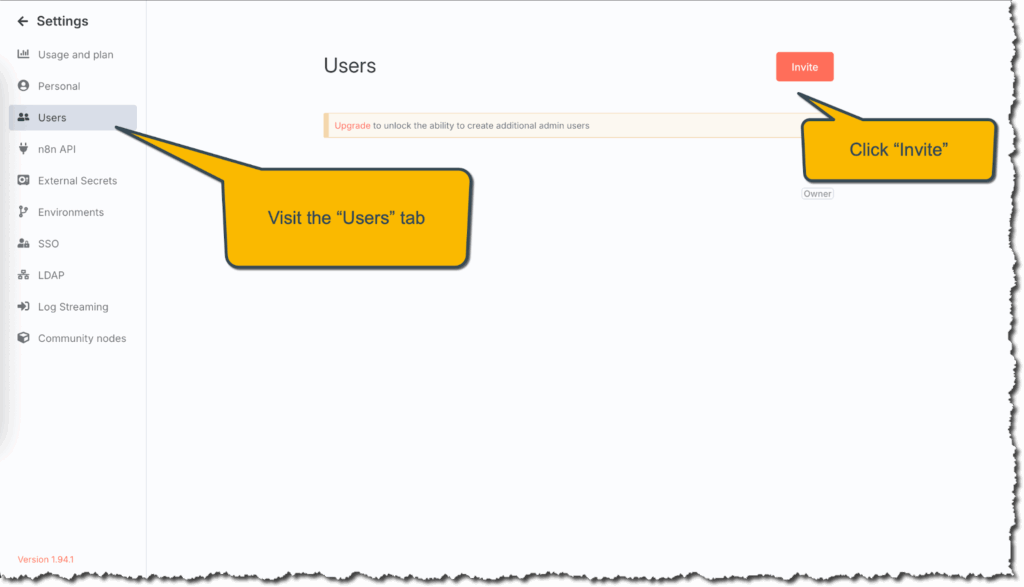
Then go to the Users tab from the sidebar. Click the Invite button to open a pop-up window.
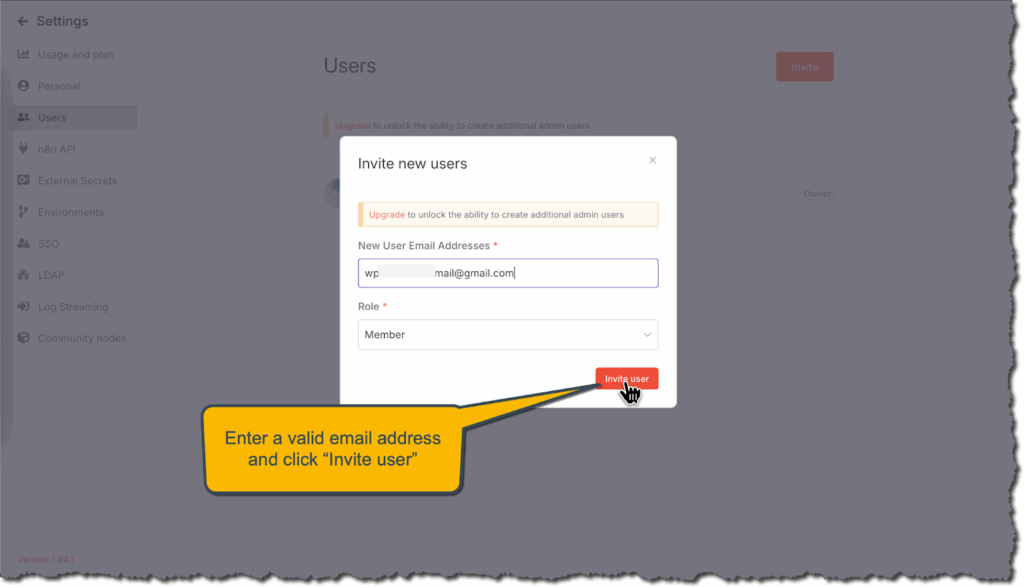
In the pop-up, enter the user’s ‘Email address’ and ‘Role’. Then click the ‘Invite User’ button. This will trigger an email, helping you confirm that your SMTP setup works properly.
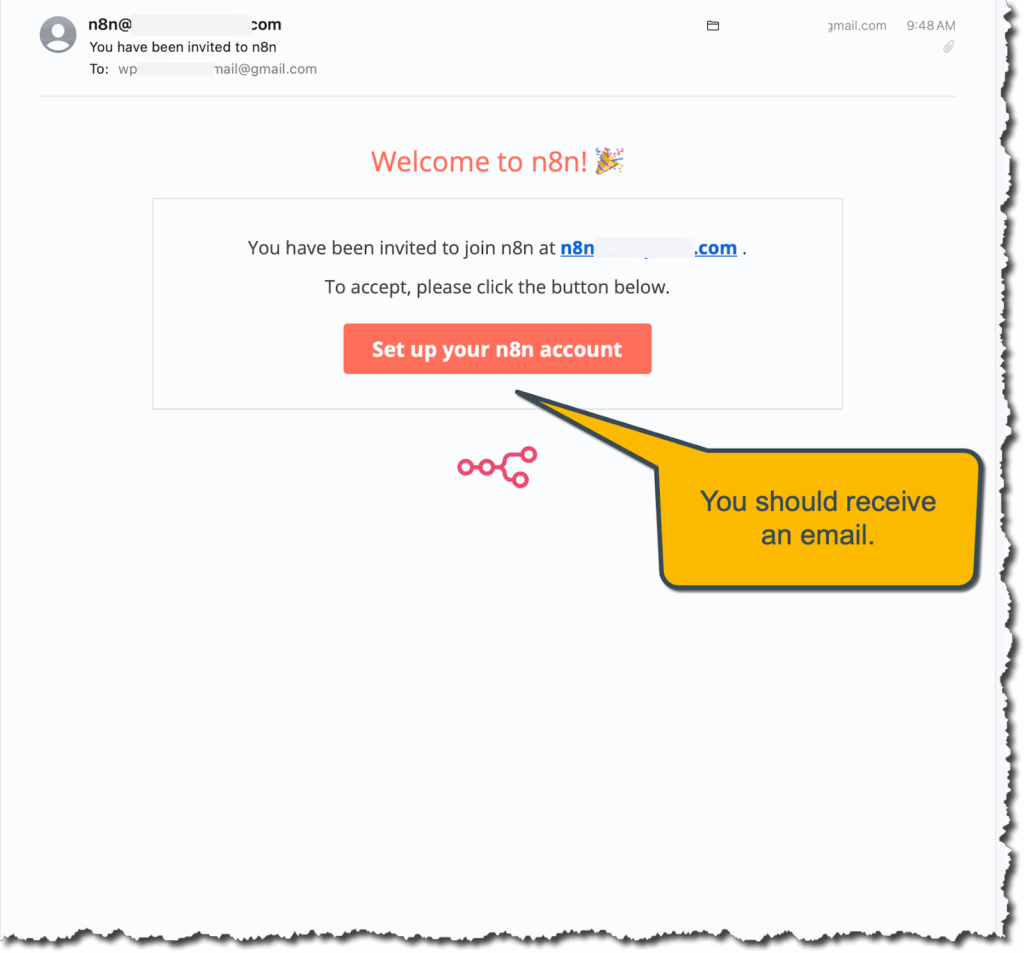
If your SMTP setup is correct, the user will receive an invitation email. If the email arrives, that means everything is working properly.
How to Add SMTP in Workflows #
If you want to send emails directly from within workflows, using environment variables is not enough. You will need to set up SMTP as a saved credential.
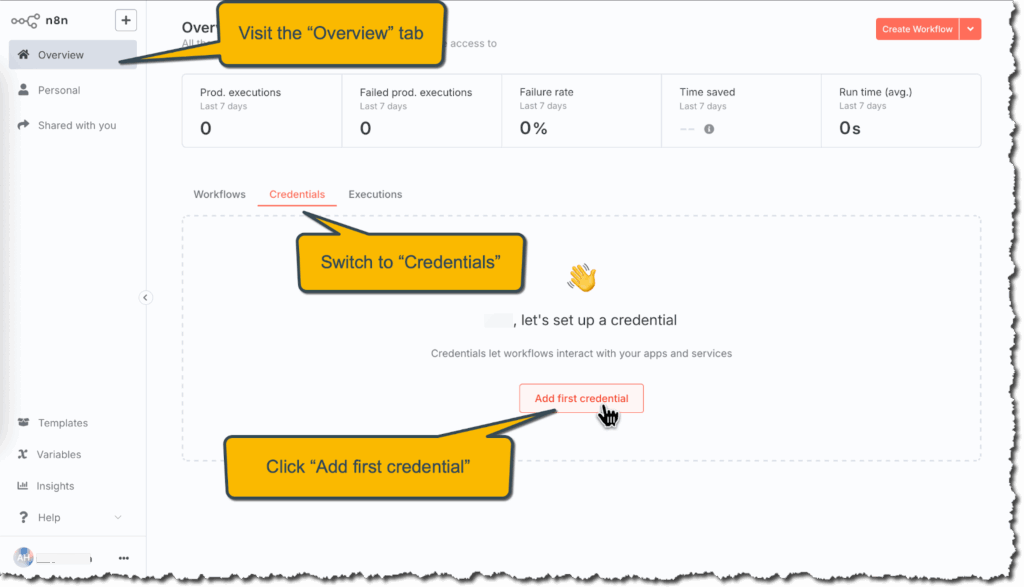
Open the ‘Overview’ section from the n8n sidebar. Then go to the ‘Credentials’ tab on the dashboard and click ‘Add First Credentials’.
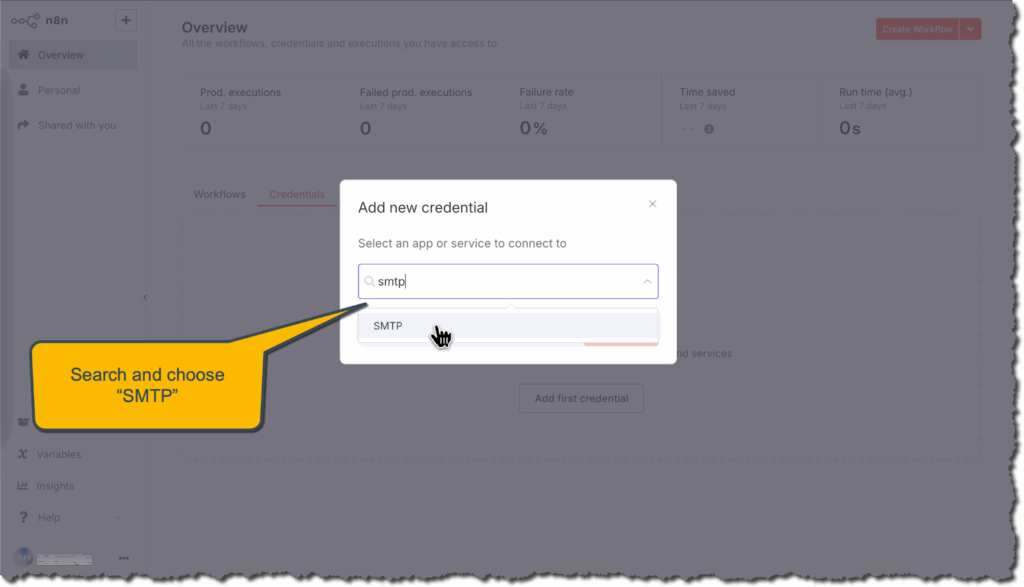
A pop-up will appear. Fro. here, choose ‘SMTP’ as the credential type.
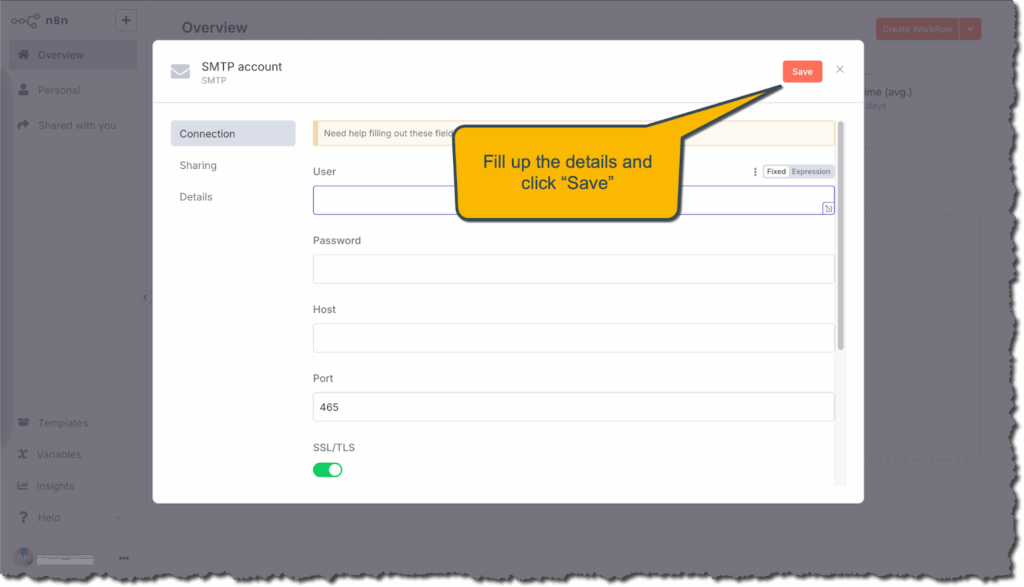
You will now see a form. Fill out this form with the following details:
- Host (your SMTP server address)
- Port (usually 587 or 465)
- User (your SMTP username)
- Password (your SMTP password)
Fill in the required fields accordingly. Once done, click the Save button.
And that’s it. This is how easily your n8n instance could be fully configured to send emails using your specified SMTP server.
Still stuck? Contact our dedicated support team for any of your queries..


