


The SSH port is the doorway you use to connect to your server securely. Changing the default port (22) adds an extra layer of security. This documentation will show how to update SSH port on your xCloud server using the terminal and xCloud Graphic User Interface (GUI).
Preparations: Before You Update SSH Port #
Before updating ports check and prepare the following things:
- Allow the port on your firewall: You will need to configure your firewall to allow access to the new port you choose. See our guide on How to Configure Firewall Management in xCloud for detailed instructions.
Update the SSH Port Using Terminal #
We will be using the command line to update the SSH port, this method involves directly editing the SSH configuration file and restarting the service as a sudo user. Follow the step below to update the SSH port using Terminal.
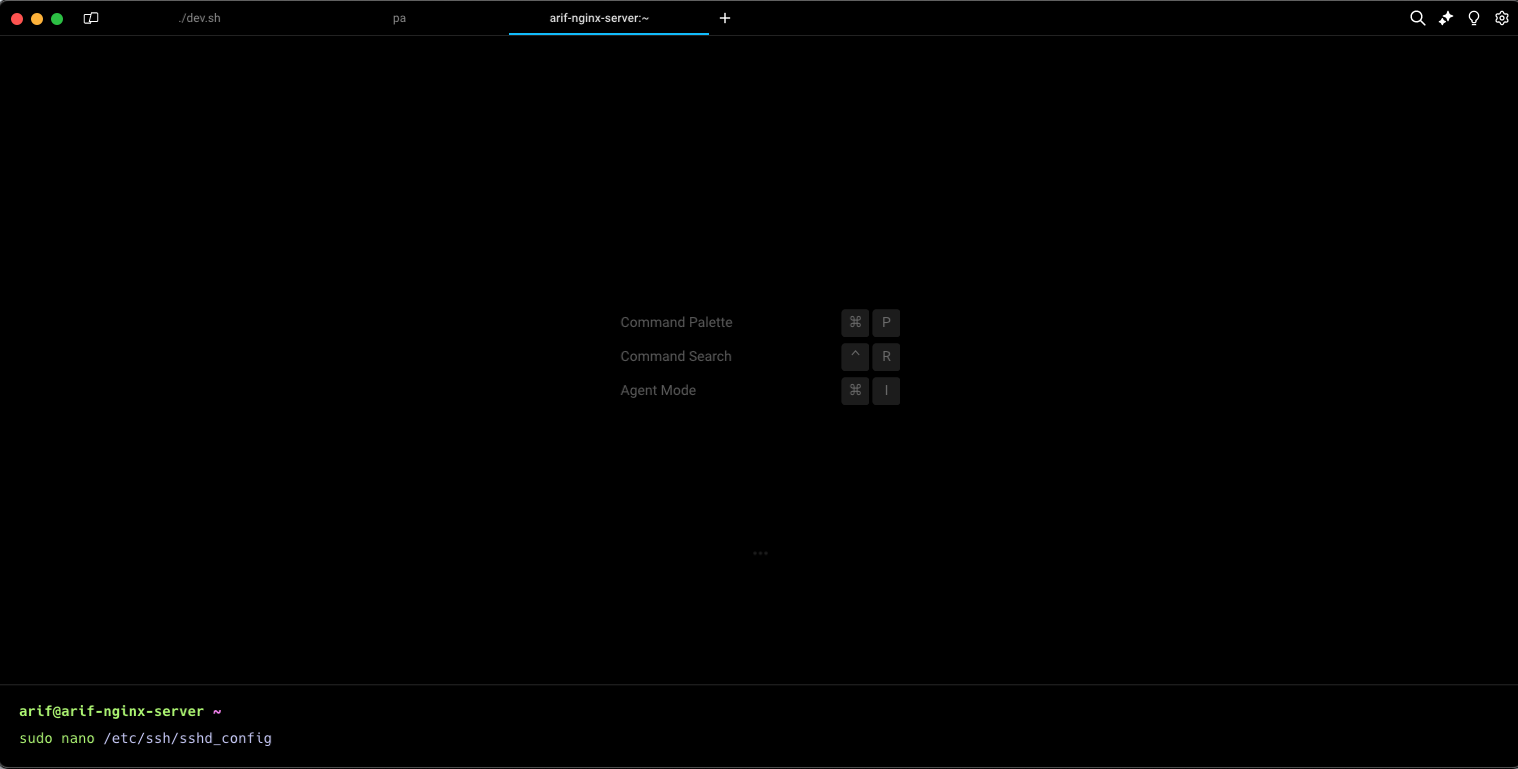
Step 1: Open Terminal #
Open the Terminal and navigate to the SSH configuration file by running the following command with nano: “sudo nano sshd_config“
Step 2: Update the Port Number #
Look for the line that reads #Port 22. The # symbol indicates a comment, and the actual port number is 22 (the default). Remove the #symbol and replace 22 with your desired port number. For example, if you want to use port 2222, the line should look like this:
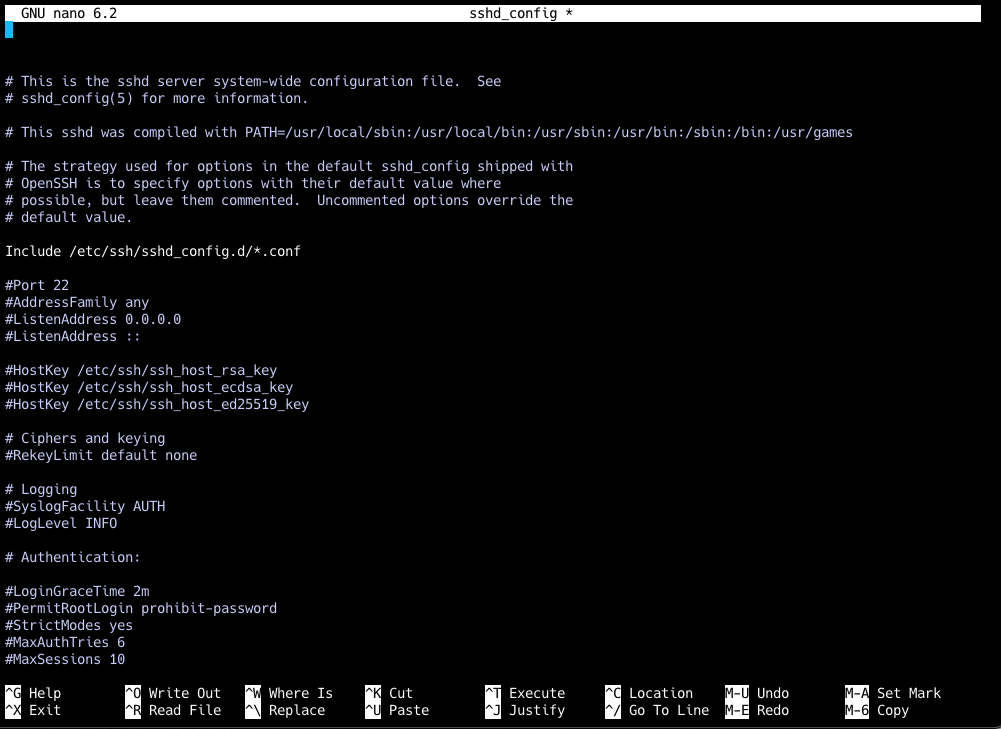
Once you have updated the port number, save the changes in your text editor (usually by pressing Ctrl+O followed by Enter). Then, exit the editor (typically with Ctrl+X).
Step 3: Restart SSH Service #
Run the following command in the Terminal to restart the SSH service and apply the new port configuration: “ sudo service ssh restart ”

Congratulations! You’ve successfully updated the SSH port on your server using the Terminal. Now you have to update it on the xCloud web GUI.
Update SSH Port Using xCloud Web GUI #
Now, we will be updating the SSH port in the xCloud web GUI part. Follow the steps shown below and update your SSH port accordingly.
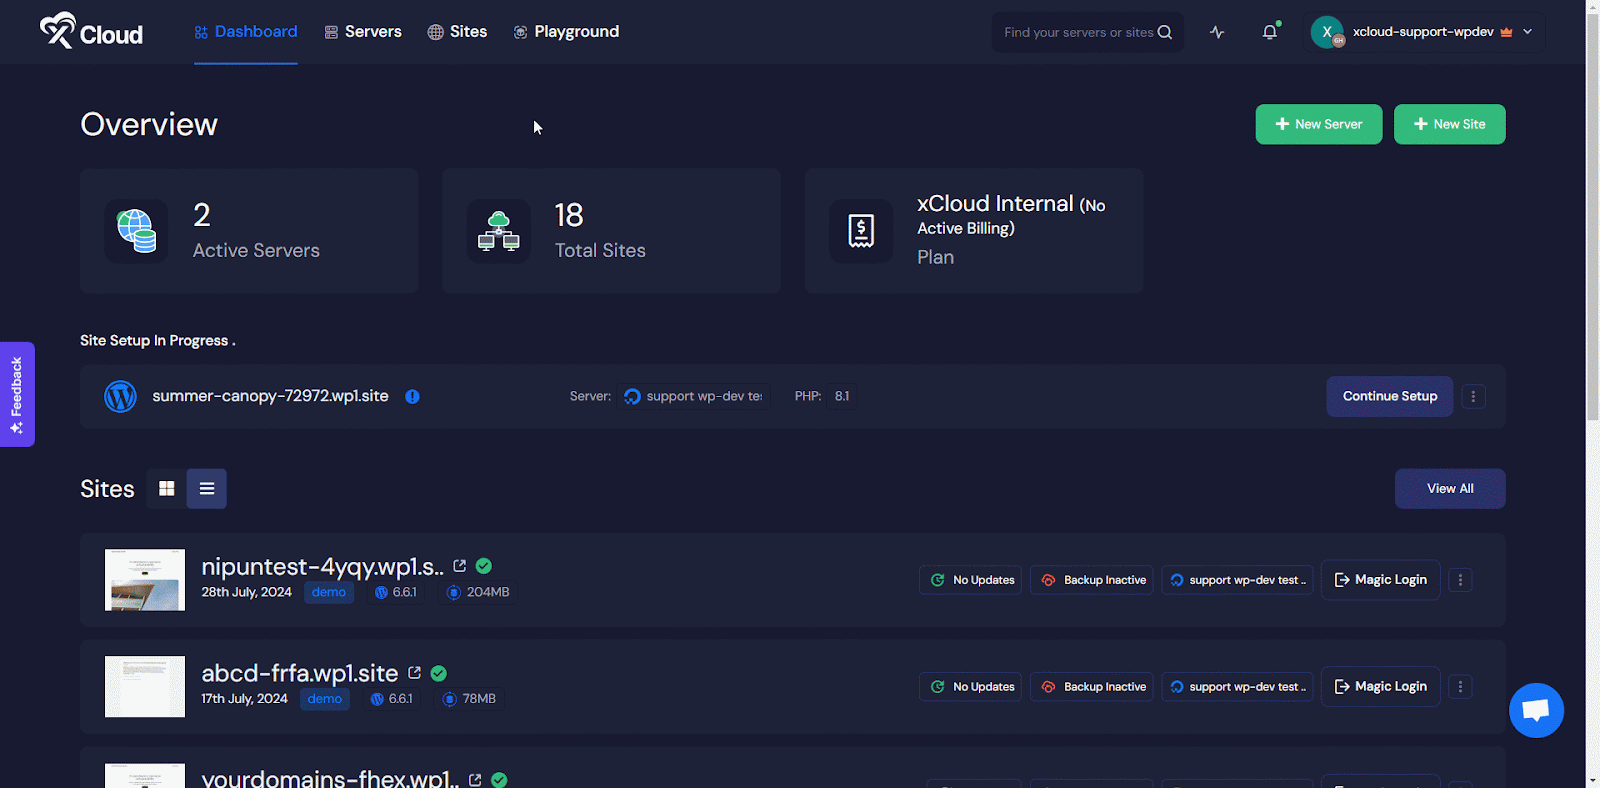
Step 1: Go to SSH Configuration Settings #
From your xCloud dashboard, go to ‘Servers’ and select a server to navigate settings. Click on ‘Others’ from the settings menu. Here Update the SSH port Number and click on ‘Save Settings’.
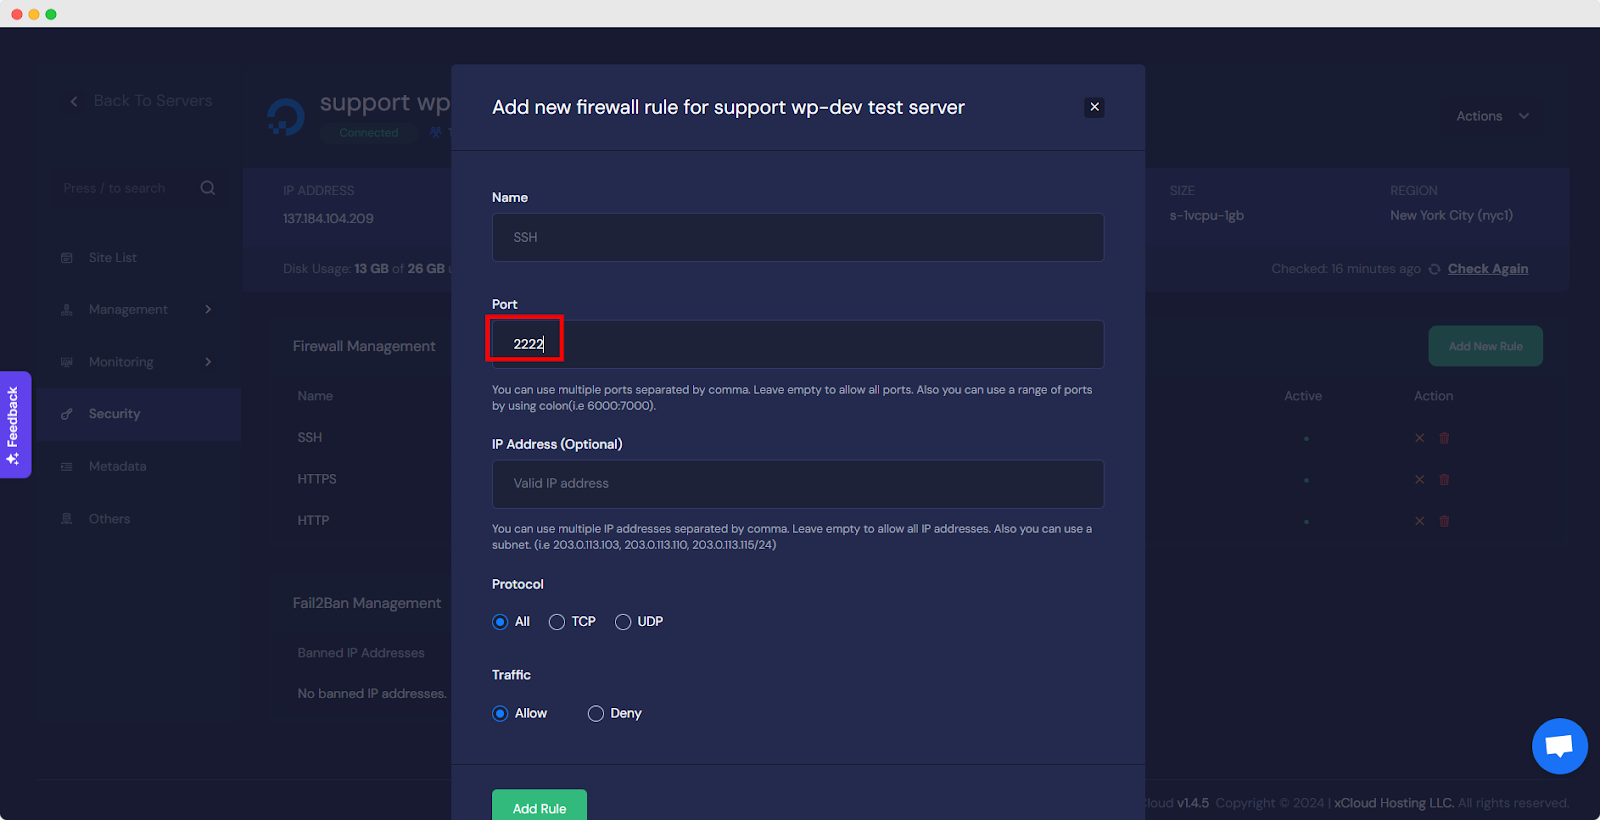
Step 2: Add a Rule in Firewall Management #
Now add a SSH Port Rule in your firewall management. To do that navigate from the server overview page go to the ‘Security’ menu and click one ‘Add New Rule’ button.
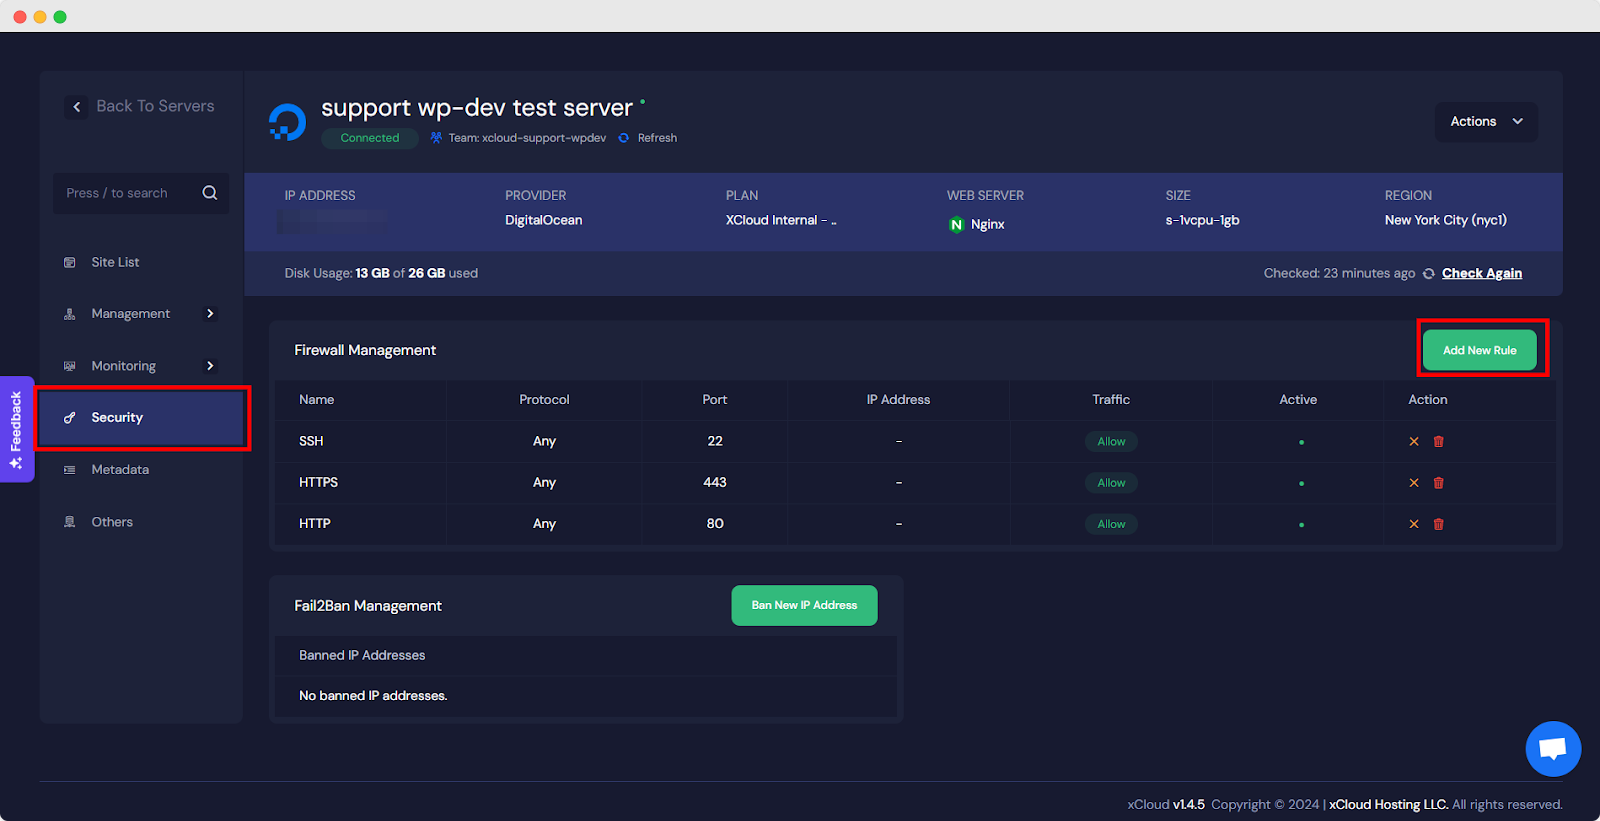
Here, Add your Rule name as SSH and add the decided port number. Then click on ‘Add Rule’ to successfully update the SSH port in xCloud.
Following these steps, you can successfully update your SSH port on your xCloud server. Remember to choose a strong, non-standard port number and adjust your firewall settings accordingly for optimal security.
Still need help with updating your SSH Port? Contact our dedicated support team for any of your queries.


