Facing issues seeing the latest changes reflected on your WordPress website can be frustrating. Caching might be the reason for this issue. Occasionally, this cached data can be outdated, causing you to see an older version of your site. So how to troubleshoot caching issues?
This guide will assist you in troubleshooting caching issues on your WordPress website hosted on xCloud.
Identify the Cause #
Before getting into solutions, let us identify what is causing the caching issue. Here are some common caching issues:
- Browser Cache: Your web browser might be storing an outdated version of your site’s files. Which can cause outdated data to show up and prevent new data from appearing on site.
- Caching Plugin: Many WordPress plugins come with caching features. If you are using one, it might be causing the issue. Try to disable and enable it to see if it is causing the issue.
- Hosting Default Caching: Your xCloud hosting plan comes with a built-in caching mechanism, LiteSpeed Cache. You can disable and enable this to identify if it is causing issues.
- Using Multiple Caching Plugins: Inconsistent website rendering errors can be caused by conflicts between your default hosting server’s cache and a separate caching plugin.
- Pages Look Broken After an Update or Change: The caching issue occurs when page builders regenerate stylesheets during updates or changes, but the cached page still references the old, unavailable stylesheets, causing pages to display unstyled text. This results in broken pages, displaying old contents and 404 errors for missing CSS files in the browser console.
Troubleshoot Caching Issues #
Depending on the cause, you can try the following solutions to troubleshoot caching issues:
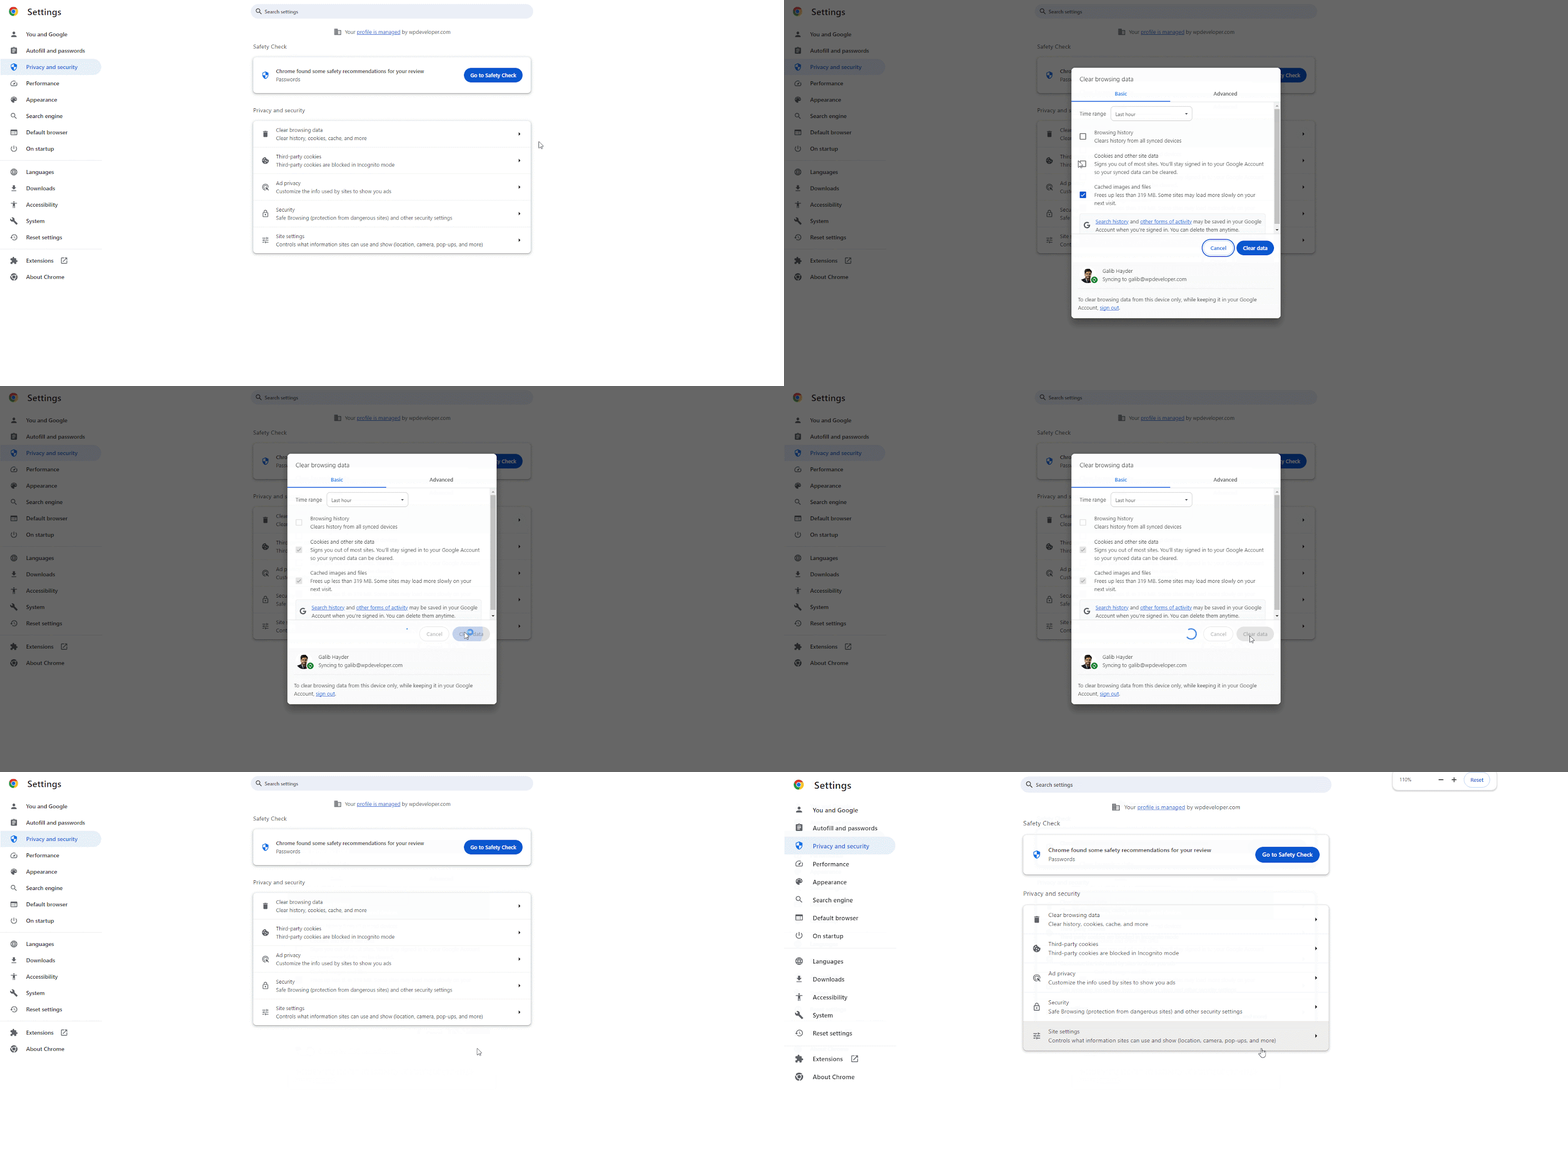
Clear Your Browser Cache #
Most browsers have built-in options to clear cache and browsing data. Go to your browser’s settings and history to clear the cache.
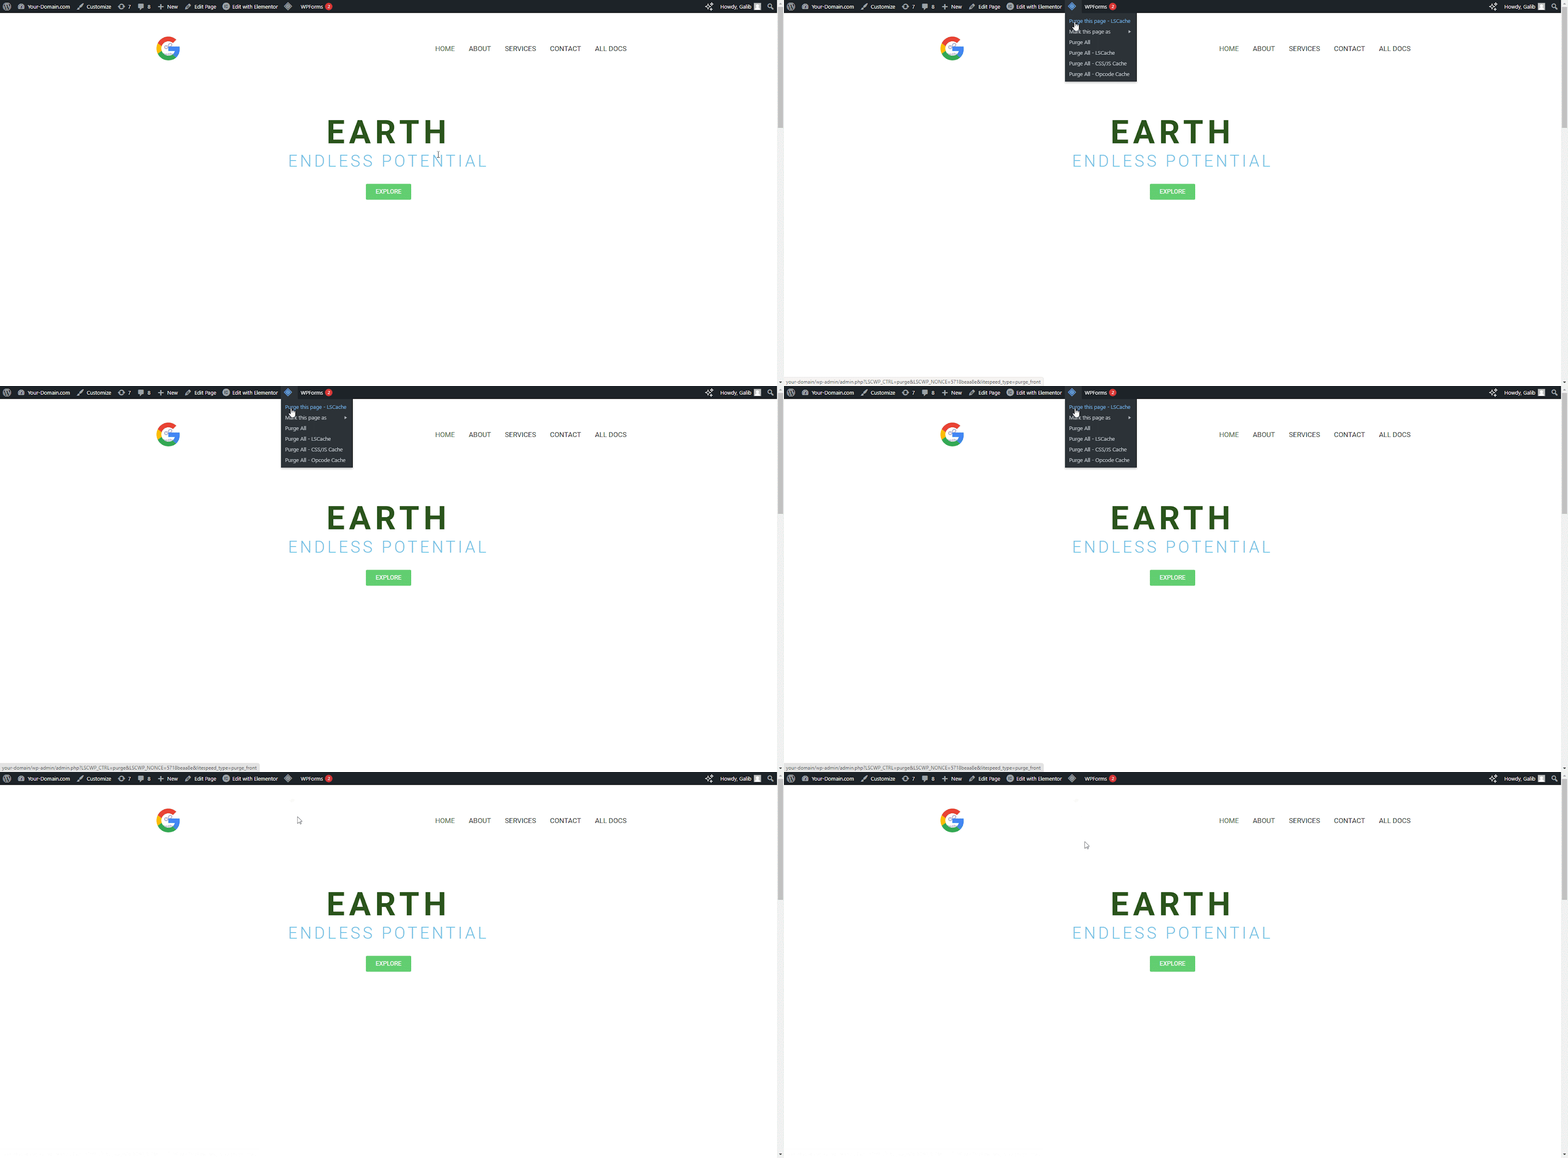
Purge Cache in Plugin Cache #
Most caching plugins have options within their settings to clear the cache. Look for a button labeled ‘Purge Cache’ or similar. If you use LiteSpeed Cache, you can follow the below steps.
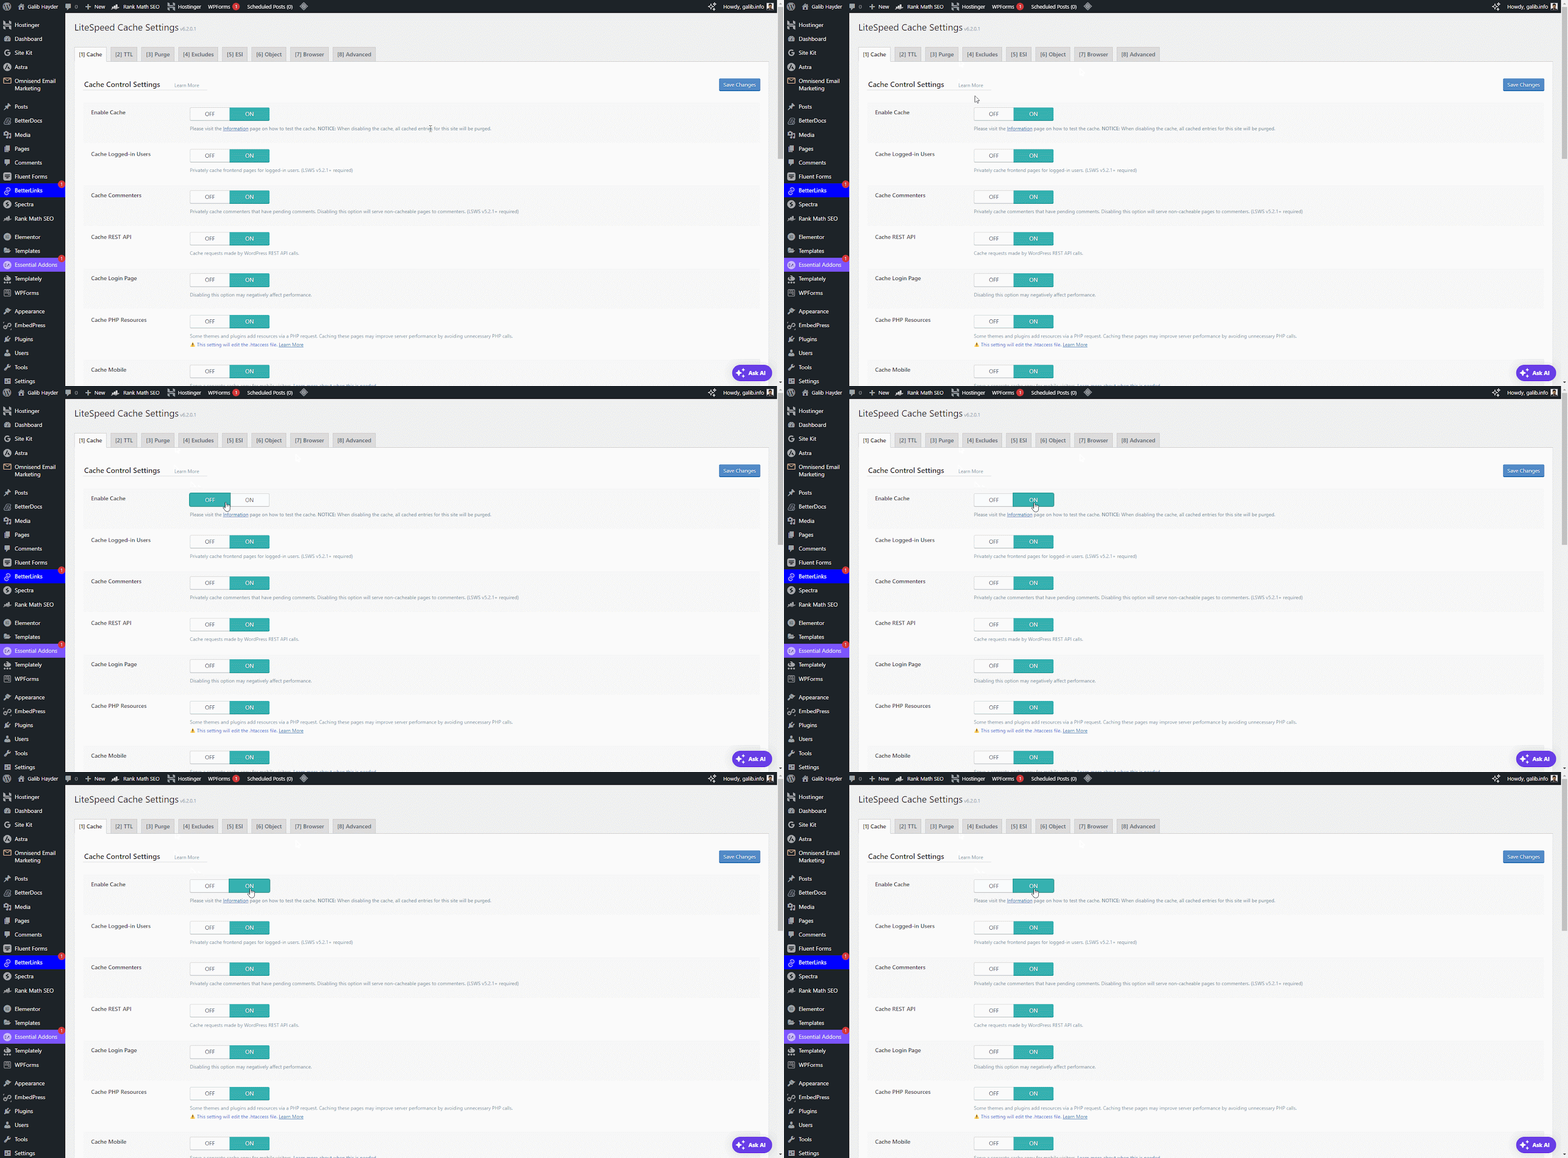
Disable Caching Plugin (Temporarily) #
Deactivate your caching plugin temporarily. After that, If your website updates display correctly, then the plugin was likely causing the issue. You can then try re-enabling the plugin and configure its settings to exclude specific pages from caching.
Note: Always backup your website before making significant changes, especially when deactivating plugins.
Disable or Clear Cache of Default Hosting Caching #
If you know how caching works in xCloud and suspect the in-build caching might be the issue for your broken page or content from before the latest update, Go to the xCloud dashboard, disable the caching, and check if the problem exists.
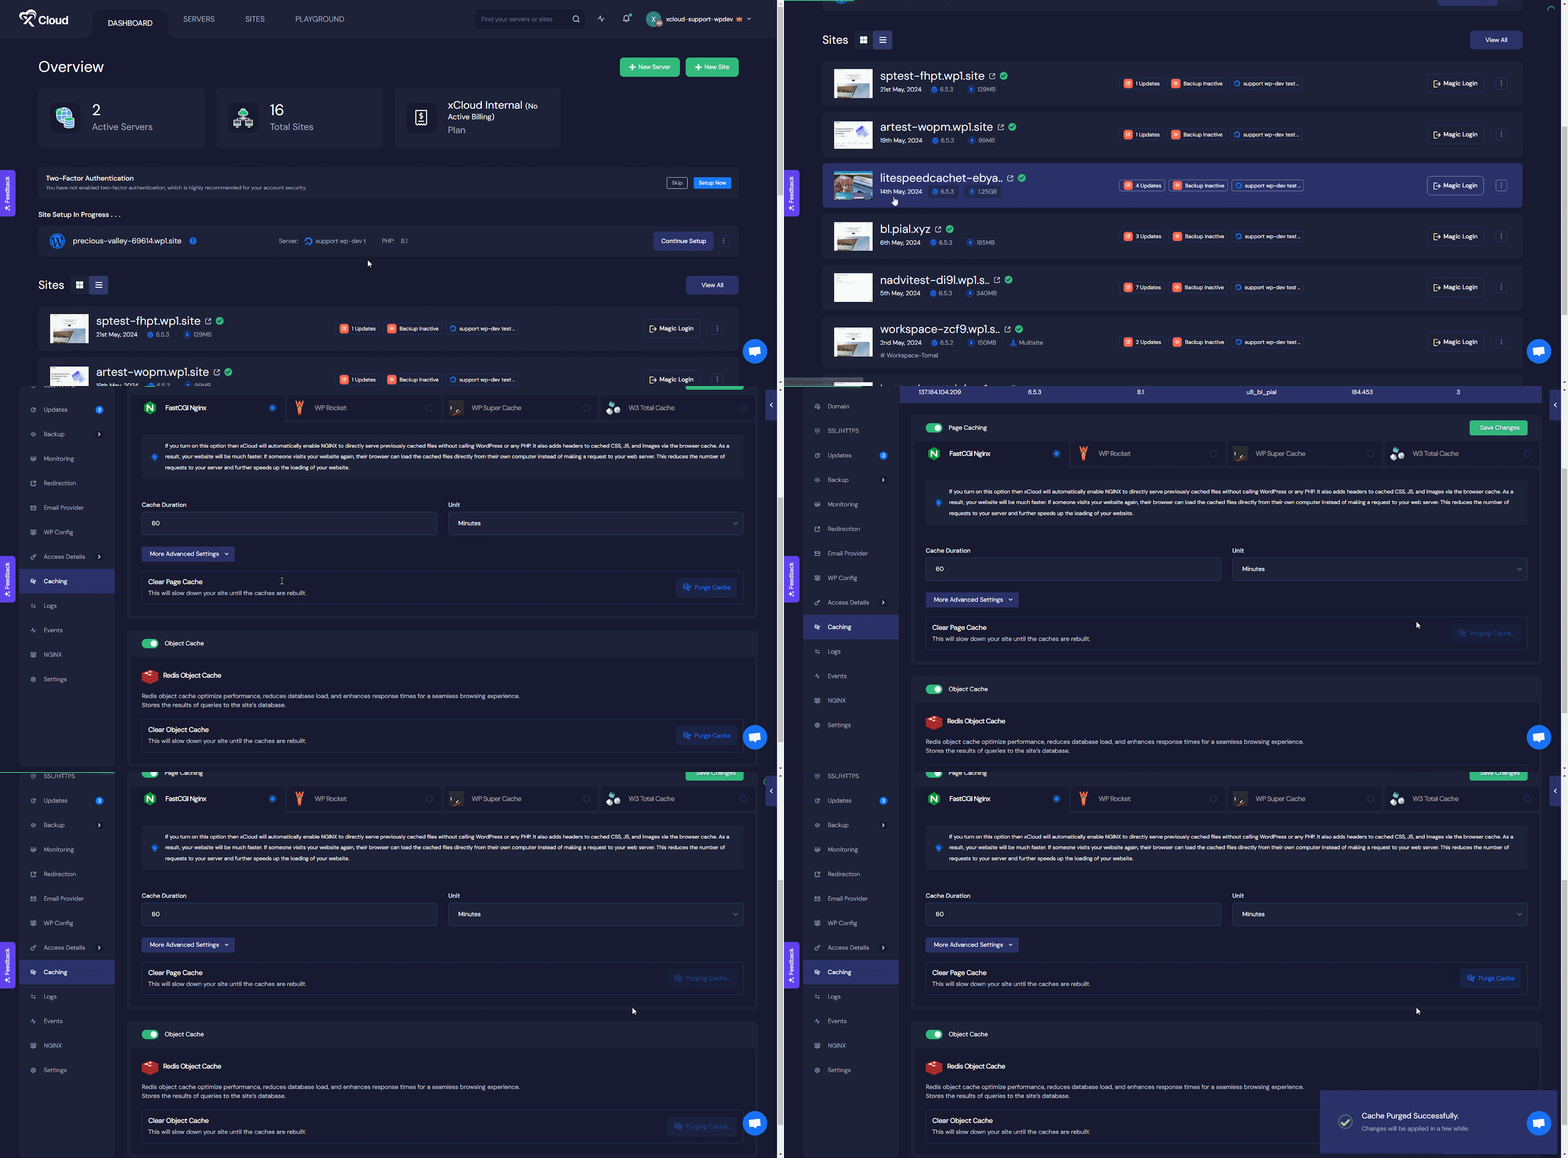
If the problem still exists disable the default caching plugin to identify if caching mechanisms on your hosting plan causing the issue.
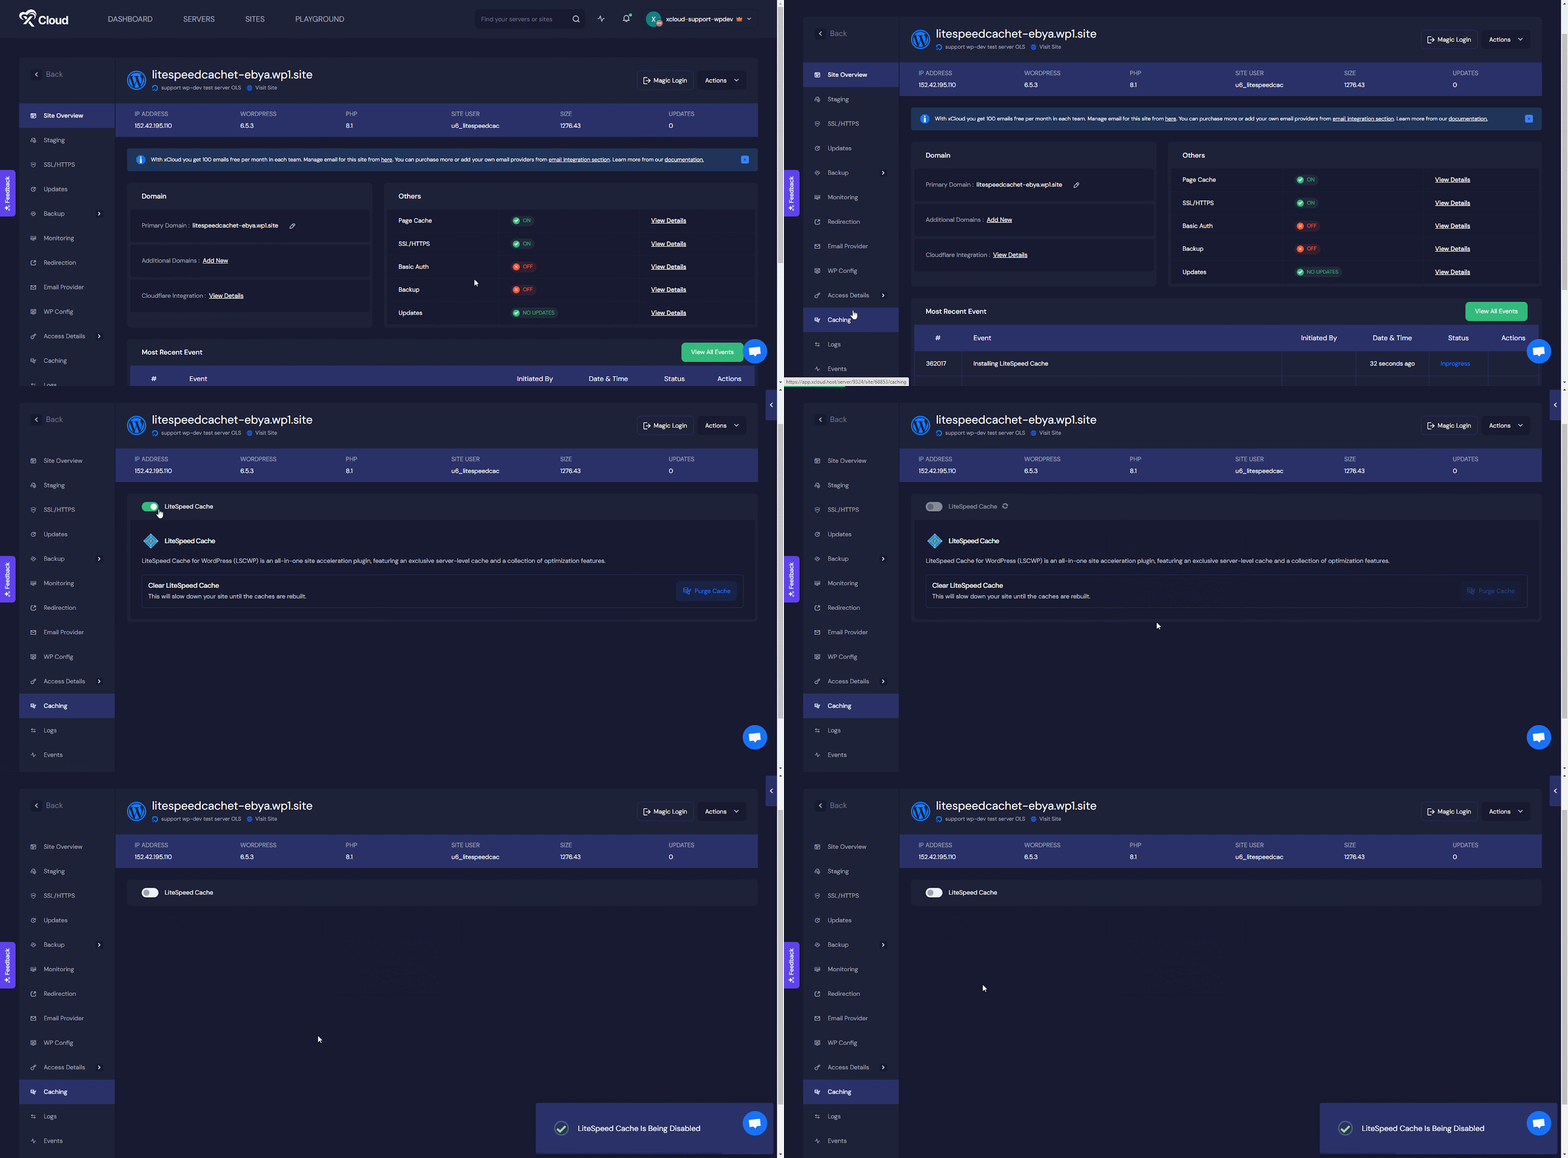
After trying these solutions, revisit your website and see if the latest changes are reflected. If not, try a clean installation of the plugin.
Disable Multiple Caching Plugins #
If you are using a third-party caching plugin along with your hosting default caching and you encounter caching issues. Try disabling one of your caching plugins and see if the issue is solved.
Here Are Some Additional Tips #
- Use a caching incognito window: Open your website in a private browsing window or incognito mode. This bypasses your browser’s cache and displays the latest version of the site.
- Utilize caching plugins strategically: While caching can improve website performance, excessive caching can cause issues. Consider excluding frequently updated pages from being cached.
If you have gone through these steps and are still facing caching problems, feel free to contact xCloud support. Our team always welcomes you and assists you further.


