


The xCloud Mailbox Addon allows you to integrate your email account with popular email clients like Gmail, Microsoft Outlook, Thunderbird, Windows Mail, and iOS Mail. By configuring an email client, you can send and receive emails directly from your desktop or mobile device, providing a seamless and efficient communication experience without relying solely on webmail.
This guide walks you through the complete process of configuring your preferred email client using IMAP/POP protocols, ensuring secure and reliable access to your xCloud mailbox.
Step 1: Create Your Email Account #
To proceed, you need to create a MailBox first. If you have not created any MailBox yet, read this detailed documentation:
How to Set Up xCloud MailBox Addon
Step 2: Gather your IMAP/POP Info #
After accessing the IMAP and POP tab in your xCloud Mailbox dashboard, you will find all the necessary credentials to configure your email account. Before proceeding, it’s important to understand the difference between IMAP and POP as each serves a different purpose.
IMAP (Internet Message Access Protocol) is the recommended option for most users. It allows for two-way synchronization between your email client and the server, meaning any changes you make—such as reading, deleting, or moving messages—will reflect across all your devices. This makes IMAP ideal if you plan to access your email from multiple devices like your smartphone, tablet, or computer.
On the other hand, POP3 (Post Office Protocol v3) is designed for downloading emails to a single device. Once downloaded, emails are typically removed from the server, and any changes made on one device won’t sync to others. POP3 is best suited for users who only check their email on one device and prefer to store their emails locally.
Choose the email setup that works best for you: IMAP for syncing your email on multiple devices or POP for accessing your email on just one device. Then, gather the setup details from your dashboard to continue configuring your email client.
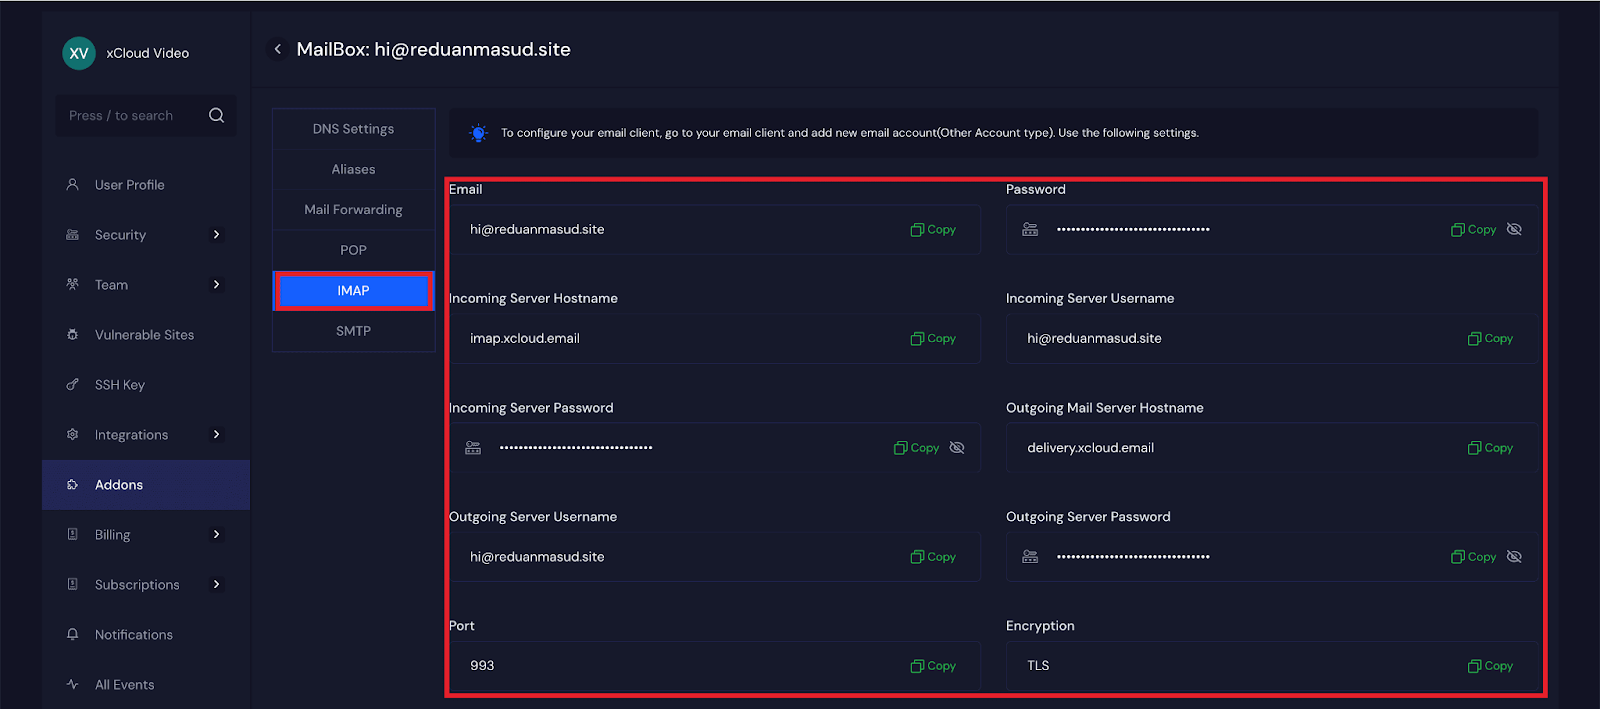
For IMAP: #
Email: hi@yoursite.com
Password: **************
Incoming Server Hostname: imap.xcloud.email
Incoming Server Username: hi@yoursite.com
Incoming Server Password:
Outgoing Mail Server Hostname: delivery.xcloud.email
Outgoing Server Username: hi@yoursite.com
Outgoing Server Password: **************
Port: 993
Encryption:TLS
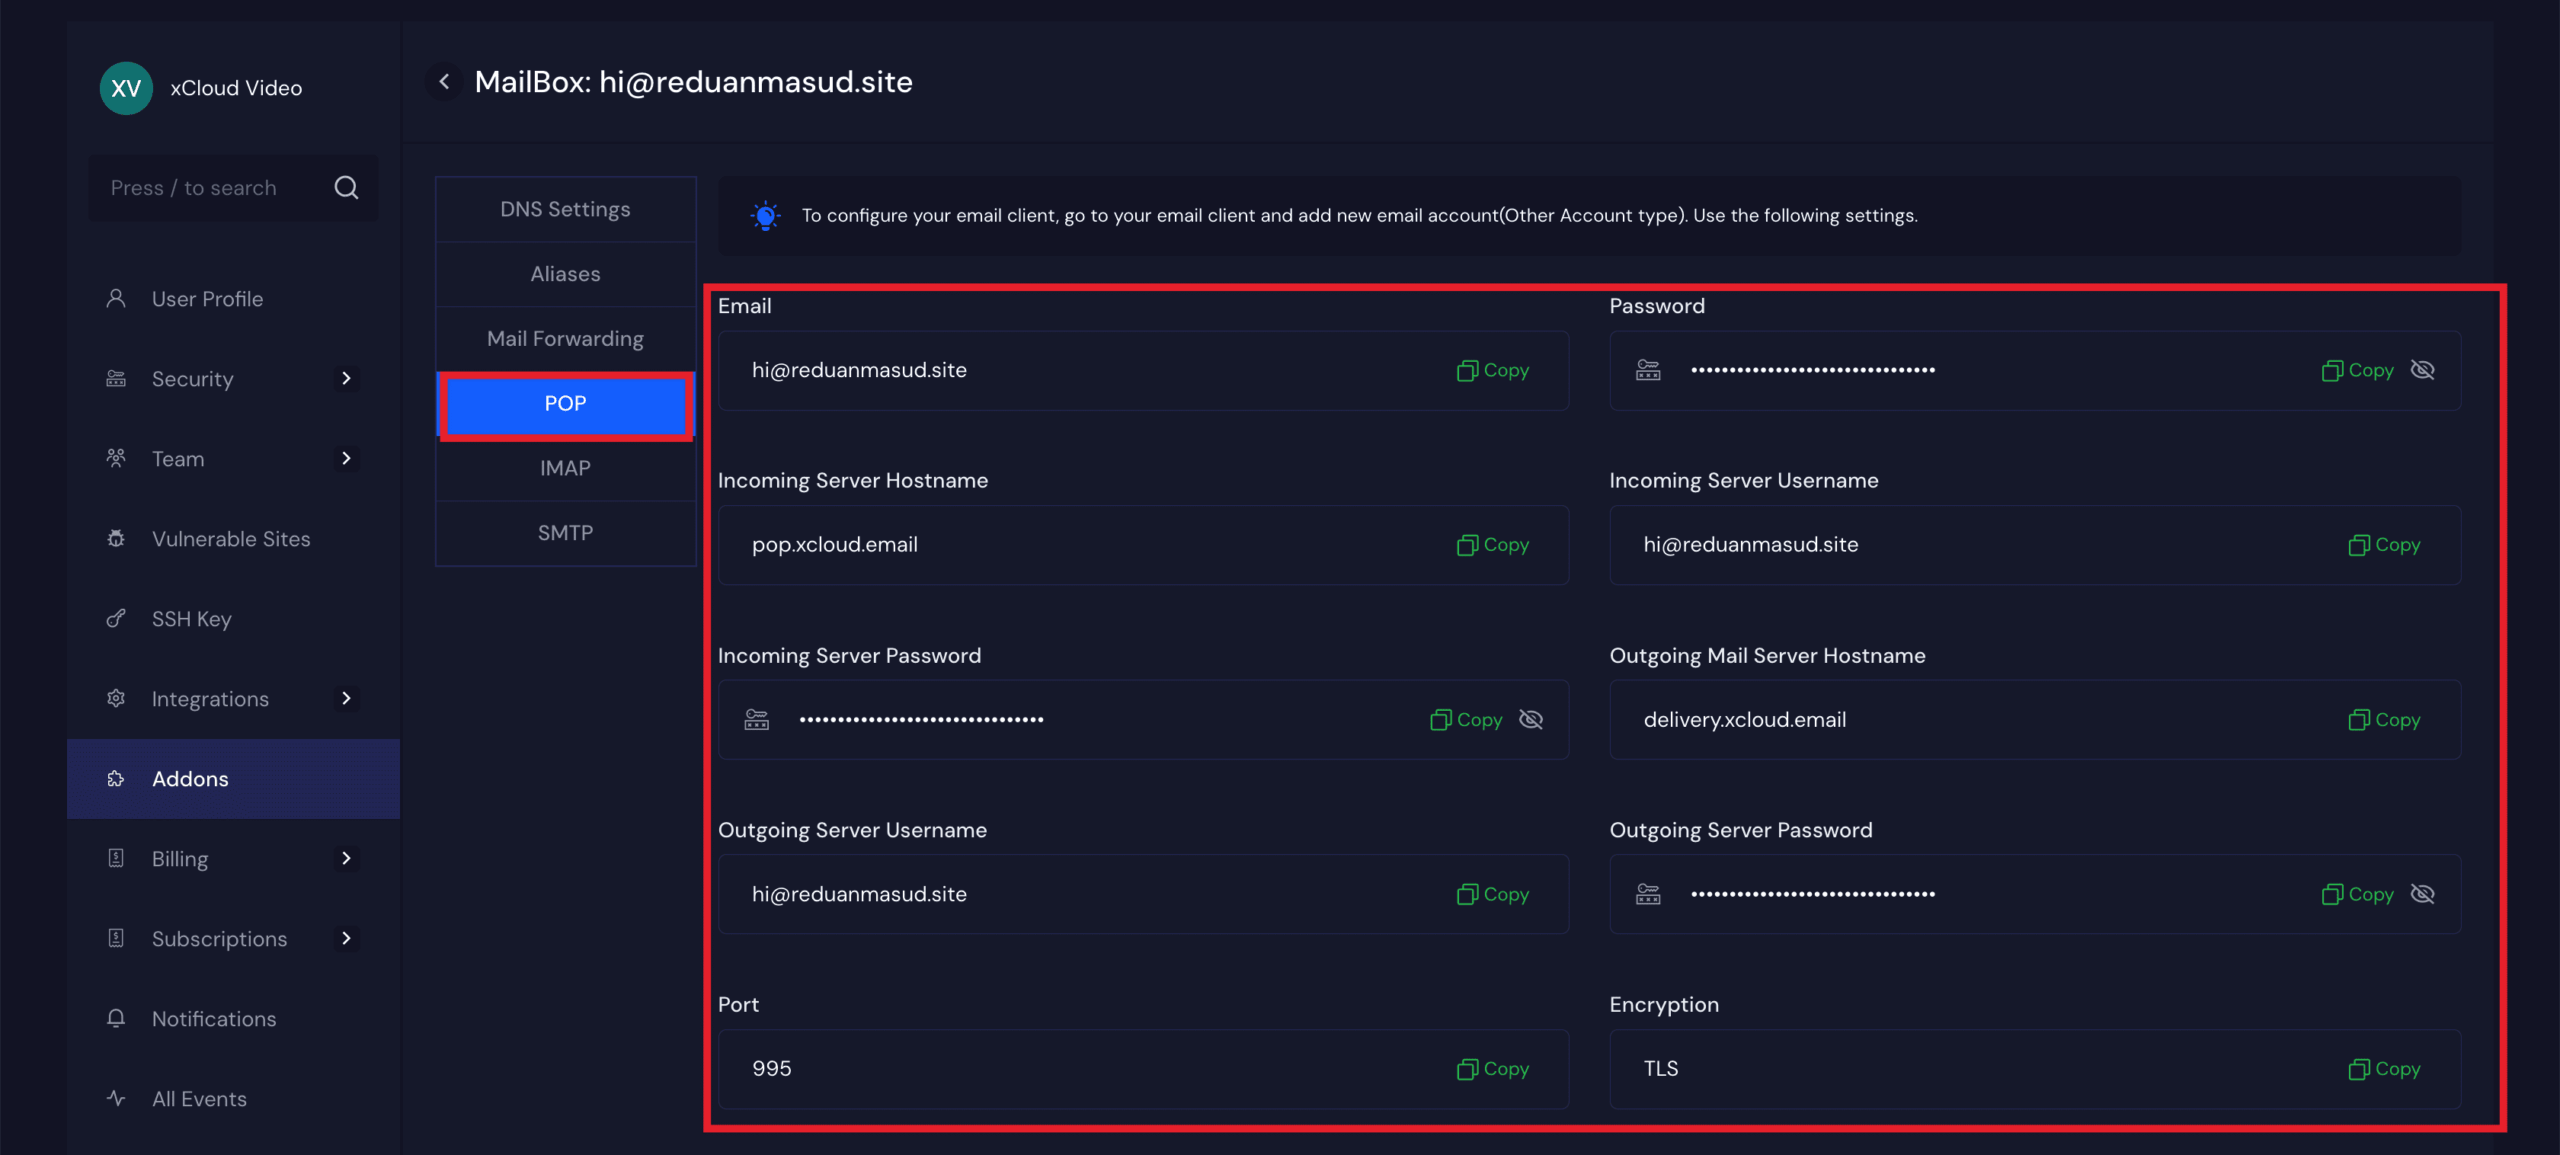
POP #
Email: hi@yoursite.com
Password: **************
Incoming Server Hostname: pop.xcloud.email
Incoming Server Username: hi@yoursite.com
Incoming Server Password:
Outgoing Mail Server Hostname: delivery.xcloud.email
Outgoing Server Username: hi@yoursite.com
Outgoing Server Password: **************
Port: 995
Encryption:TLS
Step 3 – Configure your email client #
Although various email clients and devices have distinct configurations, they all have fundamental setup requirements in common. For more information, select your device from the list below:
- Smartphones and tablets
- Mac devices
- Gmail
- Windows
- Other Email clients
If your device or email application is not included in the list, consult a similar guide or look online for the official documentation.
Still stuck? Contact our support team for any of your queries.


