With the growing popularity of large language models (LLMs), developers and businesses are increasingly looking for ways to host these powerful AI tools on their own servers. Self-hosting an LLM provides greater control over data privacy, customization, and performance, without relying on third-party platforms.
Learn how to self host LLMS and deploy OpenWebUI and Ollama with xCloud or your own cloud servers.
Note: Make sure your system has at least 20 – 30% more RAM than the model size before downloading.
Also, If you want to use Ollama, we recommend deploying it on a GPU server for optimal performance and faster model inference.
Step 1: Create a Docker+ NGINX Server #
First, you need to create a server to deploy any LLMs. Click on the ‘Add New Server’ button from the dashboard and enter all the credentials required to connect your server. You can deploy Ollama on your own server or on an xCloud server.

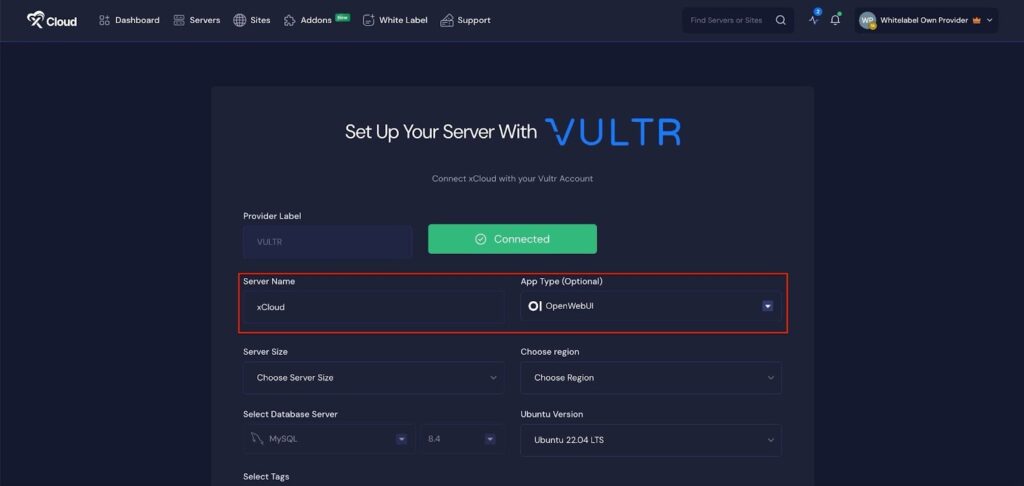
Next, enter a ‘Server Name’ and choose an ‘App Type’ from the dropdown menu. You will see all available application types here, including ‘OpenWebUI’ and ‘Ollama,’ which will provide the user with the necessary configuration settings.
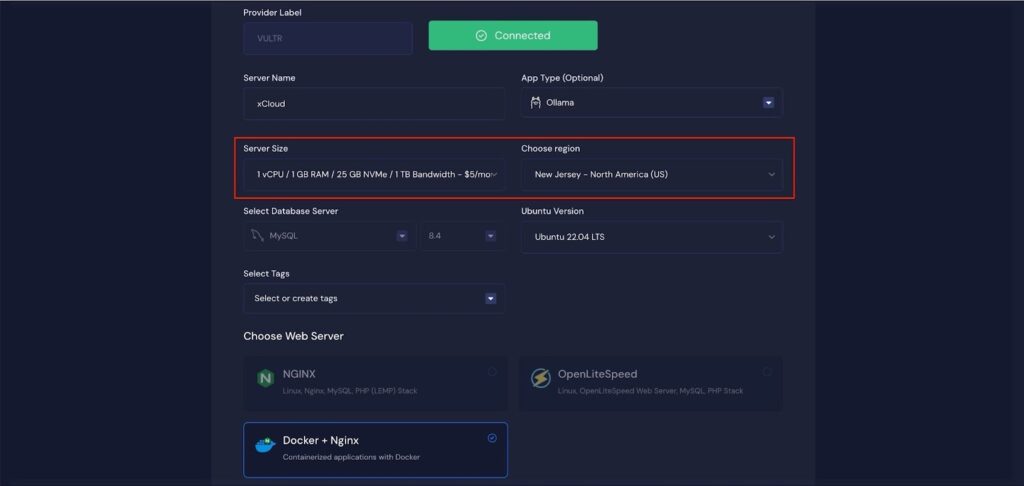
Then choose a ‘Server Size’ and ‘Region’ of the server according to your preferences.
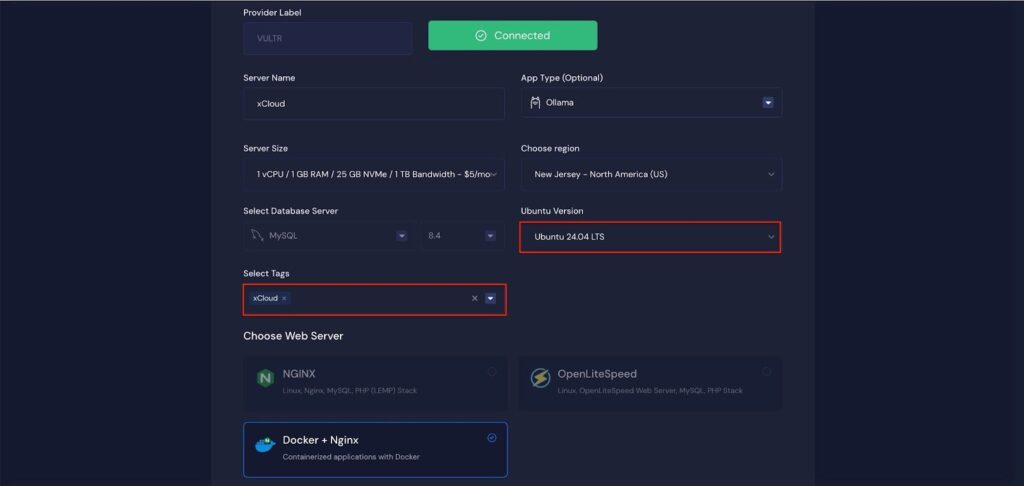
Then choose your preferred ‘Ubuntu Version’ of this server and enter the ‘Tags’ for this server.
Next, you can see the ‘Docker + NGINX’ stack is already selected, which is mandatory for deploy the LLM application.
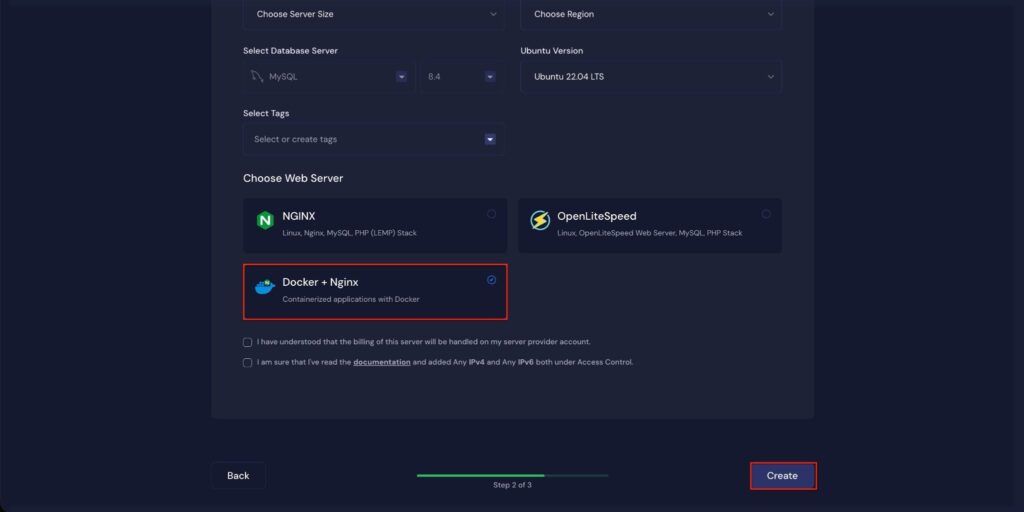
Once the server is created, you will be able to deploy your OLLAMA Application in this server.
After creating a server, it may take a while to become fully operational. Wait a few minutes before deploying your applications to ensure everything starts correctly.
How to Install Ollama on a Cloud Server #
Learn how to install Ollama on a cloud server. It walks you through creating a server, configuring the environment, and launching your Ollama application easily.
Step 2: Access the One Click Apps Dashboard #
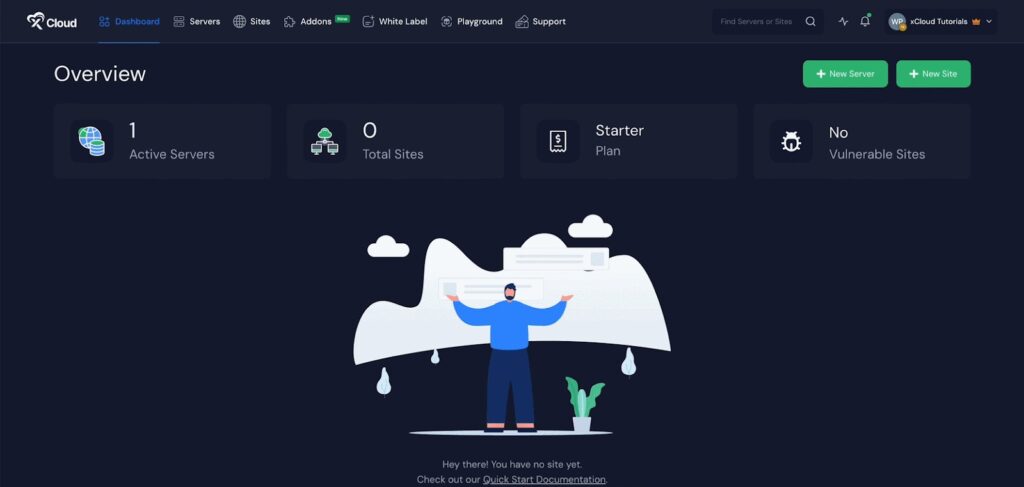
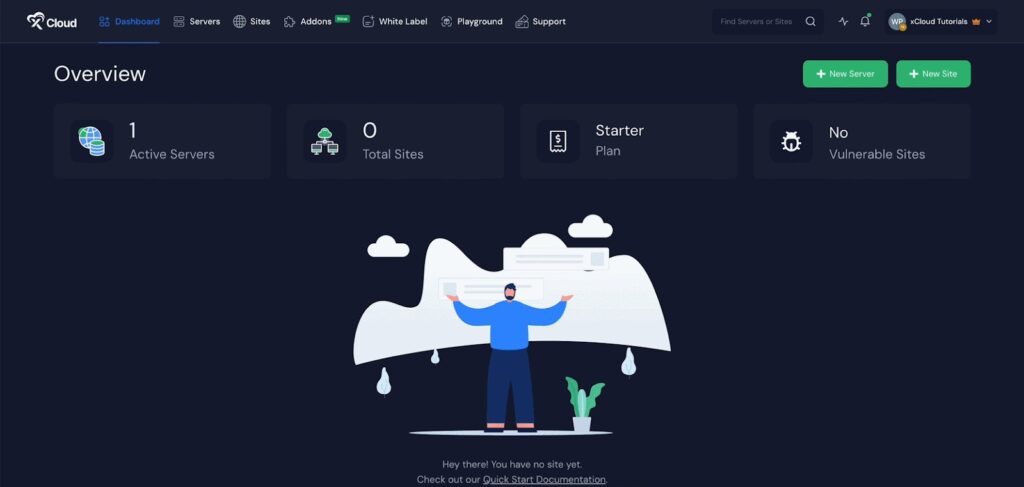
Begin by logging into your xCloud account. Once logged in, navigate to your dashboard and click on the ‘New Site’ button. Then choose your server and click on the ‘Next’ button to proceed.
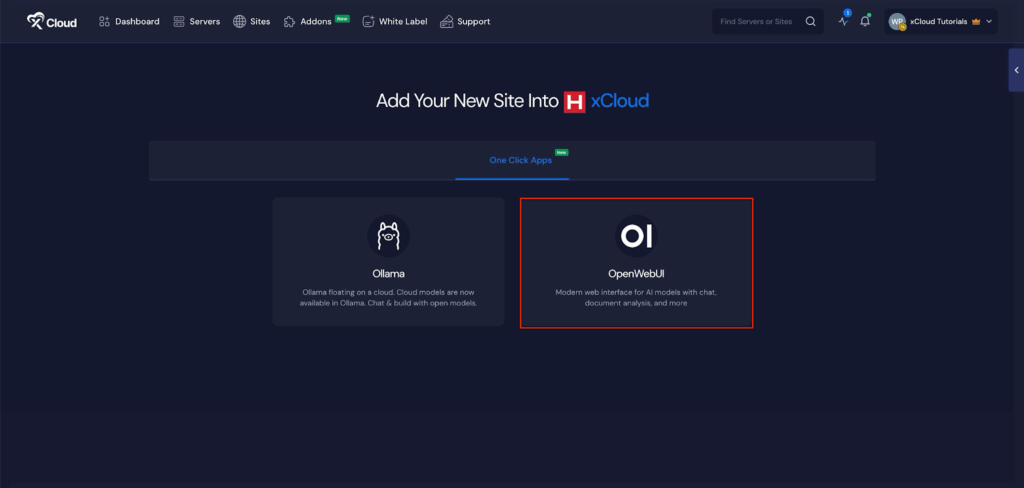
This will take you to the site creation interface. From here, select your Server, then navigate to the One-Click Apps section. You will see two options: OpenWebUI and Ollama. Choose OpenWebUI to proceed with the deployment of this application.
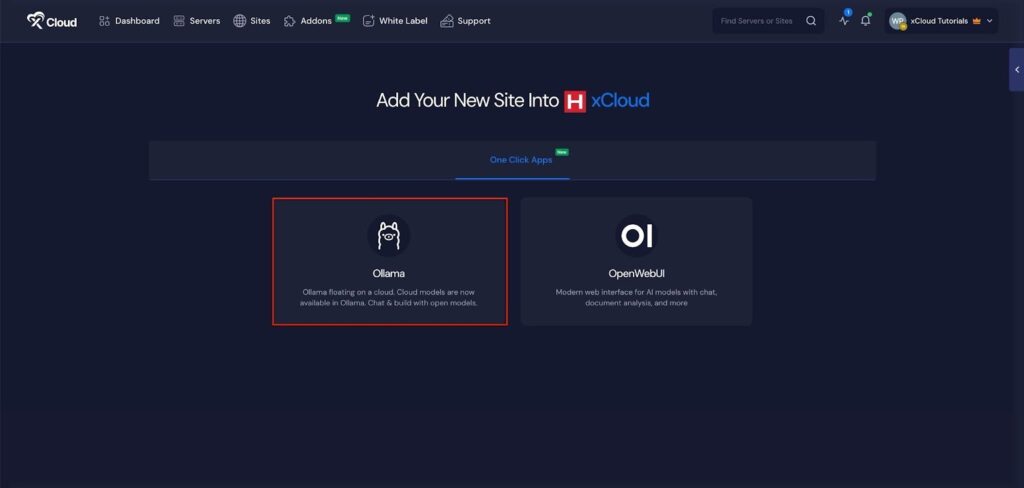
Step 3: Set Up the OpenWebUI Application #
In the site setup screen, you will be prompted to enter basic site information. Provide a ‘Site Title’ and add relevant ‘Tags’ to help organize your deployment.
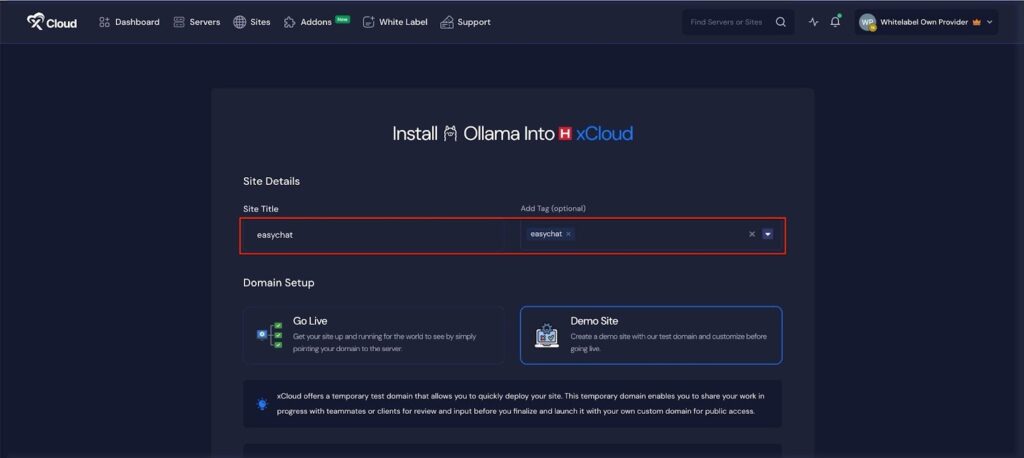
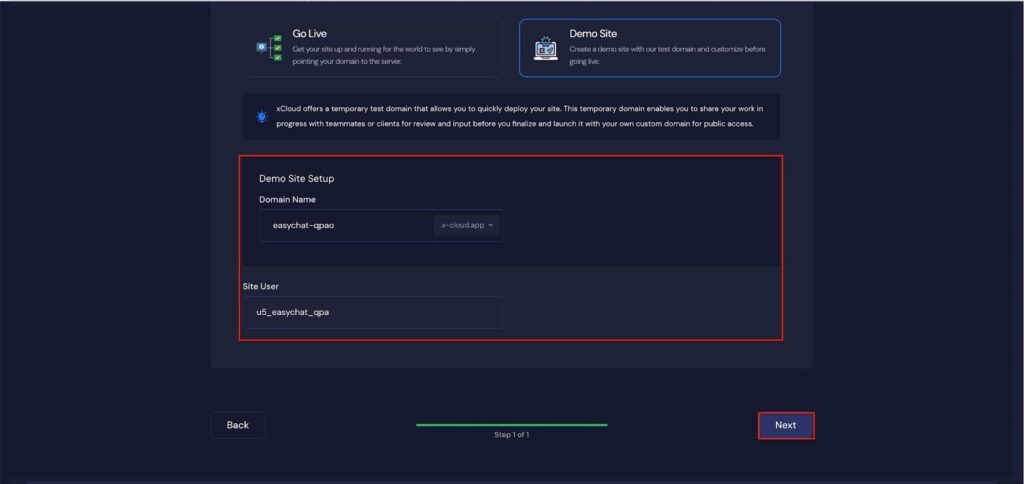
At this point, you can choose between two deployment modes: ‘Go Live’ for a production-ready deployment or ‘Demo Site’ for testing purposes. Selecting ‘Go Live’ will immediately create a live environment, while choosing ‘Demo Site’ allows you to experiment in a staging environment before promoting it to production.
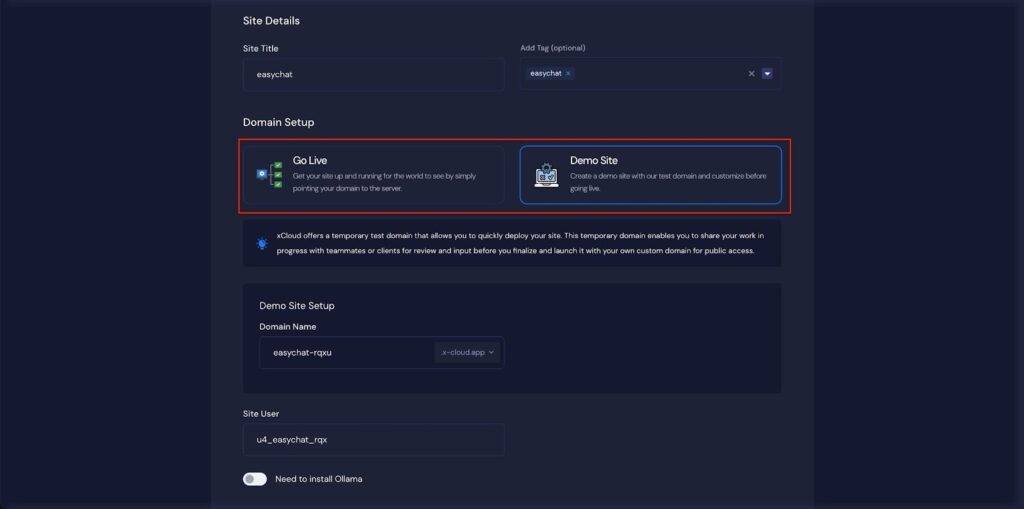
Step 4: Configure Domain Settings #
If you select the ‘Demo Site’ option, xCloud will assign a temporary subdomain for your OpenWebUI application. You can adjust the ‘Site User’ according to your preferences, or leave it as the default.
Step 4: Visit the Ollama Application #
With Ollama set up with xCloud, you should be able to log in and confirm that it’s working. From the dashboard, click on the ‘Visit Site’ app.
Environment Editor for Ollama #
The Environment section in xCloud allows you to customize configuration settings for your OpenWebUI instance. Just go to the ‘Environment’ option from the sidebar and adjust as you need, then click on the ‘Save’ button.
Manage Ollama Models #
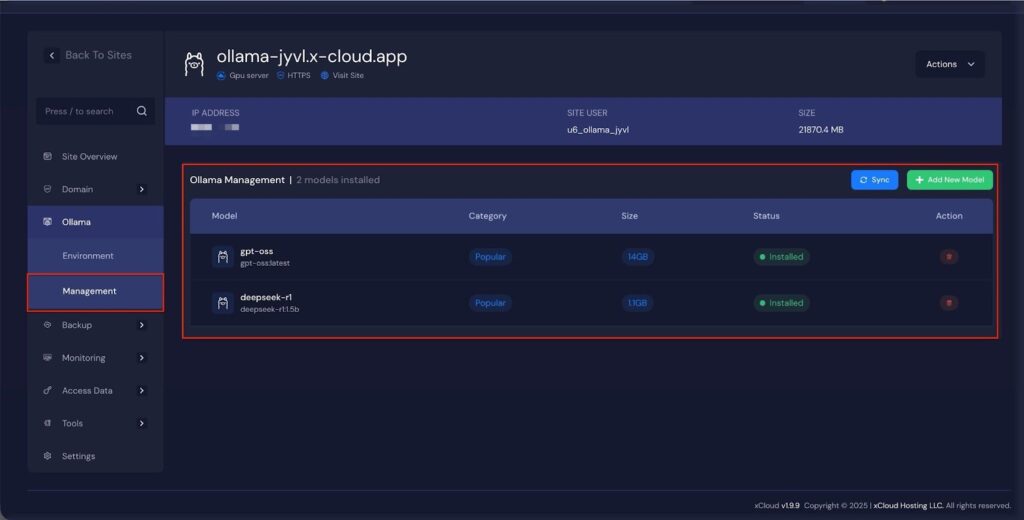
Later, you can manage your OpenWebUI application. Go to the ‘Ollama’ → ‘Management’. Next, click on the ‘Add New Model’ to install more AI models. Also, you can click on the ‘Delete Icon’ to delete the AI models of this application.
How to Install OpenWebUI on a Cloud Server #
Learn how to set up OpenWebUI on a cloud server and get it running quickly. It covers server setup, application configuration, and accessing your deployed site, making it easy to get started regardless of your technical background.
Note: It is recommended that you install Ollama before installing OpenWebUI app.
Step 1: Access the One Click Apps Dashboard #
Begin by logging into your xCloud account. Once logged in, navigate to your dashboard and click on the ‘New Site’ button. Then choose your server and click on the ‘Next’ button to proceed.
This will take you to the Site Creation Interface. From here, choose your Server, then go to the One-Click Apps section. You will see two options ‘OpenWebUI’ and ‘Ollama’. Choose ‘OpenWebUI’ to begin deploying the application.
Step 2: Set Up the OpenWebUI Application #
In the site setup screen, you will be asked to enter basic site information. Provide a ‘Site Title’ and add relevant ‘Tags’ for your application.
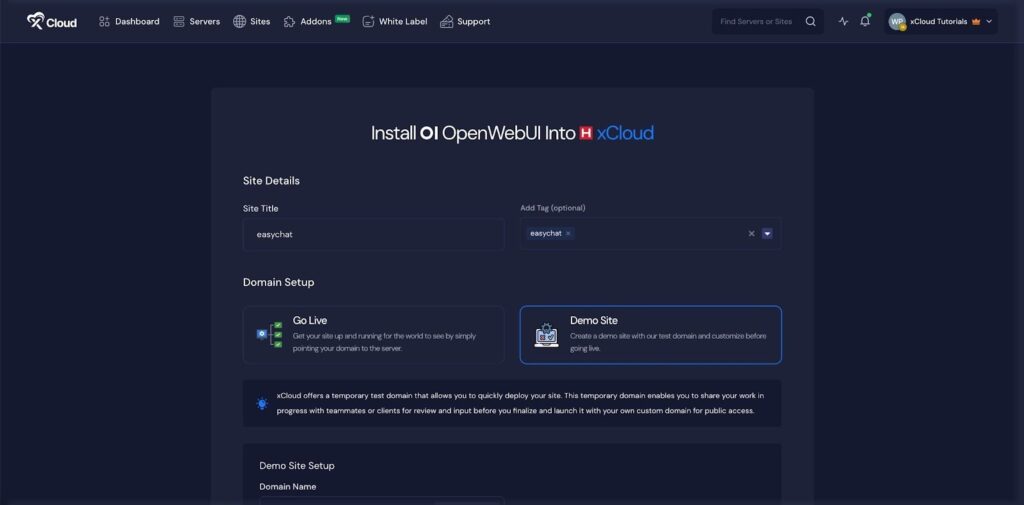
At this point, you can choose between two deployment modes: ‘Go Live’ for a production-ready deployment or ‘Demo Site’ for testing purposes. Selecting ‘Go Live’ will immediately create a live environment, while choosing ‘Demo Site’ allows you to experiment in a staging environment before promoting to production.
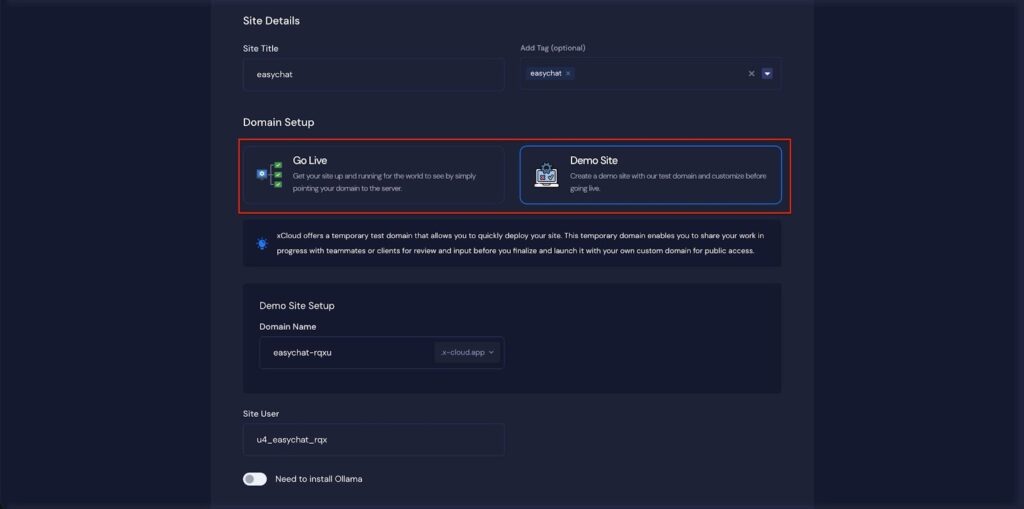
Step 3: Configure Domain Settings #
If you select the ‘Demo Site’ option, xCloud will assign a temporary subdomain for your OpenWebUI application. Adjust the Site User according to your preferences, or leave it as the default.
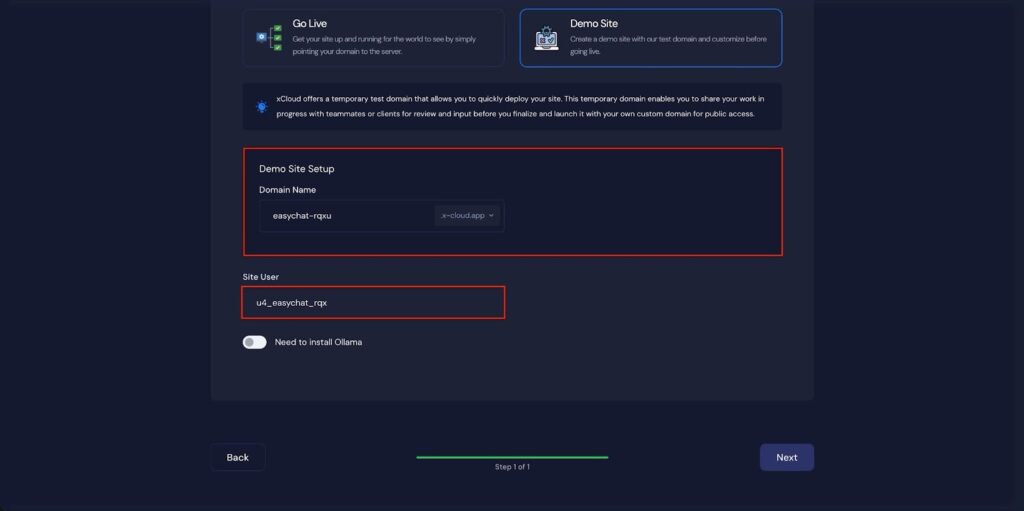
Step 4: Install Ollama Application #
If you want to install Ollama, toggle on the installation option and choose a model from the dropdown menu. Then, click ‘Next’ to proceed with the installation.
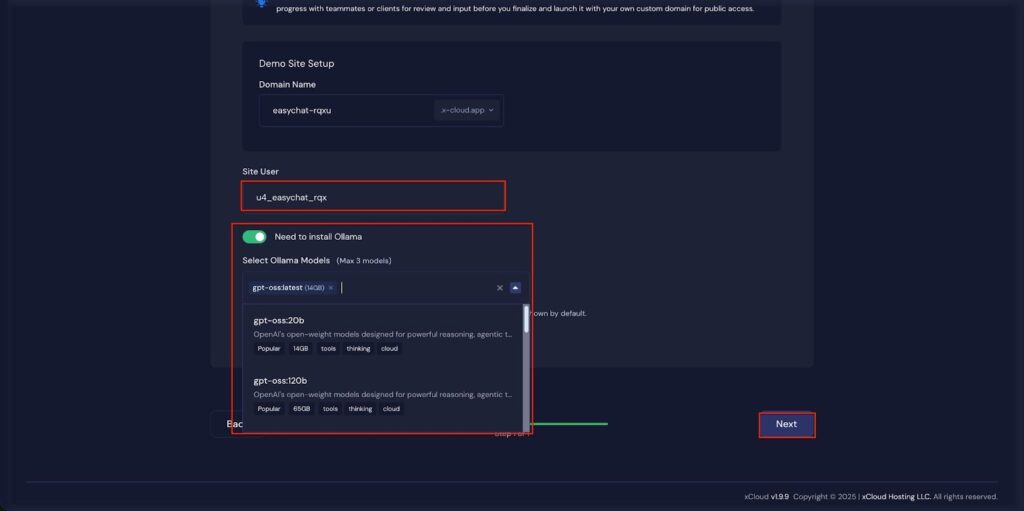
Step 5: Visit the OpenWebUI Application #
Once OpenWebUI is set up on xCloud, you can log in to confirm that it’s working. From the dashboard, click on ‘Visit Site’.
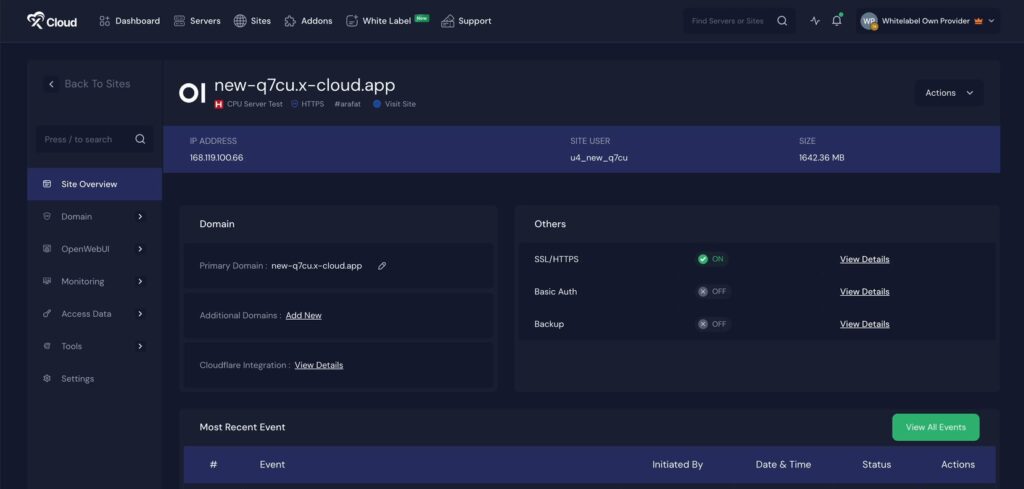
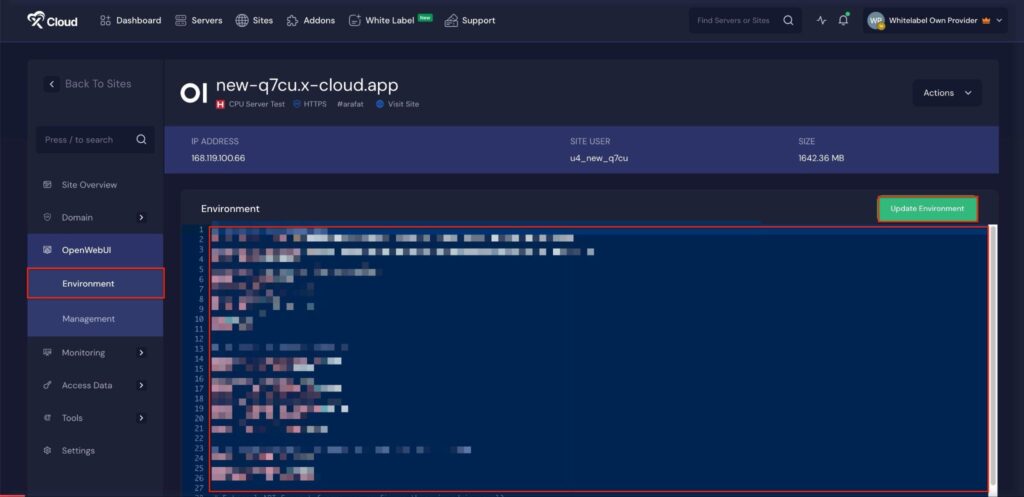
Environment Editor for OpenWebUI #
The Environment section in xCloud allows you to customize configuration settings for your OpenWebUI instance. Just go to the ‘Environment’ option from the sidebar and adjust as you need, then click on the ‘Save’ button.
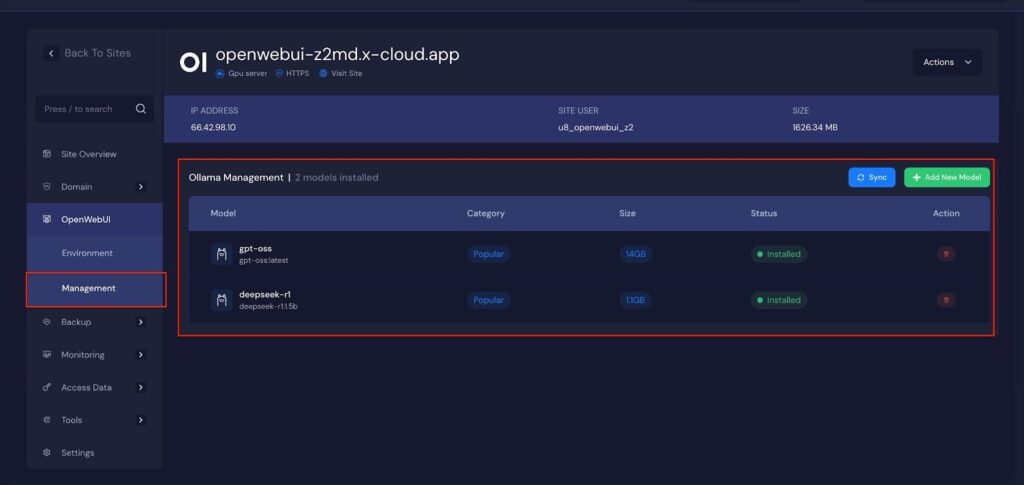
Manage AI Models #
Later, you can manage your OpenWebUI application. Go to the ‘OpenWebUI’ → ‘Management’. Next, click on the ‘Add New Model’ to install more AI models. Also, you can click on the ‘Delete Icon’ to delete the AI models of this application.
Self-hosting LLMs with xCloud empowers developers and businesses to take full control of their AI deployments, ensuring data privacy, customization, and optimized performance.
By following the instructions for setting up Docker + NGINX servers, deploying Ollama, and configuring OpenWebUI, you can quickly get your AI models up and running on a cloud environment tailored to your needs. With xCloud’s One Click Apps, Environment Editor, and model management tools, maintaining and scaling your LLM deployments becomes straightforward and efficient
Still stuck? Contact our support team for any of your queries.


