


xCloud’s 7G and 8G Web Application Firewalls automatically block malicious traffic to keep your website safe. They protect against attacks such as SQL injection, cross-site scripting (XSS), bad bots, and more. While doing this, they allow legitimate visitors to browse your site without interruption.
What Are 7G and 8G WAF? #
The 7G Firewall blocks bad bots, suspicious query strings, referrers, malformed requests, and unauthorized HTTP methods.
The 8G Firewall includes all of these protections. It also adds rules to block bad cookies, bad hosts, advanced bots, and remote code execution (RCE).
Both firewalls reduce server load by filtering harmful requests early, before they reach your site.
Why Whitelist Firewall Rules? #
Sometimes a firewall can block legitimate requests. This is called a false positive. It can cause errors such as 403 Forbidden during uploads, plugin updates, or when connecting to third-party services.
False positives often happen when:
- A plugin or theme contains query strings that match firewall patterns
- Trusted API calls are flagged as suspicious
- Certain file types or URLs match default rules
- Search engine or analytics bots are blocked
Whitelisting specific firewall rules allows safe requests to pass without turning off your firewall protection.
Steps to Whitelist 7G and 8G Rules for Your Website in xCloud #
xCloud allows you to whitelist specific 7G and 8G WAF rules in xCloud to fix false positives without turning off your firewall.Let us get started and learn how to whitelist 7G and 8G WAF rules right from the dashboard easily.
Note: Currently, 8G and 7G rule customization is only available for NGINX servers. We will add support for OLS servers in the future.
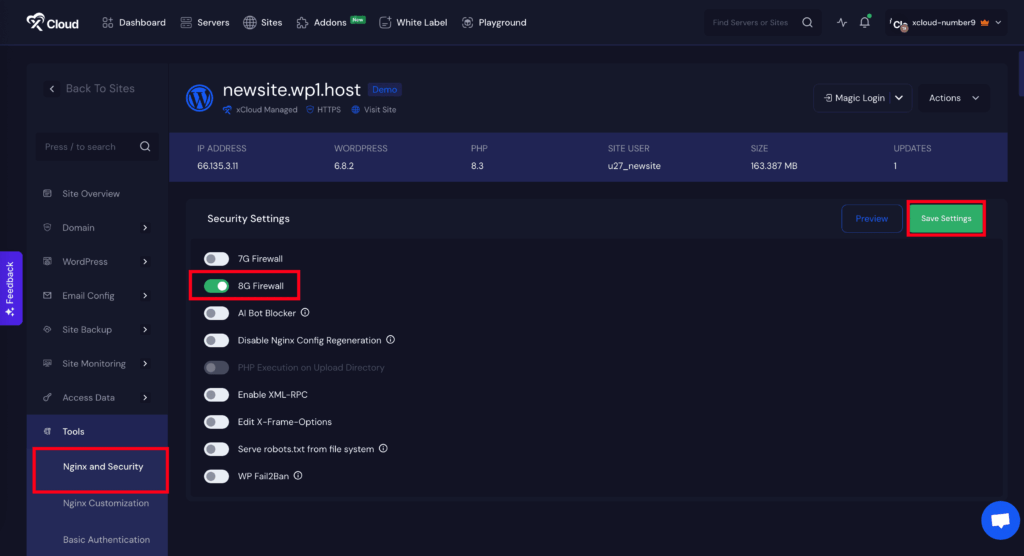
Step 1: Enable the Firewall #
Log in to your xCloud dashboard. Go to your site and navigate to the Tools → Nginx Security from the sidebar. Toggle on the ‘7G Firewall’ or ‘8G Firewall‘ and click on the ‘Save Settings’.
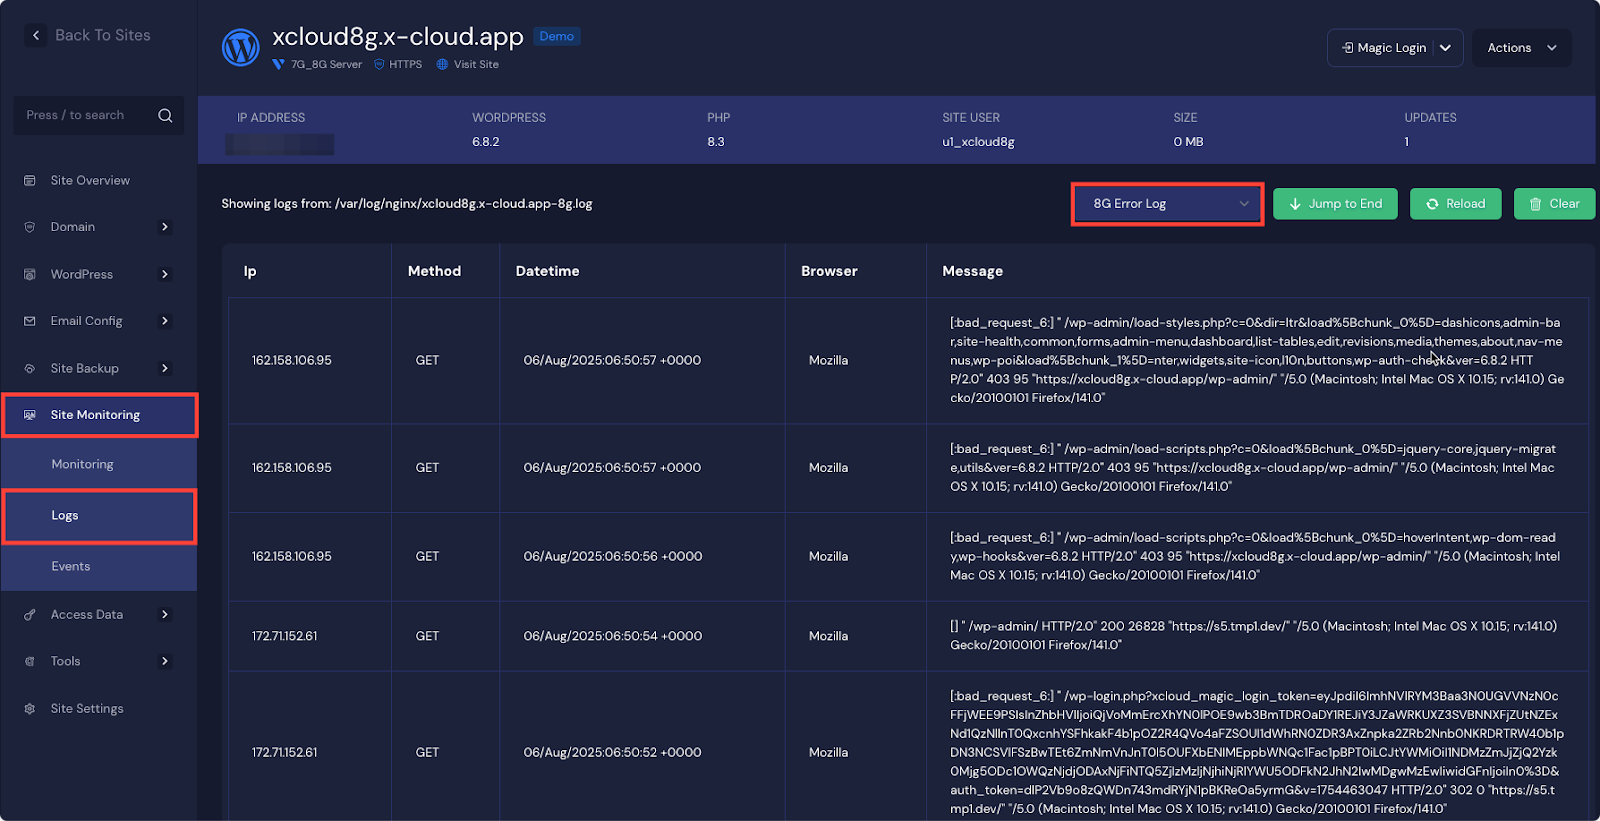
Step 2: Find Which Rules Are Blocking Legitimate Requests #
First, go to Site Monitoring → Logs. Select the 8G Error Log (or 7G log). Look for entries with 403 errors. Each log line shows a triggered rule inside brackets, such as [“:bad_request_6:”].
The part before the number (for example, bad_querystring) is the rule name you will use when creating your whitelist.
Construct the Trigger and Drop Variable Names #
When the firewall blocks a request, it uses a trigger variable to identify which specific rule has matched.
The trigger variable follows these formats:
- 7G Trigger Variable: $<rule_name>_7g
- 8G Trigger Variable: $<rule_name>_8g
To whitelist a rule, you must set its drop variable to 0. The drop variable follows these formats:
- 7G Drop Variable: $7g_drop_<rule_name>
- 8G Drop Variable: $8g_drop_<rule_name>
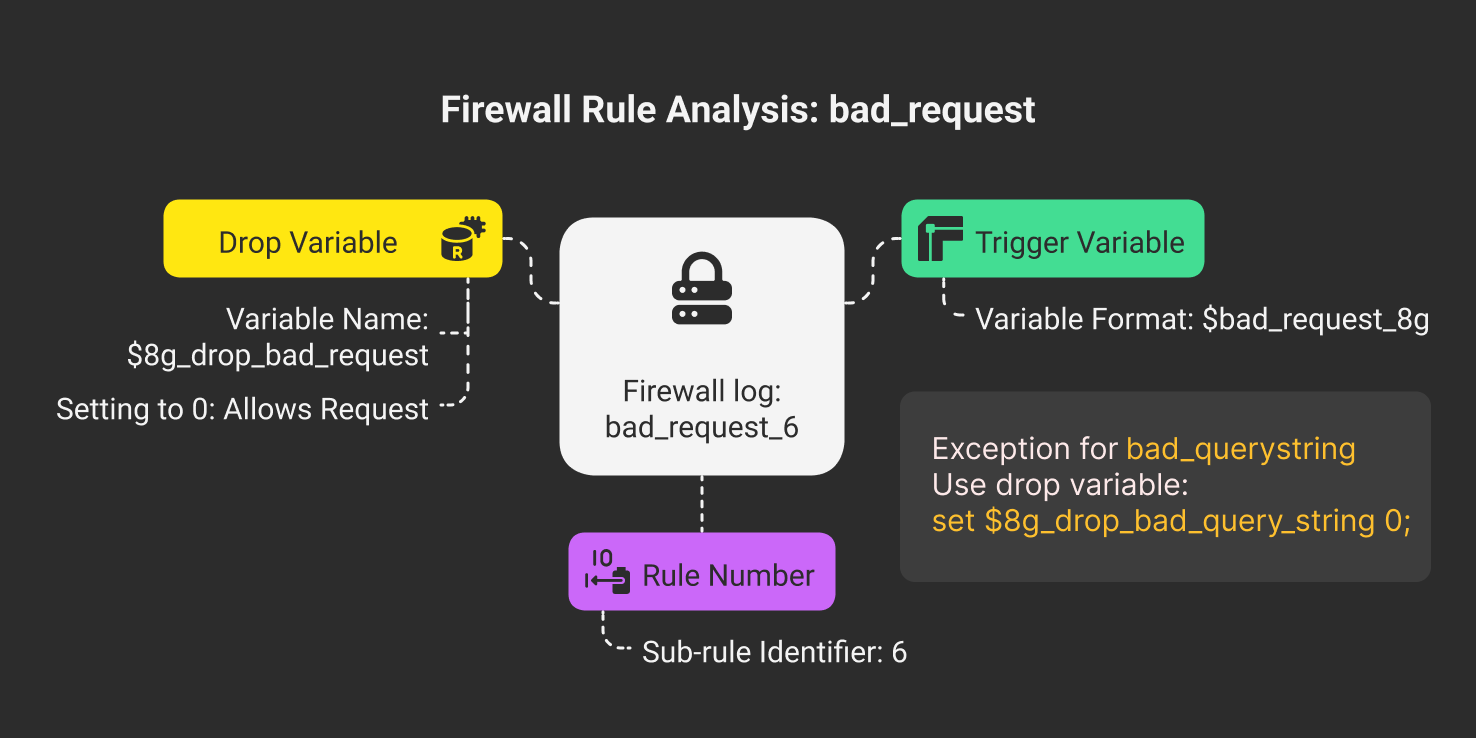
For example, if the triggered rule is bad_request_6
- For 7G, the drop variable will be:
set $7g_drop_bad_request 0
- For 8G, the drop variable will be:
set $8g_drop_bad_request 0
Special Case for bad_querystring:
For rules that start with bad_querystring, the drop variable name changes slightly. In the drop variable, the term bad_querystring is written as bad_query_string (with an extra underscore).
- For 7G, the drop variable will be:
set $7g_drop_bad_query_string 0- For 8G, the drop variable will be:
set $8g_drop_bad_query_string 0Step 4: Whitelist Rules via xCloud Custom NGINX (For Sites) #
Now to Whitelist any firewall rules navigate to the pen ‘Tools’ → ‘NGINX Customization’ in your site dashboard. Then, click ‘Add a New Config’. Enter the whitelist rule using NGINX syntax.
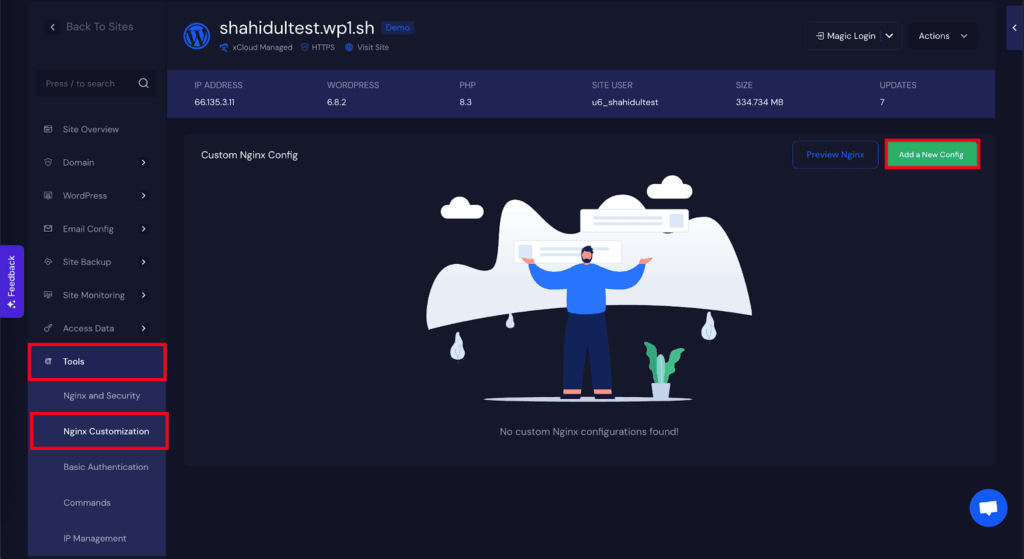
Once you click on the ‘Add a New Config’, a pop-up interface will appear. First, ‘Select Config Type’ and choose the ‘8G Block’ from the dropdown, then give it a ‘Config File Name’. After that, write the whitelisting rule inside the ‘Config Content’ field and click on the ‘Run & Debug’.
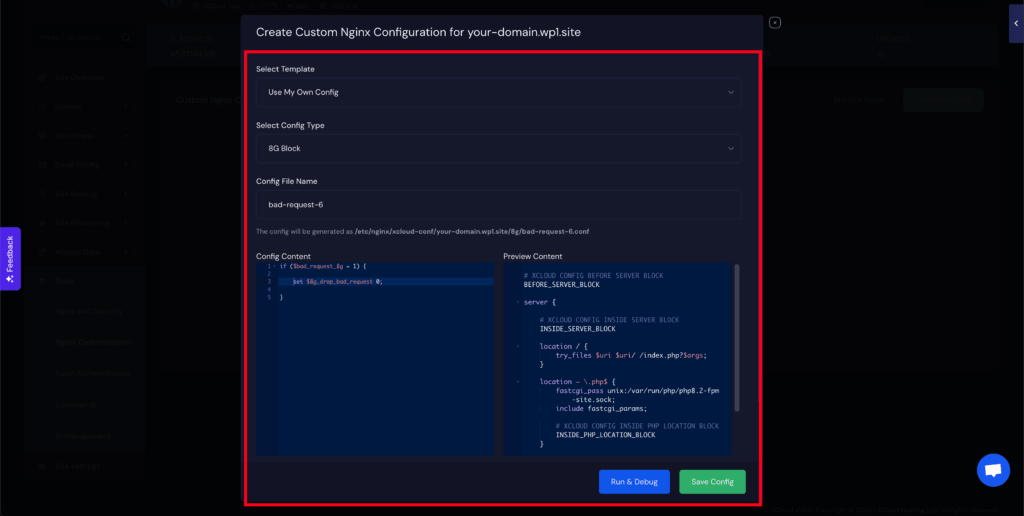
Example: Whitelist bad_request_6 in 7G or 8G #
If your log shows a rule like bad_request_6, you will need to whitelist it by disabling its drop variable.
if ($bad_request_8g = 1) {

    set $8g_drop_bad_request 0;

}
Note: If you are using the 8G Firewall, replace $8g_ with $7g_.
Example: Whitelist bad_querystring in 7G or 8G #
if ($bad_querystring_8g = 1) {

    set $8g_drop_bad_query_string 0;

}
Note: If you are using the 8G Firewall, replace $8g_ with $7g_.
Example: Whitelist by IP Address #
if ($remote_addr = "199.191.137.17") {

    set $8g_drop_bad_request 0;

    set $8g_drop_bad_referer 0;

    set $8g_drop_bad_query_string 0;

    set $8g_drop_bad_method 0;

    set $8g_drop_bad_bot 0;

}
Example: Whitelist Plugin Requests by URI #
if ($request_uri ~* "essential-blocks") {

    set $8g_drop_bad_request 0;

    set $8g_drop_bad_referer 0;

    set $8g_drop_bad_query_string 0;

    set $8g_drop_bad_method 0;

    set $8g_drop_bad_bot 0;

}
Note: If using the 8G Firewall, replace $7g_ with $8g_ in all variables.
Step 5: Save and Test #
After adding your whitelist rules, save the configuration. Test your website to confirm the false positives are resolved.
Server-Wide Whitelisting (Advanced) #
You can apply whitelist rules to all websites on the server by editing the firewall configuration files via SSH.
The file locations are:
- 7G: /etc/nginx/xcloud-conf/7g/server-conf/
- 8G: /etc/nginx/xcloud-conf/8g/server-conf/
After making changes, run nginx -t to test the configuration. Then reload NGINX with the service nginx reload.
This method affects all hosted sites and should be tested carefully. By following these steps, you can fine-tune your firewall to block real threats while preventing disruptions from false positives.
Still stuck? Contact our dedicated support team for any of your queries.


