


WP Fail2Ban is a powerful WordPress plugin that enhances the security of your site by logging and helping to prevent malicious login attempts. When integrated with xCloud, it offers additional security features such as blocking failed logins, spam protection, and more.
Follow the steps below to integrate WP Fail2Ban with xCloud and get enhanced protection for your WordPress website.
Step 1: Access Your WordPress Site #
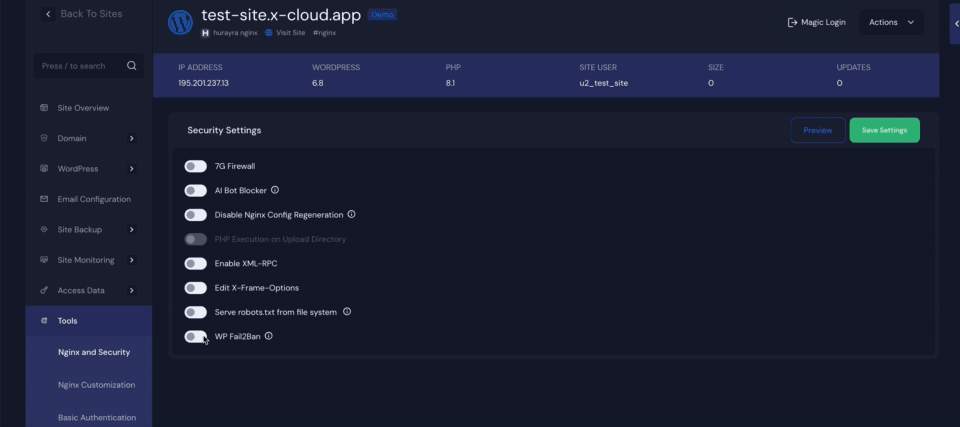
To begin the integration, log into the WordPress dashboard of the site where you want to enable WP Fail2Ban. From the dashboard’s sidebar, navigate to the ‘Tools’ menu and select ‘NGINX & Security’.
Note: For OLS servers, go to the ‘Security’ option from the menu to access this feature.
Step 2: Enable WP Fail2Ban Plugin #
Within this section, you’ll find the option to enable WP Fail2Ban with xCloud. Once you toggle this feature on, the plugin will be automatically installed and activated on your site.
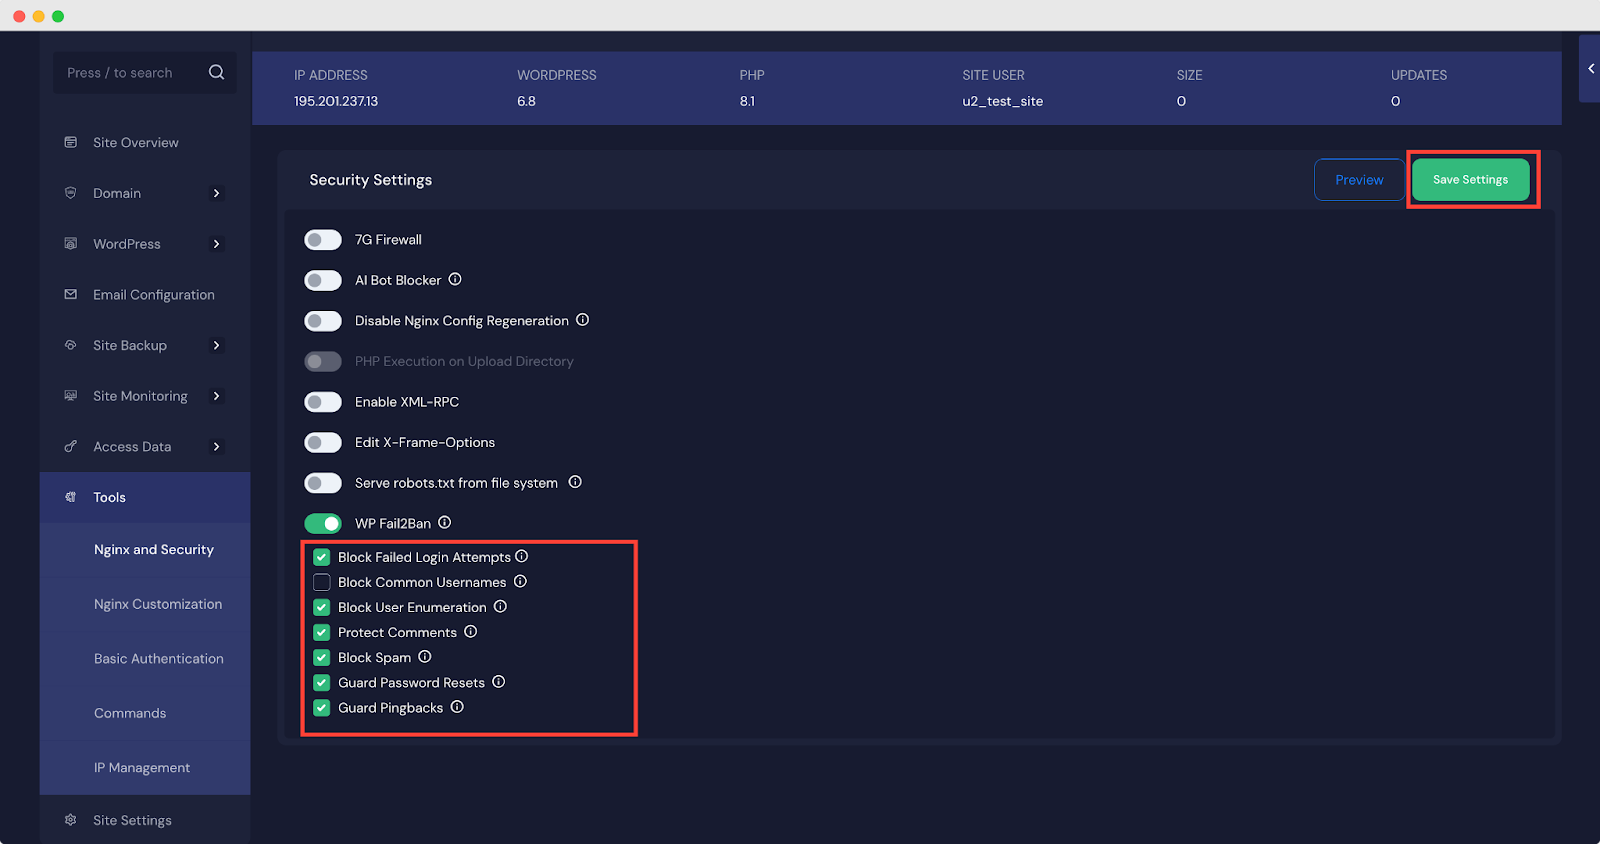
Step 3: Configure Security Settings in xCloud #
After enabling the plugin, head over to the xCloud dashboard to configure your preferred security settings. Here, you’ll find options such as ‘Block Failed Login Attempts‘, ‘Block Common Usernames’, ‘Block User Enumeration’, ‘Protect Comments‘, ‘Block Spam‘, ‘Guard Password Resets‘, and ‘Guard Pingbacks‘. Finally, click the ‘Save Settings‘ button to apply the changes.
💡Info
- Block Failed Login Attempts – Prevents brute-force attacks by blocking IPs after repeated failed login attempts.
- Block Common Usernames – Stops login attempts using commonly targeted usernames like “admin” or “test.”
- Block User Enumeration – Prevents attackers from discovering valid usernames through URL or query tricks.
- Protect Comments – Shields the comment section from spam, abuse, and malicious input.
- Block Spam – Detects and blocks known spam activity across forms and comments.
- Guard Password Resets – Blocks suspicious or excessive password reset requests to prevent account hijacking.
- Guard Pingbacks – Blocks fake or harmful pingbacks used in spam or DDoS attacks.
Now, if you log in to your website dashboard, you can see the WP Fail2Ban plugin installed and activated. Just go to your site and then head over to the plugins section.
Edit the Configuration File #
Additionally, when the WP Fail2Ban plugin is enabled, it automatically creates a configuration file named ‘wp-fail2ban-config.php’ in the ‘wp-content’ directory of your site. You can access this file by opening your site’s File Manager or connecting via FTP. If needed, you can manually edit this file to adjust advanced settings.
Note: If you disable the WP Fail2Ban plugin, this configuration file will be automatically deleted.

Integrating WP Fail2Ban with xCloud is a straightforward yet effective way to bolster your WordPress site’s security. With features that protect against brute-force attacks, spam, and unauthorized access, this setup offers peace of mind and proactive defense.
Troubleshooting Common Issues and Managing IP Access #
1. Unban IP Addresses #
Sometimes, server owners may find themselves accidentally blocked or may want to grant special access to specific IPs. In such cases, there are two ways to manage this. First, you can go directly to the Server → Security → Firewall Management section, where you can manually ban or unban IP addresses.
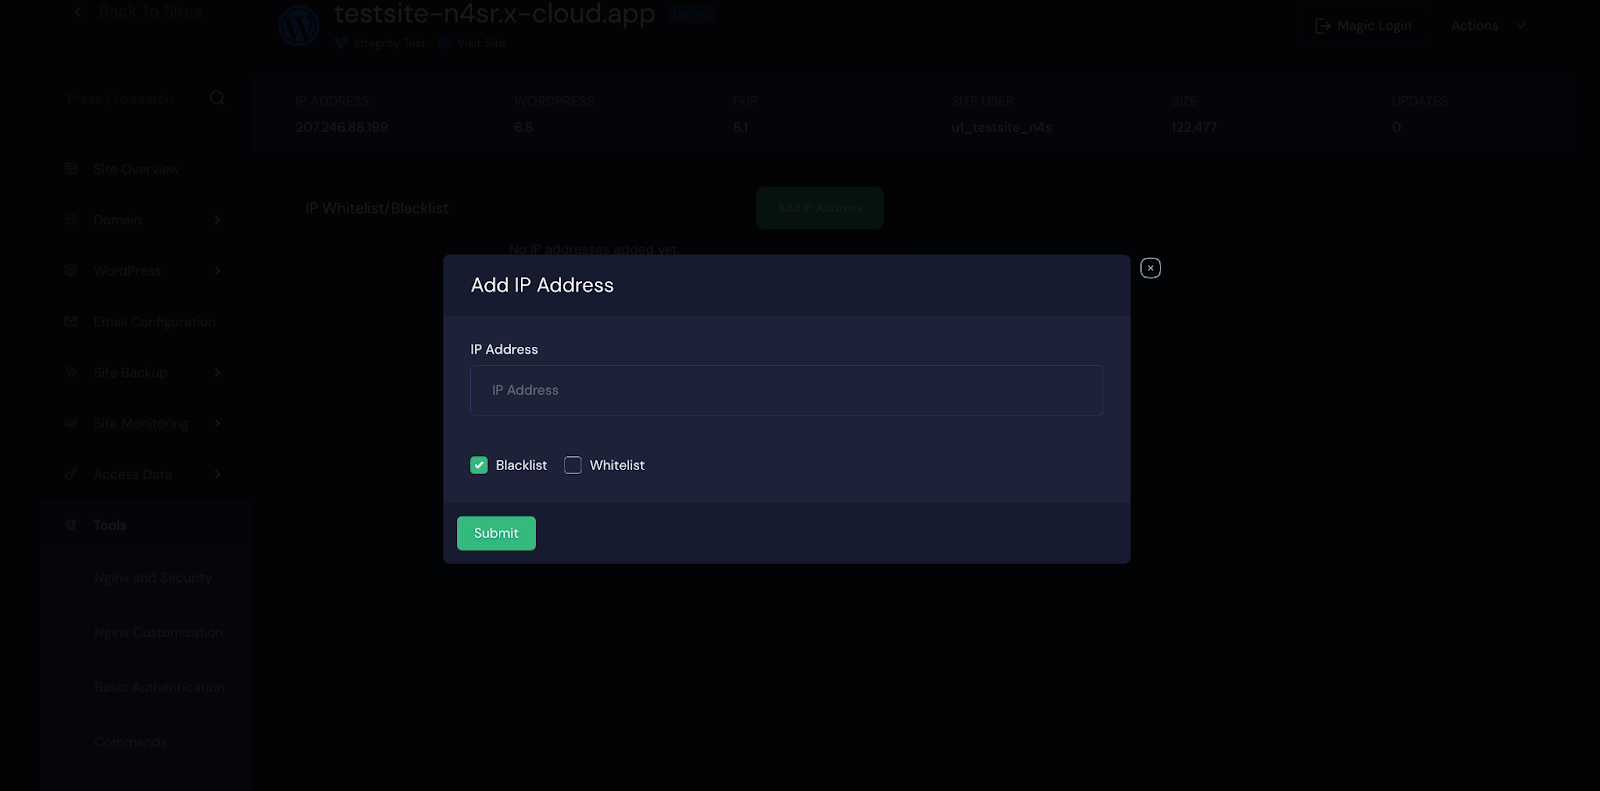
2. Whitelist And Blacklist IP Addresses #
Alternatively, you can go to ‘Site → Tools → IP Management‘, where you’ll have the ability to whitelist or blacklist any IP. Whitelisted IPs will be completely exempt from Fail2Ban restrictions, ensuring they are never blocked, while blacklisted IPs will be denied access to the site entirely, regardless of behavior.
Note: Whitelisted IPs will never be banned by Fail2Ban. Blacklisted IPs will be completely blocked from accessing the site.
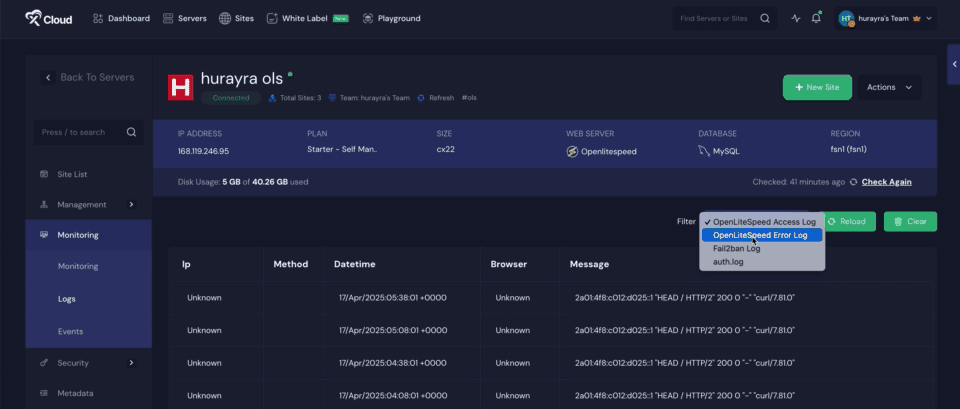
3. New Log Types Added #
Additionally, xCloud has introduced two new log types within the Server Log Viewer: the Fail2Ban Log and the Auth Log. These provide insight into IP blocking activity and authentication attempts, making it easier than ever to monitor your site’s security in real time. Both logs are available for servers running on NGINX as well as OLS.
Still stuck? Contact our support team for any of your queries.


