xCloud lets you change the language for your profile and notifications in the xCloud hosting panel with multi-language support. This feature ensures a more personalized and user-friendly experience. It caters to your preferred language, making navigation and communication easier.
Change Language for xCloud Hosting Panel #
Changing the language in xCloud hosting panels is quick and straightforward. Follow the below steps to update your profile language or adjust notification settings.
Step 1: Log in to xCloud Dashboard #
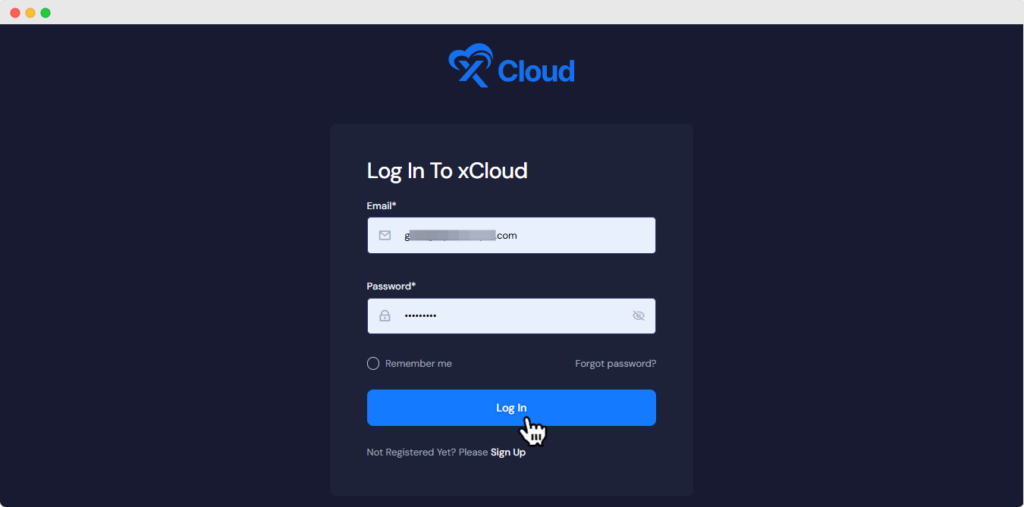
First, Log In to your xCloud hosting panel dashboard. Add your email and password, then hit the ‘Log In’ button.
Step 2: Change Language #
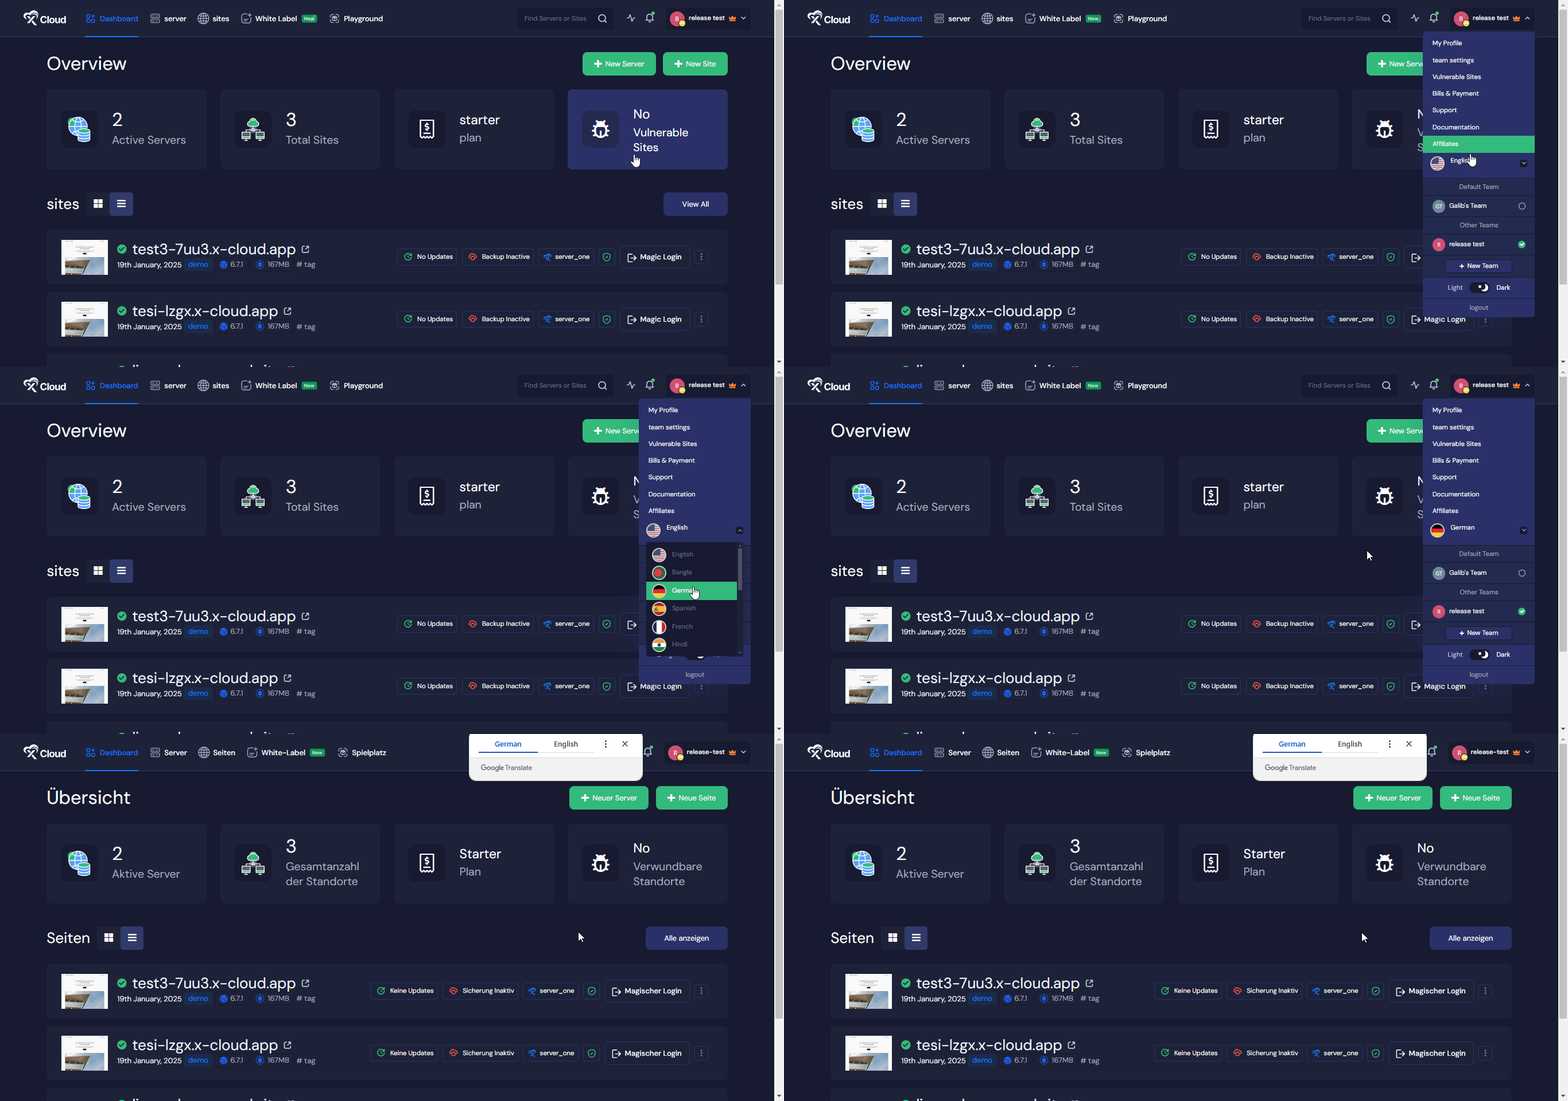
In your xCloud Dashboard, click on the top right corner ‘^‘ (up) the arrow icon beside your profile name. From the dropdown option ‘Select‘ the language you want to set for your xCloud profile. It will automatically save and implement your saved language.
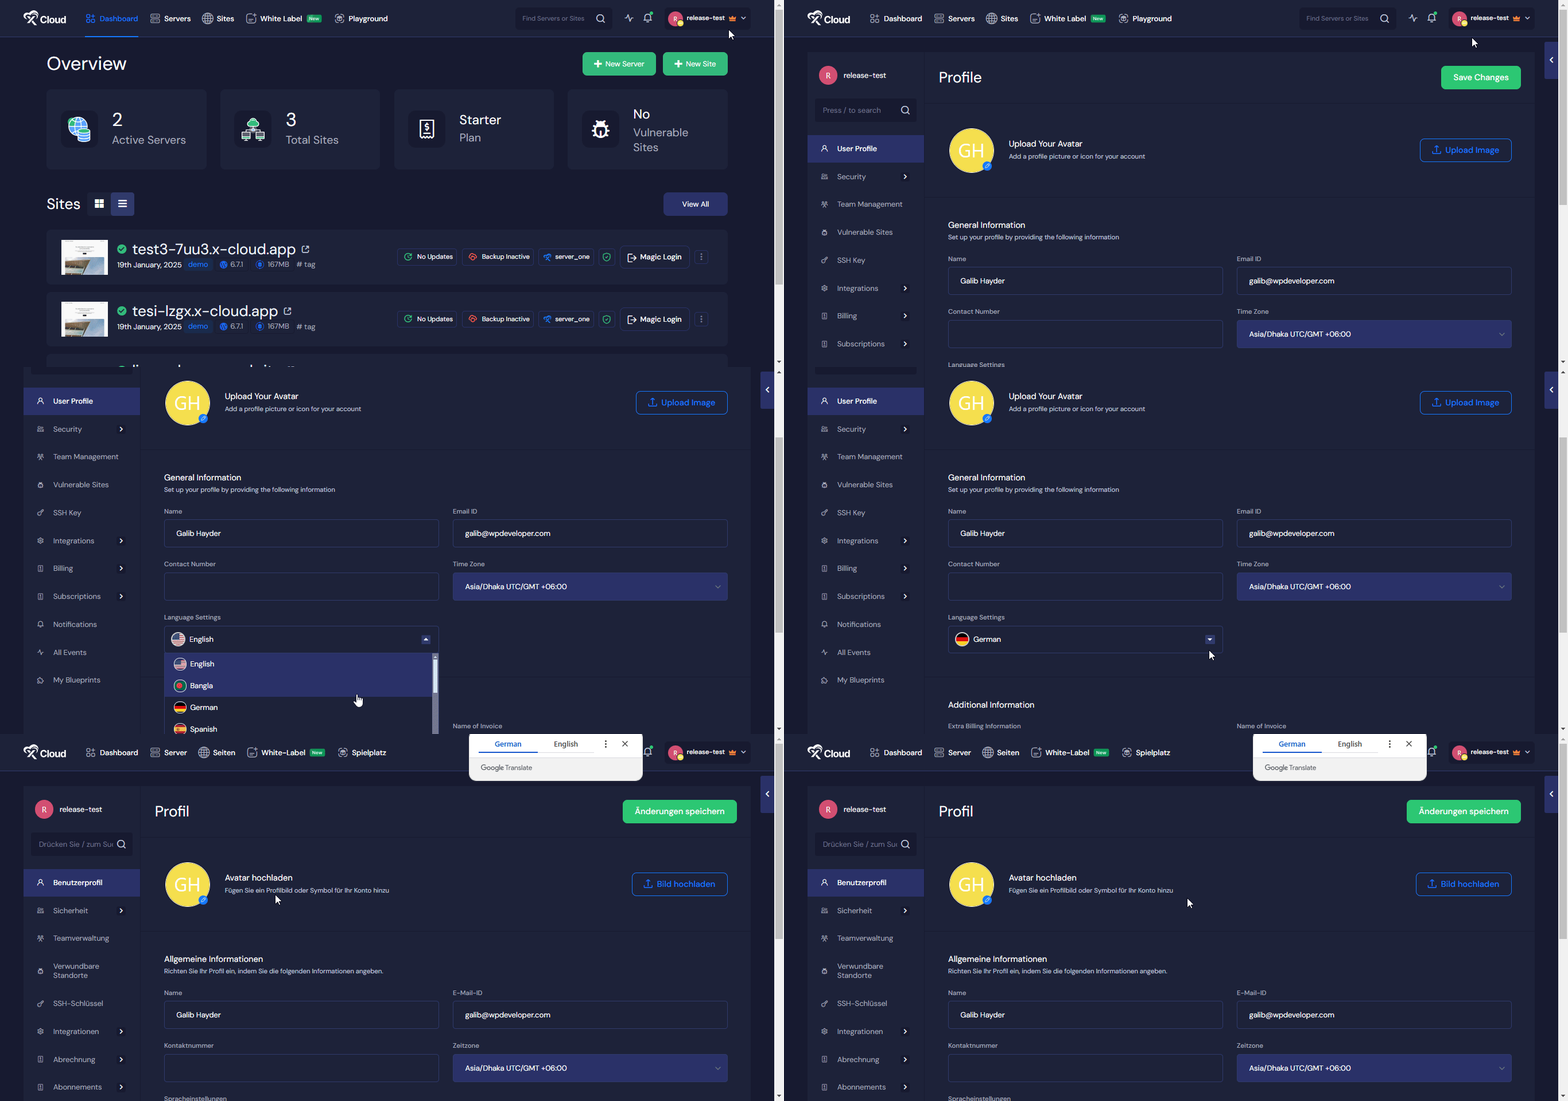
There is another way to change the language in xCloud. Click on the top right corner ‘^’ (up) the arrow icon beside your profile name and click on ‘My Profile‘. Choose a language from the dropdown option and your saved language will be implemented.
Notification Language Settings #
To receive your xCloud team’s activities in notifications in your preferred language, change it. Click on the top right corner ‘^‘ (up) the arrow icon and select ‘Team Settings,‘ click on the three-dot options of your team and select ‘Edit‘.
From the dropdown options, change the language to your preferred one in the notification language settings. Hit the ‘Save Changes’ button to update.
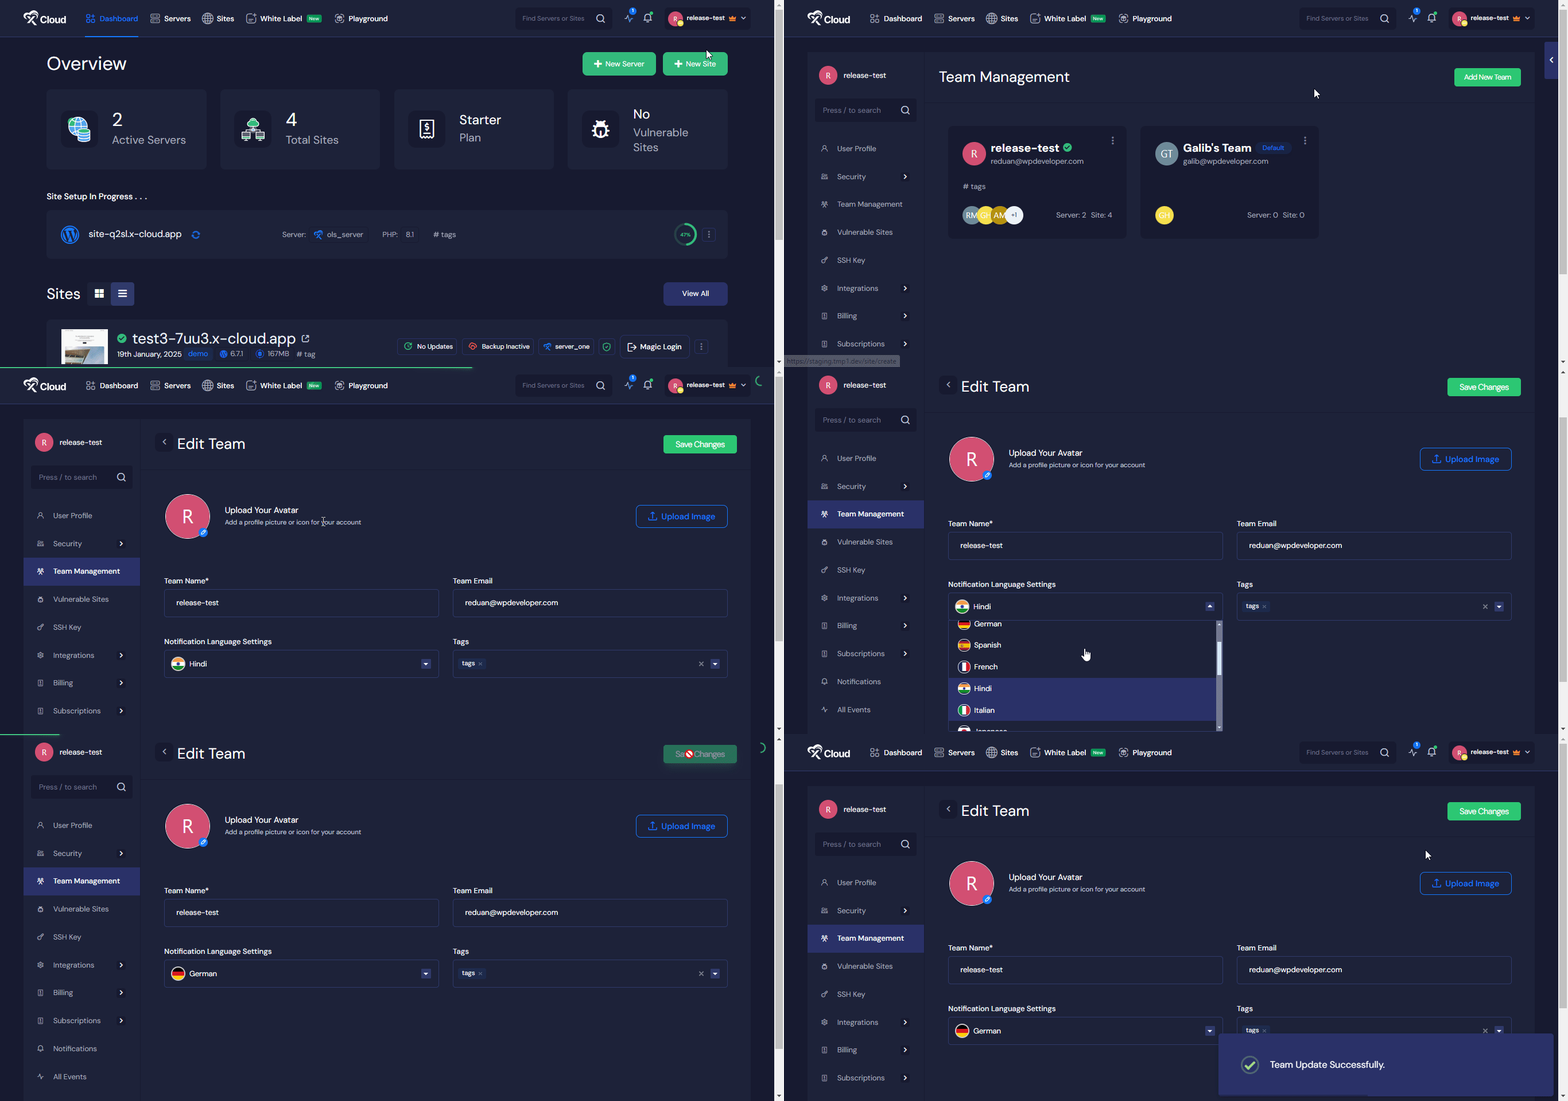
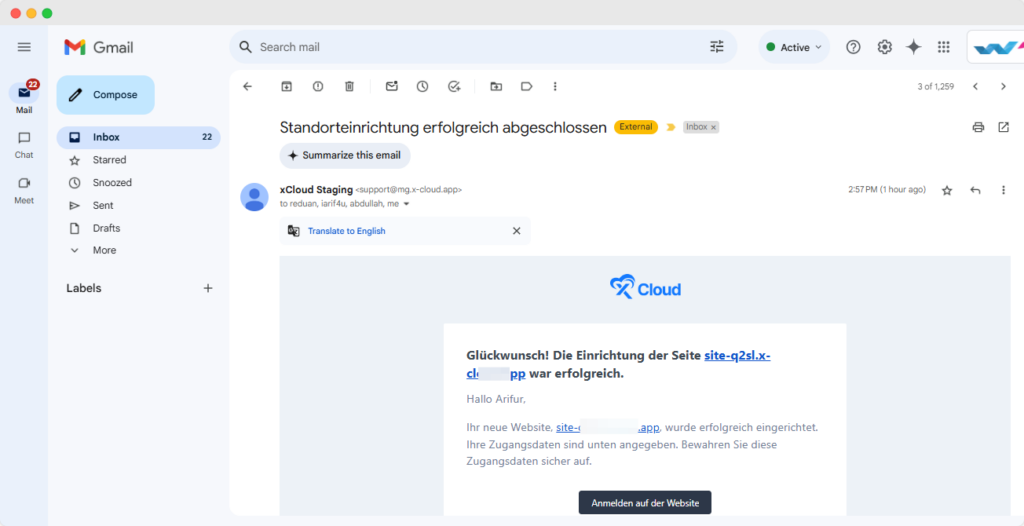
After saving your notification language settings, you can get notifications in Email, Slack, WhatsApp & Telegram in your preferred language. Here, you can see an email notification in German we set to receive notification.
This is how easily you can change language in xCloud with your preferred choice. Still Stuck! Contact our support team for further assistance.


