

How to Set Up Supabase on Linode with xCloud?
Updated September 27, 2026 · 6 min read
Setting up Supabase on Linode with xCloud is quick and easy. This guide walks you through the essential steps to configure and deploy Supabase on a Linode server, helping you manage databases, authentication, and APIs effortlessly
How to Integrate And Setup Linode Server with xCloud?
This guide shows how to set up the Linode server in xCloud. Follow the steps to quickly launch, configure and start your cloud journey.
Step 1: Sign Up/Login With xCloud
First, you will need to visit the xCloud website and you have to sign up for xCloud with your credentials.
If you already have an account please visit our login page.
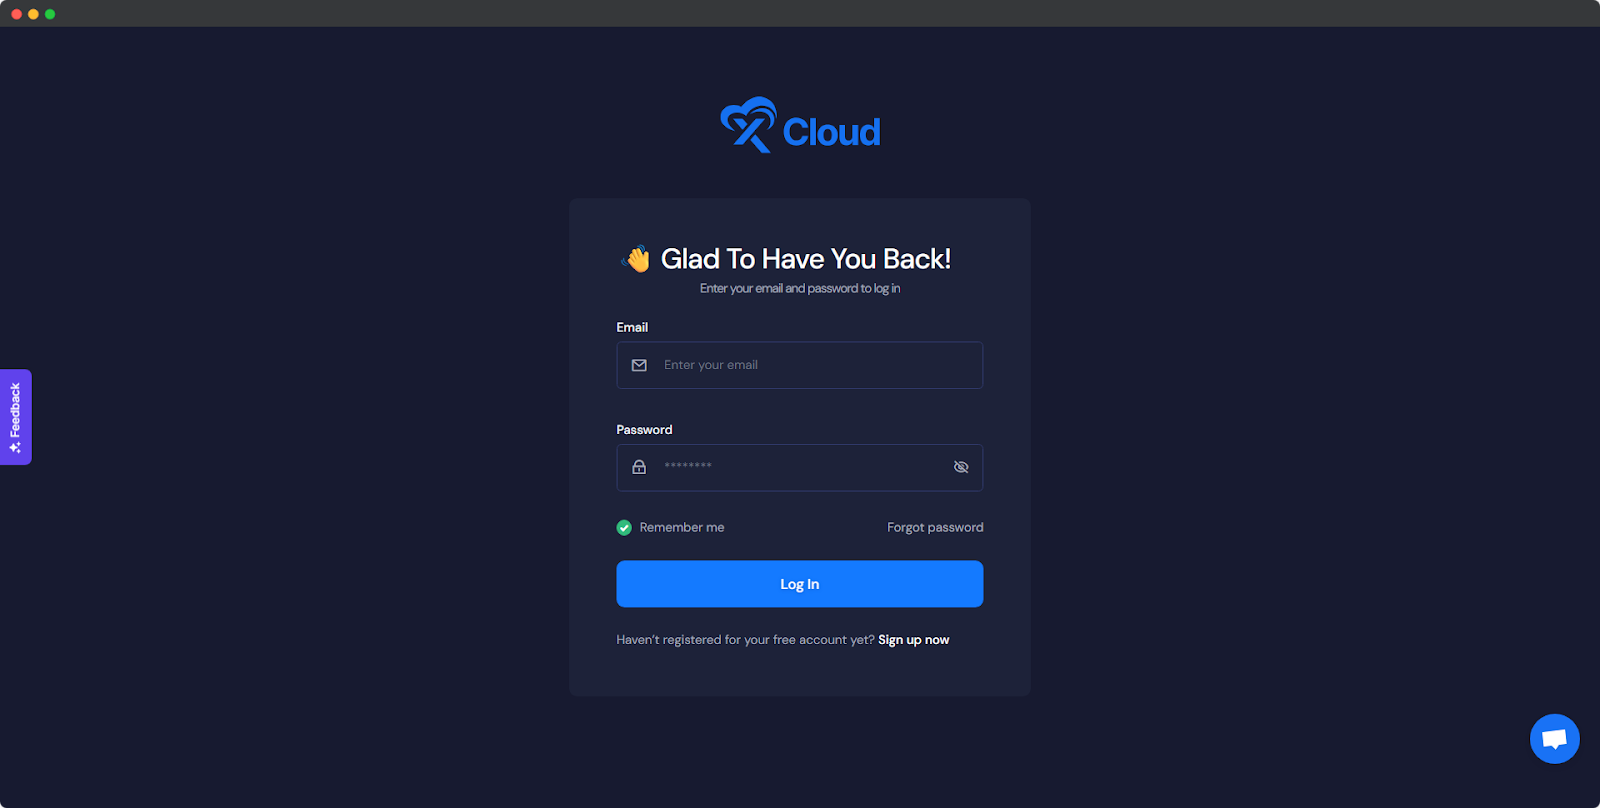
Now you are ready to set up your server with Digital Ocean in xCloud.
Step 2: Create Your Linode Server in xCloud
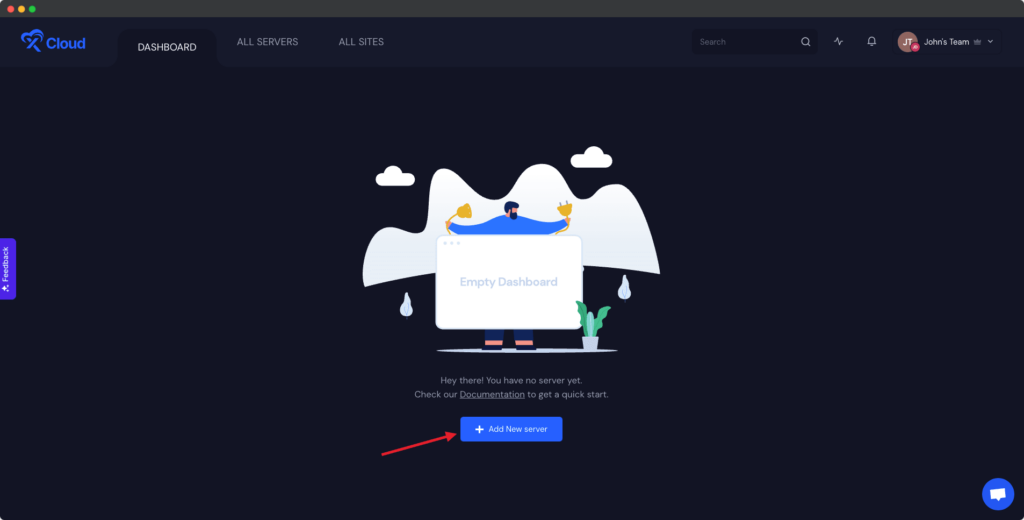
After logging in to your xCloud account, start by adding a new server by clicking on the “New Server” button from your dashboard.
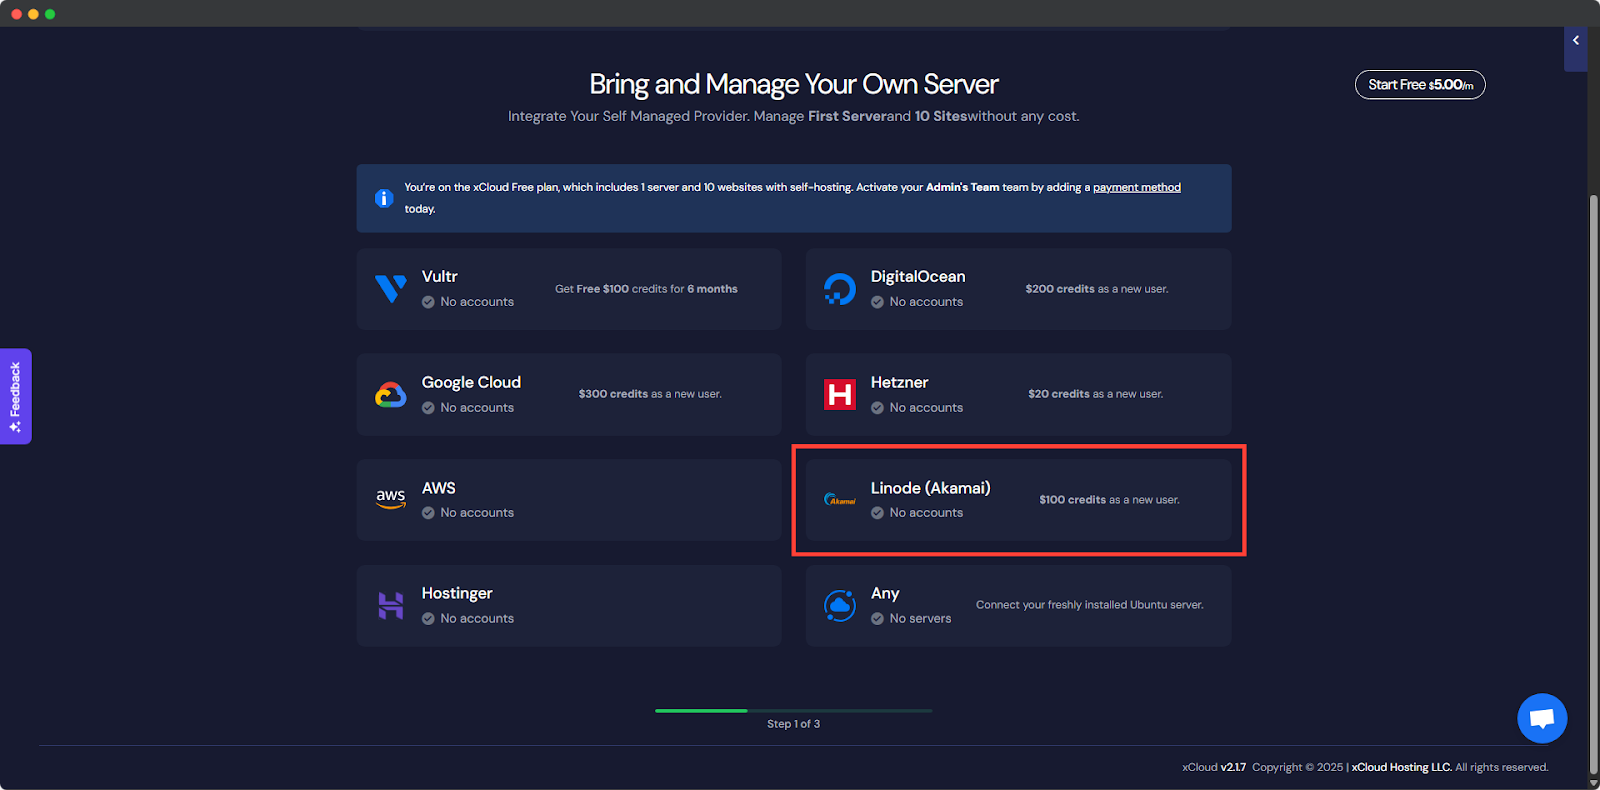
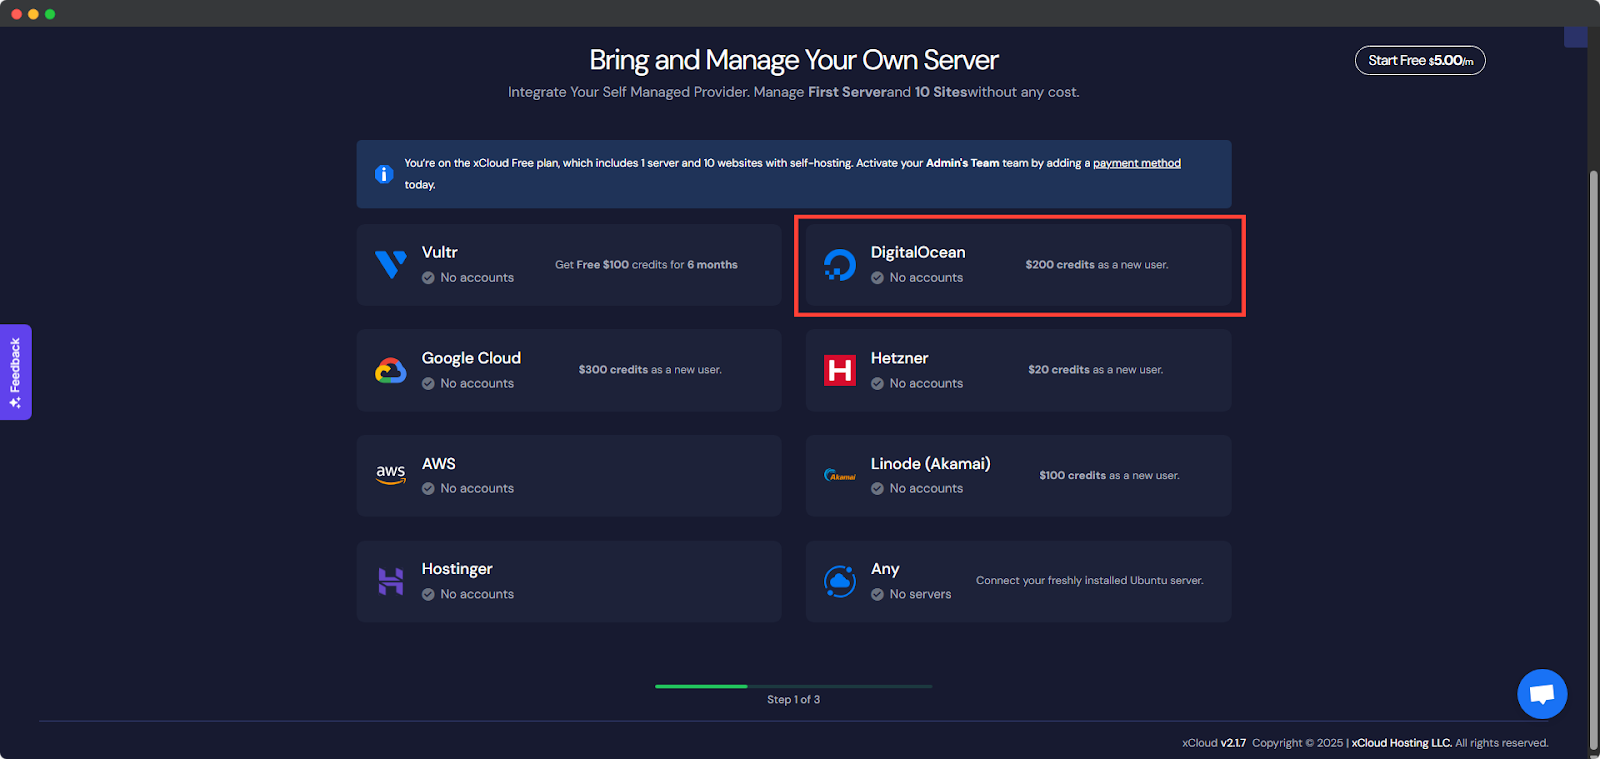
The next screen will provide the list of our available server providers. For tutorial purposes, we will create a Linode server and for that select the Linode option.
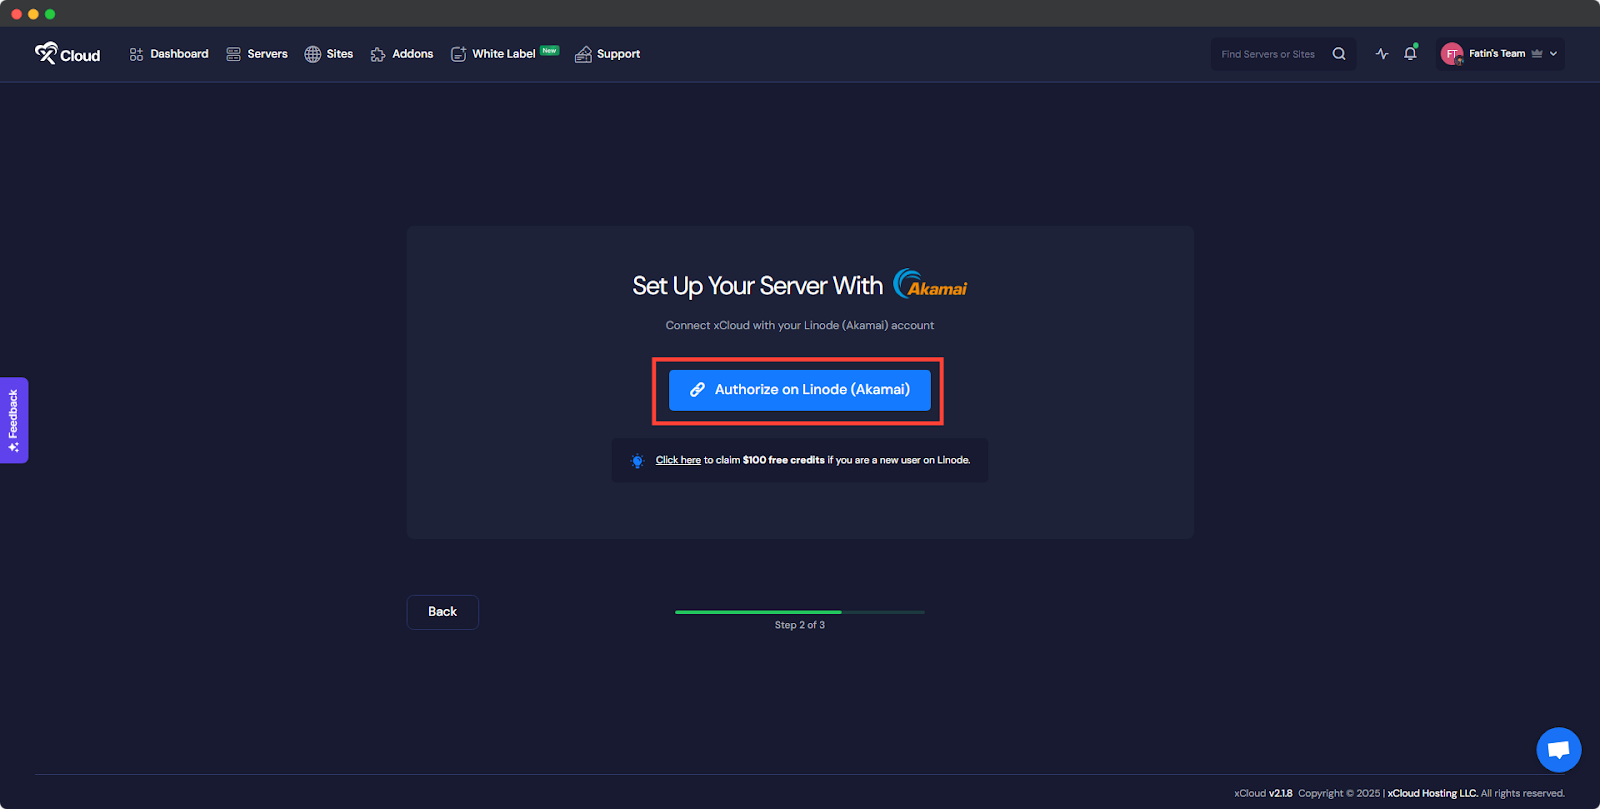
Step 2: Authorize Your Linode Account
We have made it easier and safer for you to connect xCloud with your Linode account. Now provision a new Linode server, click ‘Authorize on Linode’ during the setup, and you will be redirected to Linode to grant permission to your account. It is a straightforward and hassle-free process to set up your server with Linode.
Step 3: Connect the Account & Add the Necessary Information
You will be taken to the server creation page after successfully integrating your Linode account and your server will be connected with xCloud. Now you need to provide the ‘Server name’, your preferred ‘Server Size’ (CPU, RAM, storage), the ‘Region’ nearest to you and your visitors, and then select the ‘Database Server’ from MySQL and MariaDB.
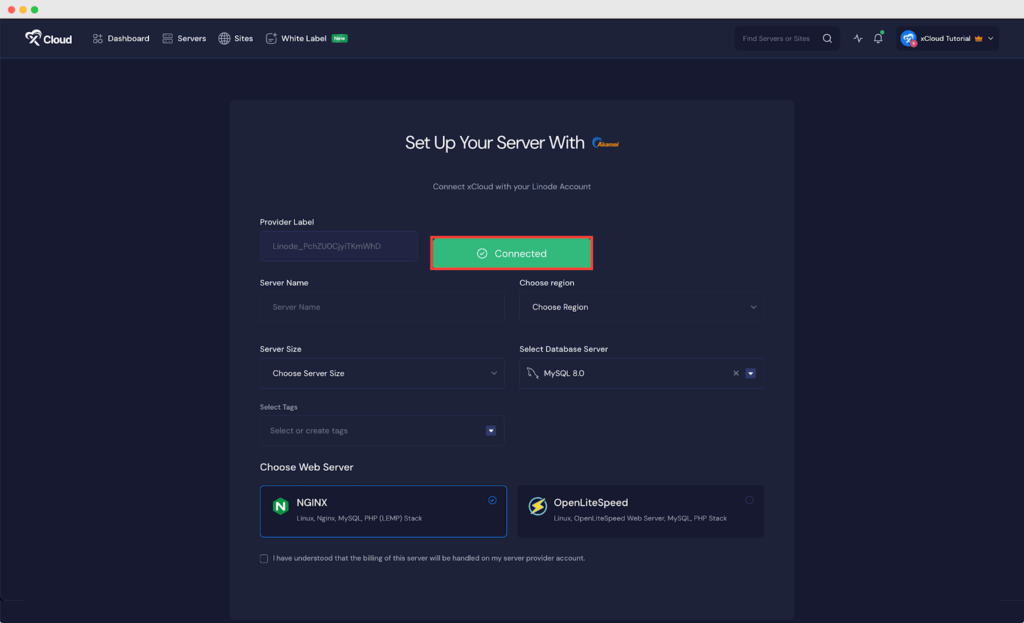
Note: We recommend at least a 2GB/ 1 shared CPU server for 10-20 brochure sites with cache enabled. And for a site whose pages cannot be cached (e.g. WooCommerce site) we recommend a 4 GB / 2 dedicated CPUs server.
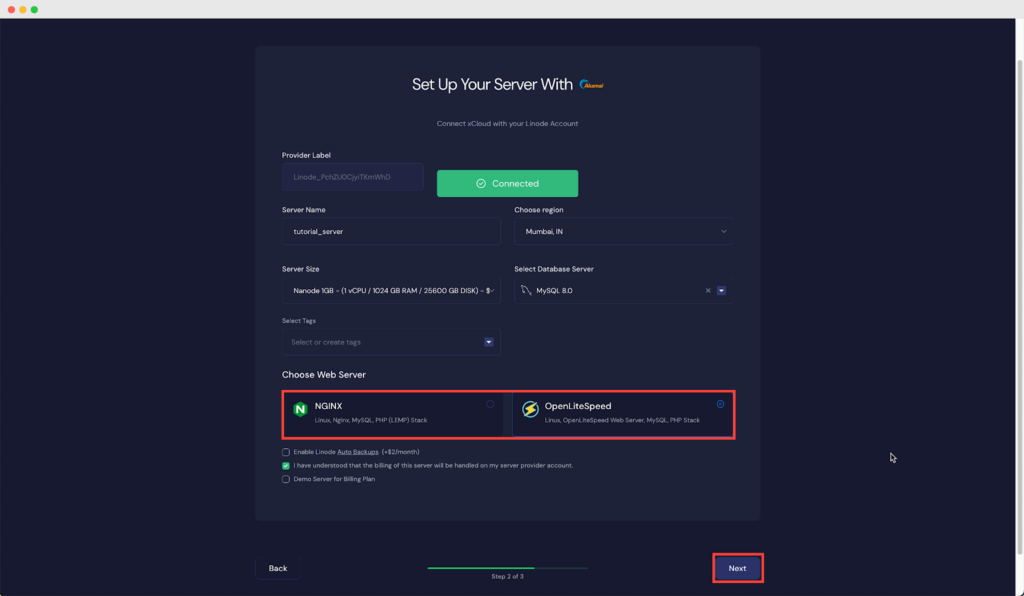
Next, choose the web server stack from ‘NGINX’ or ‘OpenLiteSpeed’ as your requirements and click on the ‘Next’ button to proceed with the server creation process.
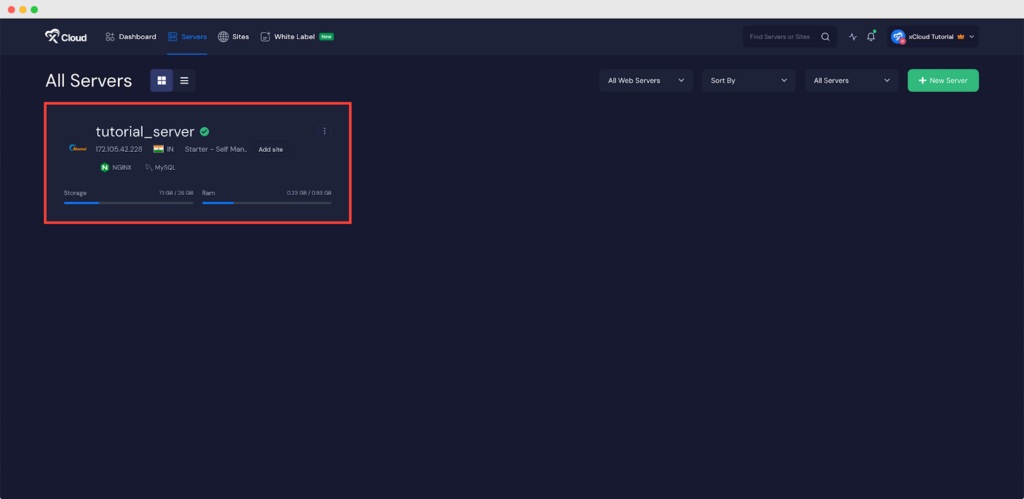
It will start creating a Linode server with xCloud within a while and if you go to the ‘Servers’ from the menu you can see your created server and create as many sites as you want under this server.
How to Install Supabase with xCloud (One Click Apps)
Follow the guide to install Supabase with xCloud with One Click Apps with xCloud. Let’s get started.
Step 1: Create a Docker+ NGINX Server
First, you need to create a Docker server to deploy Supabase. Click the ‘New Server’ button on the dashboard and enter all the necessary credentials to connect your server. You can deploy Supabase on the Vultr server you previously created with xCloud.
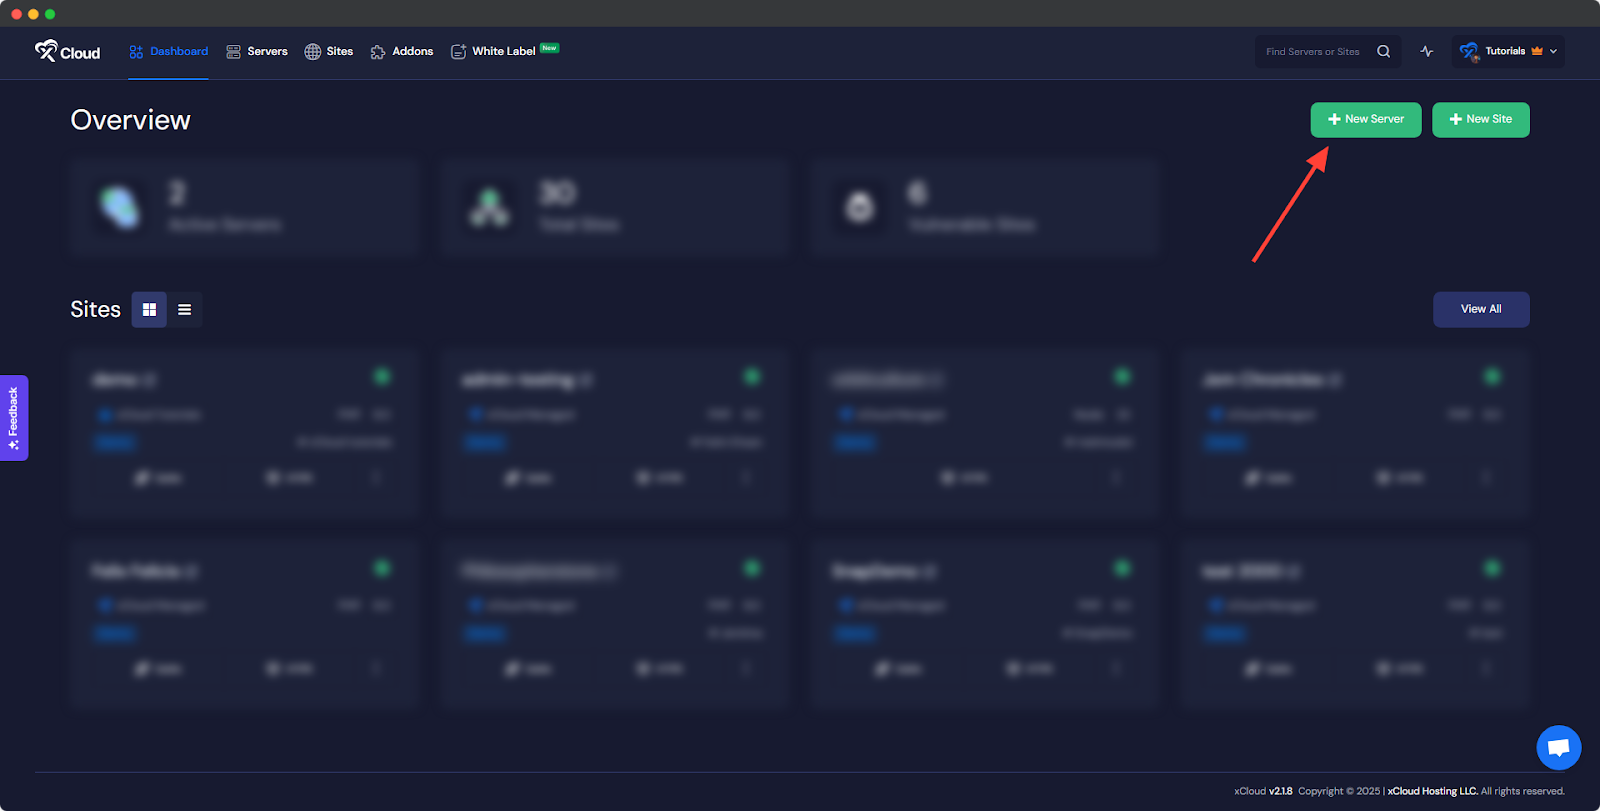
Next, choose your Vultr server to deploy Supabase with xCloud.
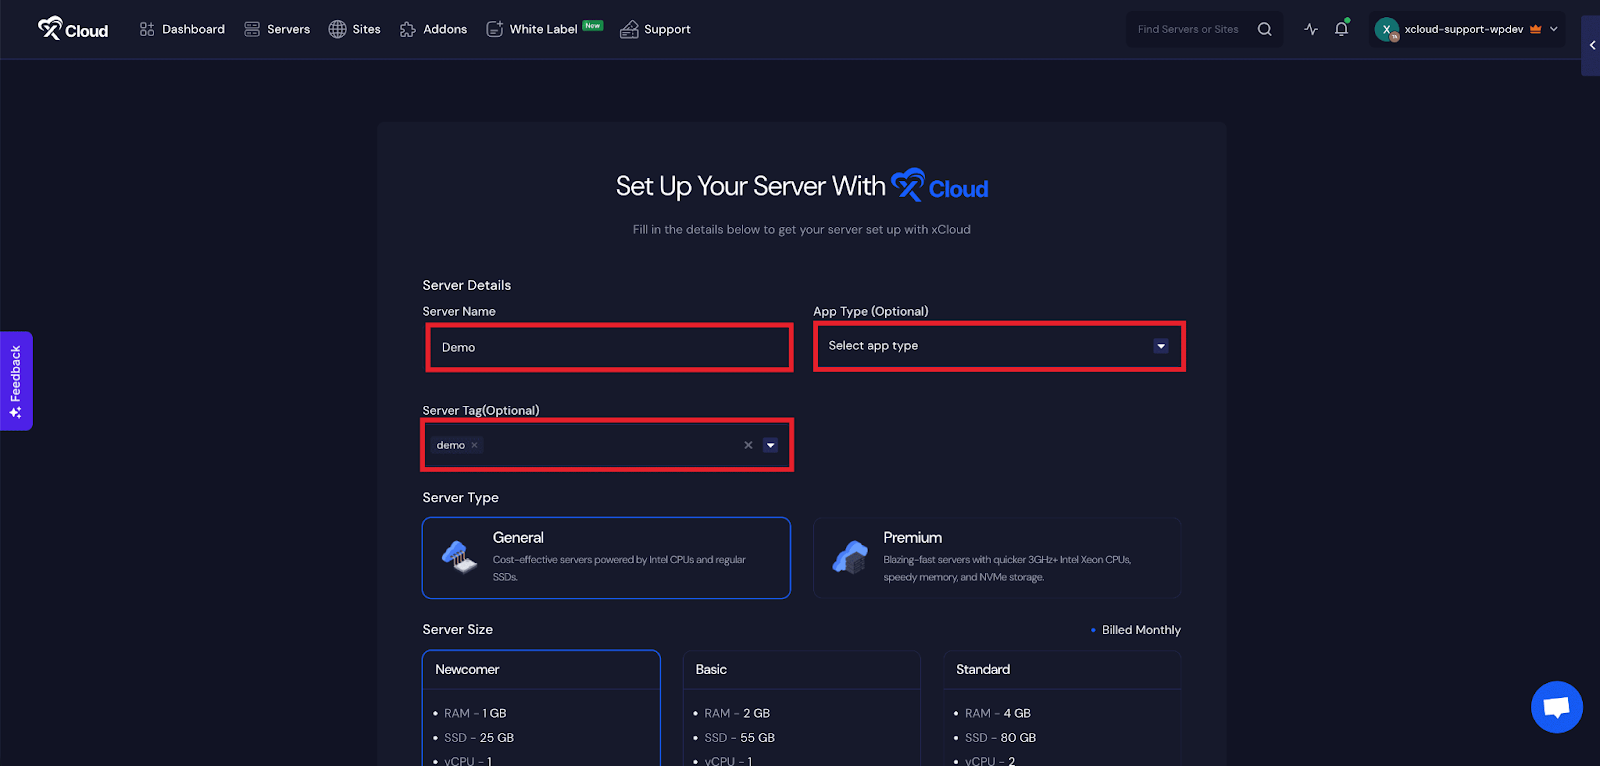
Afterward, enter the ‘Server Name’, set the ‘App Type’ to Supabase and add any relevant ‘Tags’ to help identify your server later.
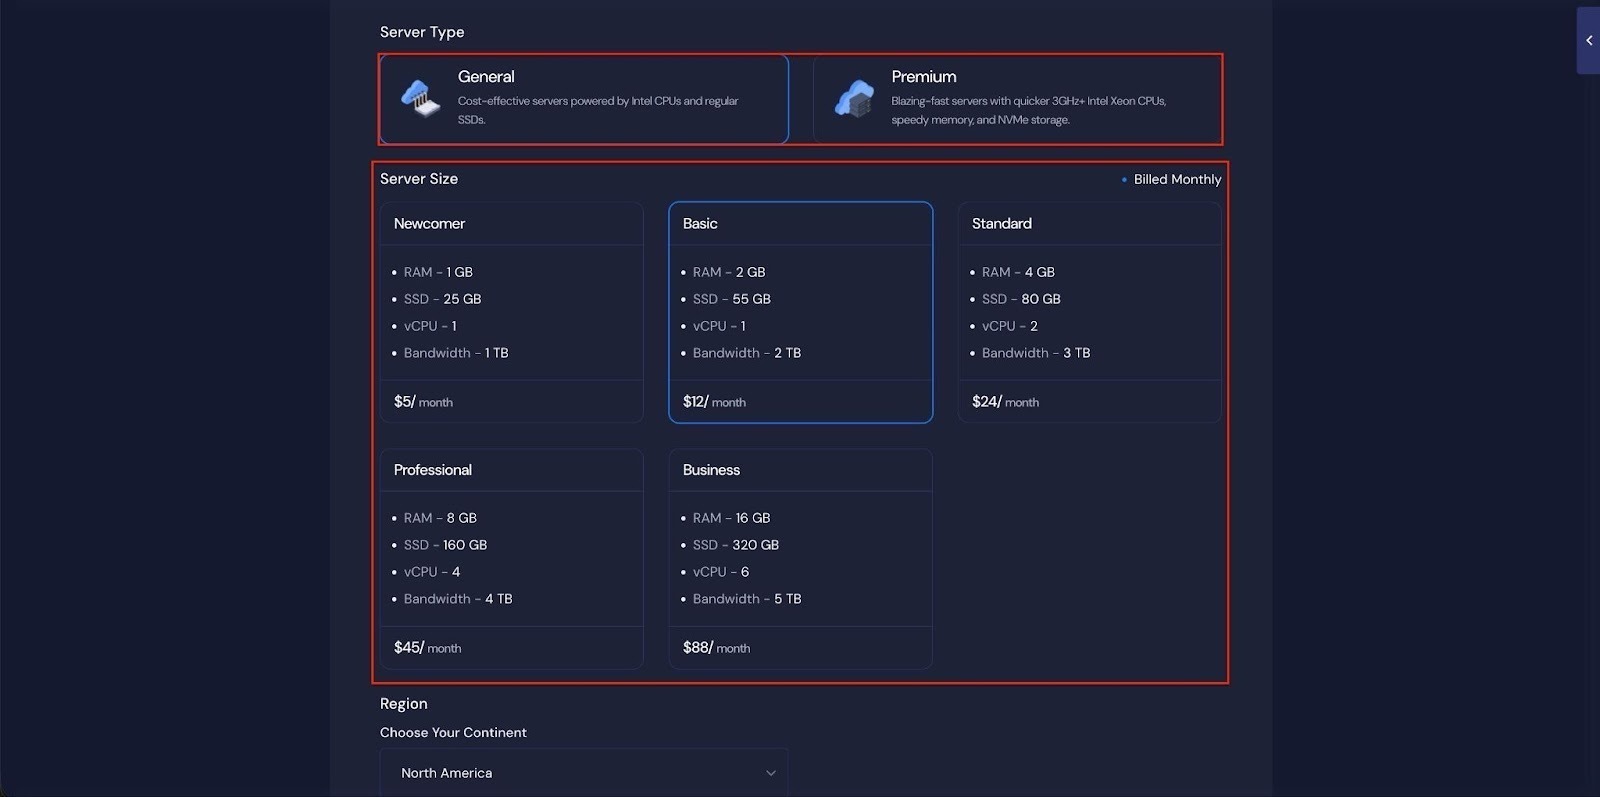
Next, choose between the ‘General’ and ‘Premium’ options based on your requirements. Then, select a plan that best fits your needs.
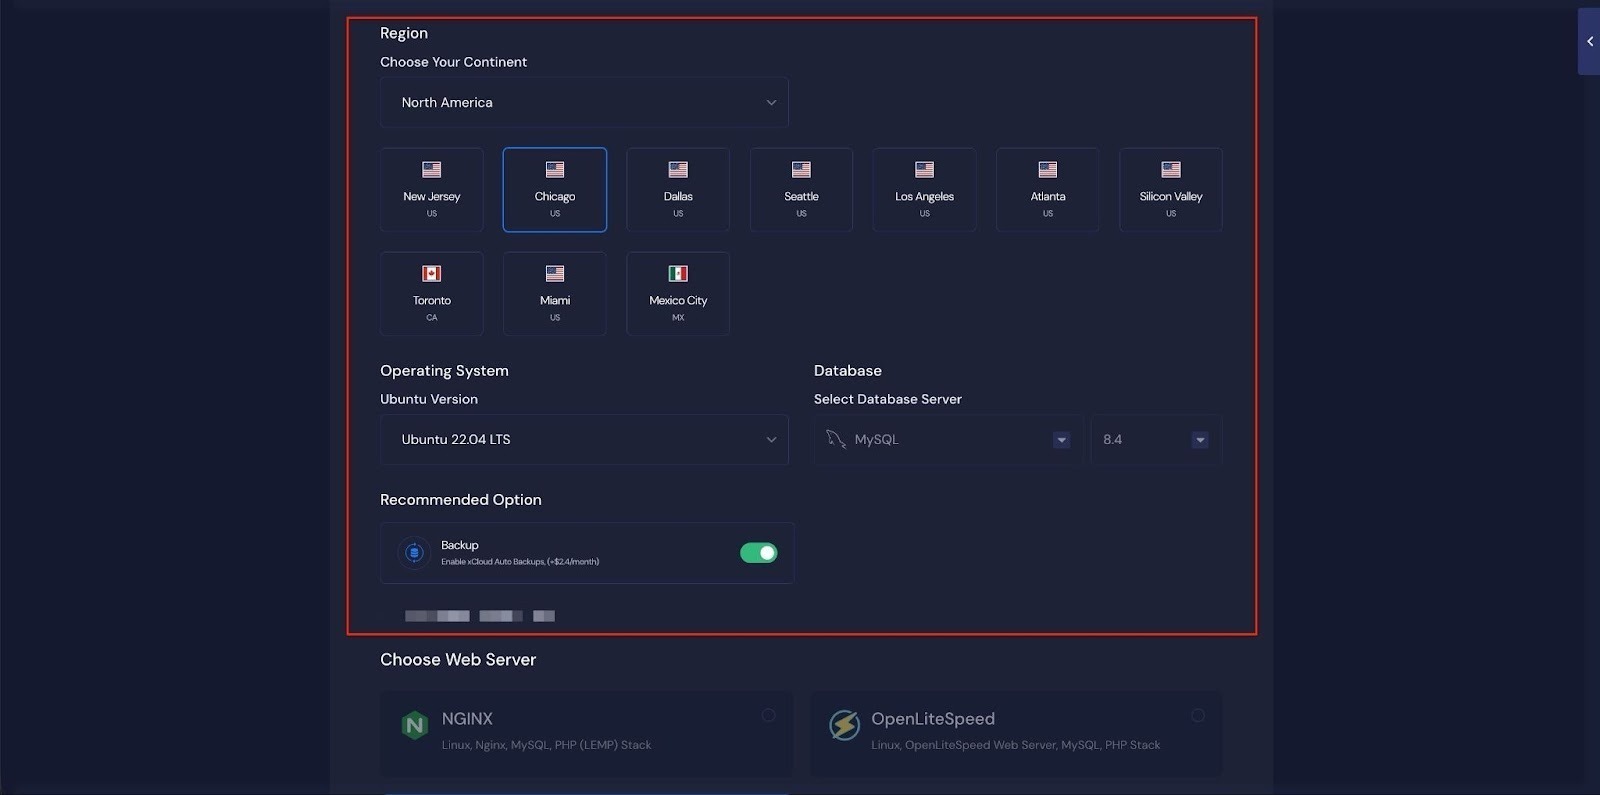
Next, choose the ‘Region’ and ‘Ubuntu Version’ for your server. You can also enable or disable the Backup option as needed.
Next, you can see the ‘Docker + NGINX’ stack is already selected, which is mandatory for deploying the Supabase application. Then click on the ‘Create’ button to proceed.
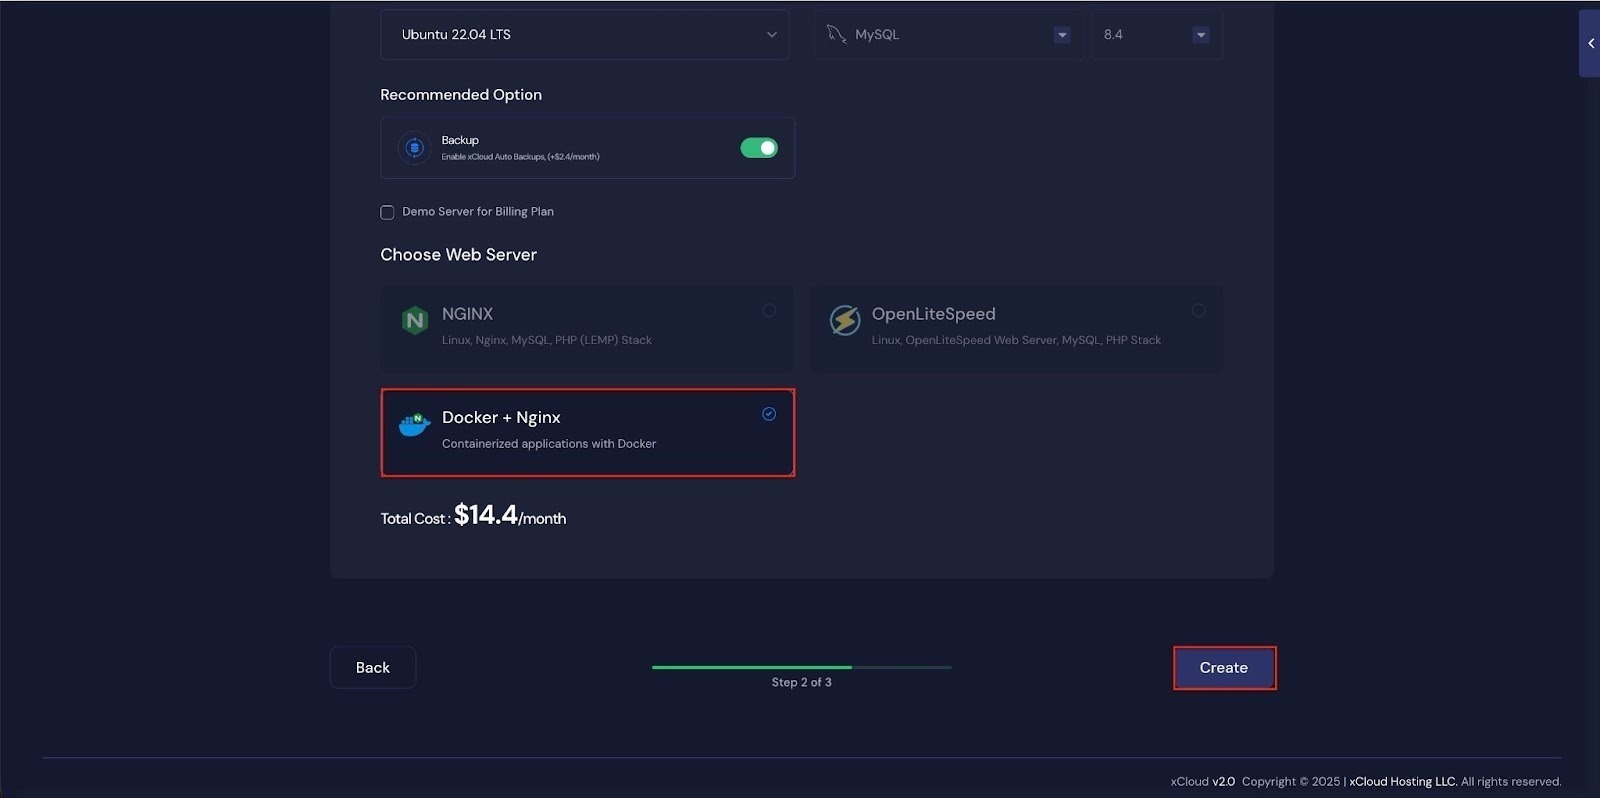
Once the server is created, you will be able to deploy your Supabase Application in this server.
After creating a server, it may take a while to become fully operational. Wait a few minutes before deploying your applications to ensure everything starts correctly.
How to Install Supabase on Vultr with xCloud
Learn how to install Supabase on a cloud server. It walks you through creating a server, configuring the environment and launching your Supabase application easily.
Step 1: Access the One Click Apps Dashboard
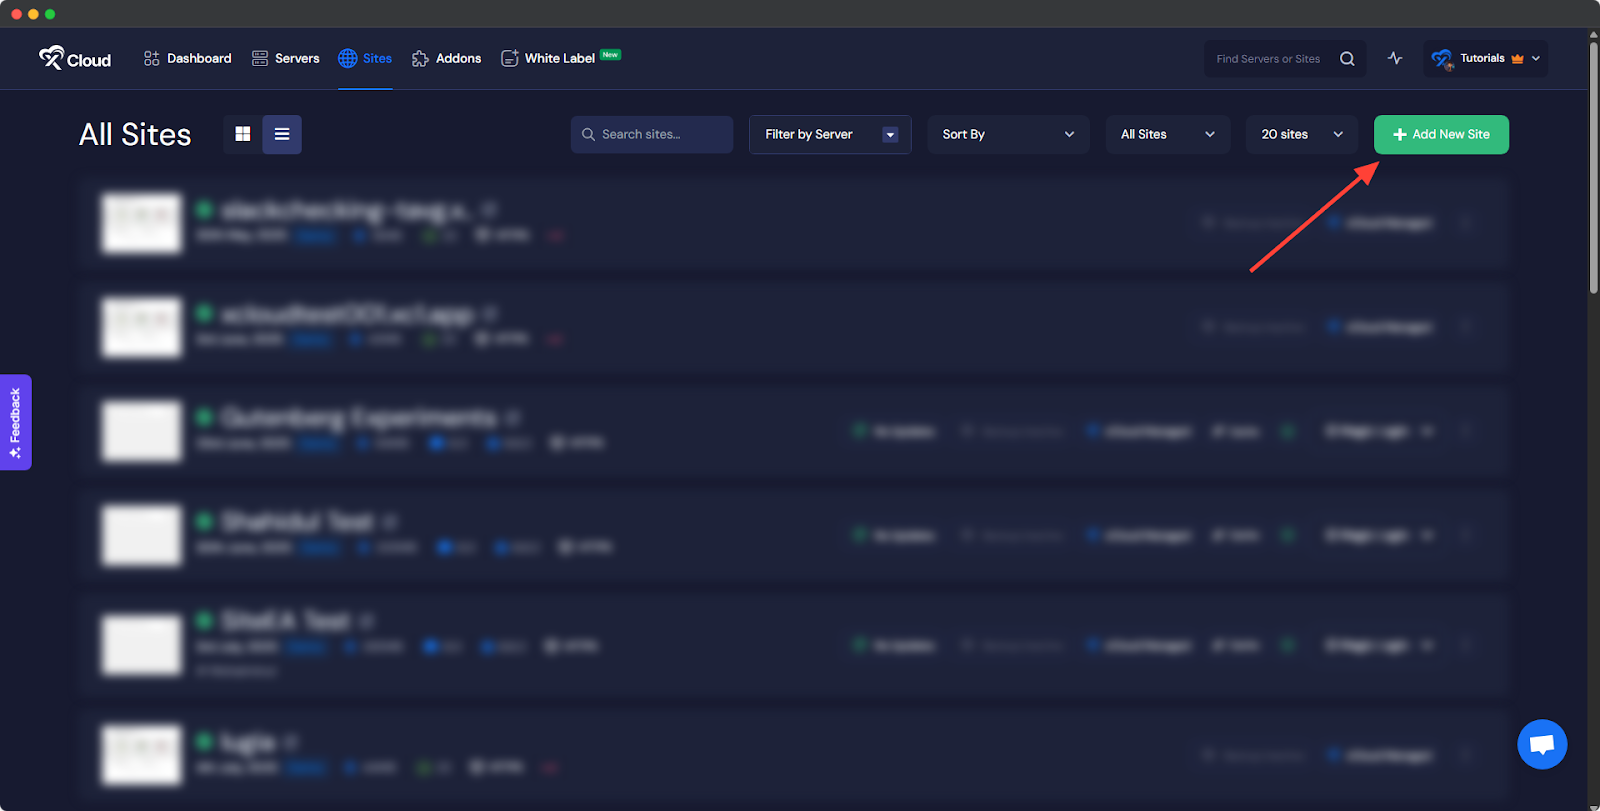
Begin by logging into your xCloud account. Once logged in, navigate to your dashboard and click on the ‘Add New Site’ button.
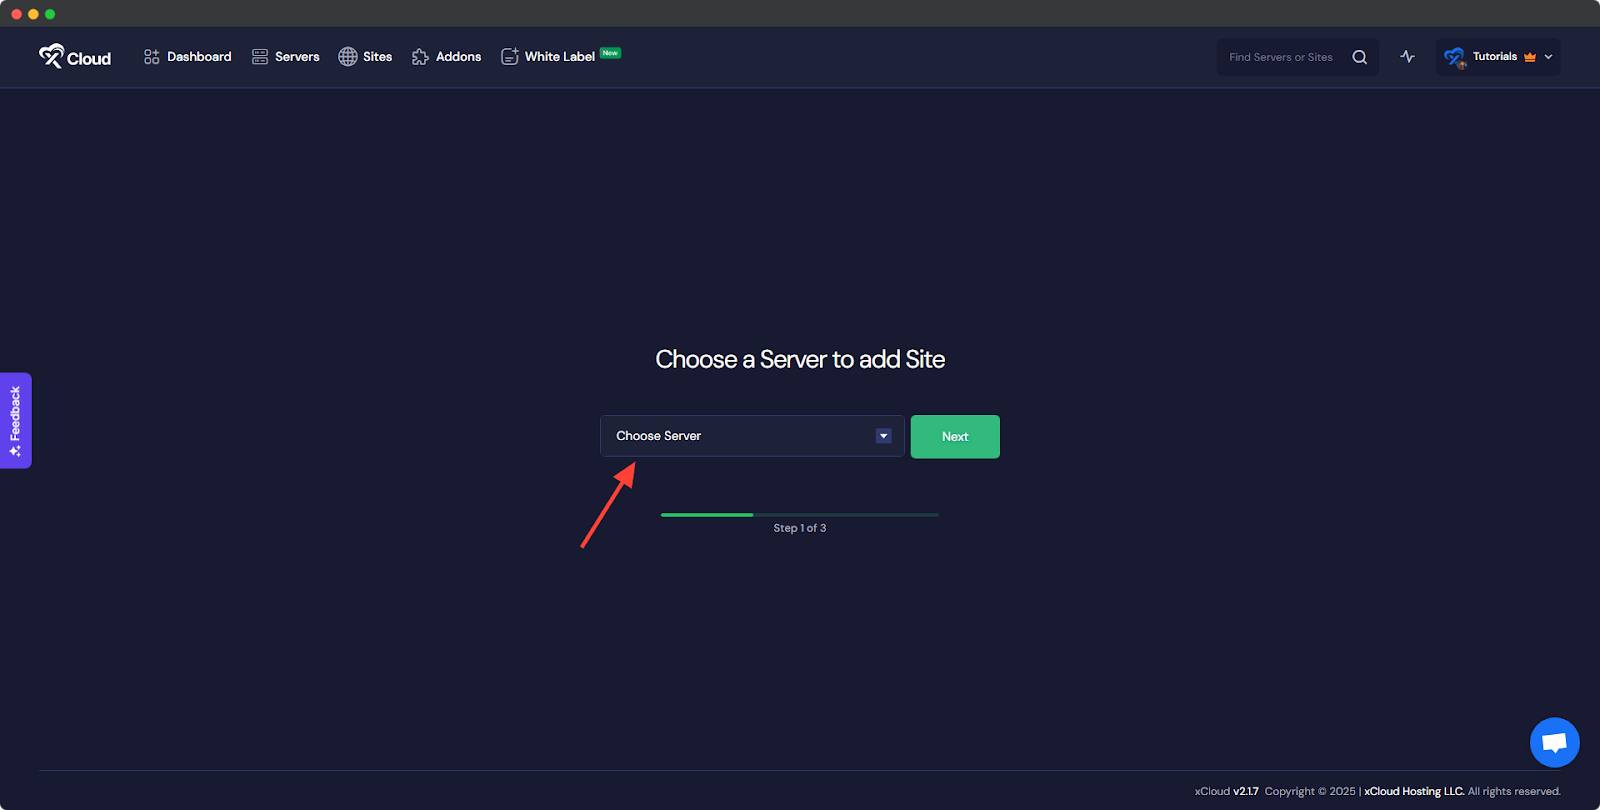
You will then be asked to ‘Choose a Server to add Site’ from the dropdown. You must select the Vultr server you set up in xCloud from this dropdown.
Then navigate to the ‘One Click Apps’ section. You will see ‘Supabase’ just as shown below, click on it to proceed with the deployment of this application.
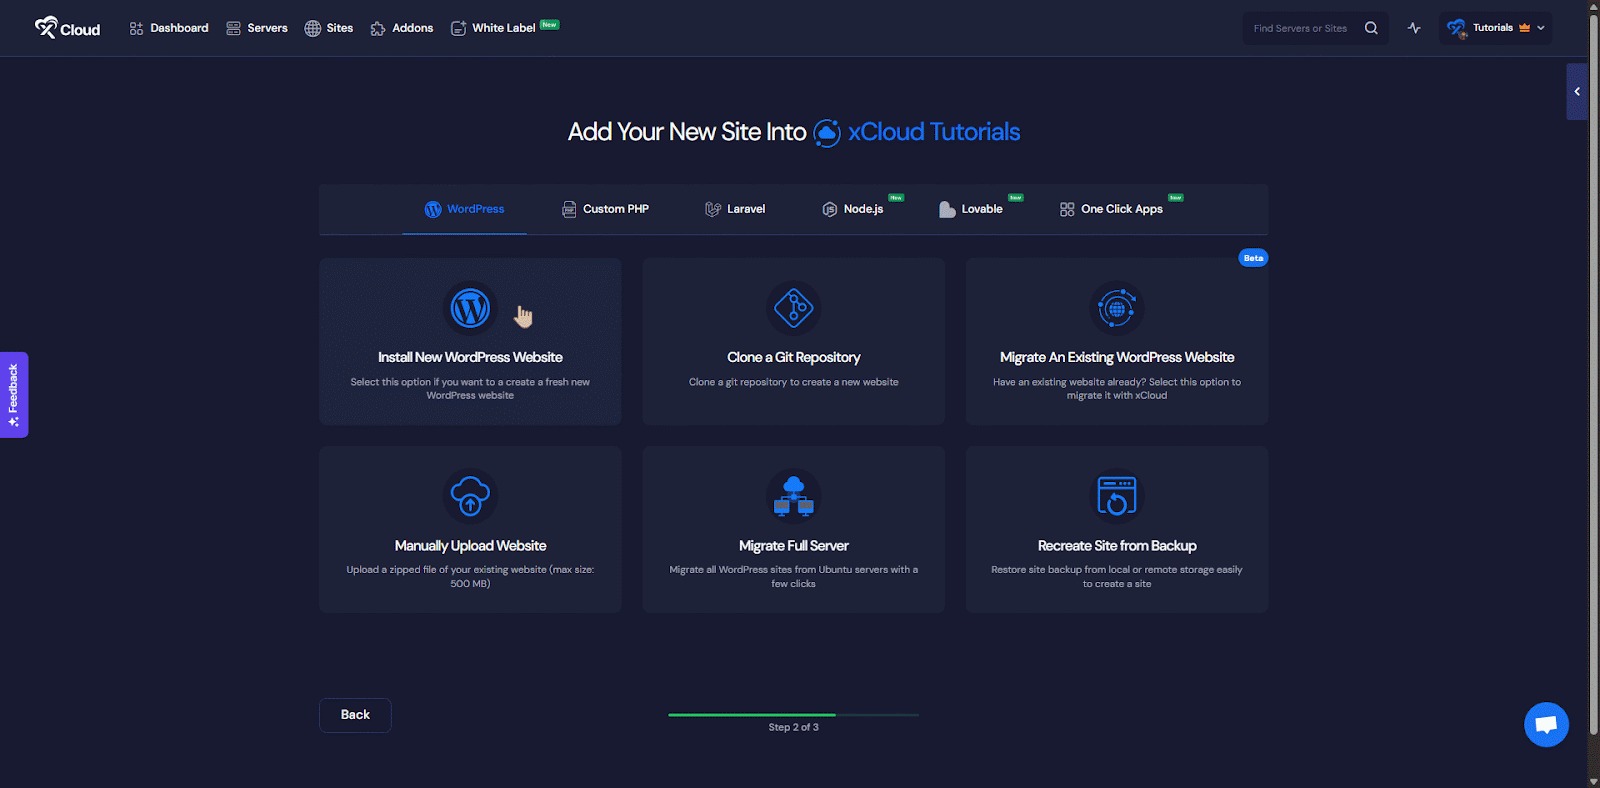
Note: You must complete Phase 2 to meet Docker’s requirements for using Supabase. Without completing Phase 2, Supabase will not be unlocked.
Step 2: Set Up the Supabase Application
In the site setup screen, you will be prompted to enter basic site information. Provide a ‘Site Title’ and add relevant ‘Tags’ to help organize your deployment.
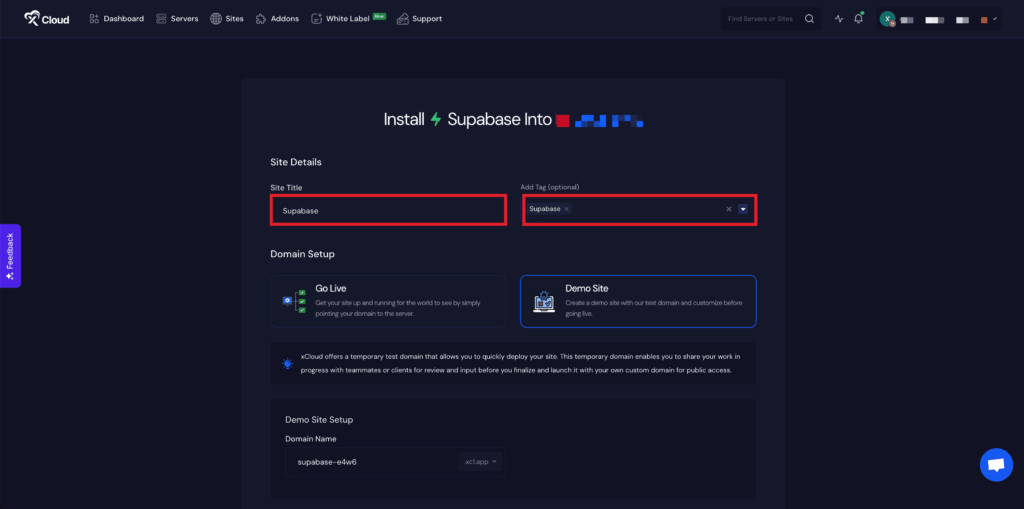
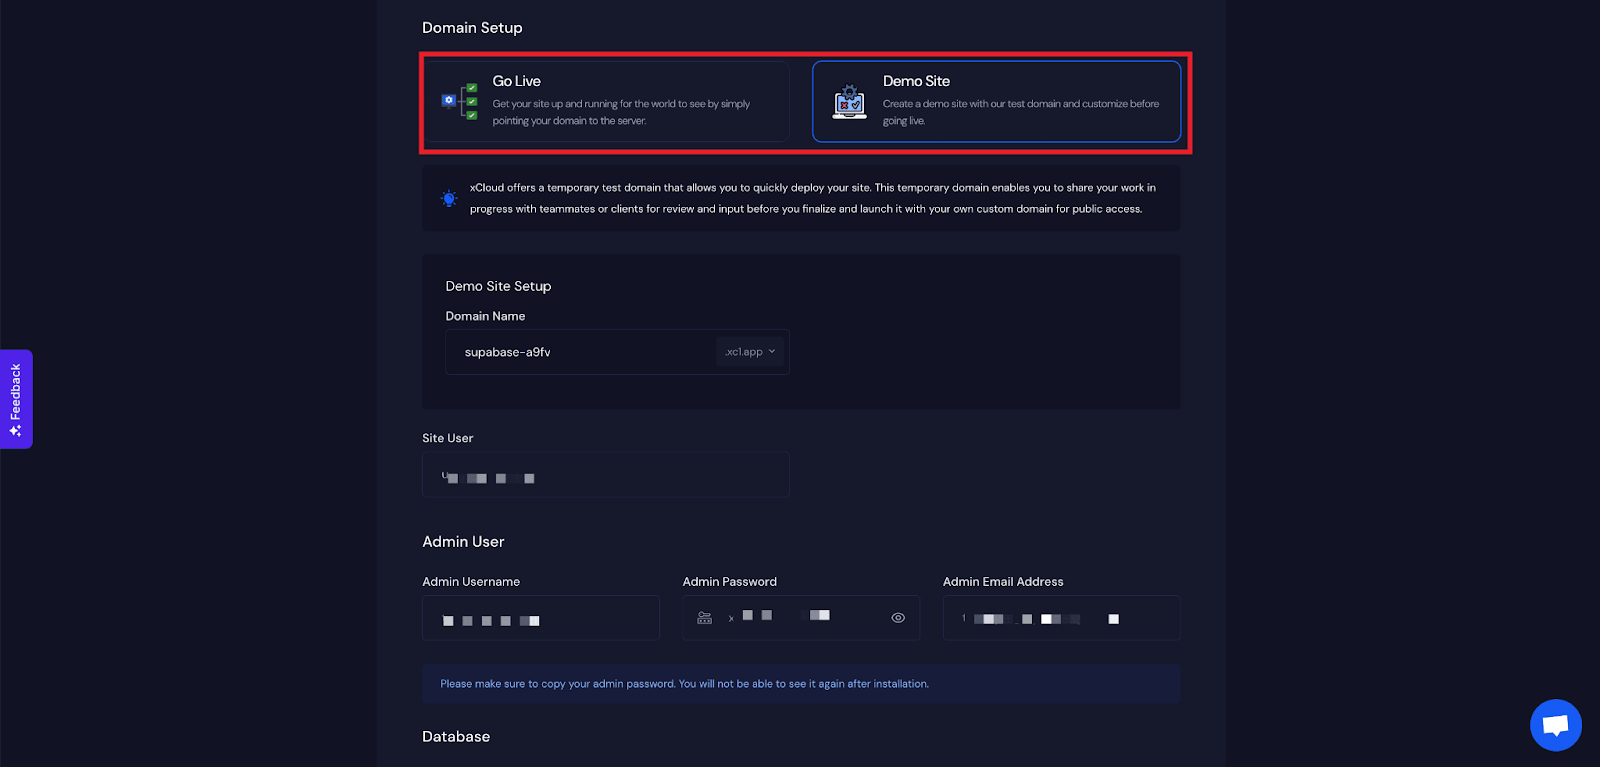
At this point, you can choose between two deployment modes: ‘Go Live’ for a production-ready deployment or ‘Demo Site’ for testing purposes. Selecting ‘Go Live’ will immediately create a live environment, while choosing ‘Demo Site’ allows you to experiment in a staging environment before promoting it to production.
Step 3: Configure Domain Settings
If you select the ‘Demo Site’ option, xCloud will assign a demo domain for your Supabase application. Next, enter your application’s domain.
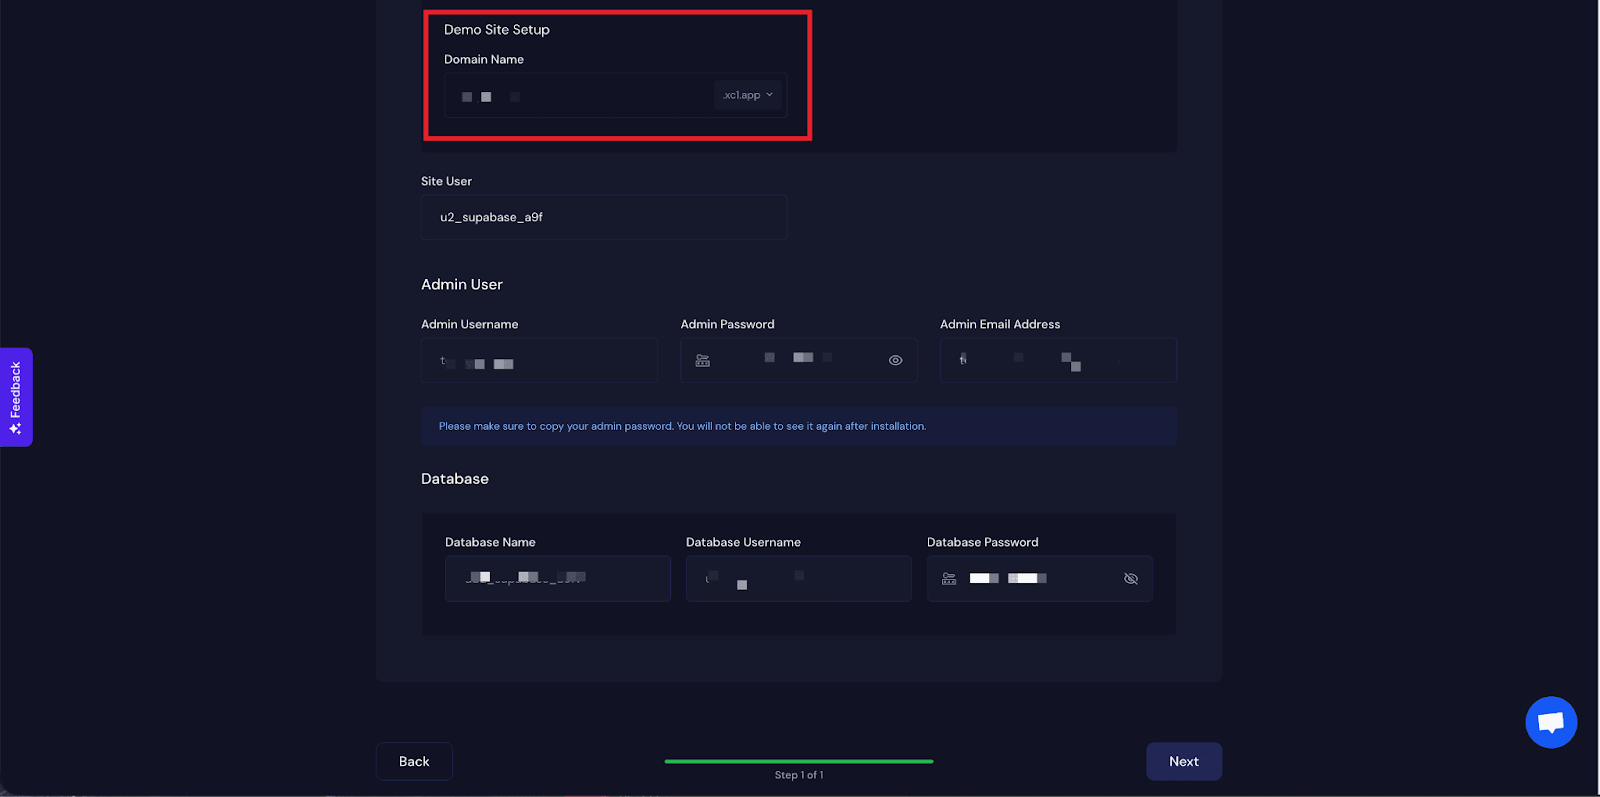
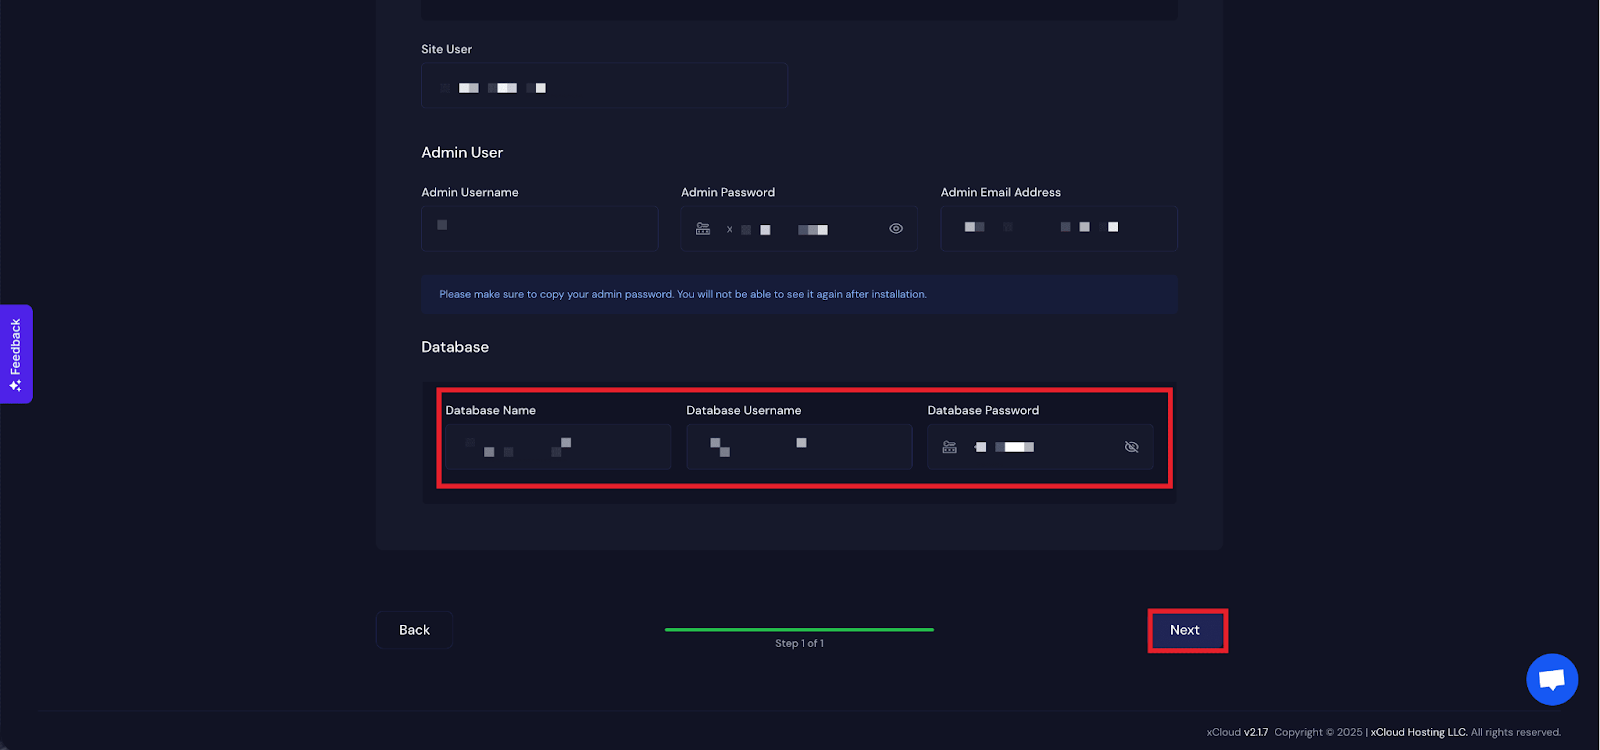
You will get a ‘Site User’ of your application. You can also adjust it according to your preferences or leave it as the default. In the next section, you will get ‘Admin Username’, ‘Admin Password’, and ‘Admin Email Address’.
Note: From here, copy your Admin Username and Admin Password to log in to your Supabase application later.
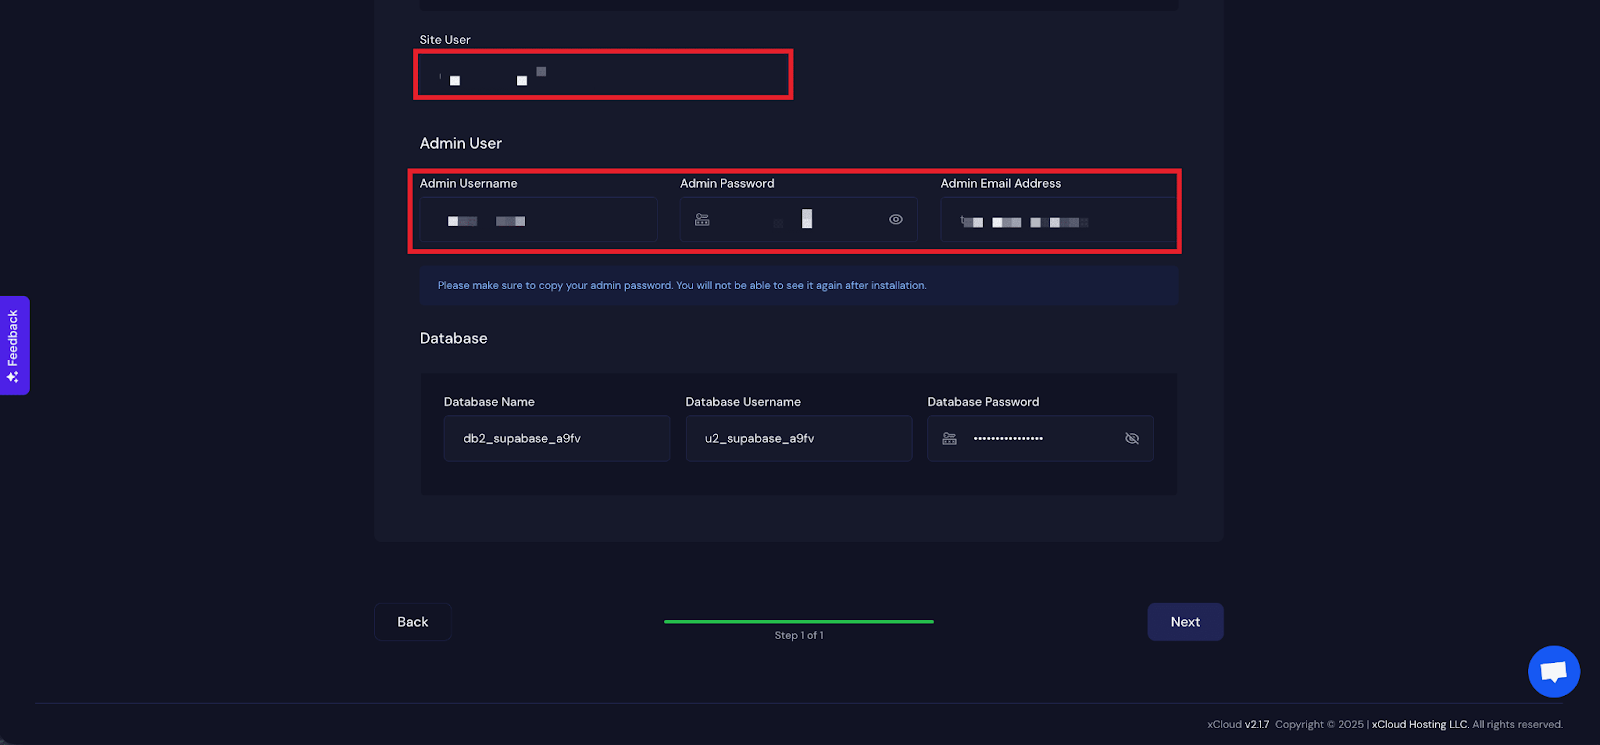
Next, get the ‘Database Name’, ‘Database Username’ and ‘Database Password’ for this application and click on the ‘Next’ button.
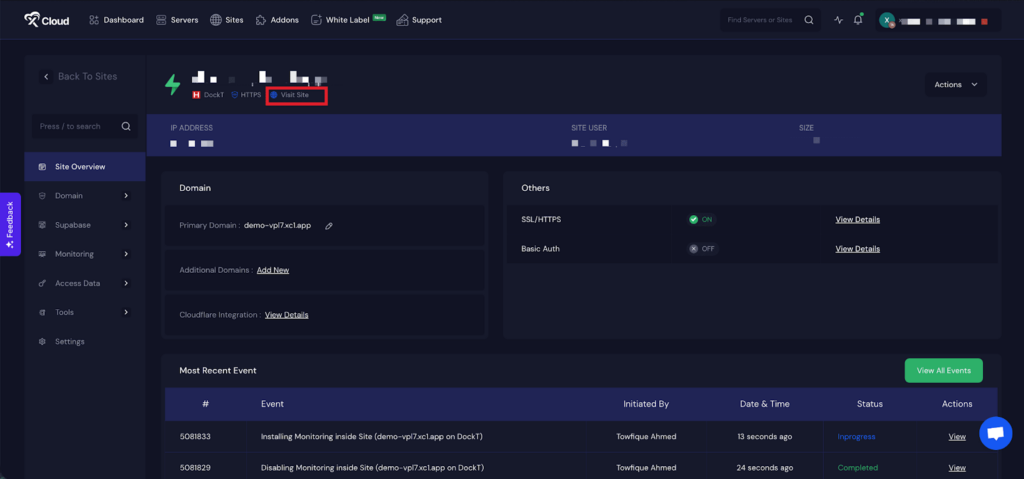
Final Outcome: Visit the Application
After completing the setup, you will be able to visit your Supabase site. From the dashboard, click on the ‘Visit Site’ app.
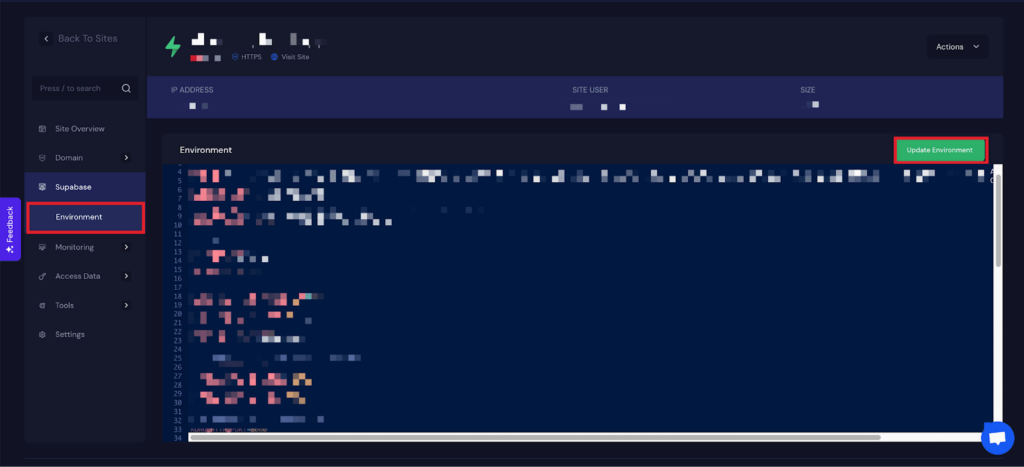
Environment Editor for Supabase
The Environment section in xCloud allows you to customize configuration settings for your Supabase app. Just go to the ‘Environment’ option from the sidebar and adjust as you need, then click on the ‘Update Environment’ button.
That’s it! This is how easily you can install Supabase on Vultr using xCloud’s One Click Apps. xCloud takes care of the heavy lifting, server provisioning, Docker configuration and deployment, so you can focus on building and scaling your application with Supabase’s powerful backend features.
If you’re setting up a demo project or going live in production, this streamlined process lets you get started quickly and confidently.
Still stuck? Contact our support team for any of your queries.