

How to Deploy Lovable Applications with xCloud?
Updated April 8, 2026 · 3 min read
Lovable is a modern AI-powered application-building platform designed to help anyone create user-friendly, scalable, and production-ready applications and websites through chatting.
xCloud allows you to deploy Lovable applications easily from your Git repositories. You can install and set up Lovable and get your application live in just a few clicks.
Follow the steps below to set up Lovable with xCloud and deploy AI-powered projects easily:
Step 1: Create a New Site
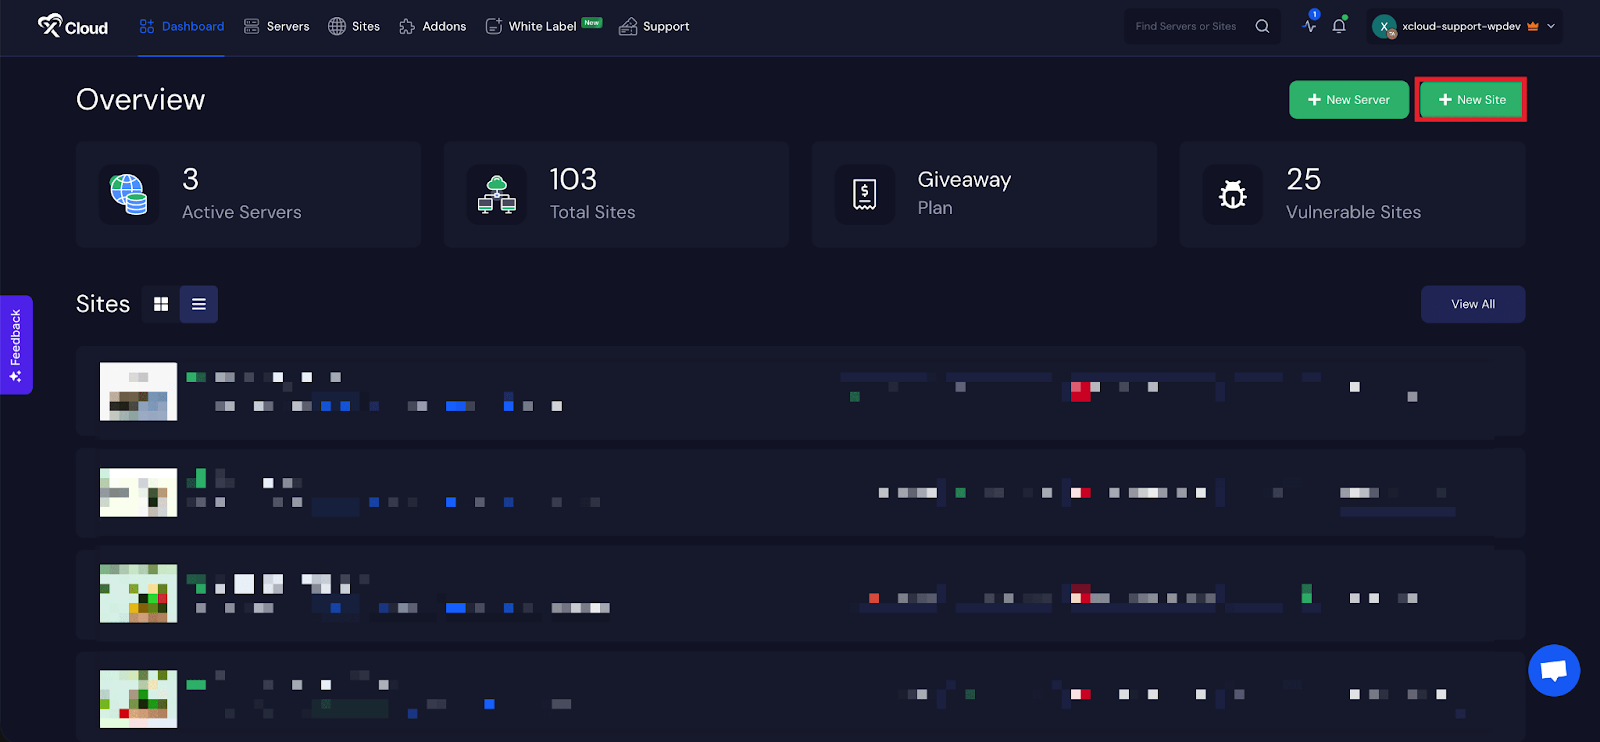
Begin by logging into your xCloud account. Once logged in, navigate to your dashboard and click on the ‘New Site’ button.
Step 2: Choose Your Server
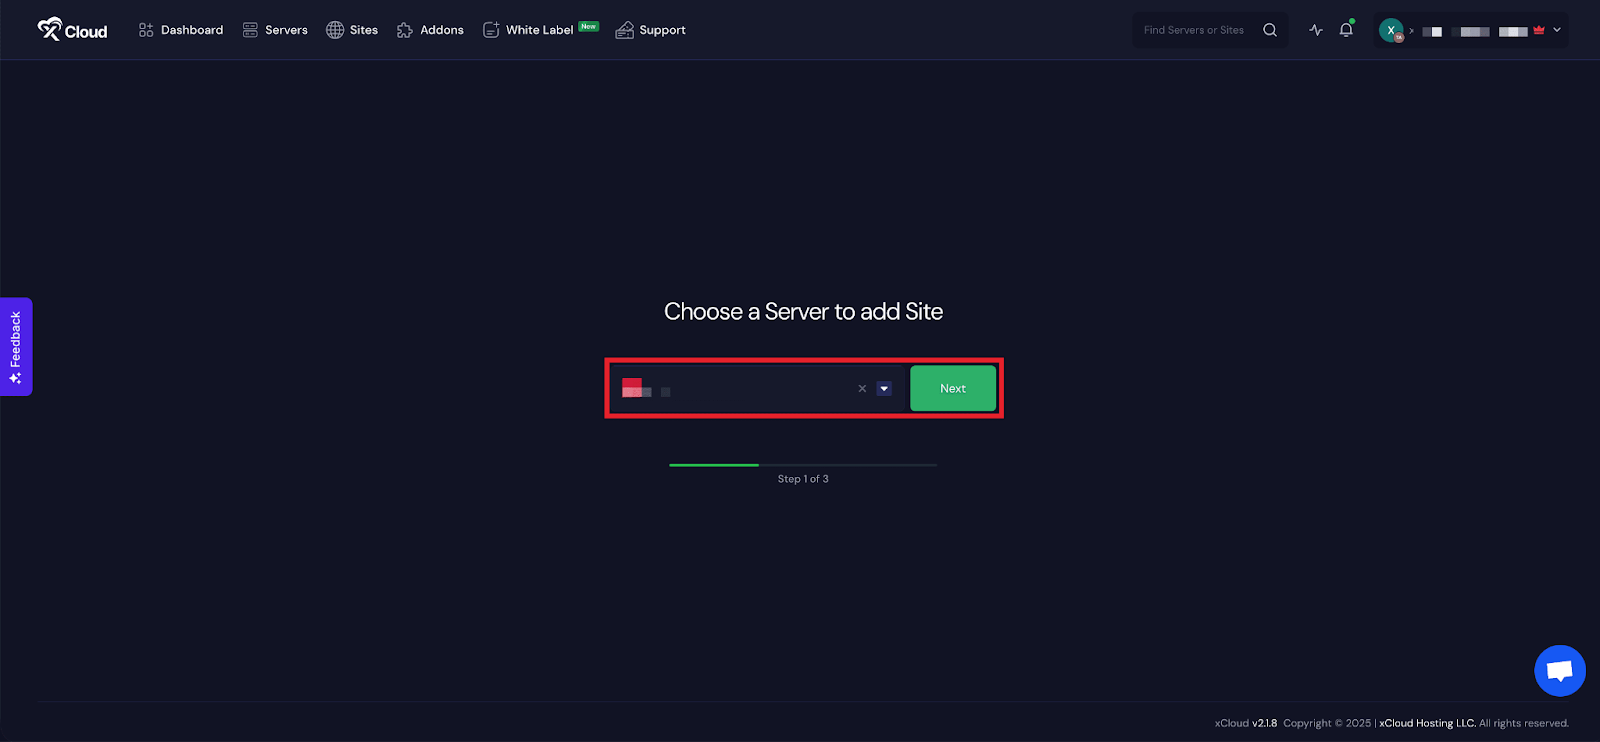
Then choose your server from the dropdown menu. Next, click on the ‘Next’ button to proceed to start creating Lovable applications.
Step 3: Go to The Lovable Tab
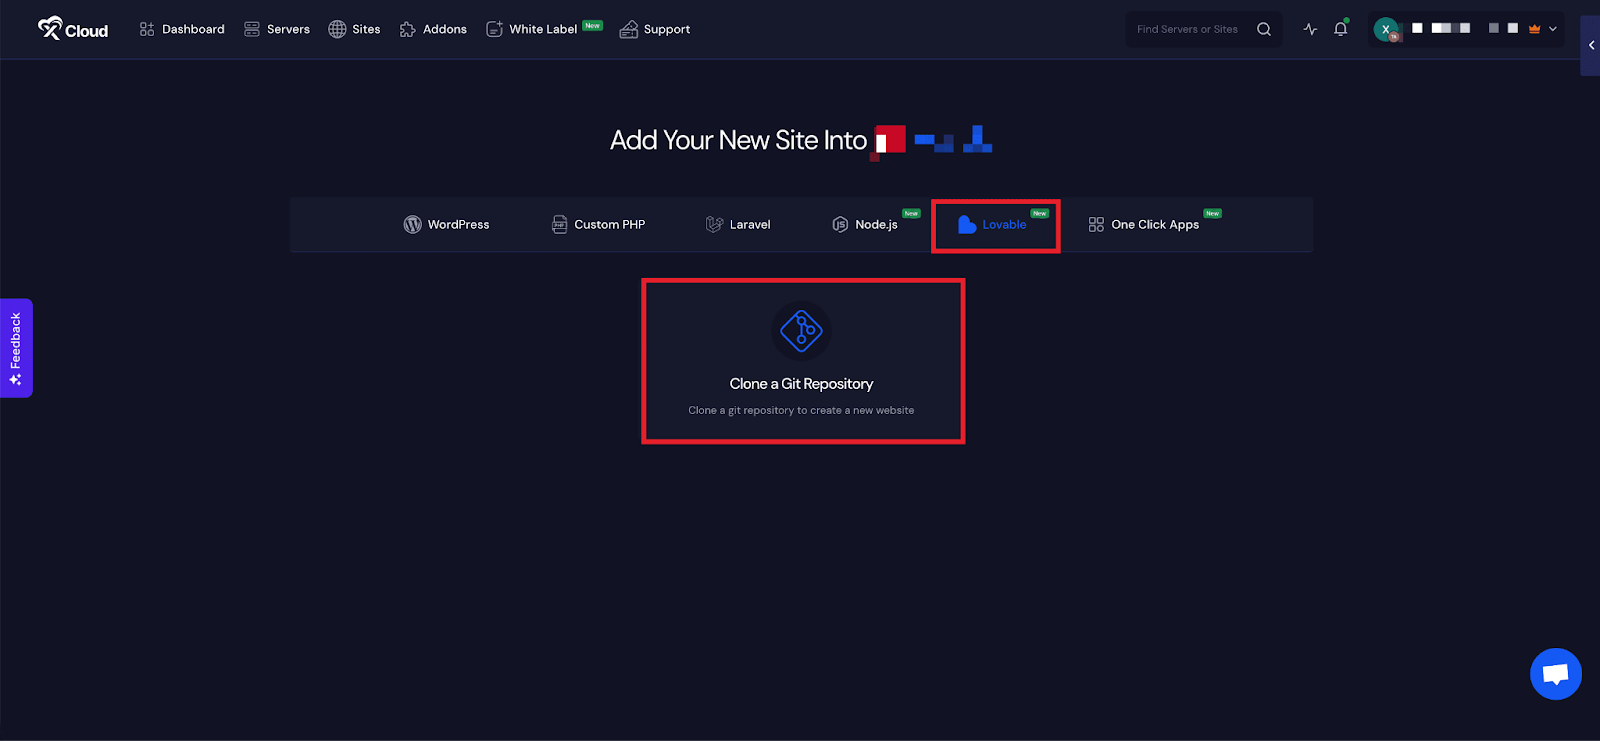
From here, go to the ‘Lovable’ tab to deploy your Laravel applications. Now, choose ‘Clone A Git Repository’ to import your custom PHP site.
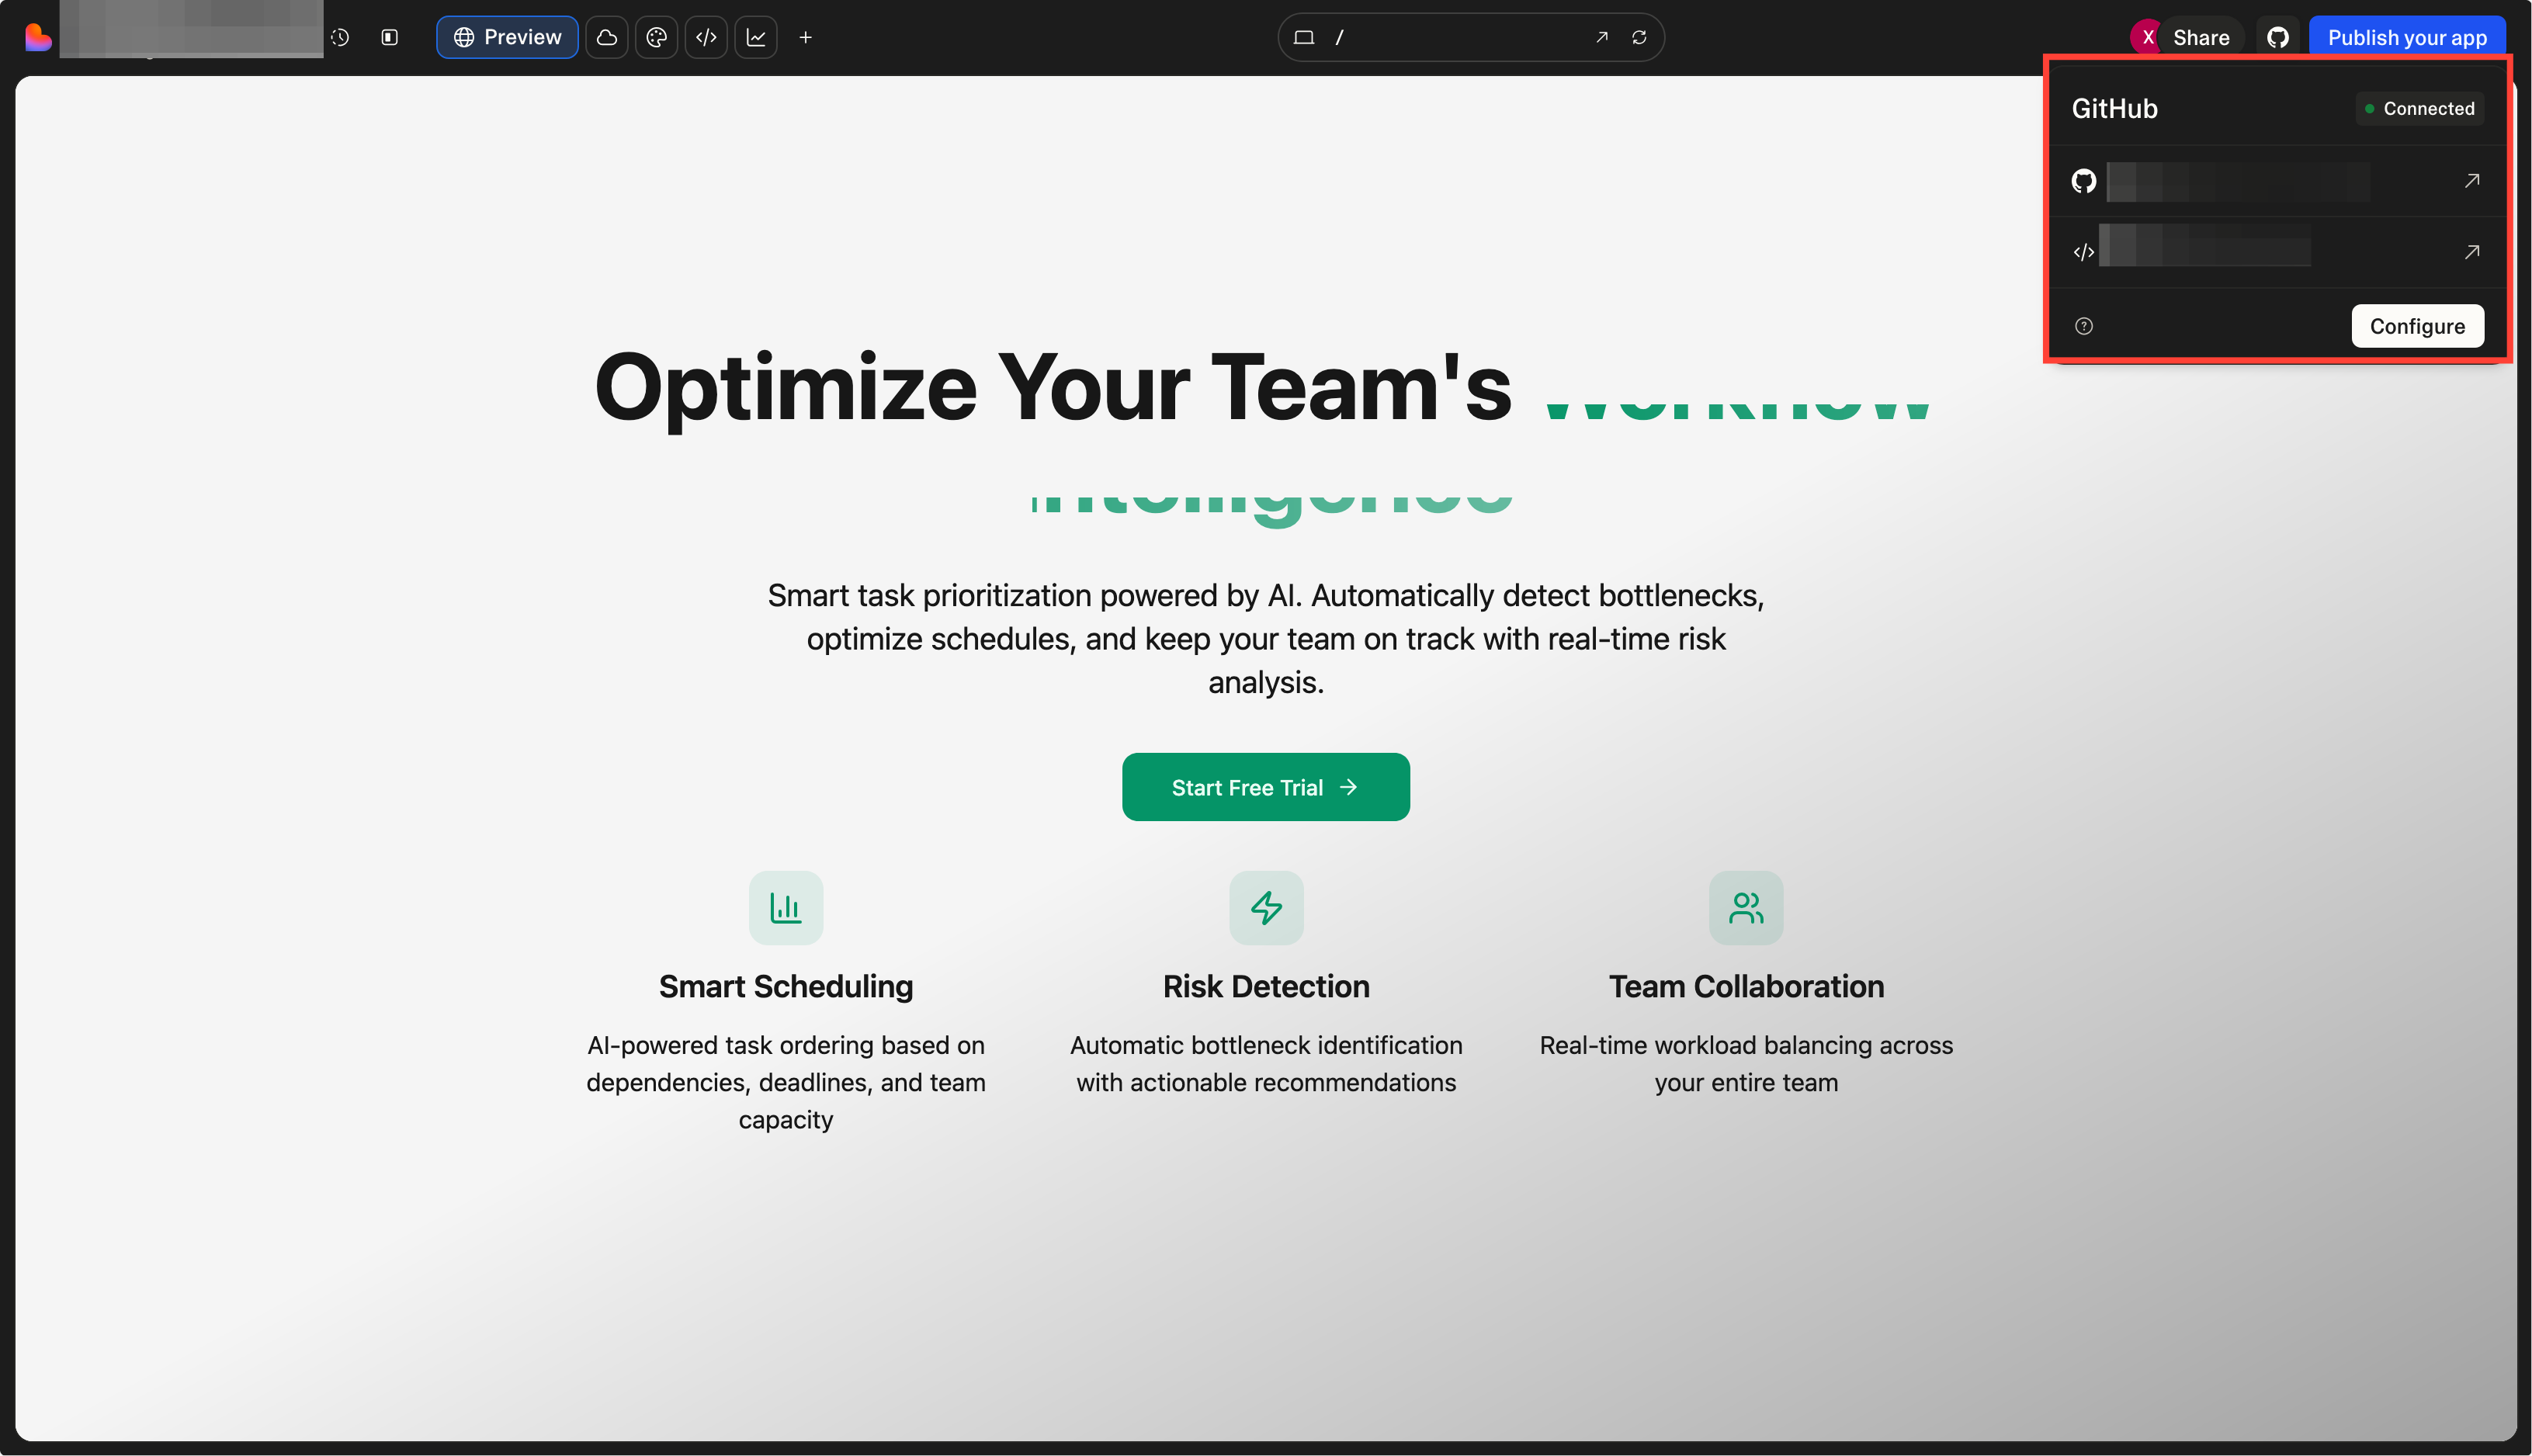
📝 Before you proceed, make sure your Lovable projects are properly synced with Git repositories.
Step 4: Set Up Domains
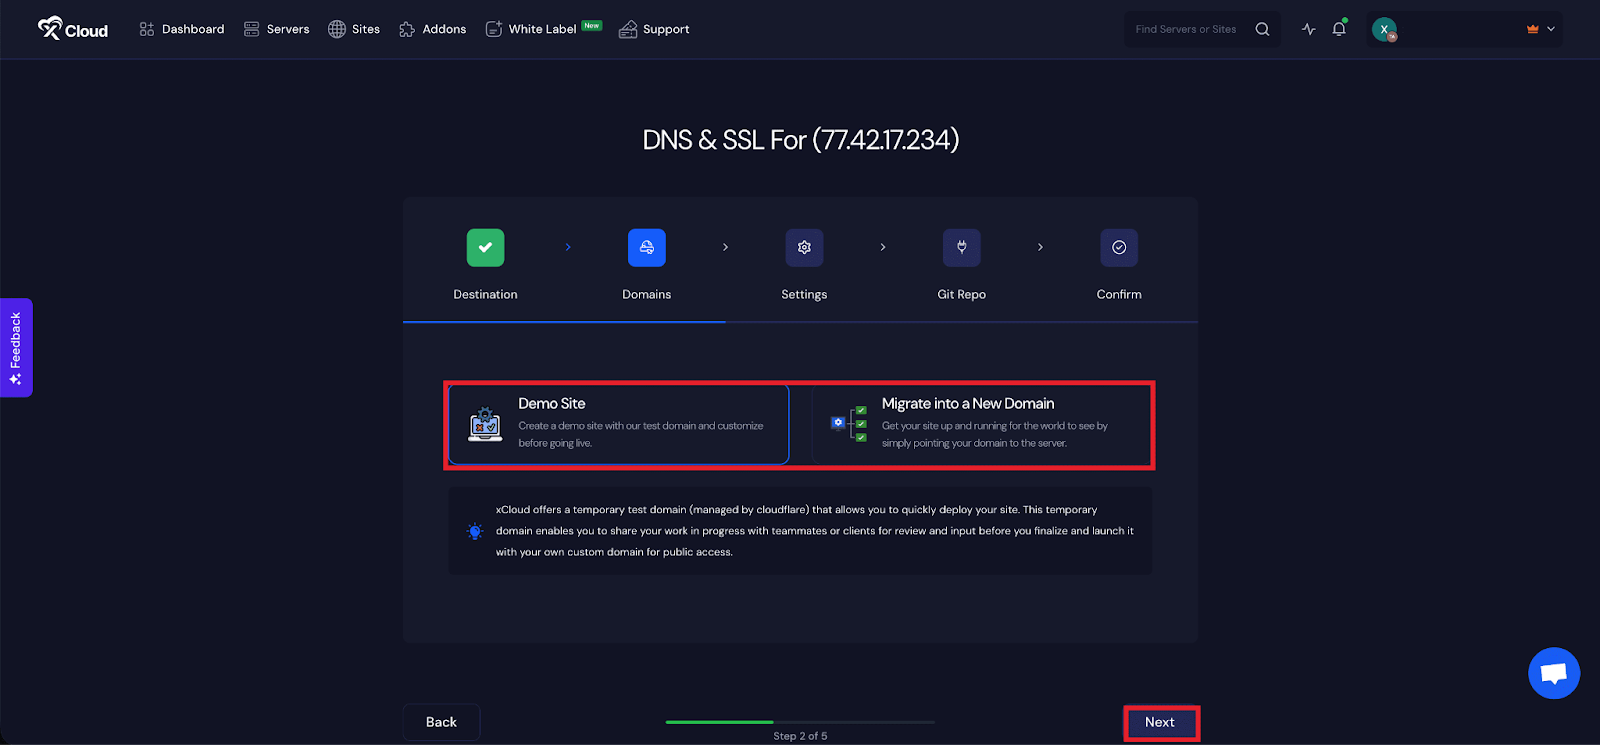
From the ‘Domains’ tab, you will get two options: either you can create a ‘Demo Site’ with a test domain and refine it until it is ready for launch, or, you can migrate into a new domain to get your site up and running in a new domain.
Or you can create your site with your live domain; you need to select the ‘Migrate into a New Domain’ option.
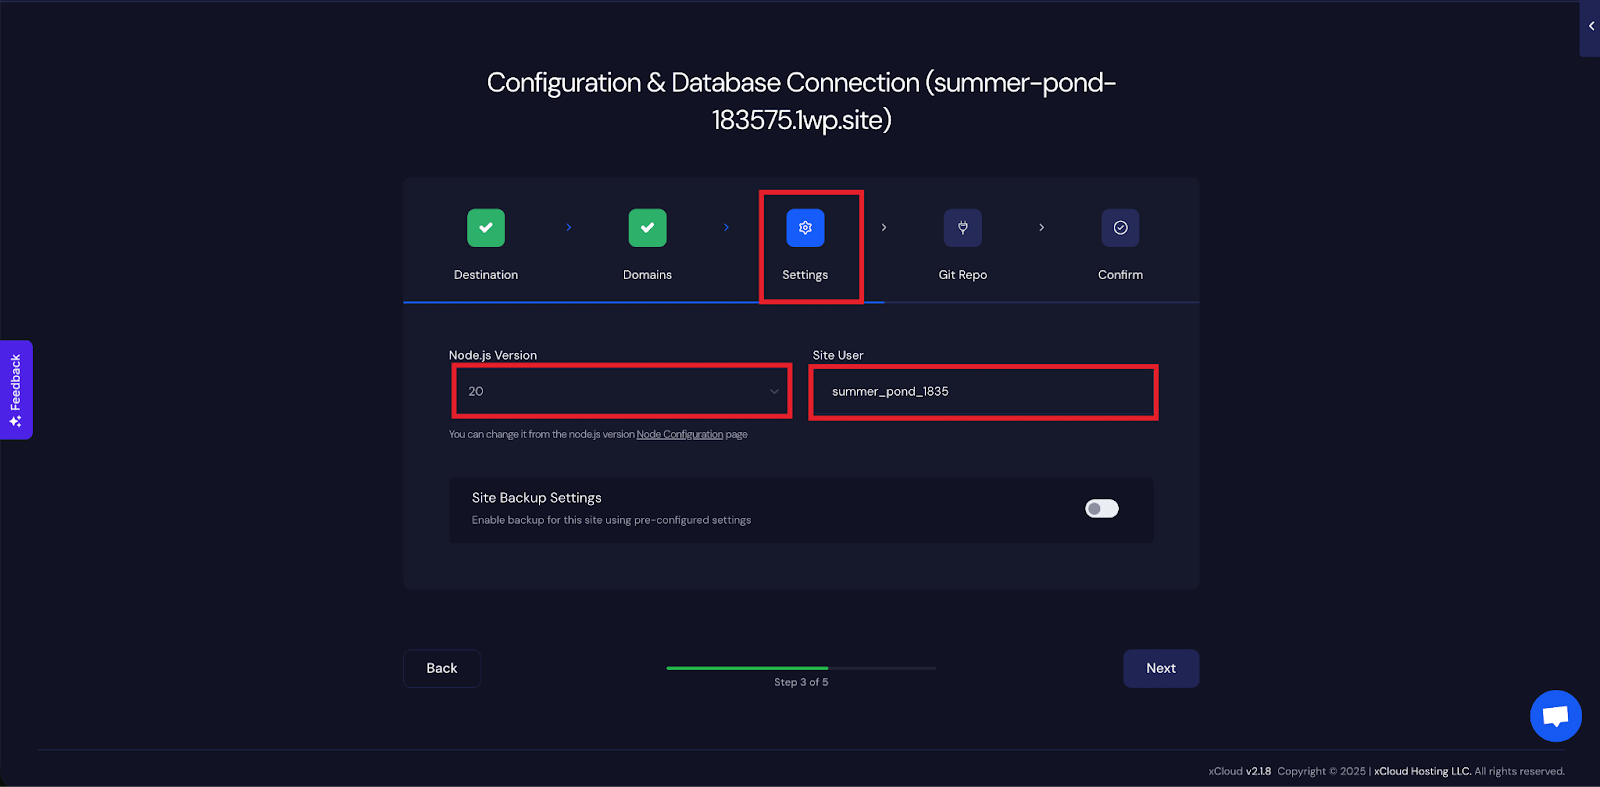
Step 5: Configure Site Settings
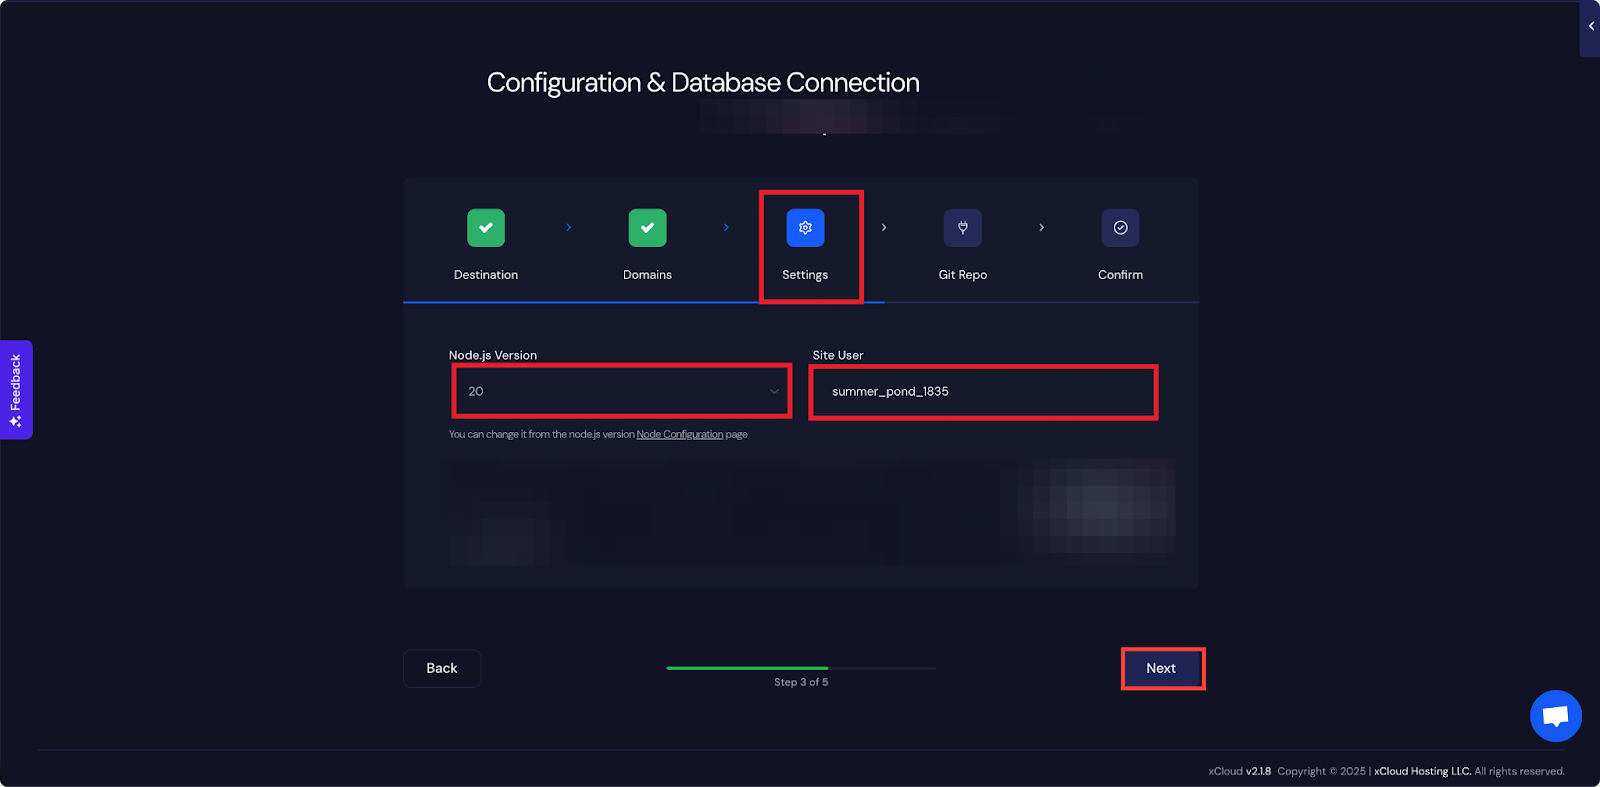
Next, under the ‘Settings’ tab, you will get the ‘Node.js Version’ and ‘Site User’ for this application. After that, click on the ‘Next’ button.
Step 6: Insert Git Repository Credentials
In the ‘Git Repo’ tab, you will get three repository options: ‘Private Repository (Manual SSH URL)’, ‘Public Repository (Manual HTTPS URL)’, and ‘Connected Git Provider’.
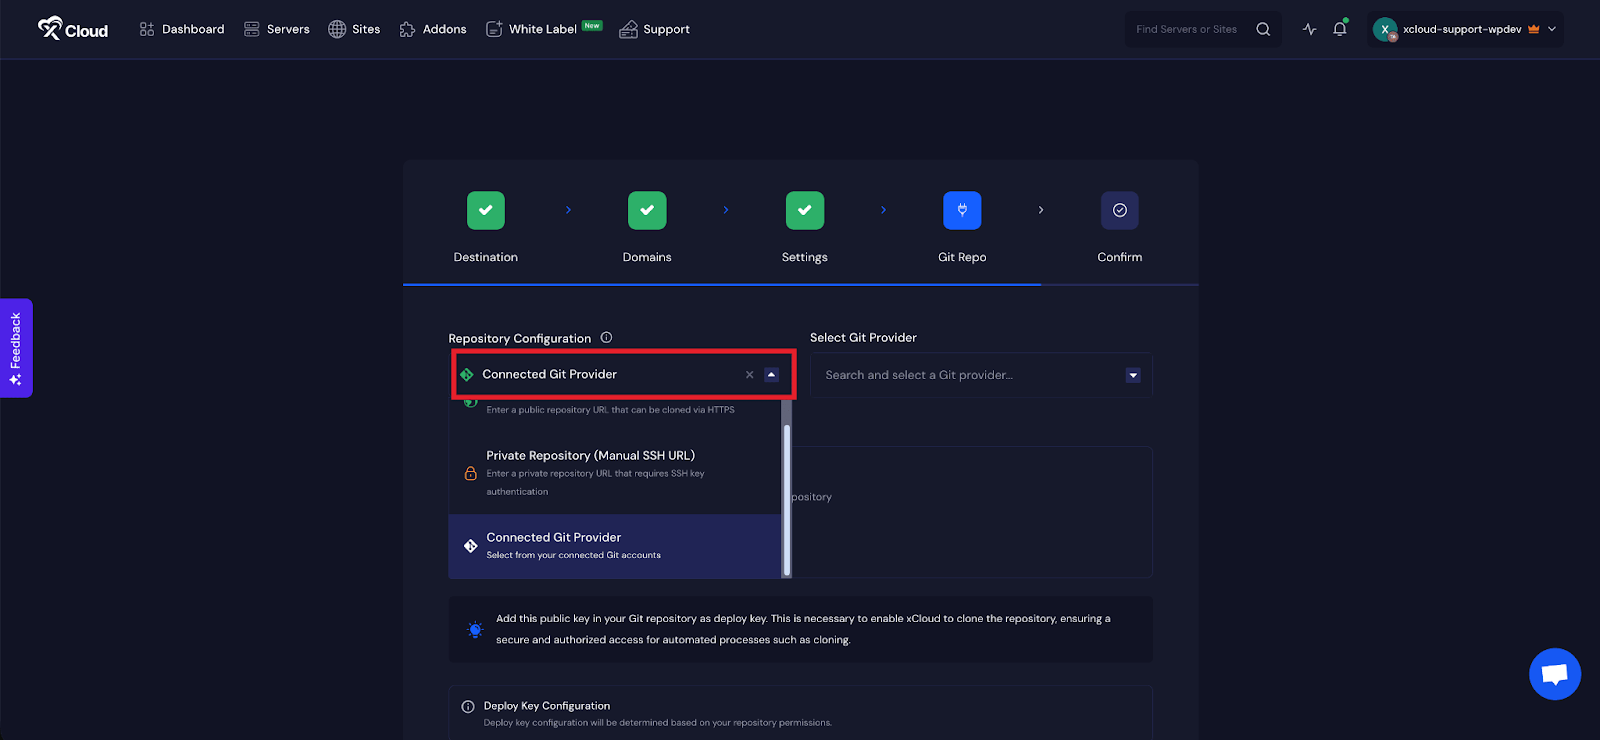
We are going to deploy Git projects using the ‘Git Provider’ option here. Choose the ‘Connected Git Provider’ option from the dropdown menu.
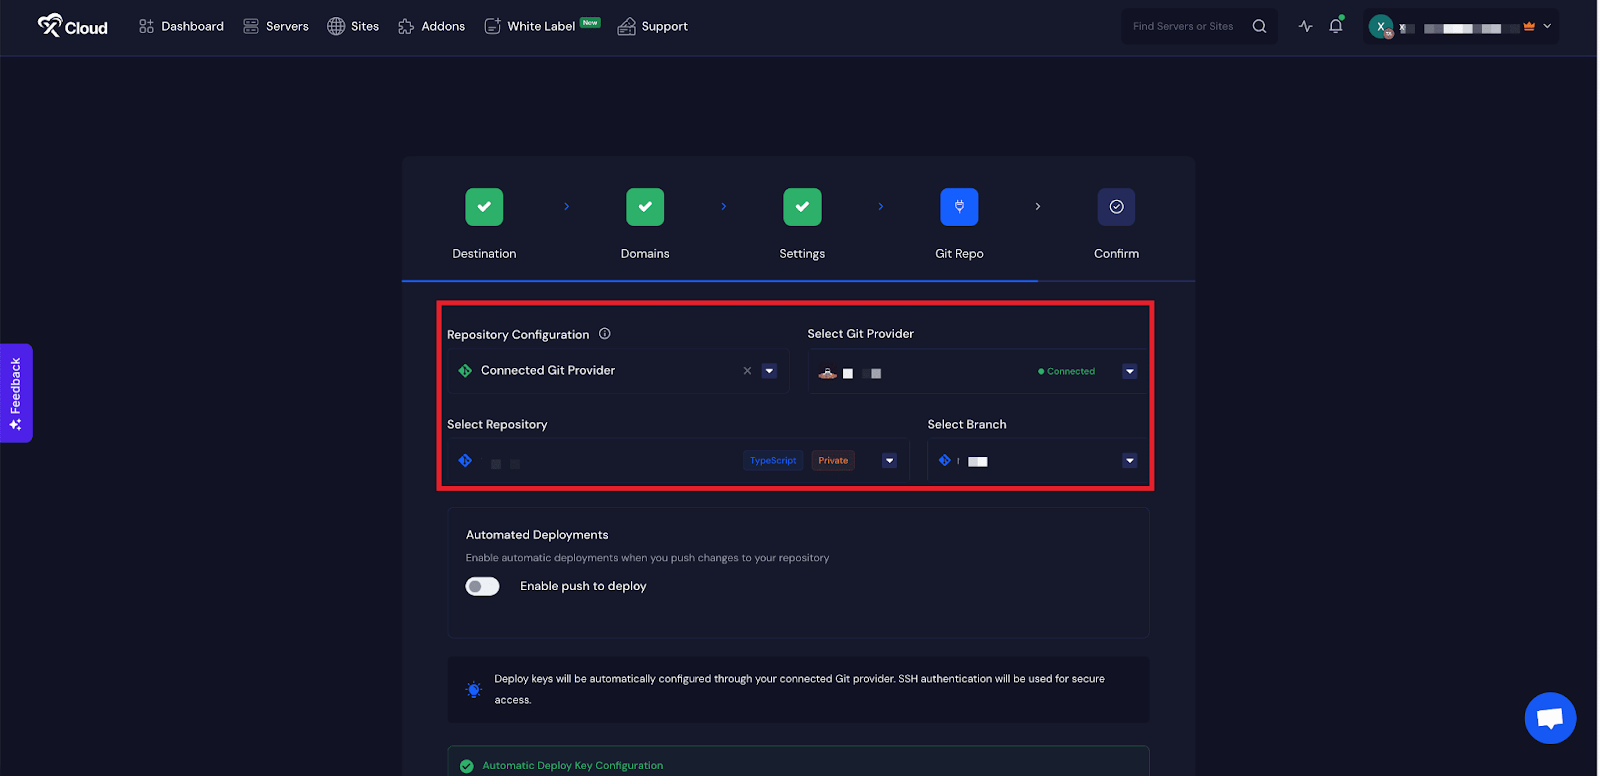
From the ‘Select Git Provider’ dropdown, choose the connected account you want to use. Once selected, navigate through the list of repositories, pick the one you want to deploy, and then select the specific ‘Branch’ of that project.
You can also deploy Lovable projects from your Public or Private Git repositories as well. For more details read this documentation:
👉 How to Insert Your Git Repositories with xCloud
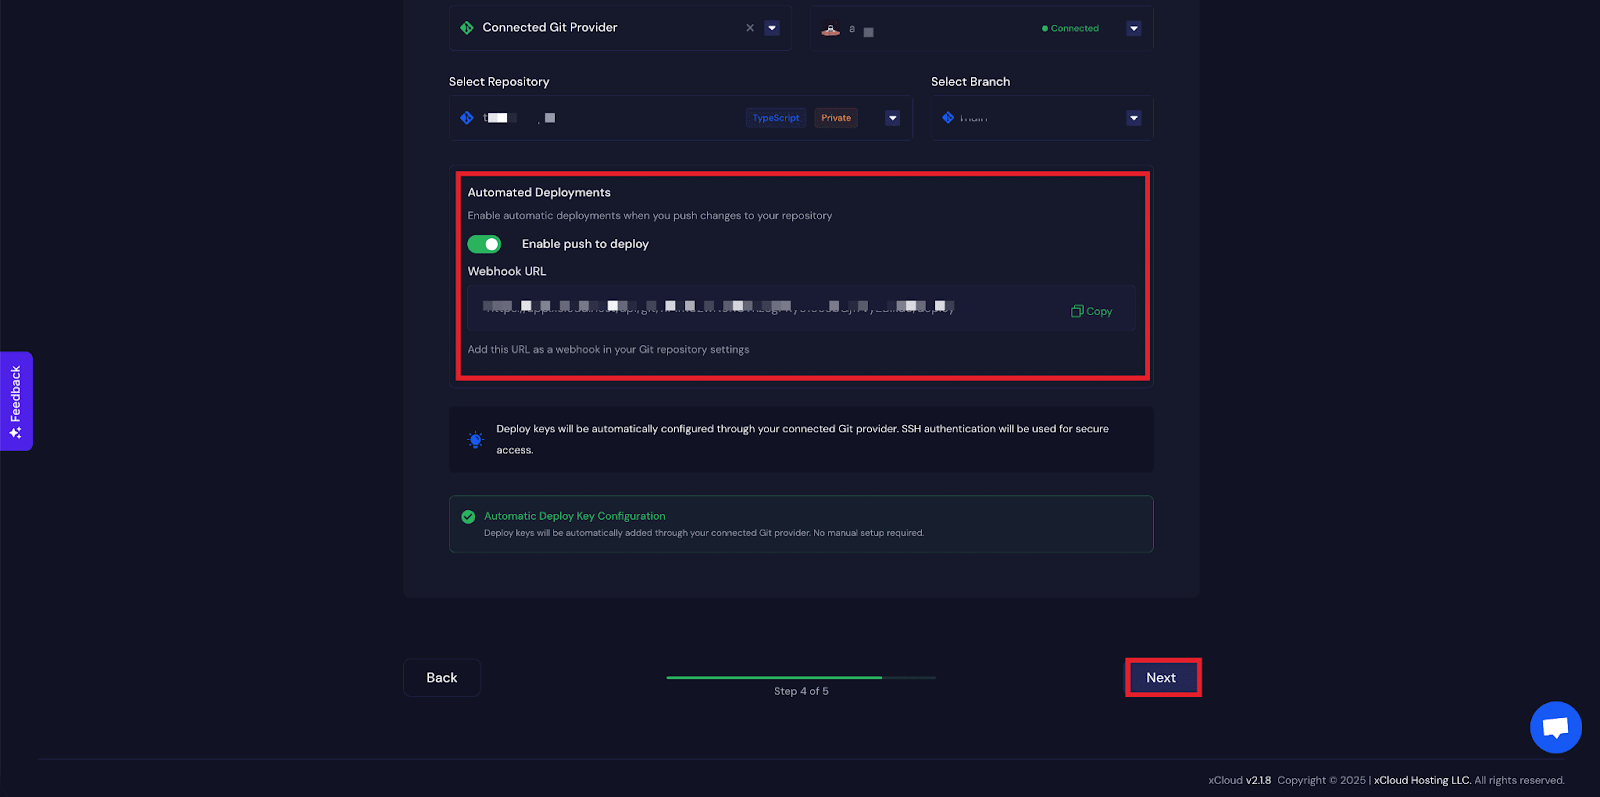
Step 7: Enable Push to Deploy
The next step is to enable automated deployment. Toggle on the ‘Enable push to deploy’ option. You need to insert this URL into GitHub. Copy the ‘Deployment URL’ from here.
Note: If you want to learn more about the process, follow the steps in this document.
Finally, review all the details and click on the ‘Start’ button to create the Lovable application.
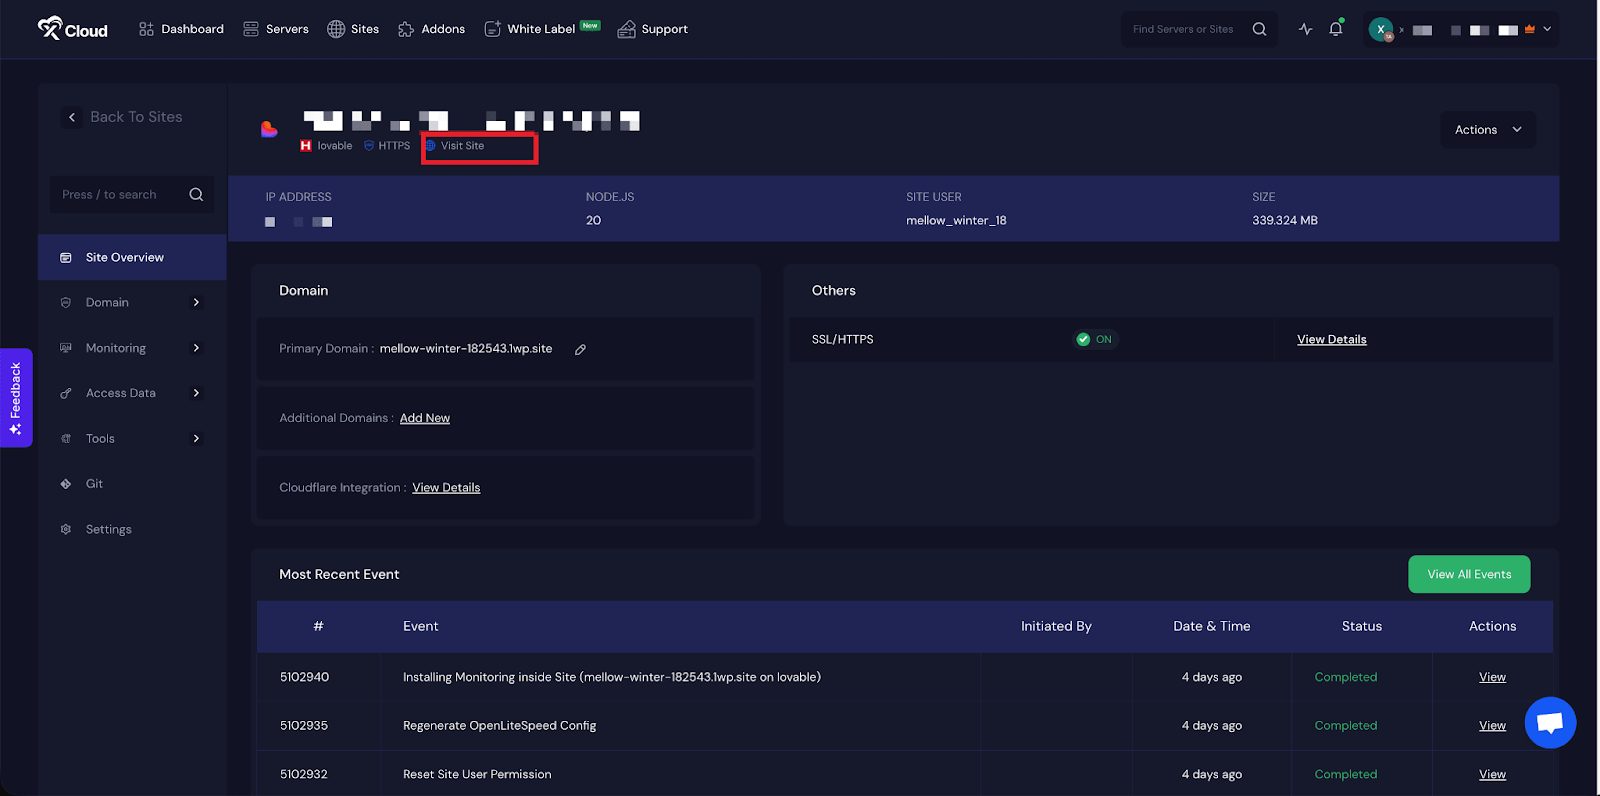
Step 8: Visit the Application
After completing the setup, you will be able to visit your Lovable site. From the dashboard, click on the ‘Visit Site’ app.
That’s it! This is how easily you can deploy Lovable with xCloud and launch your web apps in just a few clicks.
Still stuck? Contact our support team for any of your queries.