


xCloud makes it easy to create a database and manage it for your site or web application, whether you are using MySQL or MariaDB. This guide will walk you through the steps to set up a new database and a new database user. You will be able to handle everything from choosing the server to setting access permissions, all from within the xCloud dashboard. Follow these simple steps, and you will have your database and user up and running in no time!
Step 1: Choose the Server #
To begin, select the server where you want to create a database. Navigate to the left sidebar and find the Management section. From the dropdown, select Database.
Step 2: Create the Database #
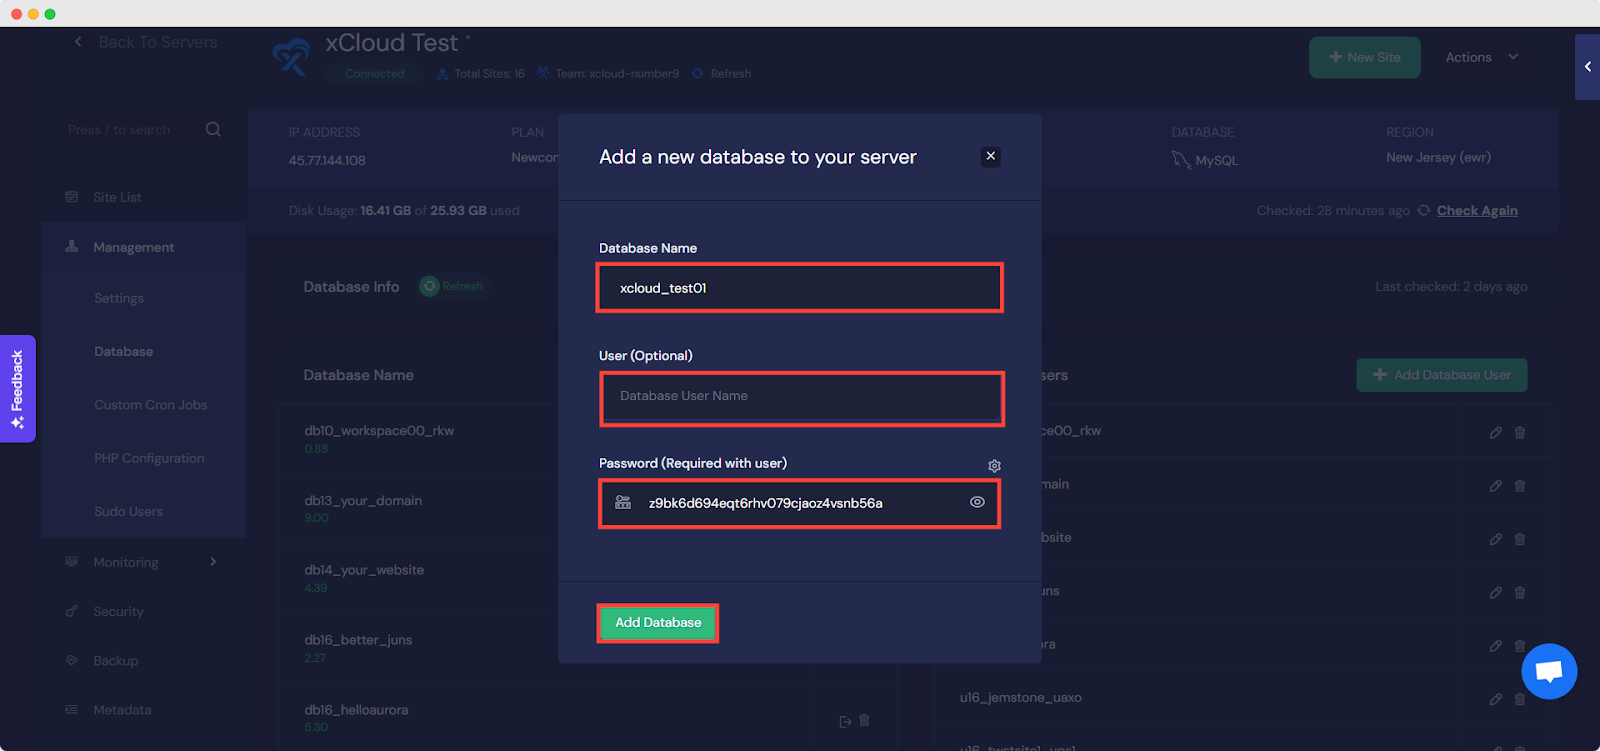
Once you have selected your server, proceed to create the database. Click the ‘Add Database’ button. A pop-up window will appear.
Enter a Database Name and Username for the database. A password will be automatically generated for the database, but you can change it if needed. After entering the necessary details, click the ‘Add Database’ button to create the new database.
Step 3: Create a Database User #
After you create the database, you can add new users and assign them the necessary access permissions. On the dashboard, locate and click the ‘Add Database User’ button. A pop-up window will appear.
Enter a Username for the new user. A password will be automatically generated for the user, though you can change it to one of your preference. Set the user’s access permissions. Choose the database the user should have access to. Finally, click ‘Add New User’ to save the user.
Step 4: Access New Database and User #
After you have created the new database and user, both will appear in your xCloud dashboard. You can now manage your databases and users directly from here.
With these simple steps, you can efficiently create a database and manage users effortlessly in xCloud!
Still stuck? Contact our support team for any of your queries.


