


When managing multiple websites or frequently deploying similar site setups, repeating the same configuration steps can be time-consuming and inefficient. The Site Snapshot feature in xCloud addresses this issue by enabling you to capture a complete version of an existing site and reuse it to create new sites instantly.
This ensures consistency across deployments, reduces manual effort, and speeds up the site creation process. Follow the steps to create a snapshot and use it to launch a new WordPress site in xCloud.
Step 1: Create a Snapshot #
To begin, log in to your xCloud account and go to the source site where you want to create a snapshot. From the site dashboard, navigate to the ‘Actions’ menu and select ‘Take Snapshot’ from the dropdown list.
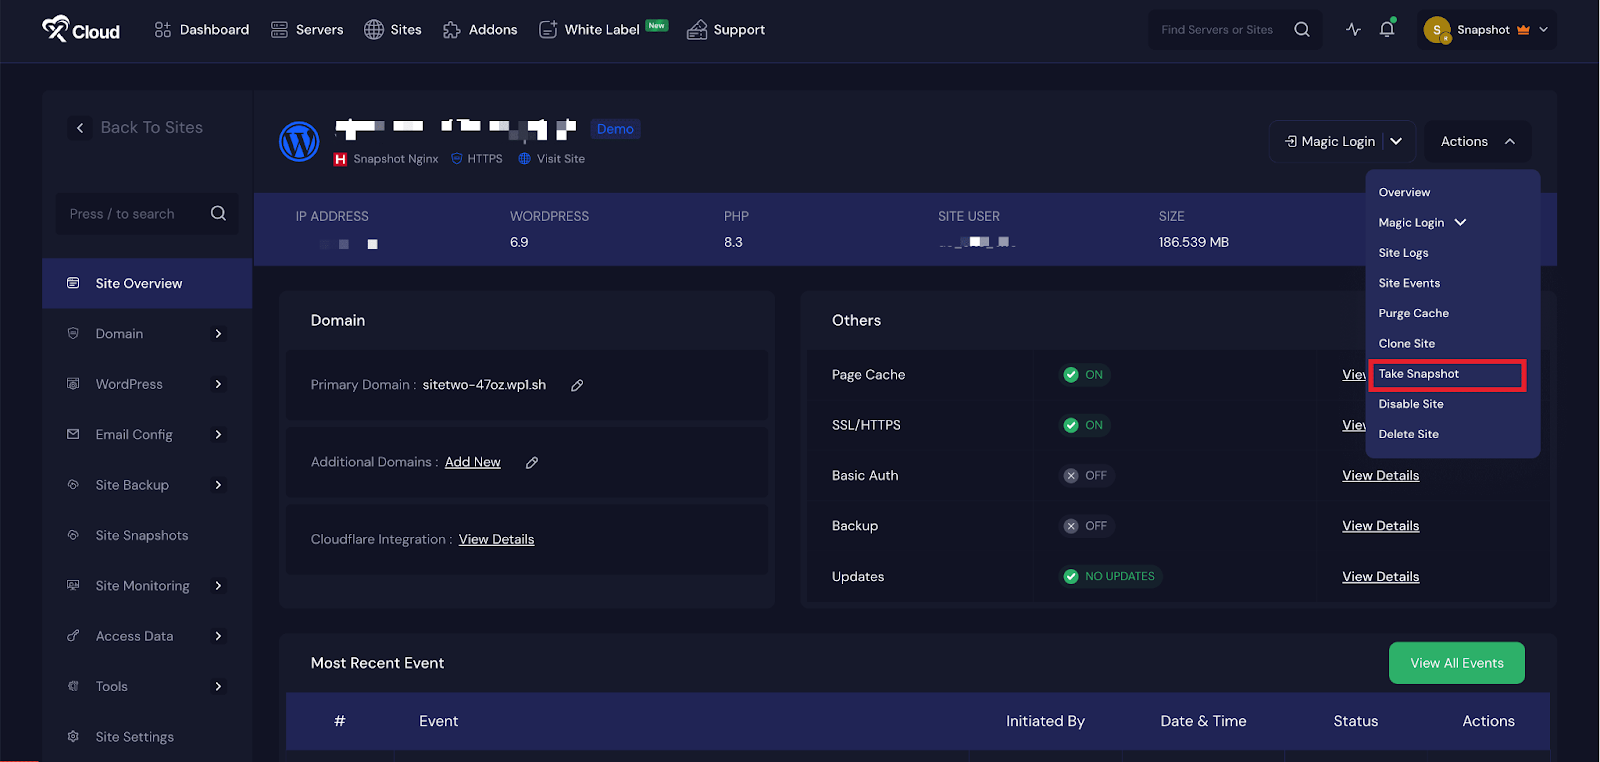
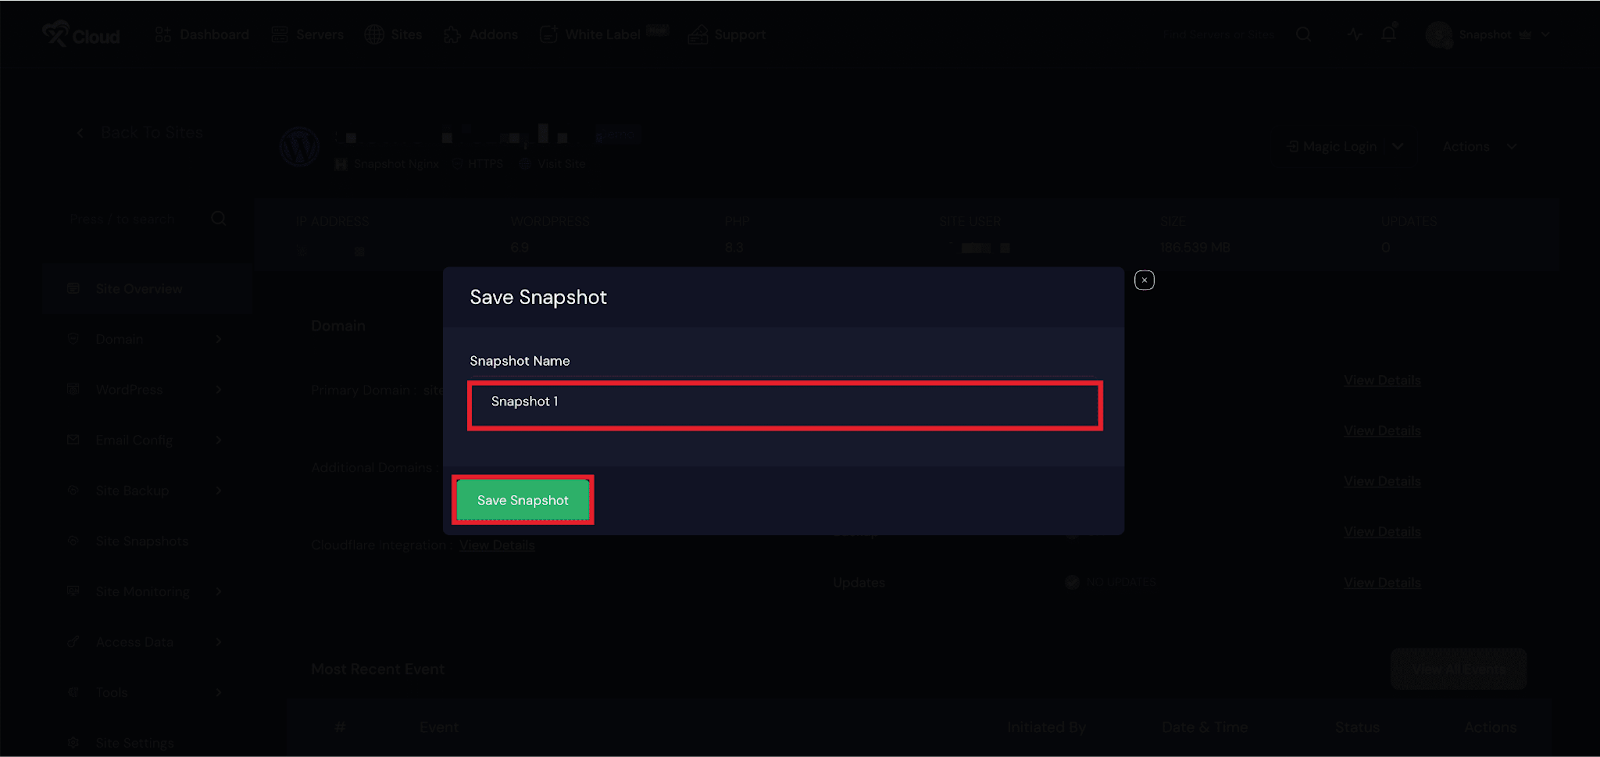
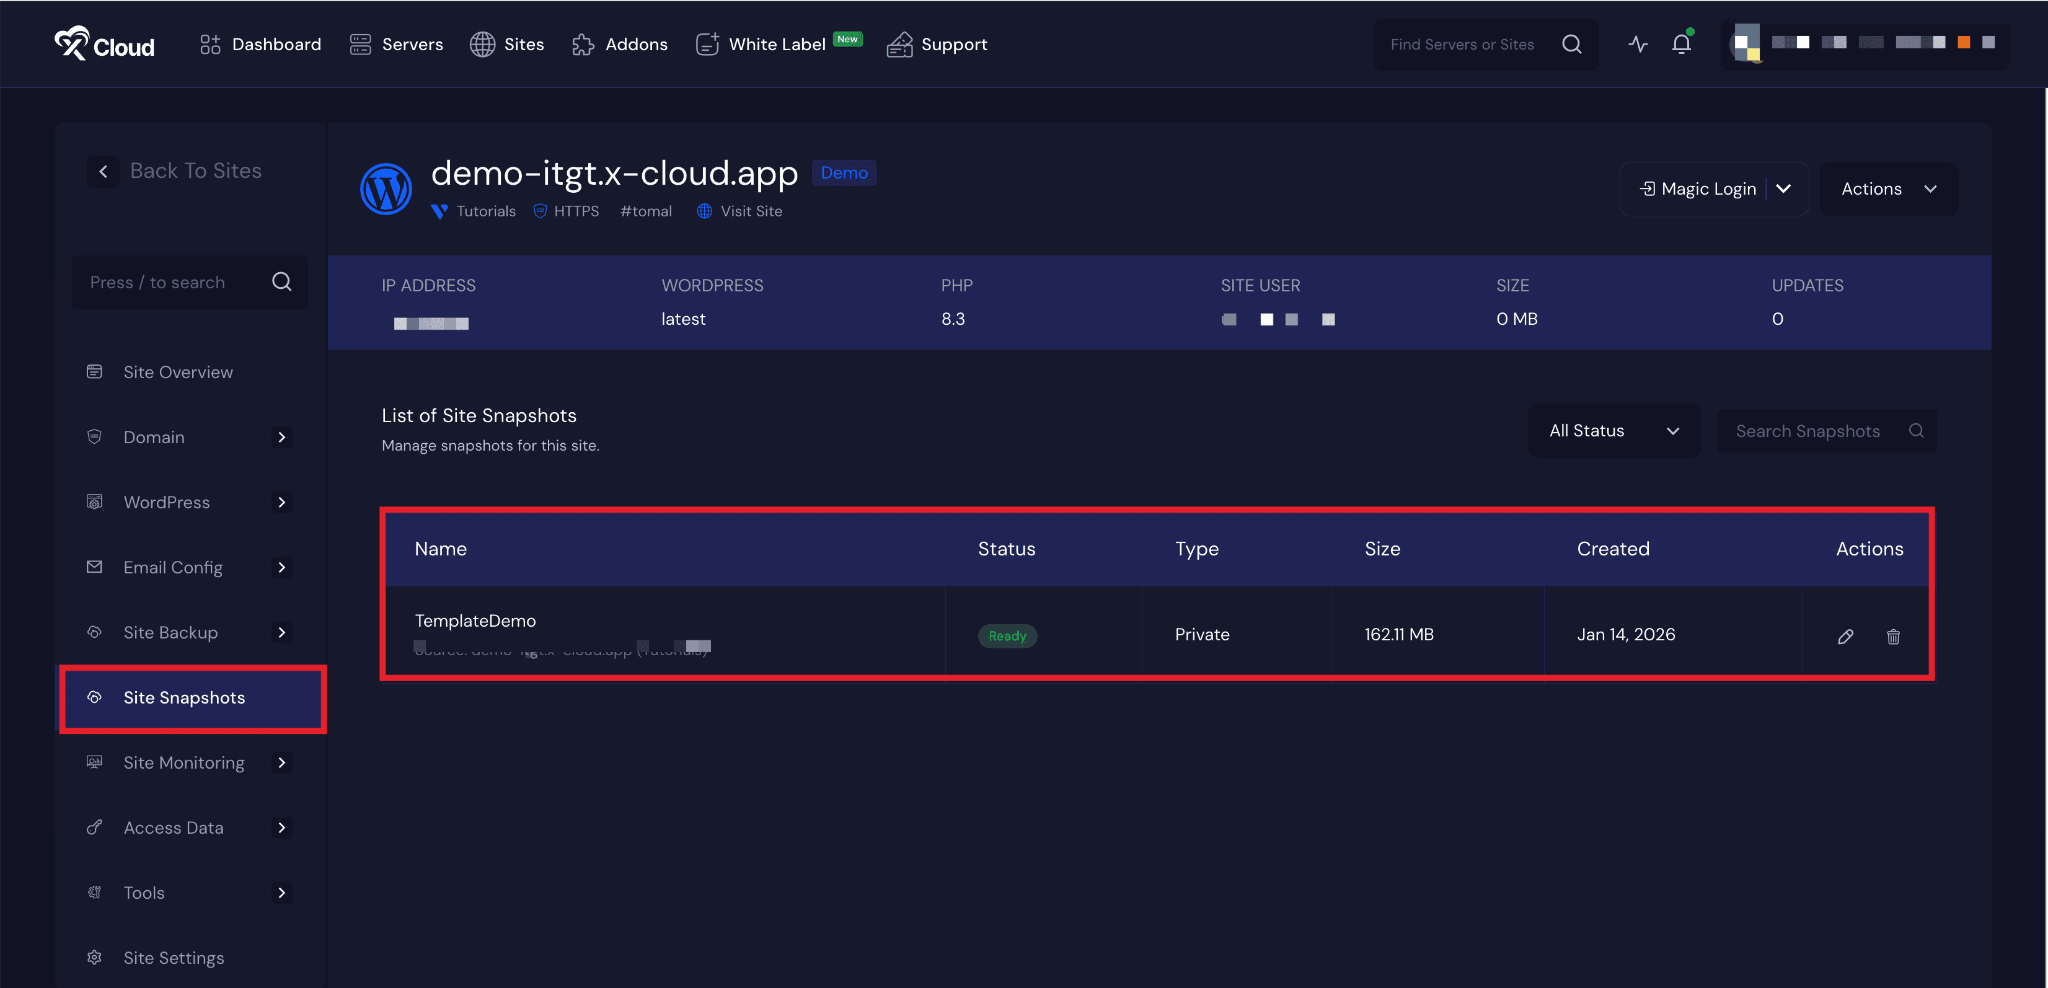
A popup window will appear where you need to enter a name for the snapshot so you can easily identify it later. Once the name is added, click the Take Snapshot button. After the process is complete, go to the Site Snapshots section from the xCloud dashboard to confirm that your snapshot has been successfully created.
After you have created the snapshot, go to the ‘Site Snapshots’ option from the xCloud dashboard.
Create a Site Using Snapshots #
After creating a snapshot, you can use it to deploy a new site without starting from scratch. The snapshot preserves your site’s configuration, structure, and settings, allowing you to replicate the same setup in just a few steps. This makes it easy to launch multiple sites, create demo environments, or test changes while maintaining consistency and saving valuable time.
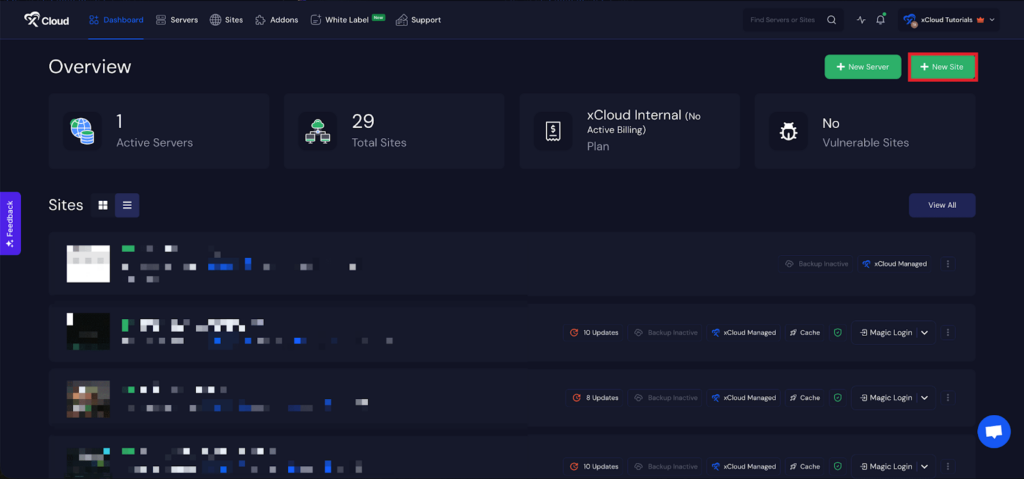
Step 1: Access the Dashboard #
Begin by logging into your xCloud account. Once logged in, navigate to your dashboard and click on the ‘New Site’ button.
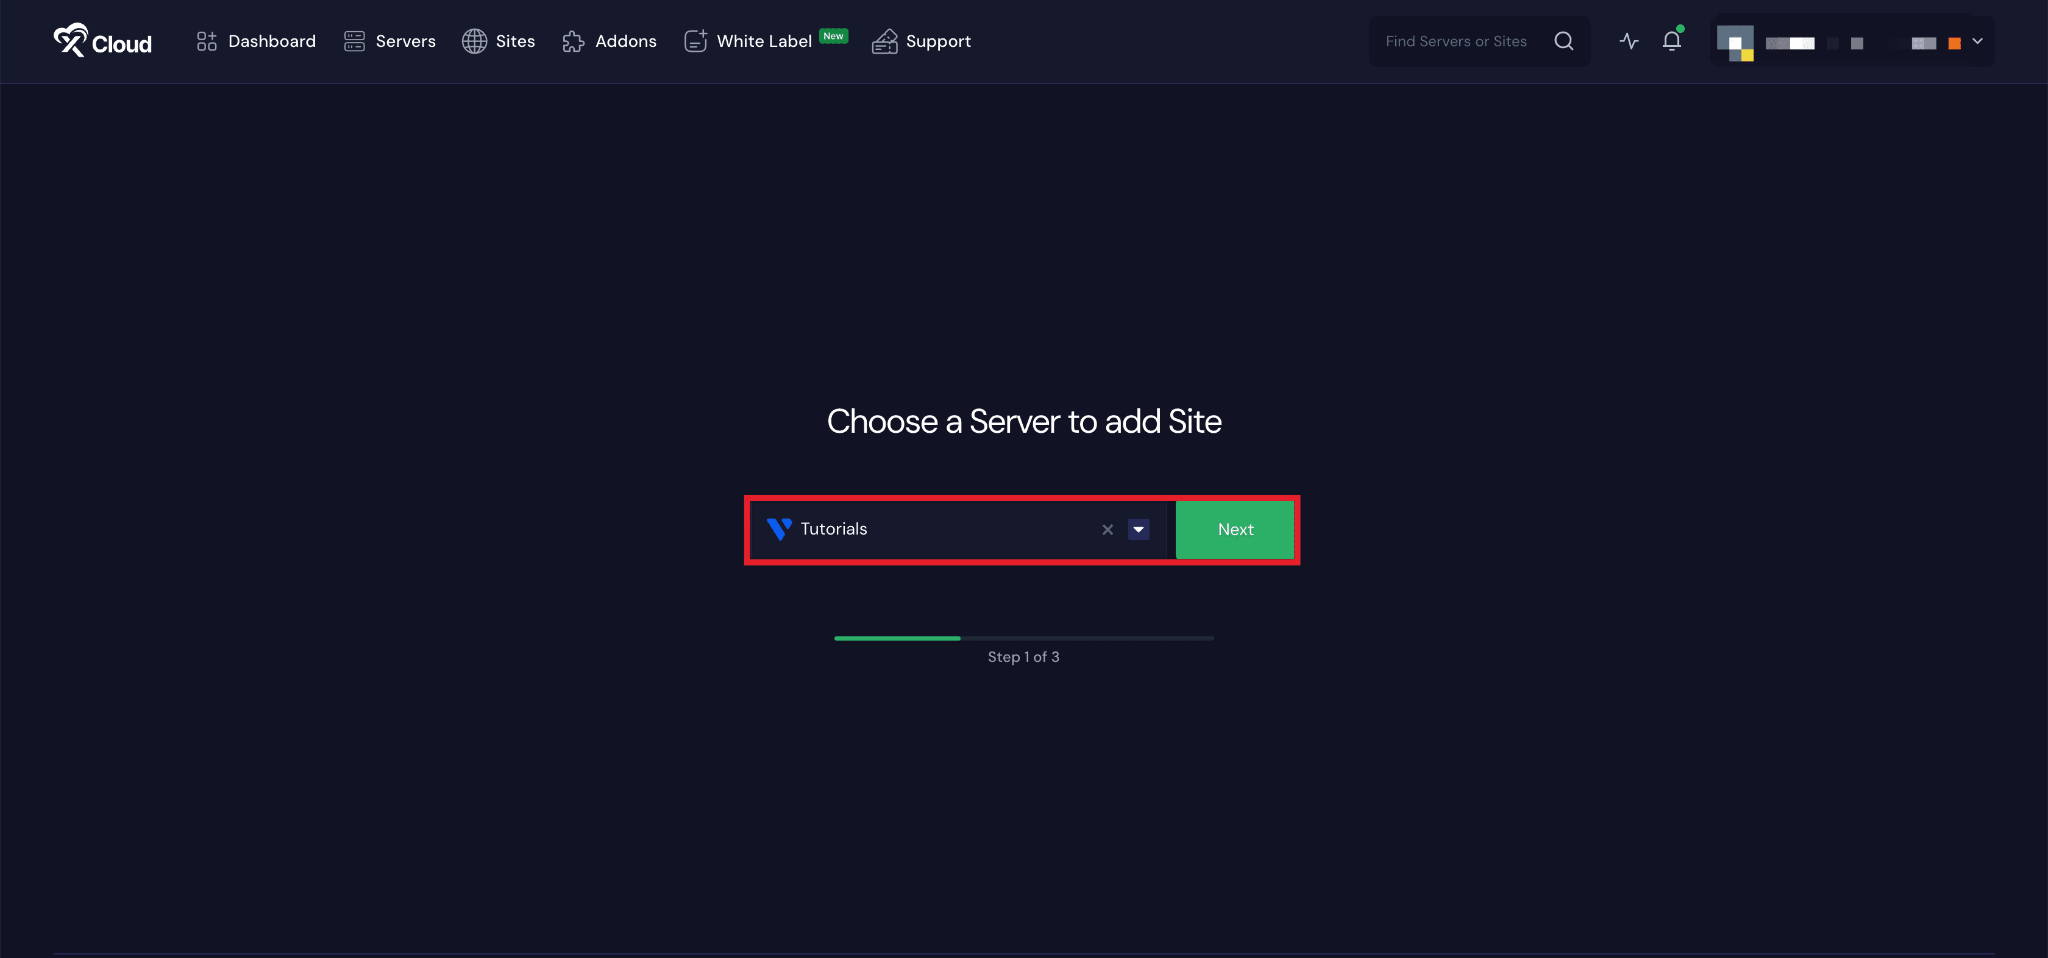
Step 2: Choose Your Server #
Once your server is connected, you can create a site from the dashboard or Site List by clicking the ‘Create New Site’ button. Then choose your server from the dropdown menu. Next, click on the ‘Next’ button to proceed.
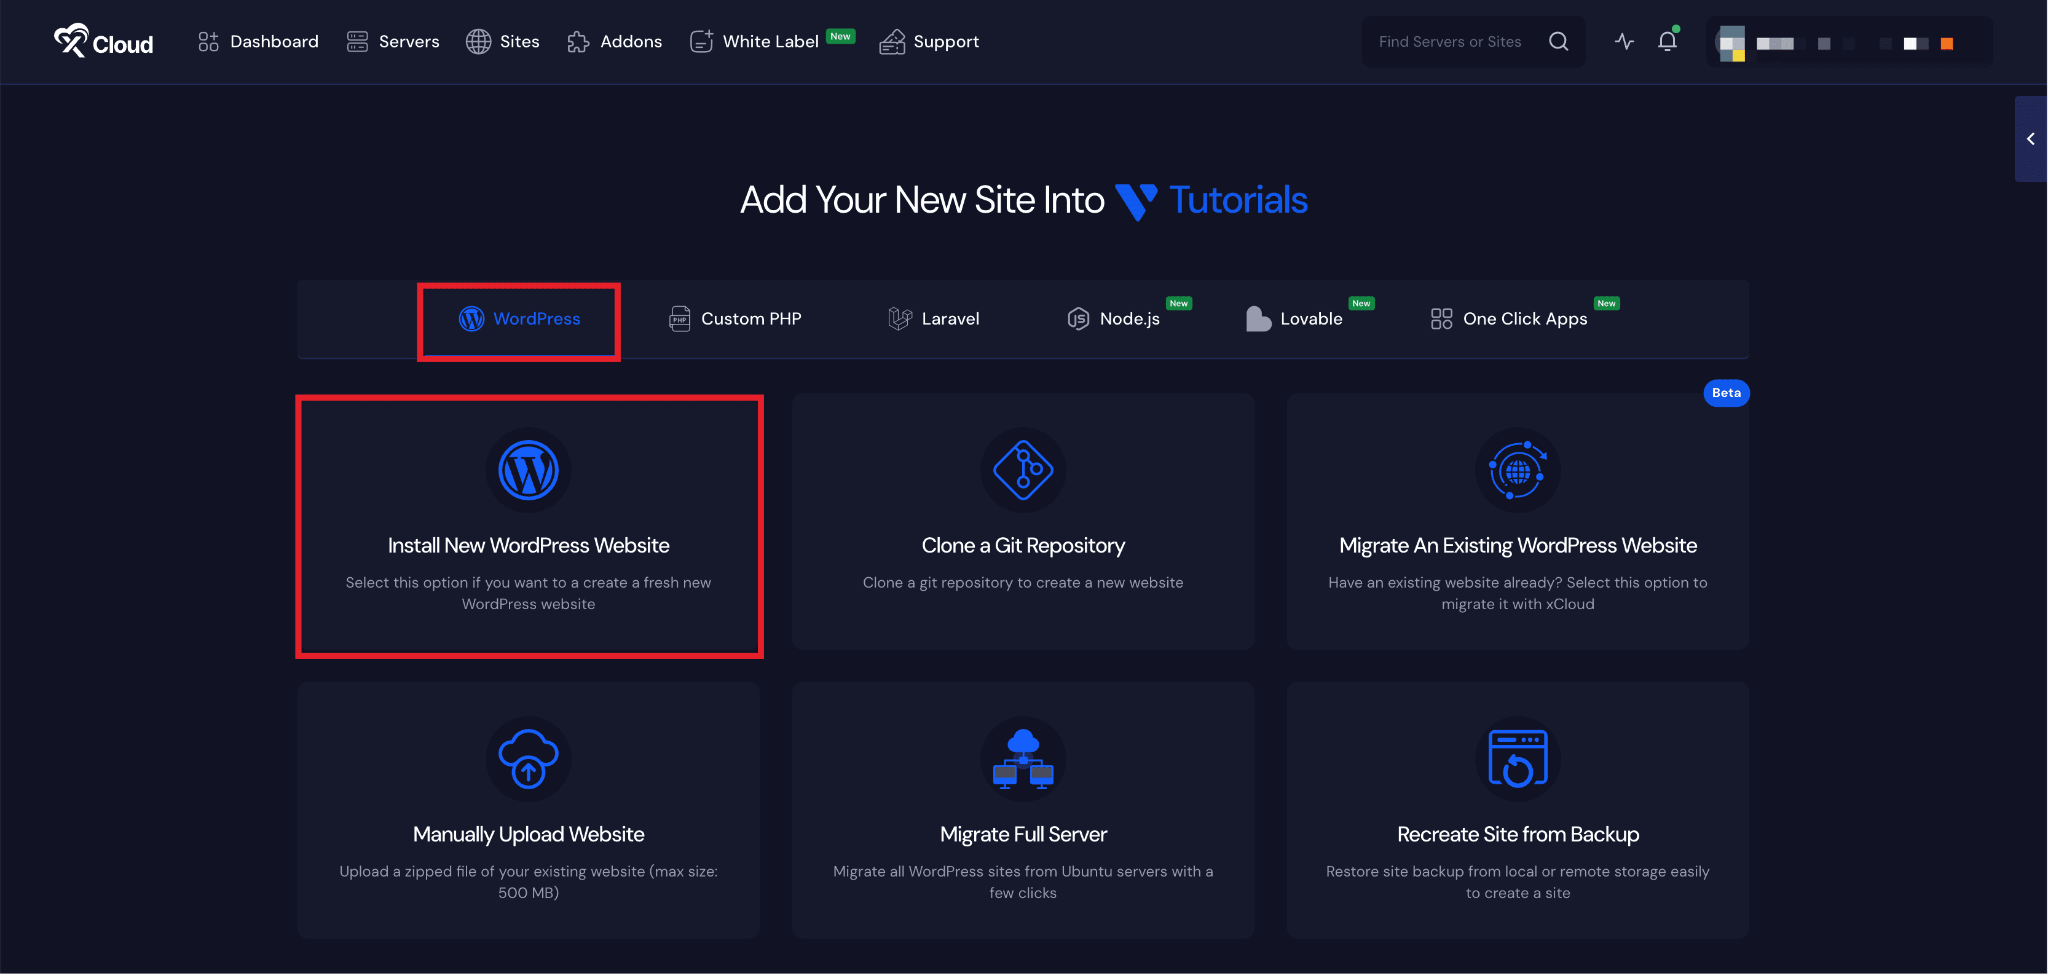
Step 3: Choose Your Site & Add Information #
As we will be creating a fresh WordPress site, choose the ‘Install New WordPress Website’ option.
Step 4: Select Site Creation Method #
Next, you need to choose a deployment method: ‘Default’, ‘Build With Templately AI’ or ‘Site Snapshots’.
To create a site manually, choose the‘Default’ method. If you want to create a site using AI, choose the ‘Build With Templately AI’ method, or if you want to proceed with site creation with your preset templates, choose ‘ Snapshots’.

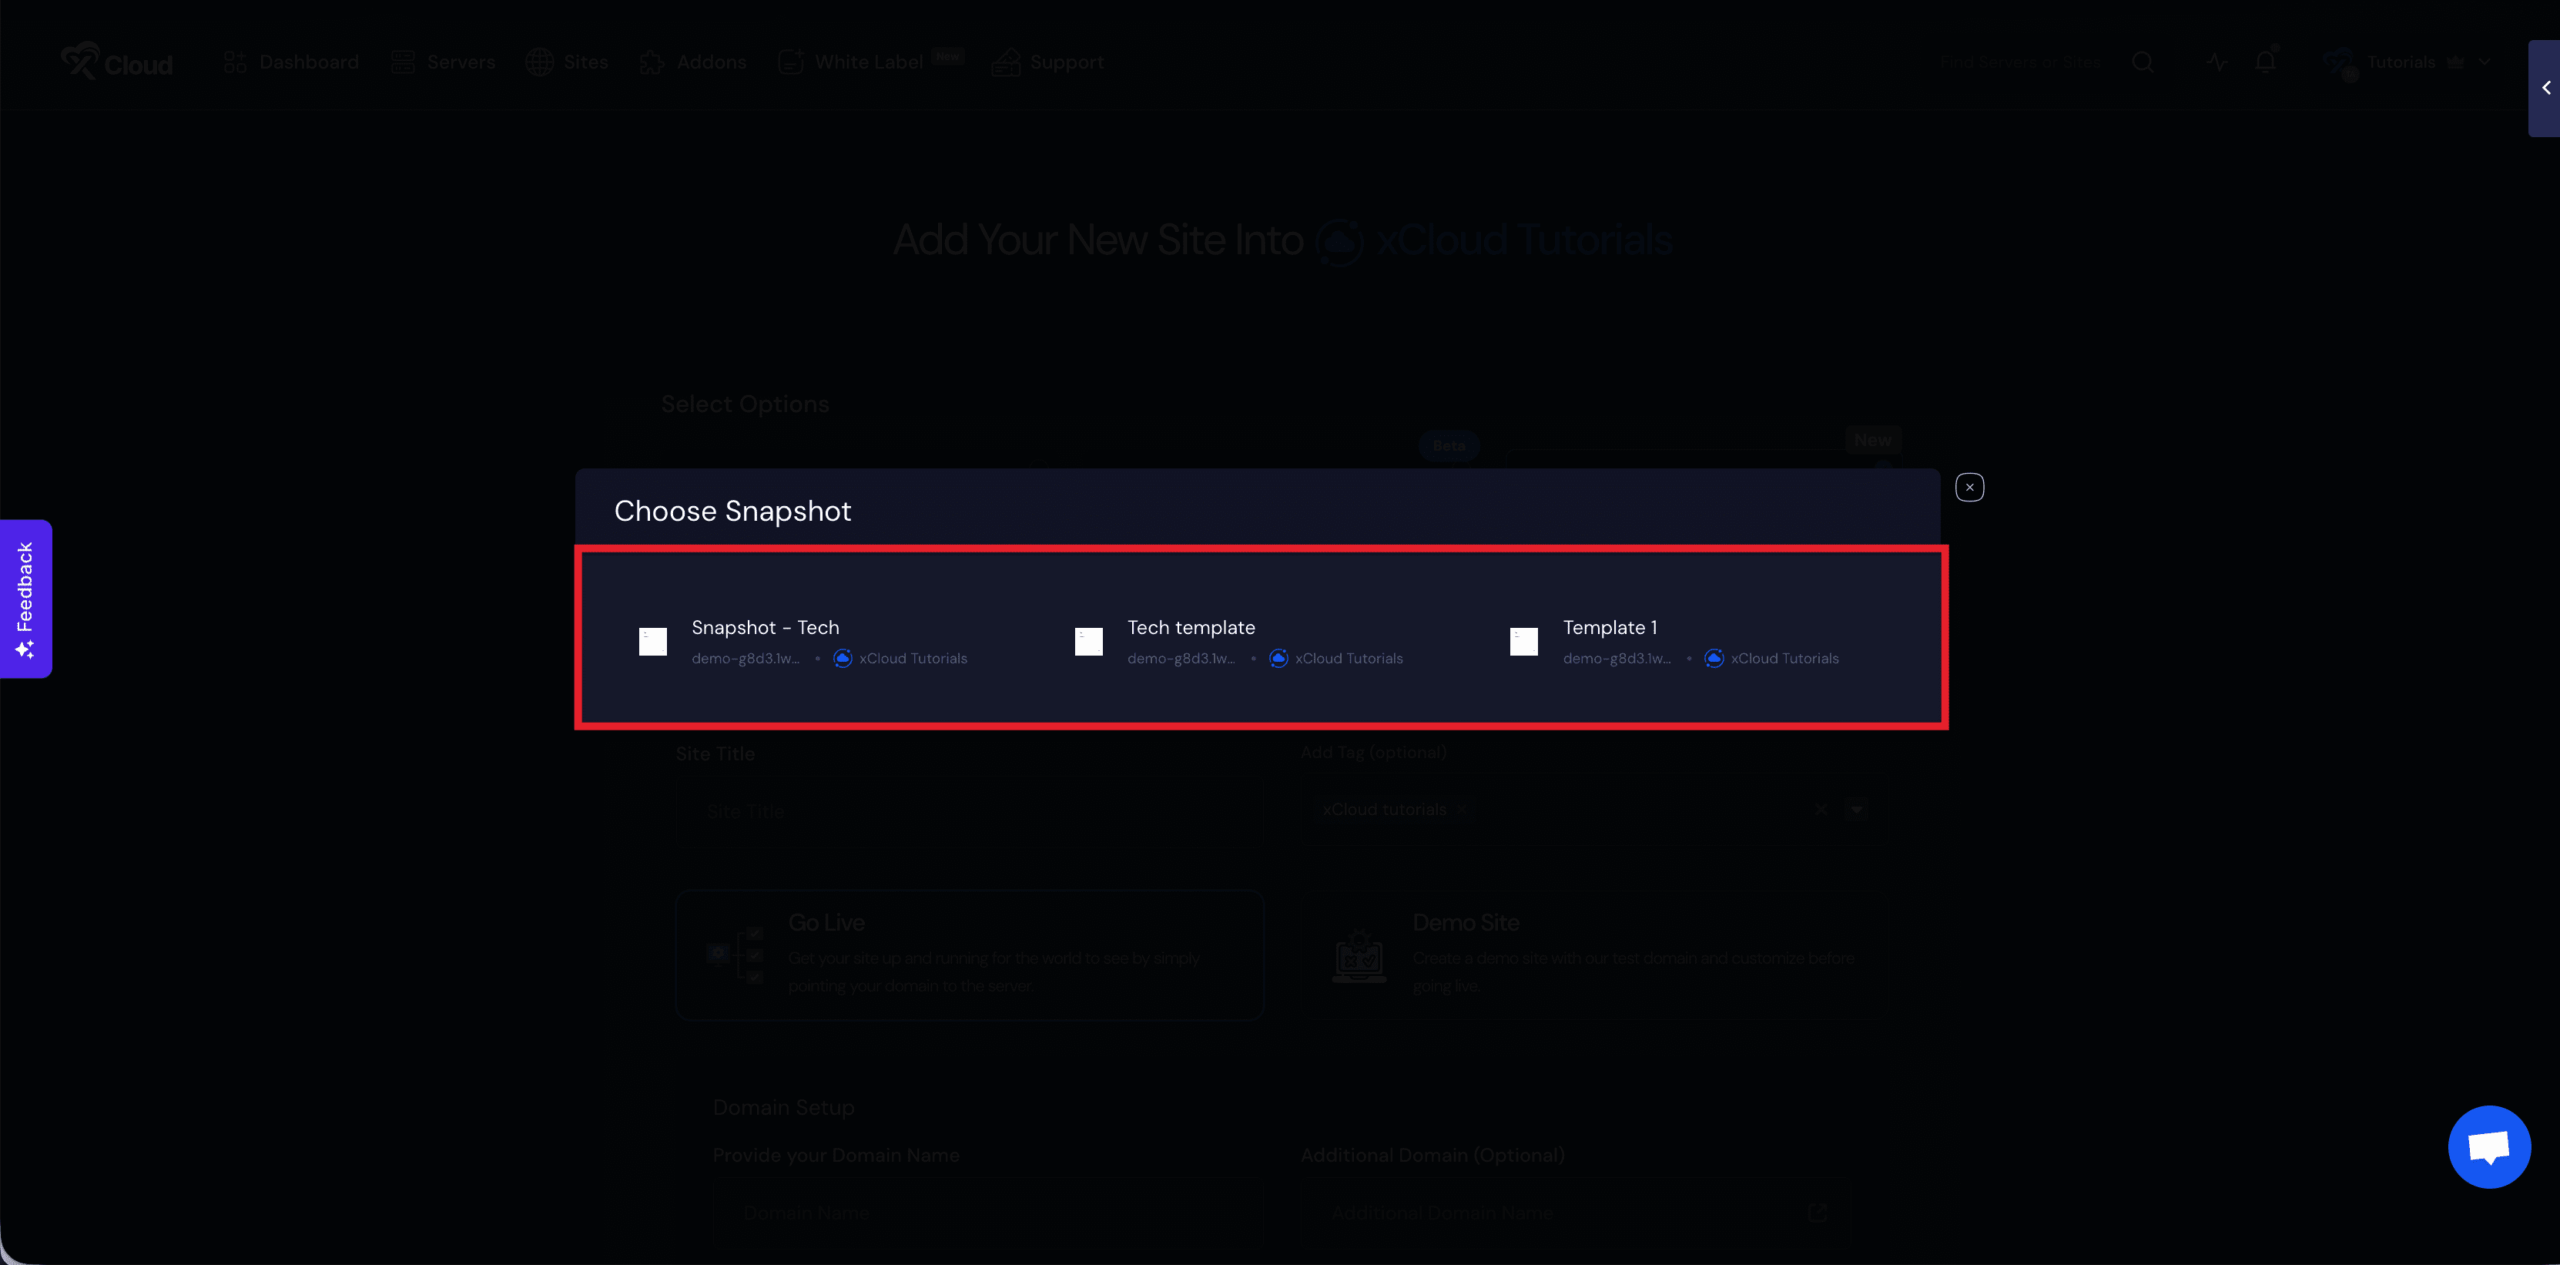
Step 5: Choose the Snapshots #
Next, in the pop-up, you will get the list of snapshots you have created. Choose your preferred one to proceed.
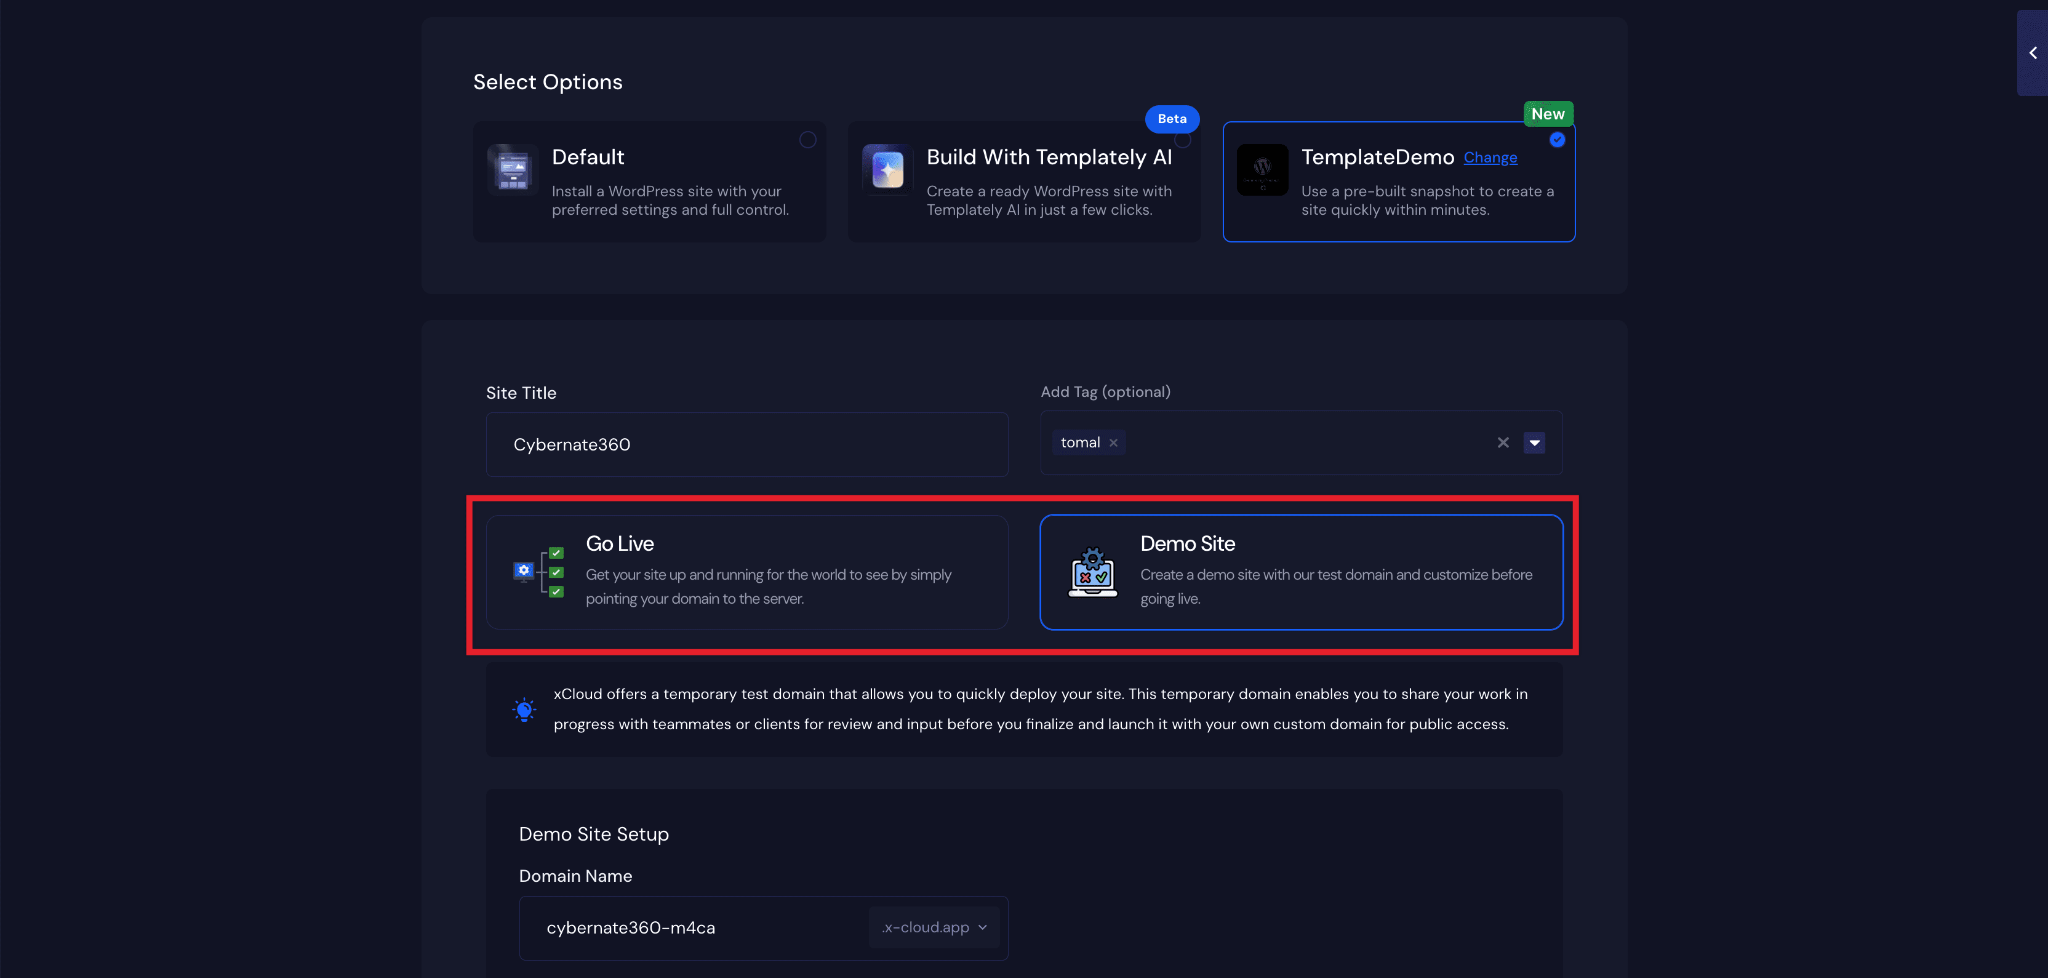
Step 6: Set Up Your Site #
In the site setup screen, you will be prompted to enter basic site information. Provide a ‘Site Title’ and add relevant ‘Tags’ to help organize your deployment.

At this point, you can choose between two deployment modes:
- Go Live – for a production-ready deployment.
- Demo Site – for deploying the site instantly with a demo domain from xCloud.
Selecting Go Live will immediately create a live environment, while Demo Site allows you to create a site using a temporary demo domain.
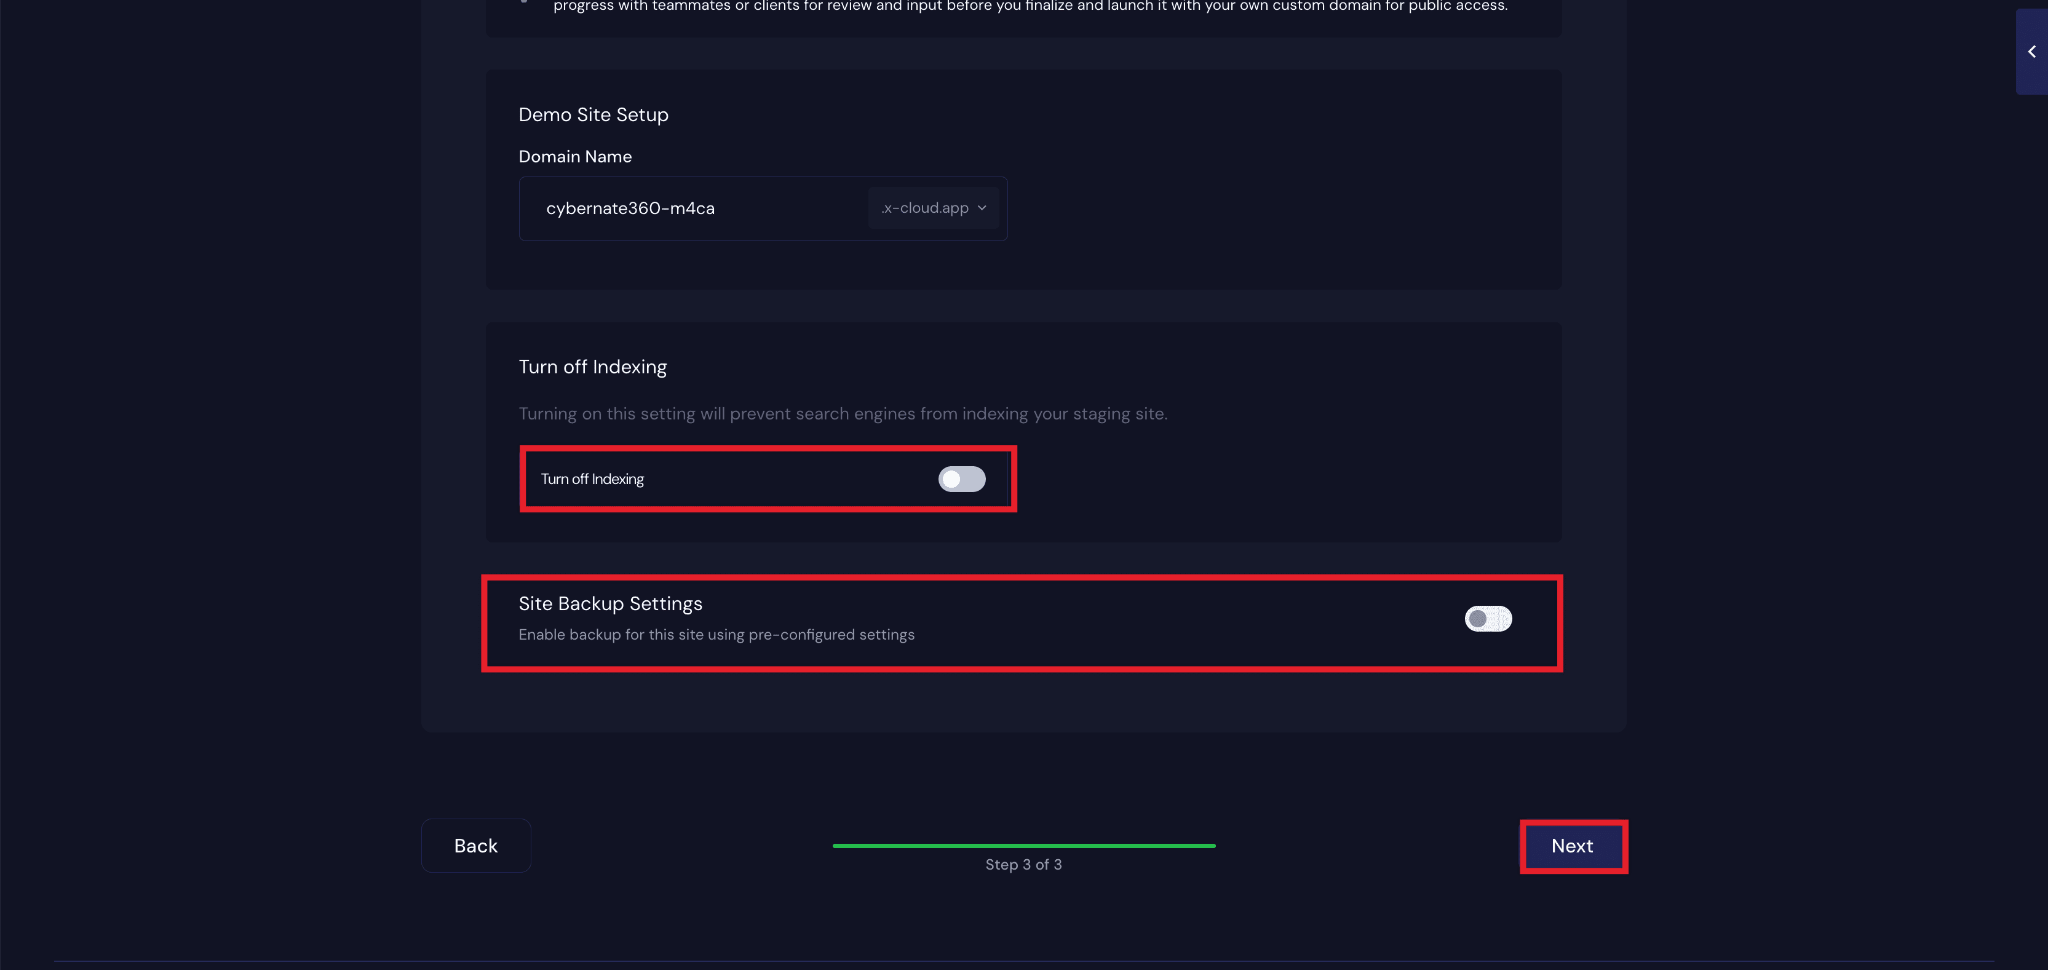
Step 7: Configure Domain Settings #
If you select the Demo Site option, xCloud will assign a temporary subdomain for your WordPress application. Next, enter your application’s domain.
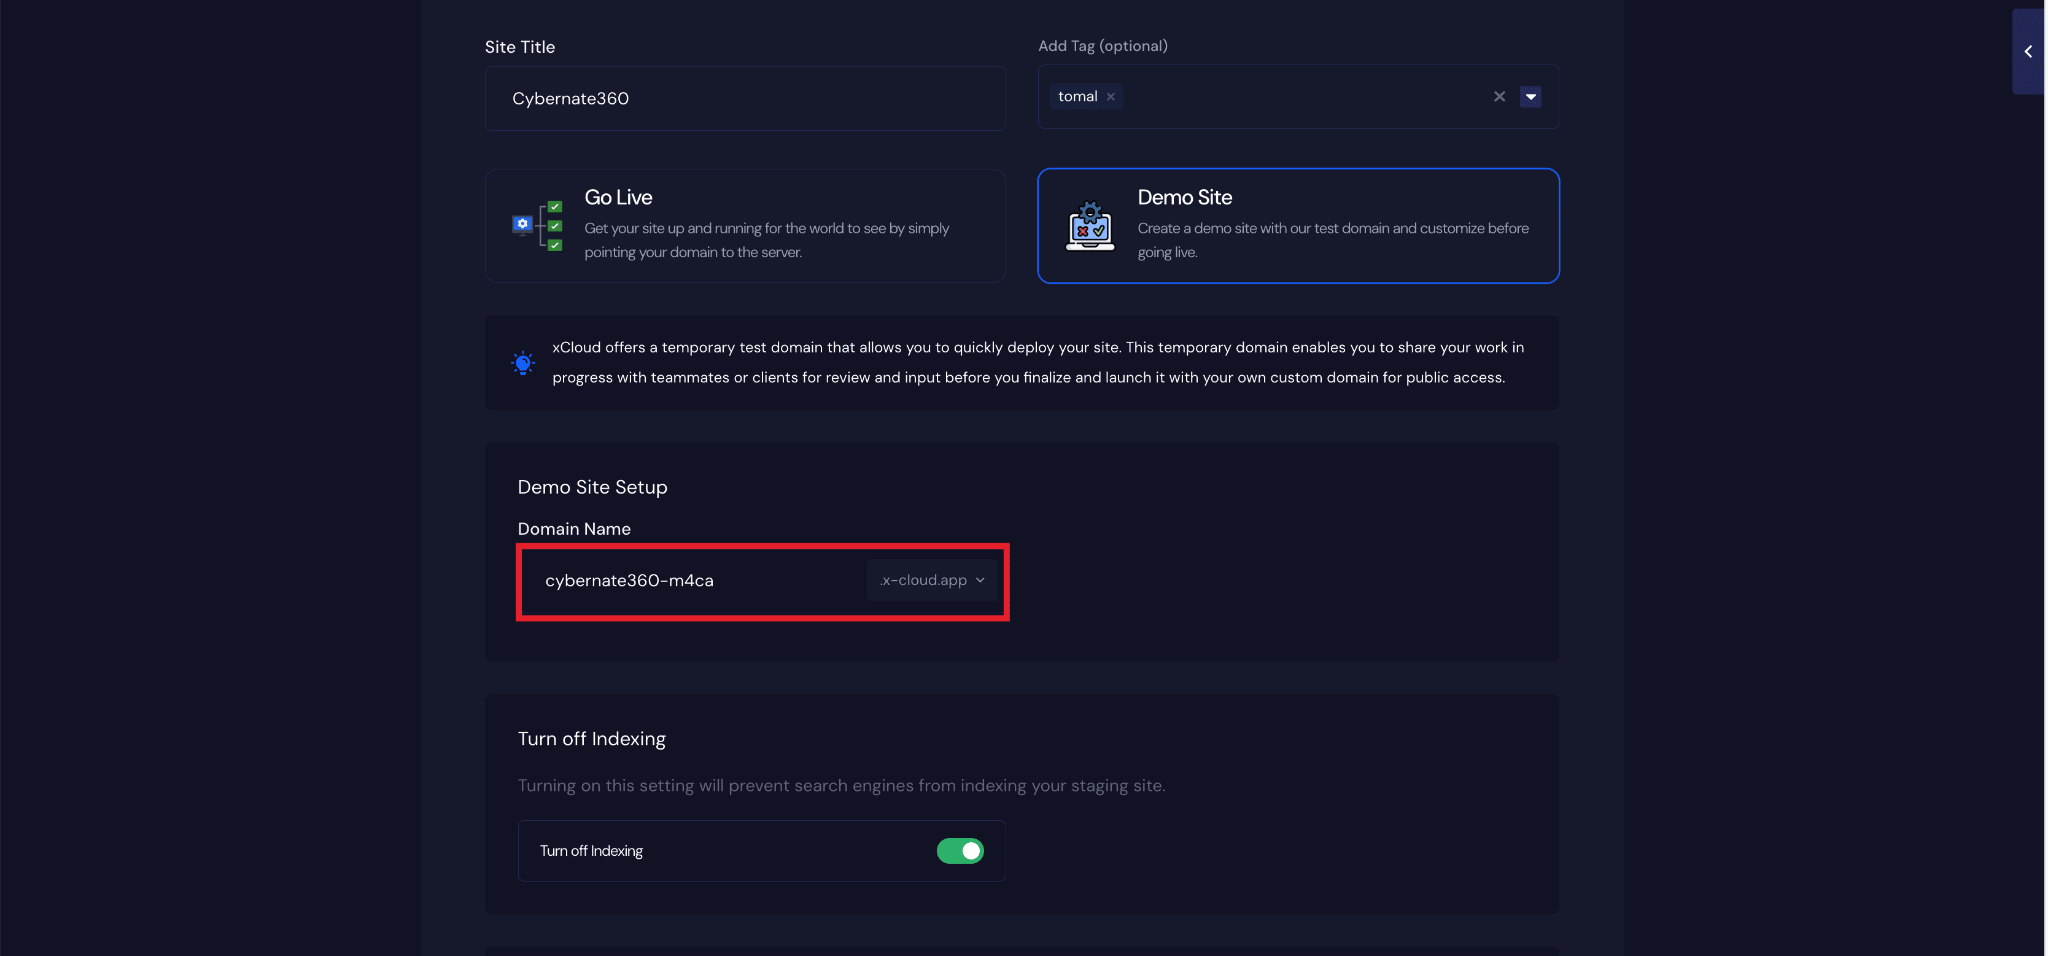
You will also get a few configuration options, including ‘Turn Off Indexing’, ‘Site Backup Settings’. Configure them according to your preferences and click on the ‘Next’ button.
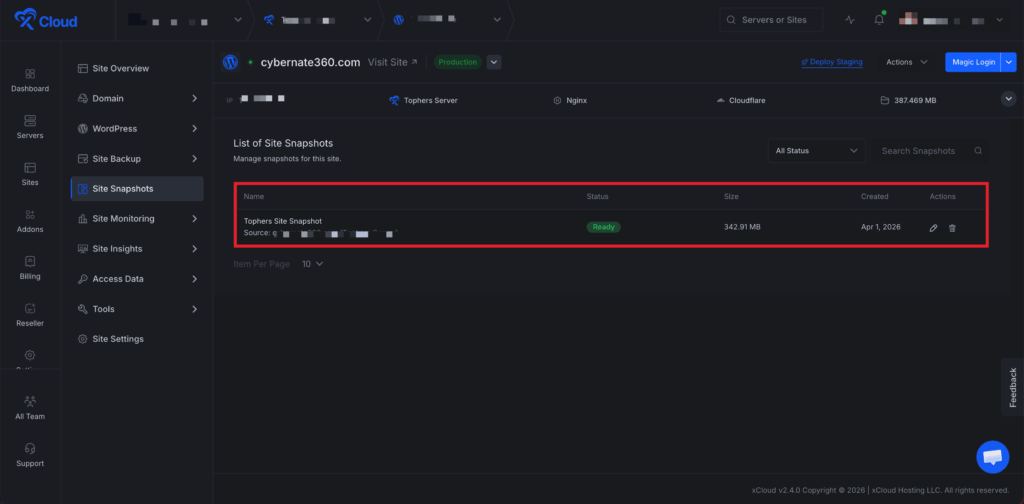
Manage Site Snapshots #
To manage the snapshots you have created under this site, go to the ‘Site Snapshots’ Option from the sidebar menu.
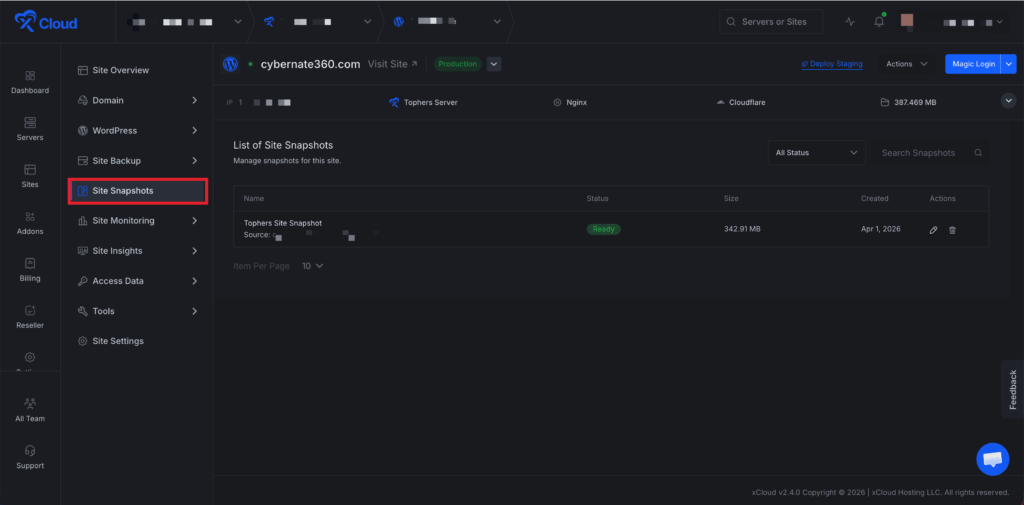
Here, you can view all your created snapshots in one place. You can select any specific snapshot to ‘Edit’ or ‘Delete’ it.
Now, you can manage all snapshots across your team. Go to Settings and navigate to Site Snapshots from the sidebar menu.
Here, you can view all snapshots from every site in the team in one place. You can select any snapshot to ‘Edit’ or ‘Delete’ it.

And that’s it. This is how easily you can create a site using the Site Snapshot feature in xCloud. It enables you to create new WordPress sites quickly and consistently, eliminating the need to repeat the same setup steps. By creating a snapshot once and reusing it whenever needed, you can deploy demo or live sites with minimal effort and maximum efficiency.


