


Securing SSH access is a critical step in protecting your server from unauthorized access. By default, SSH is often accessible from any IP address, which can expose the server to brute-force attacks and other security risks.
The SSH Restriction & Firewall IP Whitelisting System is a security feature designed to significantly reduce unauthorized access to servers by restricting SSH (port 22) access to a predefined set of trusted IP addresses only.
This system removes the commonly used but insecure “SSH (22) – Any” firewall rule and replaces it with a strict IP-based access control model. Only xCloud infrastructure and user-approved IP addresses are allowed to initiate SSH connections.
Follow the process for safely removing the default SSH firewall rule and restricting access to approved IP addresses, while ensuring that you do not lose access to your server.
Step 1: Navigate to Your Server #
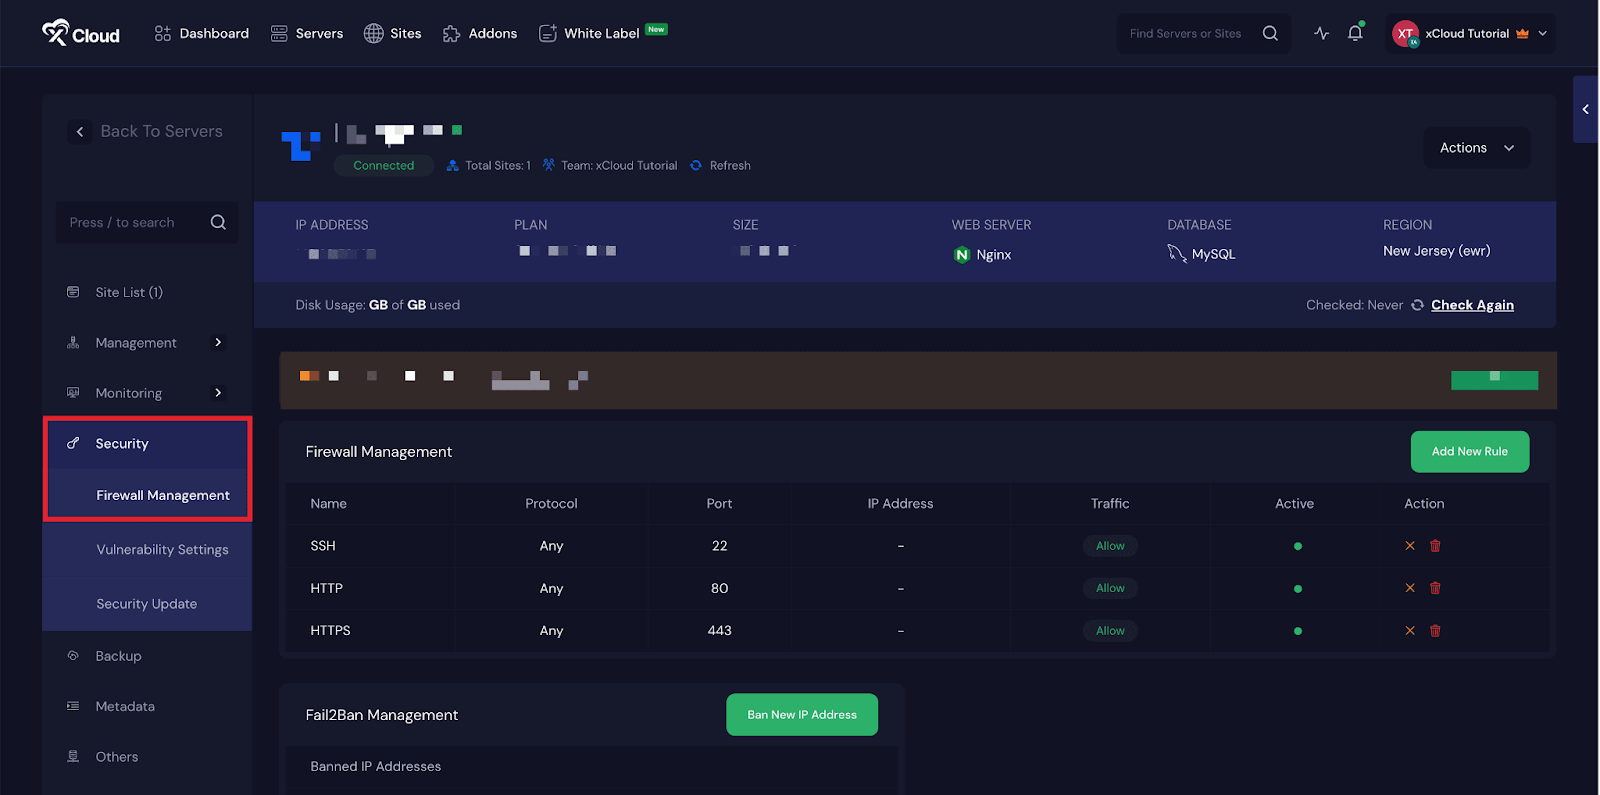
Begin by logging in to your server dashboard and selecting the server you want to secure. Once inside the server panel, navigate to ‘Security’, then open ‘Firewall Management’.
Here you will see all active firewall rules applied to your server, including the default SSH rule that permits access from any IP address.
Step 2: Delete the SSH Firewall Rule #
In the ‘Firewall Management’ page, locate the firewall rule labeled ‘SSH’, which typically allows inbound traffic on port 22 from all IP addresses. Click the ‘Delete’ icon next to this rule to begin the removal process.
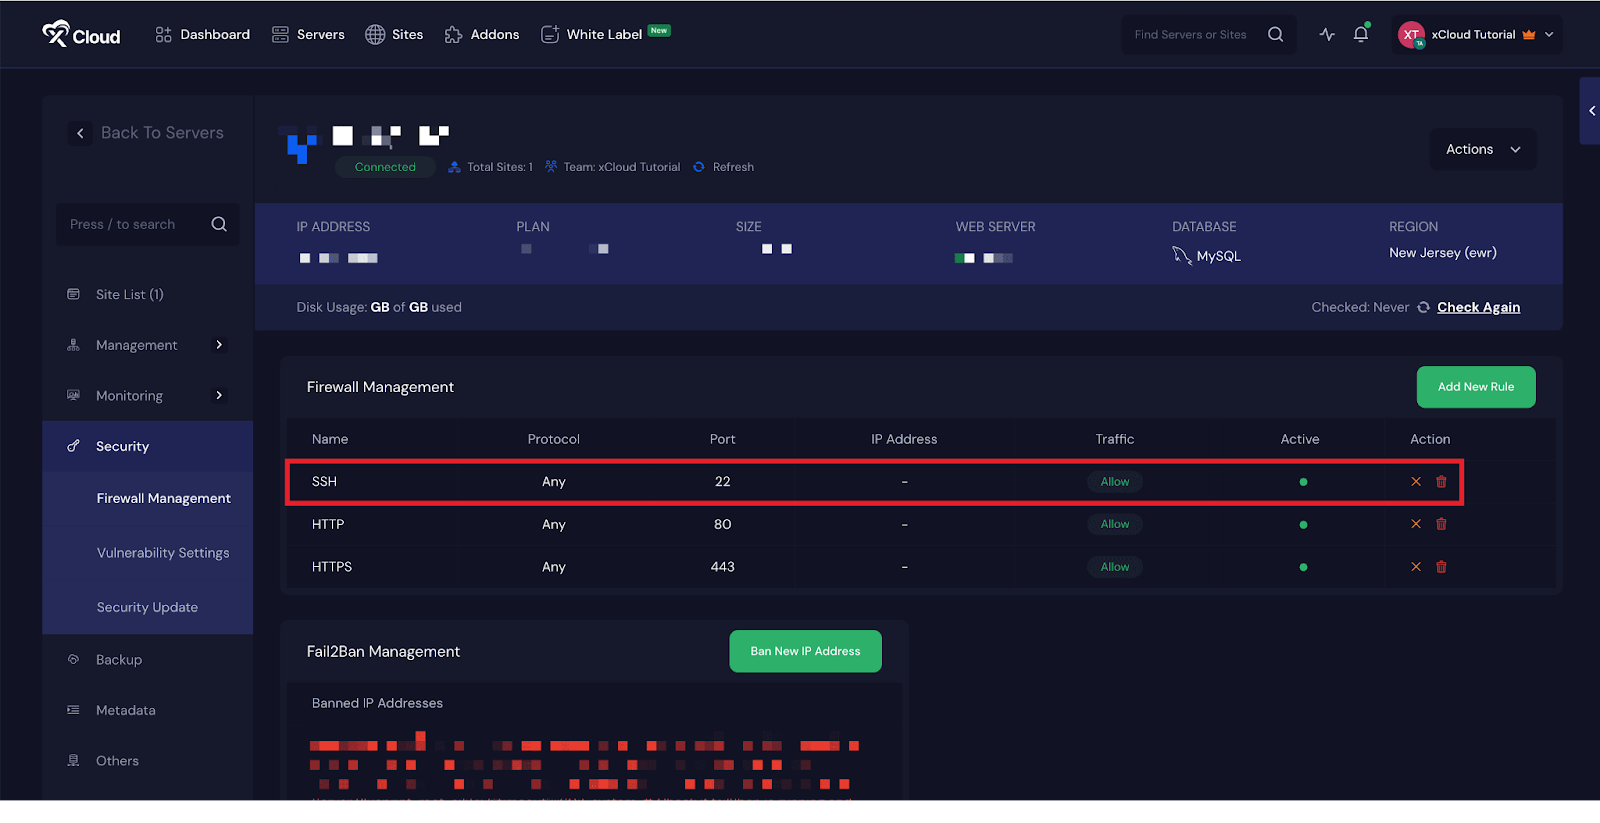
At this stage, the system will show a confirmation popup containing several critical warnings. These warnings are designed to ensure that you fully understand the impact of deleting the SSH rule.
Step 3: Review and Confirm Safety Warnings #
When attempting to delete the SSH firewall rule, you will be presented with important system warnings explaining that removing this rule will immediately revoke SSH access for all IP addresses.
To prevent accidental lockouts, the platform requires explicit confirmation of safety measures before allowing the SSH rule to be deleted. As part of this process:
- Infrastructure IP addresses will be automatically whitelisted to ensure that monitoring, backups, and emergency recovery services remain functional.
- xCloud infrastructure IP addresses will be automatically whitelisted, as they are mandatory to ensure that monitoring, backups, and emergency recovery services remain functional.Optionally, you may choose to whitelist your current public IP address. This option is user-controlled and can be enabled or disabled based on your preference. If selected, your public IP will be added to the whitelist so you retain SSH access after the rule is removed. If not selected, SSH access from your current IP will also be revoked.
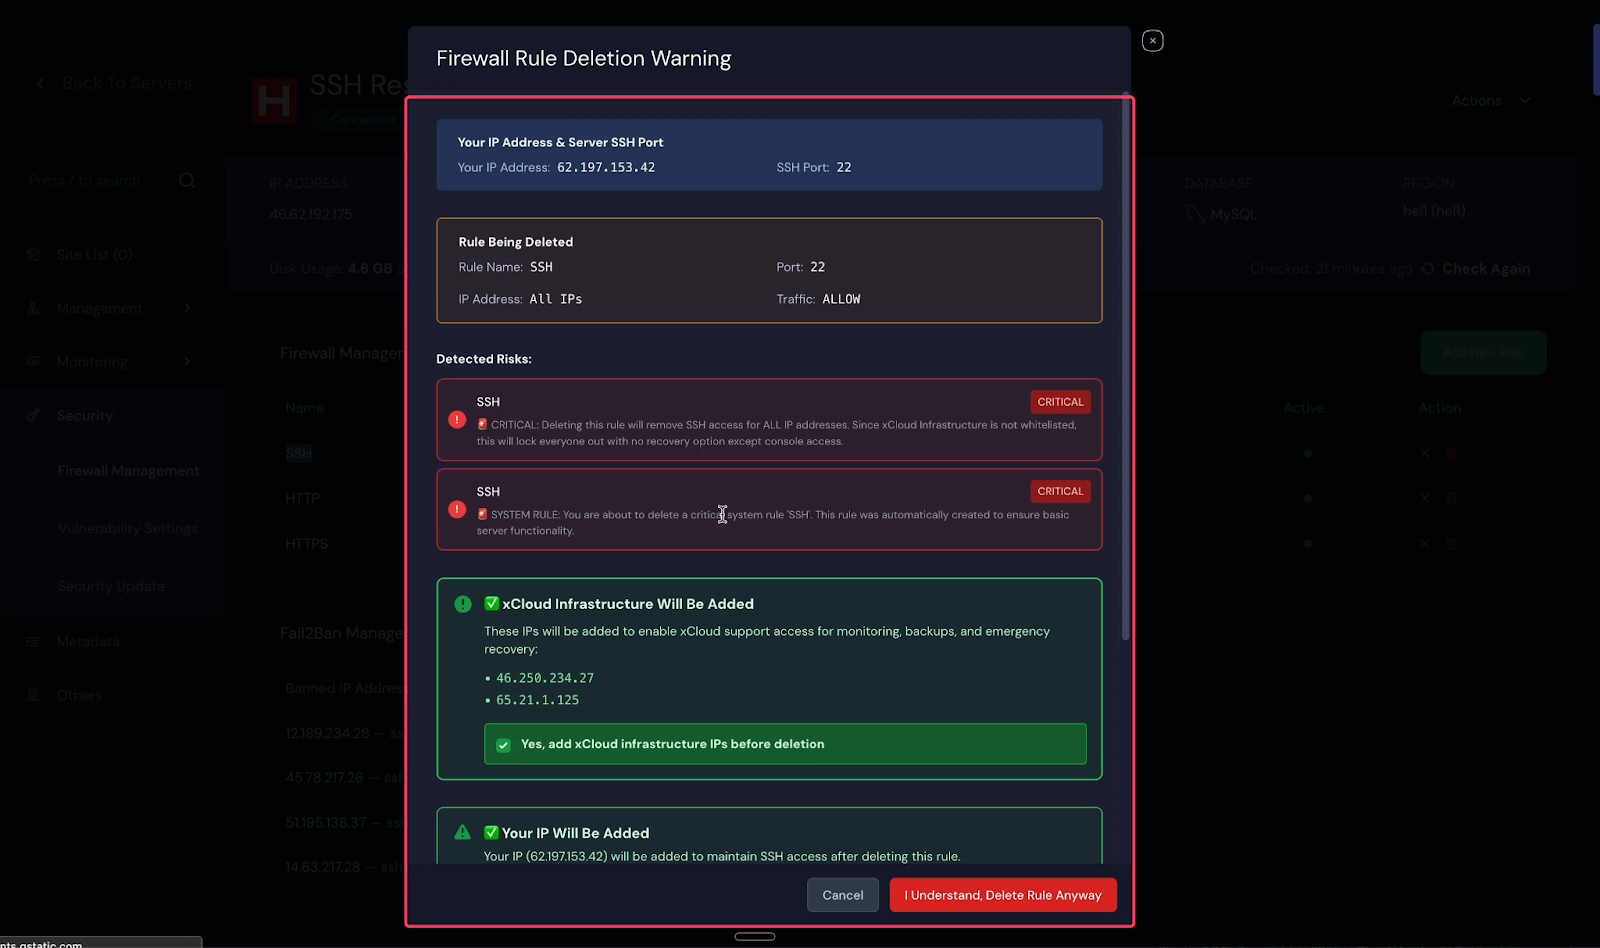
You must carefully read the warnings, acknowledge them by checking the required confirmation boxes.
The SSH firewall rule cannot be deleted until all required safety confirmations have been acknowledged. Once confirmed, the system will automatically whitelist the necessary infrastructure IPs along with your current IP address(Optional).
After reviewing all warnings and confirming the safeguards, proceed by selecting “I Understand and Delete Anyway.” The system will then remove the insecure SSH (port 22 – Any) firewall rule and immediately apply the new IP-based access restrictions.
Note: To access the whitelisted IP addresses, you can also visit this link.

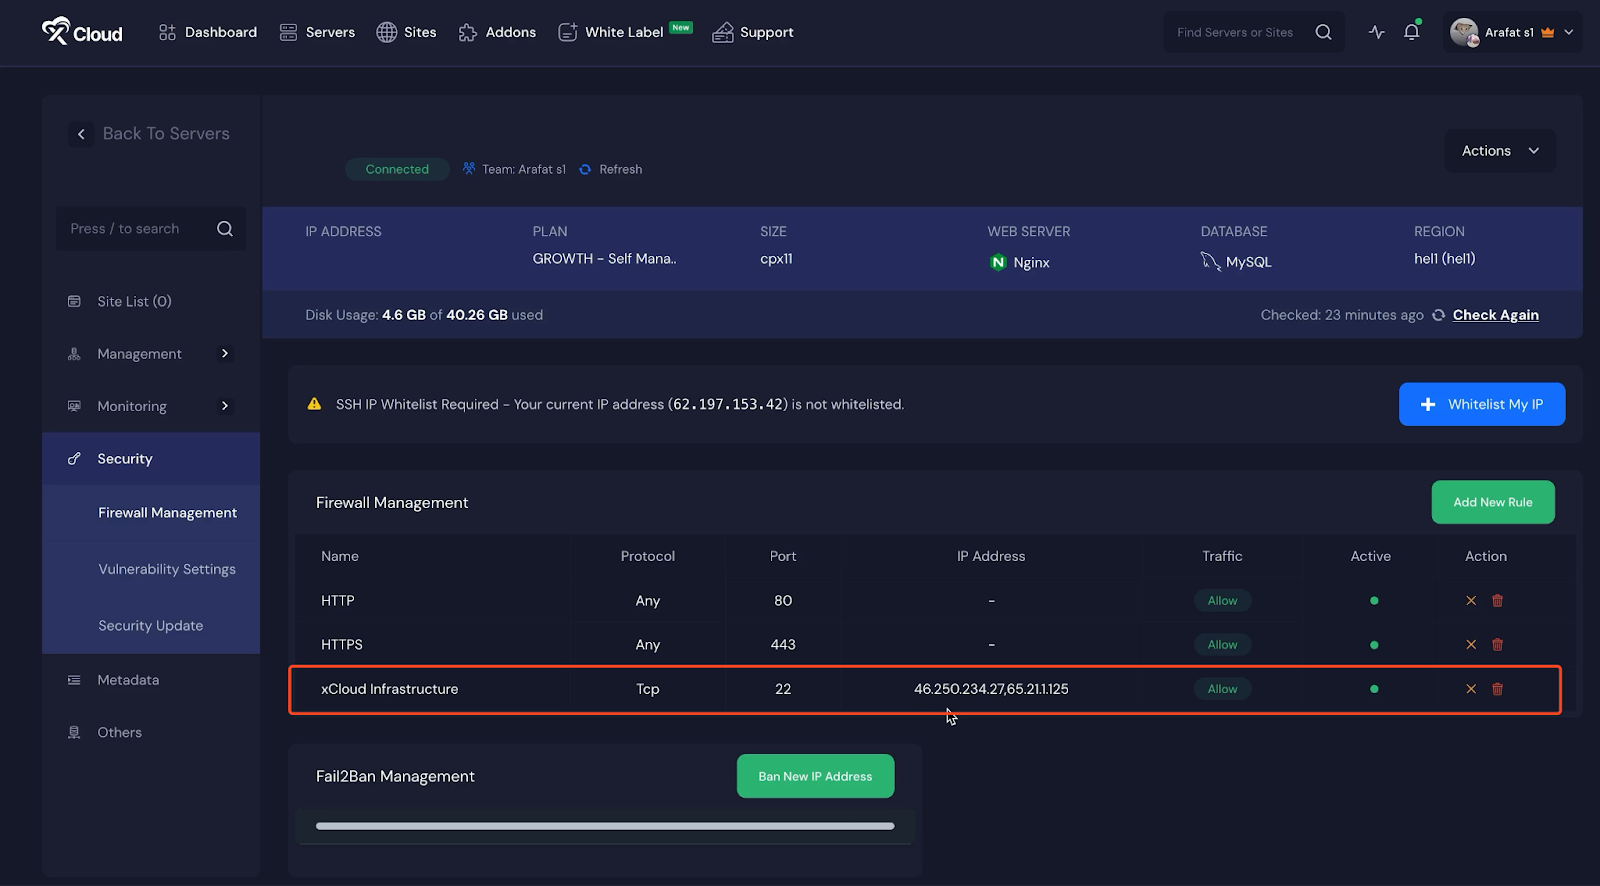
Once the process is complete, SSH access to your server will be fully restricted. Only approved IP addresses will be able to initiate SSH connections.
Re-Enabling SSH Access (If Needed) #
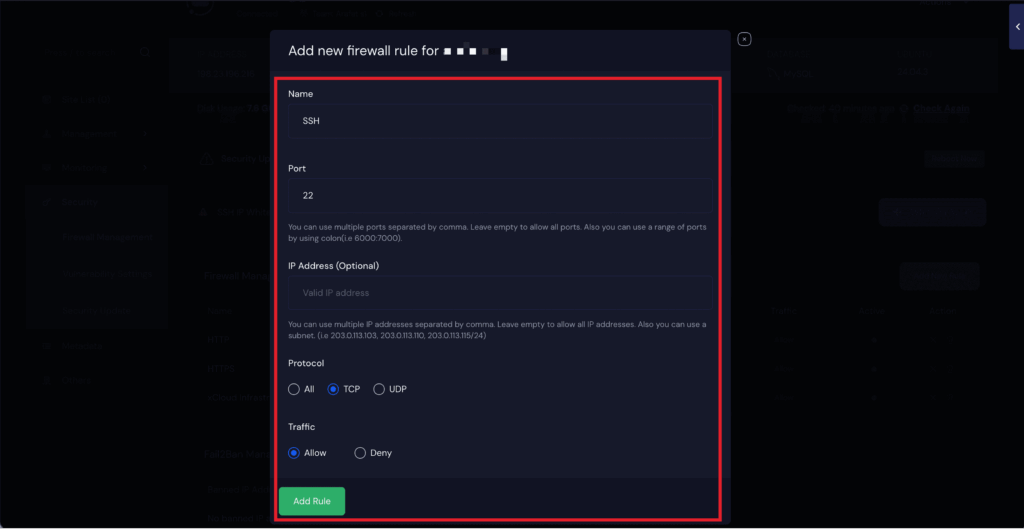
To re-enable SSH access, navigate to the firewall dashboard and click Add New Rule. A popup window will appear where you need to enter SSH in the Name field and 22 in the Port field.
In the ‘IP Address‘ field, you can specify a particular IP address to whitelist it, or leave the field blank to allow SSH access from all IP addresses. Next, set the ‘Protocol’ to ‘TCP’ and configure ‘Traffic‘ as ‘Allow’. Once all details are entered, click ‘Add Rule’ to apply the changes and restore SSH access to your server.
And that’s it. With these steps, you can easily restrict SSH access to approved IP addresses only or later re-enable, improving server security while maintaining uninterrupted access.


