


Websites require regular backups to ensure data safety and quick recovery in case of accidental loss, server failure, or security breaches. Many users prefer storing backups on external storage systems for added security and reliability.
With xCloud, you can easily integrate an SFTP storage provider to securely store your site backups, manage them efficiently, and automate backup schedules, all within a single platform.
In this guide, you will learn how to integrate SFTP storage provider with xCloud to set up a seamless and reliable backup solution for your site.
Step 1: Prepare the Backup Directory on Your SFTP Server #
First, collect the required credentials for your SFTP user account. You will need:
- Hostname or IP address
- Port number (default is 22)
- Username
- Password
- Path (directory where backups will be stored)
Before you start integrating SFTP with xCloud, you need to make sure the backup directory has the correct permissions. Connect to your SFTP server using SSH.
ssh jhon@XX.XX.XX.XXCheck the file permissions of your backup directory
ls -ld /path-to/jhon-backup-testExample output:
drwxr-xr-x 2 root root 4.0K Sep 15 18:13 jhon-backup-testHere, the directory is owned by root, which means the user arafat cannot write to it yet. Give the user full access. Run the following commands to update ownership and permissions to ensure that the user has full access to the backup directory.
sudo chown -R jhon:jhon /path-to/arafat-backup-test

chmod -R 700 /path-to/jhon-backup-test
This ensures that the user has full access to the backup directory.
Integrate SFTP Storage Provider in xCloud #
Once you have gathered all the required details, you can move forward with configuring the SFTP storage provider in xCloud. With this setup, your SFTP server will be connected to your xCloud account, making it possible to use it as a secure storage option for your site backups.
Step 2: Choose the New Storage Provider #
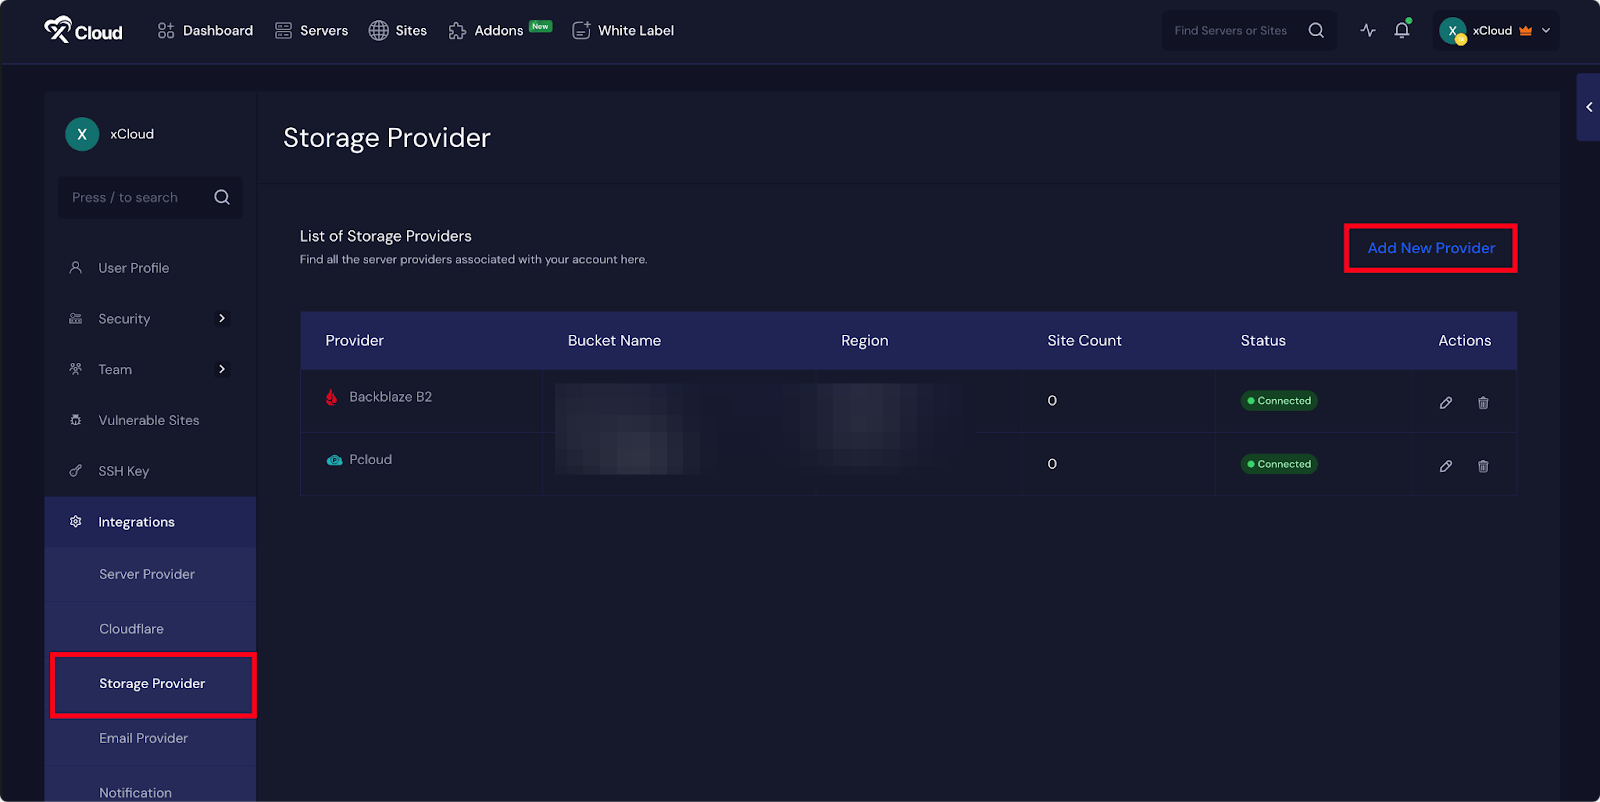
To add the storage provider, go to your xCloud dashboard and go to ‘My Profile’ from the top right menu. Then navigate ‘Integrations’ → ‘Storage Provider’ option from the sidebar menu. From there, click on the ‘Add New Provider’ button to integrate SFTP storage provider.
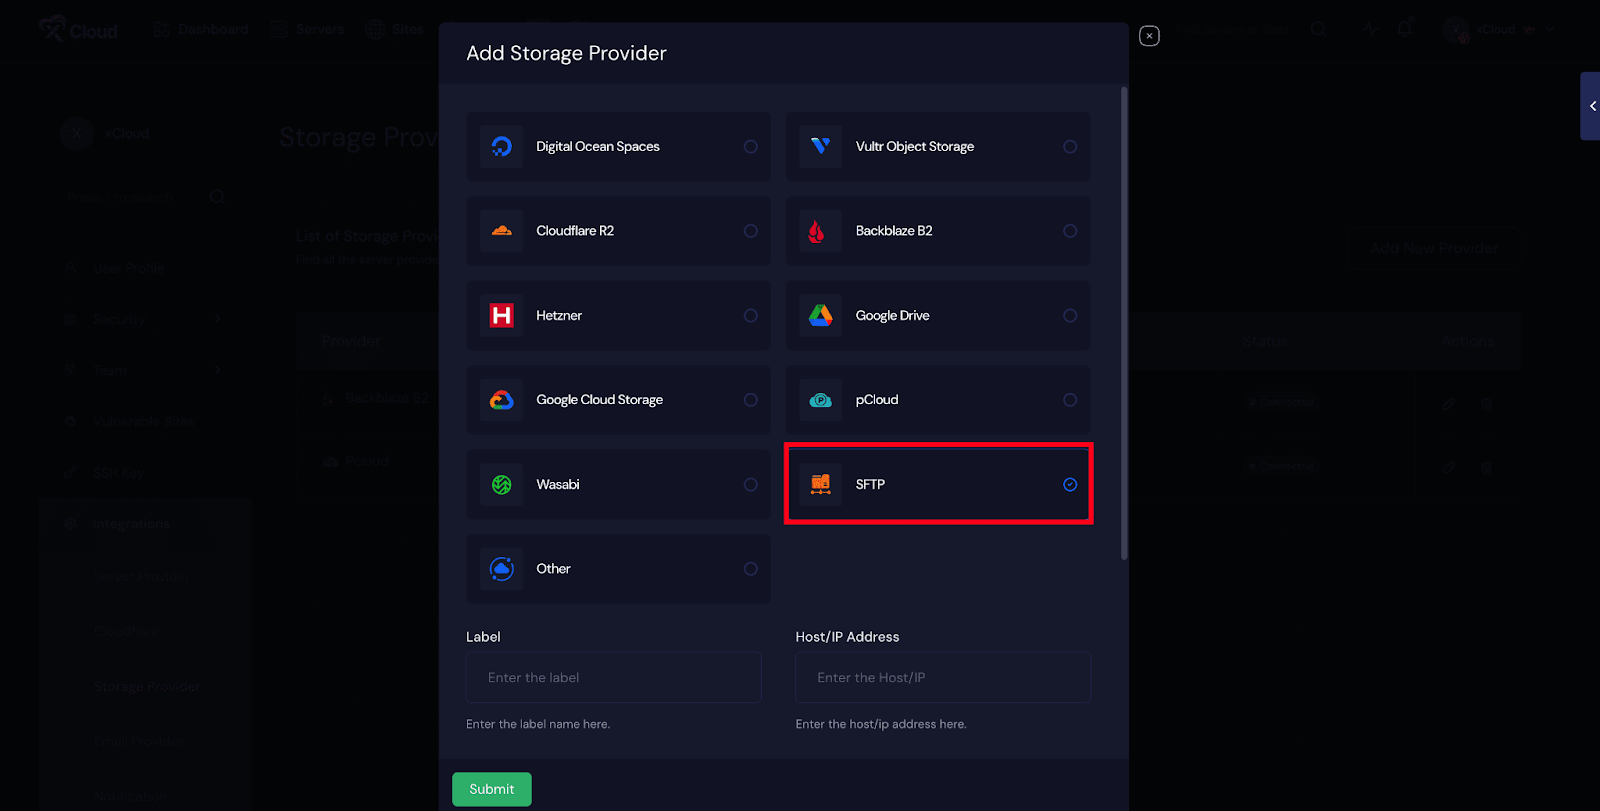
A pop-up will appear, where you will find all the storage integrations available to integrate with xCloud. Then, select the ‘SFTP’ as your storage provider to integrate with xCloud.
Step 3: Fill in the Required Information #
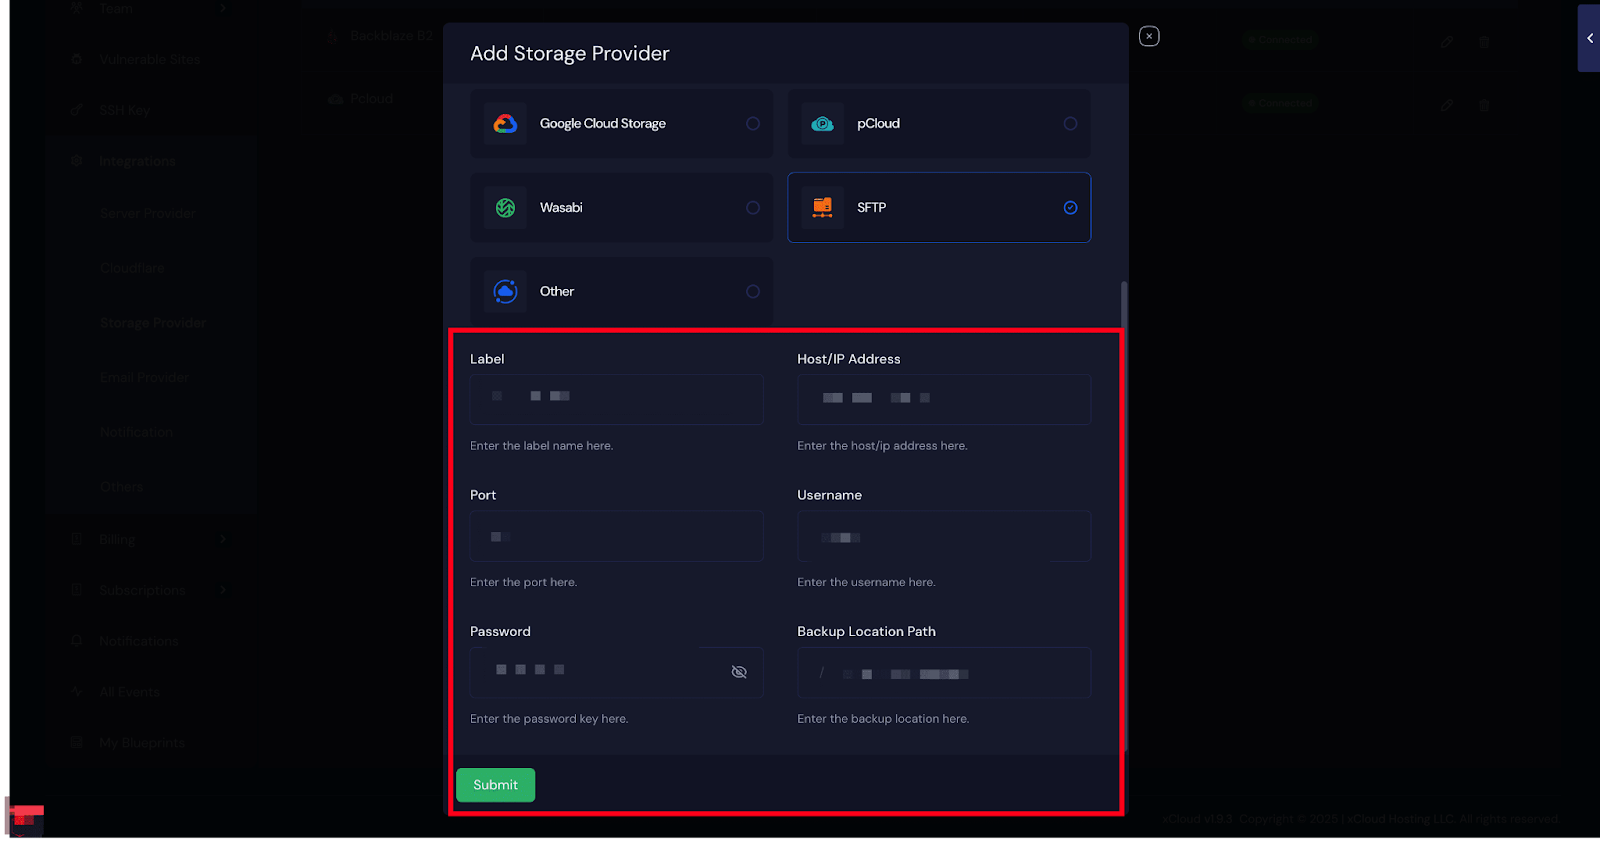
Next, provide the following details in the blank fields:
- Label: Enter a name for your SFTP integration.
- Host: Enter the hostname or IP address of your SFTP server.
- Port: Enter the port number of your SFTP server. If left blank, the default port 22 will be used.
- Username: Enter the username of your SFTP account.
- Password: Enter the password of your SFTP account.
- Path: Enter the directory path where you want to store the backup files (for example: /data1/home/1234/xcloud-backup). Make sure this directory exists on your server. If you leave this blank, the default path /home/{username} will be used.
After entering all the credentials, click on the ‘Submit’ button. Once submitted, your SFTP storage will be added to xCloud. You can now use it for site backups. If the integration is successful, it will appear in your dashboard.
Step 4: Configure Site Backup Settings in xCloud #
Now, in the ‘Remote Backup’ section, choose Backup Type as ‘Full’ and select the bucket you have just created for SFTP. You can then choose to exclude paths if necessary (for the paths you do not want to take backup).
Then, you can also enable ‘Automatic Backup’ and choose the backup frequency. Plus, you have the option to use the ‘Automatic Delete’ option with which you can set days after when your backup will be deleted automatically. Once done, hit the ‘Save’ button.

This is how you can easily integrate an SFTP storage provider and configure site backups in xCloud with SFTP.
If you encounter any difficulties, feel free to reach out to our support team for assistance.


