


Backing up your site is one of the most important steps you can take to protect your data and ensure business continuity. Data loss can occur for many reasons, such as system errors, accidental deletion, or even natural disasters. To avoid these risks, you need a reliable storage provider integrated with your backup system.
Wasabi is a high-performance cloud storage solution that offers affordable, secure, and scalable storage. When combined with xCloud, it allows you to set up a smooth and efficient backup process for your site.
In this guide, we will learn how to integrate Wasabi Storage provider with xCloud to set up a seamless, efficient backup solution for your site.
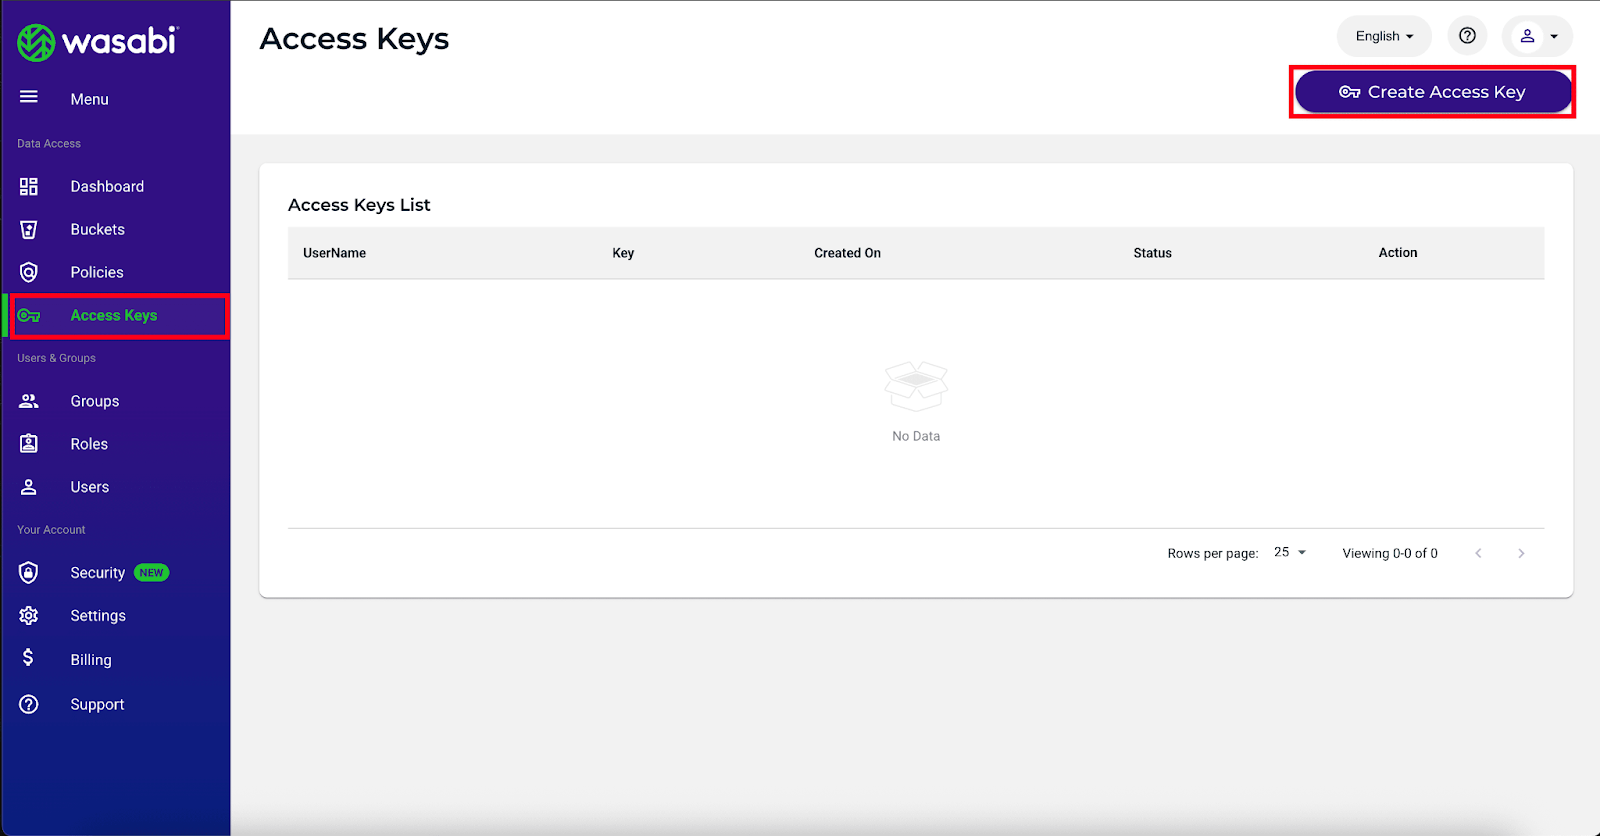
Step 1: Generate Access Key on Wasabi #
First, go to the Wasabi, click on ‘Access Keys’ on the left sidebar. Click on the ‘Create New Access Key’ button.
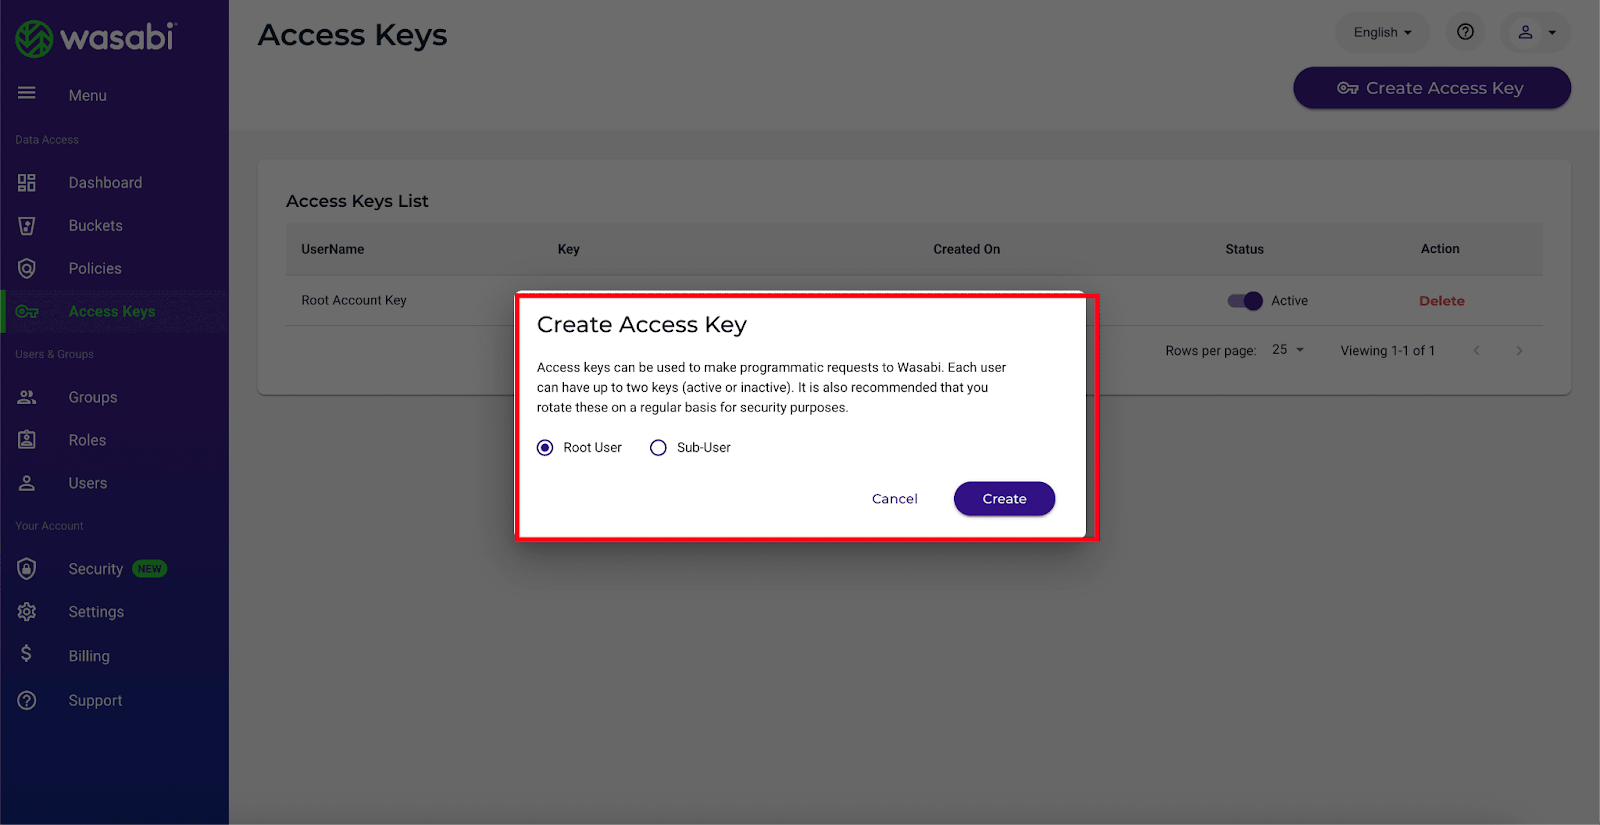
After, you can choose ‘Root User’ or ‘Sub-User’ as you wish. Next, click on ‘Download CSV’ or ‘Copy Keys To Clipboard’ and save them.
Note: Once you will click on the copy keys to the clipboard, you will get two keys: ‘Access Key’ and ‘Secret Key’. Store these keys securely to integrate with xCloud.
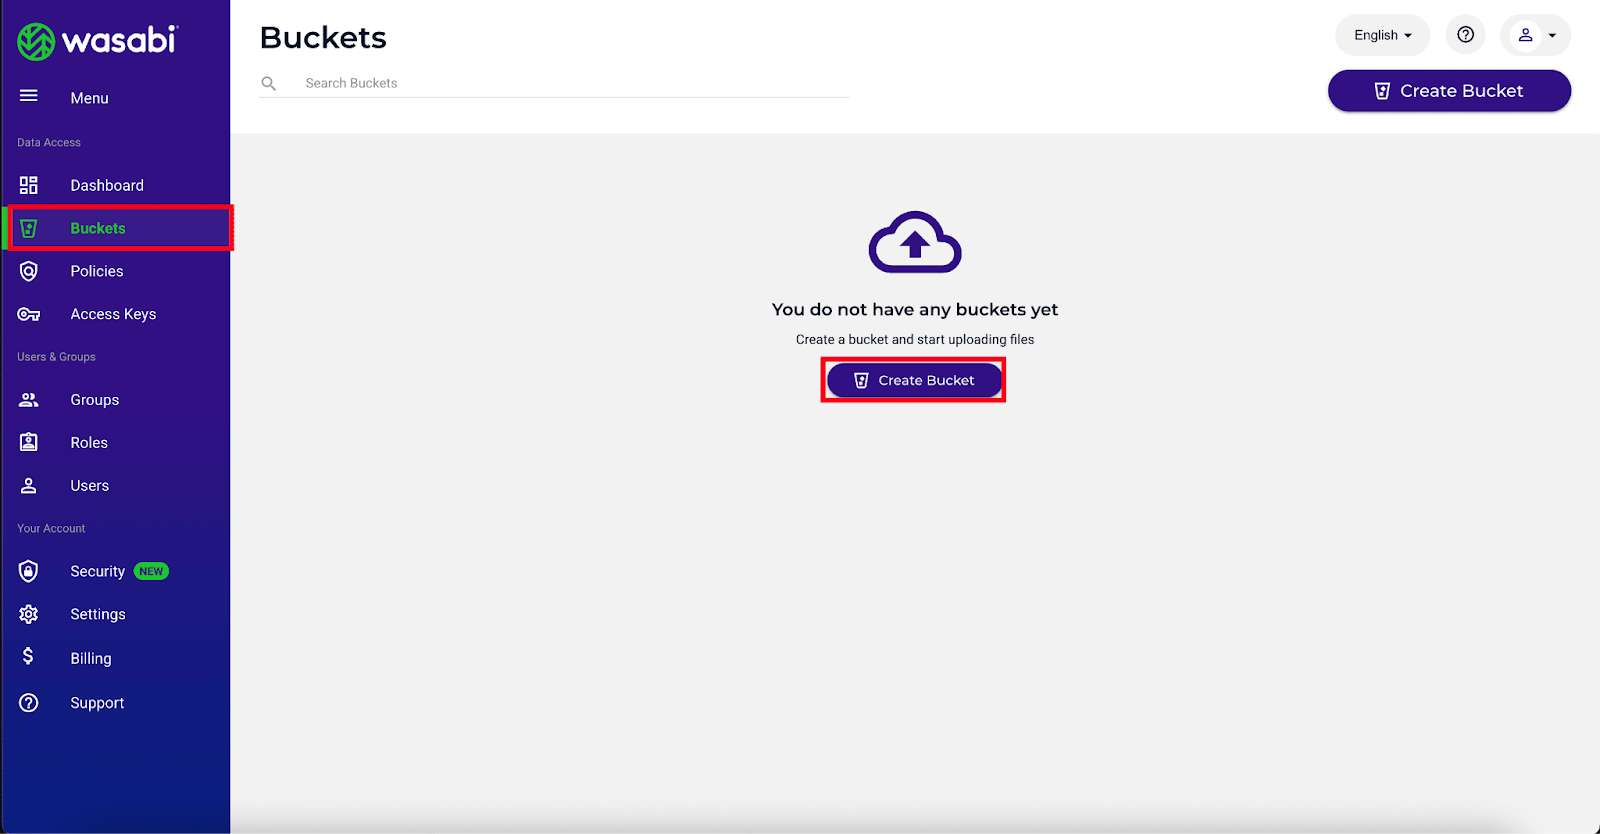
Step 2: Create a Bucket On Wasabi #
Next, go to the ‘Buckets’ option from the sidebar and click on the ‘Create Bucket’ option to create a new bucket for your site backups.
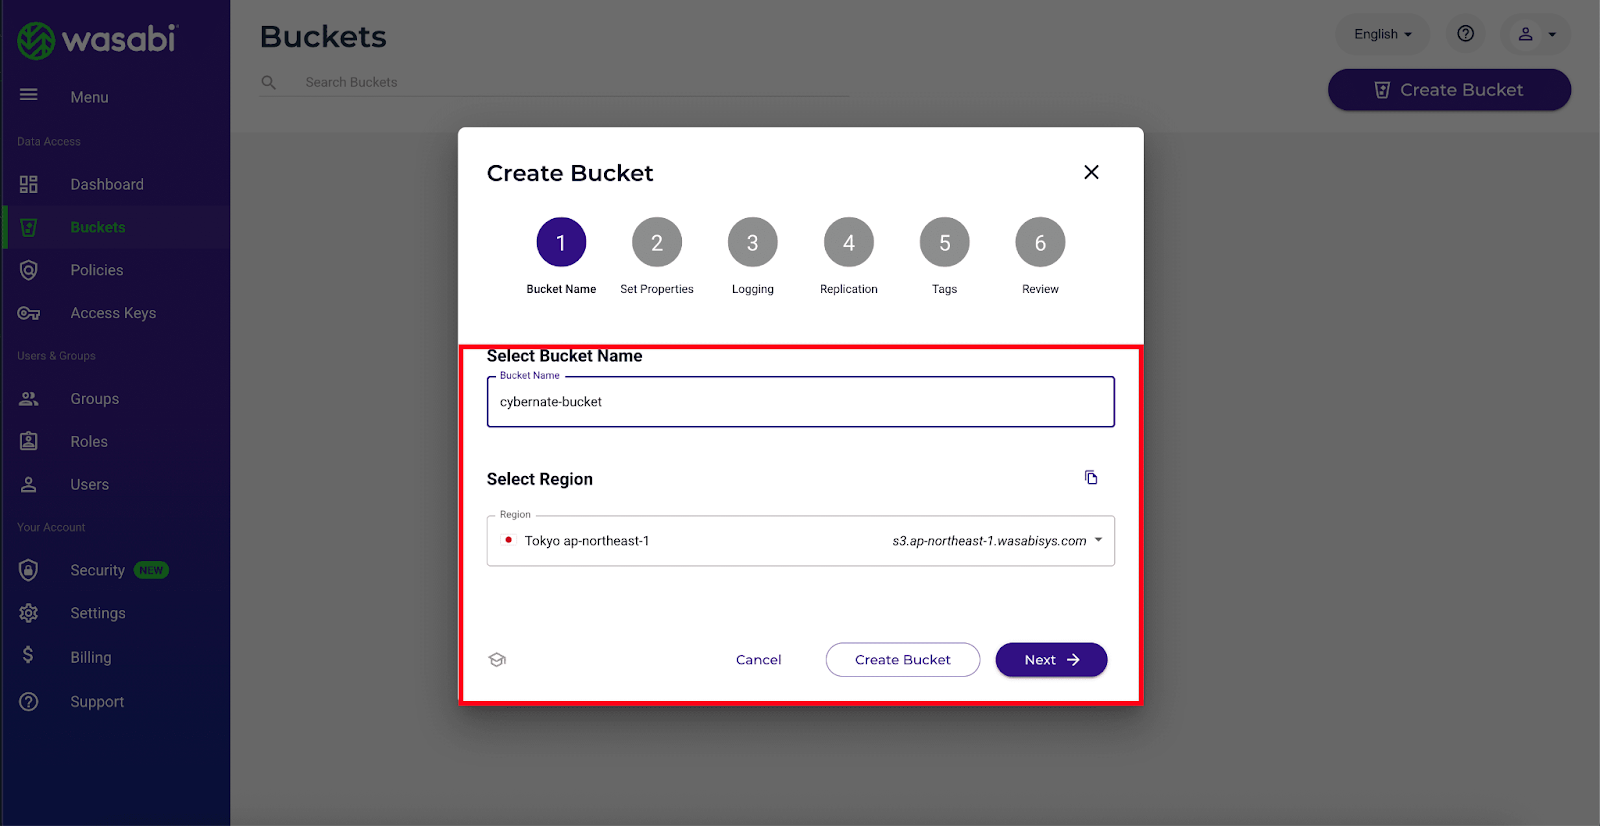
You need to enter a bucket name and select a region for the storage bucket, then click the Create Bucket button. Once the bucket is created, collect the region code such as ap-northeast-1 along with the endpoint URL displayed on the right side, for example s3.ap-northeast-1.wasabisys.com. These details are required for integration with xCloud.
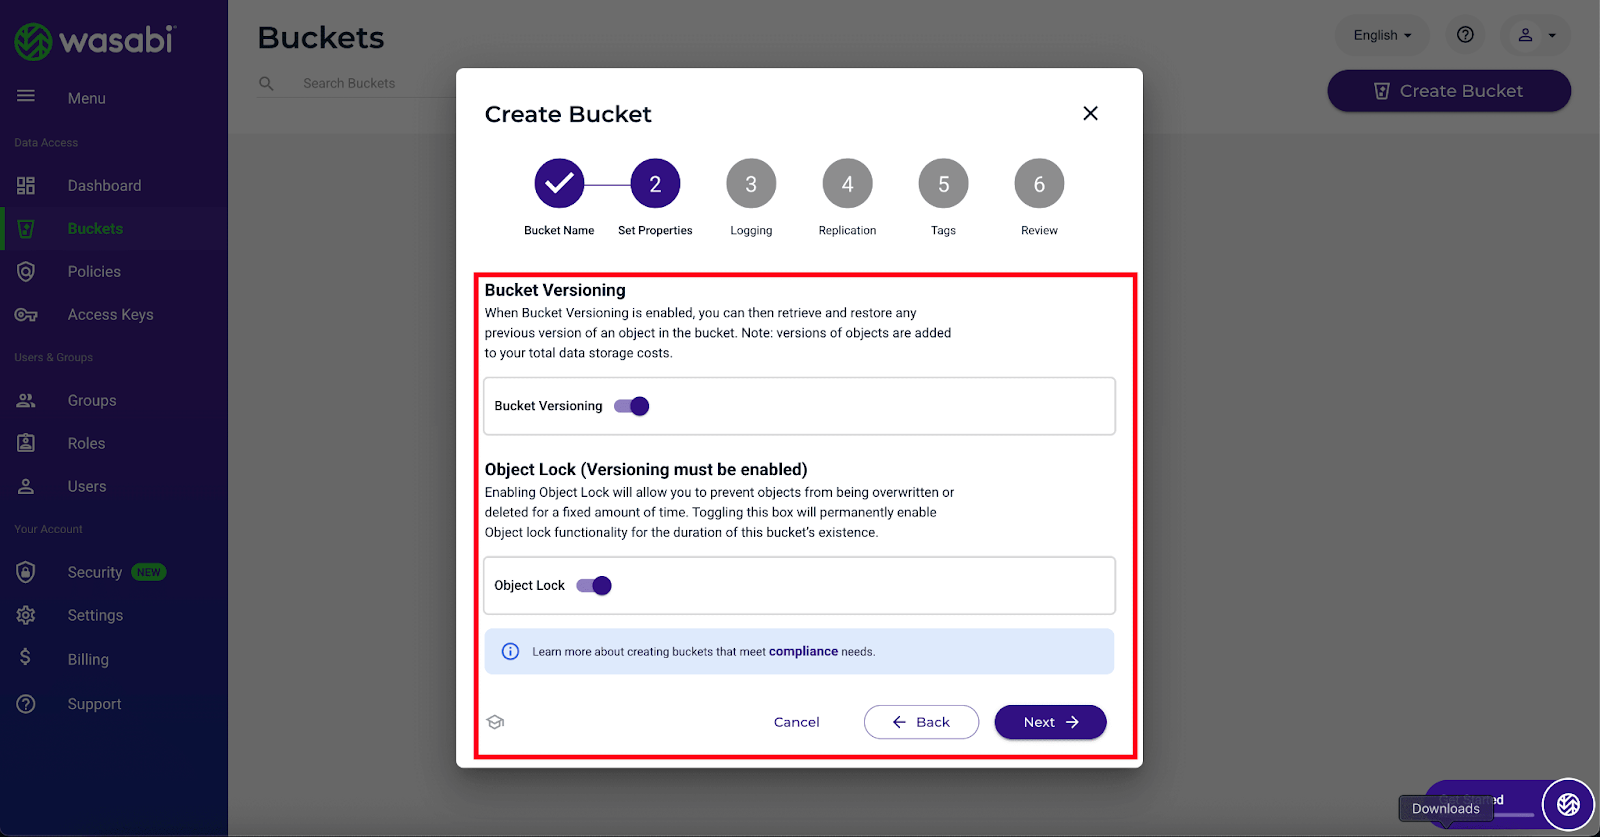
Next, set properties for this bucket like ‘Bucket Versioning’ and enable ‘Object lock’ and click on the ‘Next’ button.

Note When Bucket Versioning is enabled, you can then retrieve and restore any previous version of an object in the bucket. Note: versions of objects are added to your total data storage costs. Enabling Object Lock will allow you to prevent objects from being overwritten or deleted for a fixed amount of time. Toggling this box will permanently enable Object lock functionality for the duration of this bucket’s existence.
Then you can enable ‘Bucket Logging’, a text log file of all access to this bucket is created in the bucket specified.

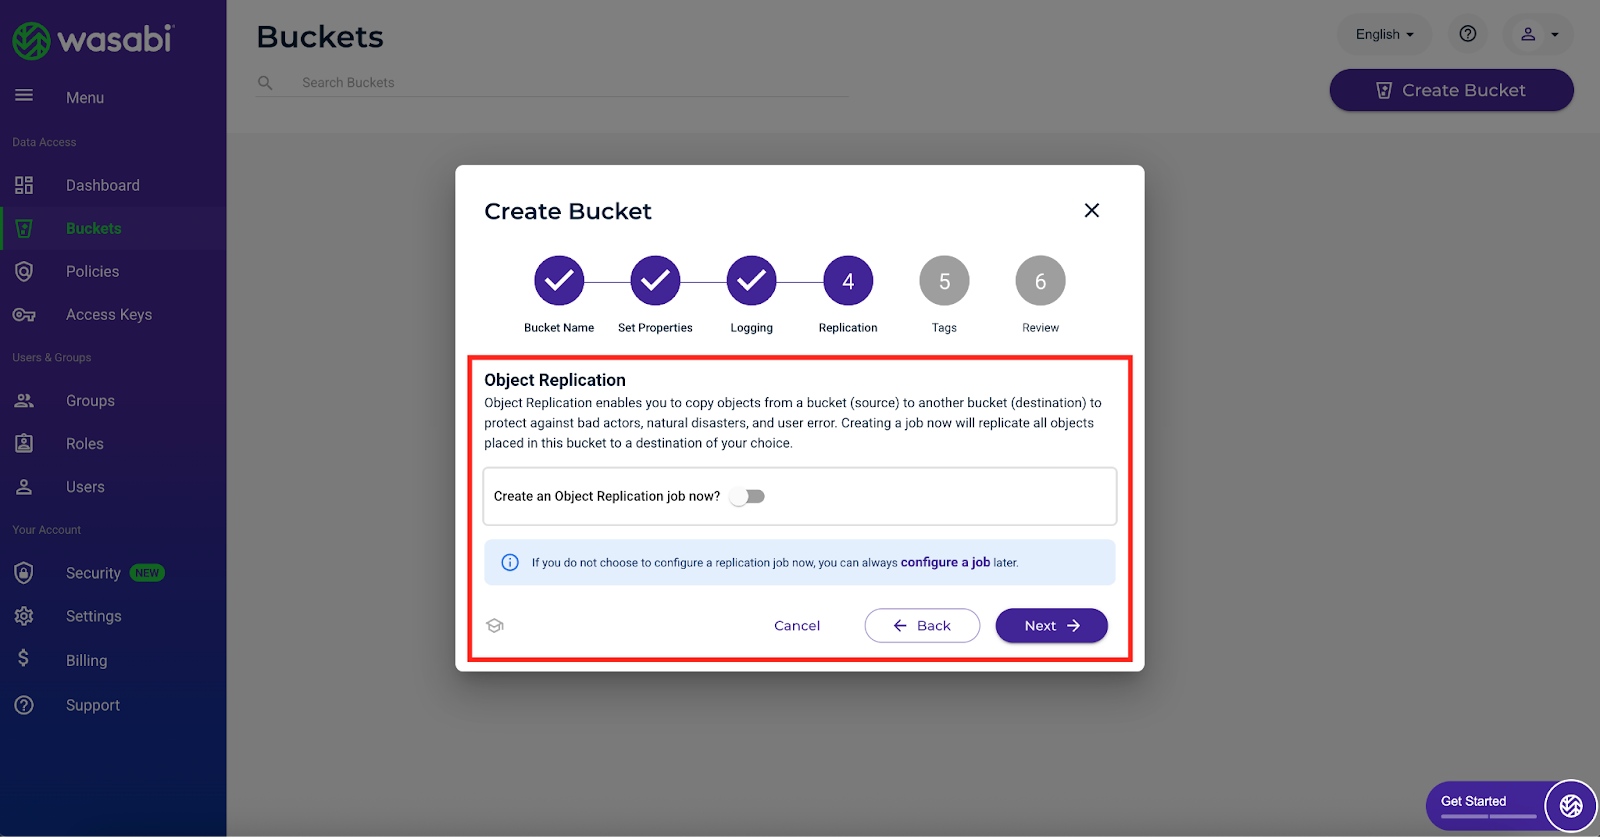
You can also enable ‘Object Replication’ to copy objects from a bucket (source) to another bucket (destination) to protect against bad actors, natural disasters, and user error.
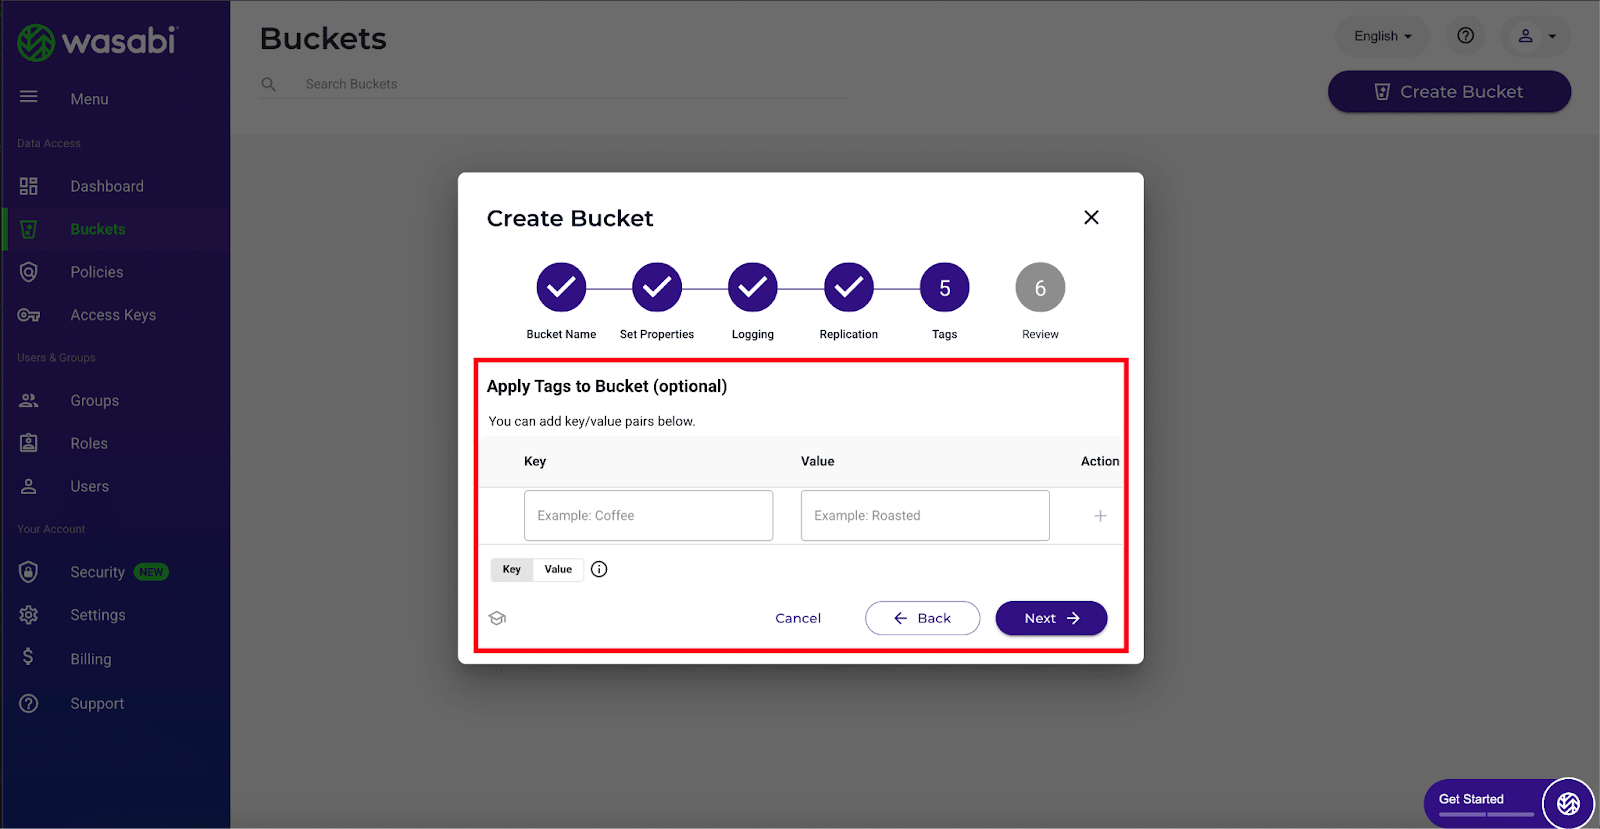
Next, add tags to your storage bucket. Add ‘Key’ and ‘Value’ to the bucket. And click on the next button.
Configure Wasabi Storage Provider for Site Backup With xCloud #
Since you have collected everything that you need from the Wasabi end, now let’s see how you can configure Wasabi storage for site backup in xCloud.
Step 3: Choose the New Storage Provider #
Log in to your xCloud dashboard, and navigate to ‘Team Settings’ → ‘Integrations’ → ‘Storage Provider’ & click on ‘Add New Provider.’ On the resulting page, click on ‘Select Provider‘ to expand the dropdown option. And select ‘Wasabi‘ as your storage provider.
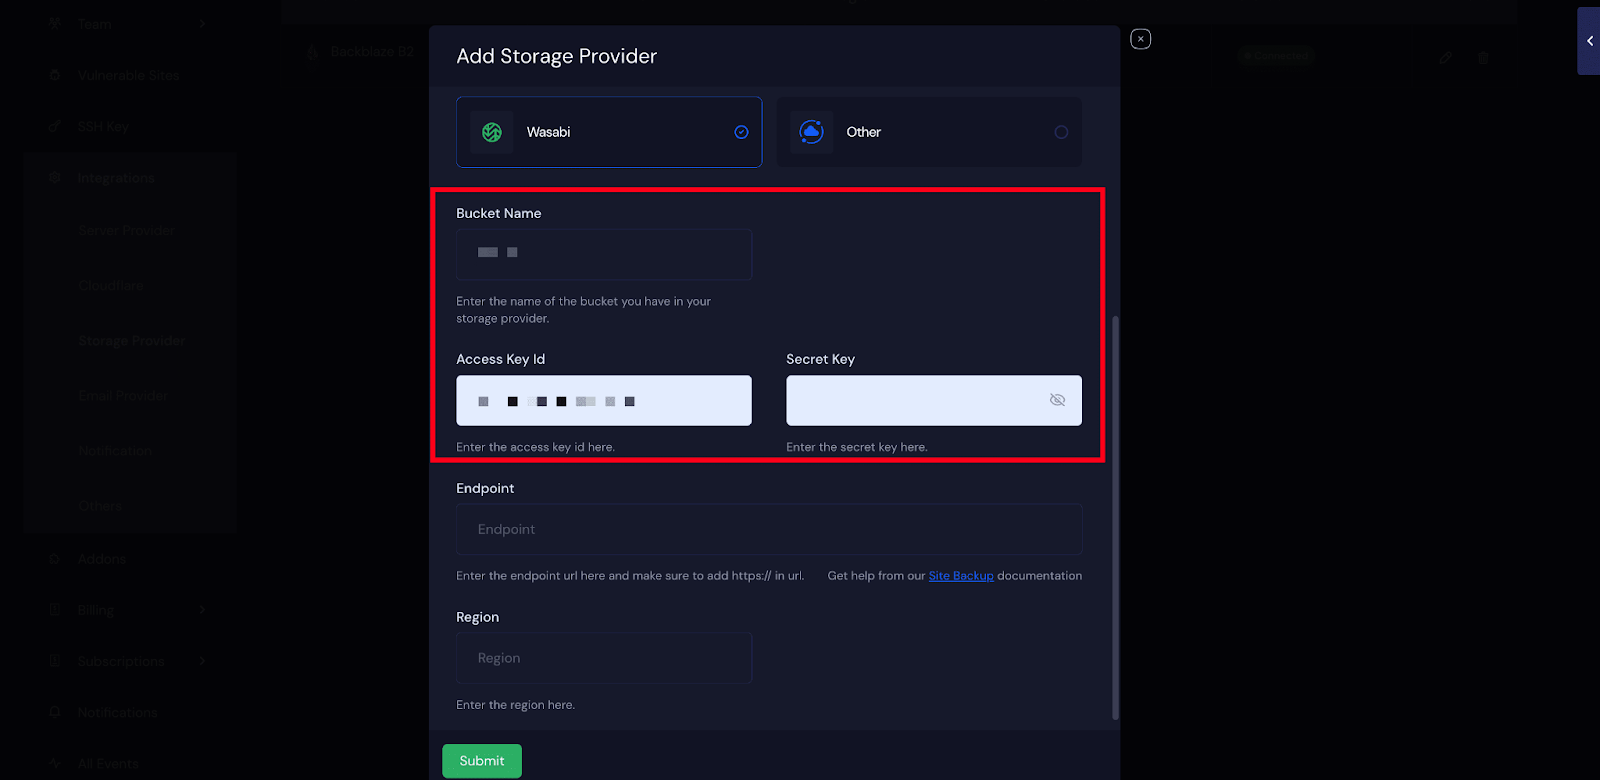
Step 5: Fill Up All the Necessary Information #
Now, fill in your ‘Bucket Name’, ‘Access Key ID’ and ‘Secret Key’ that you have copied in the dedicated fields.
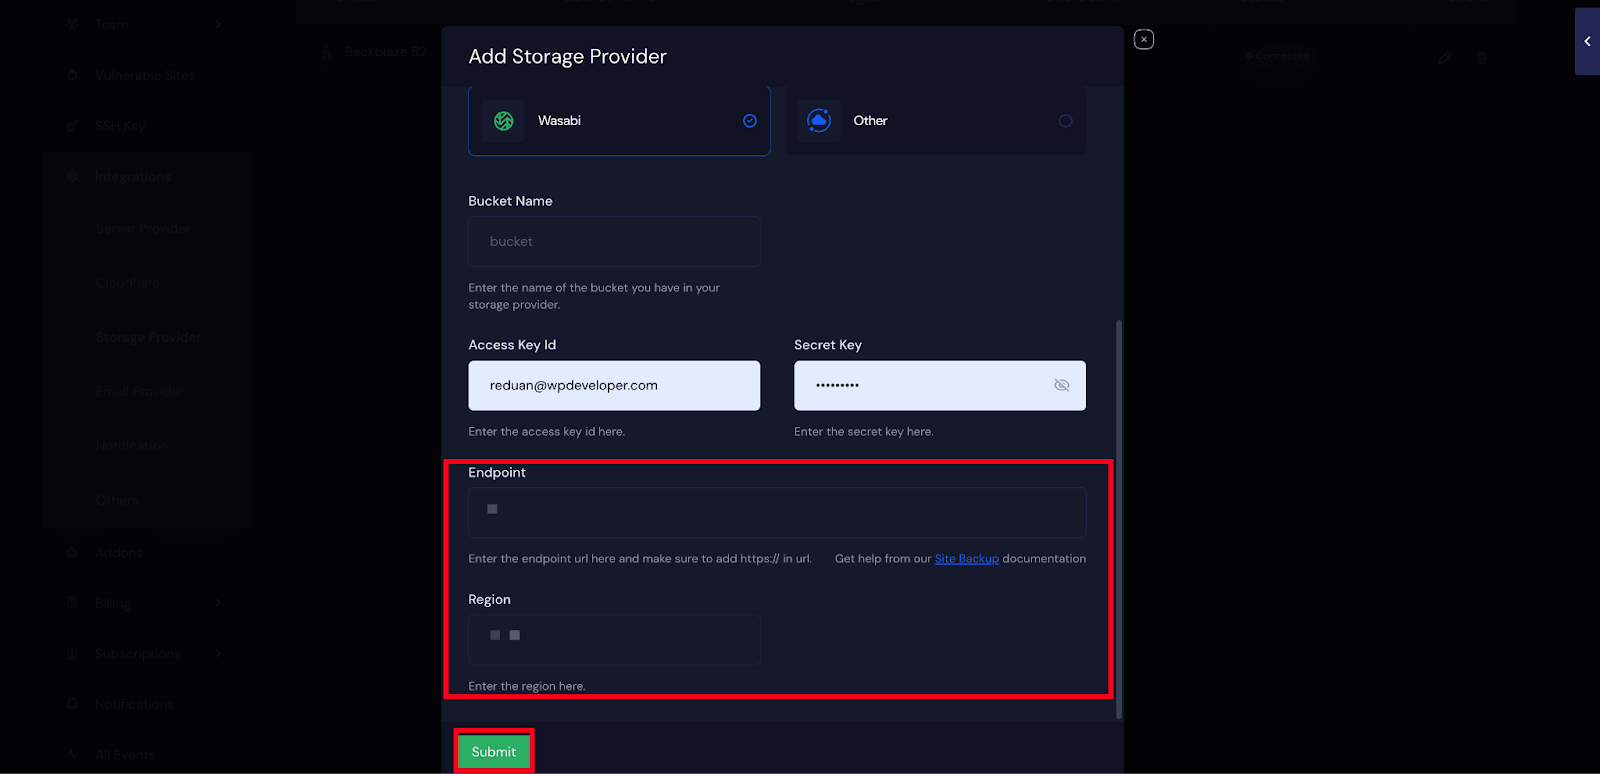
Then enter the ‘Endpoint’ from your created bucket, and choose the region of the created bucket. Once everything is done, click on ‘Submit’.
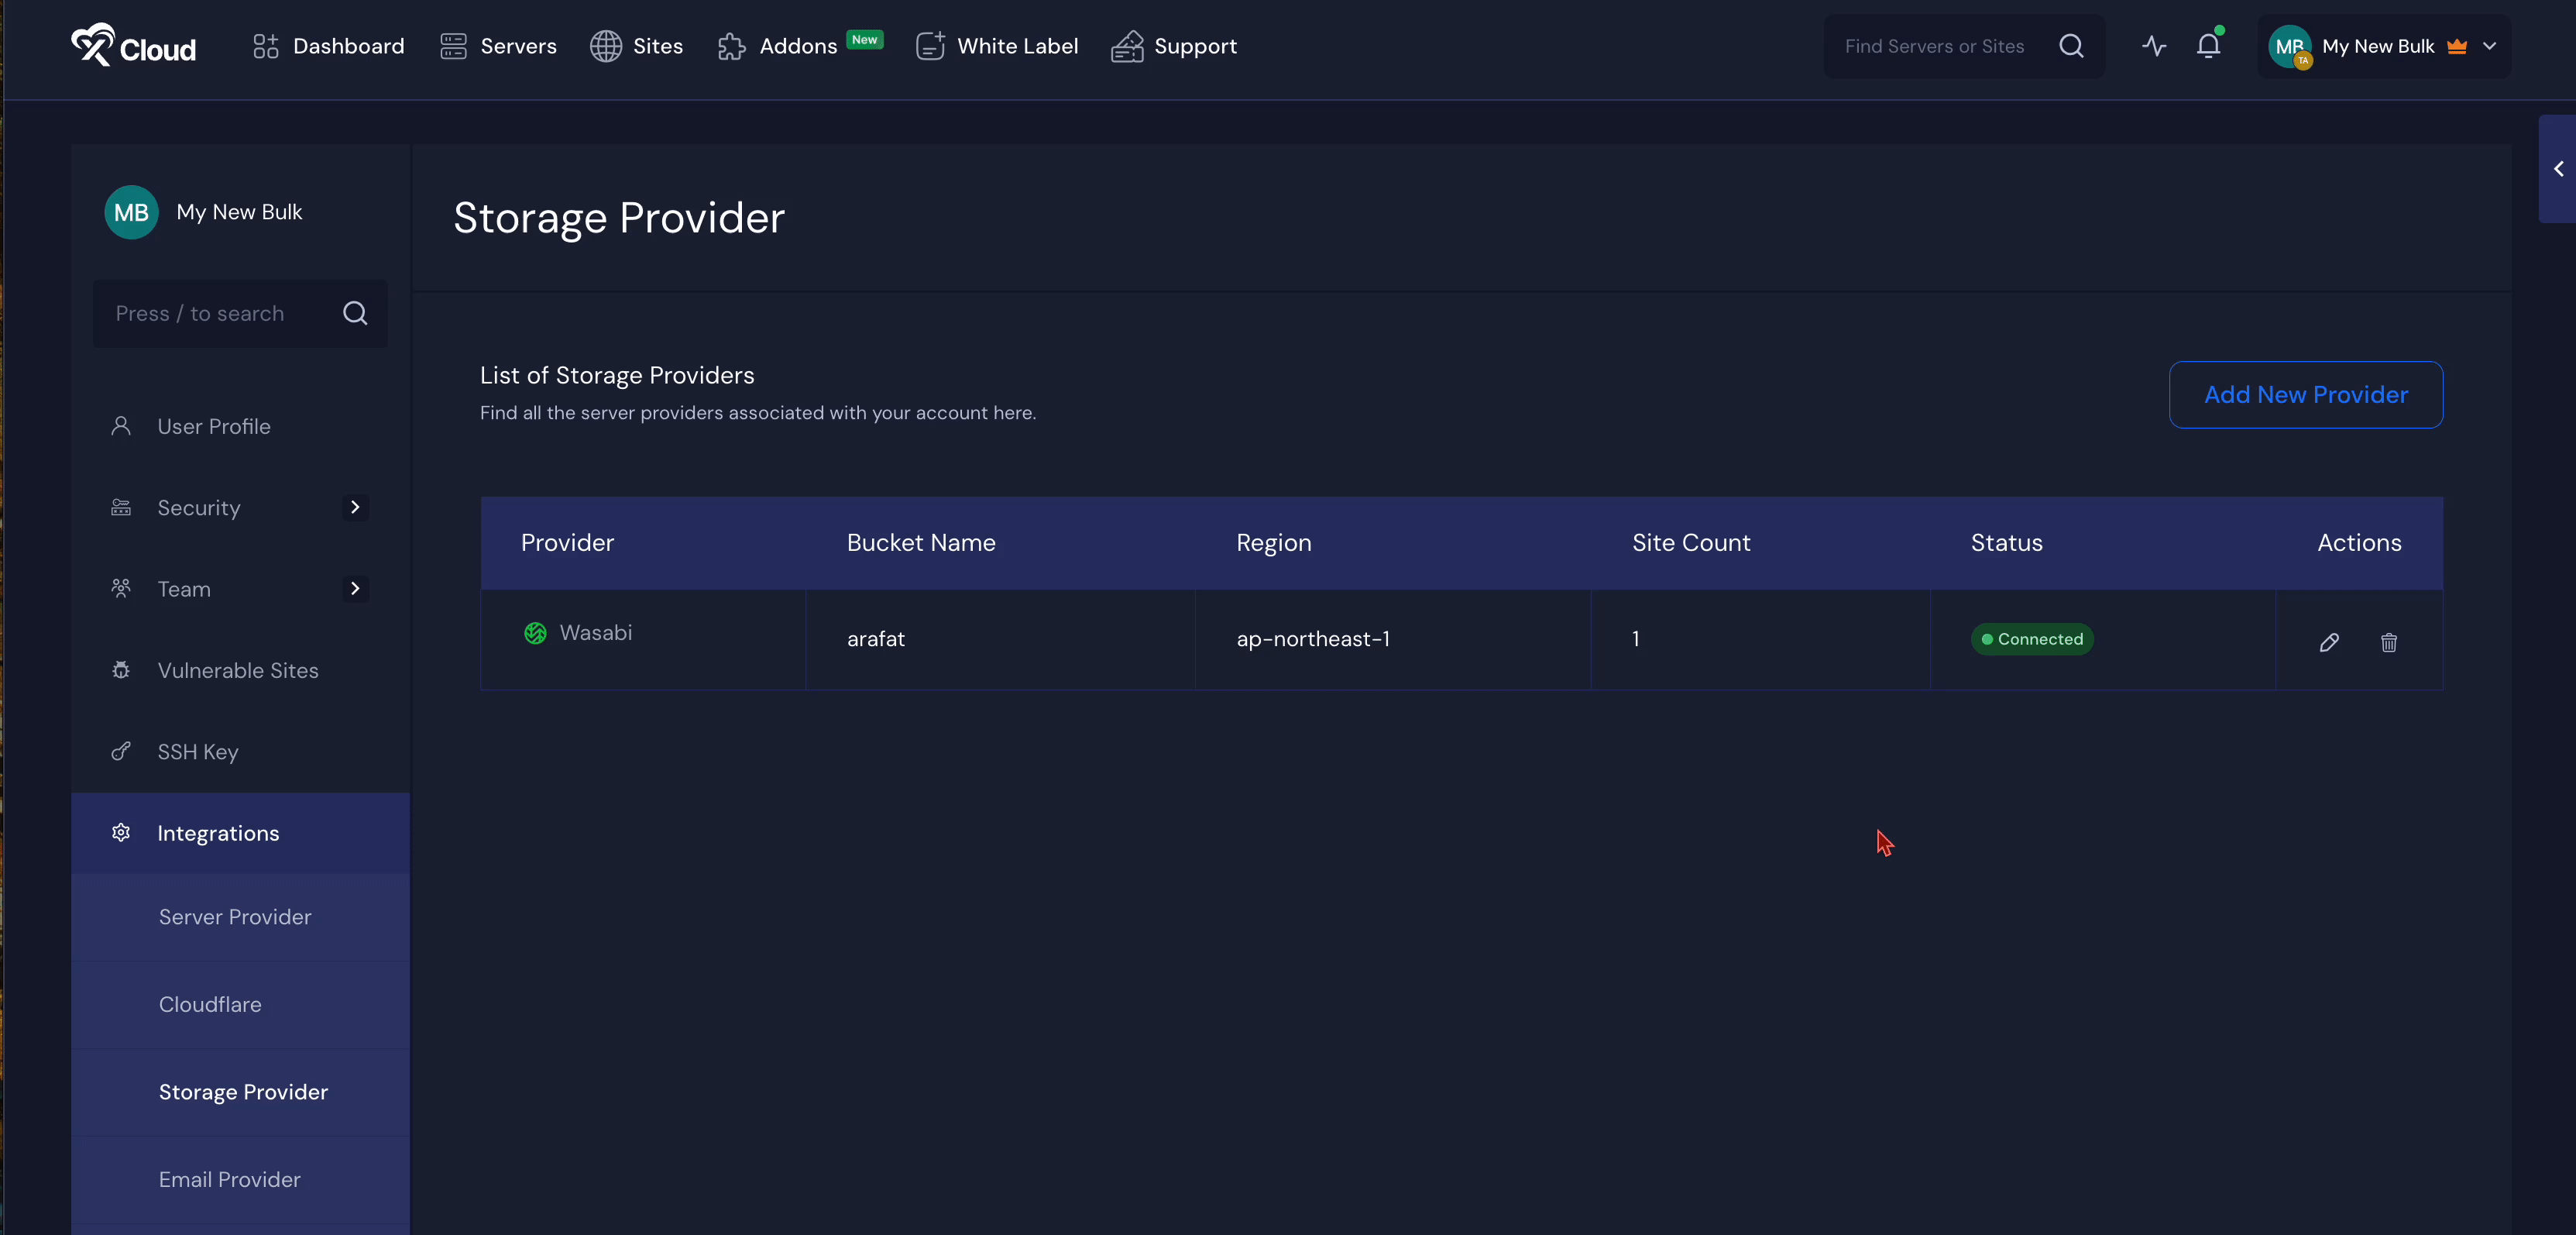
Once you have submitted it, your Wasabi storage will be added to xCloud, you can use it for site backup. Here’s how it looks in your dashboard once it gets connected successfully.
Step 6: Configure Site Backups Settings in xCloud #
Once the integration process is done, you can move on to back up your site. As you can integrate more than one storage provider, choose ‘Wasabi’ as your storage provider, Backup type ‘Full’ or ‘Incremental and other settings as your preferences and click on the ‘Save’ button.
You can also choose to schedule ‘Automatic Backup’ and ‘Automatic Delete’. For automatic backup, you need to select a backup frequency and a backup time. On the other hand, you can set a value for how many days after a backup will be deleted automatically.
This is how you can easily integrate the Wasabi storage provider and configure it for site backup in xCloud.
Still stuck? Contact our support team for any of your queries.


