


WordPress updates are an important step to keep your sites secure and running smoothly. With xCloud, you do not need to log in to each site separately; everything can be managed from one dashboard.
You can update plugins, themes, and even WordPress Core with just a single click. Follow the steps to access the Updates Manager in xCloud and update plugins, themes, and WordPress Core files easily
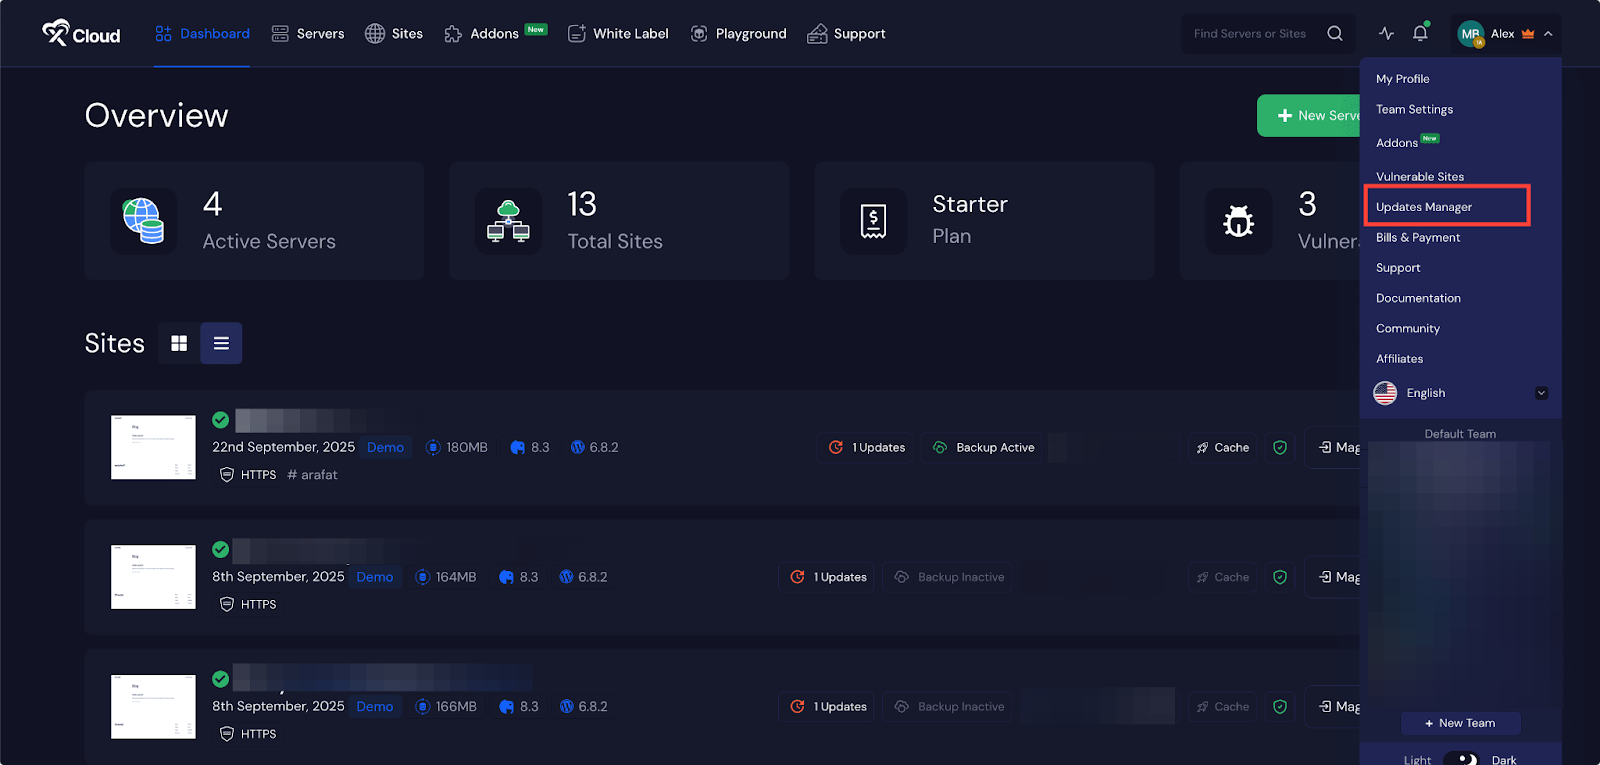
Step 1: Navigate to the Updates Manager #
First, log in to your xCloud dashboard. On the top right menu, navigate to the ‘Updates Manager’ option from the dashboard. Click on that to access the updates manager dashboard, where you can find and update all your site plugins in just a click.
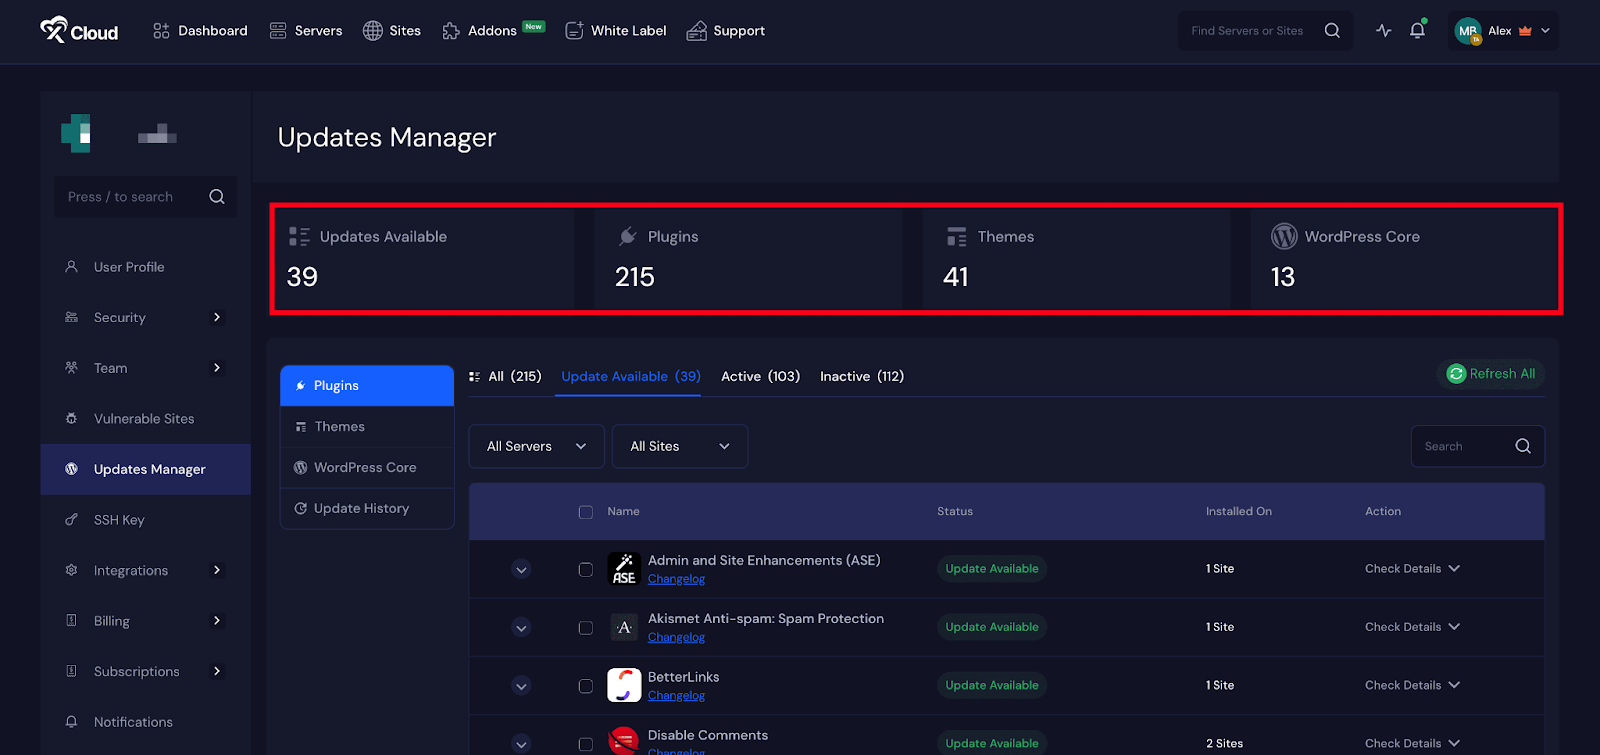
Step 2: Check the Updates Manager #
Once you are in the ‘Updates Manager’ dashboard, you will see an overview of WordPress updates available in the server and sites for this team. Here you will get ‘Plugins’, ‘Themes’, ‘WordPress Core’, and ‘Update History’. Here, you can see the total required number of updates, plugins, Themes, and WordPress Core files.
Step 3: Choose What to Update #
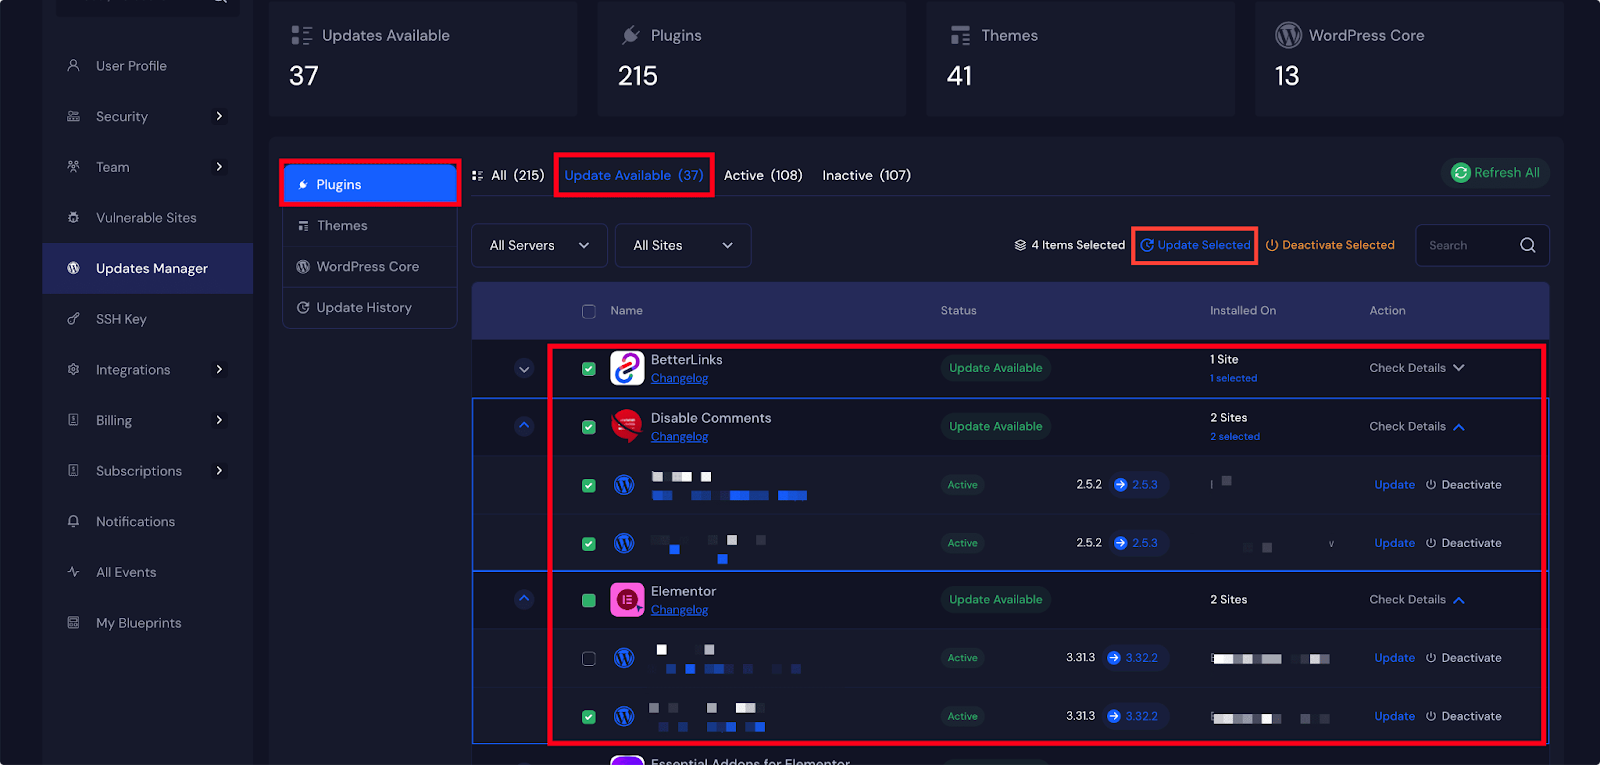
Next, navigate to the left sidebar and find options for ‘Plugins’, ‘Themes’, ‘WordPress Core’, and ‘Update History’.
Step 4: Update Plugins #
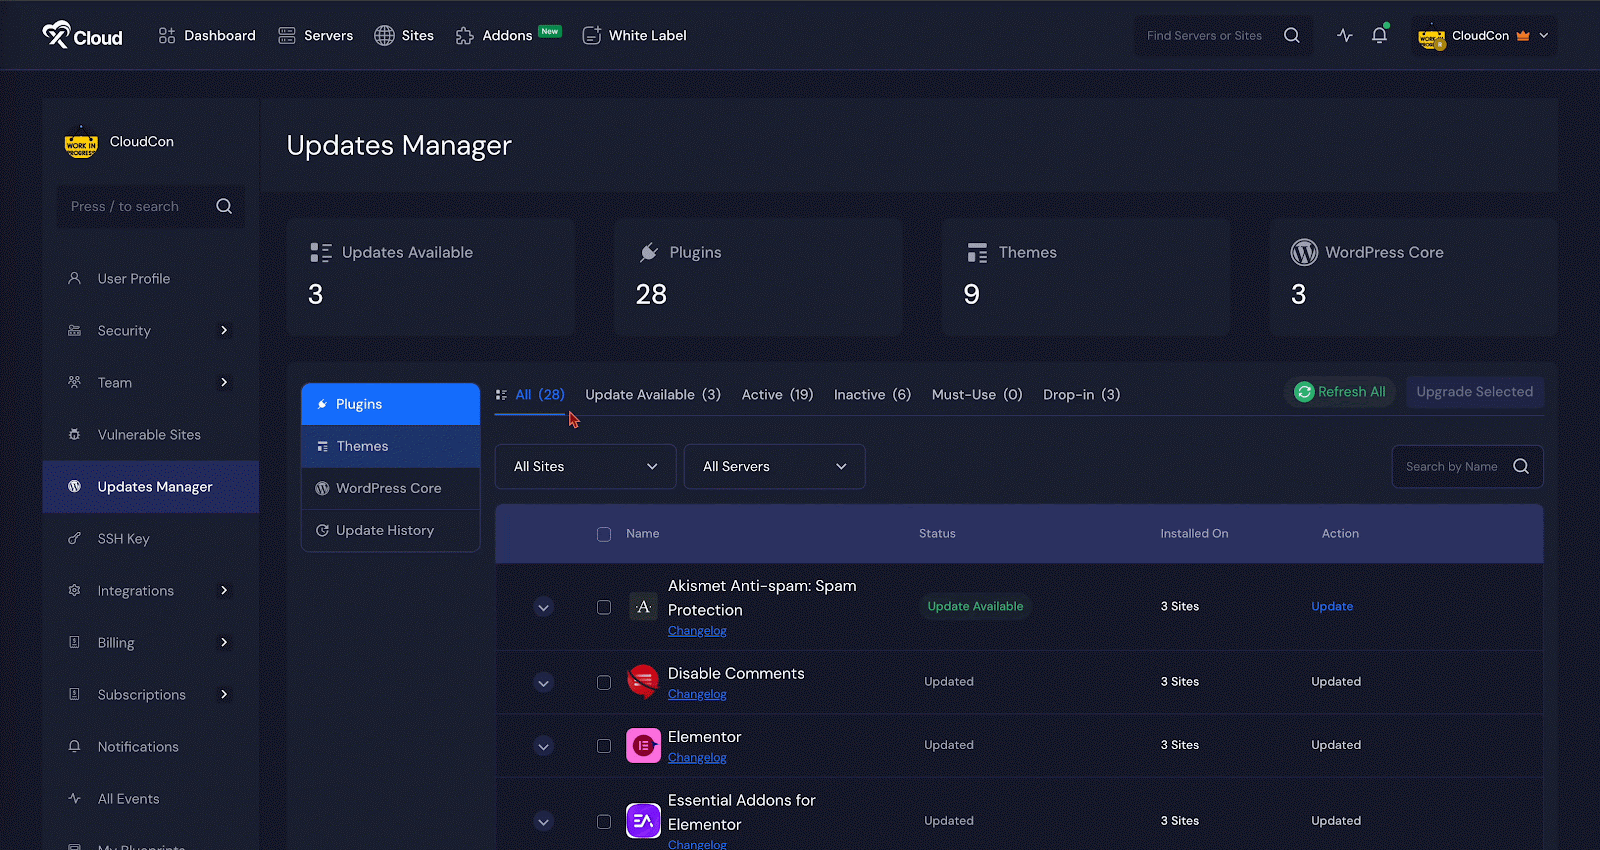
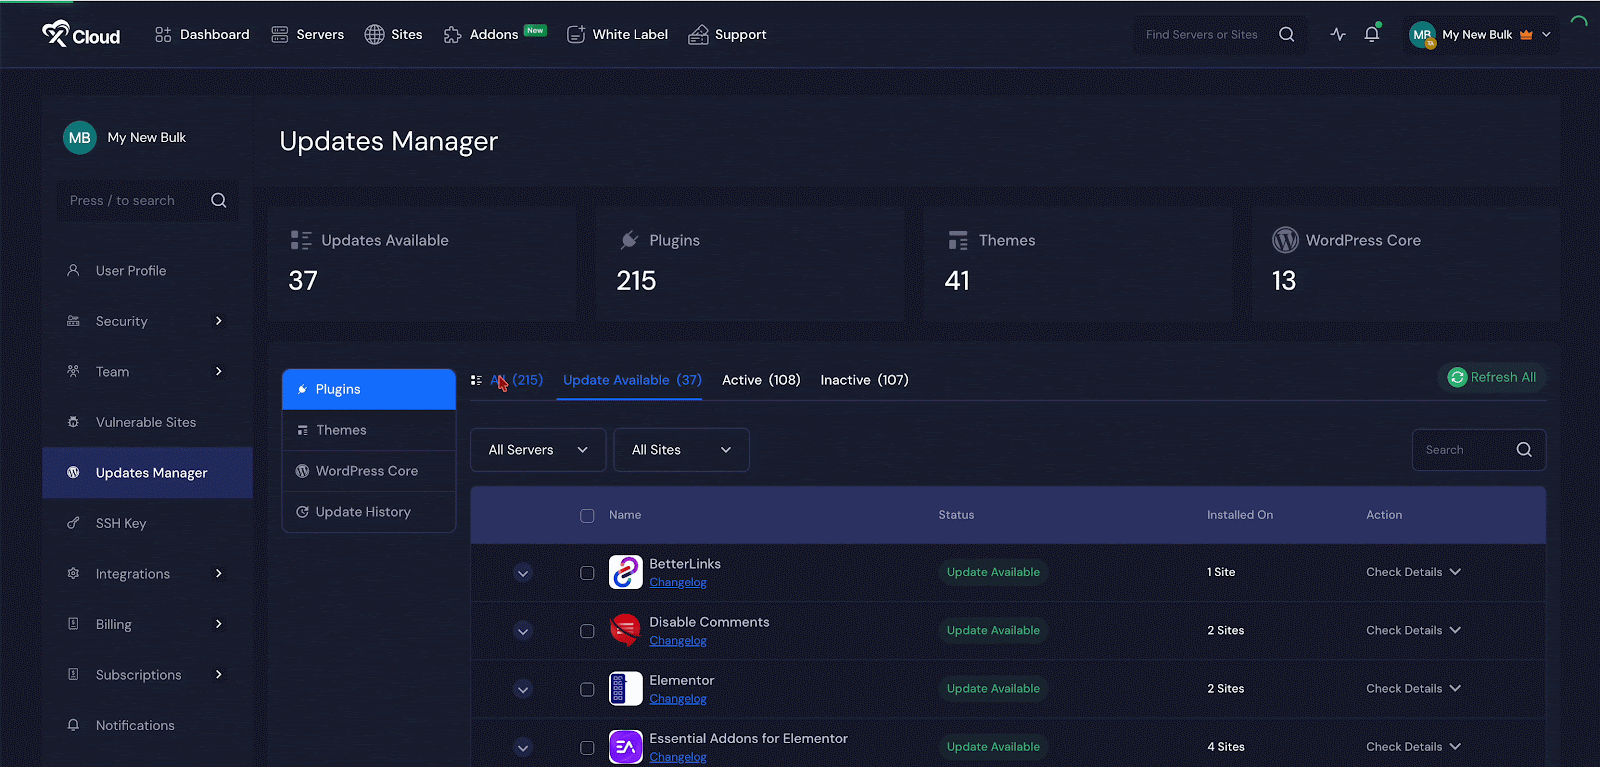
For example, we are updating the plugins here. To update plugins, go to the Plugins tab. Inside the Plugins section, you will notice that plugins are organized into different categories. These help you understand the current state of each plugin:
- All – Shows all plugins regardless of status
- Update Available (10) – Lists plugins with pending updates
- Active (17) – Displays currently active plugins
- Inactive (15) – Shows deactivated plugins
These categories make it easier for you to filter and focus on specific types of plugins during updates.
There, you will see a full list of your plugins. You can use the search bar at the top to quickly find a specific plugin if you need to. Once you have located the plugins you want to update, select them.
After that, choose the websites where you want the updates to be applied. You can pick just one site, a few of them, or all of them. When you are ready, click on the ‘Update Selected‘ button.
xCloud will take care of the rest and apply the updates to all selected sites at once. This saves a lot of time and avoids the hassle of updating each site manually.
Step 5: Update Themes and WordPress Core #
Now, to update the ‘Plugins’ of your sites, go to the ‘Plugins’ → ‘Updates Available’ tab and select the ‘Sites’ you want to update and click on the ‘Update Selected’ button.
Just like with plugins, you will see a list of items that can be updated. Select the themes or core files that need to be updated, choose the websites where you want to apply the changes, and click Update Selected. Everything will be updated in just one step, and you can be sure that your sites are using the latest versions.
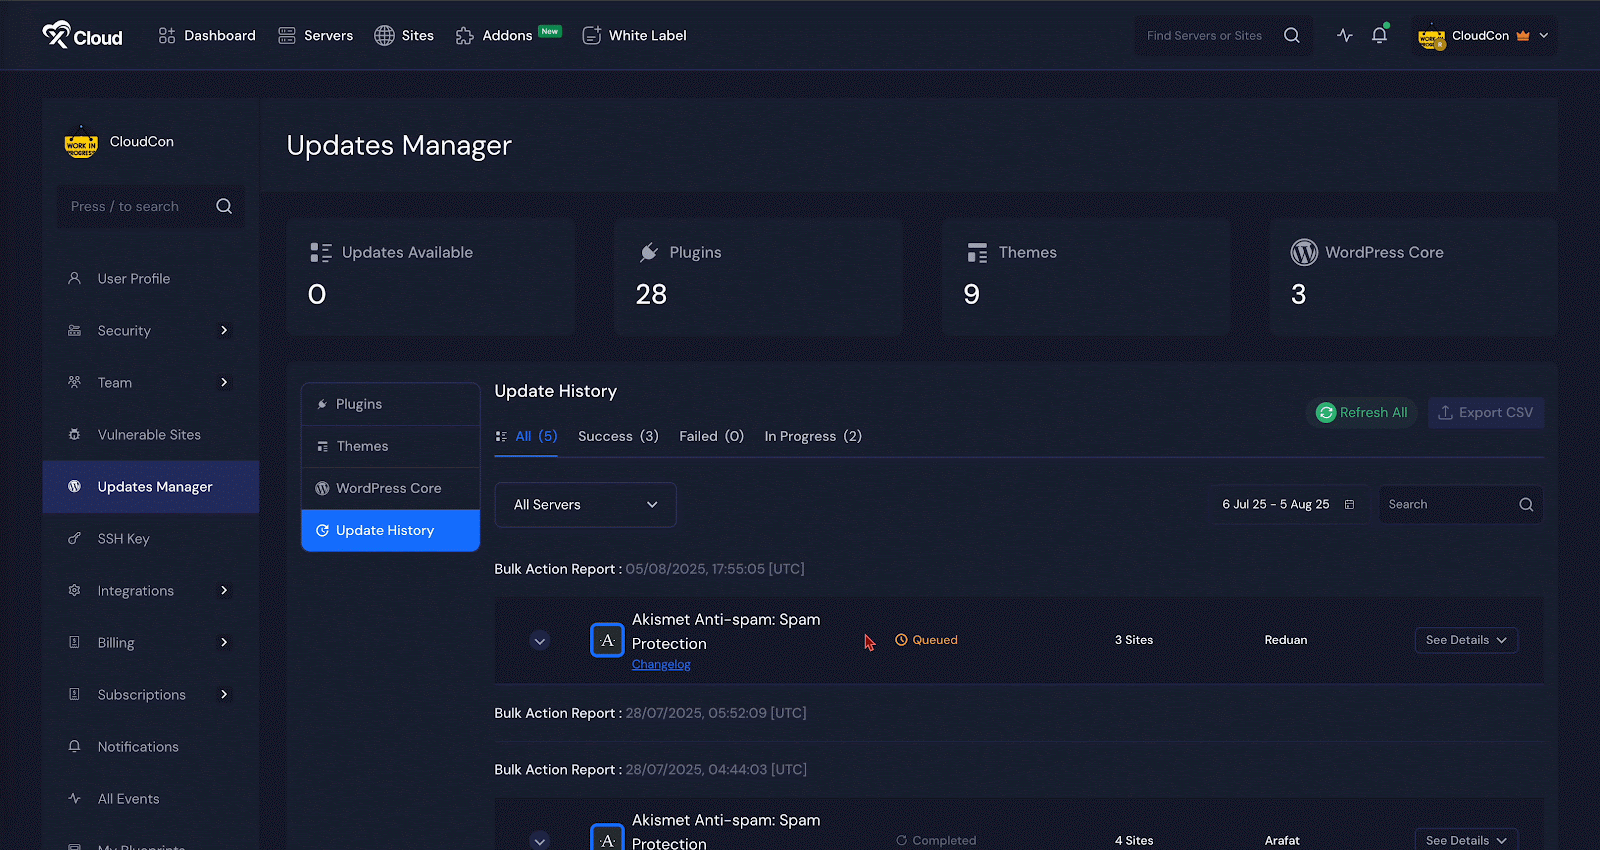
Step 6: View Your Update History #
After your updates are complete, you can go to the ‘Update History tab to see a record of everything that was done. Here, you will get the details of ‘Date’, ‘Time’ and the websites where updates were applied, and a list of updated files. If you want to see more details, you can click the ‘See Details’ button for more information. You can also filter the history by timeframe, which is helpful if you want to check what was updated recently or during a specific week or month.
And that’s it. This is how easily you can update your WordPress sites, which is a smart way to save time and reduce effort with xCloud.
Still stuck? Contact our support team for any of your queries.


