


Setting up n8n on Linode with xCloud is a straightforward way to bring automation to the cloud. This guide walks you through the essential steps to configure, deploy, and run n8n seamlessly on Linode, so you can start building powerful workflows without the usual complexity.
How to Integrate And Setup Linode Server with xCloud? #
This guide shows how to set up the Linode server in xCloud. Follow the steps to quickly launch, configure and start your cloud journey.
Step 1: Sign Up/Login With xCloud #
First, you will need to visit the xCloud website and you have to sign up for xCloud with your credentials.
If you already have an account please visit our login page.
Now you are ready to set up your server with Digital Ocean in xCloud.
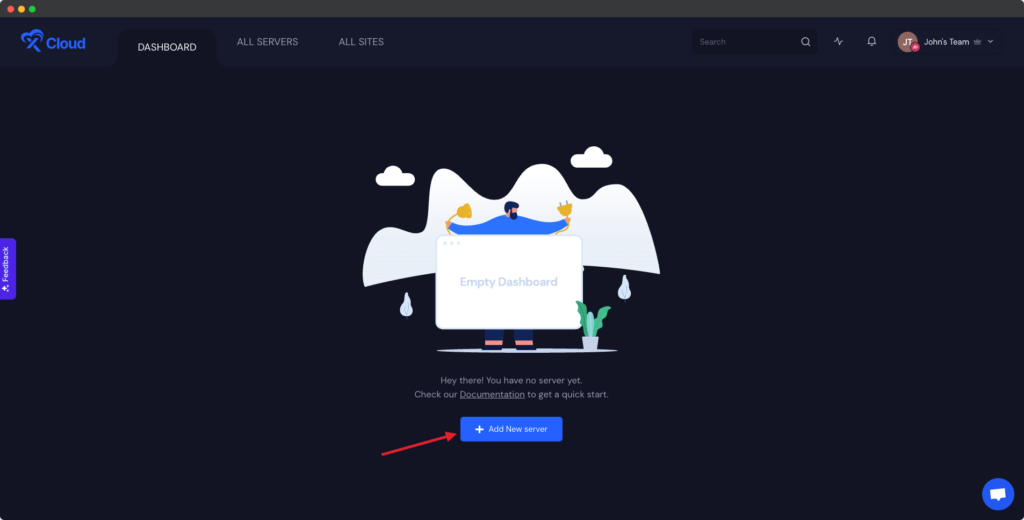
Step 2: Create Your Linode Server in xCloud #
After logging in to your xCloud account, start by adding a new server by clicking on the “Add New Server” button from your dashboard.
The next screen will provide the list of our available server providers. For tutorial purposes, we will create a Linode server and for that select the Linode option.

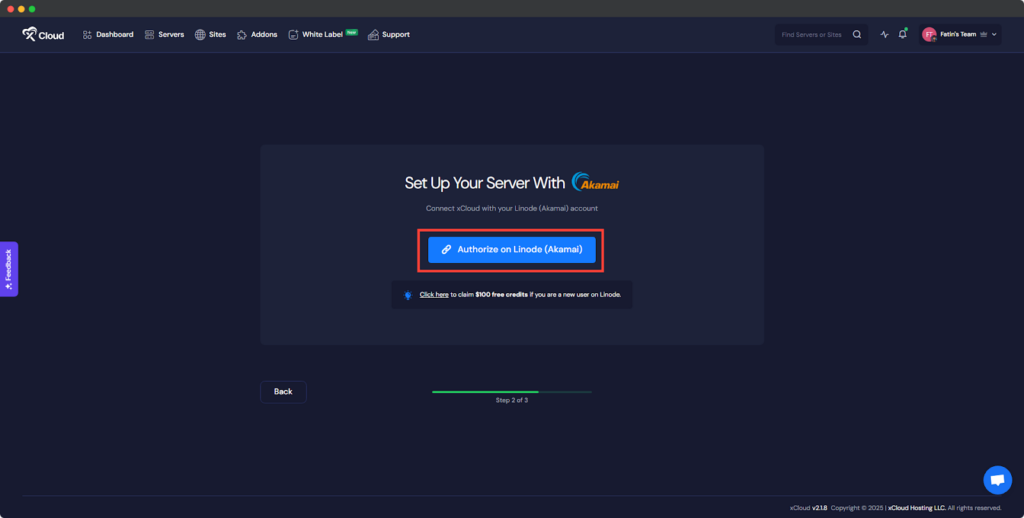
Step 2: Authorize Your Linode Account #
We have made it easier and safer for you to connect xCloud with your Linode account. Now provision a new Linode server, click ‘Authorize on Linode’ during the setup, and you will be redirected to Linode to grant permission to your account. It is a straightforward and hassle-free process to set up your server with Linode.
Step 3: Connect the Account & Add the Necessary Information #
You will be taken to the server creation page after successfully integrating your Linode account and your server will be connected with xCloud. Now you need to provide the ‘Server name’, your preferred ‘Server Size’ (CPU, RAM, storage), the ‘Region’ nearest to you and your visitors, and then select the ‘Database Server’ from MySQL and MariaDB.
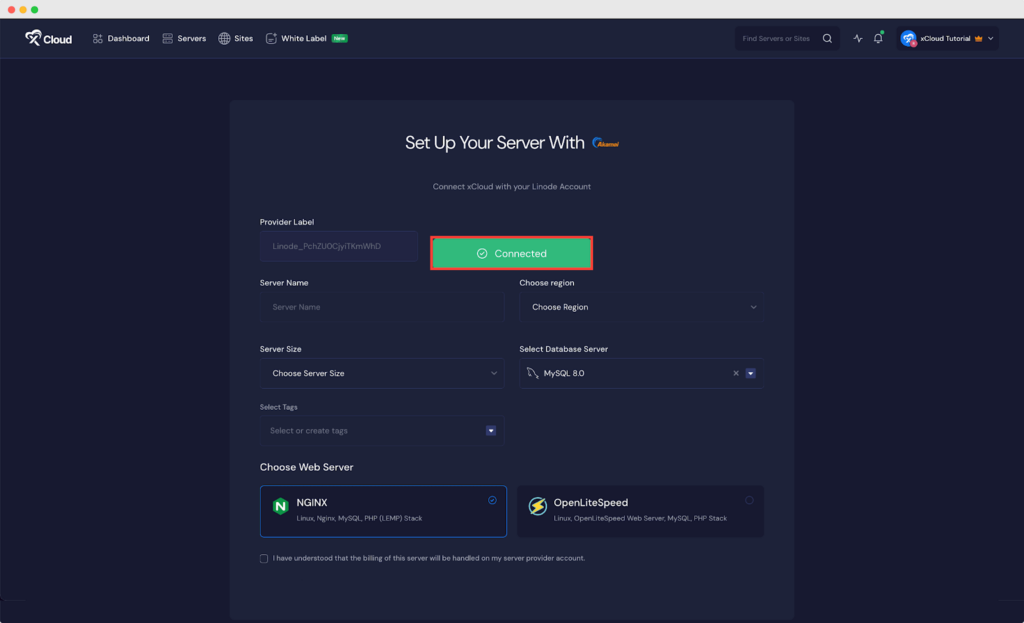
Note: We recommend at least a 2GB/ 1 shared CPU server for 10-20 brochure sites with cache enabled. And for a site whose pages cannot be cached (e.g. WooCommerce site) we recommend a 4 GB / 2 dedicated CPUs server.
Next, choose the web server stack from ‘NGINX’ or ‘OpenLiteSeed’ as your requirements and click on the ‘Next’ button to proceed with the server creation process.
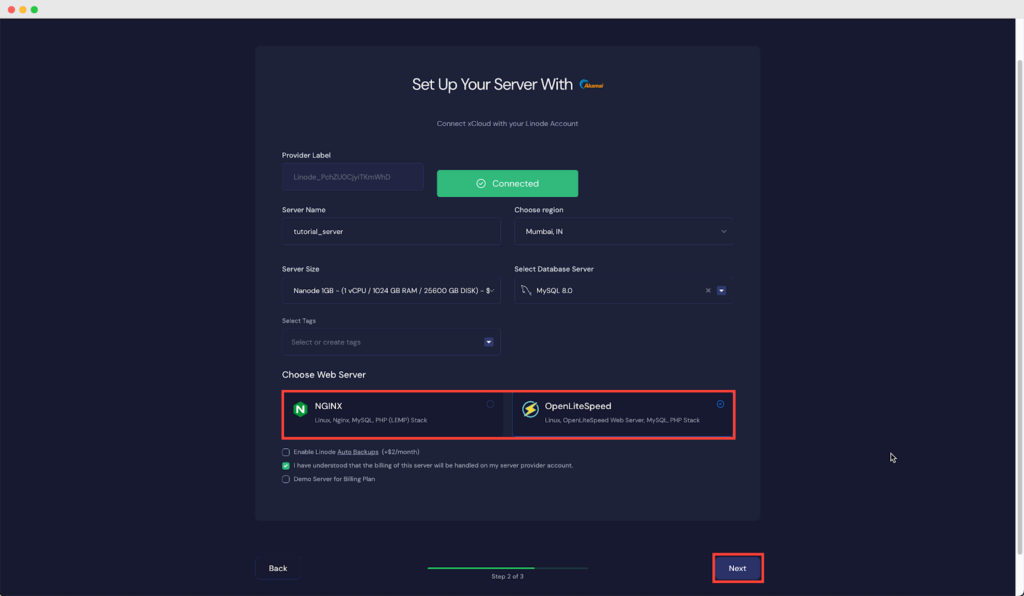
It will start creating a Linode server with xCloud within a while and if you go to the ‘Servers’ from the menu you can see your created server and create as many sites as you want under this server.

Deploy n8n on Vultr Server via xCloud #
With xCloud’s One Click Apps feature, you can deploy n8n with ease. Follow the steps below to quickly set up n8n in a demo or production environment with xCloud.
🔖Recommendations #
Here are some key suggestions to help you optimize your setup and get the best results 👉🏻
🌐Web Server for Deployment #
Though you can deploy n8n applications from both NGINX and OLS server, we recommend deploying n8n on an Nginx server for the best performance and stability. While you can use an OLS server, Nginx generally provides a more reliable experience.
⚙️ CPU Requirements #
We recommend using a server with more than 1 CPU when running n8n. A 1 CPU server may not function as expected, so choosing a server with higher resources will help ensure smooth and successful operation.
Note: n8n is available in our plans, including the free plan. But you have to upgrade to our PRO plans to access the Environment feature.
This guide shows how to set up or deploy n8n on a Vultr server in xCloud. Follow the steps to quickly launch, configure and start your cloud journey.
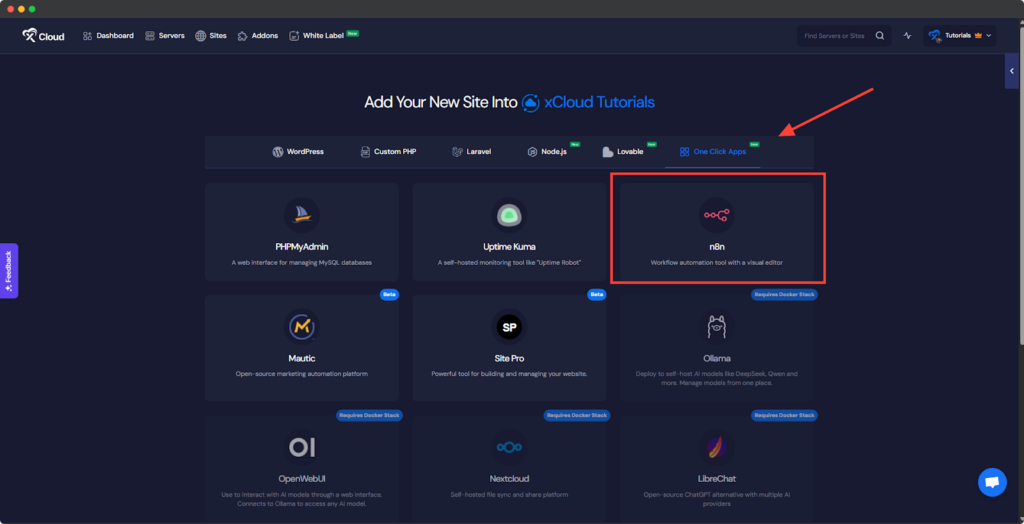
Step 1: Access One Click Apps #
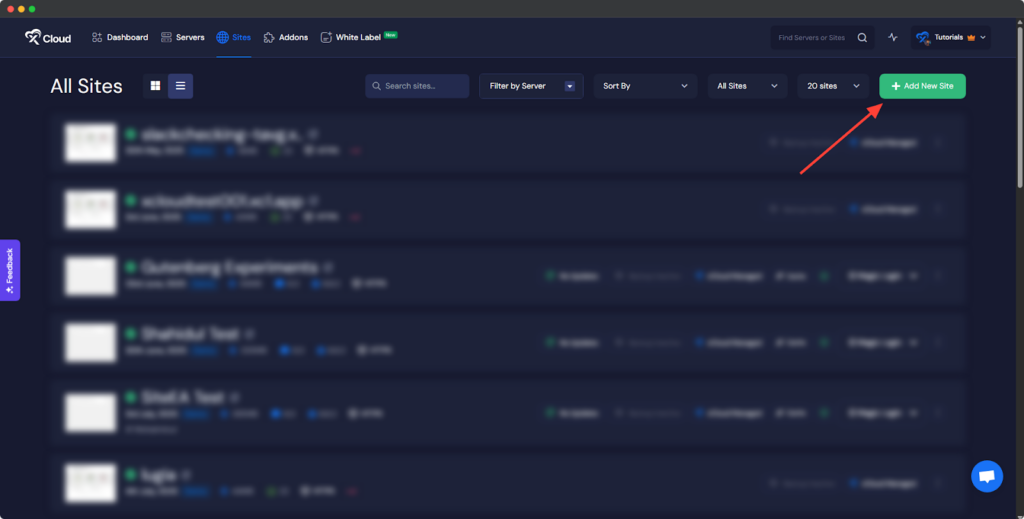
Begin by logging into your xCloud account. Once logged in, navigate to your dashboard and click on the ‘Add New Site’ button.
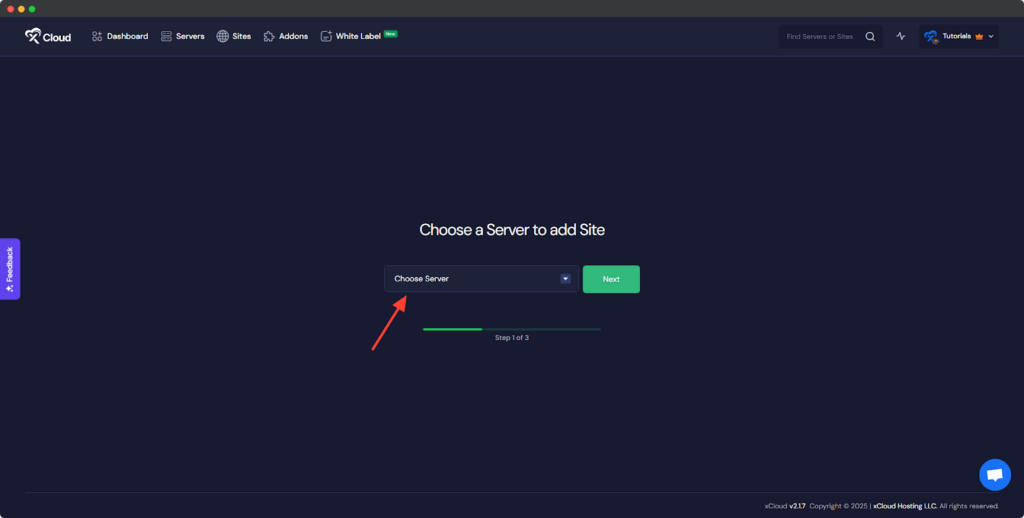
You will then be asked to ‘Choose a Server to add Site’ from the dropdown. You must select the Vultr server you set up in xCloud from this dropdown. Then click ‘Next’.
Then go to the ‘One Click Apps’ section. Select ‘n8n’ from the available applications to initiate the deployment process.
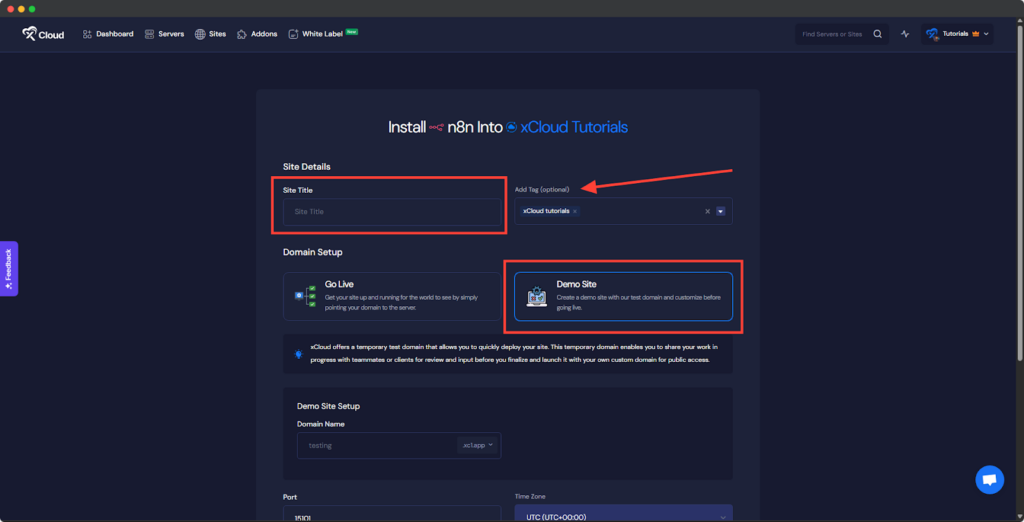
Step 2: Set Up the n8n Application #
In the site setup screen, you will be prompted to enter basic site information. Provide a ‘Site Title’ and add relevant ‘Tags’ to help organize your deployment.
At this point, you can choose between two deployment modes: ‘Go Live’ for a production-ready deployment or ‘Demo Site’ for testing purposes. Selecting ‘Go Live’ will immediately create a live environment, while choosing ‘Demo Site’ allows you to experiment in a staging environment before promoting to production.
Step 3: Configure Domain Settings #
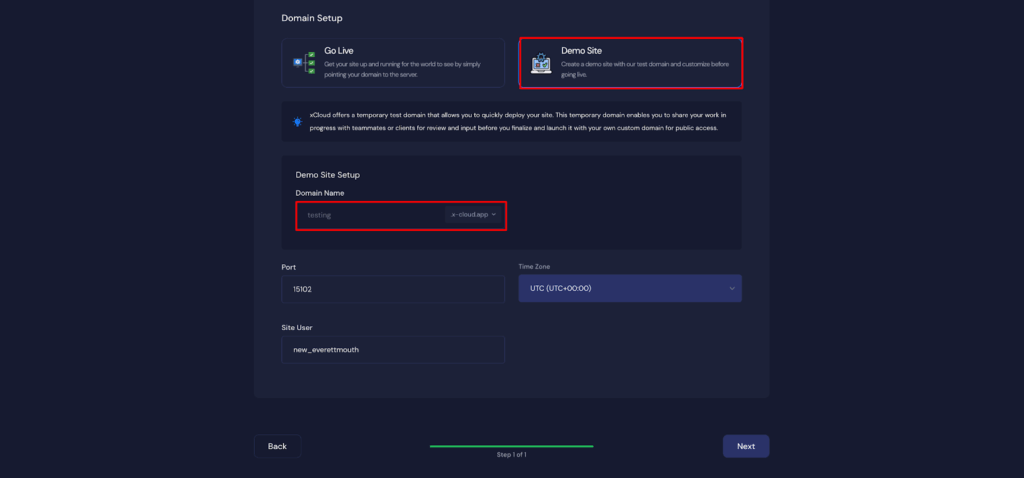
If you select the ‘Demo Site’ option, xCloud will assign a temporary subdomain for your n8n application.
Note: Once a demo site is promoted to a live environment, you cannot revert back to using the demo domain. Ensure your choice aligns with your deployment goals before proceeding.
Step 4: Configure and Install the Site #
Then, a default ‘Port’, ‘Site User’ will be selected automatically. Then choose a ‘Timezone’ for this site. Once all settings have been configured, click the ‘Next’ button to proceed.
Note: We recommend leaving the port and site user as default.
#
Step 6: Add Your Custom Domain #
You can add your own ‘Domain’ to host the site by going to the Domain section. Also, you can add an ‘Additional Domain’ with your custom domain.

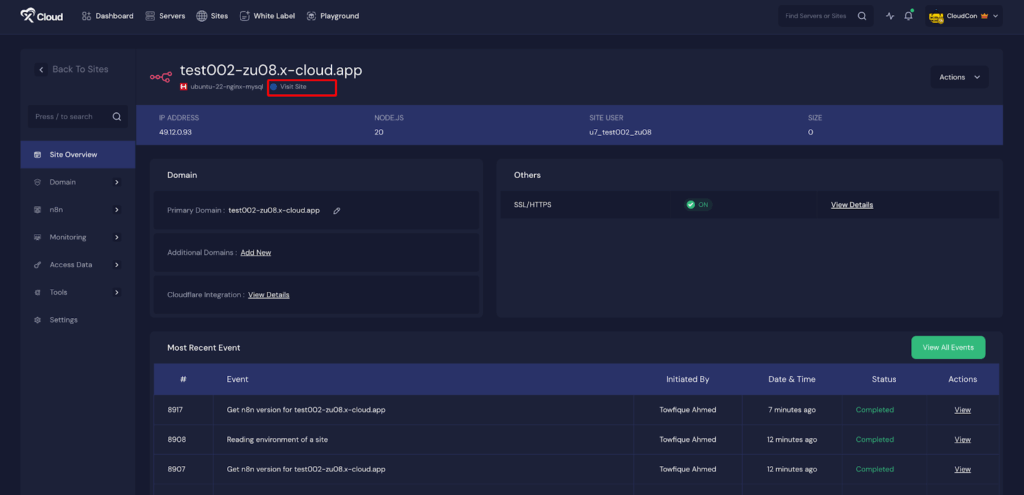
Step 7: Visit the n8n Site #
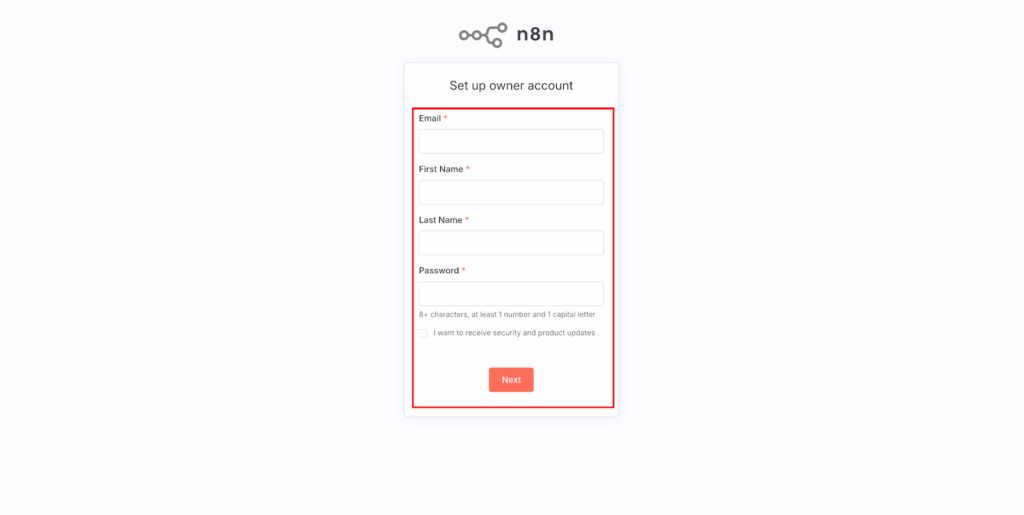
With n8n set up with xCloud, you should be able to log in and confirm that it’s working. From the dashboard, click on the ‘Visit Site’ app.
This will open the n8n dialog window for registration, which should look something like the example below. Simply enter your details and create a password according to the specs indicated. Hit the ‘Next’ button, then click through any additional popups, leaving them empty for now.
This should bring you to the n8n Overview page. Now that your n8n instance is up and running, let’s fine-tune its settings for security and customization. From here, go to the ‘Create workflow’ , set according to your preferences.
#
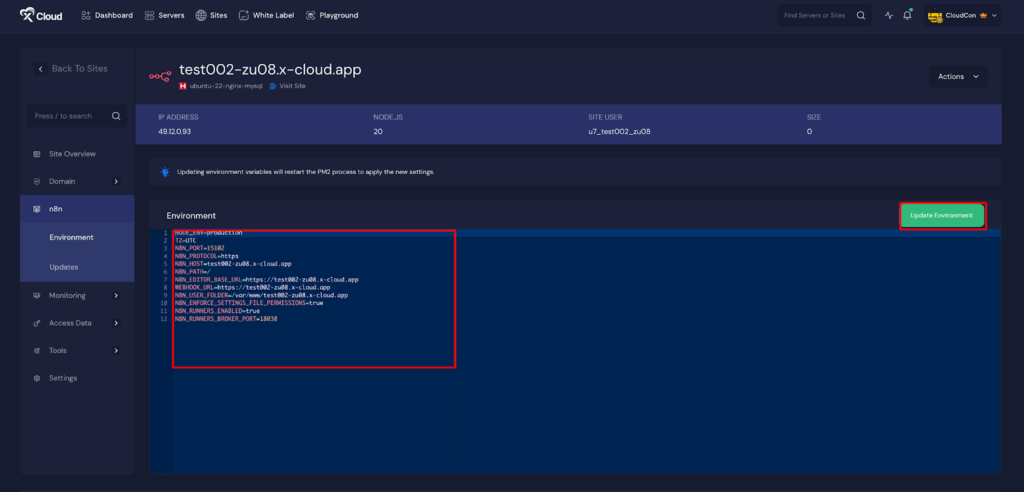
Environment Editor for n8n #
The Environment section in xCloud allows you to customize configuration settings for your n8n instance. Just go to the ‘Environment’ option from the sidebar and adjust as you need then click on the ‘Save’ button.
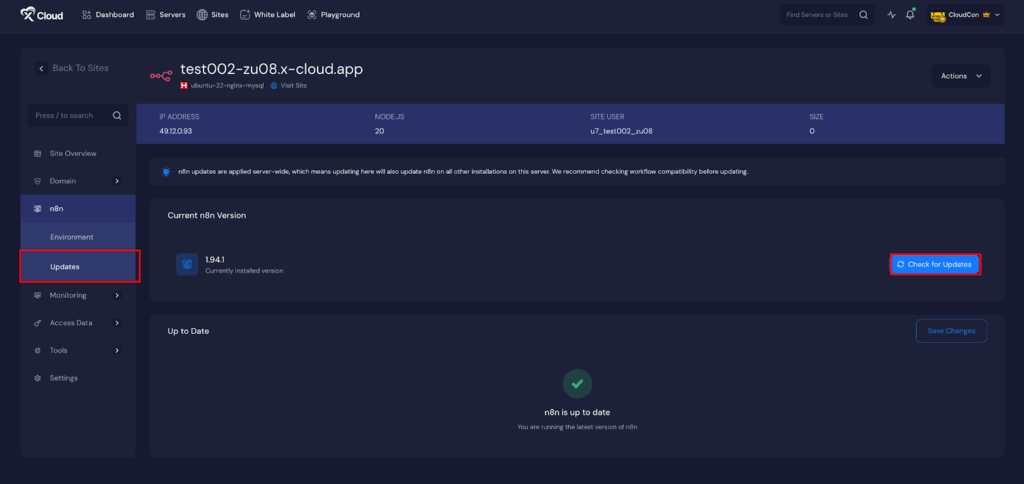
Update N8N Version #
To update n8n to the latest version, simply go to ‘Updates’ from the sidebar of the dashboard. Then simply search for the ‘Check for Updates’ button. Click the Update button and this will install the latest n8n version on your server.
And that’s it, this is how easily you can quickly and efficiently deploy an n8n on a Vultr server instance using xCloud’s One Click Apps feature. You can create your own n8n application and automate with workflows seamlessly.
Still stuck? Contact our support team for any of your queries.


