


By default, the OpenLiteSpeed webadmin console is disabled in xCloud. This is done to improve security. However, you can enable it if you need to monitor your server or view its configurations.
To do this, you need to follow a few steps. These steps involve using the command line, updating your firewall settings, and restarting the web server. You will also need some basic access and permissions before you begin.
Prerequisites #
To proceed, you must have sudo or root access to your server. This is necessary to run certain commands. You also need access to the xCloud dashboard. This allows you to manage firewall settings and restart services on your server.
Steps to Enable the OpenLiteSpeed Webadmin #
To enable the webadmin console, follow these four steps.
Step 1: Enable the Web Console via Command Line #
To start, connect to your server using SSH. After logging in, run a command to remove a specific file. This file is what disables the web admin by default. You can delete it by typing the following command:
sudo rm /usr/local/lsws/conf/disablewebconsole
When you remove this file, the web console will become active.
Step 2: Open Port 7080 in the Firewall #
The OLS webadmin operates on port 7080. Make sure this port is open. Go to your server dashboard, choose ‘Security’ → ‘Firewall Management’. Here you can find ‘Add new rule’ to button to create a new rule to allow incoming traffic on TCP port 7080.
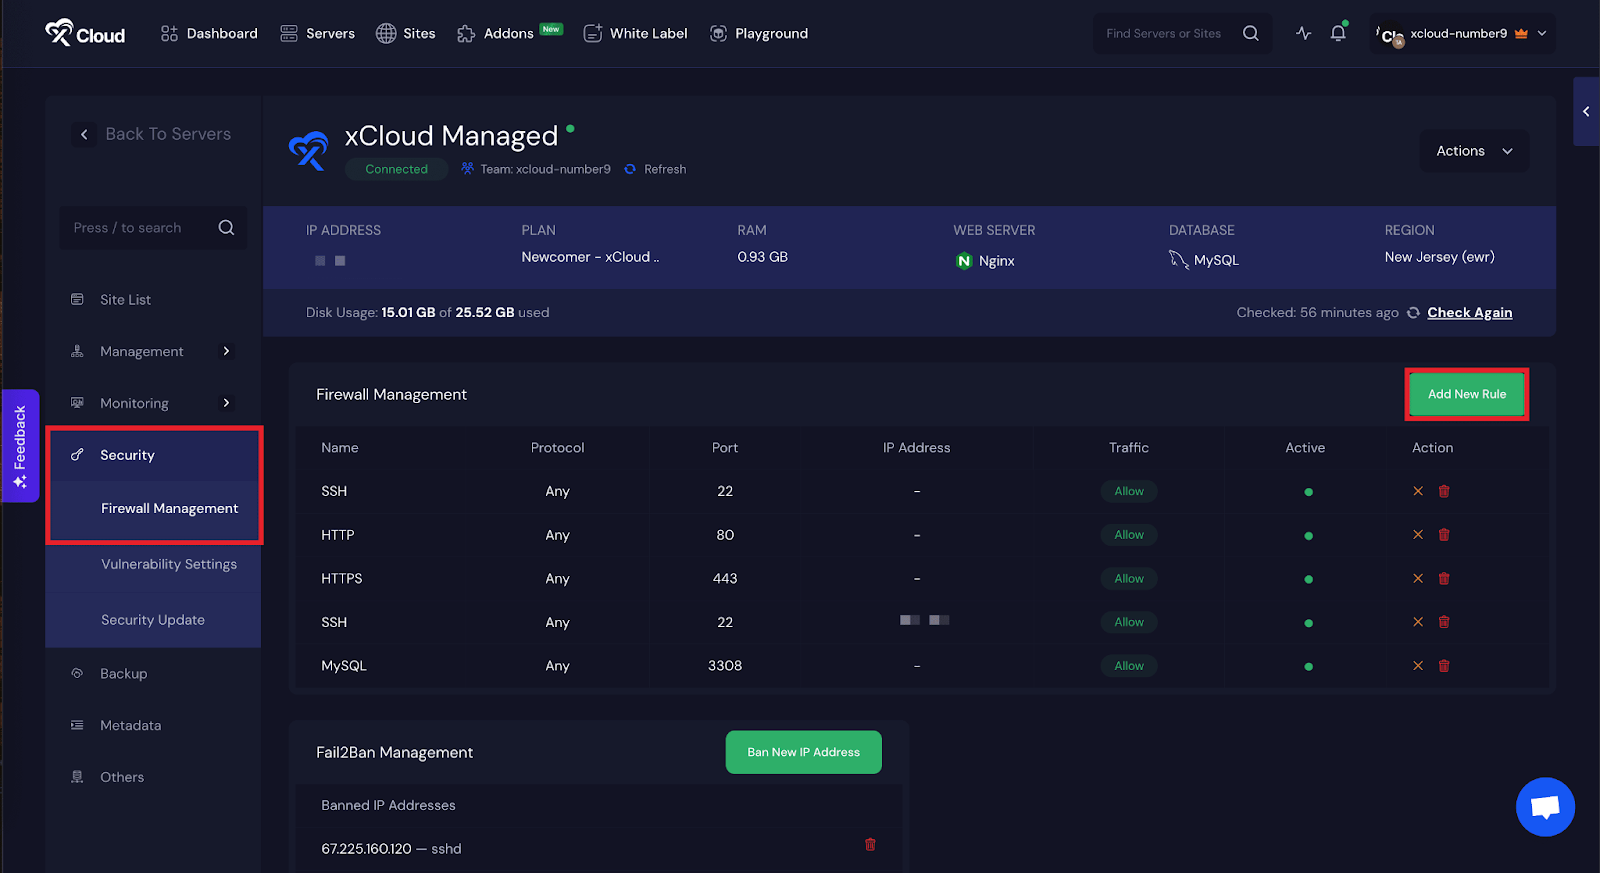
If you are using another cloud provider like AWS, Google Cloud, Azure, or DigitalOcean, you will also need to open port 7080 in their security groups or external firewalls.
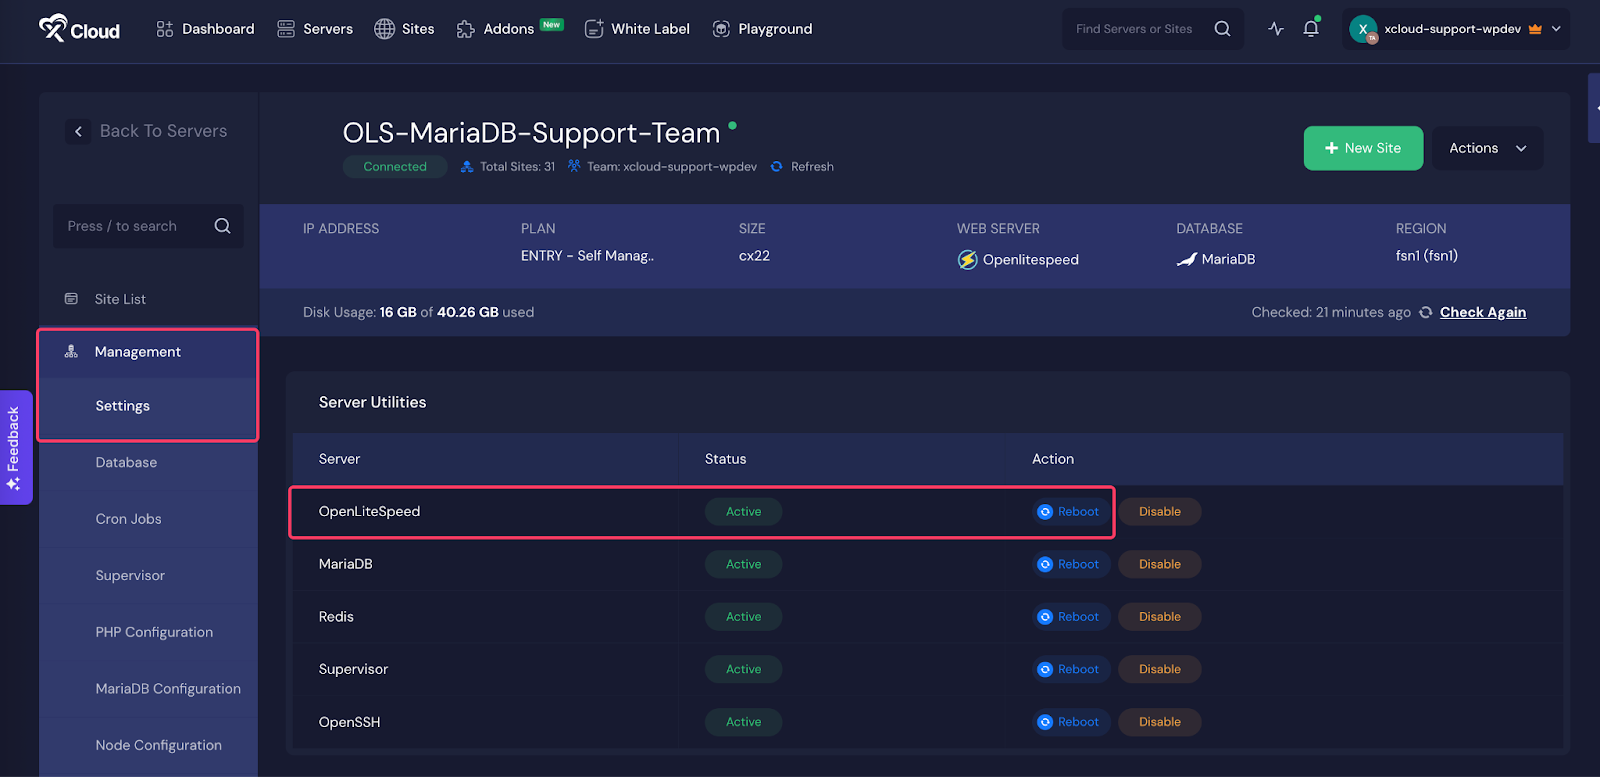
Step 3: Restart OpenLiteSpeed #
After opening the port, restart the OpenLiteSpeed service to apply the changes. To do this, go to your xCloud dashboard. Click on ‘Server Management’ and then choose ‘Settings.’ Look for the section where you can manage services. Find OpenLiteSpeed in the list and click the ‘Reboot’ button.
Step 4: Access the Webadmin Console #
Once the service restarts, you can access the OpenLiteSpeed webadmin in your browser. Enter the following URL:
Replace your_server_ip with the actual IP address of your server. You should now see the OpenLiteSpeed login page in your browser.
Important Note: Read-Only Mode #
The OpenLiteSpeed webadmin in xCloud only works in read-only mode. This means you can use it to view server configurations, monitor the system, and check statistics. However, you cannot make or save any changes using the webadmin console.
If you want to update configurations or apply changes, you must use the xCloud dashboard. All configuration management should be handled through that panel.
This guide helps you enable and use the OpenLiteSpeed webadmin in xCloud. Use it when you need to monitor your server without making changes directly through the web interface.
Still stuck? Contact our dedicated support team for any of your queries.


