


Building a new website becomes much easier when you have the right tools and a clear process to follow. xCloud makes it simple to deploy a WordPress site using Templately AI. If you want to create a site with ready-made templates and AI-generated content, xCloud enables you to launch your website quickly and efficiently.
Follow the steps to create a WordPress site using Build With Templately AI right from the xCloud dashboard.
✅ Free Access for All xCloud Free and PRO Users #
Enjoy exclusive AI-powered website-building capabilities at no extra cost:
- 100 AI Credits
- 3 Full Site Imports
- 1 Month Templately Pro Access
(includes 3,836 Premium Templates!)
Step 1: Access the Dashboard #
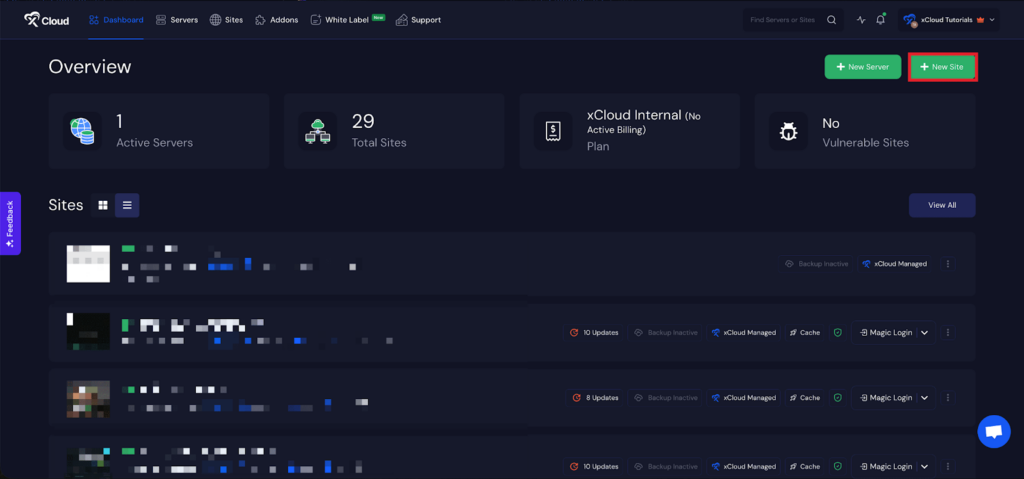
Begin by logging into your xCloud account. Once logged in, navigate to your dashboard and click on the ‘New Site’ button.
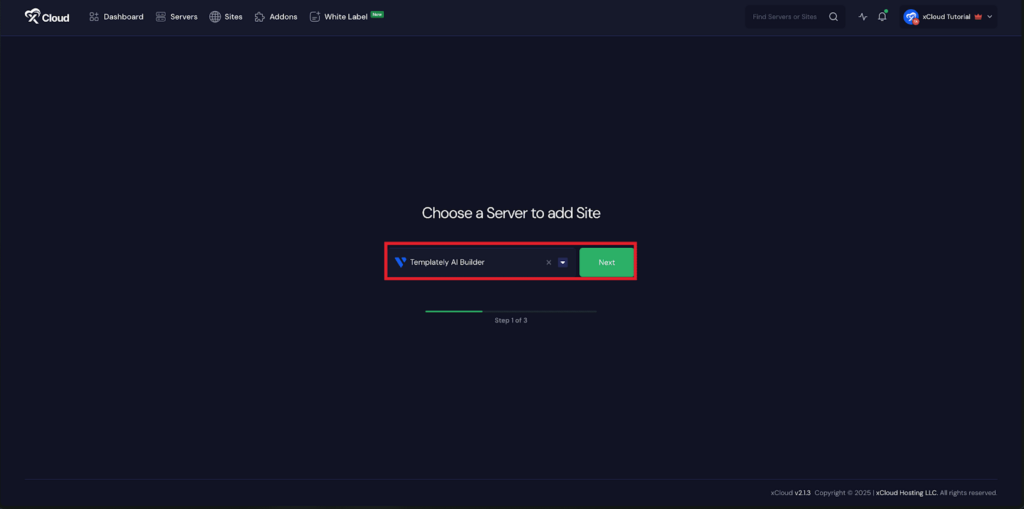
Step 2: Choose Your Server #
Once your server is connected, you can create a site from the dashboard or Site List by clicking the ‘Create New Site’ button. Then choose your server from the dropdown menu. Next, click on the ‘Next’ button to proceed.
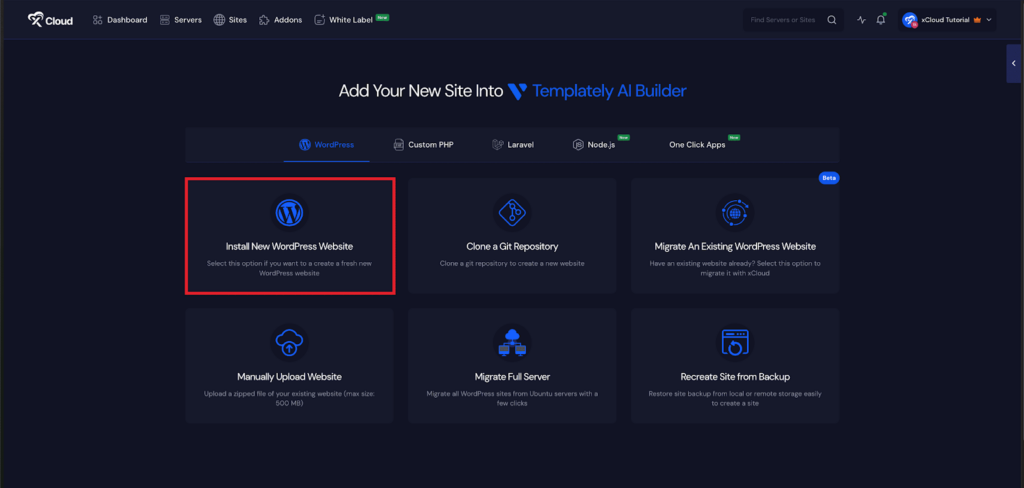
Step 3: Choose Your Site & Add Information #
As we will be creating a fresh WordPress site, choose the ‘Install New WordPress Website’ option.
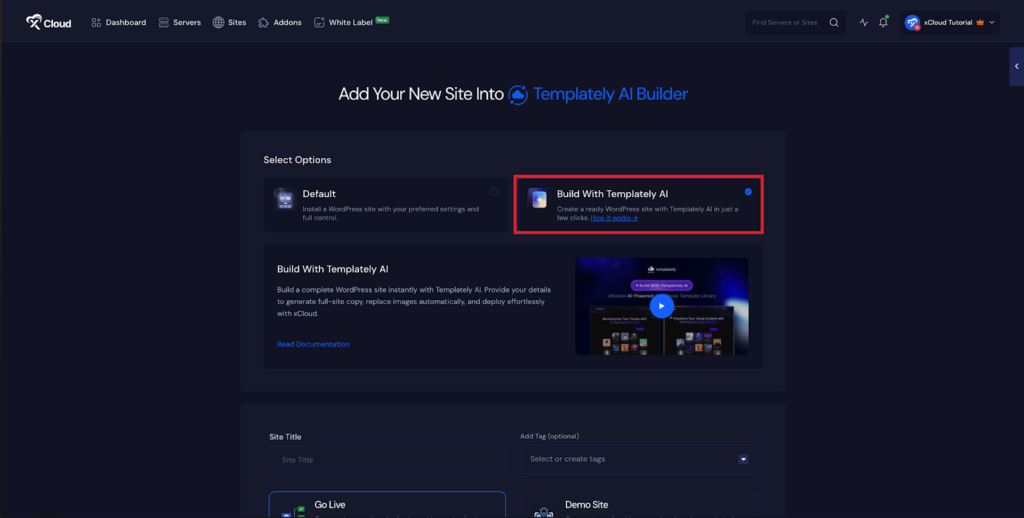
Step 4: Select Site Creation Method #
Next, you need to choose a deployment method: ‘Default’ or ‘Build With Templately AI’.
To create a site manually, choose the ‘Default’ method. If you want to create a site using AI, choose the ‘Build With Templately AI’ method.
Step 5: Set Up Your Site #
In the site setup screen, you will be prompted to enter basic site information. Provide a ‘Site Title’ and add relevant ‘Tags’ to help organize your deployment.
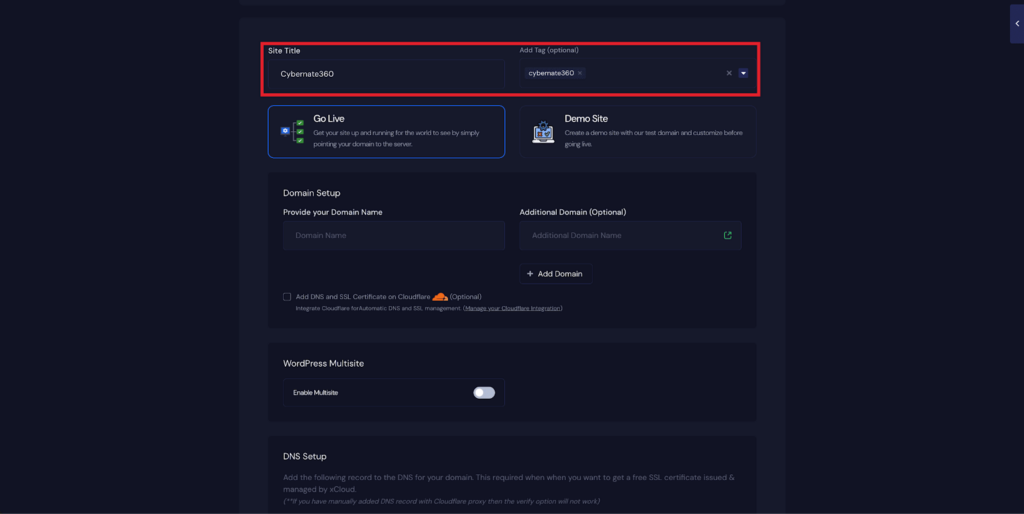
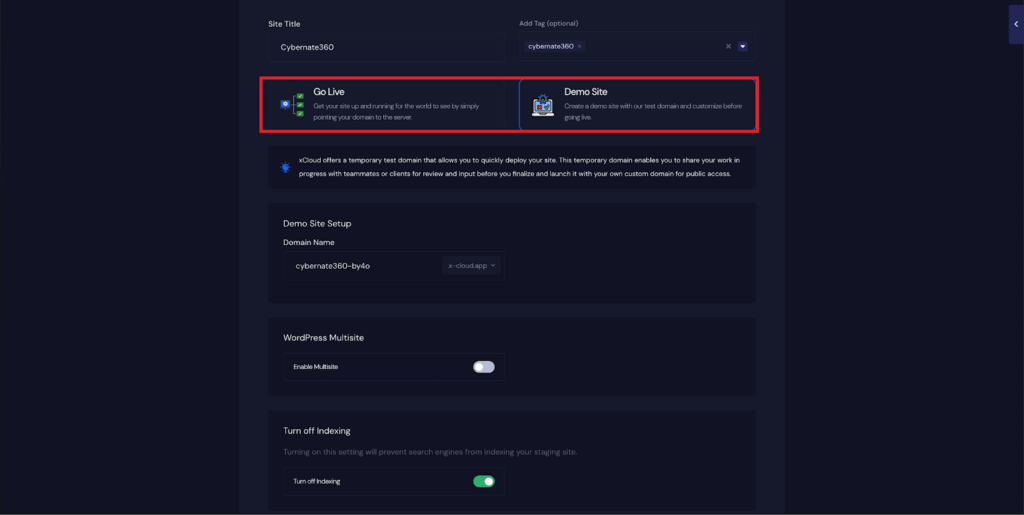
At this point, you can choose between two deployment modes:
- Go Live – for a production-ready deployment.
- Demo Site – for deploying the site instantly with a demo domain from xCloud.
Selecting Go Live will immediately create a live environment, while Demo Site allows you to create a site using a temporary demo domain.
Step 6: Configure Domain Settings #
If you select the Demo Site option, xCloud will assign a temporary subdomain for your WordPress application. Next, enter your application’s domain.
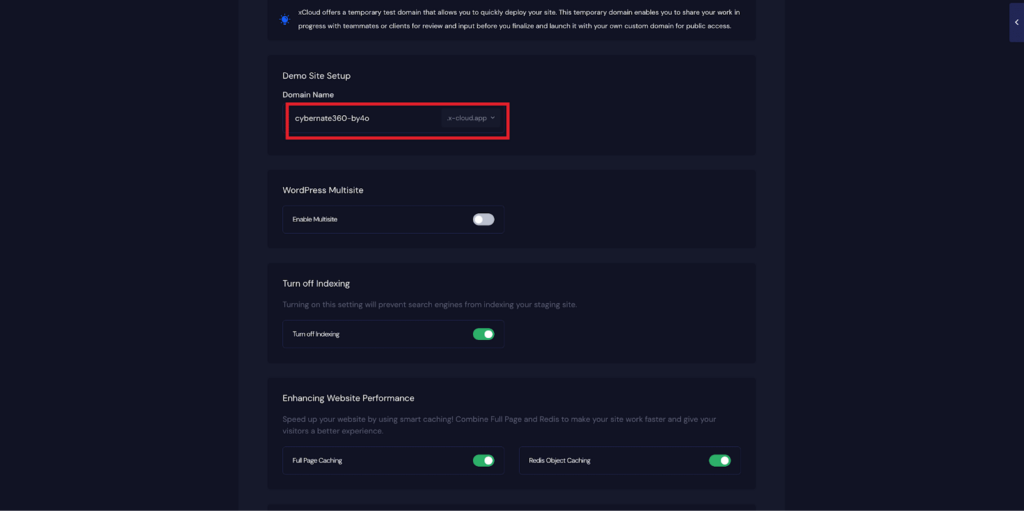
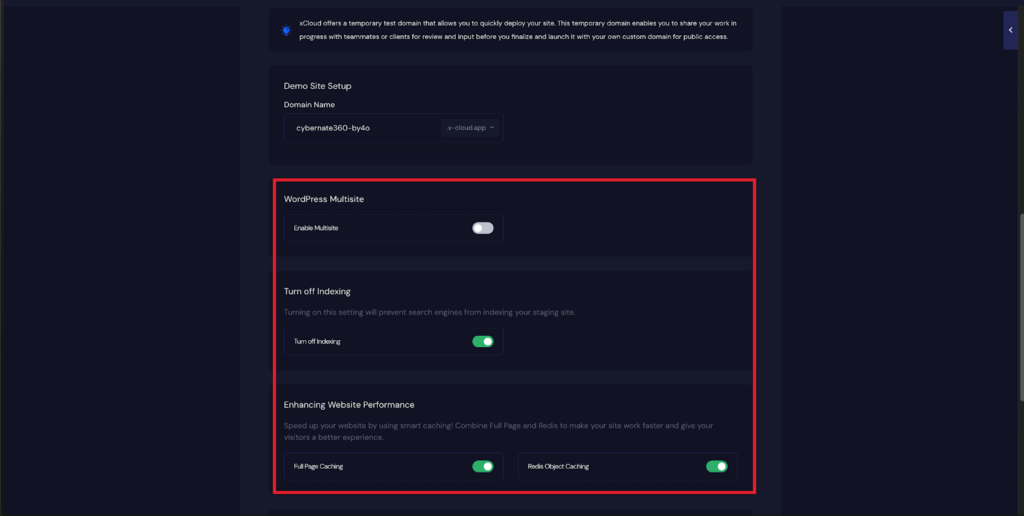
You will also get multiple configuration options, including‘WordPress Multisite’, ‘Turn Off Indexing’, ‘Full Page Caching’, ‘Redis Page Caching’. Toggle them on according to your preferences.
📌 Note for WordPress Multisite Users: When using Multisite, xCloud will only build the Primary Site during deployment. Additional network sites will not be automatically generated and must be created manually within the WordPress Network Admin after deployment.
Get 100 Free Emails With xCloud Email Delivery For Your Sites #
Next, toggle on the ‘Email Provider Configuration’ for your site. xCloud provides 100 free emails per site.
📌 Follow this documentation to learn more.

Step 6: Configure Additional Settings #
By default, the WordPress admin credentials are auto-generated to speed up the site creation process. Once your site is deployed, you will receive your admin credentials via email. You can later update your password if needed.
From More Advanced Settings, you can update ‘Admin Username’, ‘Admin Password’, ‘Admin Email Address’ additional configuration details.
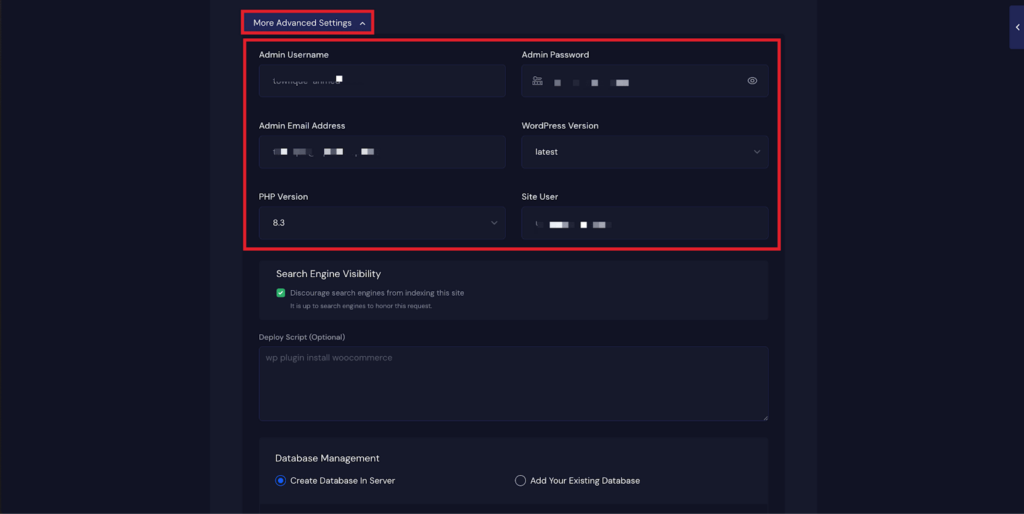
You can also configure Search Engine Visibility, Deploy Script, and Database Management settings according to your preferences.

Step 7: Review Your WordPress Settings #
After completing the previous steps, click the ‘Next’ button. It usually takes 1–2 minutes to create your site.
🔔 Note: After your site is created, Templately will automatically send an email containing your WordPress admin login credentials.
Step 8: Insert Full Site with AI #
Click on the ‘Build with Templately AI’ button. This will automatically redirect you to the Templately dashboard.
If the redirect does not happen automatically, simply click the ‘Build with Templately AI’ button again to proceed manually.
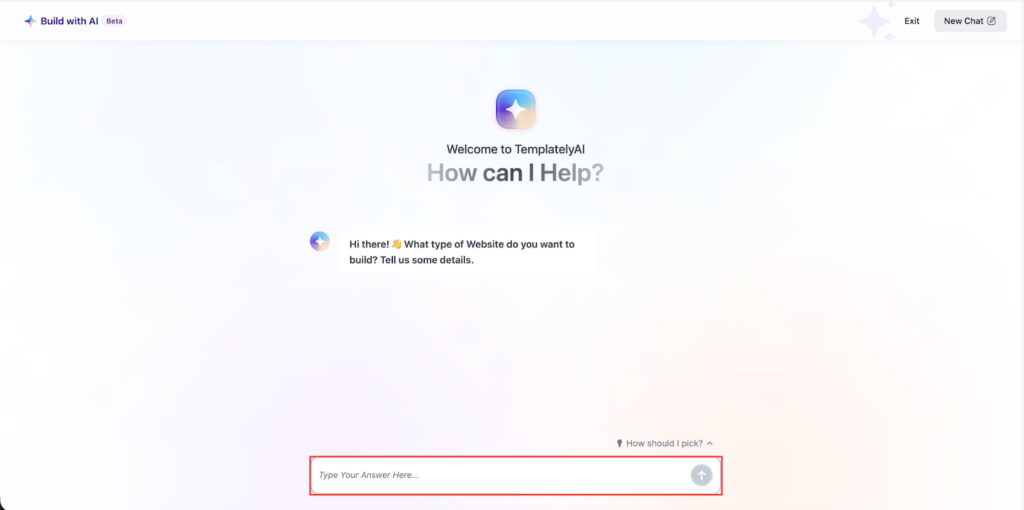
Here, the AI will ask some questions to generate content based on the answers you provide. Here are the questions that you need to answer.
- Business Name: The chatbot will ask, ‘What is Your Business Name?’. Here, in the answer, type your business name. If you are creating a portfolio website, you can add your name here, too.
- Industry: Then, you have to define which industry your business belongs to. You will find the suggested industry name in the conversation. You can either pick an industry from the options or add yours.
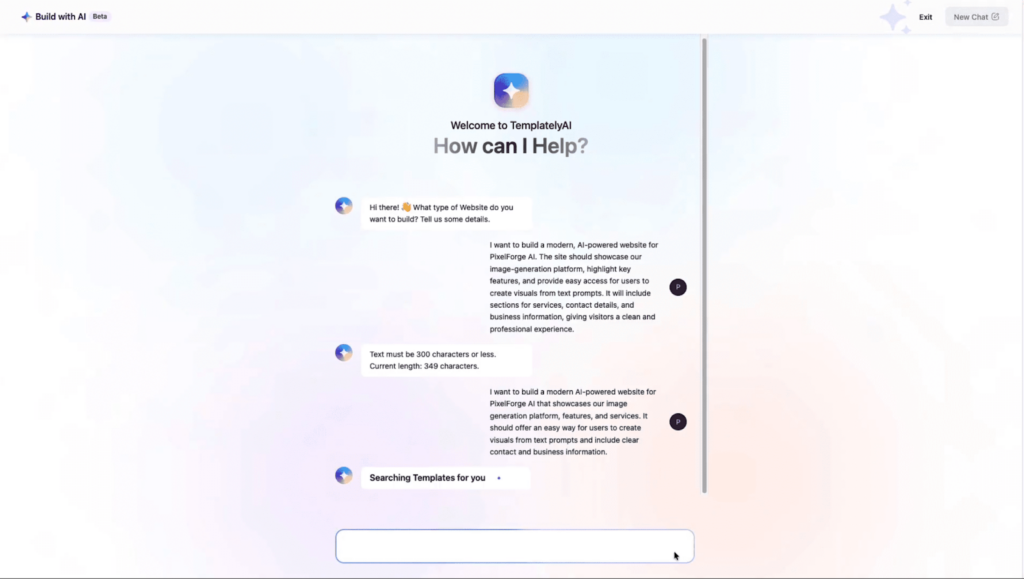
- Business Details: In the next part, give a detailed description of your business. Here, you can add what specifically your business does. For example, if it’s an agency, then whether it is a digital marketing agency or a study abroad agency, you can specify the information.
Email Address: Add specific email addresses for your website contact section. Through this email address, your visitors can contact you.

- Contact Number: Next, you will be asked whether you want your contact number or not. If you want to, then you can add it, or else you can click on the ‘Skip’ button.
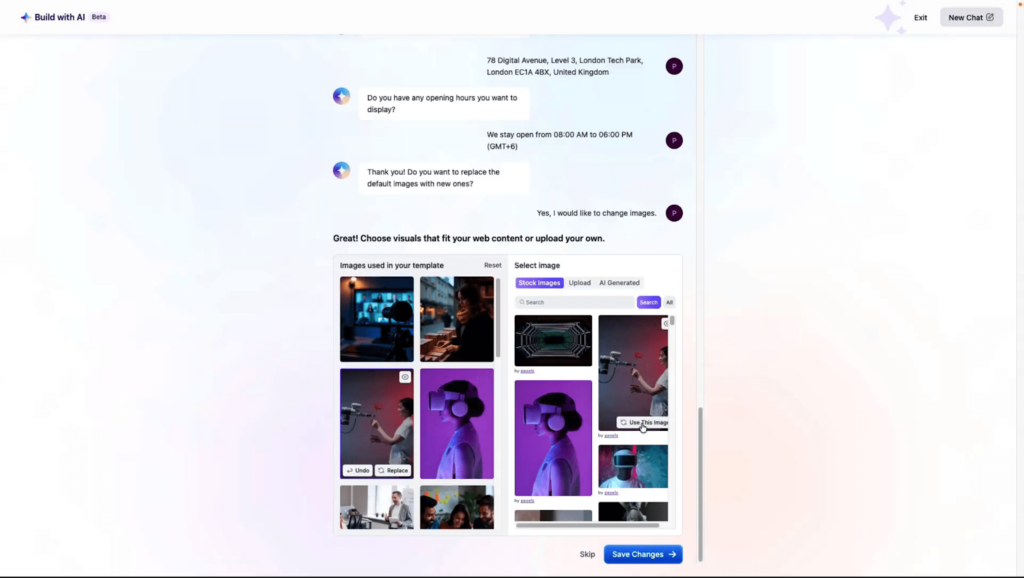
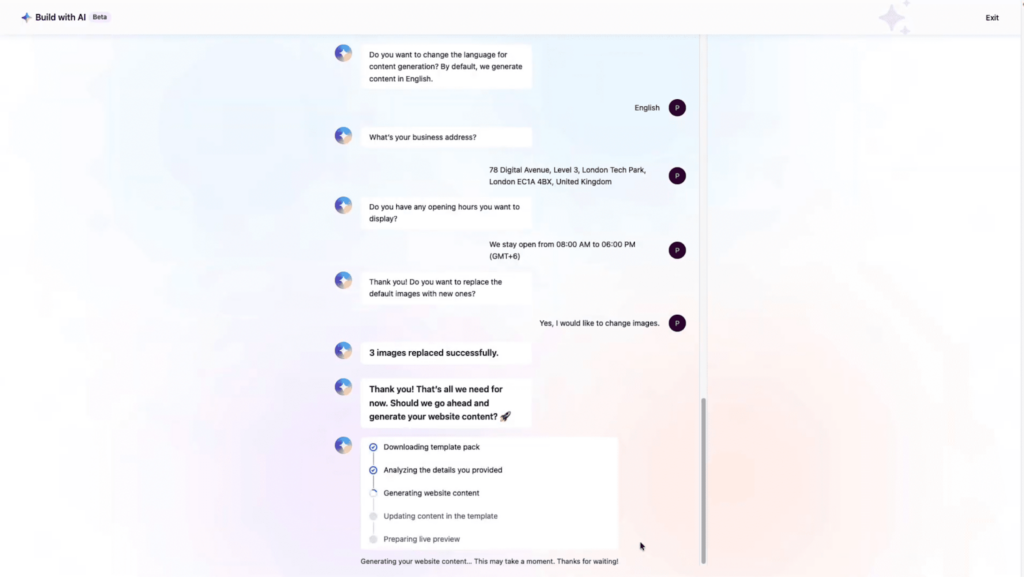
- Business Address: In the next part, add your business address if you have one. OtherwiseOther wise you can click on the ‘Skip’ button here too.
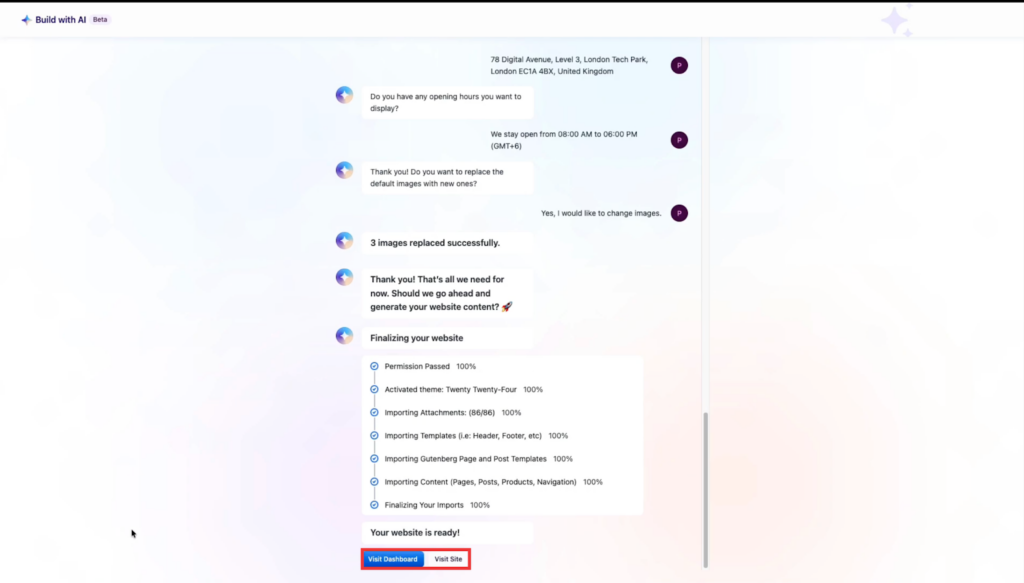
- Opening Hours: If your business has a specific business hour, then add the opening hours in detail. You can click on the ‘Skip’ button if you do not have any specific hours.
- If you want to replace the images from the template and want to add customized images, you can do that. With Templately AI, you can also replace images. To change images, click on the ‘Yes’ button to agree to replace images.
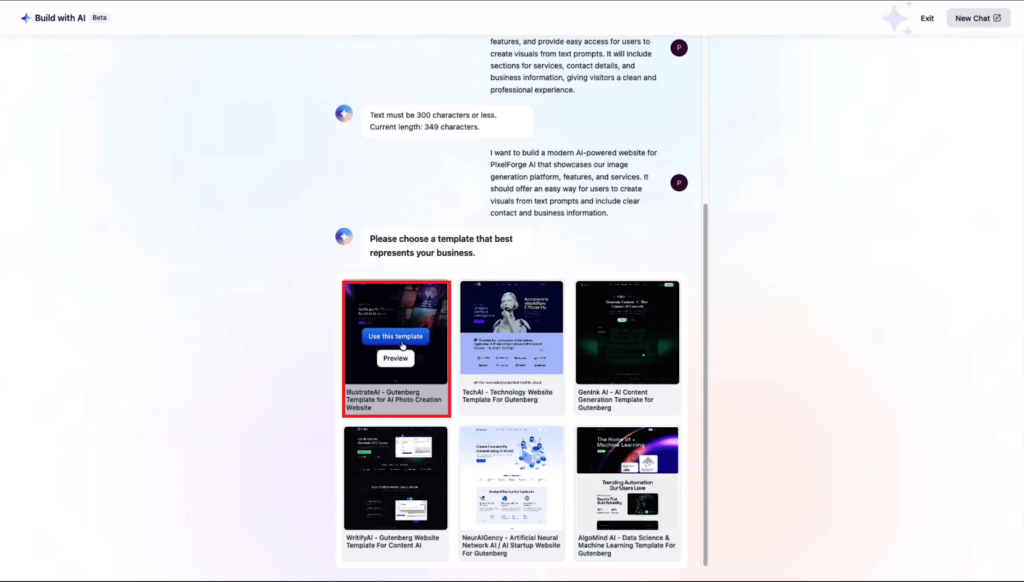
After answering the questions, you will receive a confirmation text to generate content on the website based on the information you provided. If you are still confused, you can click on the ‘How should I pick?’ to get a demo sample.
After that, you will find an option to change images. From the options, select the image you want to replace. Then, you can choose from stock photos or upload them from your files. Select the images you want to replace.
Finally, click ‘Save Changes’, and after importing the full site, you will see that the images will be replaced with the ones you have chosen. Finally, click on ‘Generate and Proceed’ to generate full content and replace images on your website with AI.

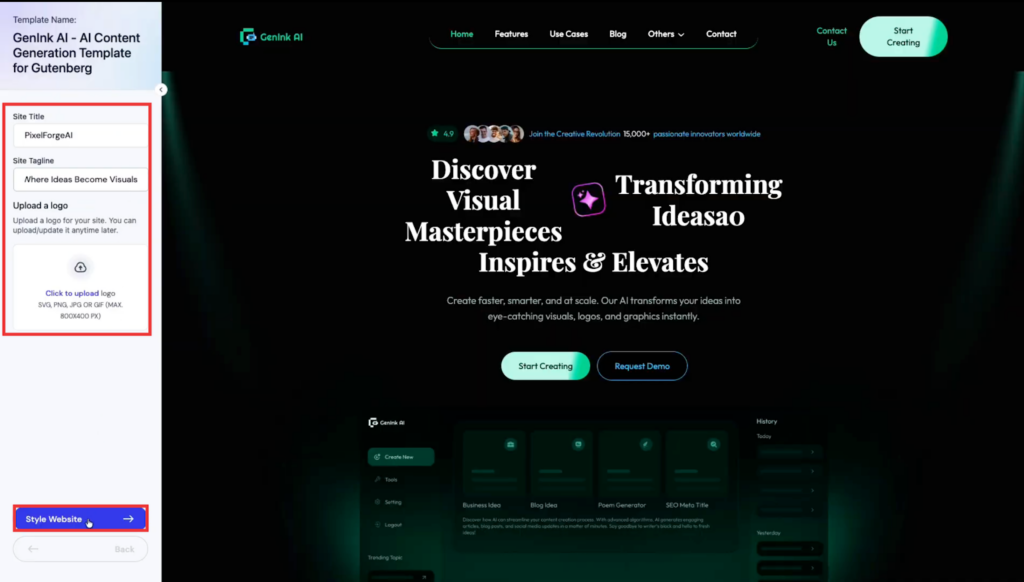
Finally, after completing the process you will see your website will be createdwill created instantly. Here enter your ‘Site Title’, ‘Site Description’ & ‘Logo’ and then click on the ‘Style Website’.
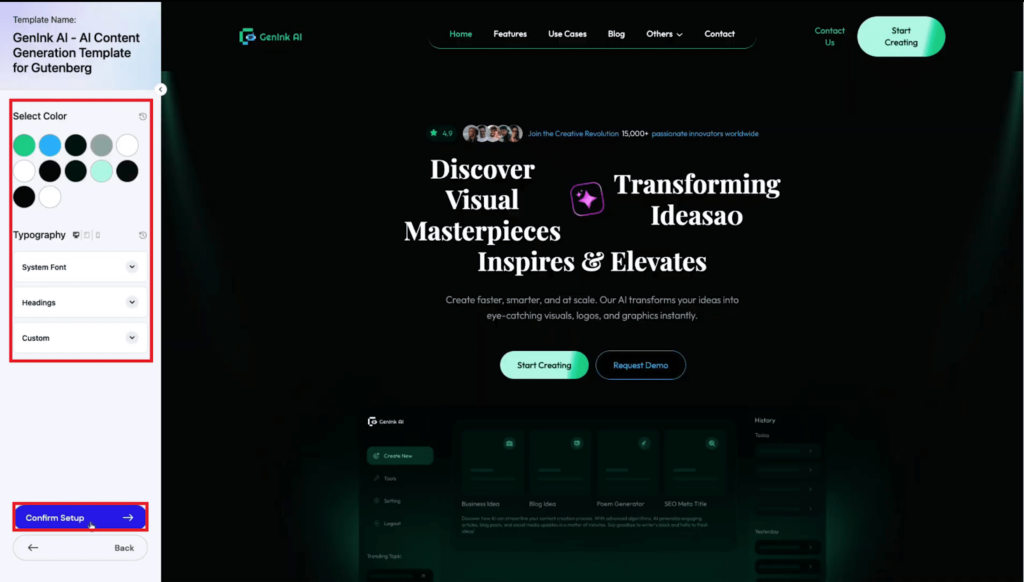
Next, adjust the color and ‘Typography’ according to your preferences and click on the ‘Confirm Setup’ button.
Final Outcome of Generating Content & Image Replacement #
And your site creation will be completed instantly. You will get two options: ‘Viewoptions ‘View Dashboard’, and ‘Visit Site’. Click on the visitvisti site option to check out your newly created site.
And that’s it. This is how easily you can effortlessly create and customize a fully functional WordPress website on xCloud. With xCloud and Templately AI, building a professional website has never been faster or more intuitive.
Frequently Asked Questions #
What happens to Templately Pro access and my website after the 1-month free period ends? #
After the complimentary one-month Templately Pro access ends, you will no longer have access to Pro templates or advanced Pro-only features, and you won’t be able to connect more than three websites. However, your website will remain live and fully functional, and all content and designs you created will stay exactly as they are. You can continue using Templately’s free features, and if you wish to regain Pro access, you can upgrade to PRO at any time.
What if I already have a Templately Pro (or Templately Lifetime Deal) account? #
If you already have a Templately Pro (Or Lifetime Deal) account, xCloud will automatically connect to your existing account; no new account will be created. Any website built through xCloud will not count toward your active site limit under your Templately subscription. In addition, the 100 AI credits provided by xCloud will be added directly to your existing account, even if you’re an LTD user. For example, if you currently have 50 AI credits, your total will become 150.
How do AI credits work, and are they separate from my existing account with Templately? #
The 100 AI credits included with xCloud are added directly to your current Templately account, whether you’re on a Free, Pro, or LTD plan. These credits are not part of a separate product or dashboard. Once your credits are used up, you won’t be able to generate new AI content, but all previously generated content will remain on your website without any interruption.
Still stuck? Feel free to reach out to our support team.


