


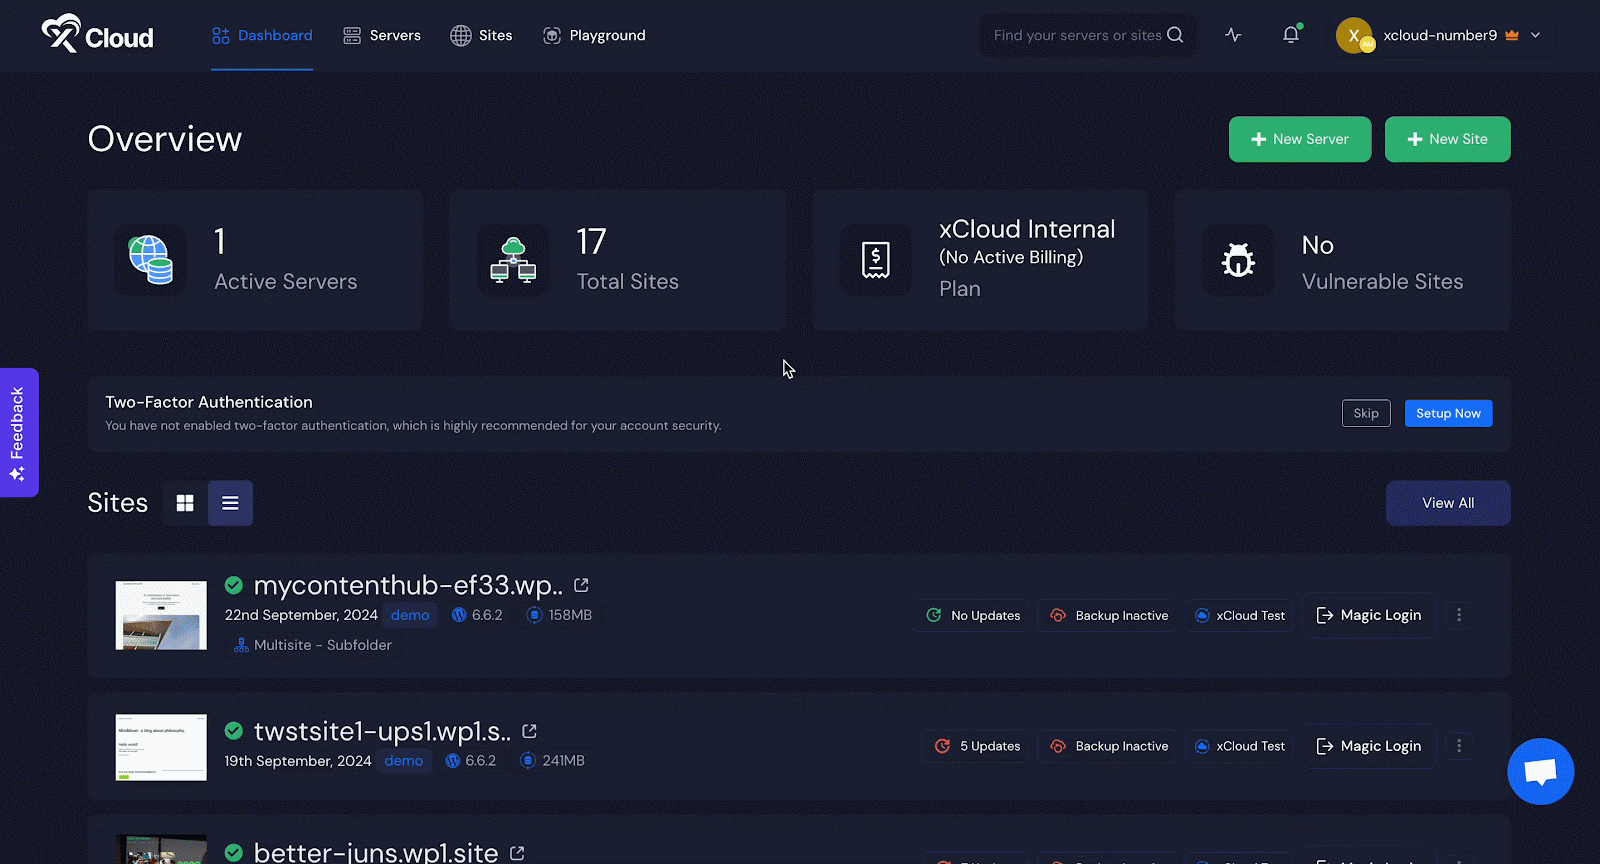
With xCloud, you can easily create a demo site in a few clicks and test everything before going live. A demo site serves as a test website where you can migrate sites, run experiments, use all necessary plugins and themes, and more with a temporary domain before going live.
On the other hand, a staging environment lets you push and pull site data between staging and production sites. Follow this step-by-step guideline below to learn how to create a demo site in xCloud.
Step 1: Add New Site & Add Information #
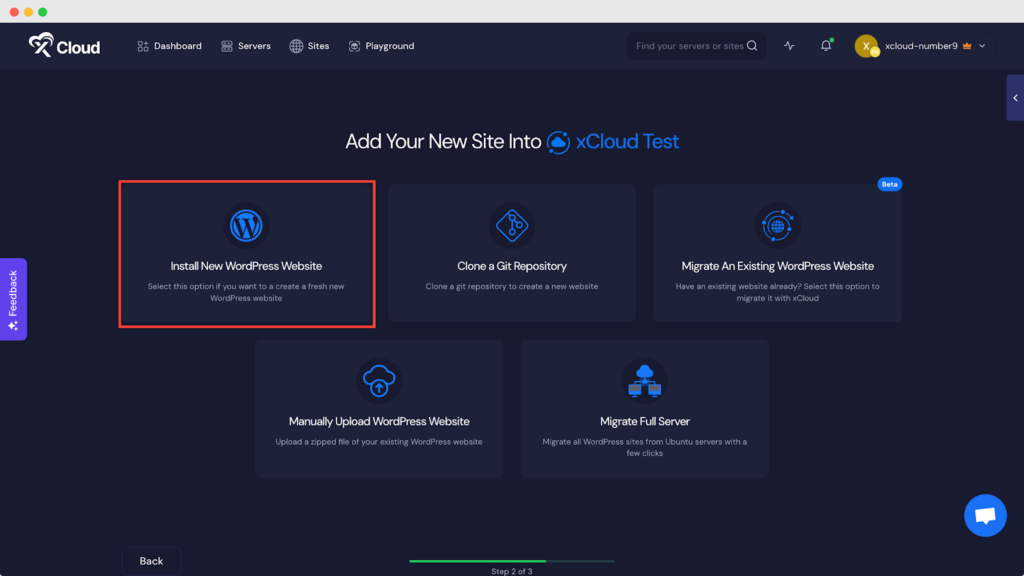
Log in to your xCloud dashboard and click the ‘+New Site’ to add a new site. Then, choose a server from the list and go ‘Next’.
We will be creating a fresh WordPress site here. So choose the ‘Install New WordPress Website’ option as shown below.
Step 2: Configure & Install Your Demo Site #
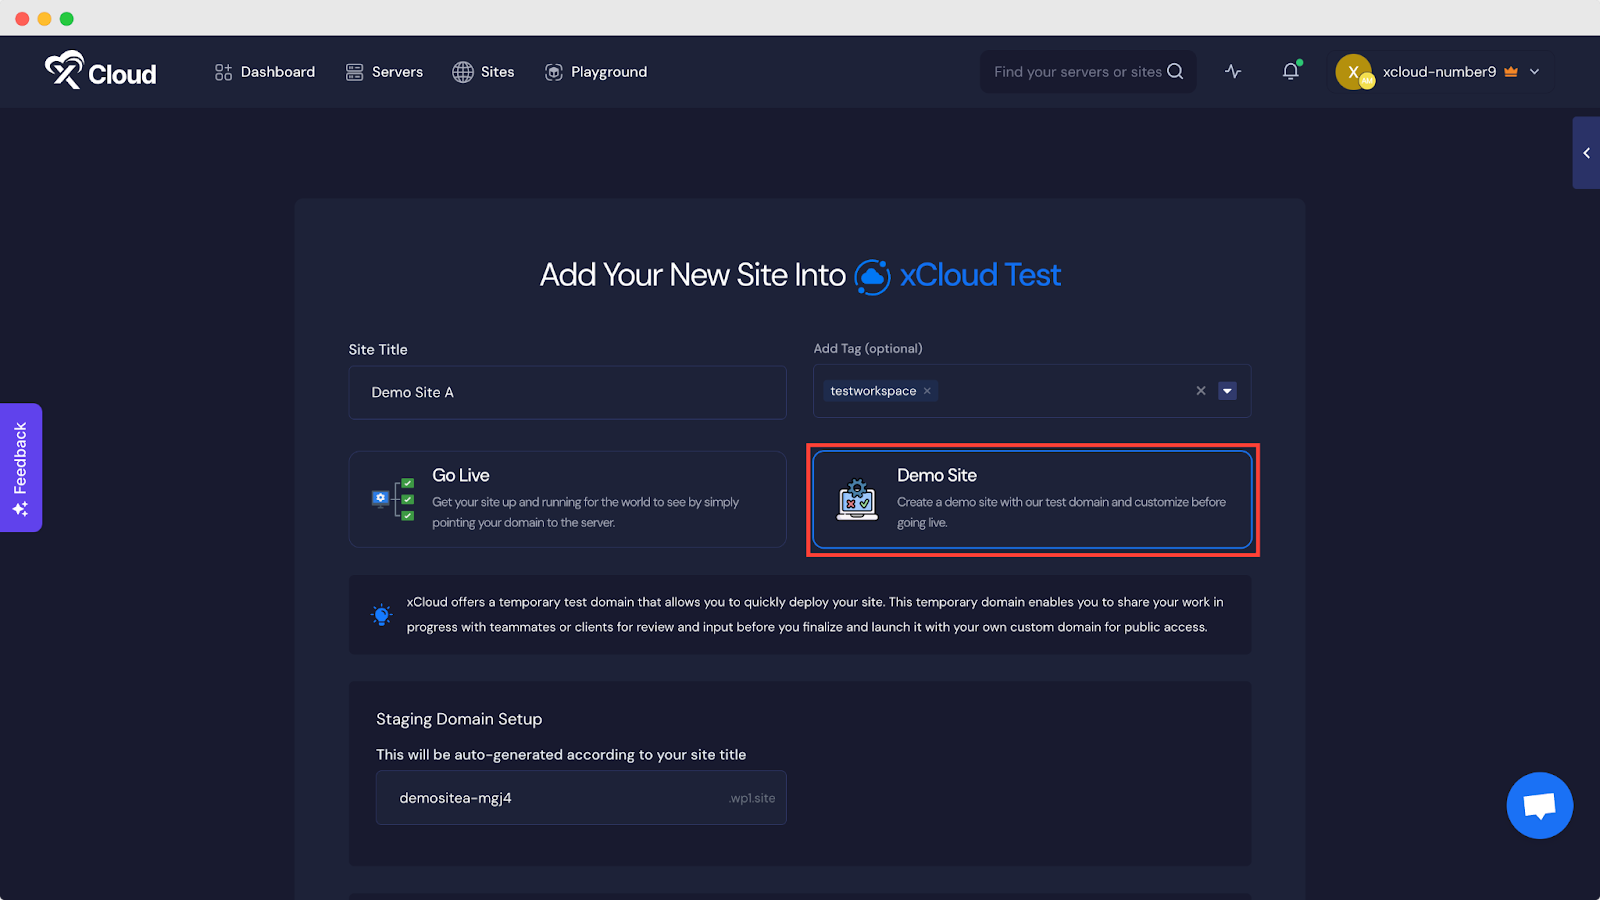
Now, instead of going live, you need to choose ‘Demo Site’ in this section as shown below. Your new WordPress site will be a demo site, so you can run some tests and experiments before sending it live.
Before continuing, please note that xCloud provides demo domains as ‘.wp1.site’ and ‘.wp1.sh’. The demo domains are subdomains of wp1.site and wp1.sh and team xCloud uses Cloudflare to manage these domains. You can choose between any of these. Once you go from Demo to Live, you cannot go back to the Demo domain again.
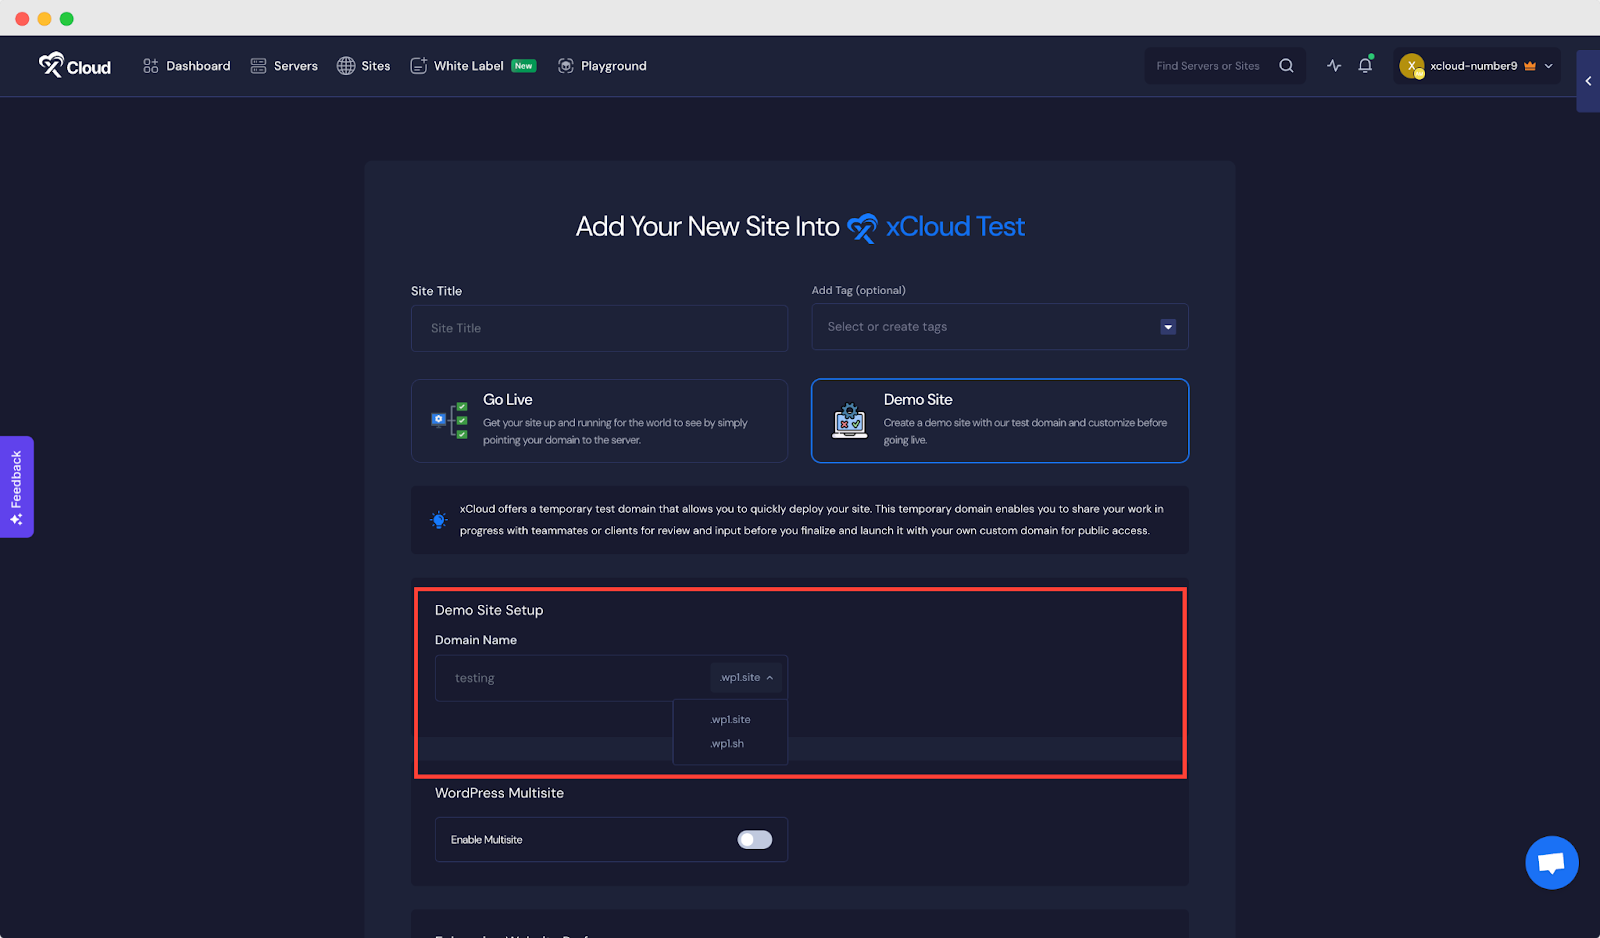
Set a name for your demo site and add relevant tags. Your staging domain will be generated automatically. Now, scroll down to configure more settings, such as Multisite, Caching, Email Provider, and Blueprints as you need.
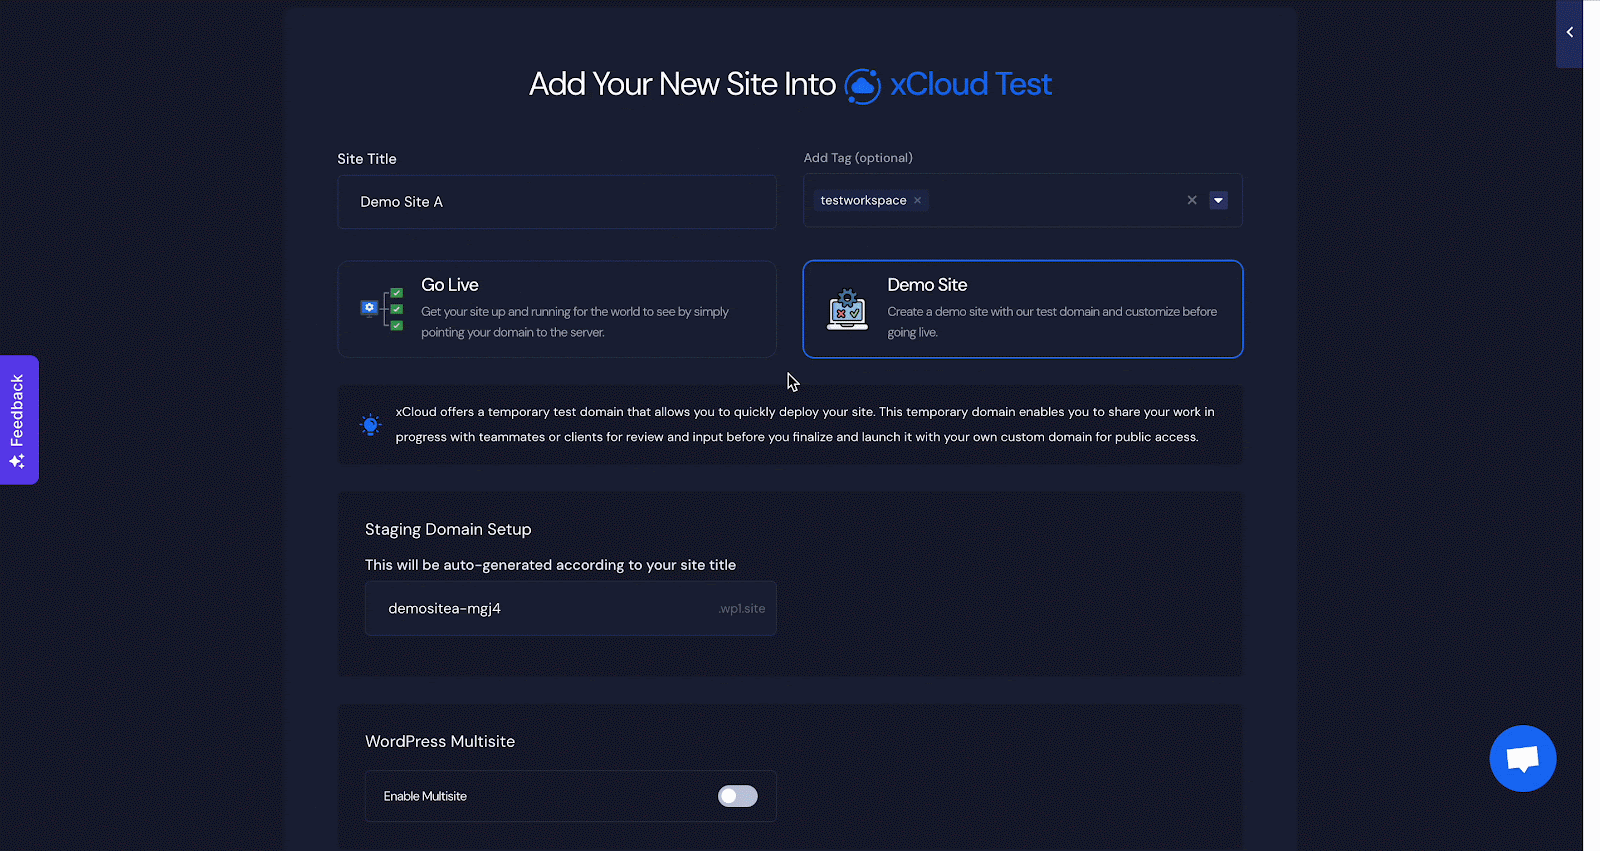
At the bottom, you will see another option for ‘More Advanced Settings’, where you can set and choose admin details, WordPress Version, PHP Version, manage database, and more.
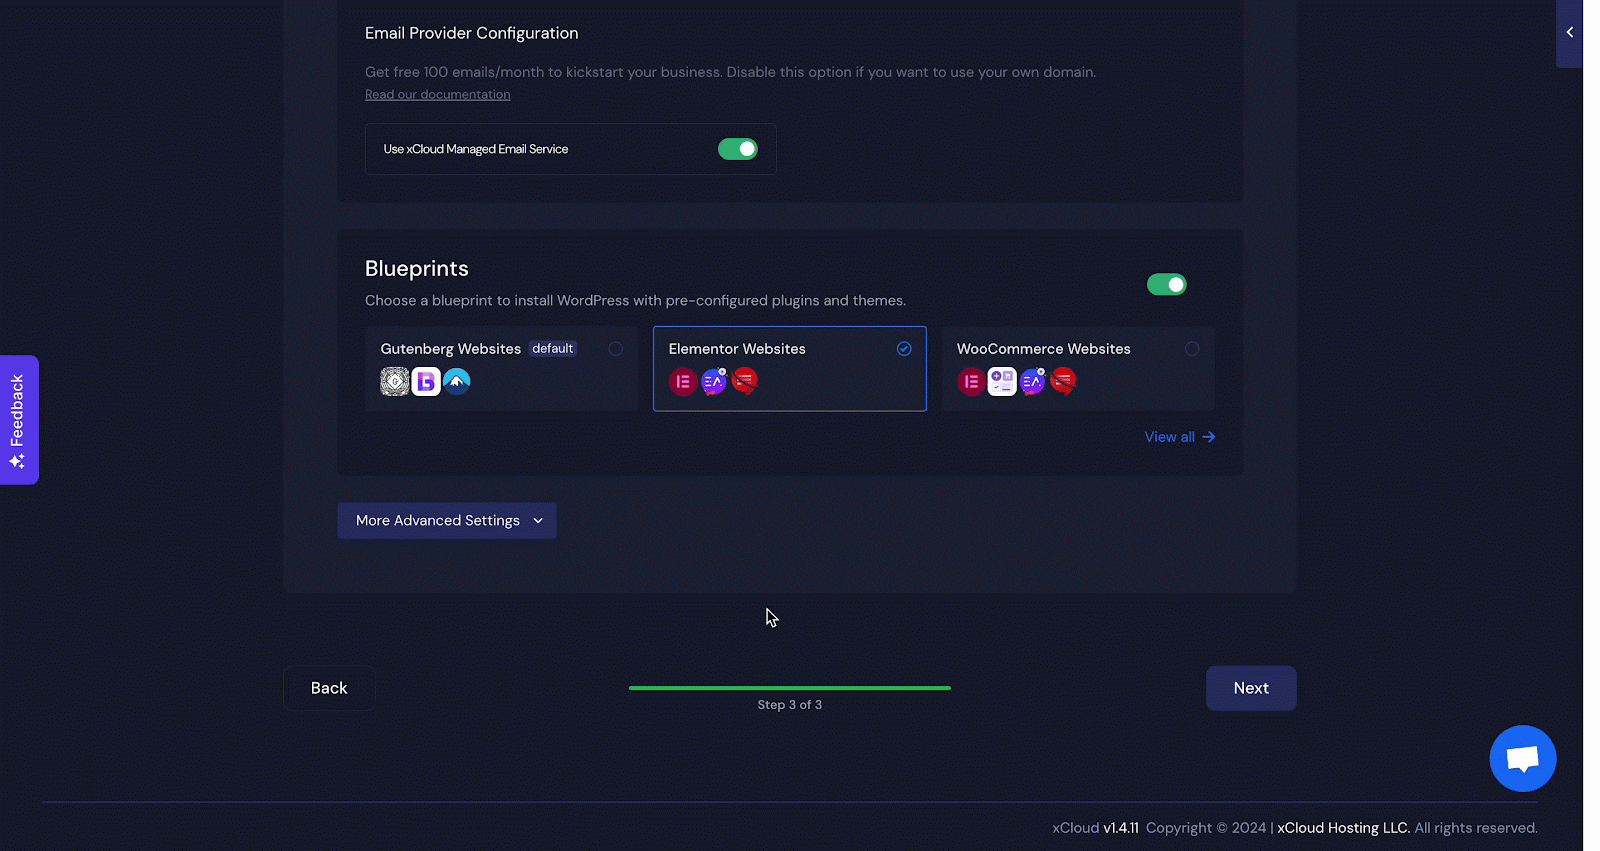
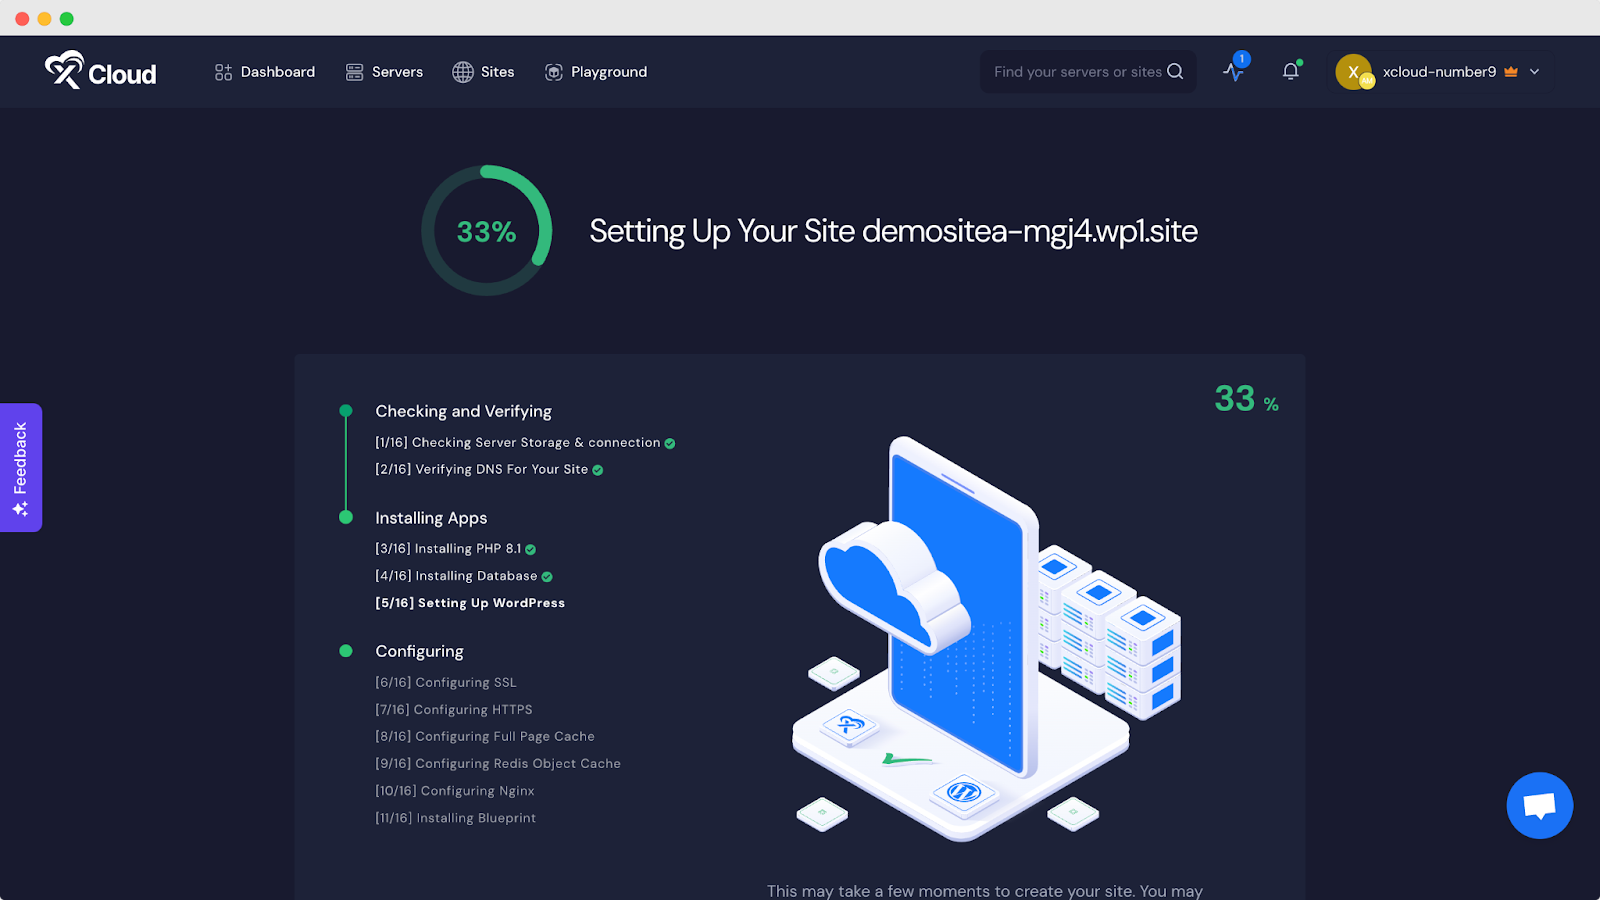
Once you are done with all the configurations and adjustments, hit the ‘Next’ button. Within a few minutes, your demo site will be ready & you will be able to manage everything on your site from the xCloud dashboard.
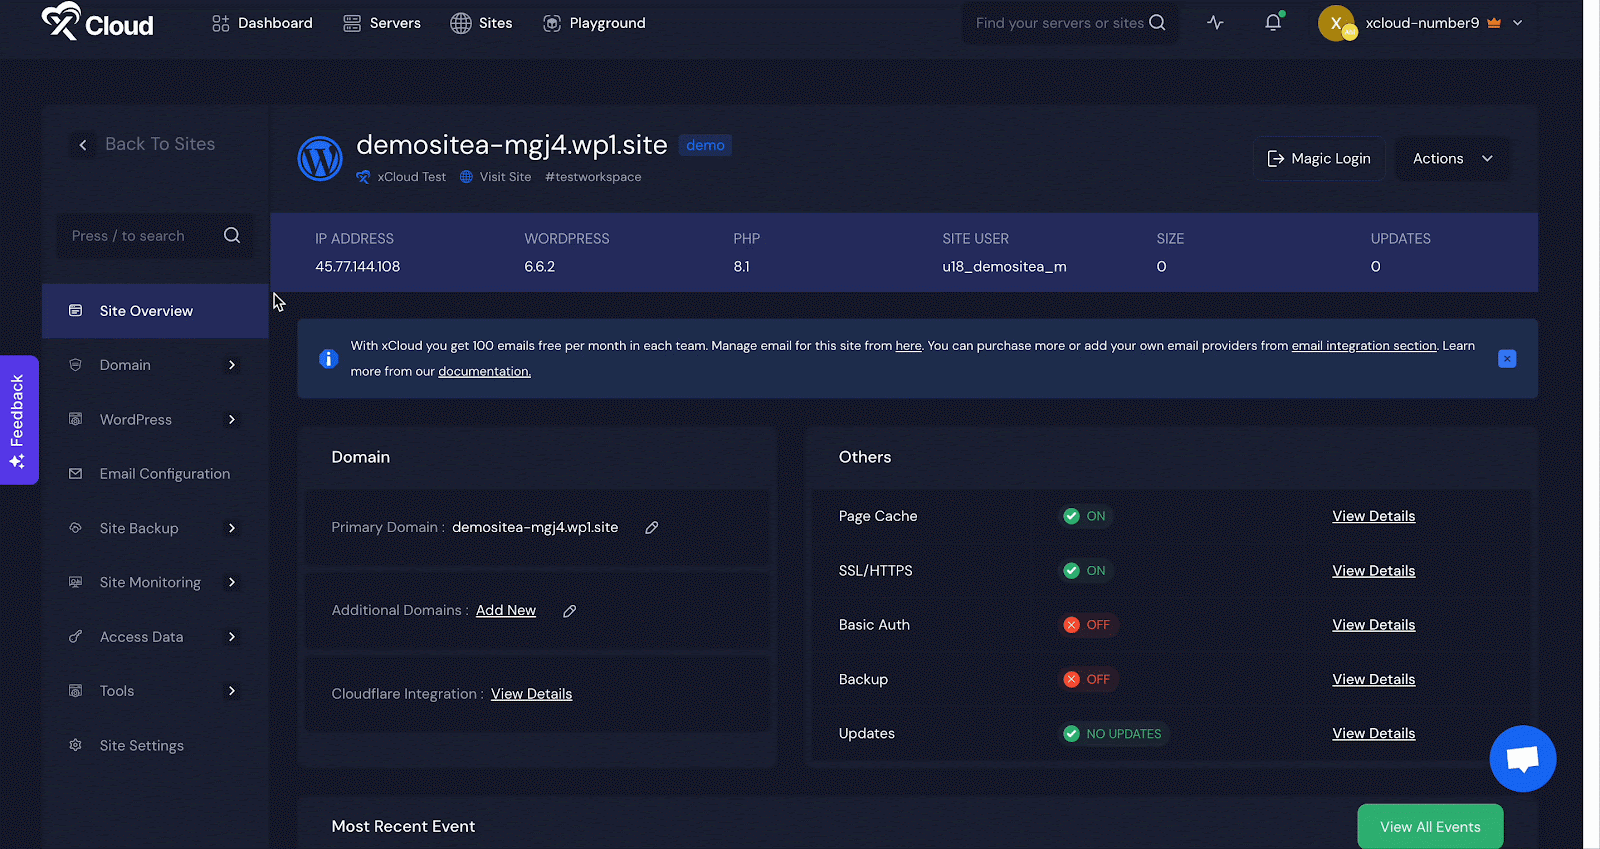
Final Outcome #
Here is the outcome of your demo site’s environment below. xCloud provides this demo site to do all the development to your site with a temporary domain. When you are ready with everything on your site, simply select the ‘GO LIVE’ option and add your own domain to make the site available to your user/visitor.
This is how easily you can create a demo site in xCloud.
Still feeling stuck? Contact our dedicated support team for further assistance.


