


Redis Object Cache is a powerful caching solution that helps improve the performance and scalability of WordPress websites. By integrating Redis with your xCloud server running OpenLiteSpeed, you can reduce database queries, speed up page loads, and provide a smoother experience for your visitors.
The LiteSpeed Cache plugin already includes Redis integration, so you do not need to install any additional plugin if you do not want it. However, this guide is for those who prefer to use the Redis Object Cache plugin separately instead of LiteSpeed’s built-in Redis option.
Let us follow the step-by-step process to enable Redis Object Cache plugin with OpenLiteSpeed servers correctly and without conflicts.
Step 1. Enable LiteSpeed Cache Plugin #
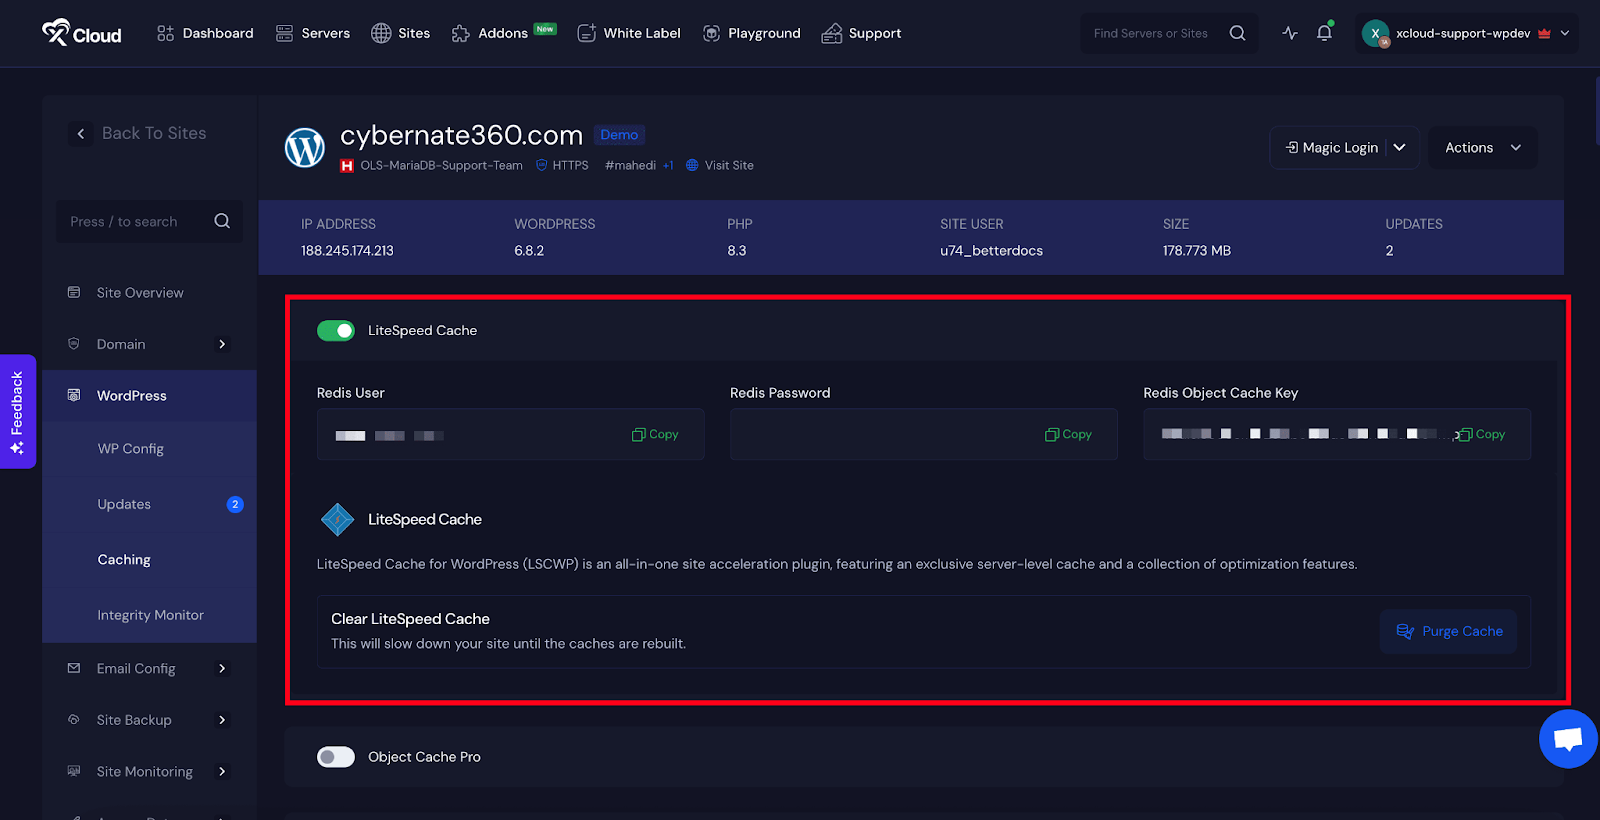
First, go to your site from the dashboard. Then, find the ‘WordPress’ option from the side navigation bar and toggle on the ‘LiteSpeed Cache’ button to enable the plugin from the xCloud dashboard.
Once you toggle on the ‘LiteSpeed Cache’, you will get the ‘Redis User’, ‘Redis Password’ and ‘Redis Object Cache Key’ or Redis Prefix. Collect the credentials.
Step 2: Access the wp-config.php file #
Next, go to ‘WordPress’ → ‘WP Config’ from the sidebar to customize the wp-config file directly from the xCloud dashboard.
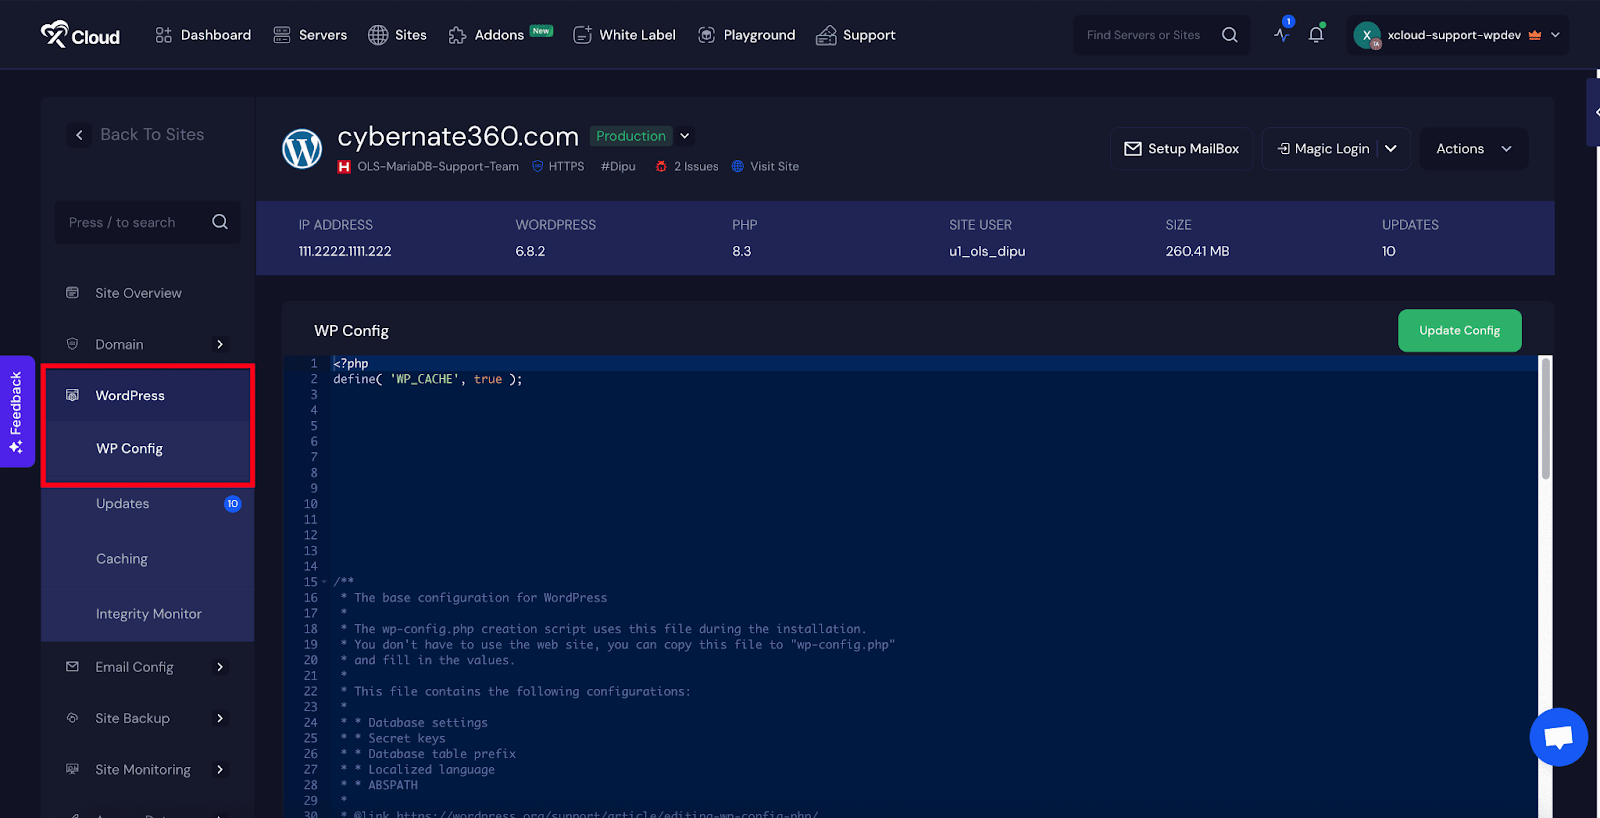
Once you are in the wp-config.php editor panel. Add the following code into the editor and update the username, password, and prefix with the Redis credentials you collected earlier from the LiteSpeed Cache page. After updating the values, click on the Update Config button to save the changes.
define( 'WP_REDIS_PASSWORD', ["user", "password"] );
define( 'WP_REDIS_DISABLE_BANNERS', 'true' );
define( 'WP_REDIS_PREFIX', 'prefix' );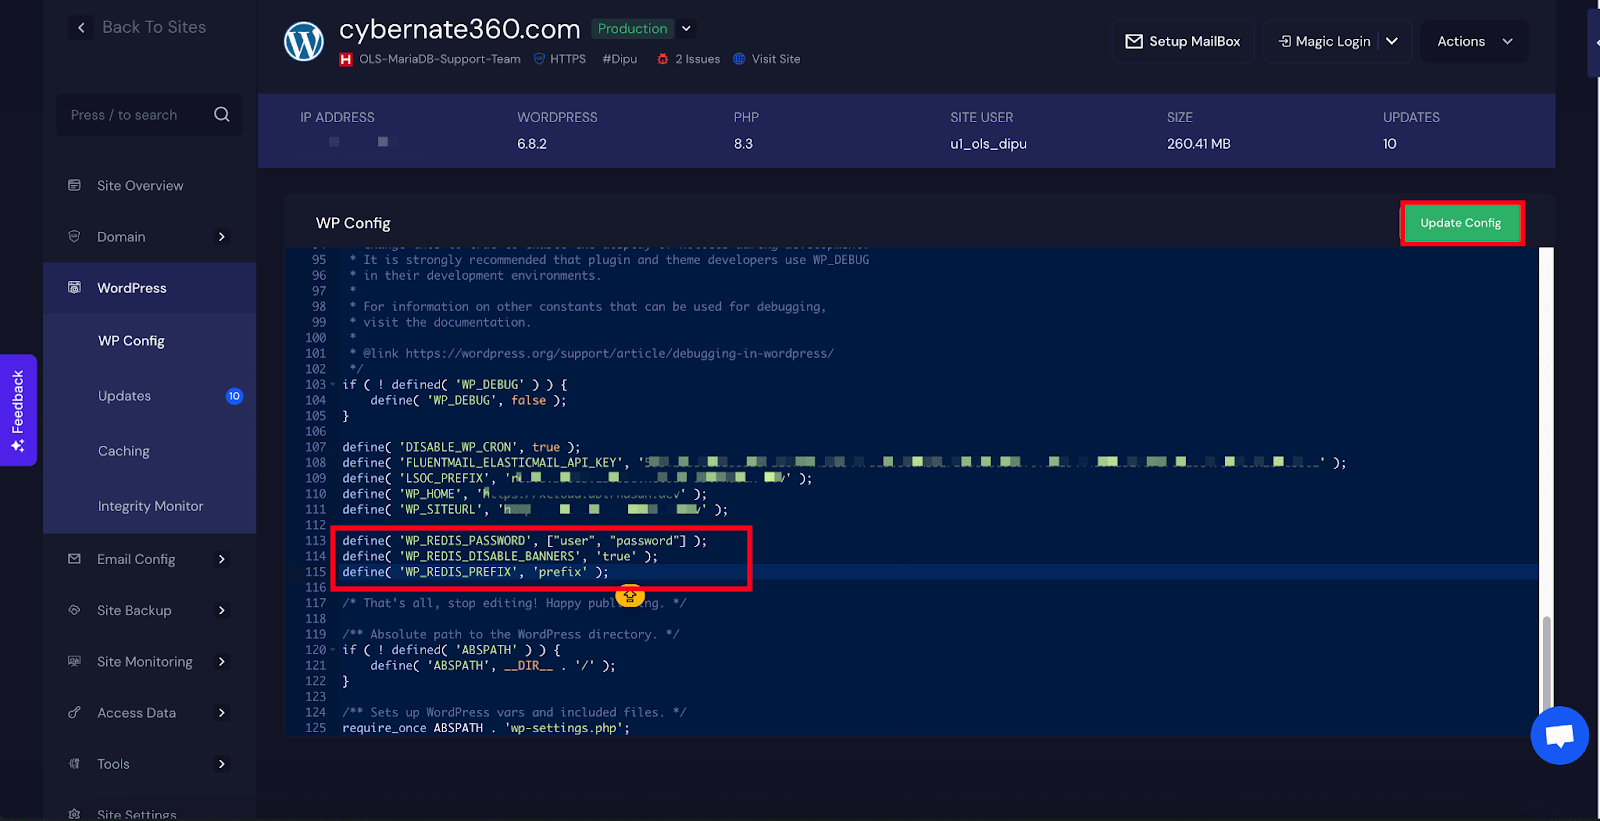
Step 3: Turn OFF or Uninstall the Object Cache Plugin #
To use the Redis Object Cache in OpenLiteSpeed servers, you need to prevent conflicts between caching systems. LiteSpeed Cache plugin handles both Full Page Cache and Object Cache, and Redis is already configured inside it.
- If you want to use the Redis Object Cache plugin separately, you must either disable the Object Cache option in LiteSpeed Cache or uninstall the plugin entirely.
- If you want to continue using LiteSpeed Cache for full page caching only, then just disable the Object Cache option.
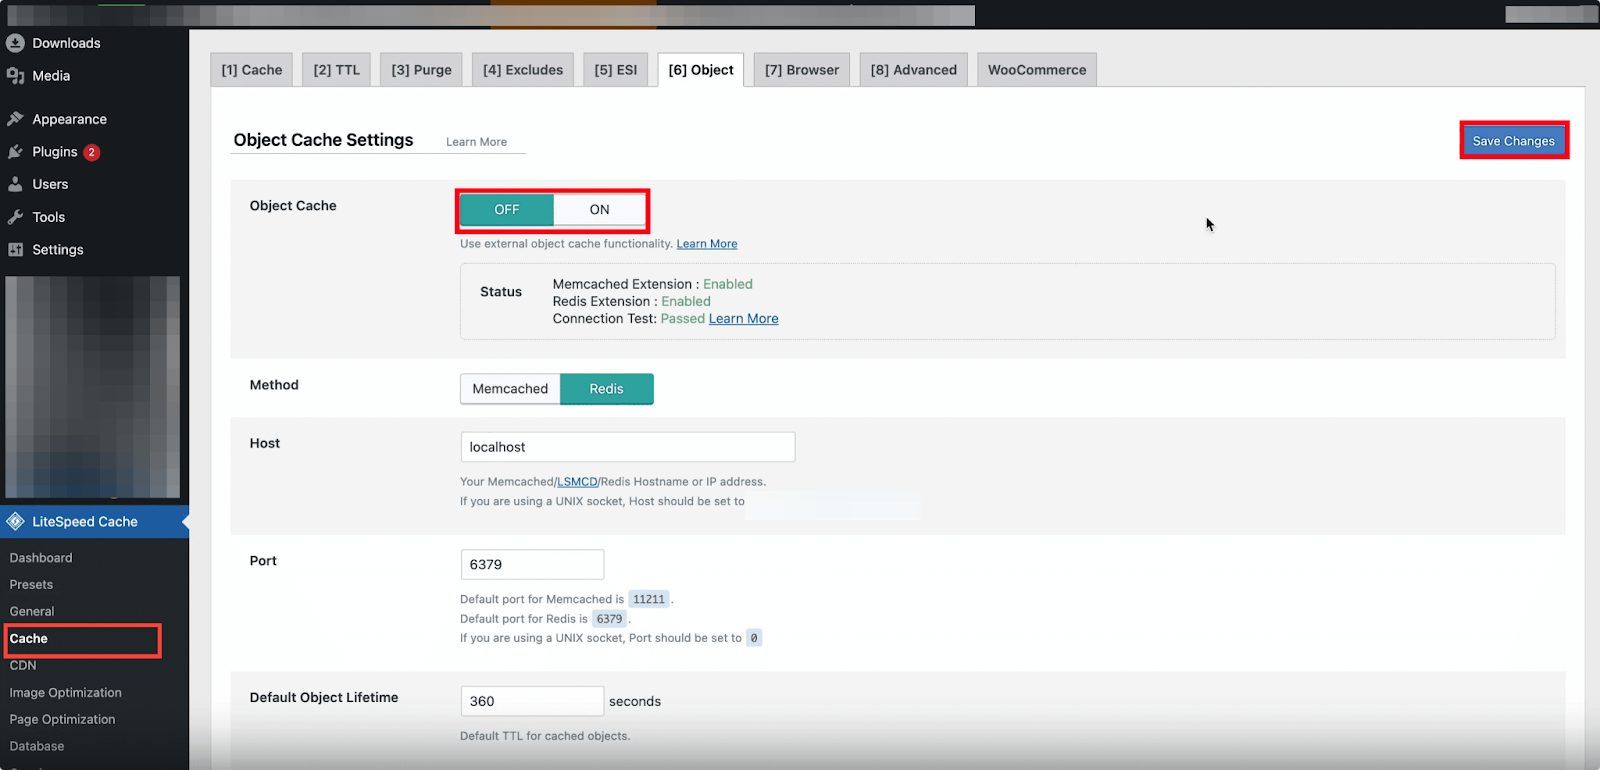
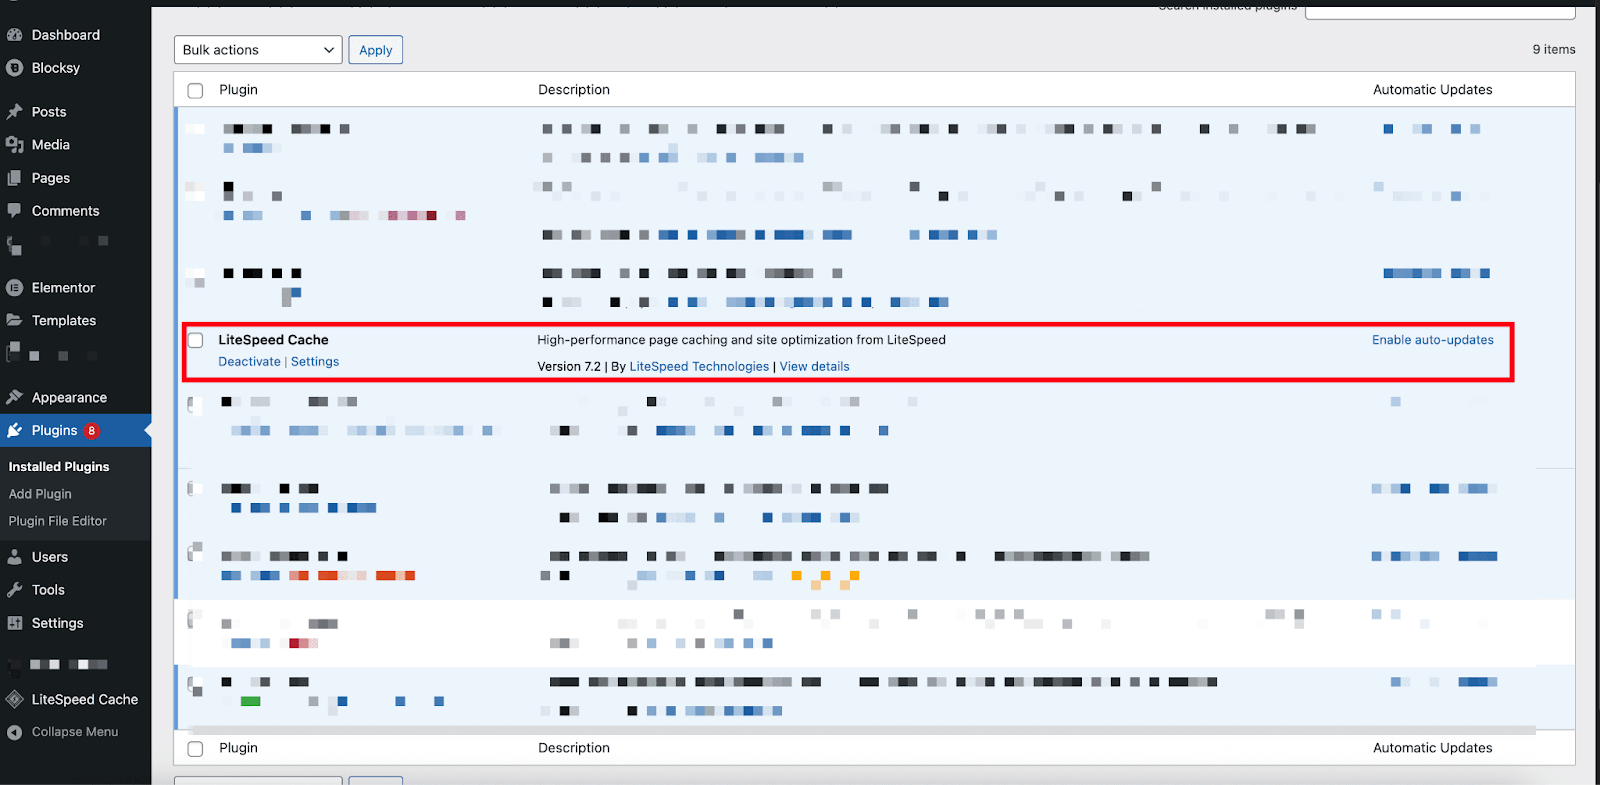
Go to LiteSpeed Cache → Cache, turn off the Object Cache button, and click Save Changes to proceed.
You can also uninstall and deactivate the LiteSpeed Cache plugin. Just go to Plugins → Installed Plugins and locate ‘LiteSpeed Cache (LS Cache)’. Deactivate and uninstall the LS Cache plugin to prevent conflicts between caching systems.
Step 4. Install And Activate Redis Cache Plugin #
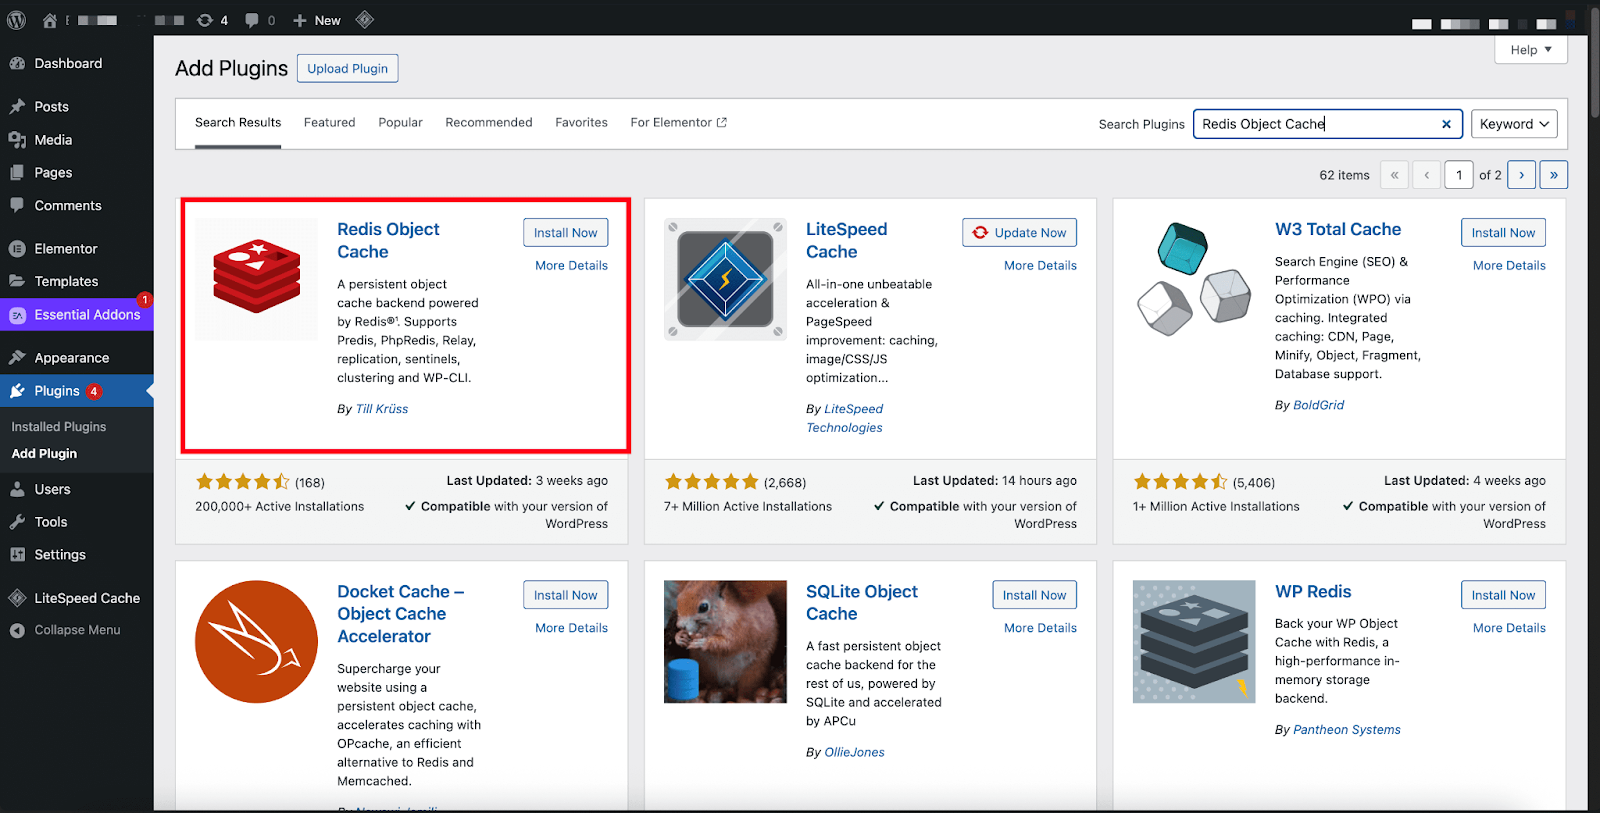
Next, you will configure WordPress to use the Redis cache plugin. Log in to your WordPress admin dashboard. Navigate to ‘Plugins’ → ‘Add New’. In the search bar, type ‘Redis Object Cache‘. Click ‘Install Now‘ and then ‘Activate’.
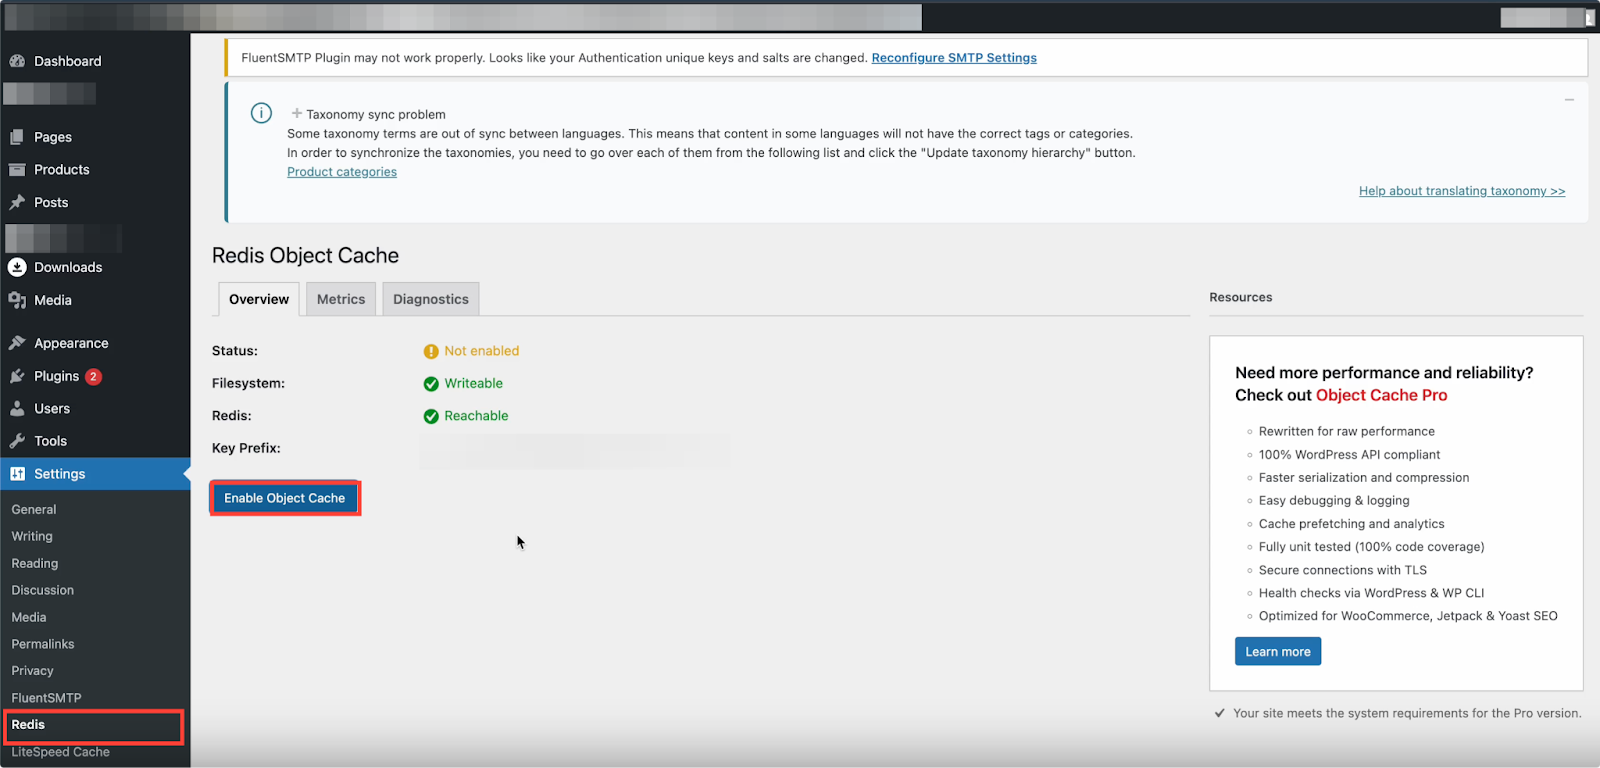
After installing and activating the plugin go to the ‘Settings’ → ‘Redis‘ from the sidebar and just click on the ‘Enable Object Cache’ button from the dashboard.
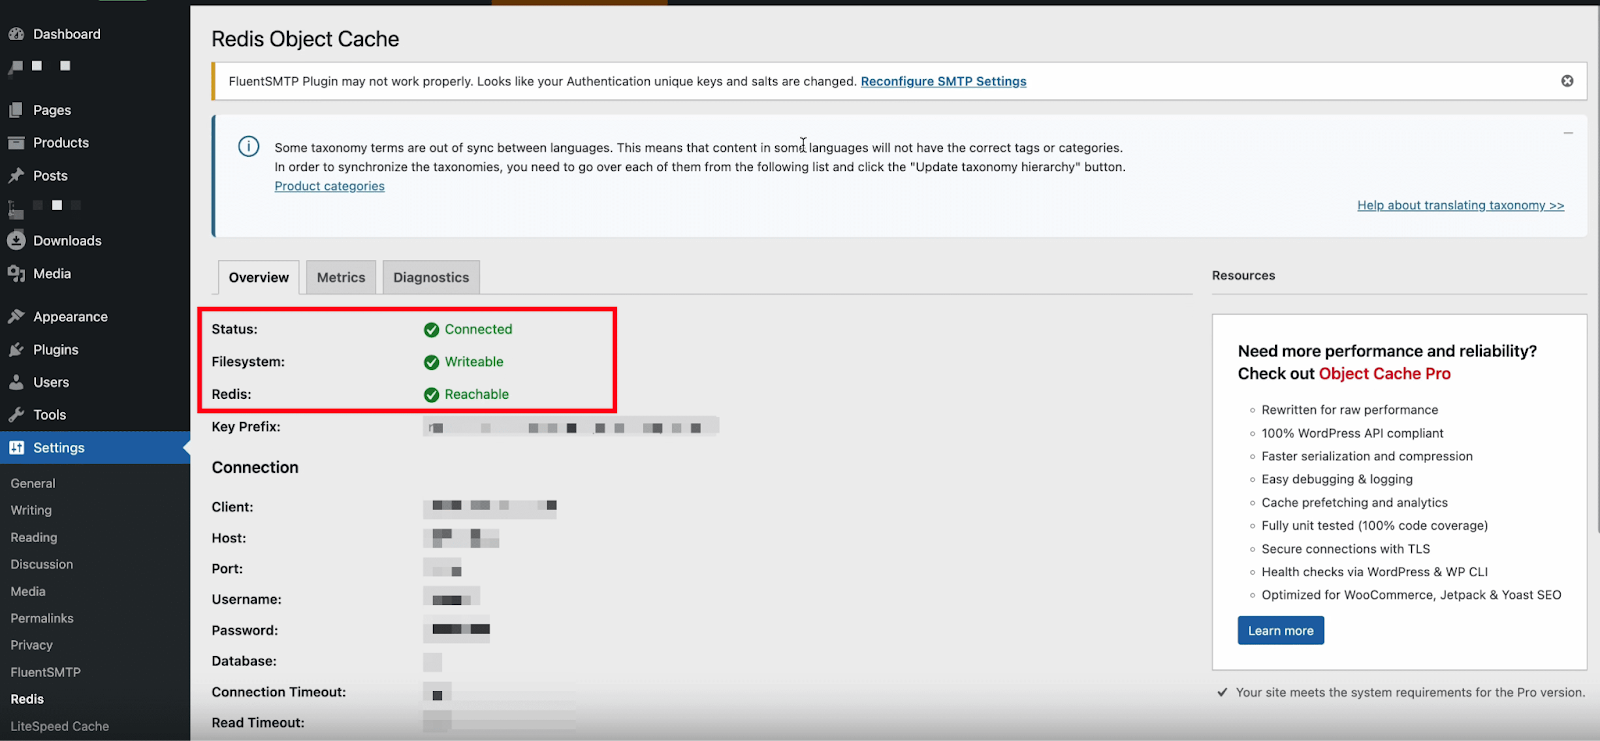
If configured correctly, you will see a success message indicating that Redis is connected. Look for the Overview tab. It should show:
Status: Connected
Filesystem: Writeable
Redis: Reacable
If you see these values, your Redis cache is active and working.
And that’s it, this is how easily you can enable Redis Object Cache on OLS server with xCloud. With Redis successfully connected, your WordPress website will run faster, handle more traffic efficiently, and deliver a seamless experience to your users.
Still stuck? Contact our dedicated support team for any of your queries.


