


Deploying a website directly from a Git repository streamlines development and updates, making development faster, easier, and more secure. However, manually deploying every project from Git can be a complex and time-consuming process. xCloud simplifies this by integrating with Git, allowing you to deploy your projects with just a few simple steps.
With xCloud, you can seamlessly integrate a Git provider, clone your git repositories, and automate deployments. This eliminates the need for manual uploads or complex server configurations, allowing you to focus on building and improving your application.
Follow this guide to easily integrate a Git provider and deploy your projects with xCloud in just a few clicks.
Step 1: Integrate a Git Provider #
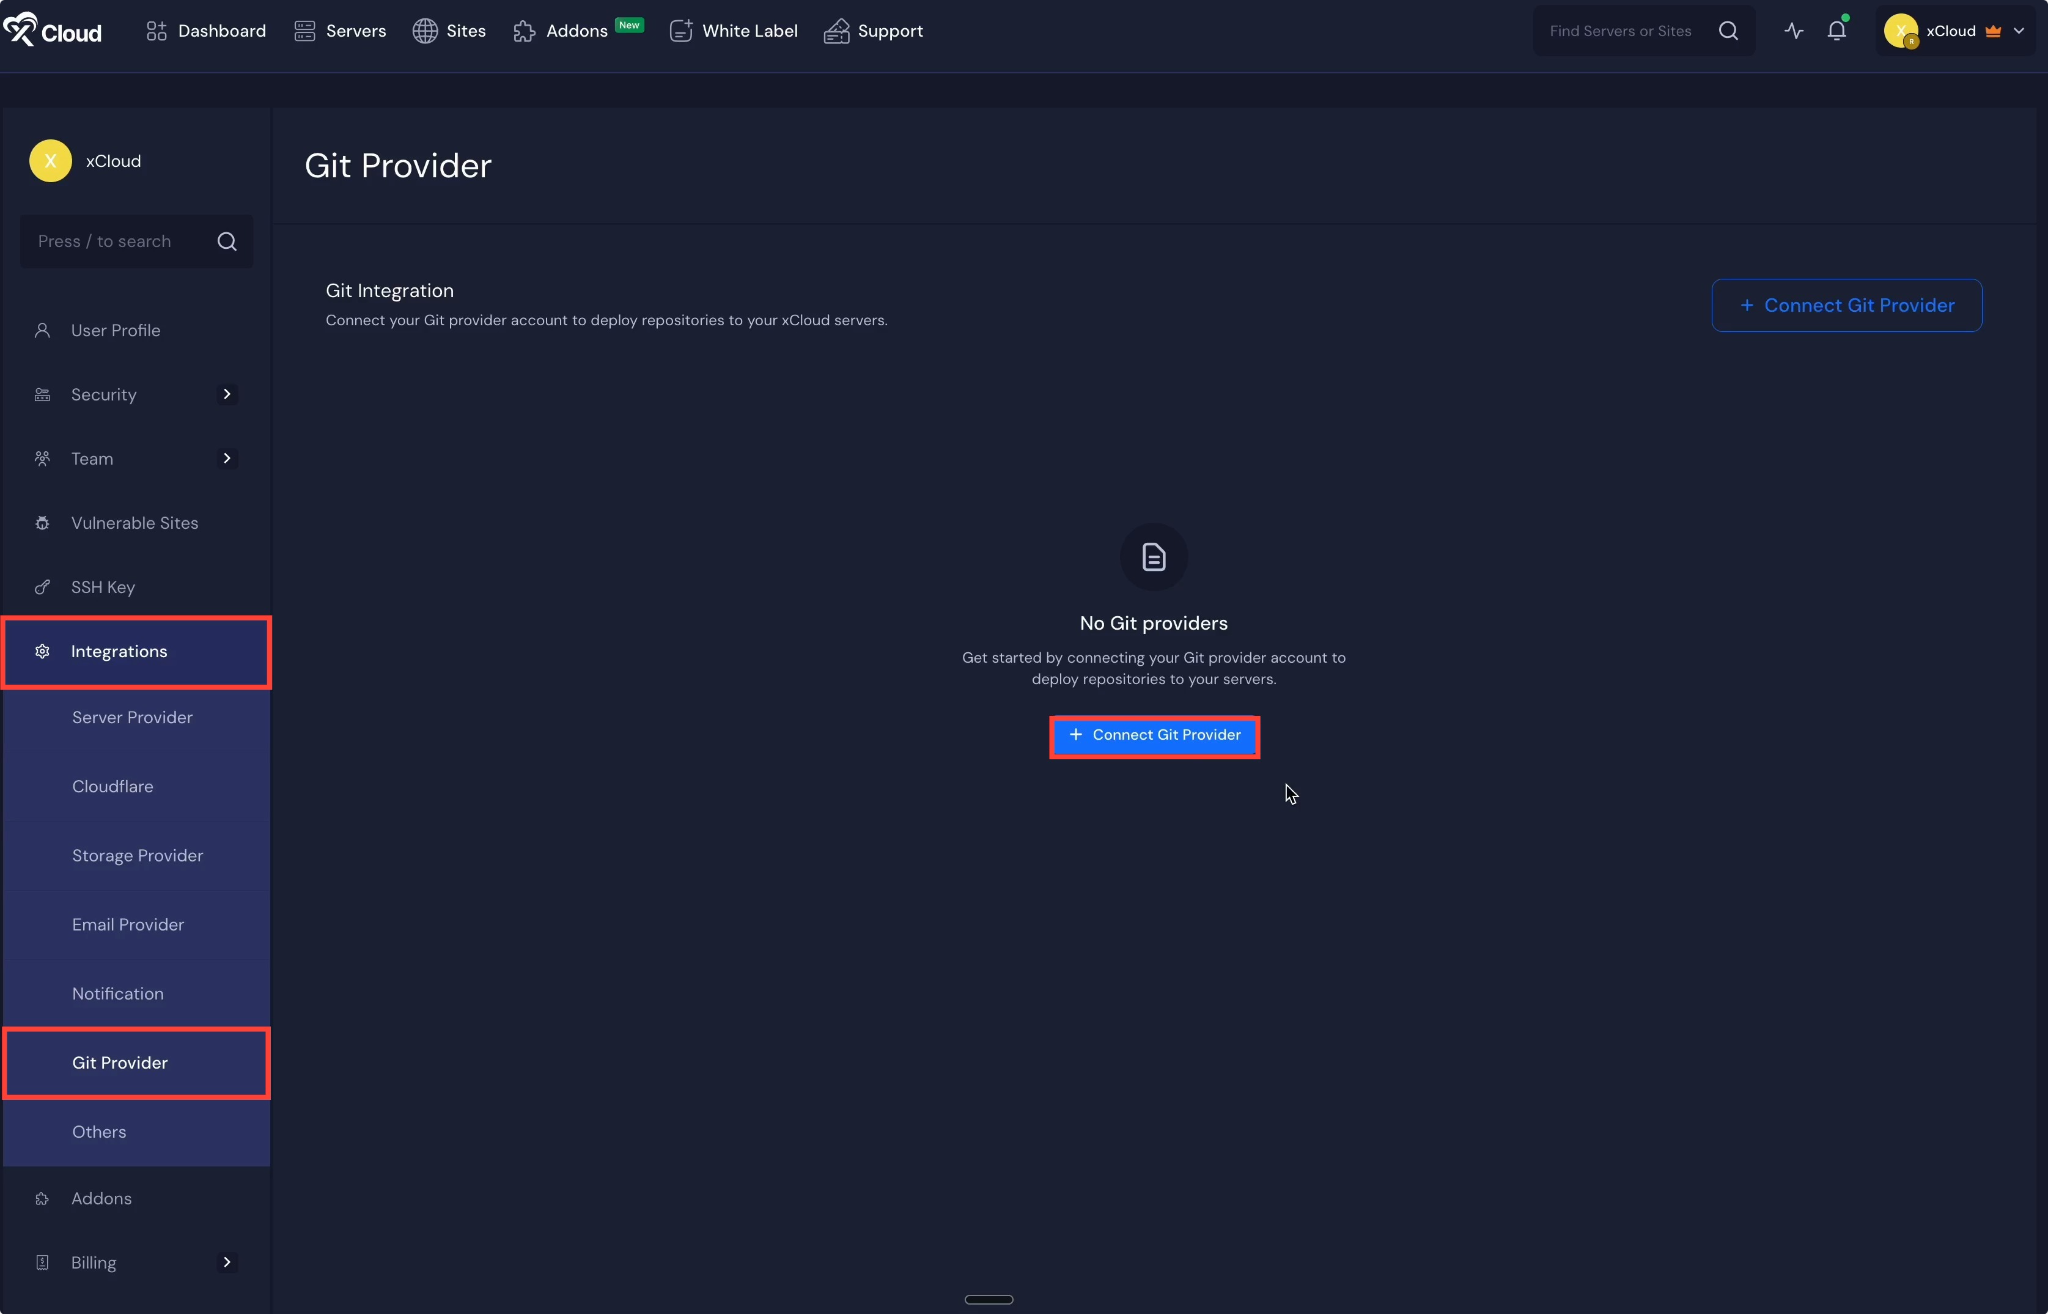
To integrate Git with xCloud, start from your xCloud dashboard and navigate to the ‘Team Settings’ option located in the top-right menu. From the sidebar, go to ‘Integrations’ → ‘Git Provider’ and click on the ‘Connect Git Provider’ button
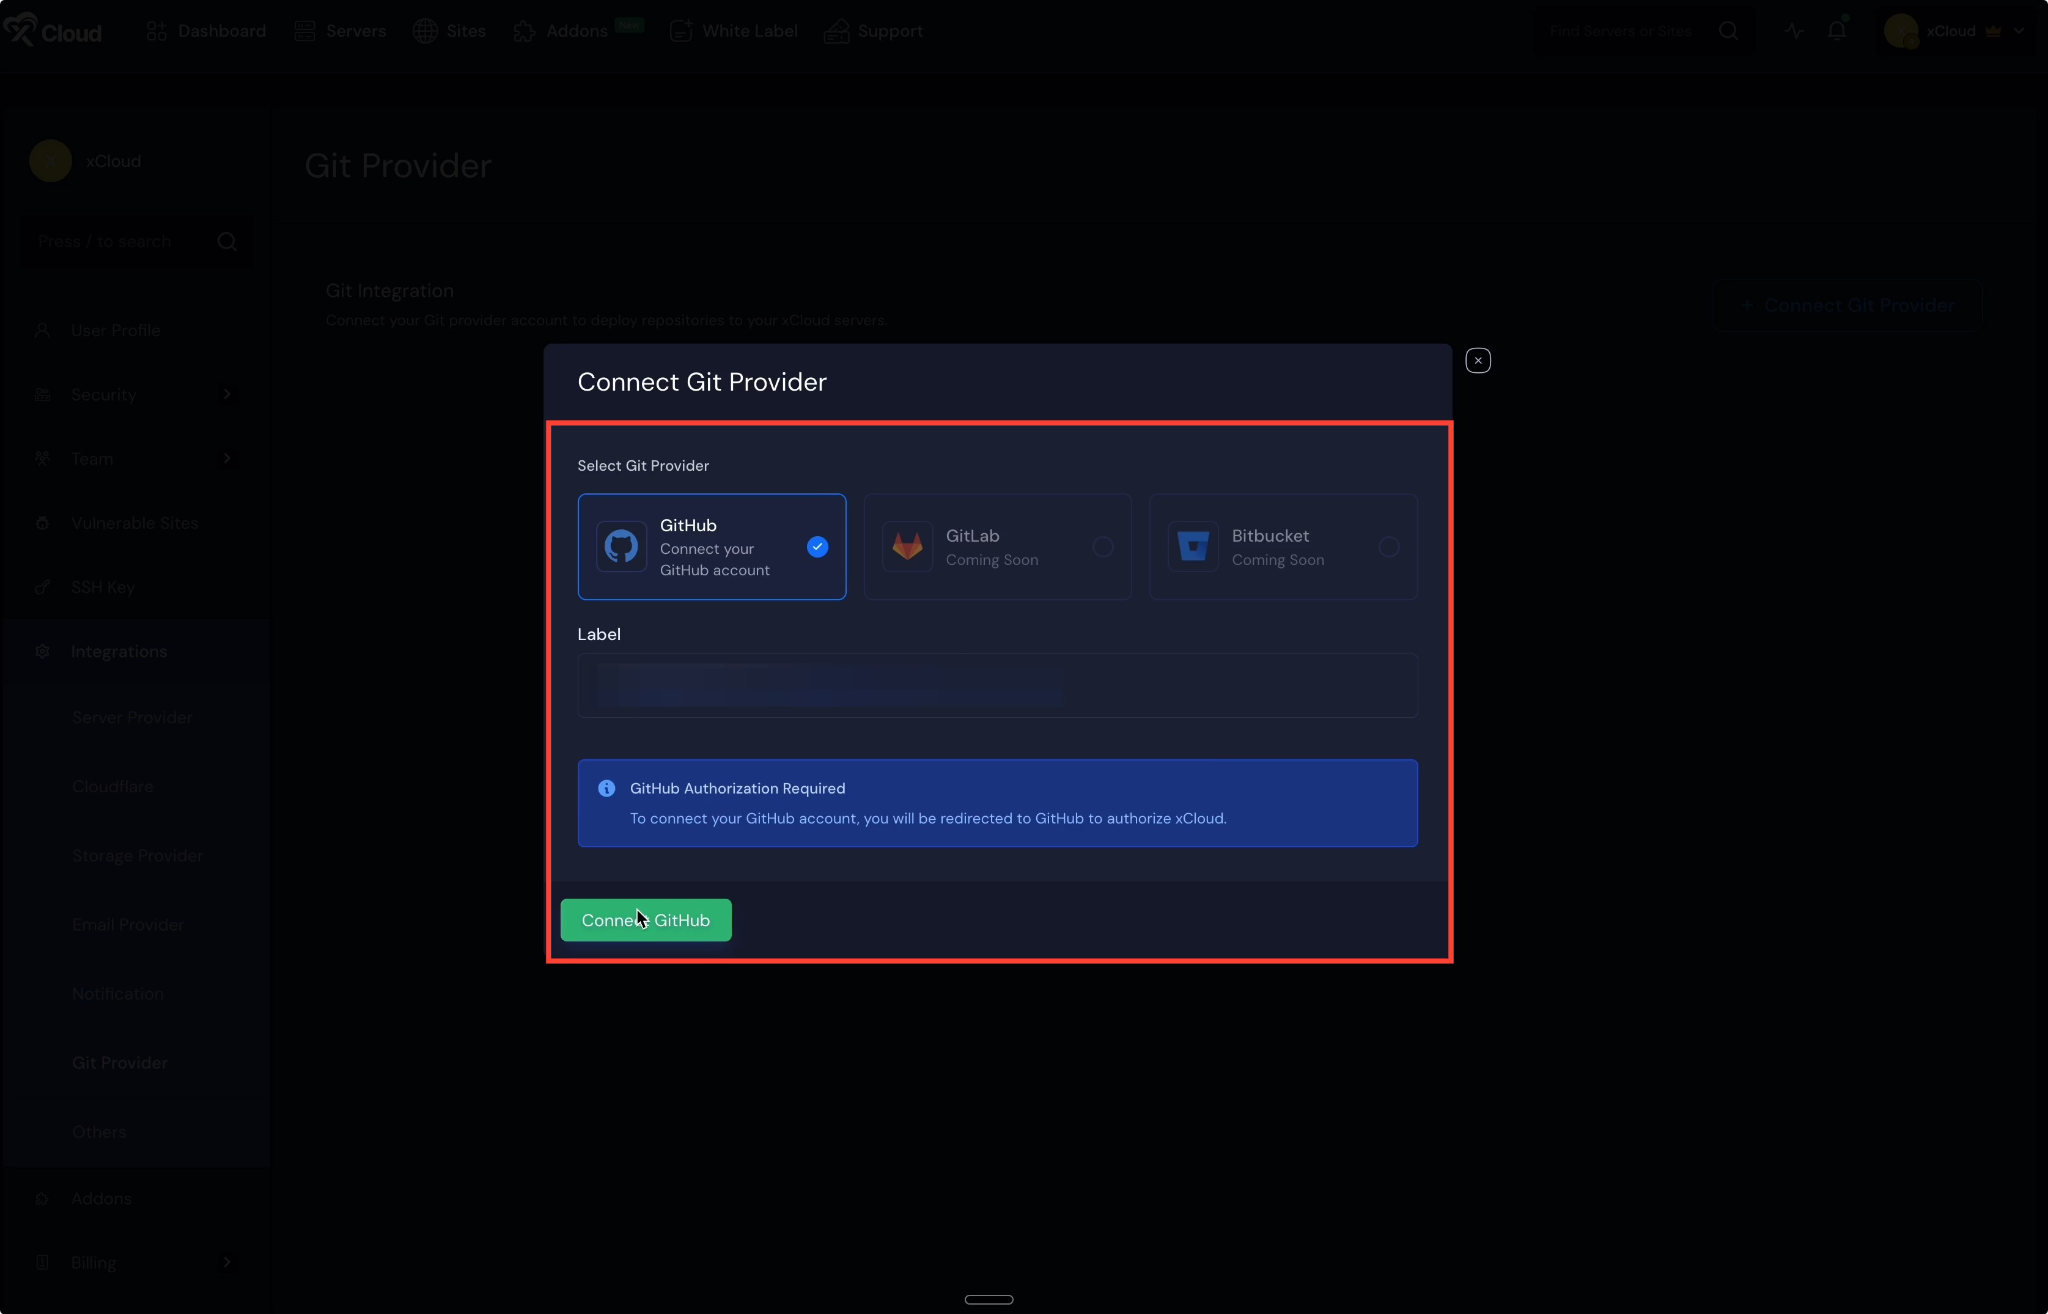
A popup window will appear, choose ‘GitHub’ from the provider options. Next, enter a ‘Label’ and click on the ‘Connect GitHub’ button to authenticate and connect your GitHub account with xCloud.
Note: You must be logged in to your GitHub account to connect with xCloud
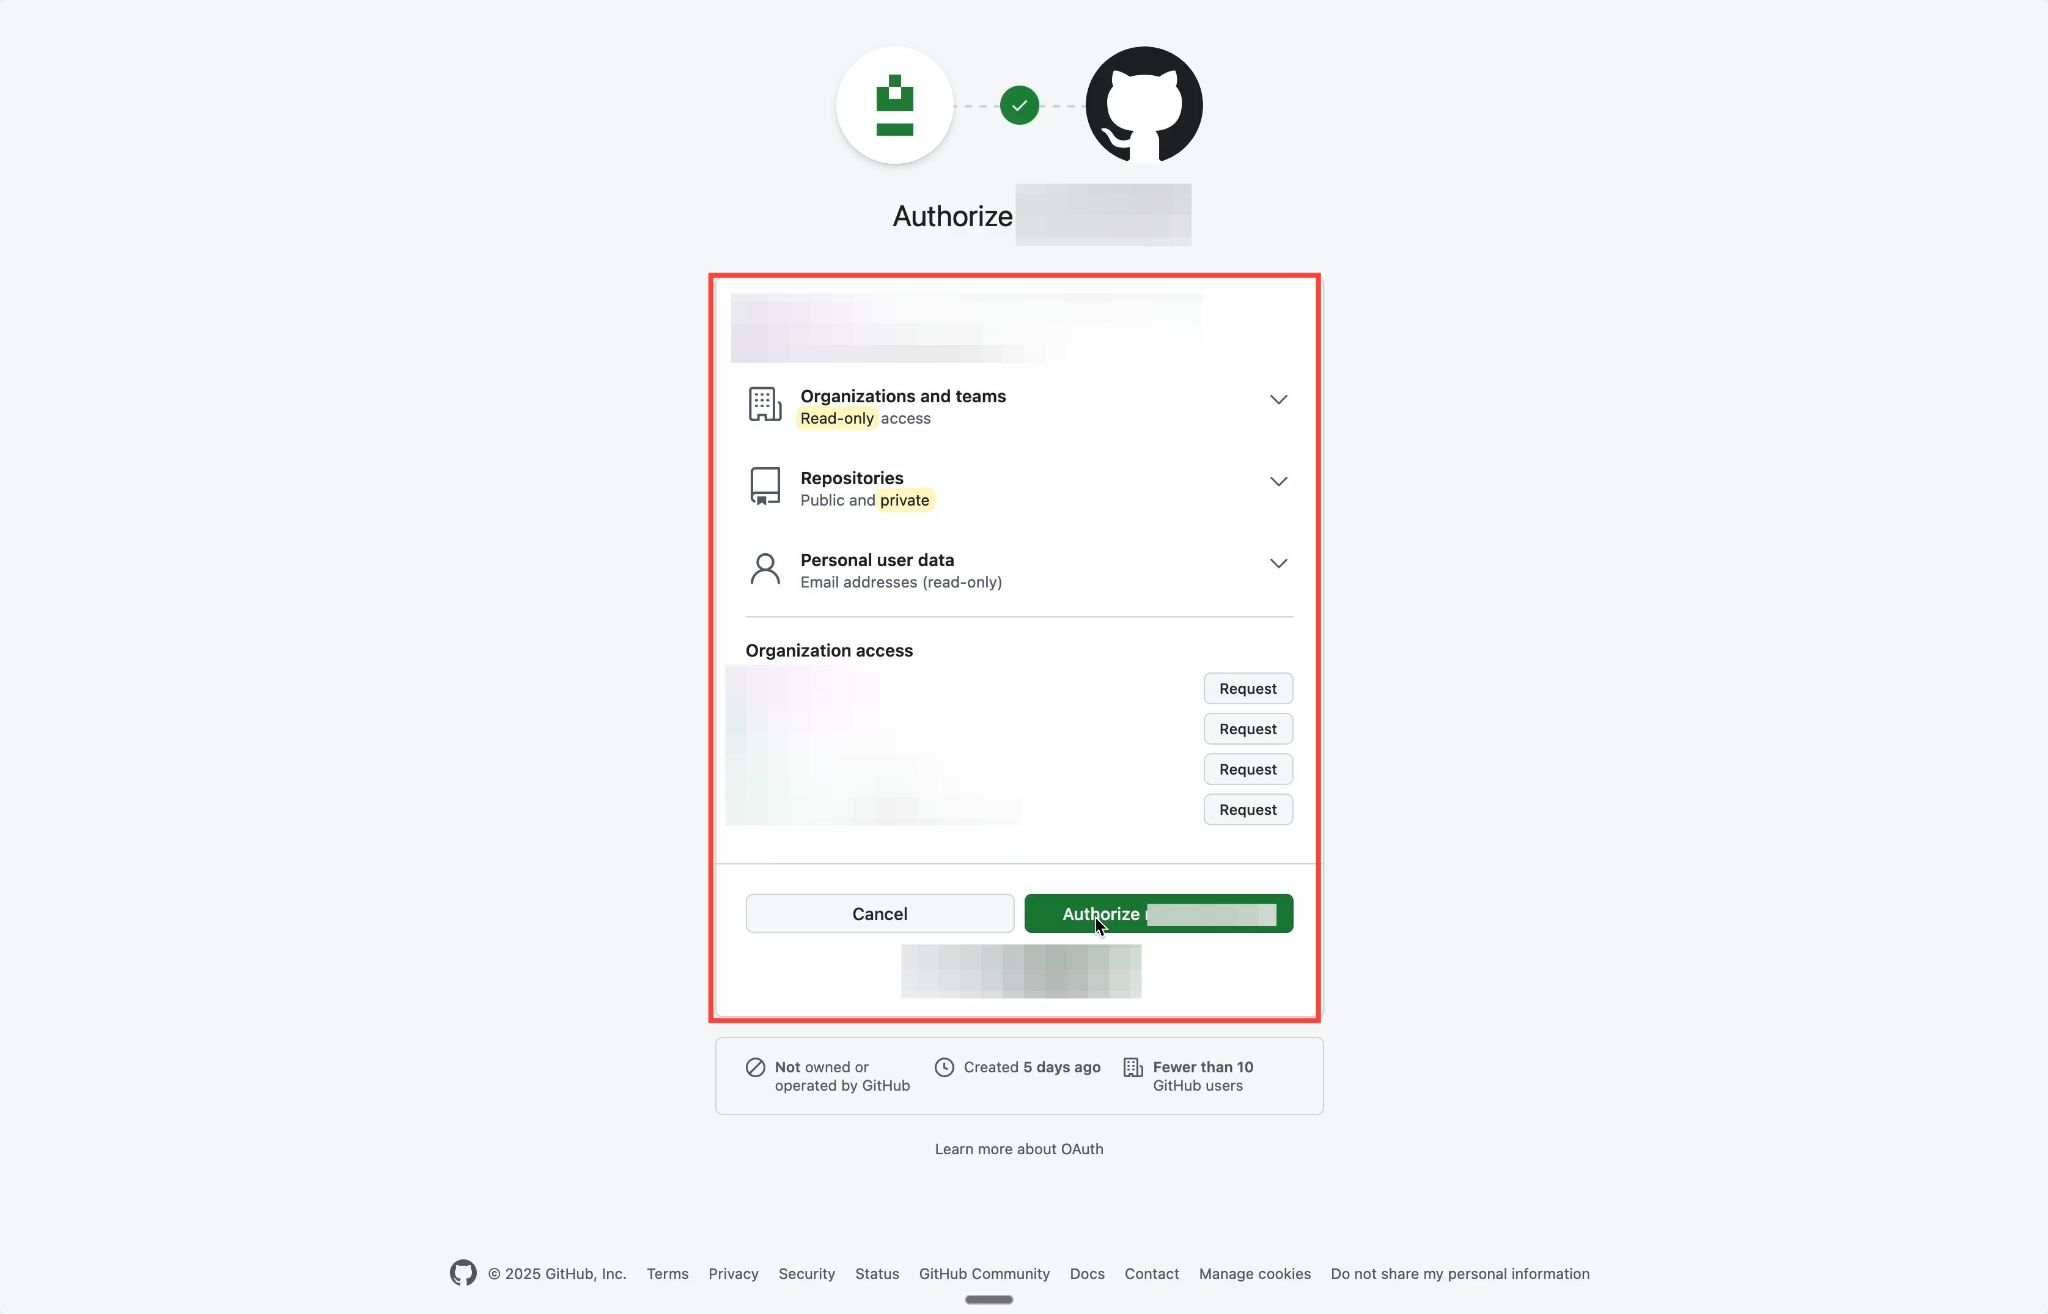
Next, you will be redirected to authorize your GitHub account. Review the account and click on the ‘Authorize’ button to complete the authorization process.
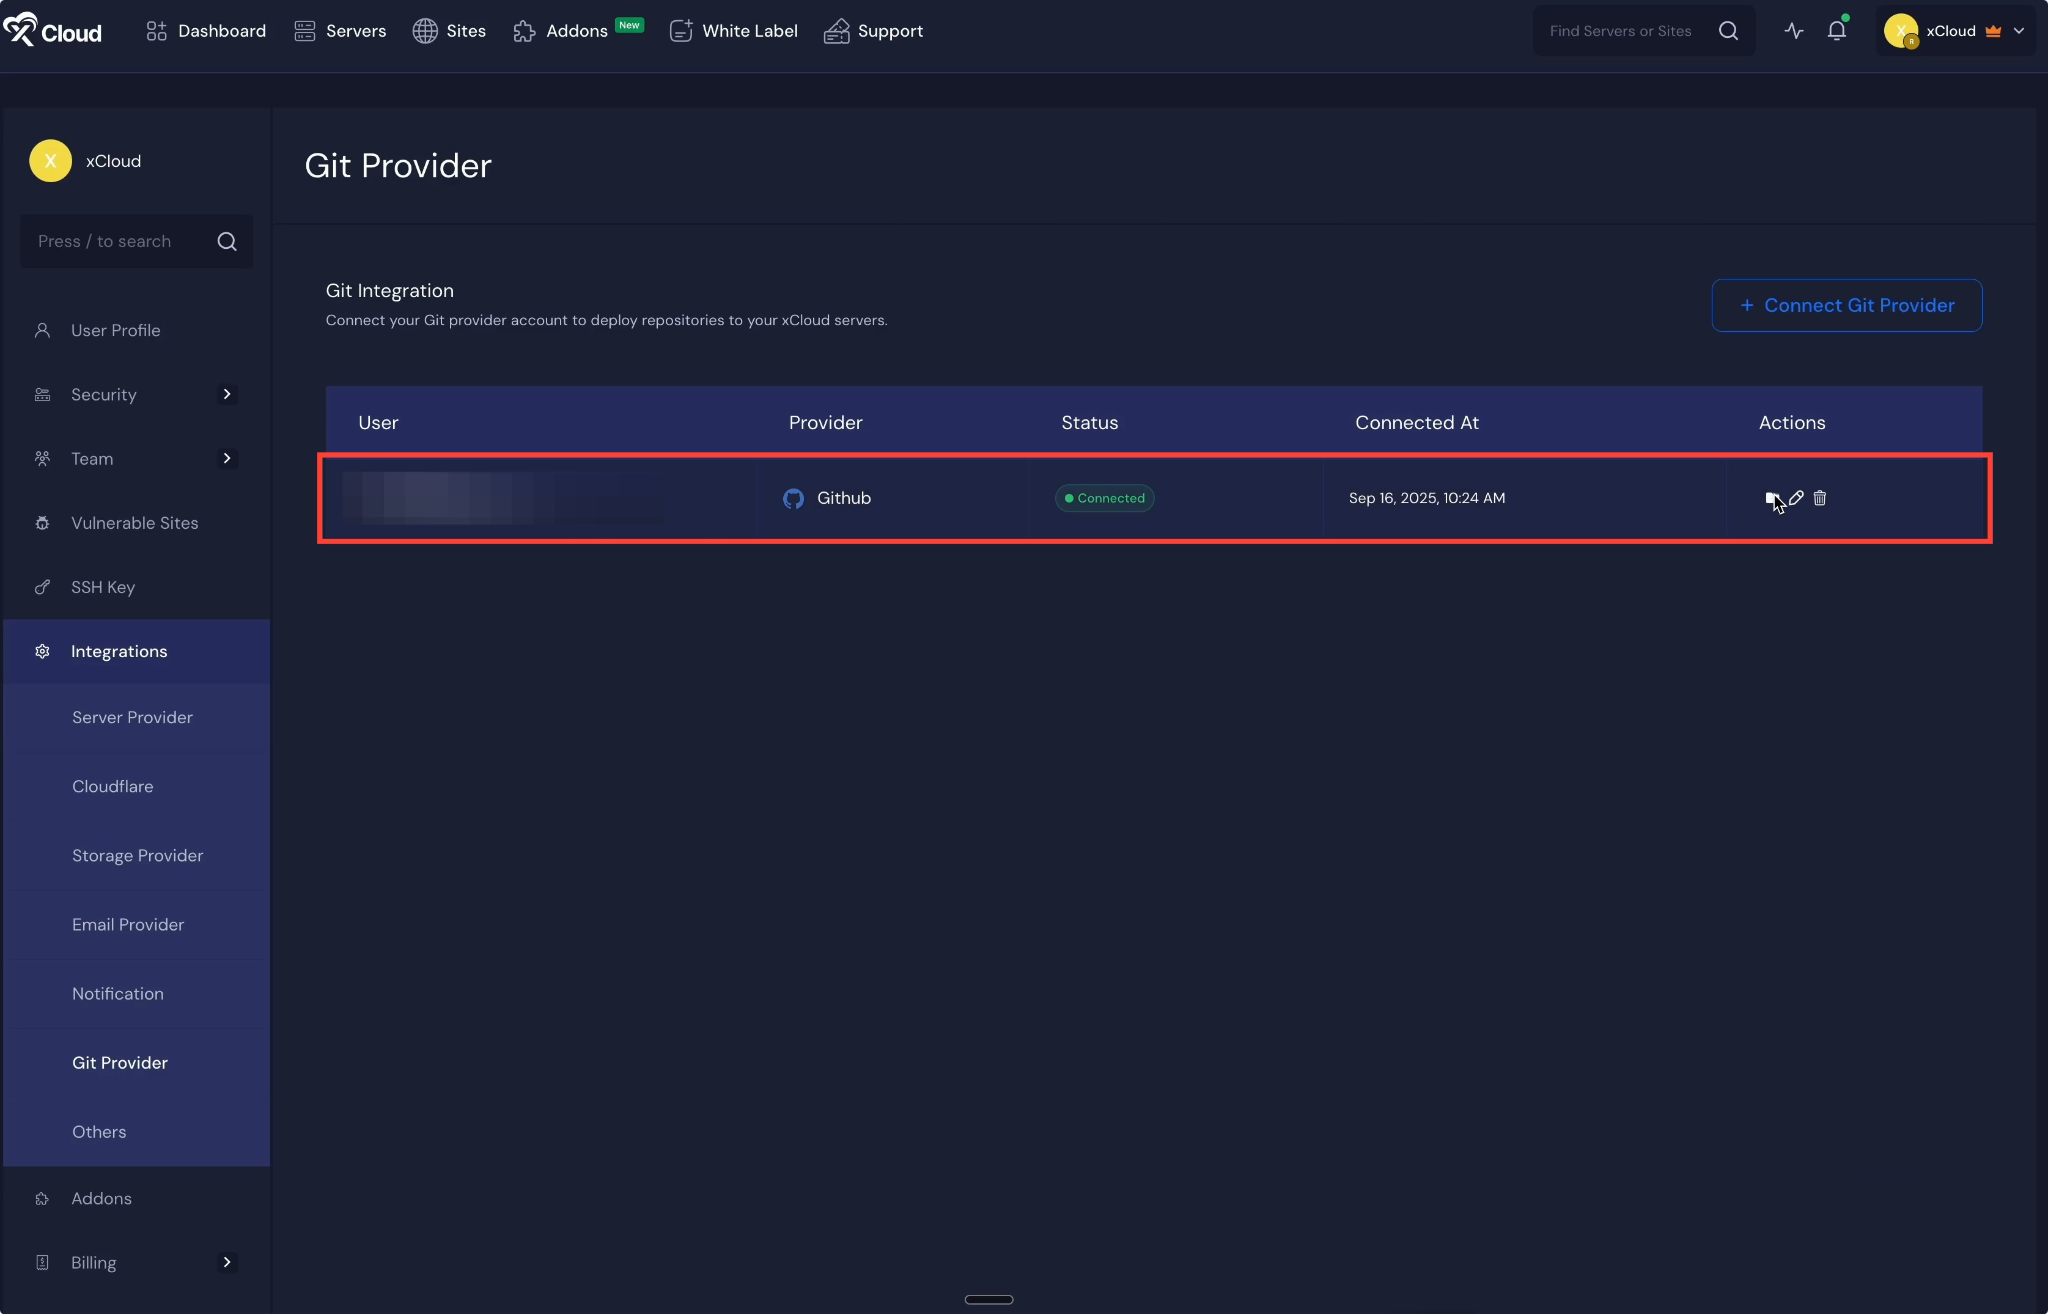
Once the connection is successful, your account and all of your Git repositories will be visible directly from the xCloud dashboard. You can easily ‘Edit’ or ‘Remove’ the connected account at any time, depending on your requirements. Also, click on the ‘Folder’ icon to see the repositories of your connected GitHub account.
Step 2: Choose the Application #
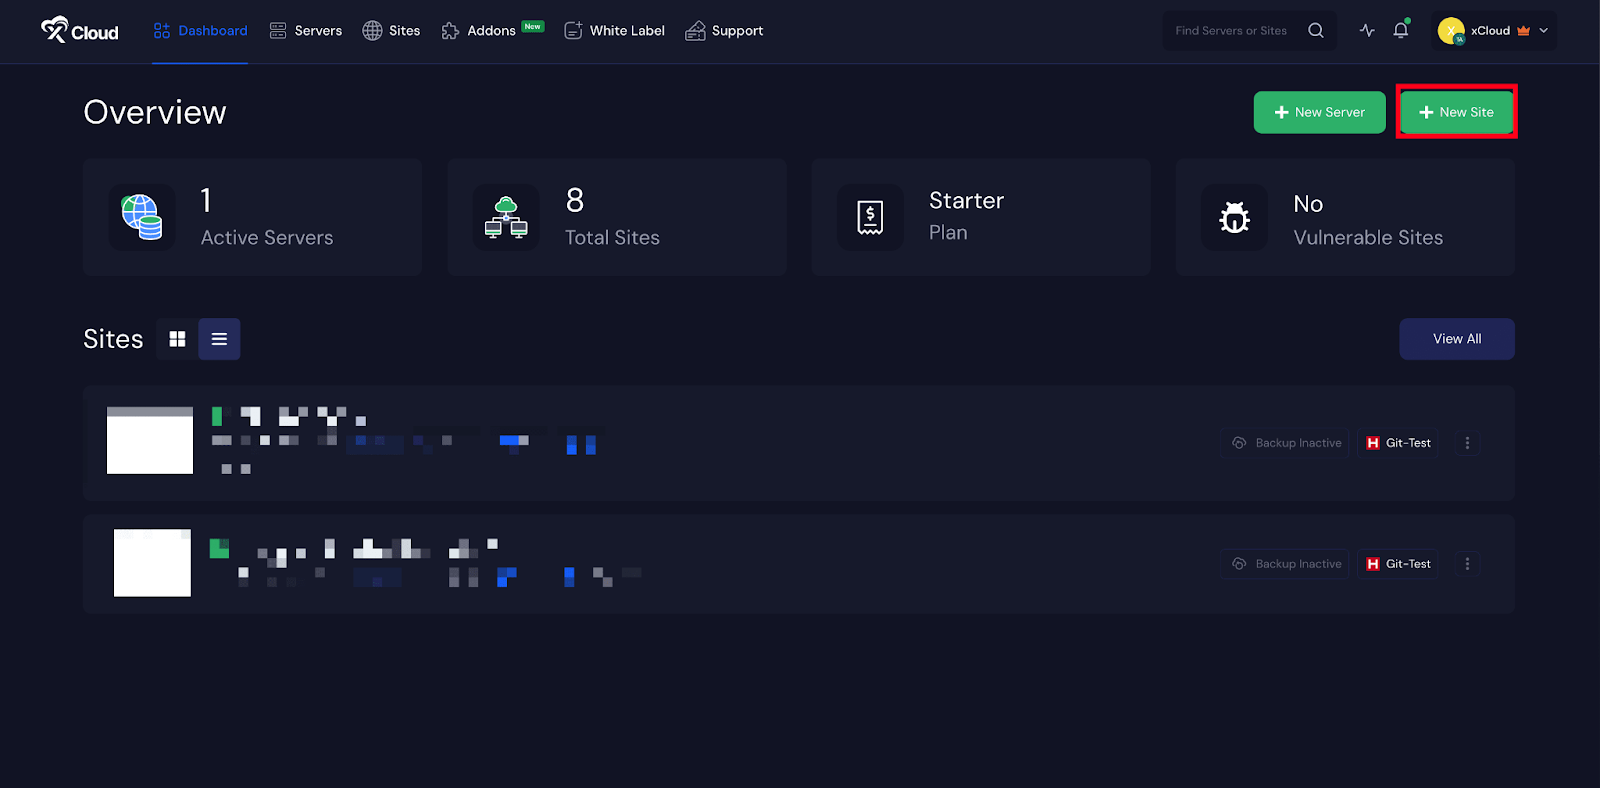
To begin deployment, click on the ‘Create Site’ button from the dashboard. You will then be asked to choose ‘Server’ from the dropdown.
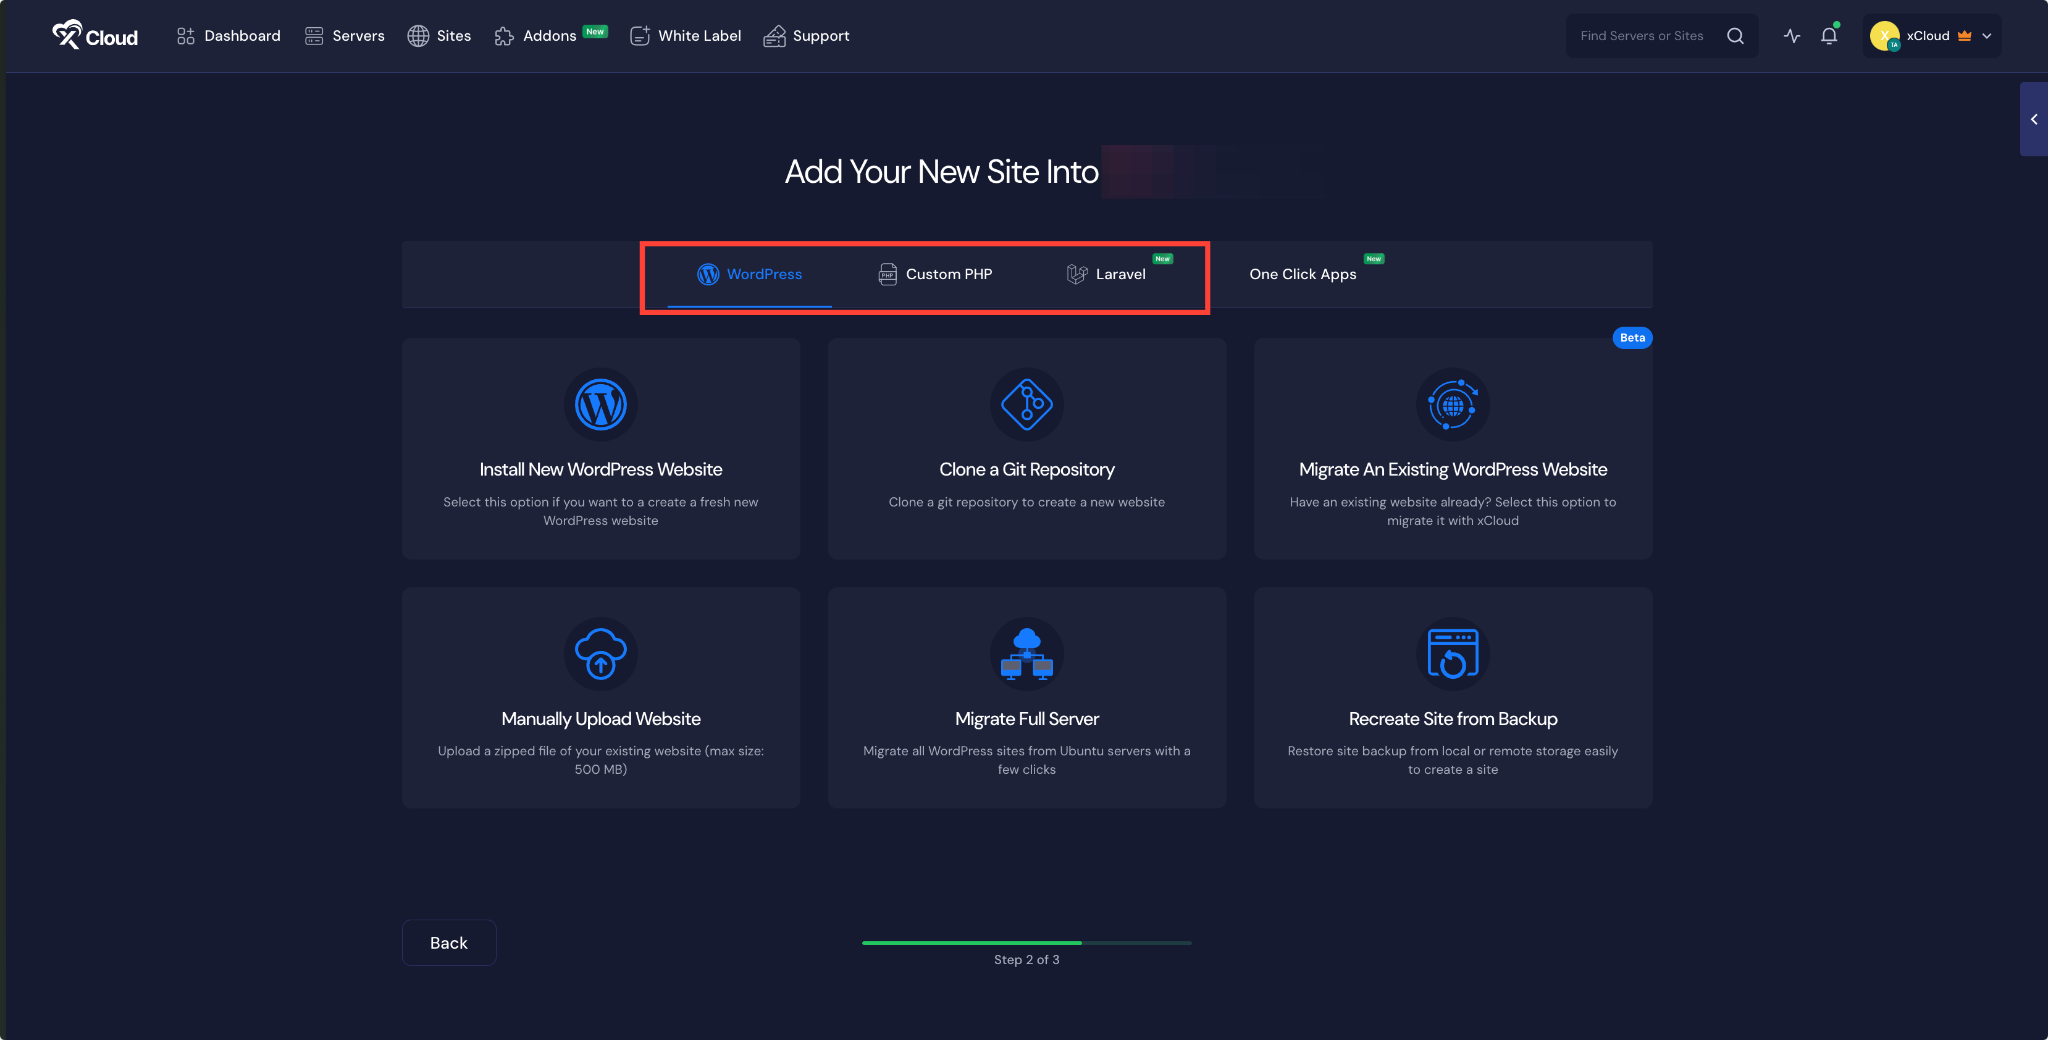
Afterwards, go to your preferred deployment options from ‘WordPress’, ‘Laravel’, or ‘Custom PHP’ as your preference. In this documentation, we are selecting the ‘Custom PHP’ option.
Step 3: Select the Option to Clone a Git Repository #
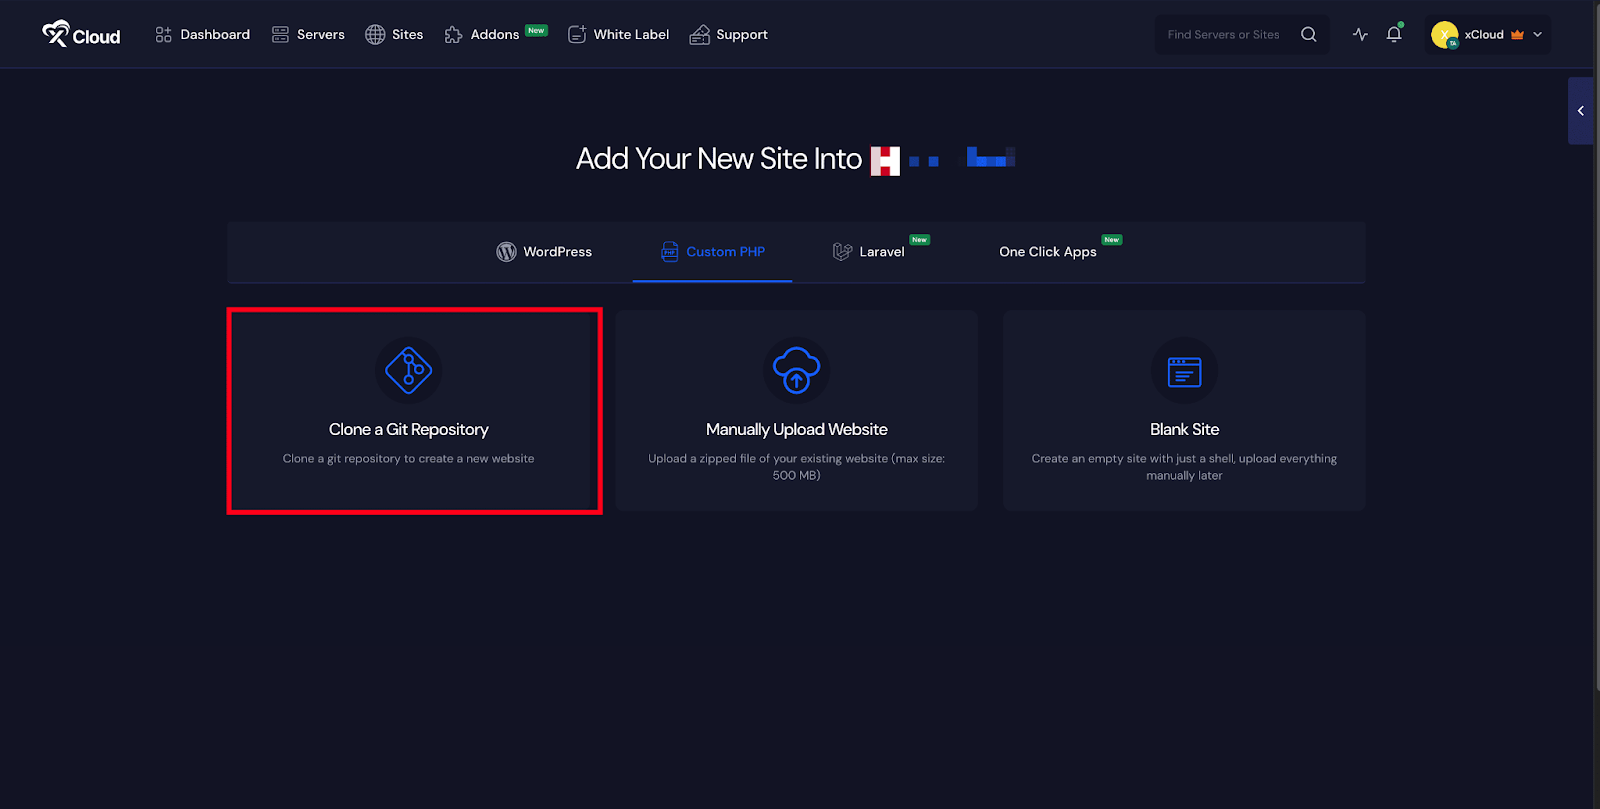
After that, choose the ‘Clone A Git Repository’ option to import your PHP site using Git Provider.
Step 4: Set Up Domains #
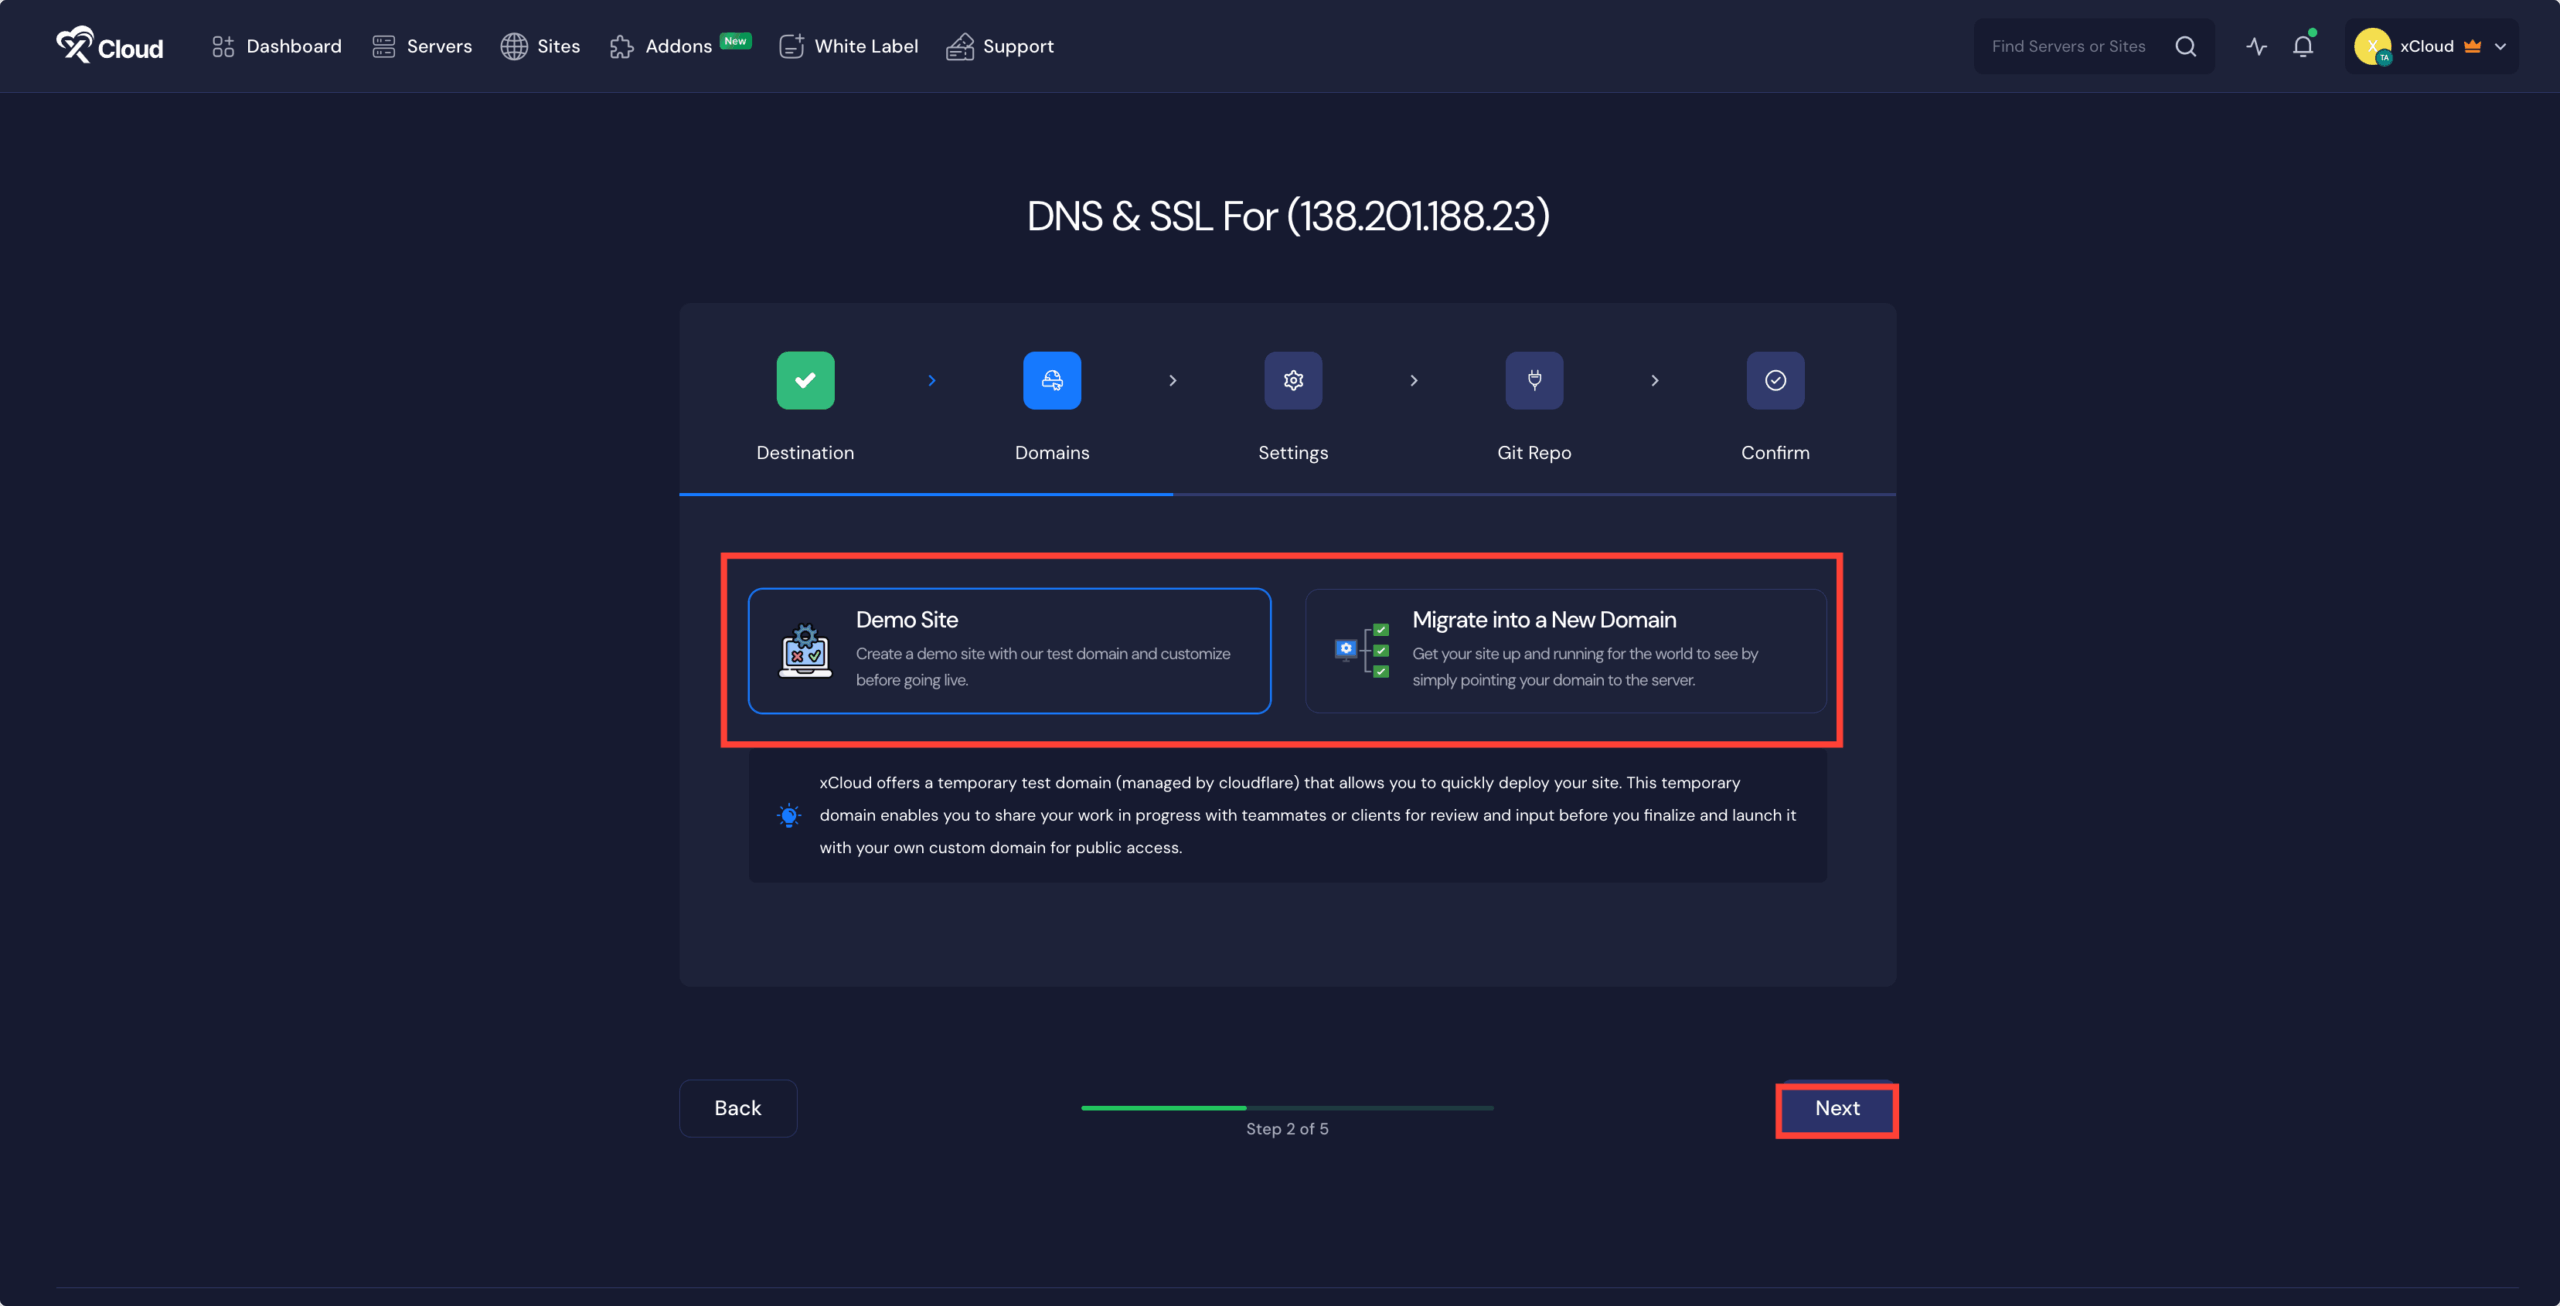
The ‘Domains’ tab allows you to decide how you want to configure your site’s domain. You can either create a ‘Demo Site’ or ‘Live Site’.
For this documentation, we are proceeding with the ‘Demo Site’ option and clicking ‘Next’ to go to the next step.
Step 5: Manage Database Settings #
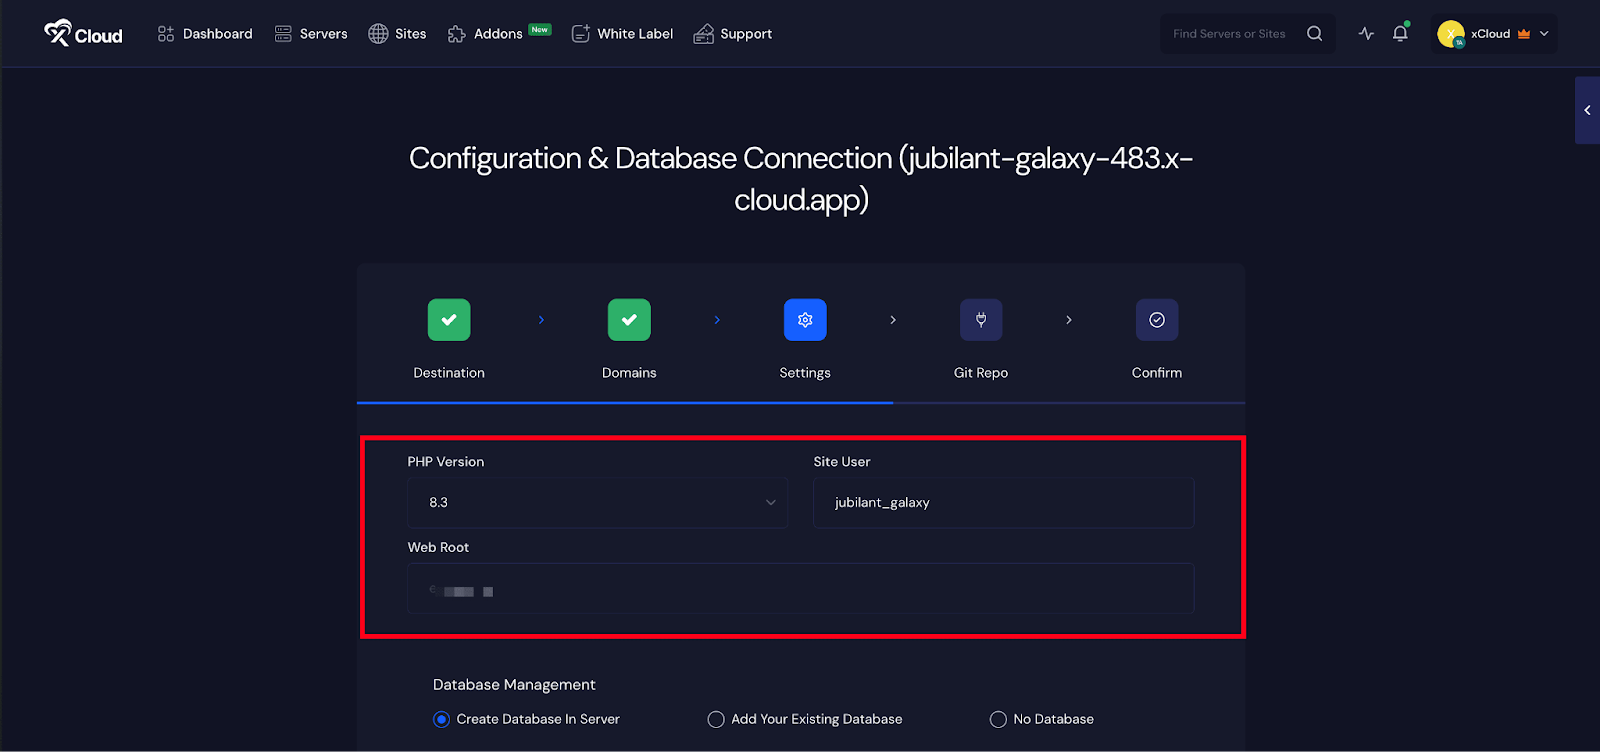
In the ‘Settings’ tab, you will find options to configure the ‘PHP Version’ and manage ‘Site Users’. Adjust these settings based on your requirements.
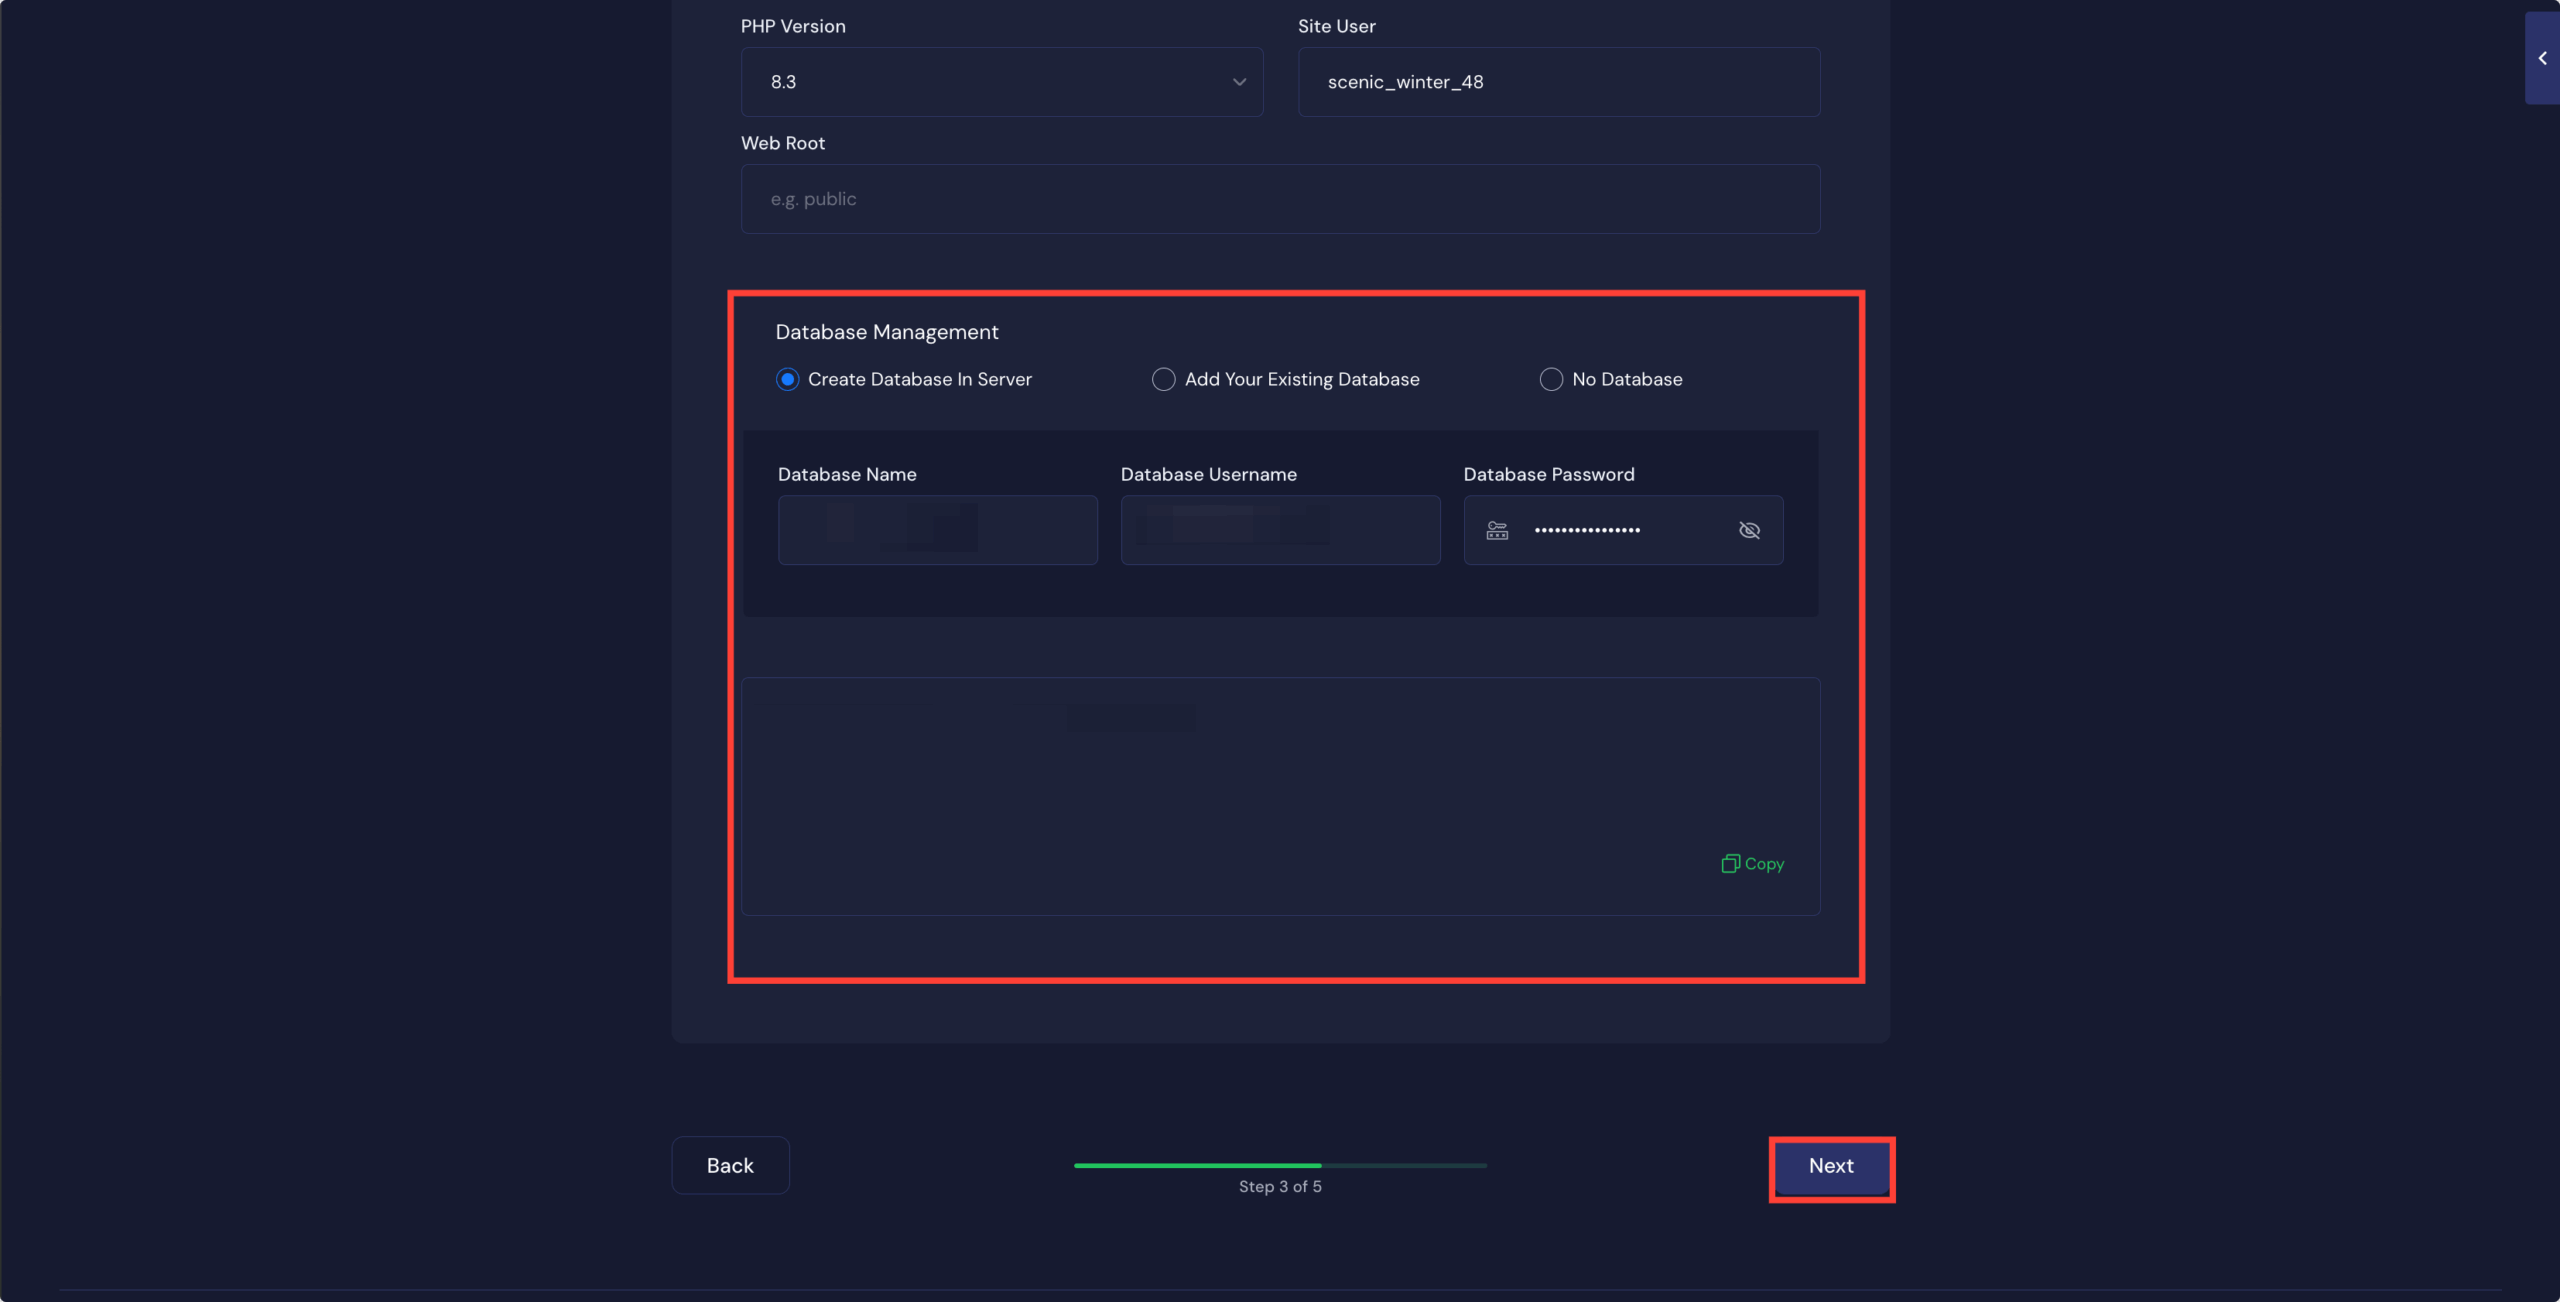
In the next step, you can either proceed with ‘No Database’, ‘Add an Existing Database’, or ‘Create a new database’ directly on the server and click on ‘Next’.
Step 6: Insert Git Repository Credentials #
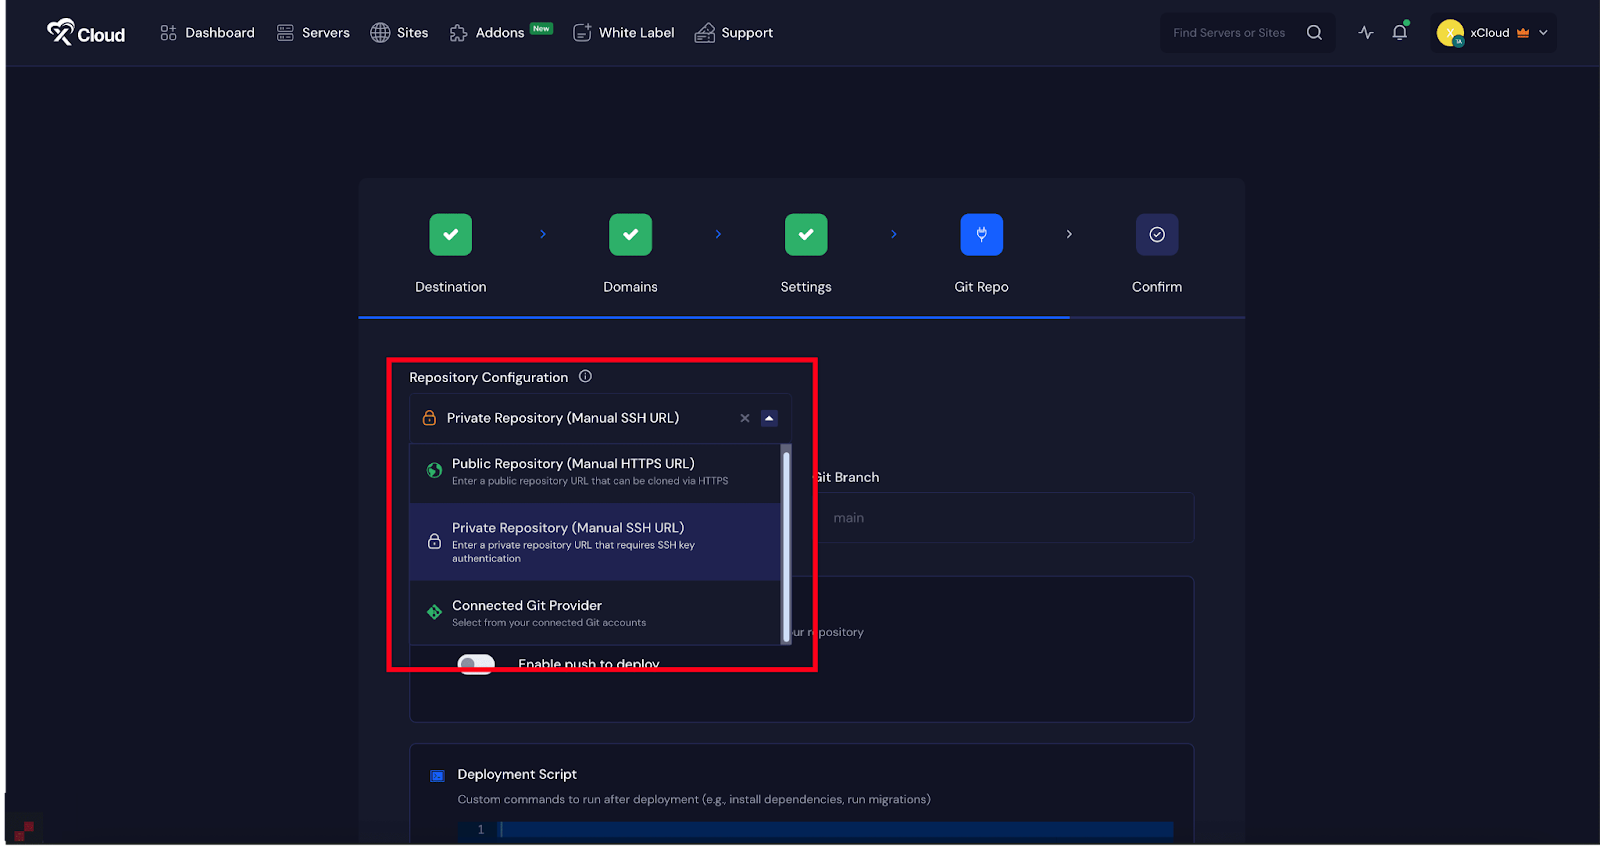
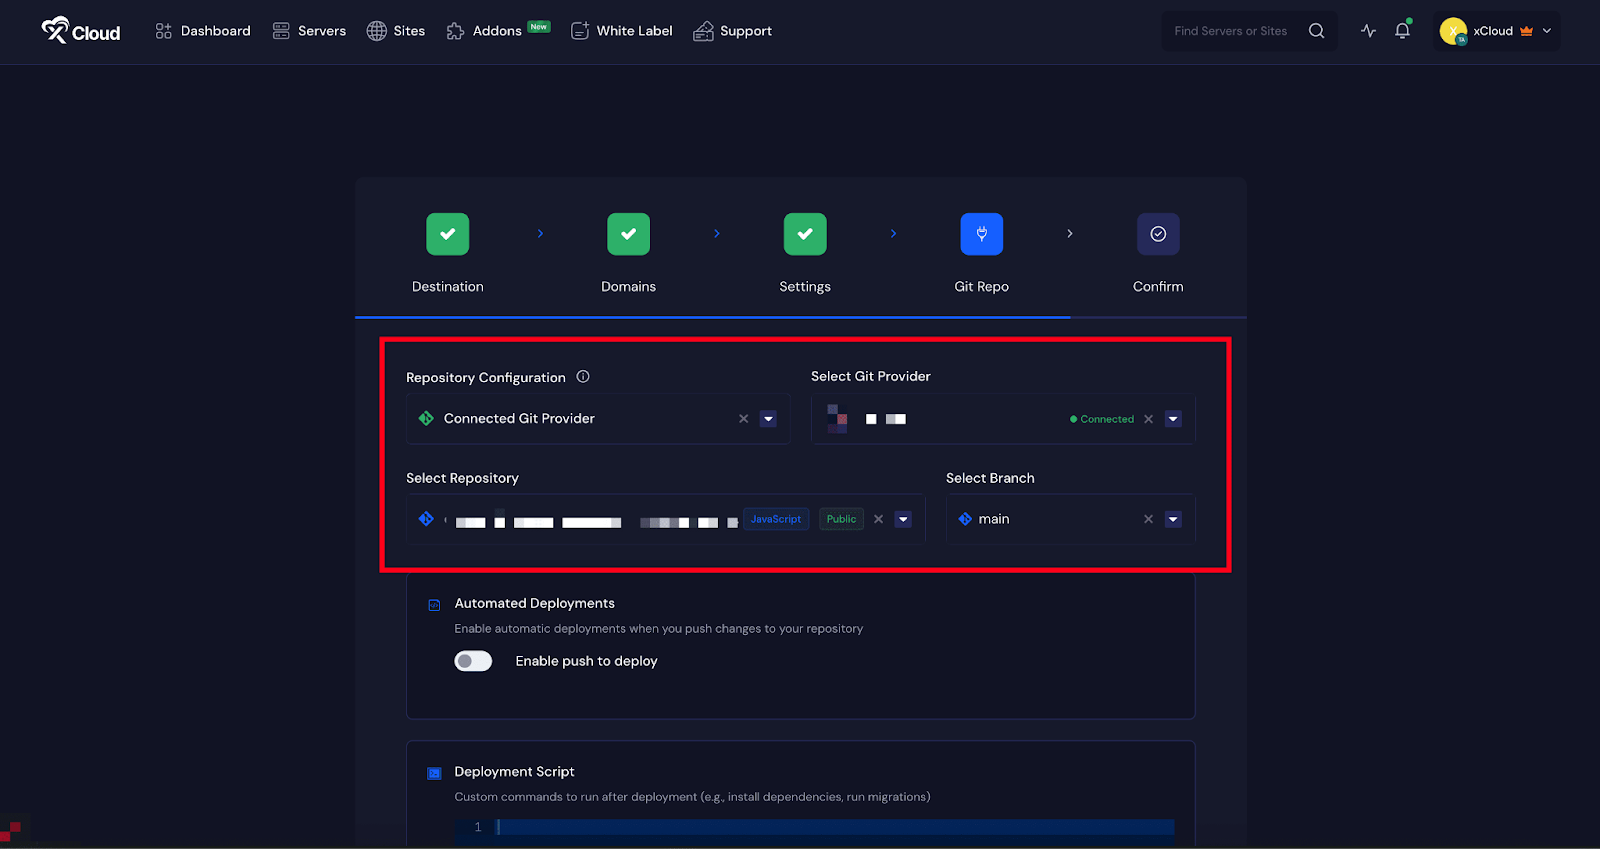
In the ‘Git Repo’ tab, you will get three repository options: ‘Private Repository (Manual SSH URL)’, ‘Public Repository (Manual HTTPS URL)’, and ‘Connected Git Provider’.
If you choose the ‘Public Repository(Manual HTTPS URL)’ option, enter the ‘GitHub Repository URL’ into the dedicated field and branch into the ‘Git Branch’.
Note: Collect the HTTPS URL from your GitHub dashboard repository to deploy the Public repository.

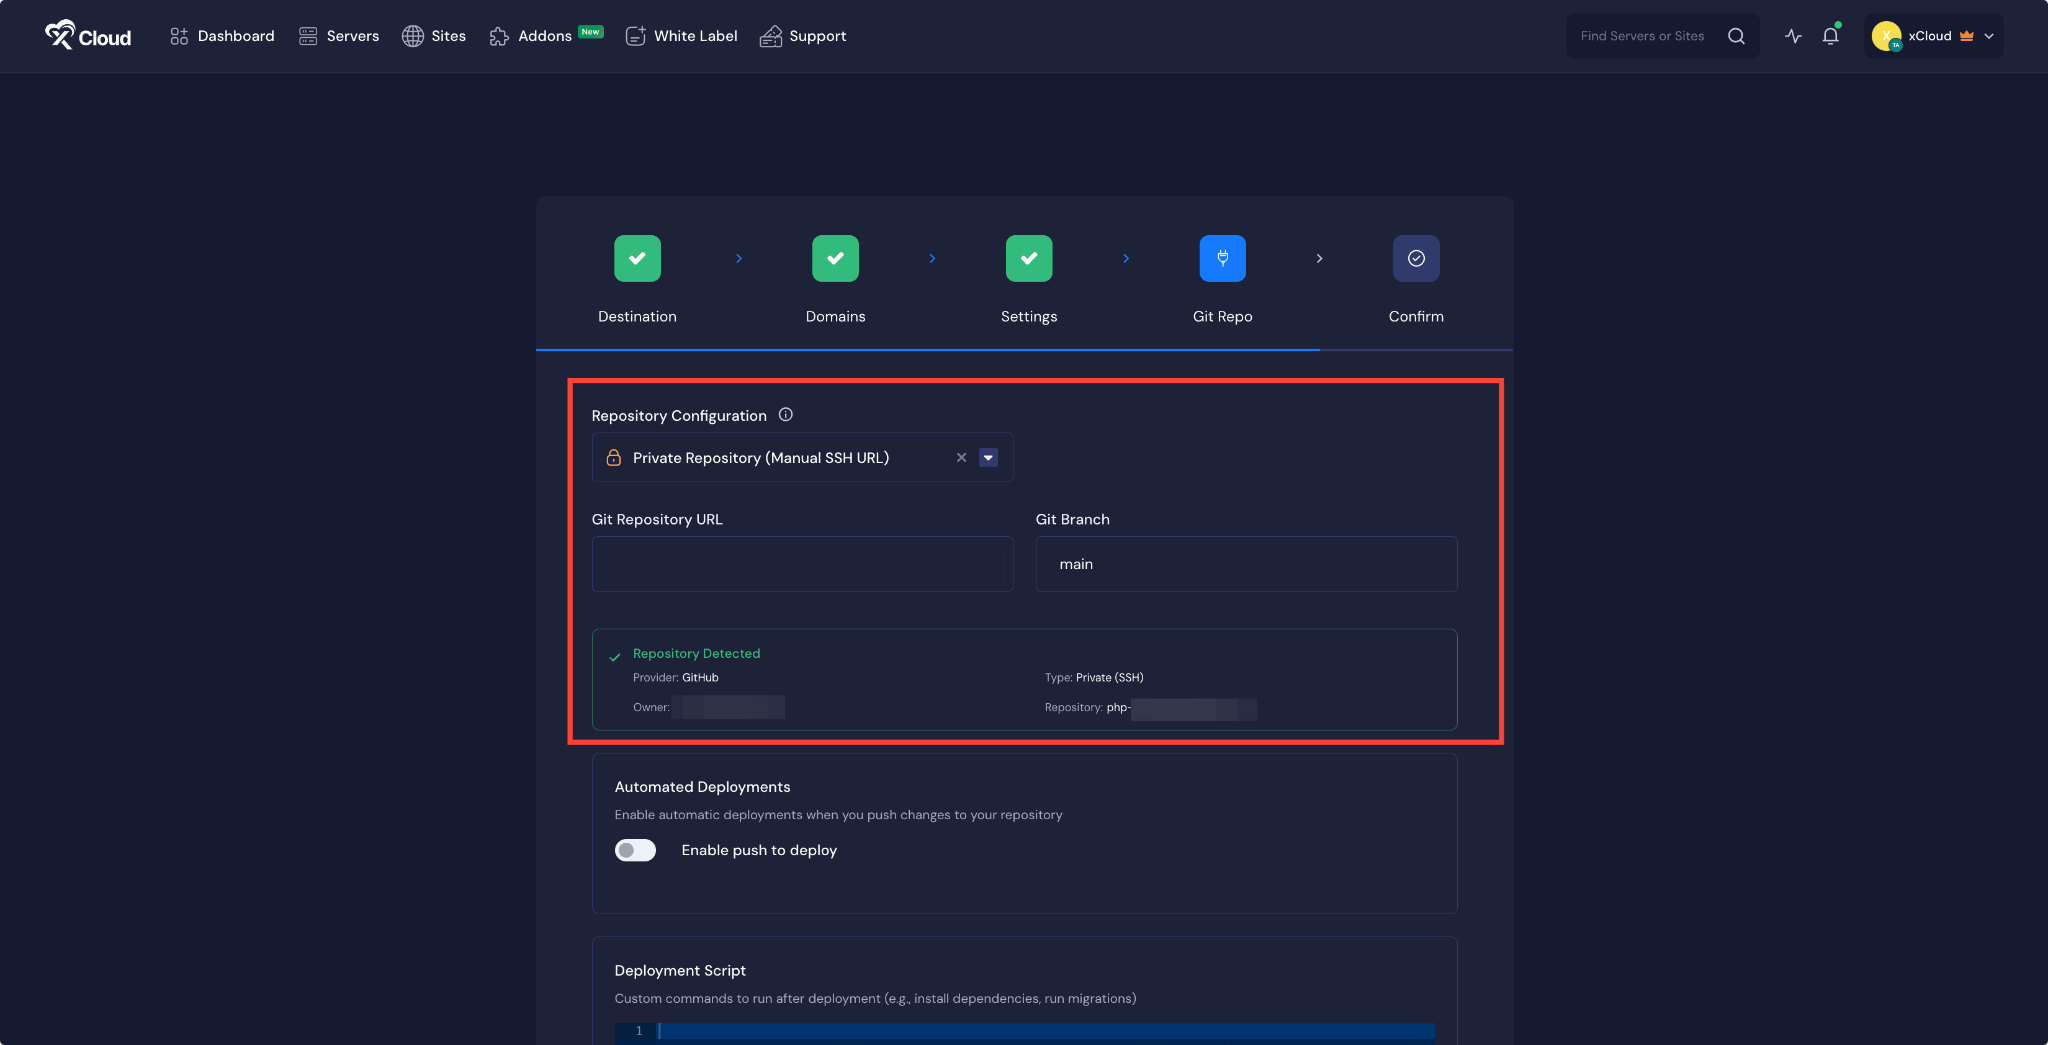
If you choose the ‘Private Repository(Manual SSH URL)’ option, enter the ‘GitHub Repository URL’ into the dedicated field and branch into the ‘Git Branch’.
Note: Collect the SSH URL from your GitHub dashboard repository to deploy the Public repository.
We are going to deploy Git projects using ‘Git Provider’ option here. Choose the ‘Connected Git Provider’ option from the dropdown menu.
From the ‘Select Git Provider’ dropdown, choose the connected account you want to use. Once selected, navigate through the list of repositories, pick the one you want to deploy, and then select the specific ‘Branch’ of that project.
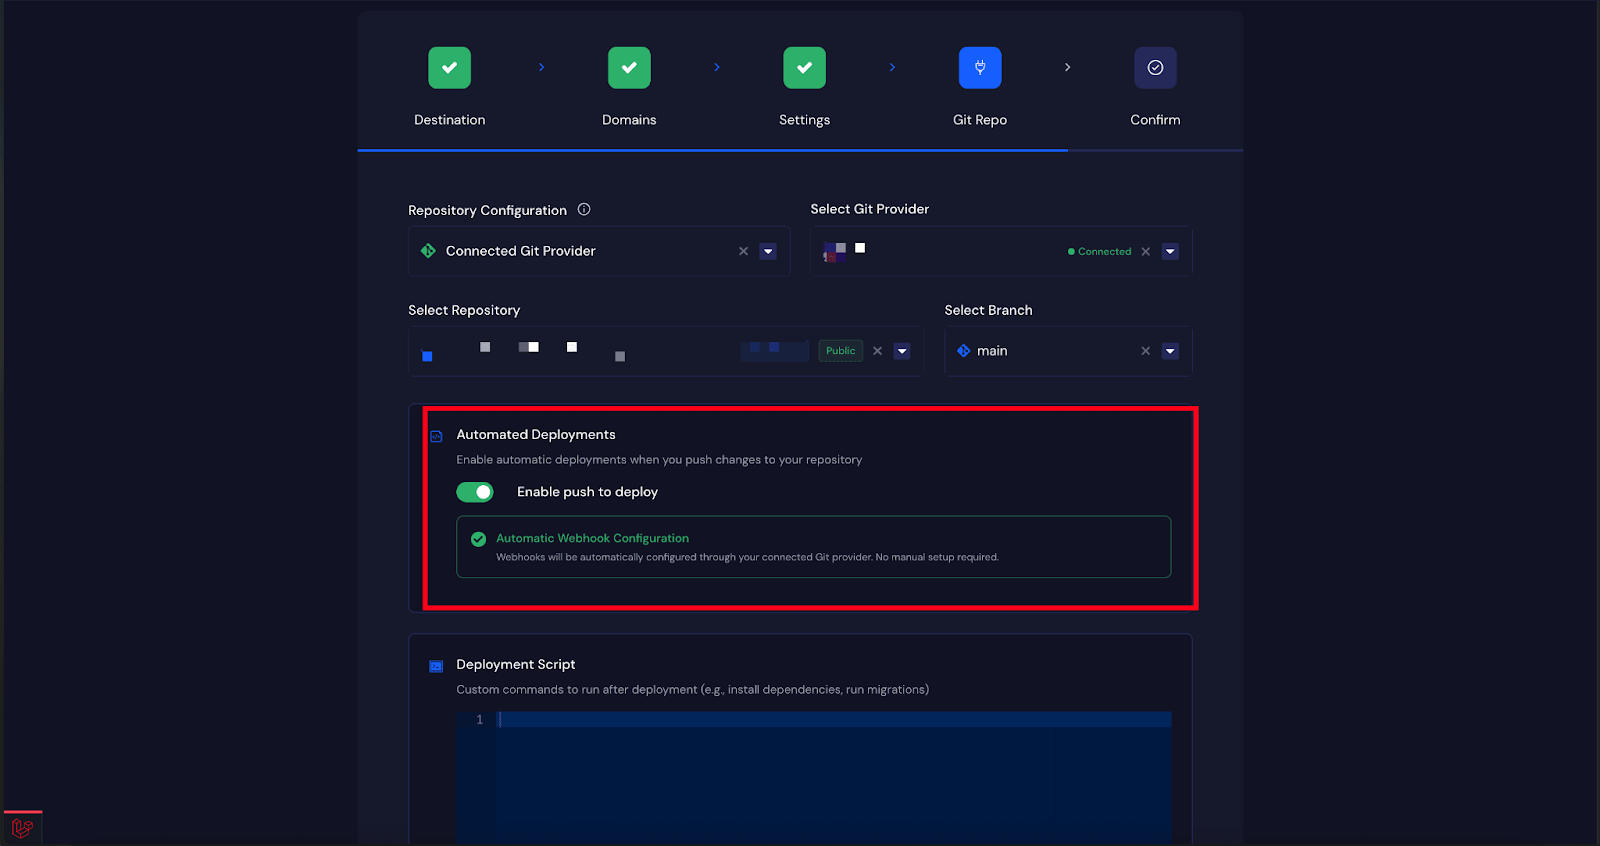
Step 7: Enable Push to Deploy #
The next step is to enable automated deployment. Toggle on the ‘Enable push to deploy’ option. You need to insert this URL into GitHub. Copy the ‘Deployment URL’ from here.
Note: if you want to learn more about the process, follow the steps from this document.
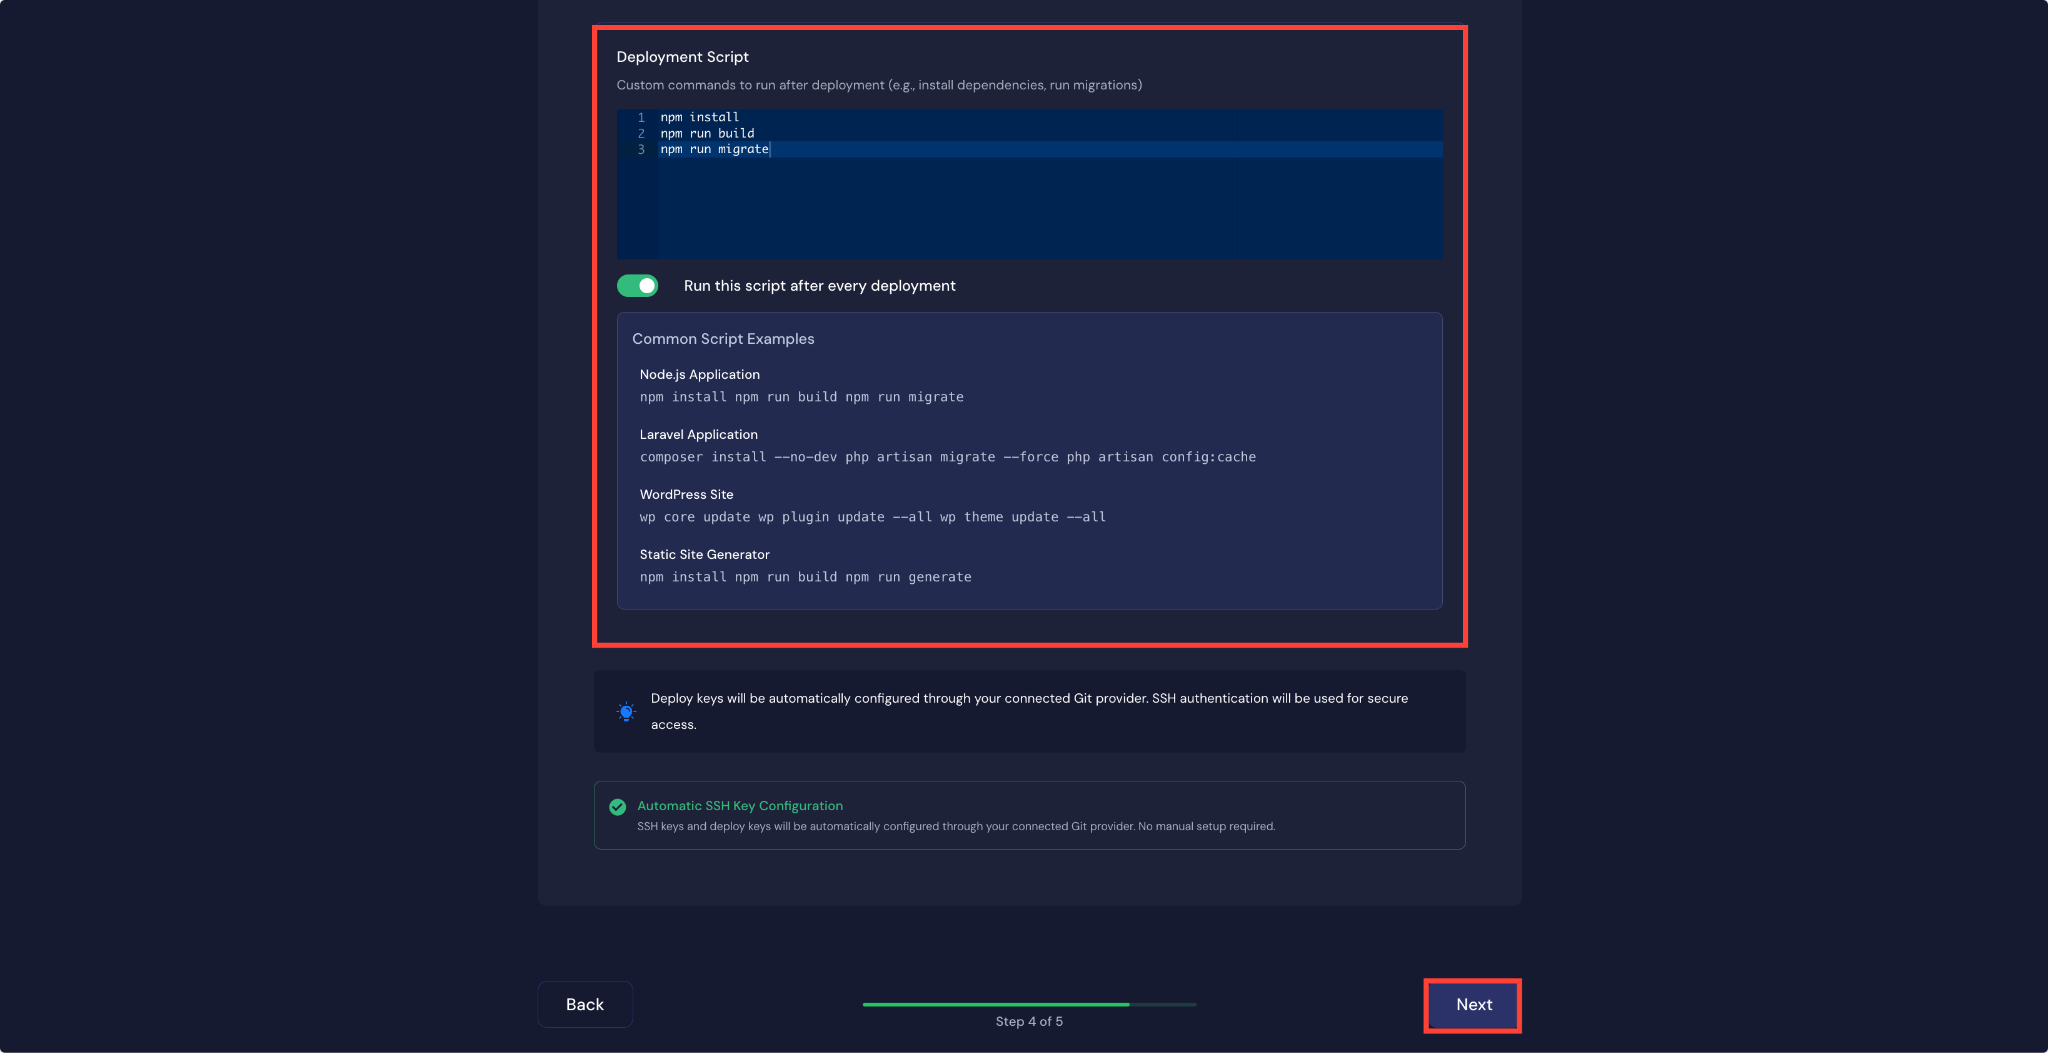
Step 8: Run Deployment Script #
Once the repository integration is complete, you can configure post-deployment actions. In the ‘Deployment Script’ field, enter any custom commands you want to run after deployment. You can also select one of the provided example scripts. After setting this up, click on ‘Next’ to continue.
Step 9: Confirm Migration #
The final step is to confirm and start the migration. Click on the ‘Start’ button, and the migration process will begin immediately. You will be able to monitor the progress in real time.
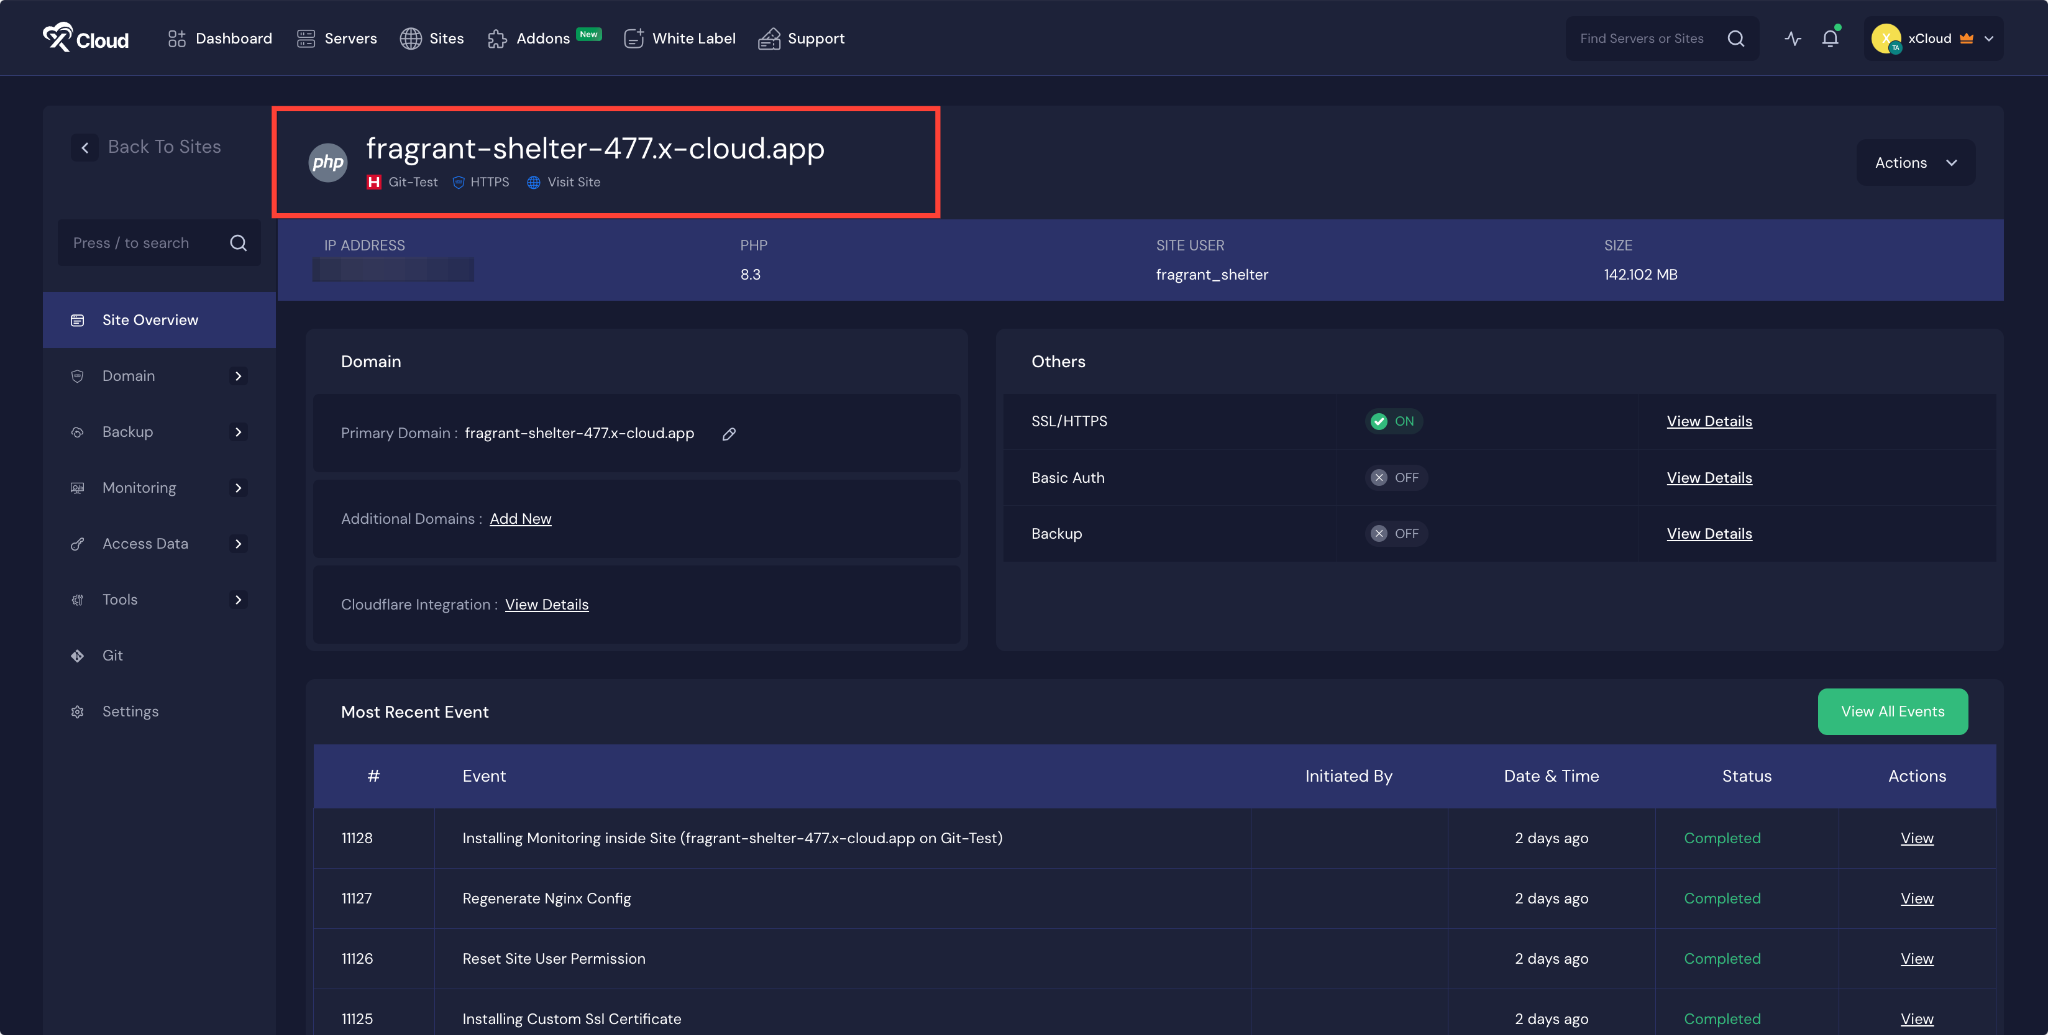
Once the migration is complete, a success message will appear. From there, you can access your site dashboard.
After the migration is complete, you can visit your site to see your PHP application deployed successfully. With these steps, you can quickly set up Git integration, configure your database, and launch your site with either a staging or live domain.
Git Pull Script & Deploy Script (Advanced Configuration) #
In this step, you can customize how your application pulls code from your Git repository and define actions to run after deployment.
Available Variables #
You can use the following variables in both Git Pull Script and Deploy Script:
Project variables (all sites)
• PROJECT_DIR — absolute path to your site root
• XCLOUD_SITE_PATH — absolute path to your site root
• XCLOUD_SITE_BRANCH — current Git branch used for deployment
PHP variables (PHP sites only)
• XCLOUD_PHP_VERSION — PHP version (e.g. 8.2)
• XCLOUD_PHP — full path to PHP binary
• XCLOUD_COMPOSER — PHP-prefixed Composer path
Node.js variables (all sites)
• XCLOUD_NODE — path to Node.js binary
• XCLOUD_NODE_VERSION — installed Node.js version
• XCLOUD_NPM — path to npm binary
PM2 variable (Node.js sites only)
• PM2_PROCESS_NAME — the PM2 process name for the site
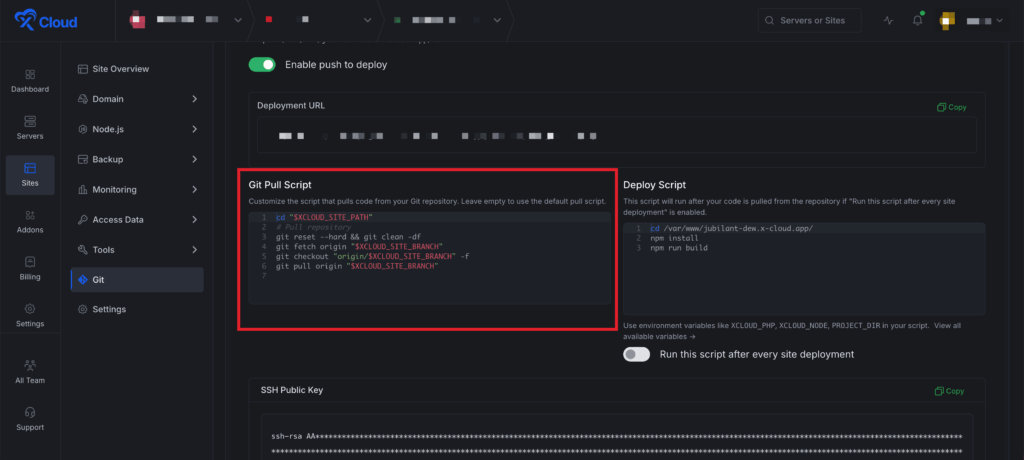
Git Pull Script #
The Git Pull Script allows you to control how the code is fetched from your Git repository during deployment. You can go to the ‘Git Pull Script’ section and enter your custom script. If you leave this field empty, xCloud will use the default pull process.
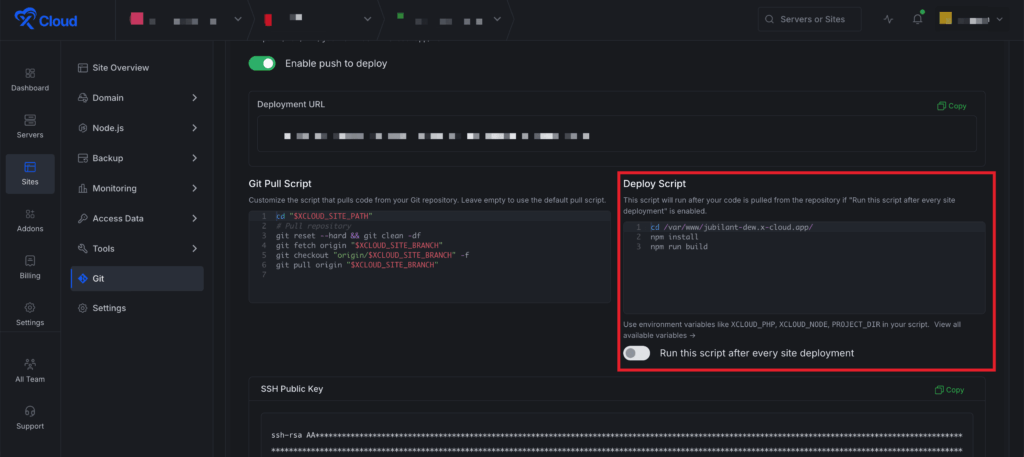
Deploy Script #
The ‘Deploy Script’ runs after your code is successfully pulled from the repository. To access this, make sure the “Run this script after every site deployment” option is turned on. Enter your scripts under the ‘Deploy Script’ section.
After configuring your scripts, click on the ‘Save Changes’ button to continue.
Whether you prefer to use Git repositories or upload files directly, xCloud provides a straightforward and secure way to bring your applications online.
If you encounter any difficulties, feel free to reach out to our support team for assistance.


