


Managing NGINX configurations across multiple sites can be time-consuming, especially when you need to apply the same custom config to dozens of sites on a single server. Normally, you’d have to visit each site’s settings individually, paste the same snippet, and repeat the process over and over.
xCloud’s Bulk NGINX Customization feature eliminates that repetitive work. It lets you select a configuration – whether from a ready-made template or your own custom snippet and push it to multiple sites in a single operation.
Follow this to apply bulk NGINX customization for your sites easily with xCloud.
Prerequisites #
- Your server must be running the NGINX stack (not OpenLiteSpeed). The Bulk NGINX Customization option is not available on OLS servers.
- Your server must have at least one provisioned site.
- You must be the server owner or have the appropriate team role to manage server settings.
⚠️ Bulk NGINX Customization processes sites in the background. For servers with many sites, changes may take a few minutes to apply across all selected sites.
Step 1: Open Bulk NGINX Customization #
From your xCloud dashboard, navigate to your server. In the left sidebar, go to ‘Management → Nginx Customization.
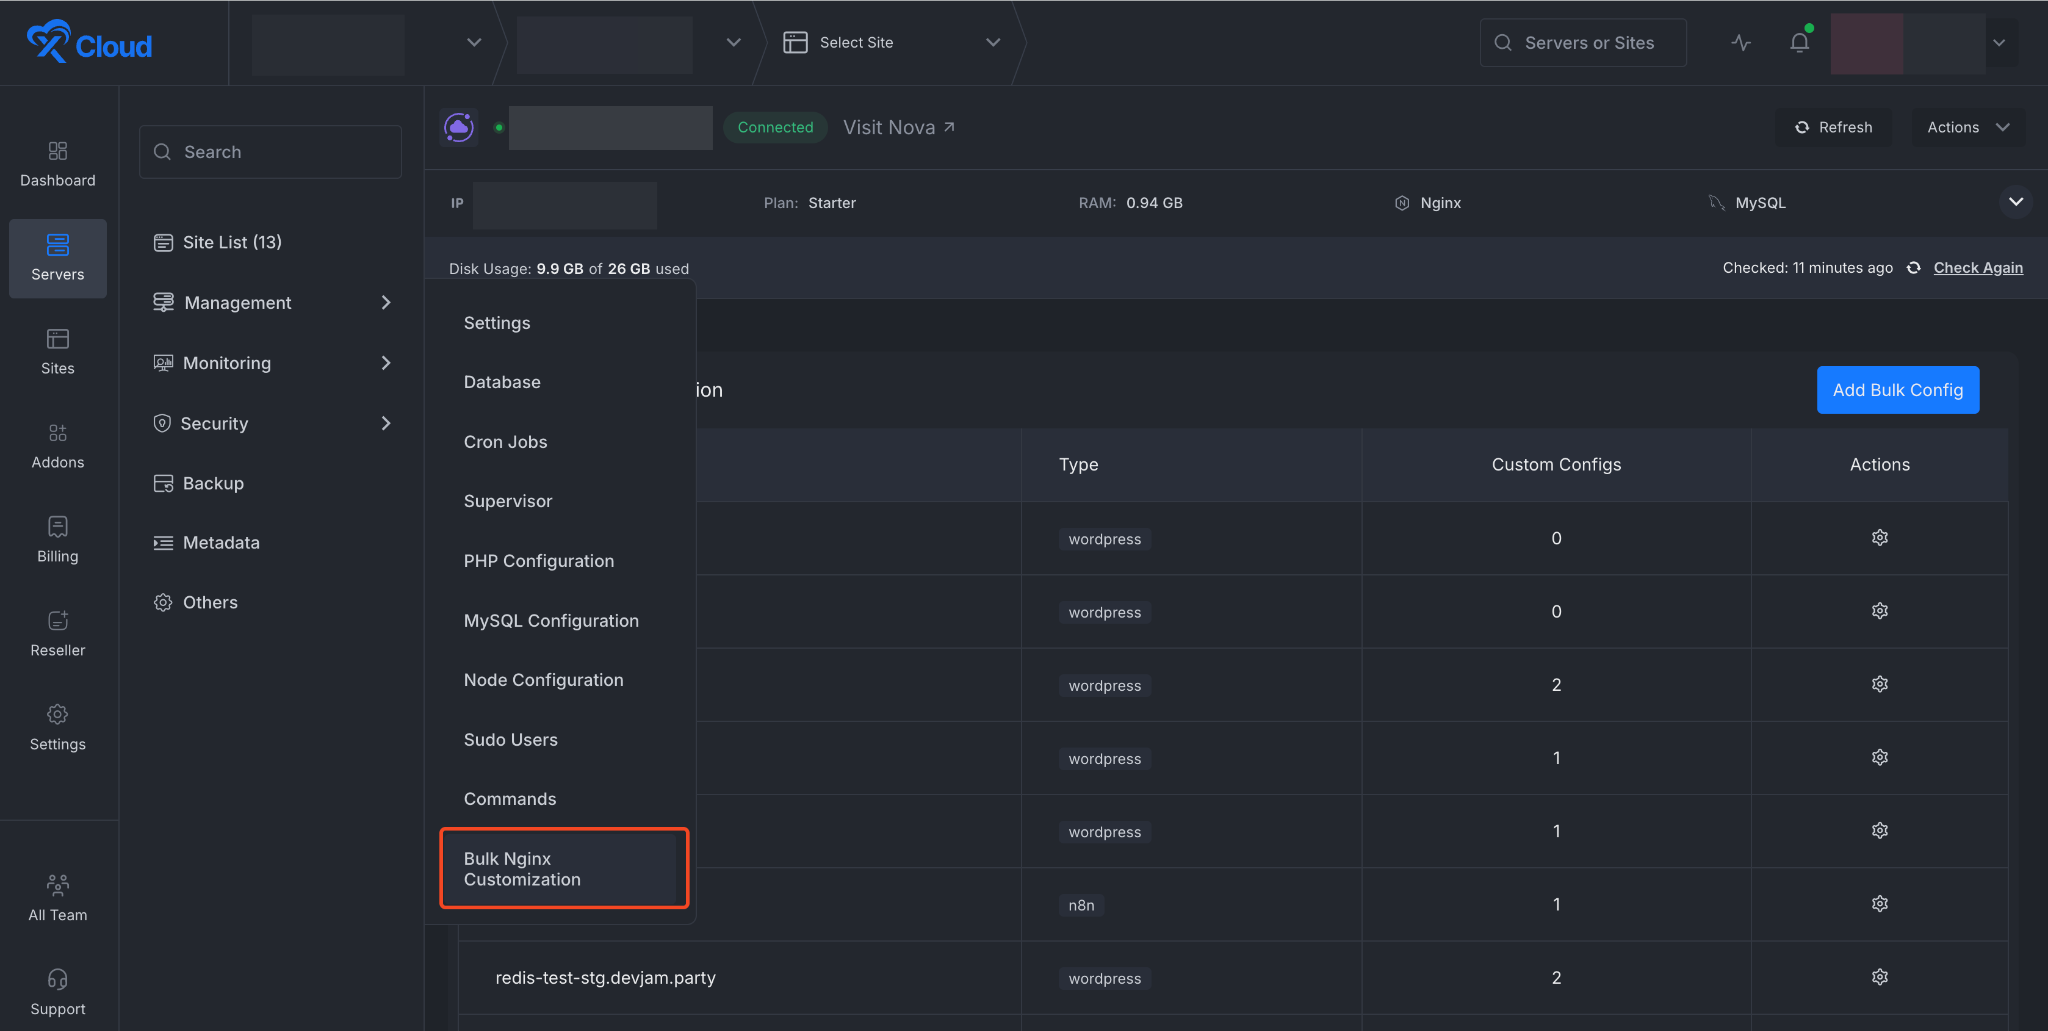
Next, click on the ‘Add Bulk Config’ option to create a new NGINX config.

Step 2: Choose a Configuration Type #
Next, a pop-up will appear. Here, you need to configure a Custom NGINX. If you are not sure how to create a custom NGINX config, then read this documentation:
👉 How To Configure Custom NGINX In xCloud?
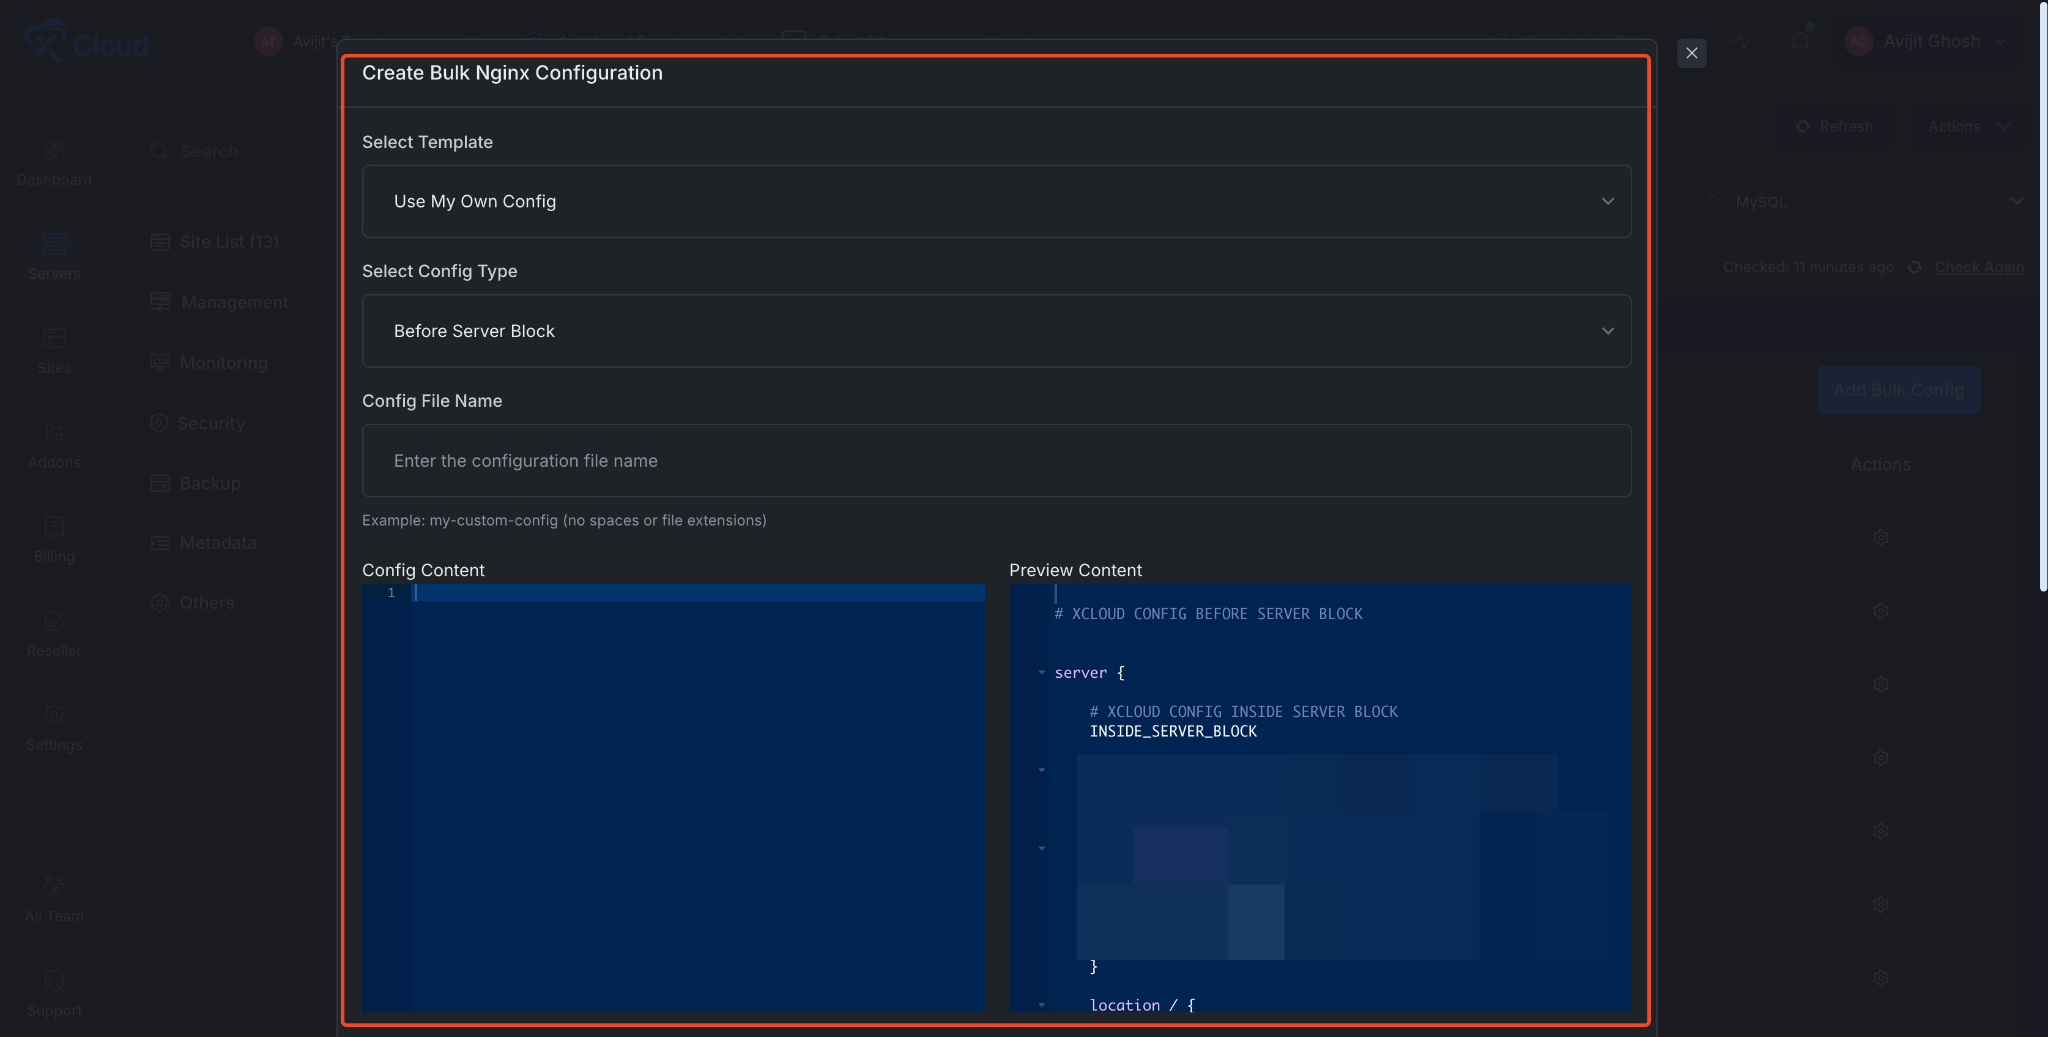
Once you select a type or template, the config snippet appears in the code editor below the dropdowns. You can review it as-is or make custom edits directly in the editor before applying.
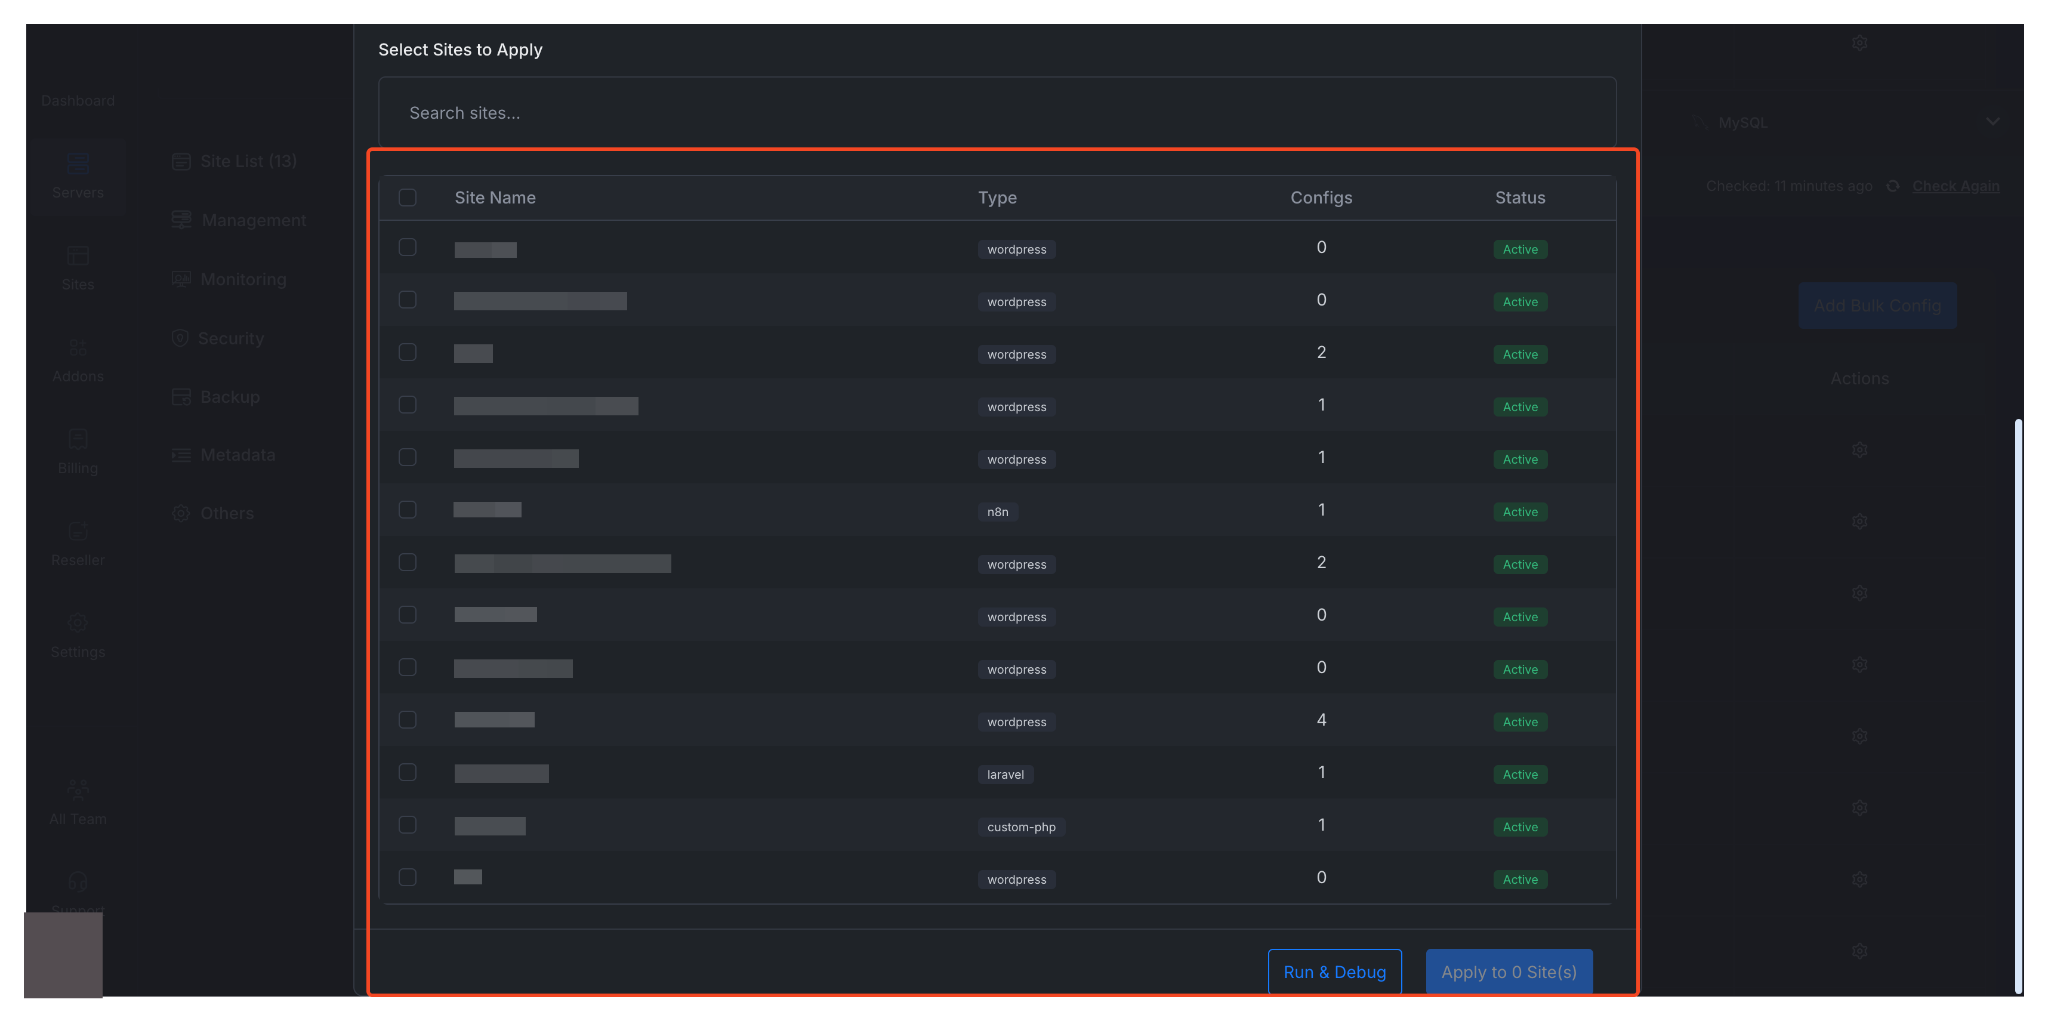
Step 3: Select the Sites to Apply To #
The site selection table lists all sites on the server. Use the search bar to filter by site name or domain, or use the Select All checkbox to select every site at once.
For WordPress-only templates, the list automatically filters to show only WordPress sites.
💡 Sites that already have a custom NGINX config will show an “Overwrite” indicator. Applying a new config to these sites will replace their existing configuration.
Step 4: Apply the Configuration #
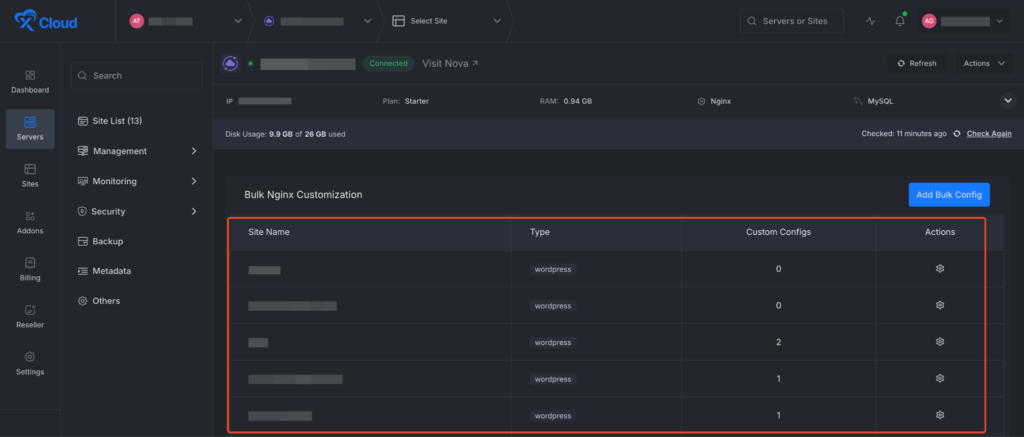
Before applying to all sites, it’s strongly recommended to test your config. Click ‘Run & Debug,’ then click ‘Apply’ to Selected Sites, and the NGINX configuration will start working on the selected sites. Afterward, your newly created Custom NGINX config will be displayed under ‘Site Name,’ ‘Type,’ and ‘Custom Configs’ in the dashboard.
Bulk NGINX Customization saves you from the tedious task of configuring each site individually. By applying a single config across all the sites that need it, you reduce both the time spent and the risk of inconsistent configurations between sites.
Just remember to use the Run & Debug option before applying to catch any issues early, and keep an eye on the overwrite indicators so you don’t accidentally replace a site’s existing config. If anything goes wrong after applying, you can always roll back by editing the config at the individual site level and reloading NGINX.
Still stuck? Contact our Support team.


