


Backups give you safety, but flexibility comes when you can move them across sites without friction. xCloud allows restoring to another site, a feature that lets you restore a WordPress site backup directly onto a different existing WordPress site on the same server or on a different one within your team.
This is useful for cloning a production site to a staging site, recovering a site using another site’s recent backup, or replacing a broken site’s content without creating a new site from scratch. Follow this to learn how to restore a backup to another site in xCloud:
Step 1: Go to Your Site #
Navigate to the source site in the dashboard. Open ‘Site Backup’ → ‘Previous Backups’ from the sidebar.
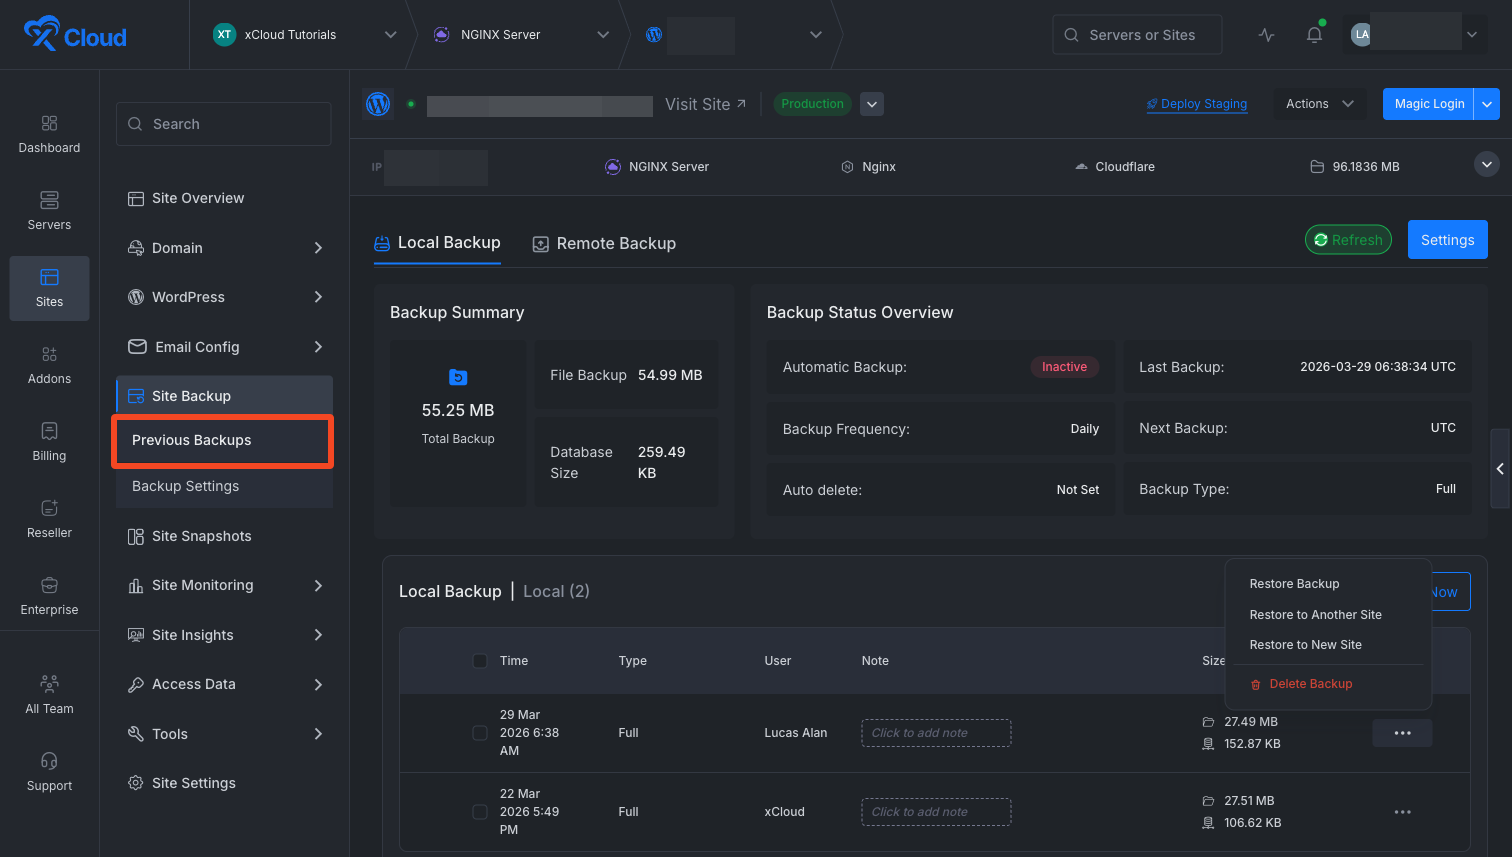
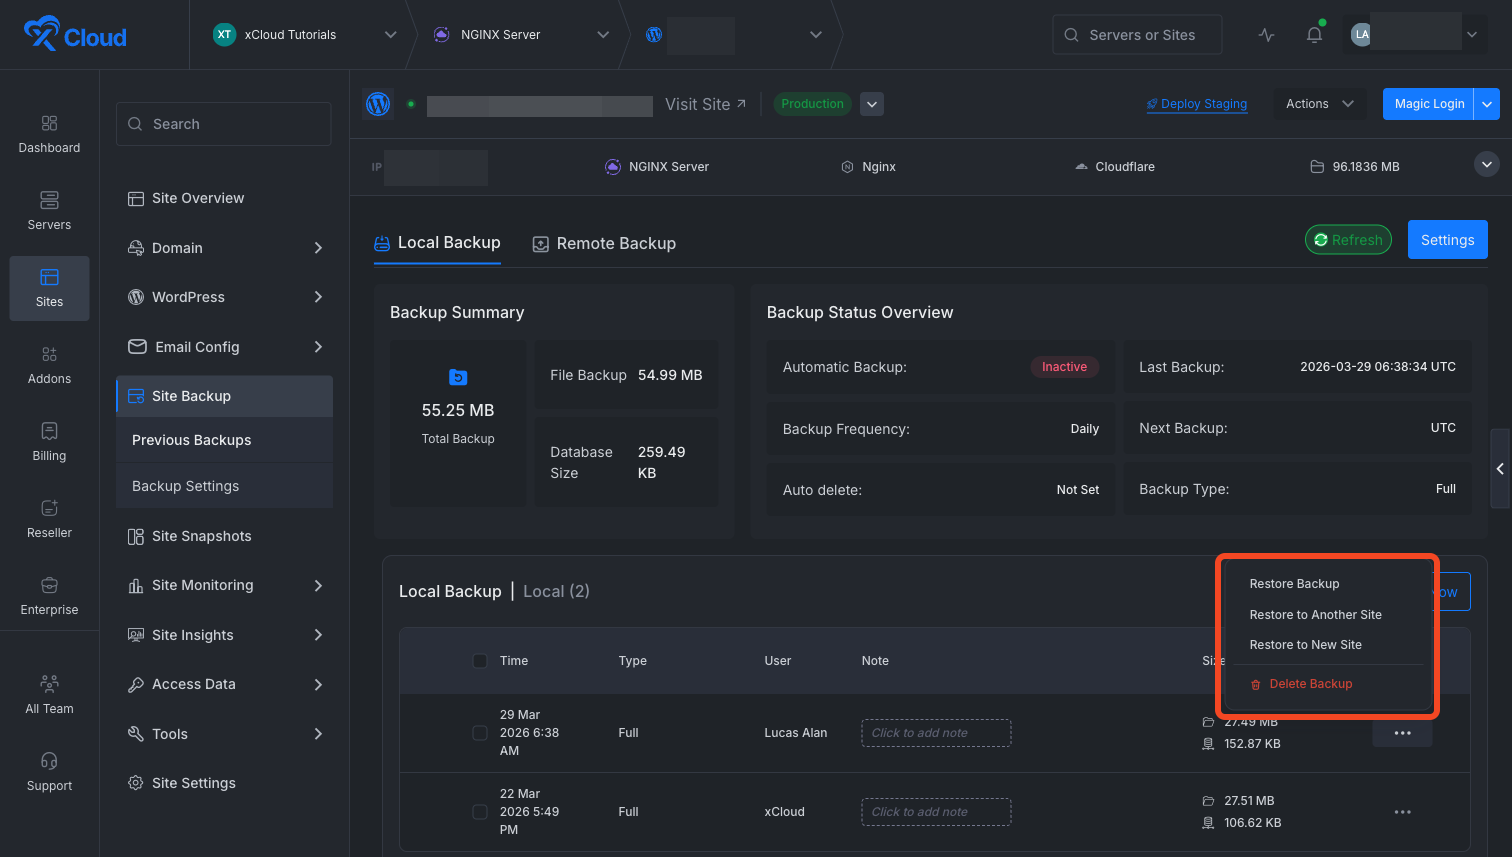
Now, click on the action menu on any backup. The action menu on each backup provides three restore options:
- Restore Backup: Restore to the same site (existing behavior)
- Restore to Another Site: Restore to a different existing WordPress site
- Restore to New Site: Create a new site from the backup
Select the ‘Restore to Another Site’ option to proceed.
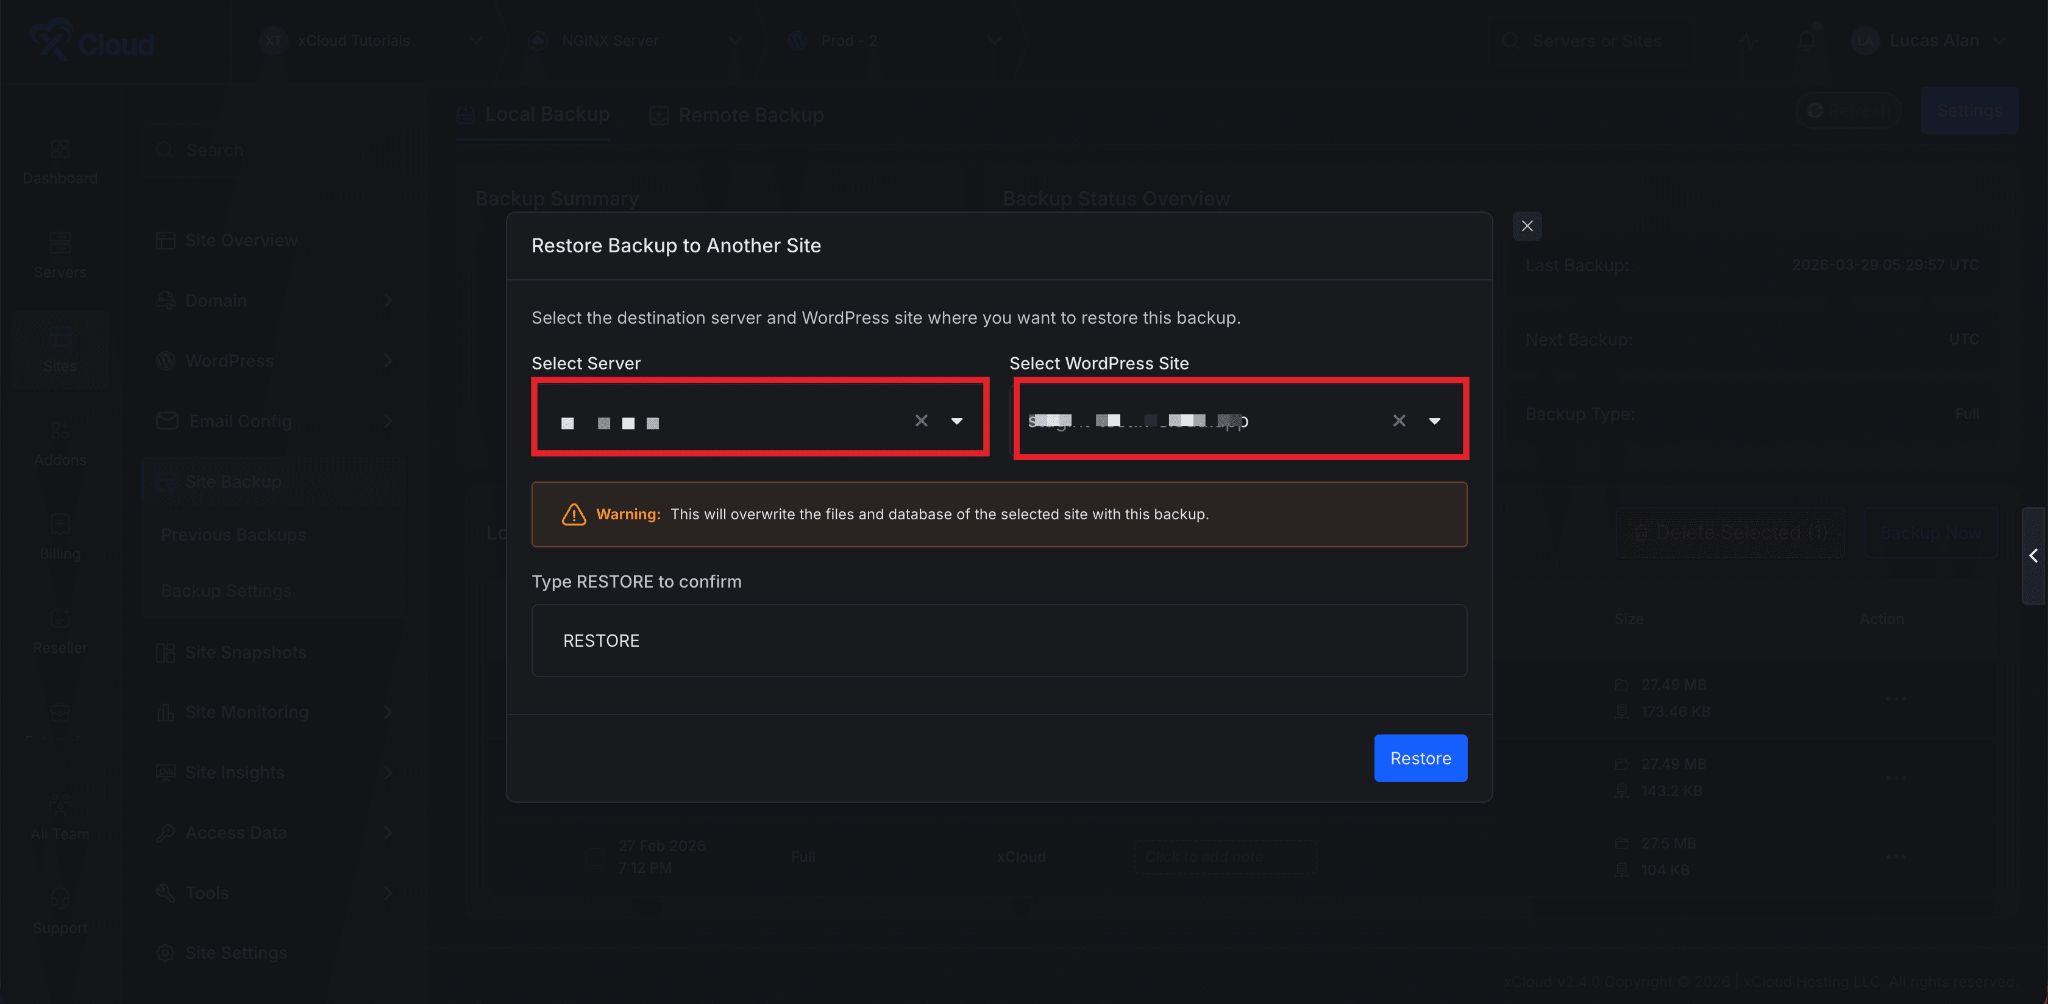
Step 2: Select the Destination Server And Site #
In the modal that opens, use the Select Server dropdown to choose the target server. You can type to search by server name. Once a server is selected, the Select WordPress Site dropdown becomes active. Choose the site you want to overwrite with the backup.
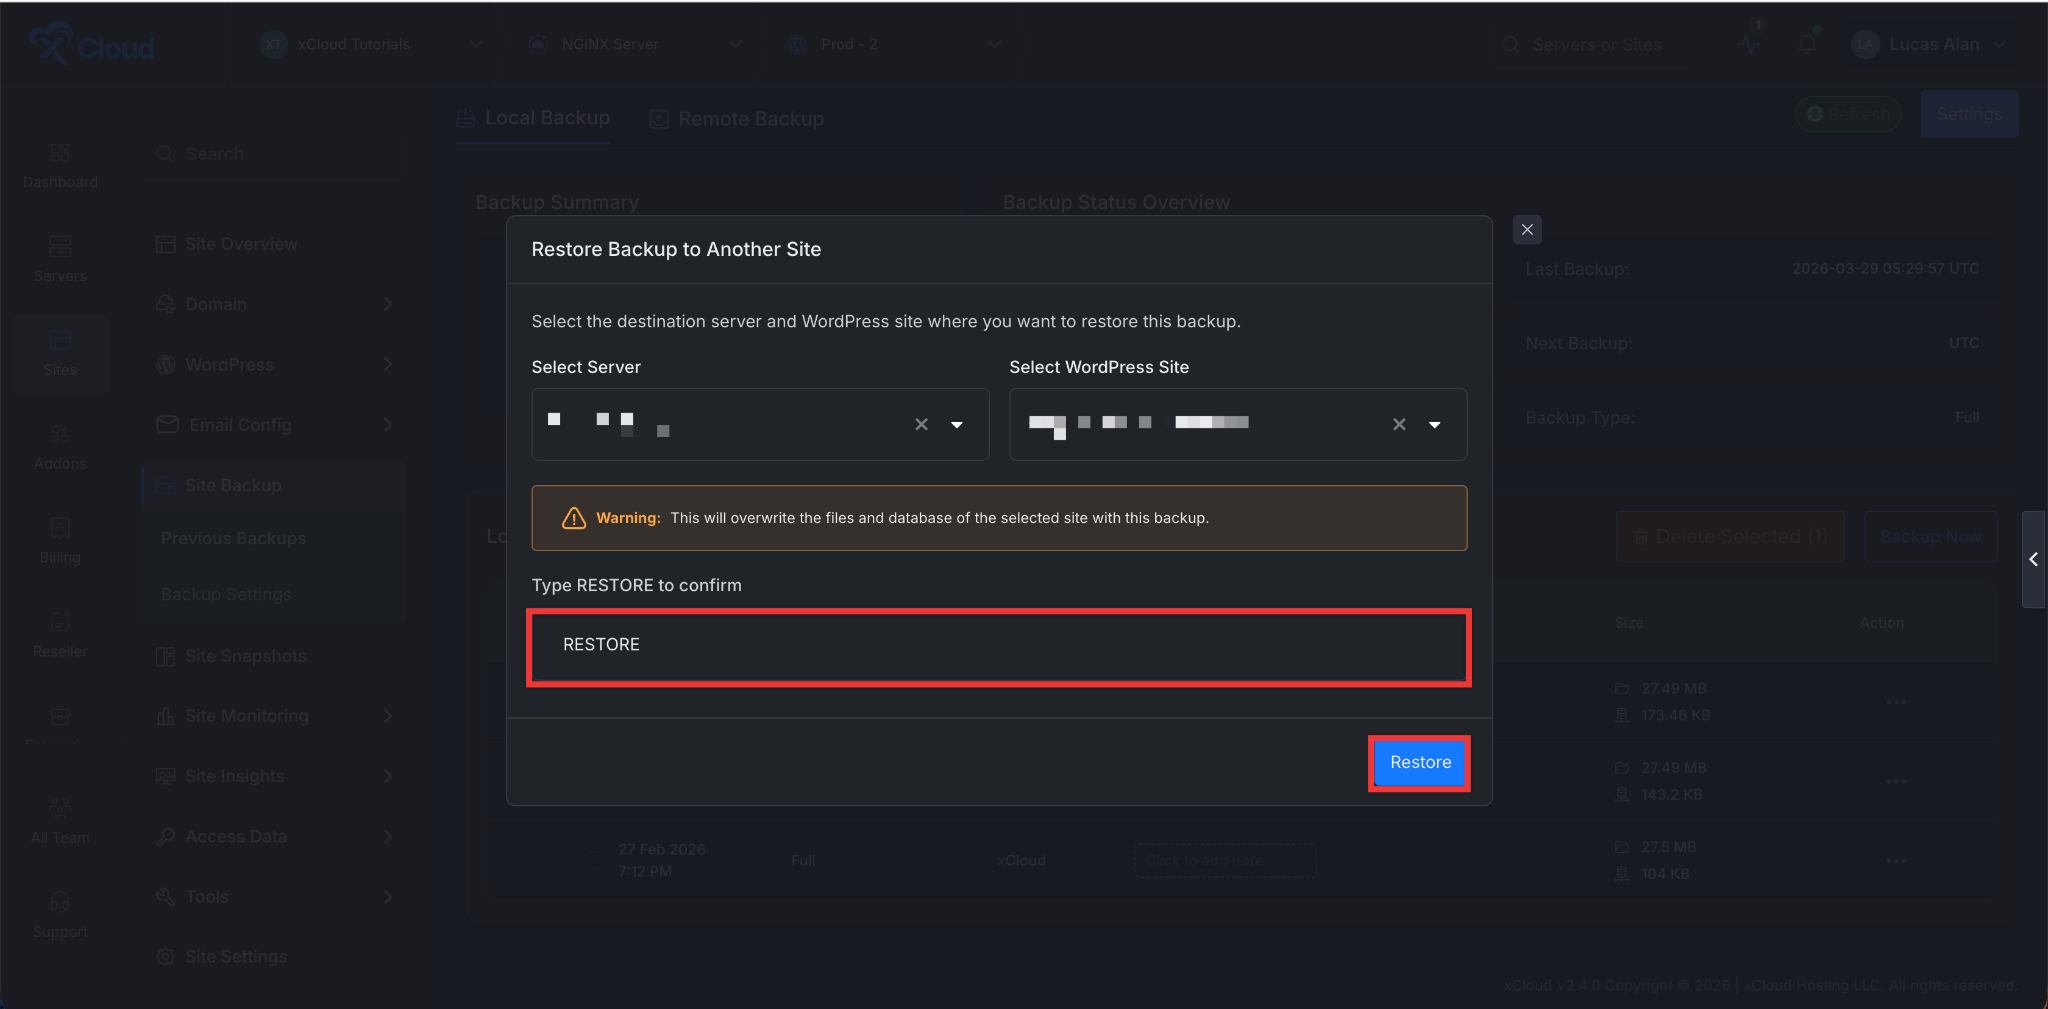
Step 3: Confirm the Restore #
Then read the warning message carefully. Type “RESTORE” (in capitals) in the confirmation field to enable the Restore button and click on the ‘Restore’ button to start the restoration process.
Restoring a backup to another site in xCloud gives you a fast and controlled way to migrate or recover WordPress environments without manual setup. The process ensures data integrity by validating backup compatibility, protecting the destination site through confirmation steps, and allowing safe rollback if anything goes wrong.
Still stuck? Contact our Support team.


