


WordPress frequently requires sending site emails to you or your users, known as transactional emails. These may include admin notifications, new user signups, password resets, and form submission emails from form plugins. At times, WordPress’s default email delivery system may fail, leading to potential issues like emails being flagged as spam or failing to reach their intended recipients.
xCloud does not configure your server to send or receive emails. Instead, we recommend using external email-sending services like Mailgun or Amazon SES for handling outgoing emails. Unlike traditional shared hosting, cloud servers do not come with a built-in email solution. We strongly advise against setting up an email server on the same server hosting your websites for security and performance reasons. Instead, you can choose from reliable hosted email services such as GSuite, Rackspace, Zoho, or set up an open-source email server solution like iRedMail if needed. It’s essential for WordPress sites to have a third-party SMTP service in place to send administrative and transactional emails, ensuring full functionality.
Due to its focus on optimal performance and security, xCloud provides email services on its own. You can send up to 100 emails for free per team with the xCloud Managed Email services. Plus, there are multiple plans to purchase 1000-8000 emails with a minimal cost. Web hosting servers are not optimized for sending emails, and you may also want to avoid running your own mail server.
However, if you want to set up site emails with any SMTP provider, we recommend using reliable email-sending services like Mailgun, SendGrid, Elastic Email, etc., which ensure that site emails are efficiently sent and delivered to recipients.
xCloud can streamline the delivery of transactional emails for your website by integrating any SMTP provider with FluentSMTP. It is a popular tool for managing SMTP services.
Note: If the CNAME record verification fails, that means your domain is not added to the Elastic email.
This usually happens when the domain already exists on Elastic Email (maybe he was using Elastic Email on other platforms).
Thus, always make sure that you have removed the existing domain from Elastic Email. Then you can use the retry button, it will automatically add the domain and verify the CNAME record.
Here is our detailed documentation on how you can configure any SMTP provider for site emails in the xCloud environment.
Step 1: Log In To SMTP Provider Account #
Log in to your SMTP provider account and collect your login credentials (username and password), SMTP Host, and SMTP Port for using it in the xCloud mail integration.
Step 2: Add SMTP Provider For Site Emails #
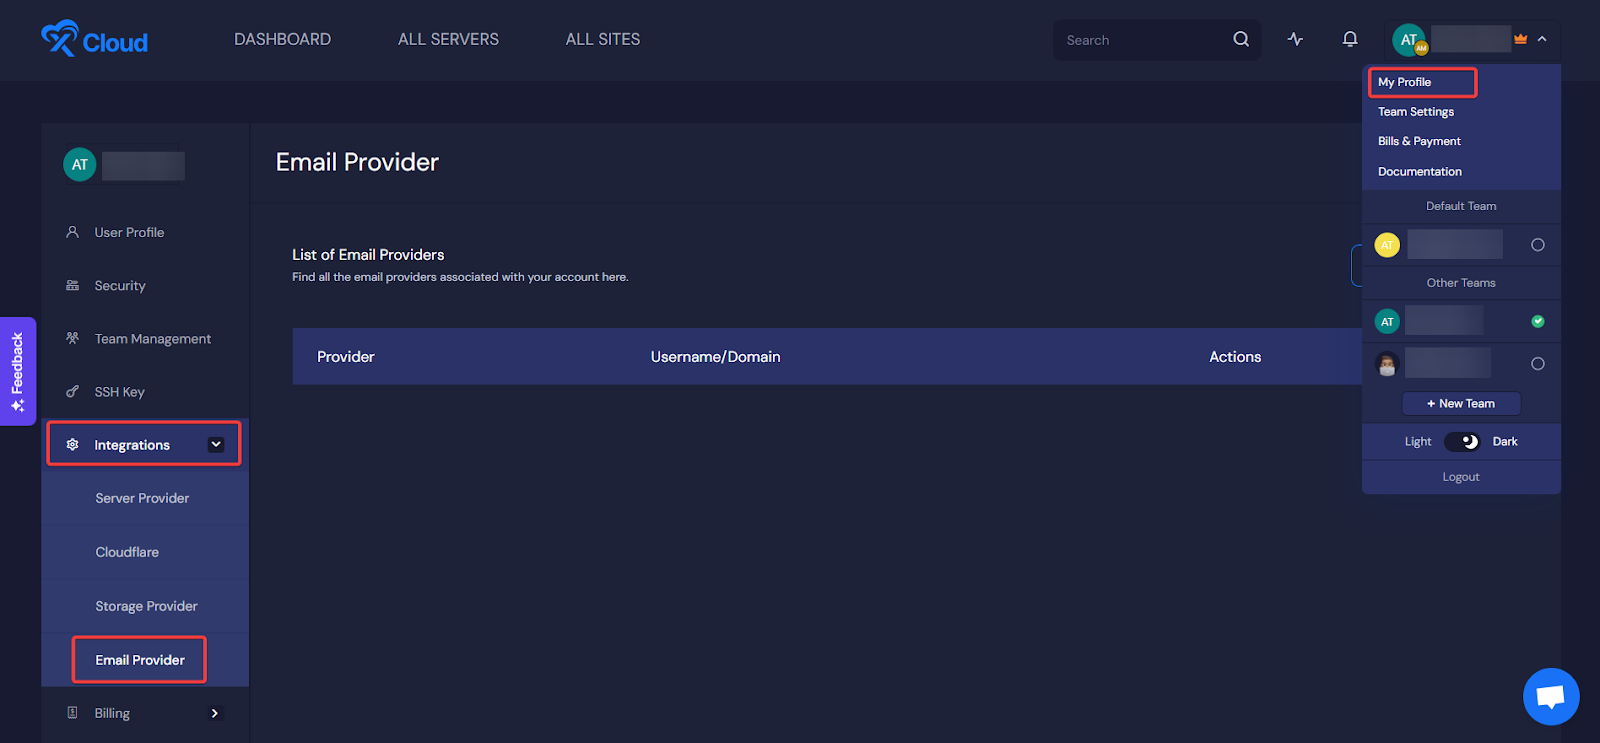
Once you are done collecting your SMTP details for Mailgun, it’s time to add the SMTP service as the email provider in xCloud. From your xCloud dashboard, navigate to My Profile → Integrations → Email Provider. You need to integrate your account domain with the credentials by clicking the ‘Add New Provider’ button.
Once you hit the ‘Add New Provider’ button, you will see a pop-up asking you to select the email provider, SMTP username, and SMTP password.
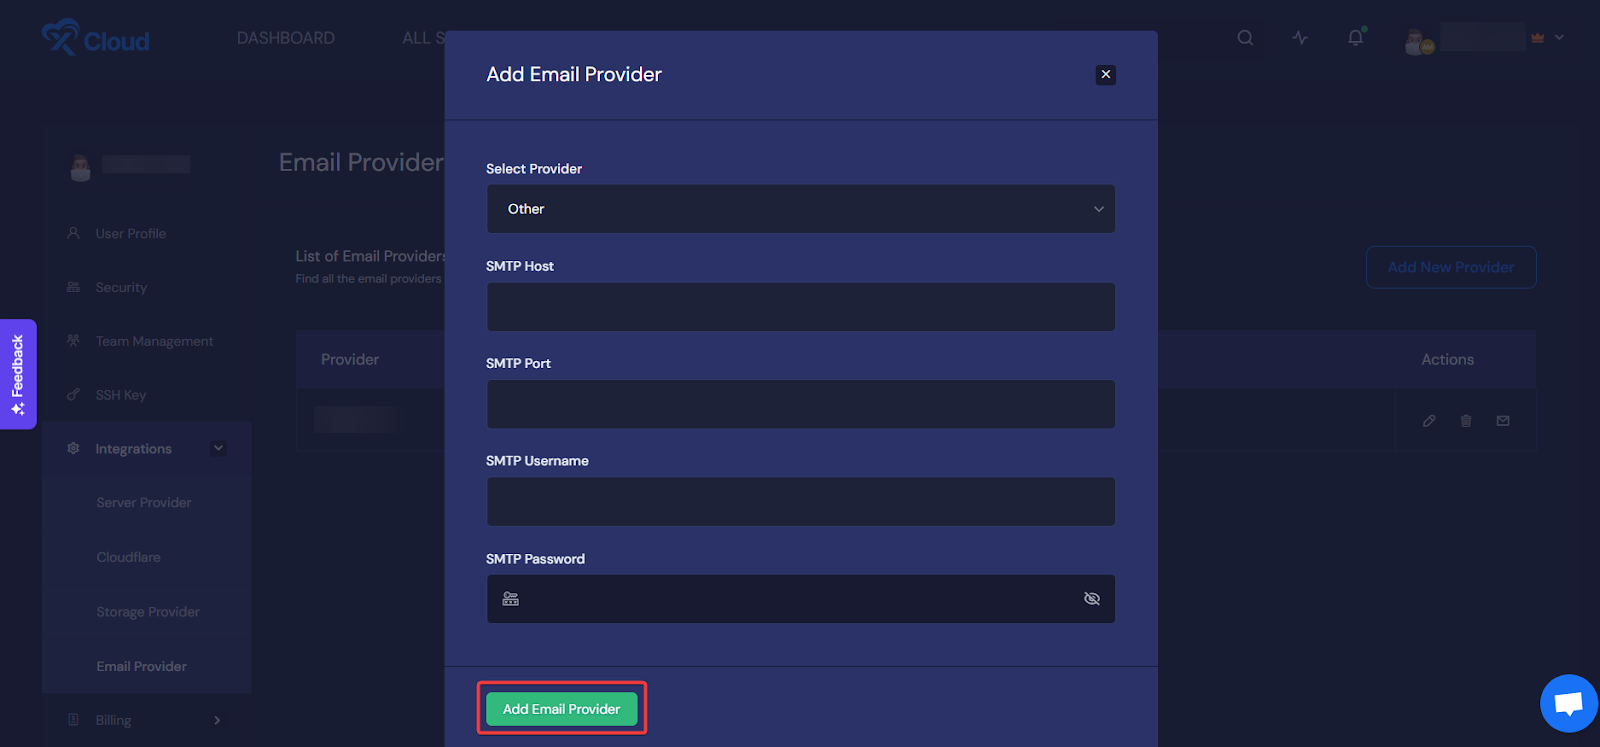
Select Other as the provider, and input your SMTP Host, SMTP Port, SMTP Username and SMTP Password. The email provider will be added instantly.
Step 3: Add Email Service Provider To Site #
After adding the SMTP provider to integrate your xCloud environment, you just need to add the email provider to the site. Go to ‘All Sites’ and choose your website to add the email provider. Select your site and navigate to the ‘Email Config’ tab → ‘Mail Delivery’ addon from the dropdown.

Now select your domain from the ‘Email Provider’ options, set the sender’s name in the ‘From Name’ field, and input your email sender’s address in the ‘From Email’ field. Once done, hit the ‘Save Changes’ button.
💡To set up a professional email address with your custom domain, get a subscription for the xCloud MailBox Addon in just a few clicks.
That’s how easily you can configure any SMTP provider for site emails for xCloud environment to streamline the email delivery process of transactional emails.
Still stuck? Contact our support team for any of your queries.


