


Deploying custom Docker projects doesn’t have to be complicated. With xCloud, you can pull your Docker Compose setup directly from a Git repository and have your application running in minutes.
Follow this guide to walk you through the entire process, from creating a Docker + NGINX server to deploying your application and going live.
Step 1: Create a Docker+ NGINX Server #
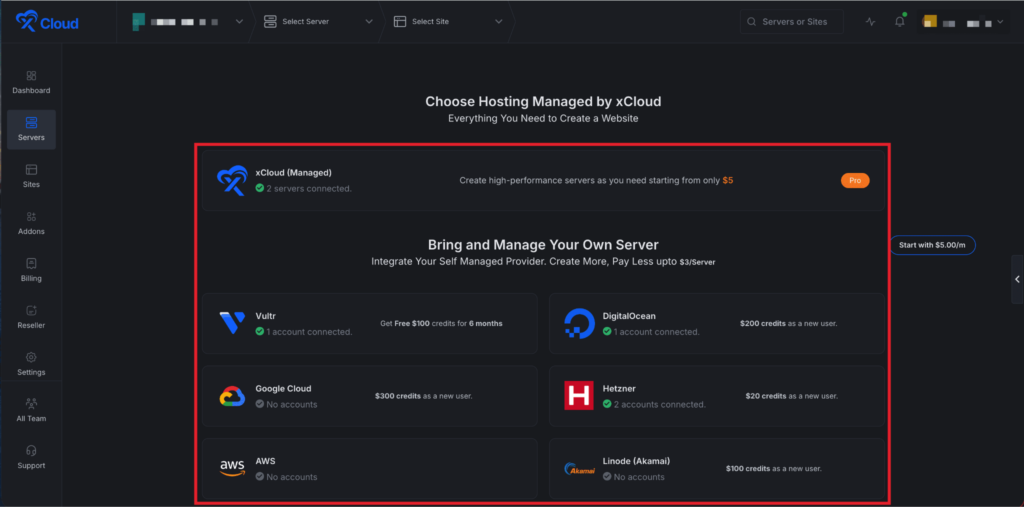
First, you need to create a Docker server to deploy Custom Docker. Click the ‘Add New Server’ button on the dashboard and enter all the necessary credentials to connect your server. You can deploy Custom Docker either on your own server or on an xCloud server.
Next, choose your server provider to deploy Custom Docker with xCloud. You can either use an xCloud Managed Server or select your preferred provider. In this guide, we’ll use the xCloud Managed Server.
Afterward, enter the ‘Server Name’, set the ‘App Type’ to Custom Docker(it is optional to select), and add any relevant ‘Tags’ to help identify your server later.
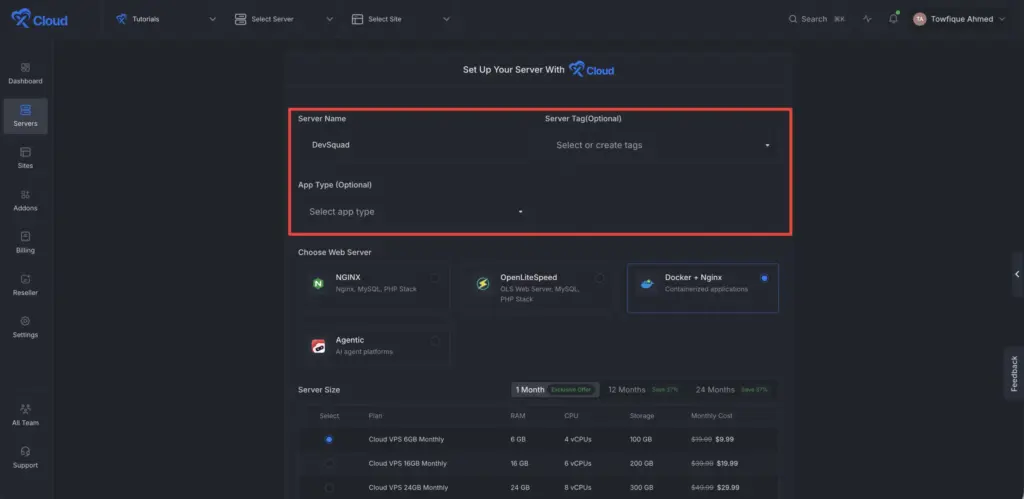
Next, you can see the ‘Docker + NGINX’ stack is already selected, which is mandatory for deploying the Custom Docker application. Then click on the ‘Create’ button to proceed.
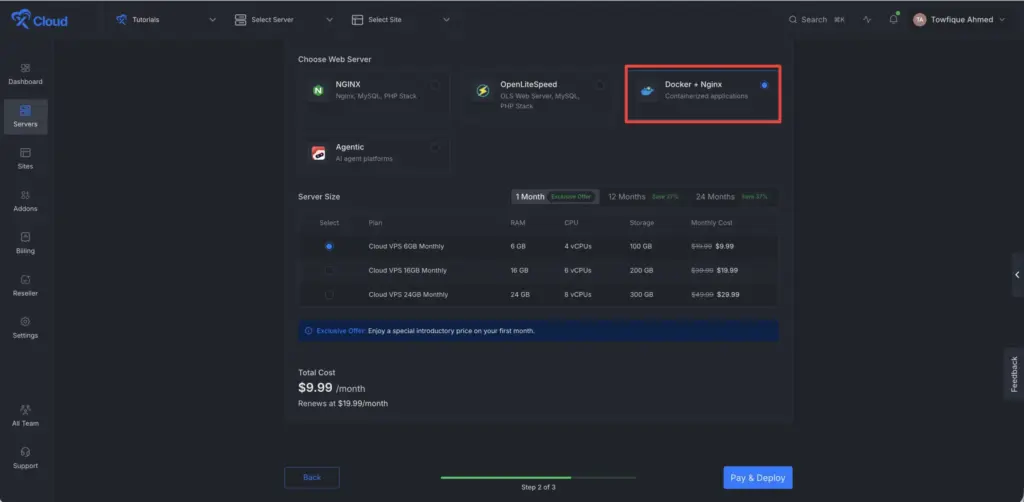
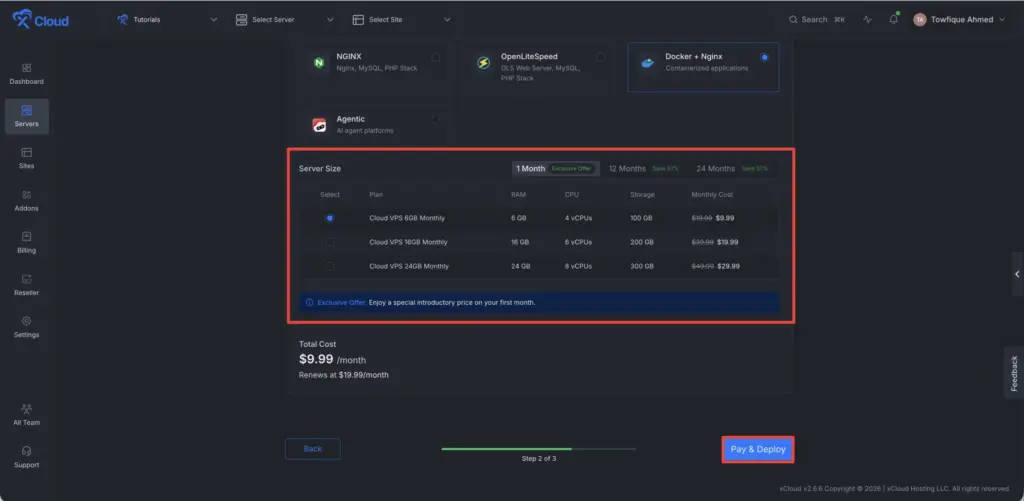
Next, choose your server size according to your preferences. xCloud offers an exclusive discount for the first month. Moreover, you can save up to more discounts if you proceed to an annual or 24-month plan.
Once the server is created, you will be able to deploy your Custom Docker Application on this server.
After creating a server, it may take a while to become fully operational. Wait a few minutes before deploying your applications to ensure everything starts correctly.
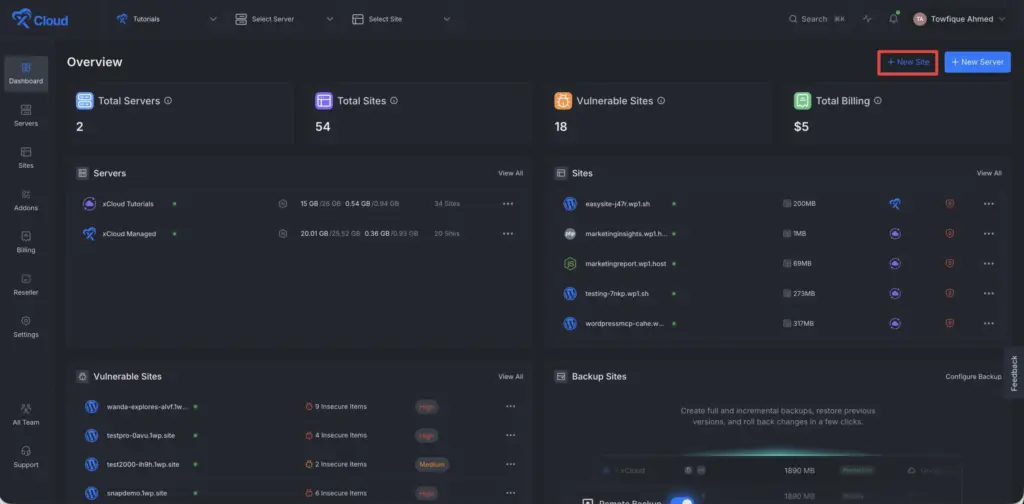
Step 2: Create a New Site #
Begin by logging into your xCloud account. Once logged in, navigate to your dashboard and click on the ‘New Site’ button.
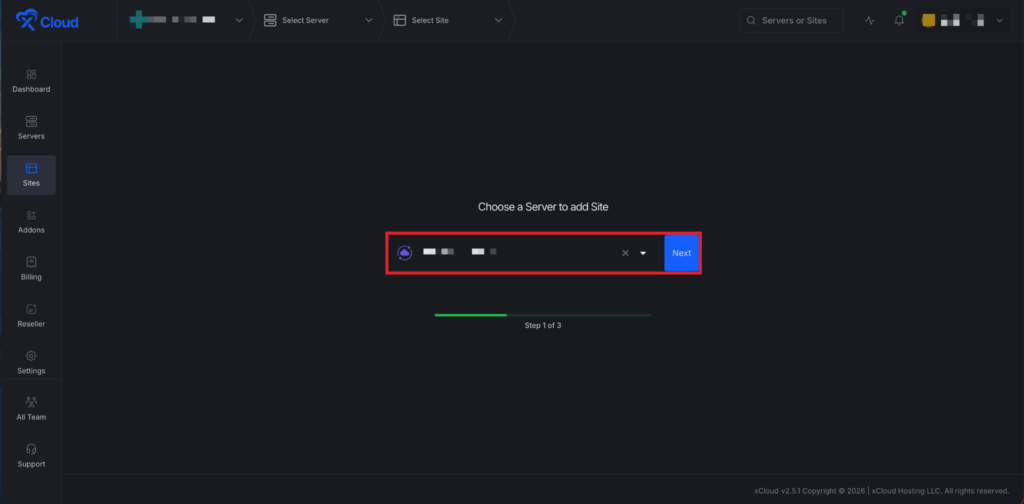
Step 3: Choose Your Server #
Then choose your server from the dropdown menu. Next, click on the ‘Next’ button to proceed to start creating Custom Docker applications.
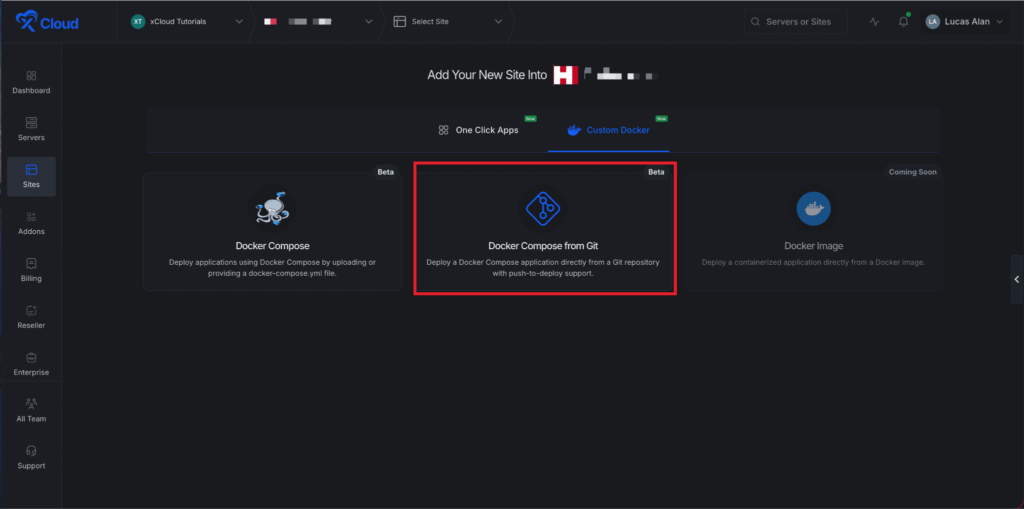
Step 4: Go to The Custom Docker Tab #
From here, go to the ‘Custom Docker’ tab and click on the ‘Docker Compose From Git’ to deploy your Custom Docker applications.
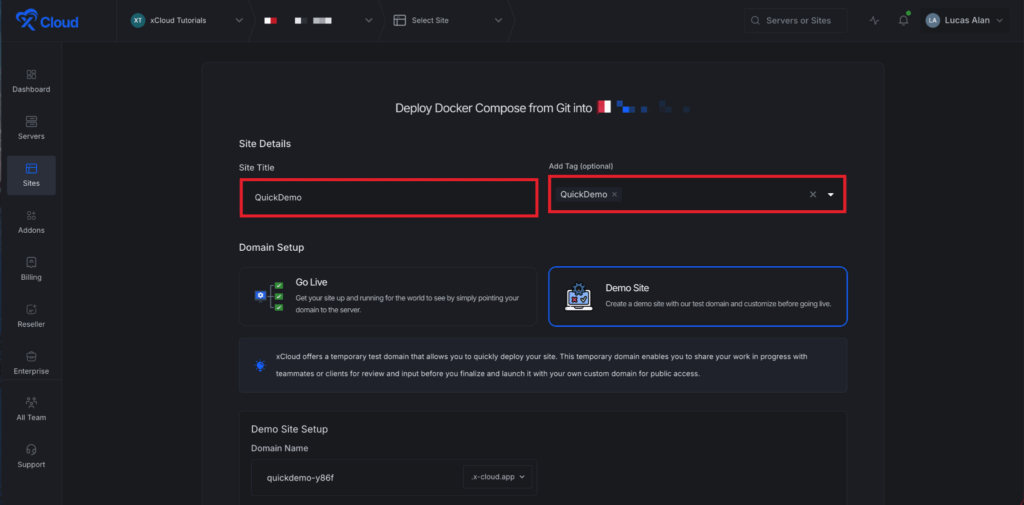
Step 5: Set Up the Docker Compose Application #
In the site setup screen, you will be prompted to enter basic site information. Provide a ‘Site Title’ and add relevant ‘Tags’ to help organize your deployment.
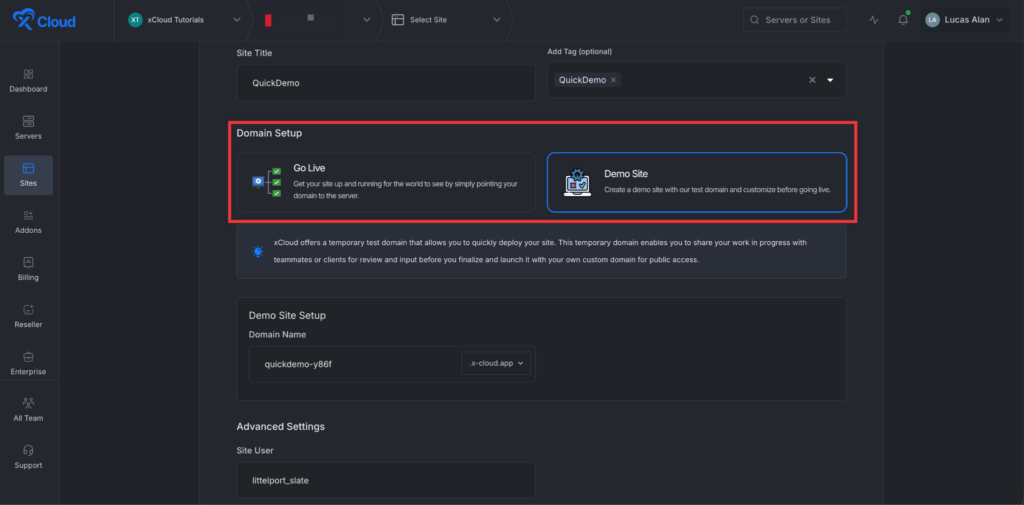
Step 6: Set Up Domains #
From the ‘Domains’ tab, you will get two options: either you can create a ‘Demo Site’ with a test domain and refine it until it is ready for launch, or, you can migrate into a new domain to get your site up and running in a new domain.
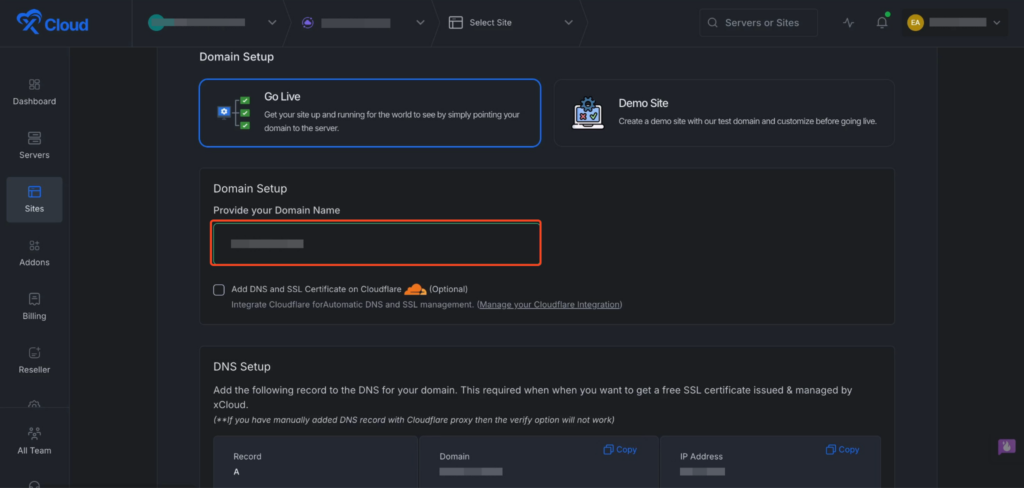
Or you can create your site with your live domain. Just proceed with the ‘Go Live’ option.
It is recommended to proceed with your own domain. Top begin, click choothe ‘Go Live’ and enter your preferred domain name. Then complete the DNS verification process.
Then you will get a ‘Site User’ of xCloud and click on the ‘Next’ button to proceed.

Step 6: Insert Git Repository Credentials #
In the Git Repo tab, you will see three options: Private Repository (SSH), Public Repository (HTTPS), and Connected Git Provider. For a Public Repository, enter the GitHub HTTPS URL and select the branch. For a Private Repository, enter the GitHub SSH URL and select the branch. In this guide, use Connected Git Provider. Choose your linked account, select the repository, and then pick the branch to deploy.
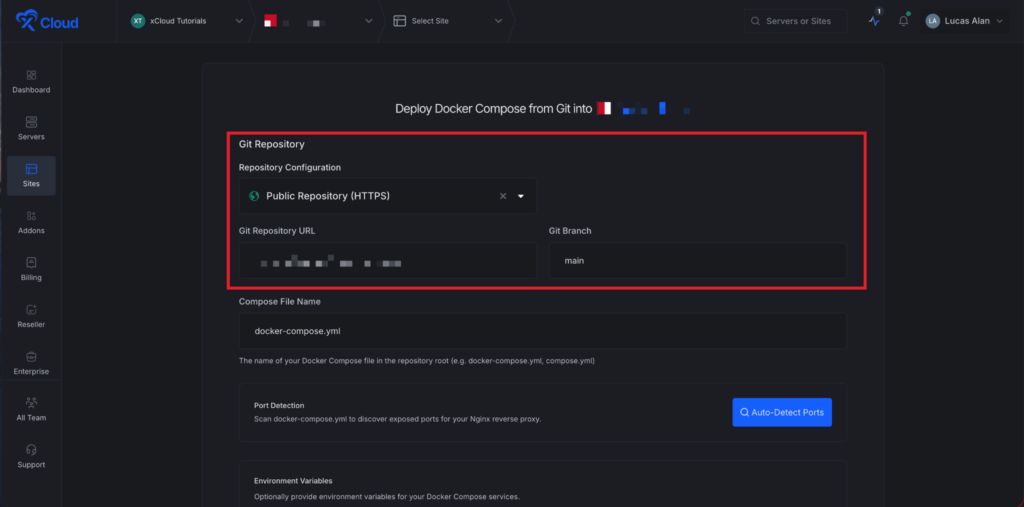
Next enter the name of your Docker Compose file in the repository root ‘Composer File Name’ in the dedicated field.
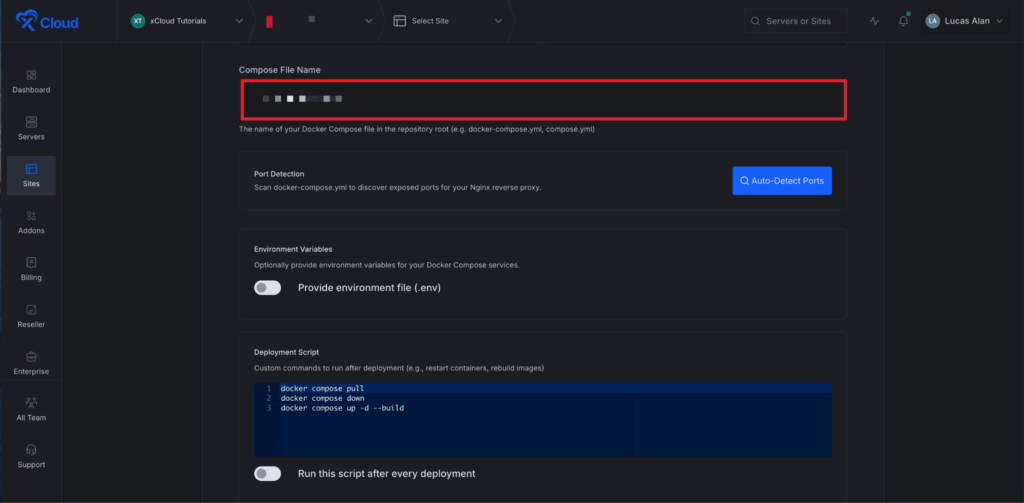
Next, go to the ‘Port Detection’ section and click on the ‘Auto-Detect Ports’ button. It will
Scan docker-compose.yml to discover exposed ports for your Nginx reverse proxy.

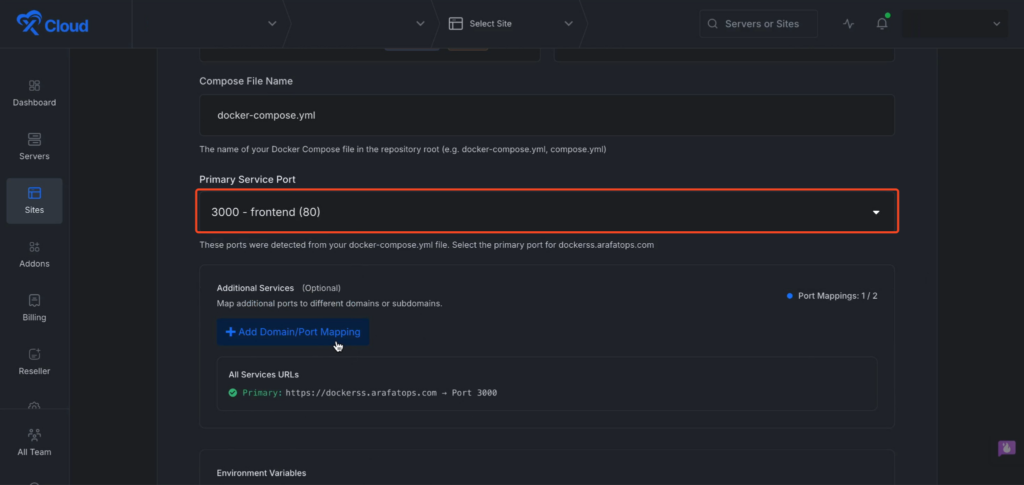
Next you will get few ports that detected from your docker file. You can select the ‘Primary Service Port’ from the dropdown menu.
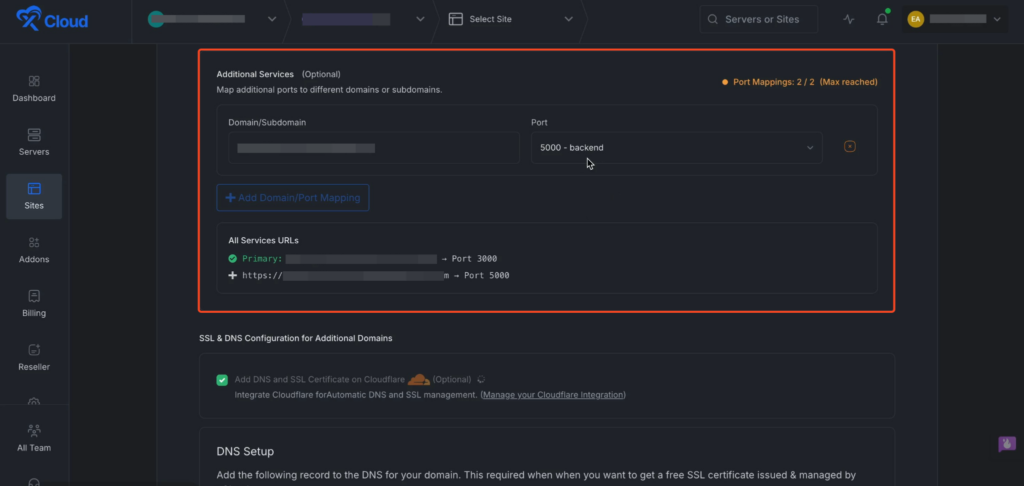
Next under the ‘Additional services, you can map for additional ports to different domains or subdomains. Enter the ‘Domain/Subdomain’ and ‘Port’ in the dedicated fields.
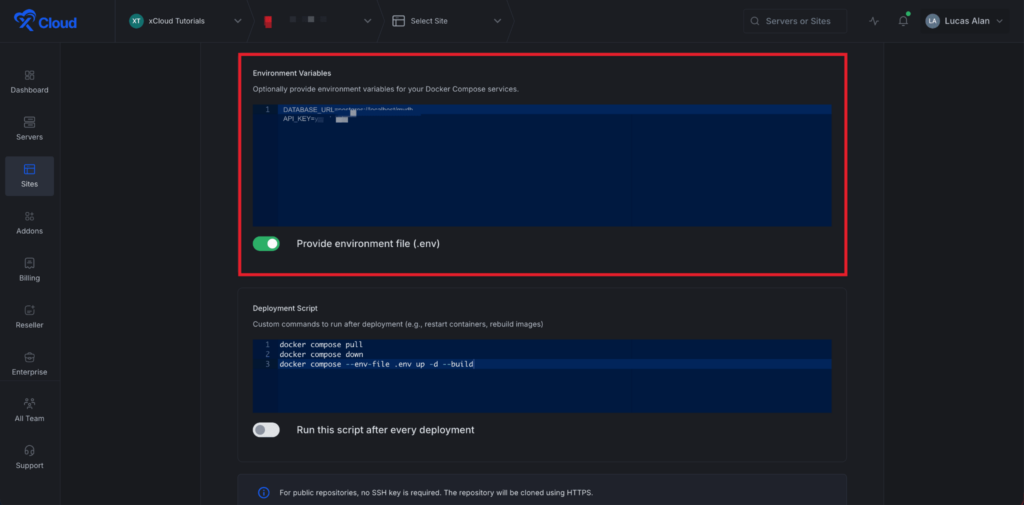
Then toggle on the ‘Environment File’ to enable if you want to enter environment variables for your Docker Compose services.
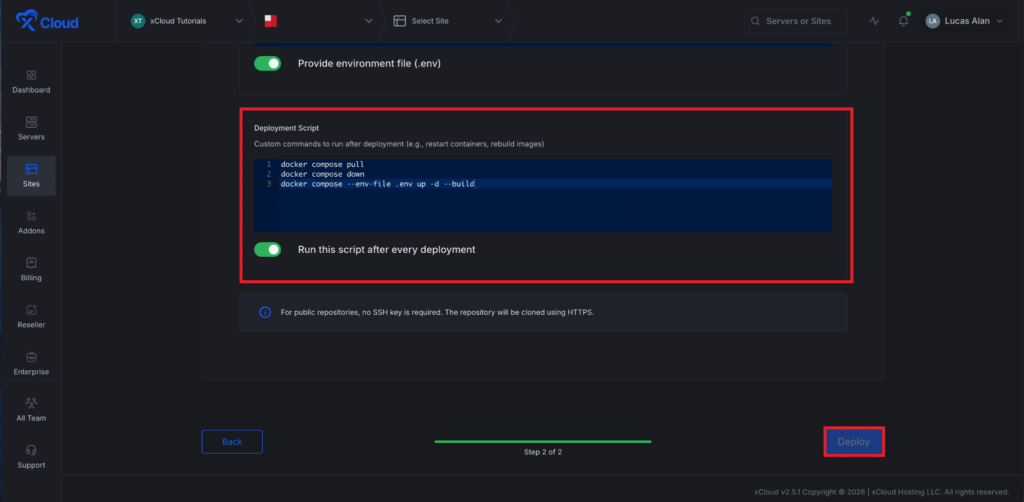
Then, go to the ‘Deployment script section,. In the ‘Deployment Script’ field, enter any custom commands you want to run after deployment. here you can add custom commands to run after deployment (e.g., restart containers, rebuild images).
Once the deployment process is complete, your Custom Docker application will be live. From the site dashboard, click Visit Site to access your application in the browser.
You’ve successfully deployed a Custom Docker project from a Git repository using xCloud. With your application now live, you can manage updates by pushing changes to your Git repository and redeploying through the xCloud dashboard. If you run into any issues, review your Docker Compose file, port configuration, and environment variables to ensure everything is set up correctly.


