


Paperclip is a powerful AI-powered application that you can easily deploy using xCloud’s fully managed hosting platform. With xCloud, you don’t need to worry about complex server configurations or manual setup processes. Whether you’re a developer or a non-technical user, xCloud simplifies the entire deployment by handling server provisioning, application installation, and configuration in just a few steps.
In this guide, we will walk you through the complete process of deploying Paperclip on xCloud, from creating a managed server to configuring your AI provider credentials and managing your application through the xCloud dashboard.
Step 1: Create an xCloud Managed Server #
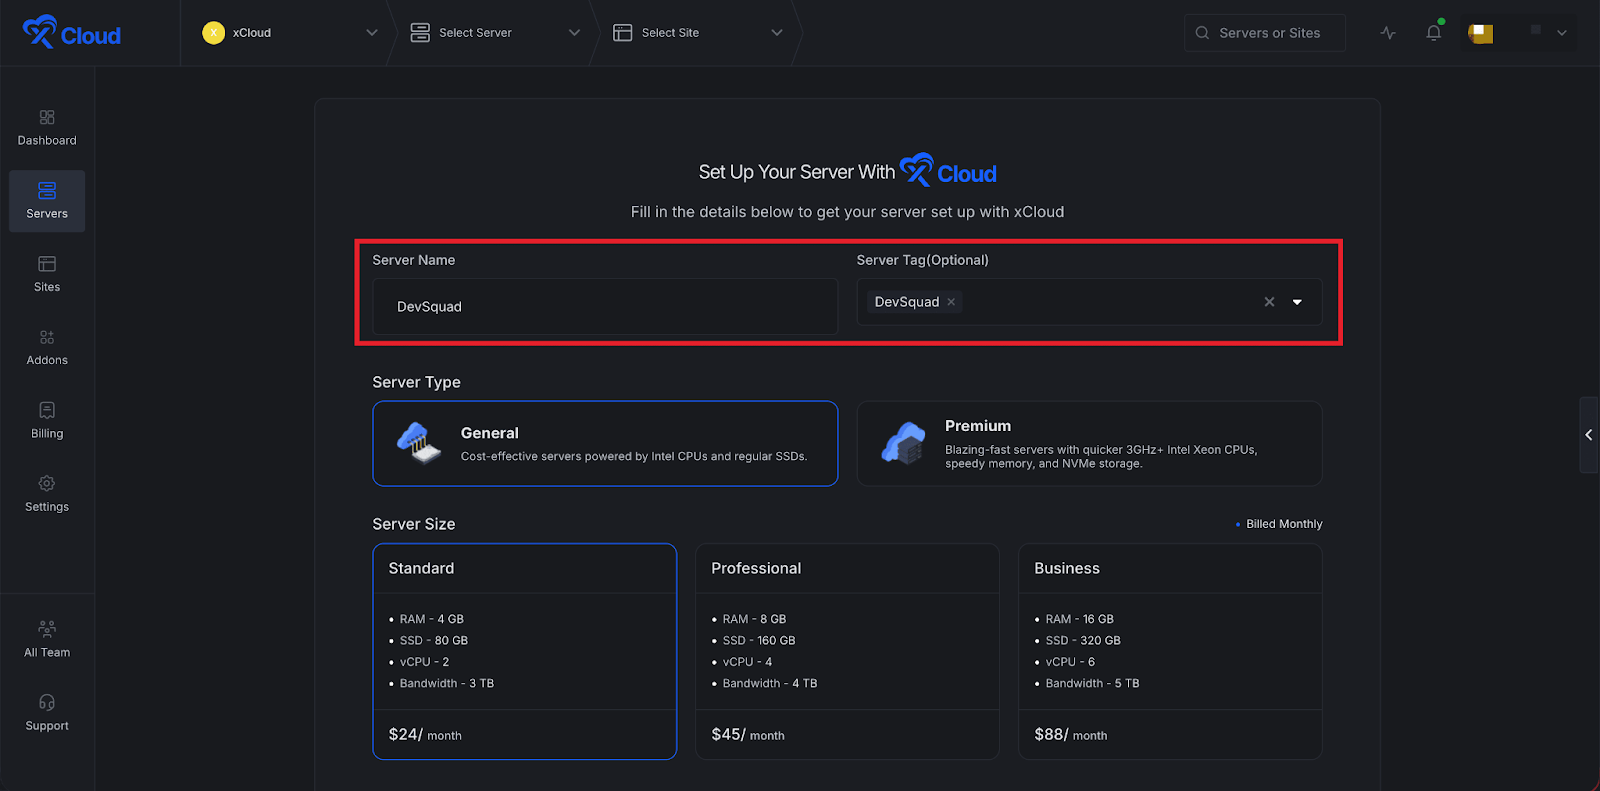
First, visit this link to start creating an xCloud managed server. Go to the ‘Server Name’ field and enter your server name. Then add a tag for the server. This step is optional and not mandatory.
Note: If you haven’t signed up yet, you will be prompted to create an account, choose a plan based on your preferences, and then proceed to payment.
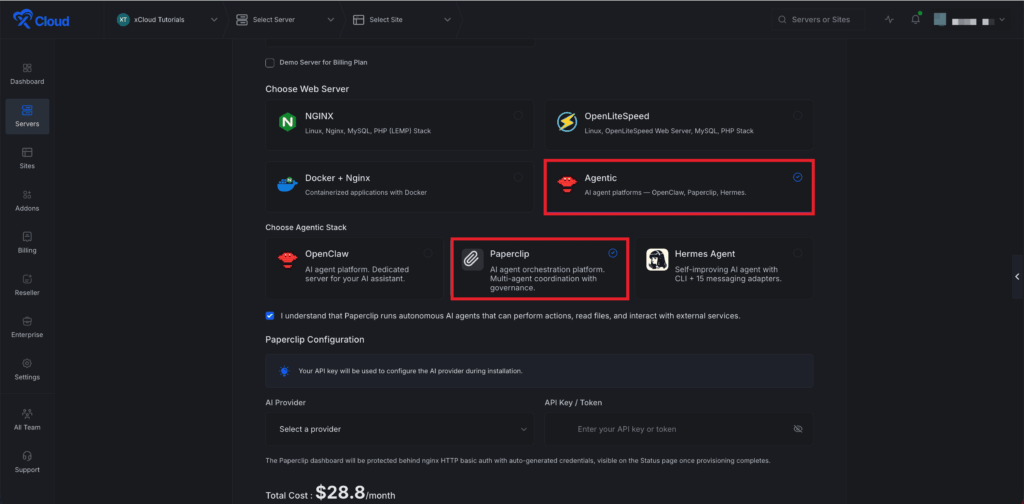
Note: If you create an xCloud Managed Server using the standard server creation flow, choose “Agentic” as the web server, then select “Paperclip.” xCloud will then display the configuration options for deploying Hermes Agent.
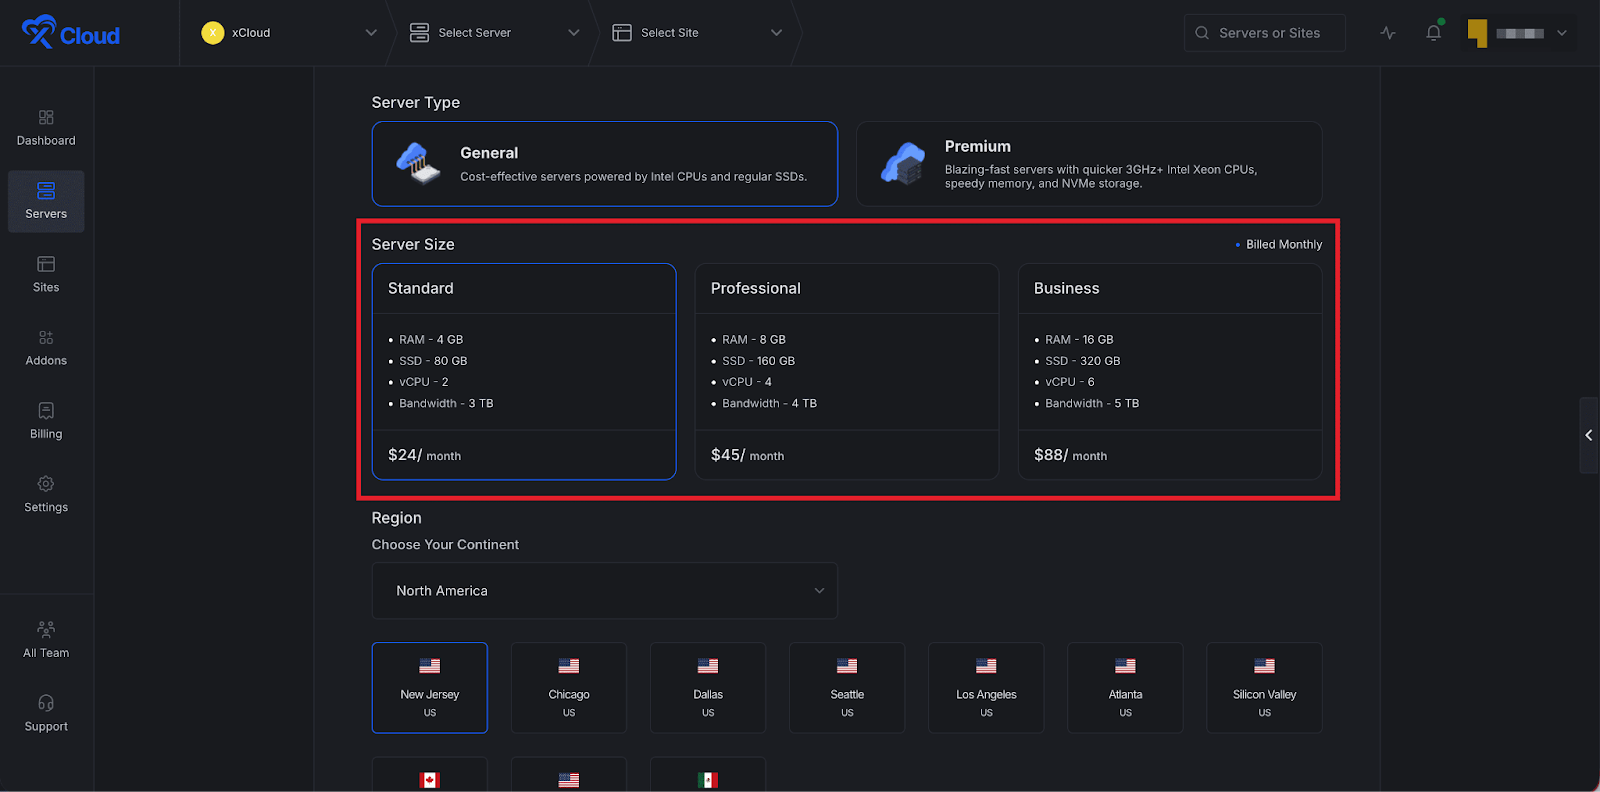
Next, go to the ‘Server Type’ option. Here, xCloud provides two types of servers. One is ‘General’, and the other one is ‘Premium’.
- General servers are cost-effective servers powered by Intel CPUs and regular SSDs.
- On the other hand, premium servers are blazing fast with quicker 3 GHz+ Intel Xeon CPUs, faster memory, and NVMe storage.
After that, go to the ‘Server Size’ option and choose your preferred server size. Please note that deploying a Paperclip instance requires a minimum 4 GB RAM server.
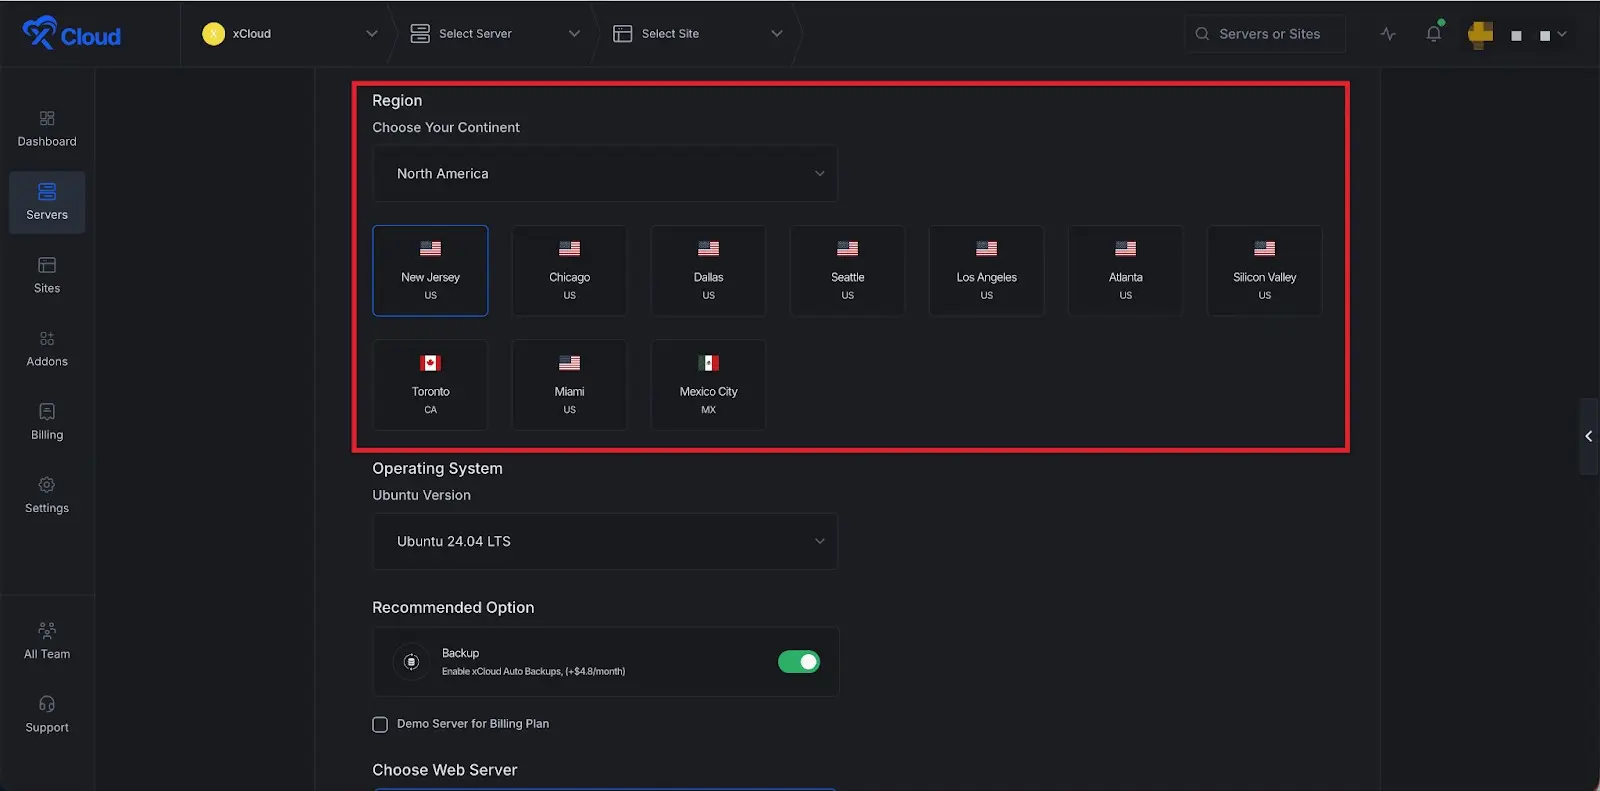
Next, choose your preferred continent from the dropdown menu. Then select the server location within that region.
After that, choose your ‘Ubuntu version’ from the dropdown menu under the ‘Ubuntu Operating System’. You can also enable or disable backups for this application.
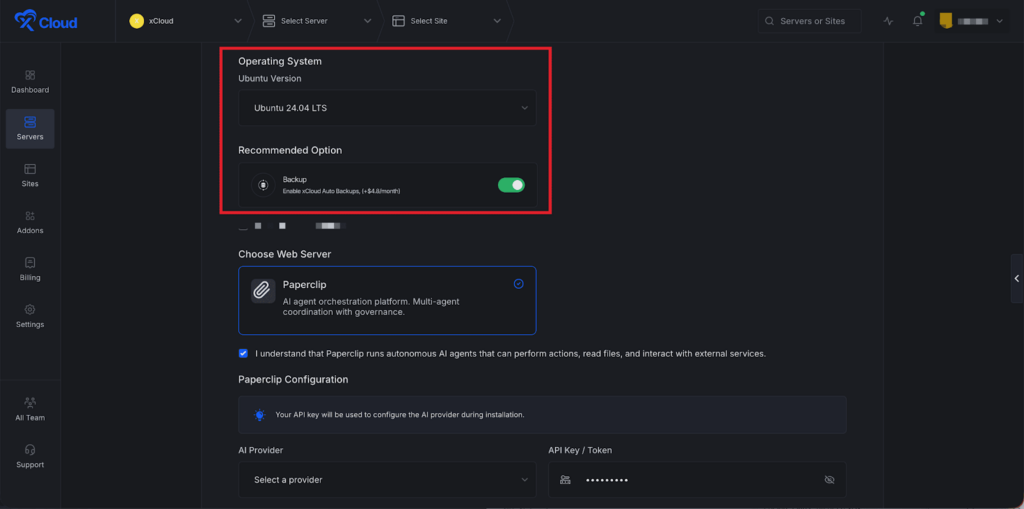
xCloud provides a separate stack for this application. You will see the ‘Paperclip’ stack already selected.

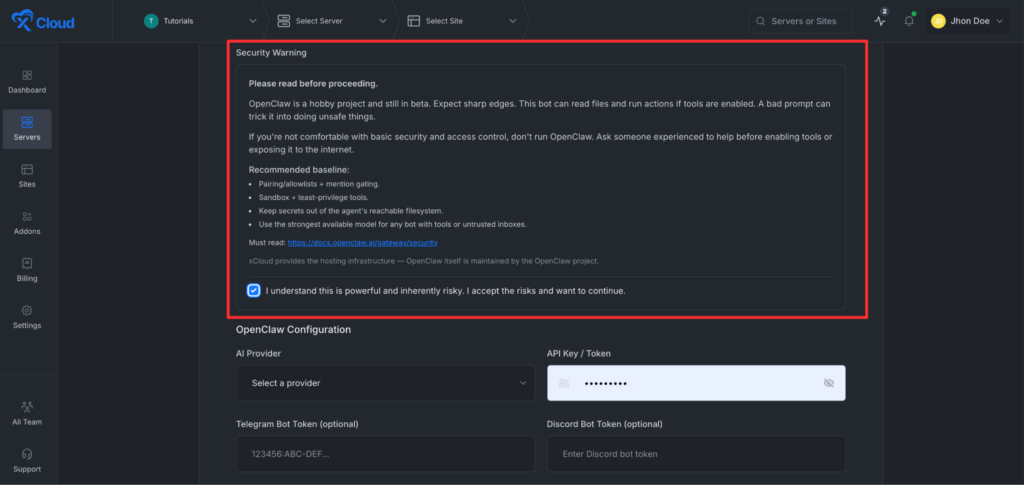
Next, go to the security warning section, read the information carefully, and click on the checkbox to confirm that you have read and understood it.
Enter Your AI Provider Credentials #
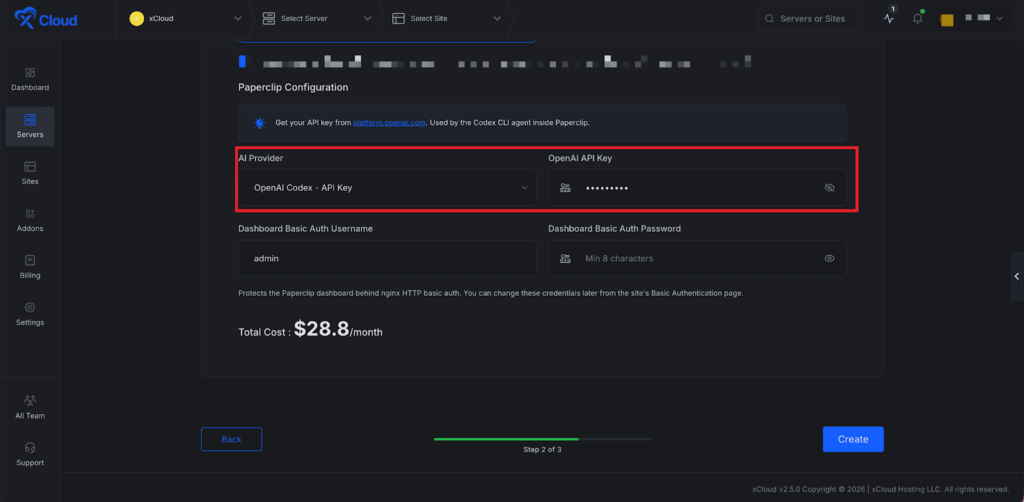
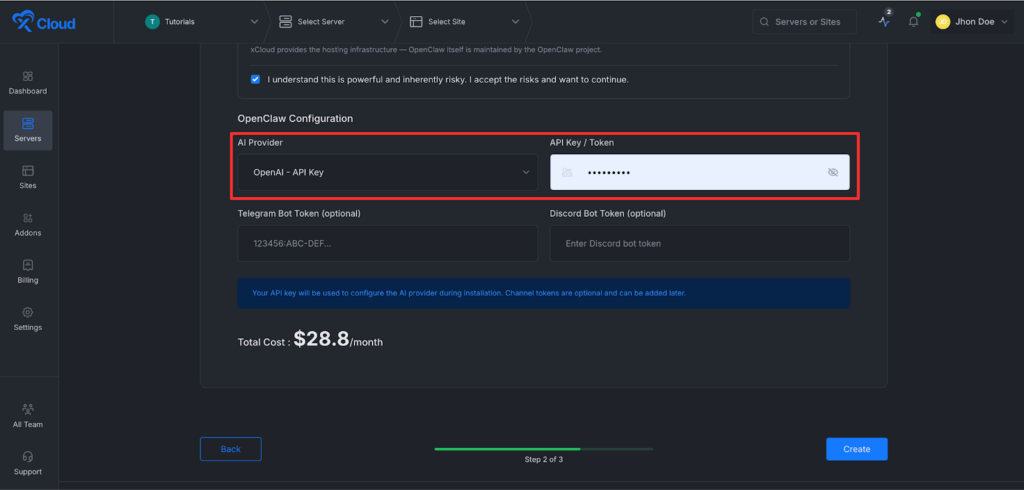
After that, go to the ‘AI provider’ section. Select your preferred AI model from the dropdown list under ‘AI Provider’, such as ‘OpenAI Codex’ or ‘OpenAI API’. Then enter the API token for the selected AI model.
OpenAI Codex – API Key: #
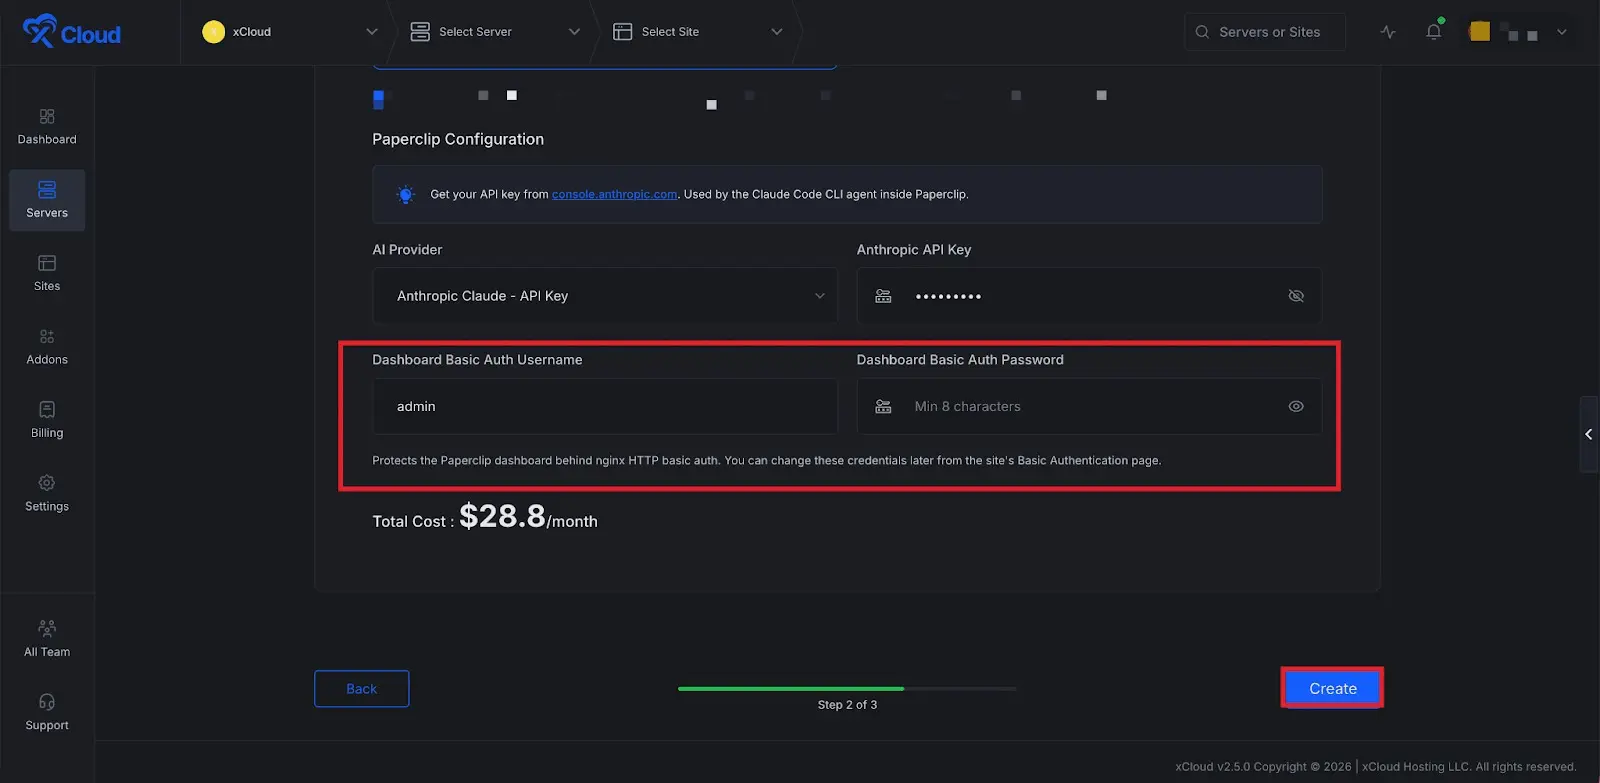
To use Anthropic, choose ‘Anthropic – API KEY’ from the ‘AI Provider’ menu and enter the API Key into the blank field.
OpenAI – API Key: #
To use OpenAI, choose ‘OpenAI – API KEY’ from the ‘AI Provider‘ menu and enter the API key into the blank field.
Set up Your Dashboard Credentials #
Next, configure your Paperclip dashboard credentials. Enter your preferred ‘Dashboard Username’, and set your preferred ‘Dashboard Basic Auth Password’ in the dedicated fields. Finally, click on the ‘Create’ button to proceed. This action will start creating the xCloud managed server and deploying the Paperclip application.
Step 2: Manage the Configurations from the xCloud Dashboard #
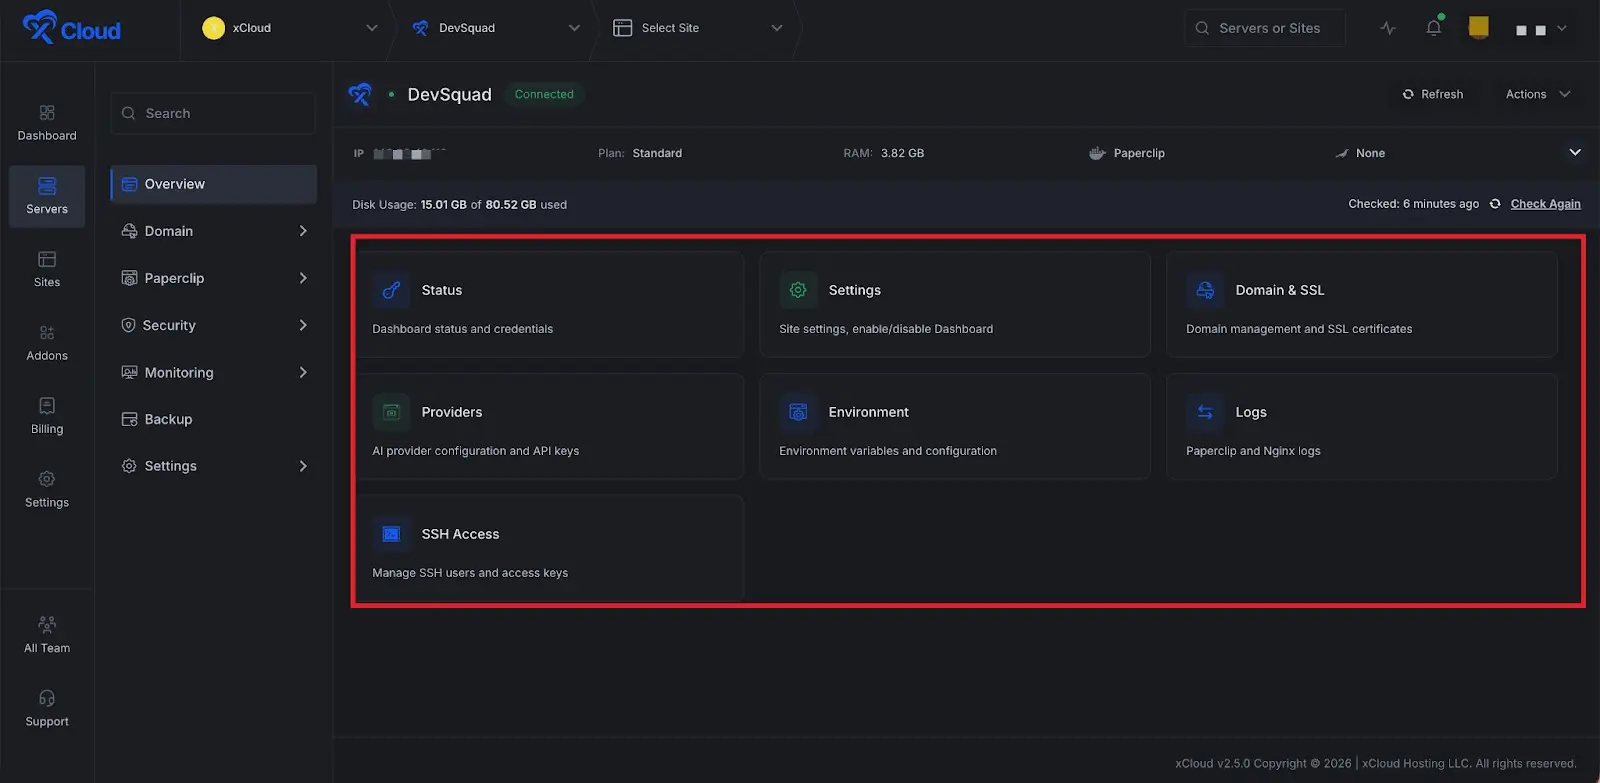
Once the server is created, you will be redirected to the xCloud Paperclip dashboard. Here you will get options for ‘Status’, ‘Settings,’ ‘Domain & SSL’, ‘Providers’, ‘Environment’, ‘Logs’, and ‘SSH Access.’
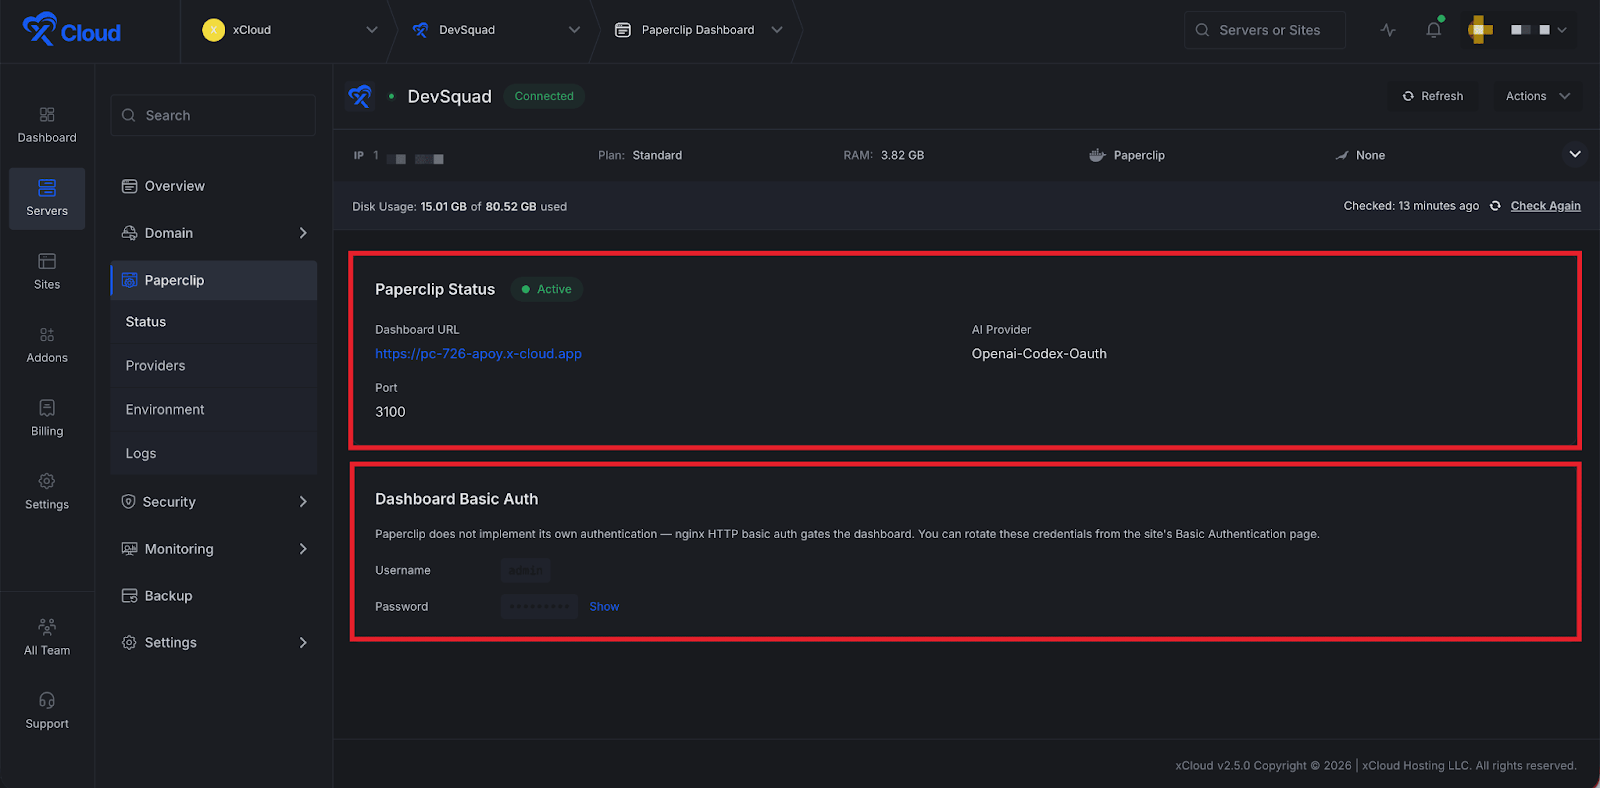
To log in to your Paperclip account, go to the ‘Status‘ option from the dashboard. Collect the ‘URL‘ of your Paperclip dashboard. From here, you can also access ‘Admin‘ and ‘Dashboard Basic Auth‘ from this page.
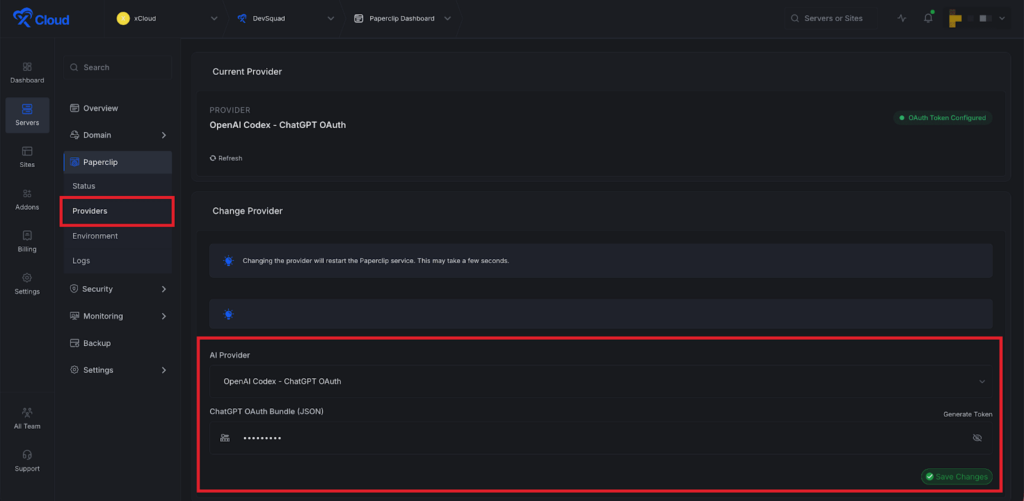
Next, go to the ‘Providers‘ option from the left menu of the Paperclip dashboard. Here you can see the ‘Current Provider‘ that you configured for your Paperclip. If you want to change your AI provider, then go to the ‘AI Provider‘ section, set a provider from the dropdown list, and complete the setup process of the AI provider, and click on the save button.
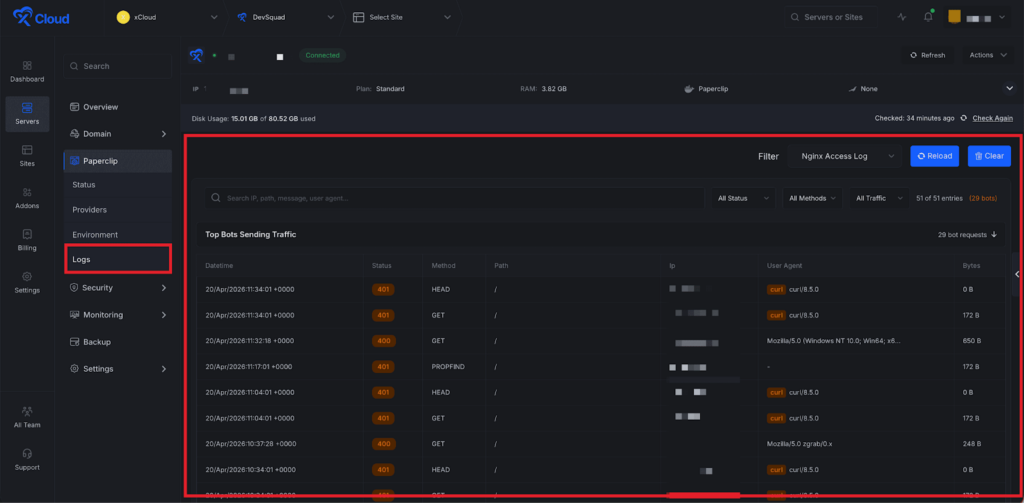
Now go to the ‘Logs‘ option and get different types of logs: ‘Nginx Access Log‘, ‘NGINX Error Log‘, ‘Fail2ban log‘, ‘auth.log’.
And that’s it. This is how easily you can deploy Paperclip on xCloud. Paperclip deployment on xCloud removes the complexity of self-managed hosting and lets you focus on what matters most.
If you run into any issues during the deployment process, feel free to reach out to the xCloud support team for assistance.


