


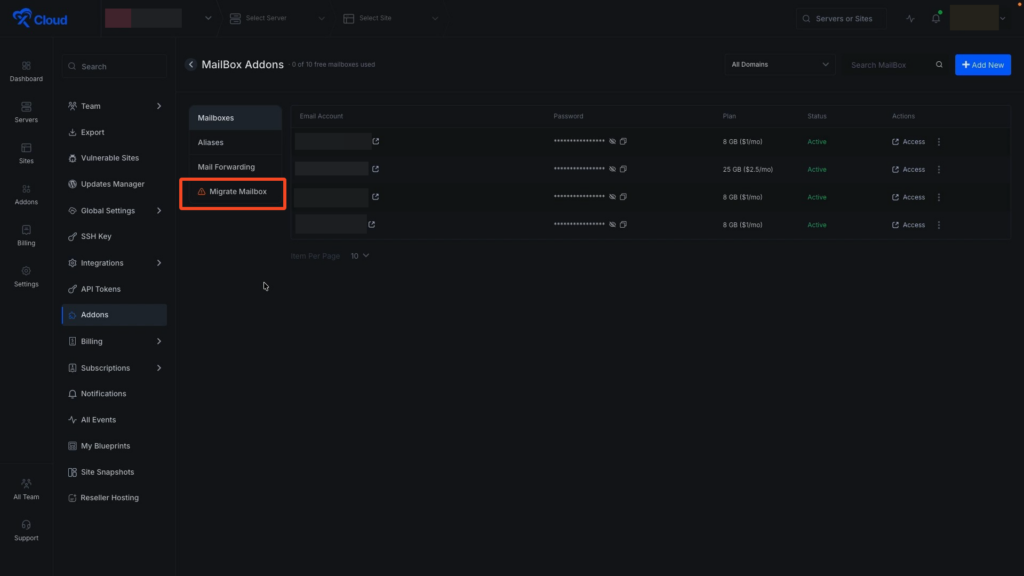
The xCloud MailBox Addon allows you to create and manage professional email addresses using your own custom domain. With a centralized dashboard, you can access your inbox, manage existing mailboxes, set up aliases, configure mail forwarding, and migrate your legacy email accounts to the new MailBox infrastructure, all from one place.
If you are currently using a legacy Mailbox and want to move your existing emails to the new MailBox system, xCloud makes the process seamless with its built-in migration workflow. The migration runs in bulk per domain, ensuring all emails under a chosen domain are transferred together without disruption.
Follow the steps below to access your MailBox dashboard, migrate your legacy mailboxes, verify your DNS records, and start using your new MailBox right away.
Note: Before starting the migration, keep in mind that when you migrate a MailBox, all emails from the legacy MailBox under the selected domain will be migrated together.
Step 1: Go To the Migrate MailBox Option #
Now navigate back to the xCloud MailBox Addon dashboard and from the left sidebar, click on the Migrate MailBox tab.
Important: Before you proceed, remember that migration will be bulk per domain, which means every legacy MailBox on the chosen domain moves all emails together.
Step 2: Select the Domain to Migrate #
First, select the domain you want to migrate from the Domain dropdown. Below the domain selector, you will see the complete list of mailboxes that will be migrated. All mailboxes under the selected domain are listed along with their individual storage amounts.
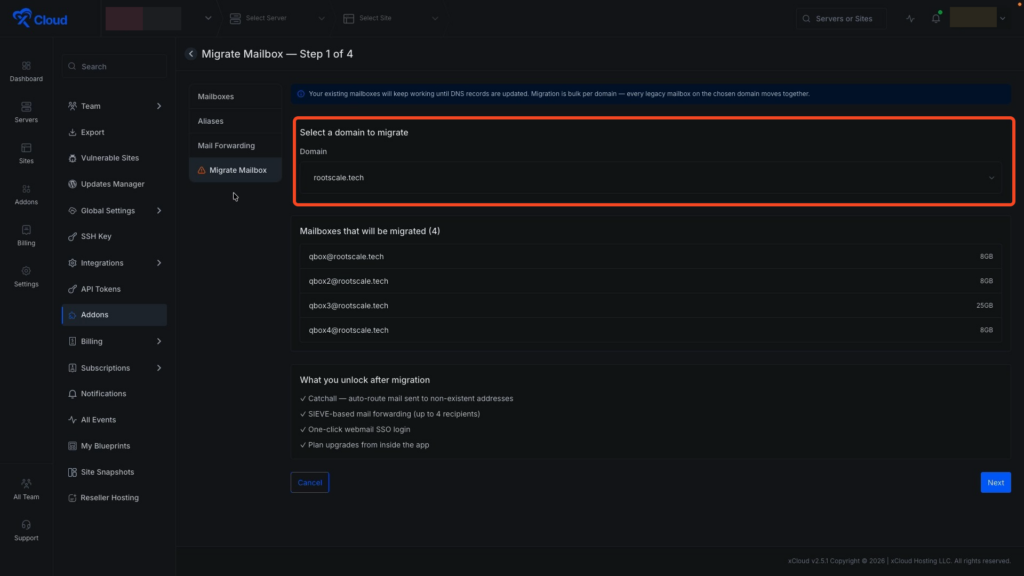
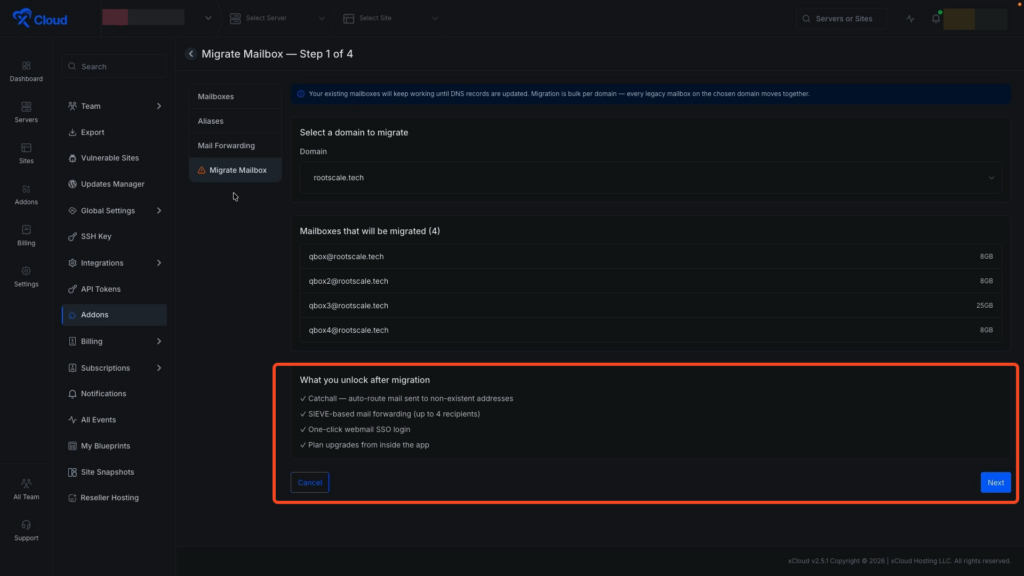
Scroll down and read the general information. Once you have reviewed everything and are ready to proceed with this migration, click the Next button.
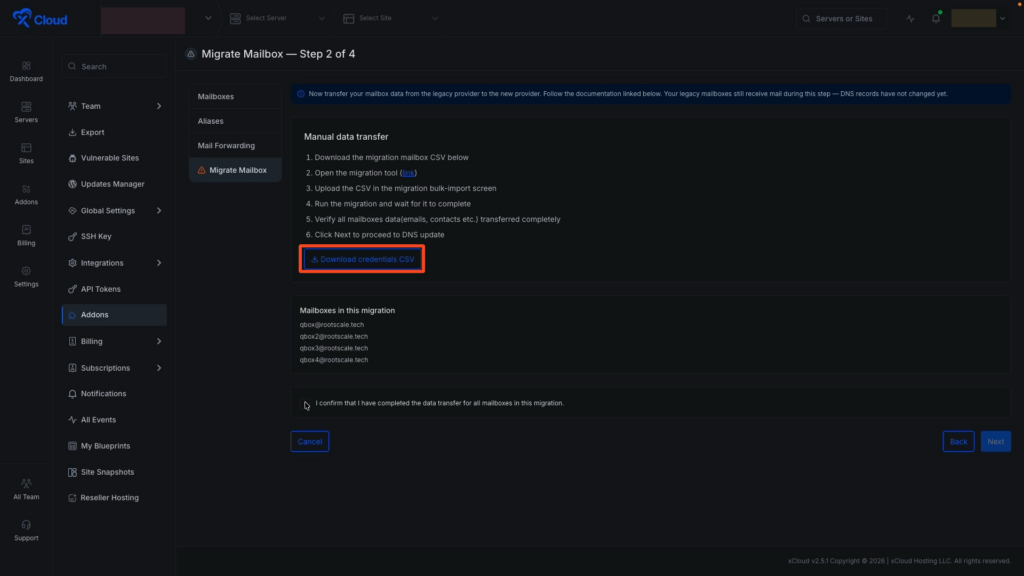
Step 3: Download Mailbox Credentials #
In the next step, click the Download credentials CSV button to download the CSV file containing all your mailbox credentials for the migration. Keep this file safe, as you will need to upload it to the migration tool in the next step.
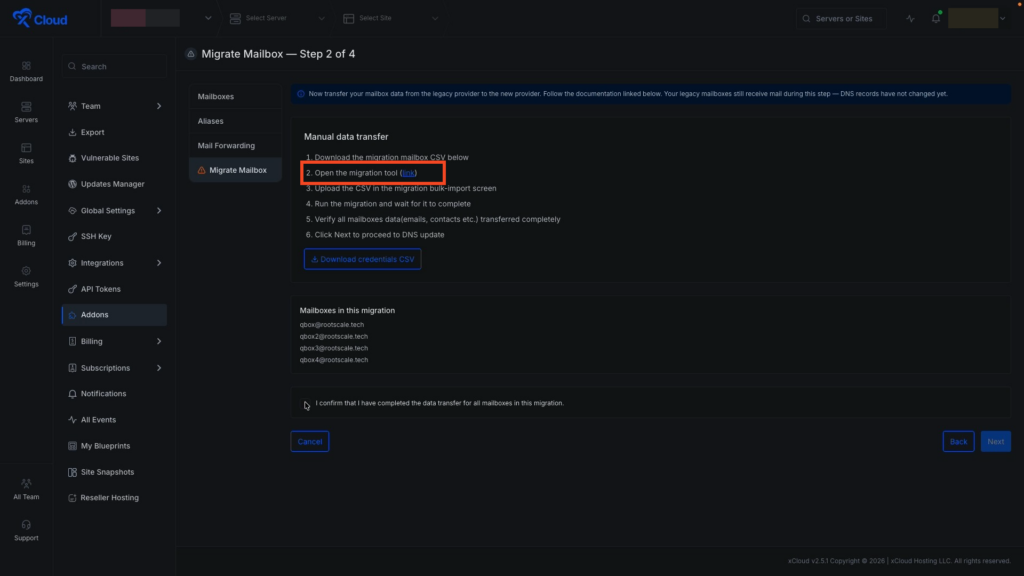
Step 4: Open The Migration Tool #
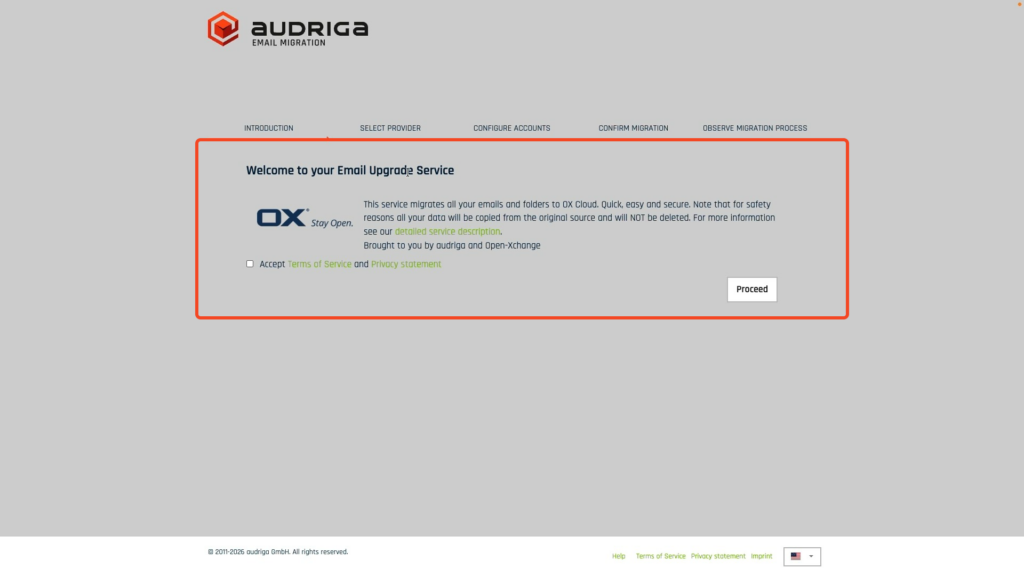
Now open the migration tool using the provided link. This opens the Audriga Email Migration tool in a new browser tab.
On this page, you will see a Terms of Service checkbox. Accept the Terms of Service and Privacy statement checkbox, then click the Proceed button.
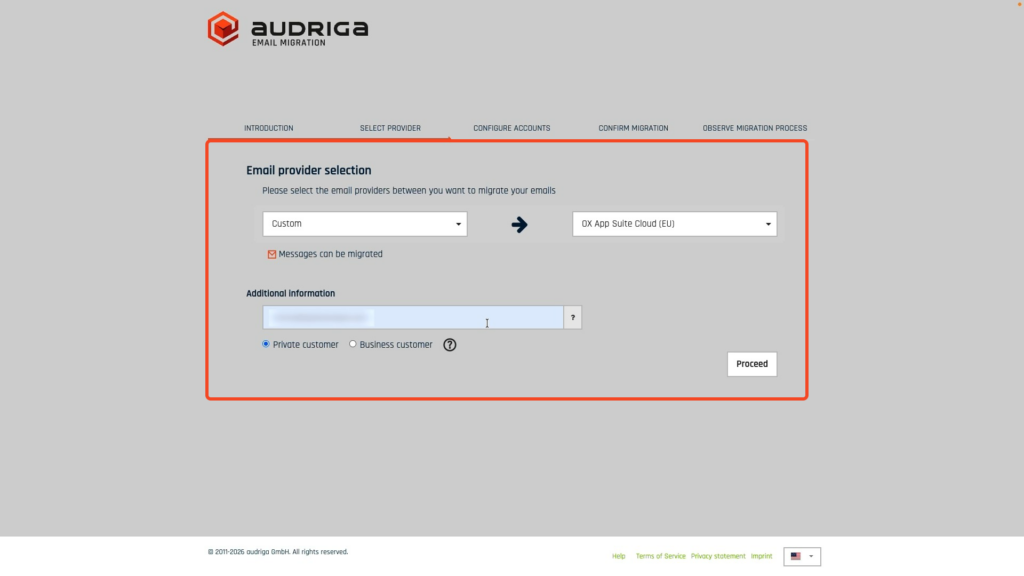
Step 5: Select the Email Providers #
Next, you will see the Email provider selection page. You need to select the email providers from which you want to migrate your emails. Keep the source provider set to Custom, and the destination provider is automatically set to OX App Suite Cloud (EU) on the right side.
Below the provider selection, enter any required additional information in the provided field. Then click Proceed to continue.
Step 6: Upload the CSV File #
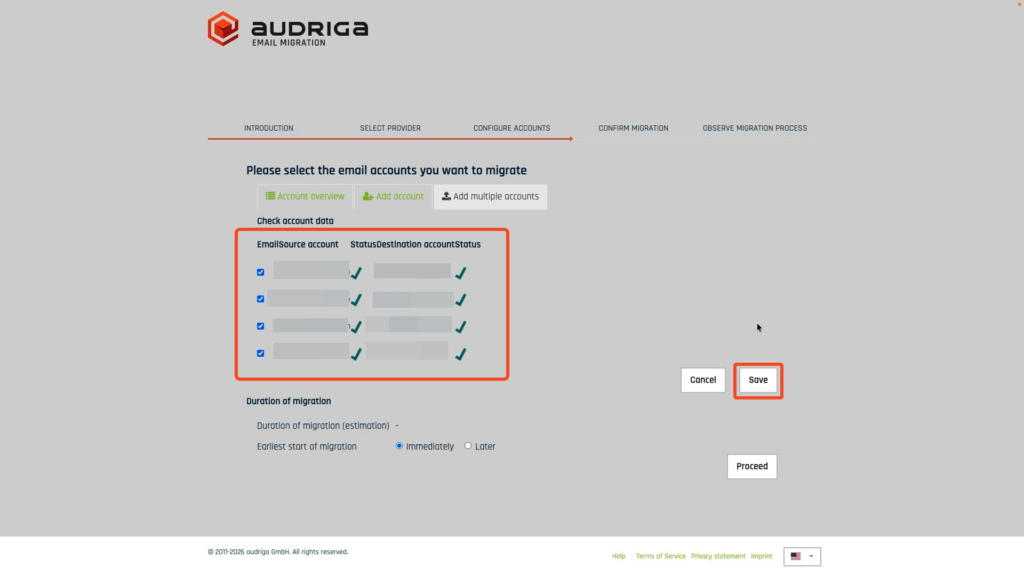
On the next page, go to the Add multiple accounts tab and upload the CSV file you downloaded earlier. Next, click on the Check button. The system begins checking account data, which may take a few moments.
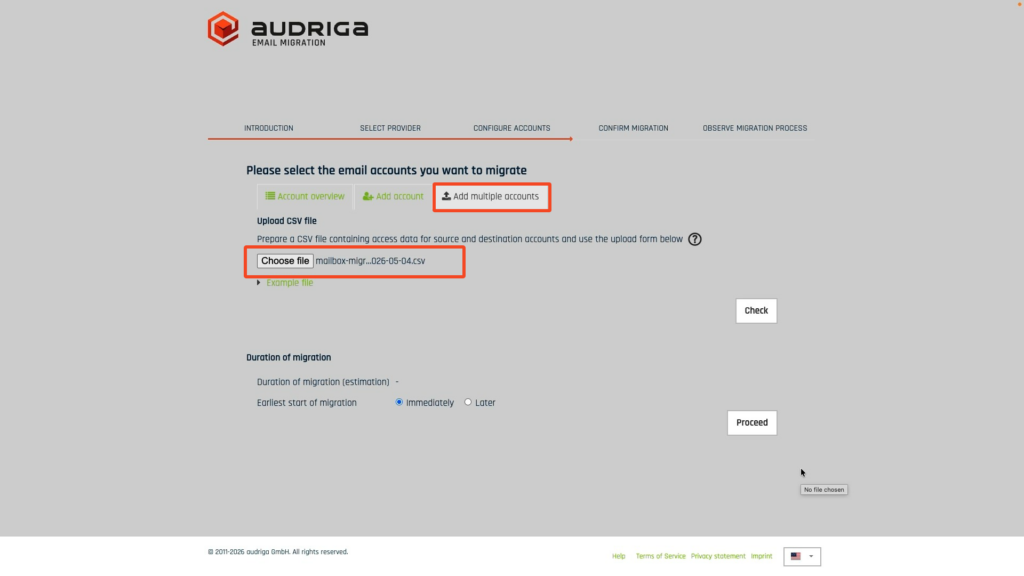
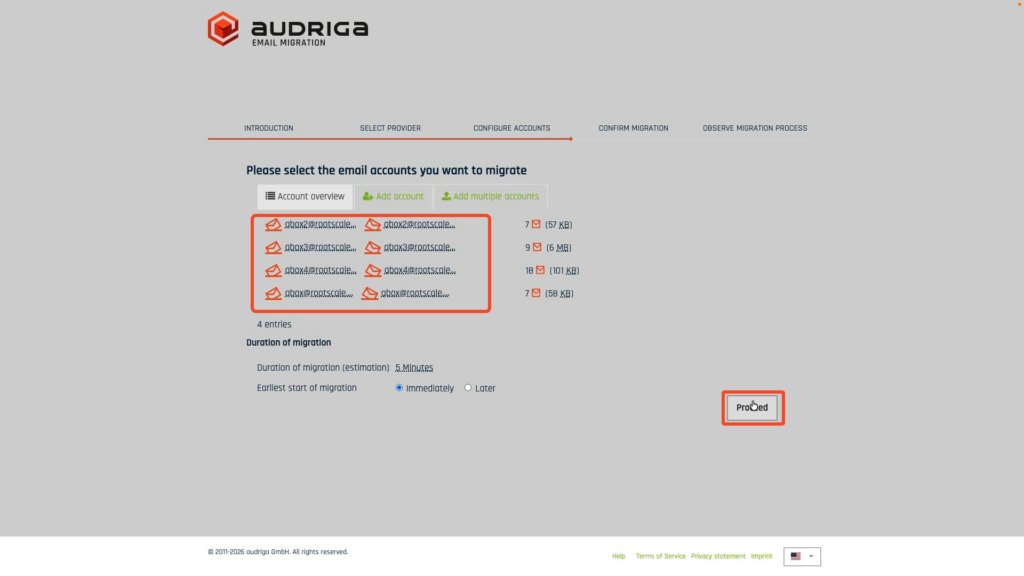
Once the validation is complete, click on the Save button.
Then click the Proceed button to start the migration right away.
Step 7: Start the Migration #
You will then see the Migration summary. Click on the Start migration button and it will begin migrating the emails from the legacy MailBox to the new MailBox.

Depending on the number of mailboxes and the volume of data, the migration may take some time. Wait until all accounts finish migrating successfully before moving on.
Step 8: Confirm the Data Transfer #
Once all accounts finish migrating successfully, navigate back to the xCloud dashboard tab.
Now, check the confirmation checkbox that reads I confirm that I have completed the data transfer for all mailboxes in this migration. Then click the Next button.
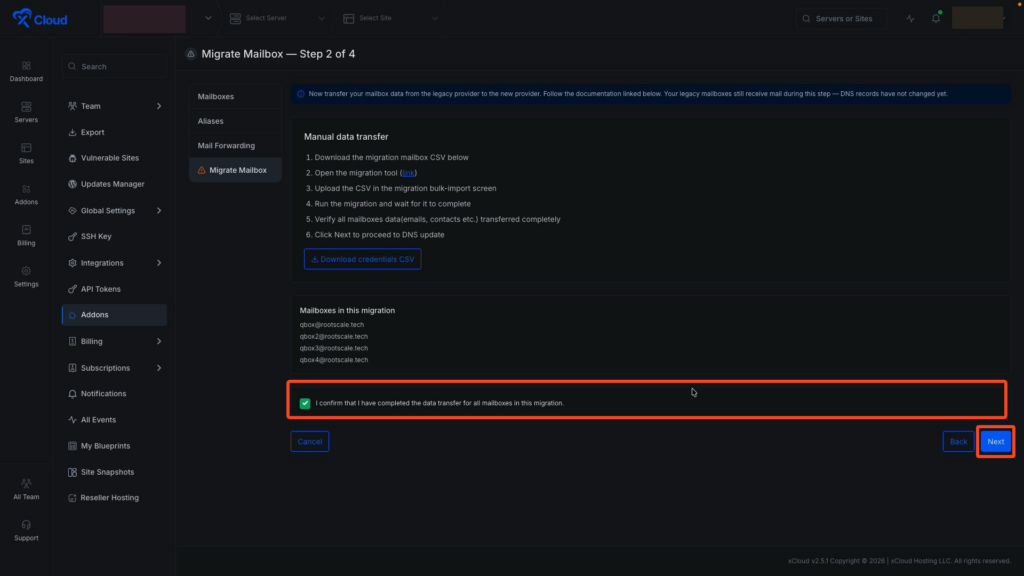
Click the OK button from the confirmation dialog to proceed to the DNS configuration step.
After the migration completes, you must verify the DNS records of your domain to finalize the switch to the new MailBox.
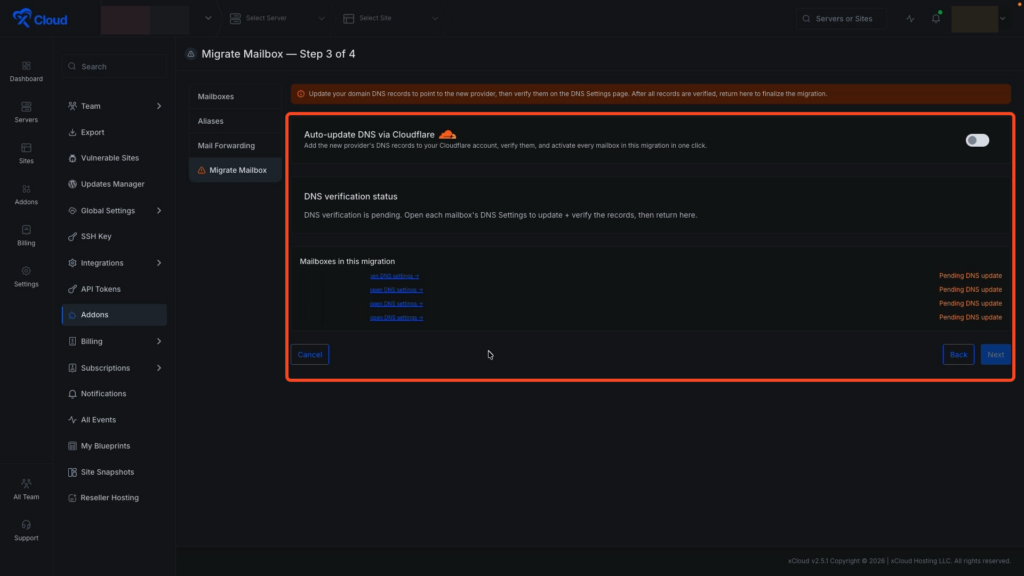
Step 9: Verify DNS Records #
If you have a different domain provider, then click on the Open DNS settings button for the domain you want to verify and verify the records manually.
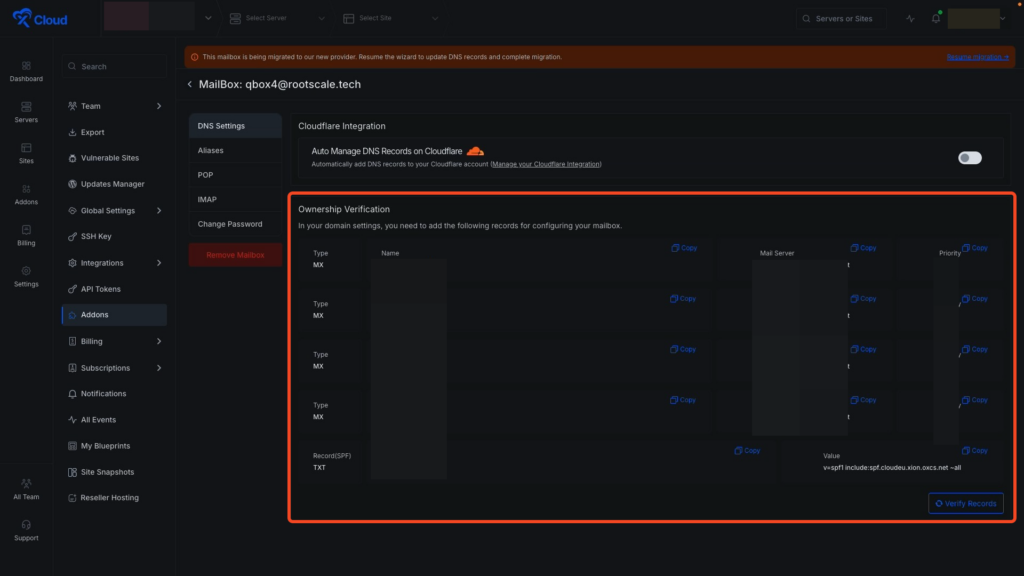
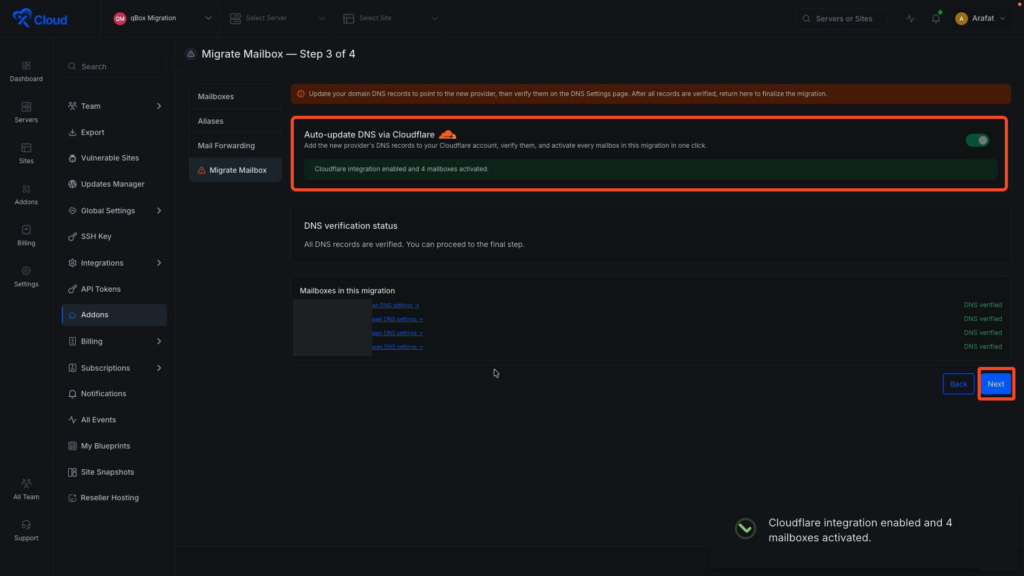
Or if your domains are managed through Cloudflare and you have Cloudflare integration with xCloud, then you can verify the DNS records in just a click. Simply enable the Auto-update DNS via Cloudflare option.
After enabling, you will see that the domains are verified.
Click the Next button to proceed to the final step.
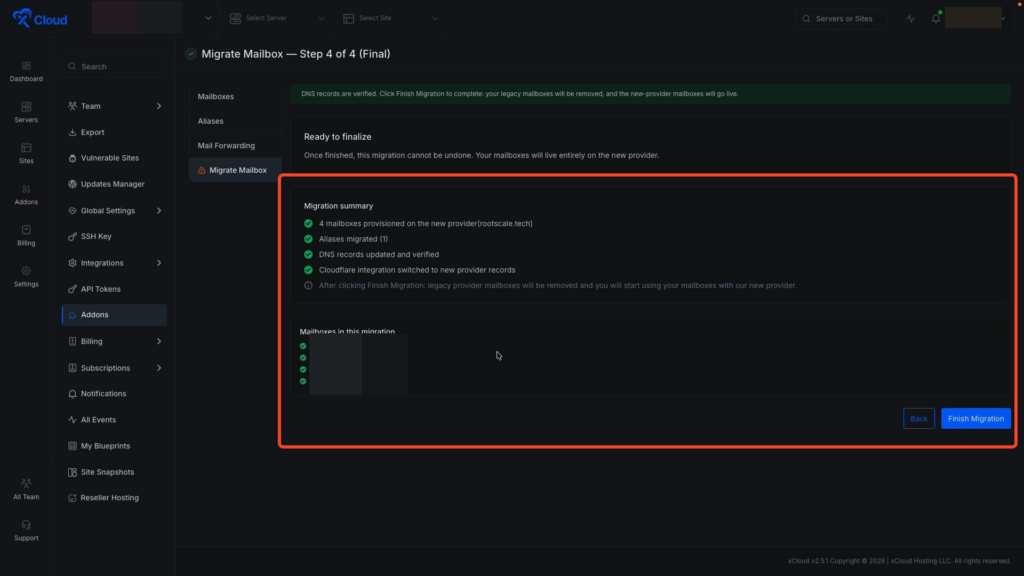
Step 10: Finish the Migration #
All four mailboxes are listed below with green checkmarks confirming they are ready for the final switch. Click the Finish Migration button to complete the process.
Once the migration is complete, you can log in to your new MailBox and confirm that all emails have been successfully transferred.
Step 11: Access Your New Mailbox #
Next, go back and click on the Access button, copy the credentials, and visit the new MailBox. Log in using the credentials. Now you can see all your emails have been migrated successfully from the previous legacy mailbox.
And that’s it, this is how easily you can migrate your legacy mailboxes to the new xCloud MailBox in just a few steps. Your professional emails are now hosted on the upgraded MailBox infrastructure with all your historical messages intact.
⚠️ Important Considerations #
- Bulk Migration Per Domain: All mailboxes under the selected domain will migrate together. You cannot migrate individual mailboxes one by one, so plan your migration during a low-activity window to minimize disruption.
- Keep Credentials Safe: The downloaded CSV file contains sensitive mailbox credentials. Store it in a secure location and delete it once the migration is complete.
- DNS Propagation Time: After verifying DNS records, allow some time for the changes to propagate globally. Cloudflare usually updates within minutes, while other providers may take a few hours.
- Failed Verification Fix: If the DNS verification fails, double-check that all DNS records are correctly added. If you’re using Cloudflare, try toggling the Auto-update DNS via Cloudflare option OFF and then ON again.
📌 Limitations #
To ensure fair and stable service, here are some limitations and notes you should keep in mind during and after the migration:
- Migration is bulk per domain. Every legacy mailbox under the chosen domain will be migrated together; selective migration of individual mailboxes is not supported.
- You cannot create mailboxes or aliases using the same domain in different teams. For instance, if demo@domain.com is part of Team A, then test@domain.com cannot be created under Team B.
- Avoid using POP email clients during and after migration. POP only downloads emails to your device and does not sync changes like read status or sent emails. Use IMAP-supported email clients to ensure full syncing across all your devices.
- Each mailbox can send up to 250 emails in a 24-hour rolling window. You can also create up to 20 email forwards for each mailbox.
- If you are using Cloudflare and face verification issues even after automatic integration, try toggling the DNS integration off and on again. This often helps reset the settings and successfully verifies your domain.
xCloud MailBox Migration – Frequently Asked Questions (FAQs) #
Will my old emails be preserved after the migration? #
Yes. The migration tool transfers all your existing emails from the legacy mailbox to the new MailBox. Once the migration completes, you can log in to the new MailBox and see all your historical messages intact.
Can I migrate only one mailbox at a time? #
No. The migration is bulk per domain, meaning every legacy mailbox on the chosen domain will be migrated together in one operation. You cannot migrate individual mailboxes selectively.
How long does the migration take? #
The duration depends on the number of mailboxes and the total volume of email data being transferred. Smaller migrations may finish in minutes, while larger ones can take longer. The migration tool will display progress for each account.
What is the Audriga Email Migration tool? #
Audriga is the third-party migration service used by xCloud to securely transfer emails between providers.
What if my DNS verification fails after migration? #
Double-check that all DNS records are correctly added. If you are using Cloudflare with xCloud integration, try toggling the Auto-update DNS via Cloudflare option OFF and then back ON. Wait a few minutes for the records to propagate and try verifying again.
Can I use my old credentials on the new MailBox? #
Once migration is complete, click the Access button next to any mailbox in the new MailBox dashboard, copy the new credentials, and use those to log in. Your inbox, folders, and historical emails will all be available.
What happens if I close the migration tool while it’s running? #
It is recommended to keep the Audriga migration tab open until all accounts finish migrating successfully. If you close it accidentally, the migration may need to be restarted. Always wait for confirmation before navigating away.
Still stuck? Contact our support team for any of your queries.


