
















OPcache is a PHP extension that enhances performance by storing precompiled script bytecode in memory. This allows PHP scripts to execute more quickly by avoiding the overhead of parsing and compiling code on each request. Enabling OPcache can significantly improve the efficiency of your PHP applications.
Follow the steps to learn how to enable OPcache on your server with xCloud.
Note: OPcache is compatible with PHP versions 5.6 through 8.5. Ensure your server is running a supported PHP version before proceeding.
Step 1: Access the PHP Configuration #
To begin, log in to your xCloud server management dashboard. From the main interface, navigate to the Management section and select ‘Manage PHP‘ option. This will take you to the configuration settings where you can manage various PHP extensions and options.
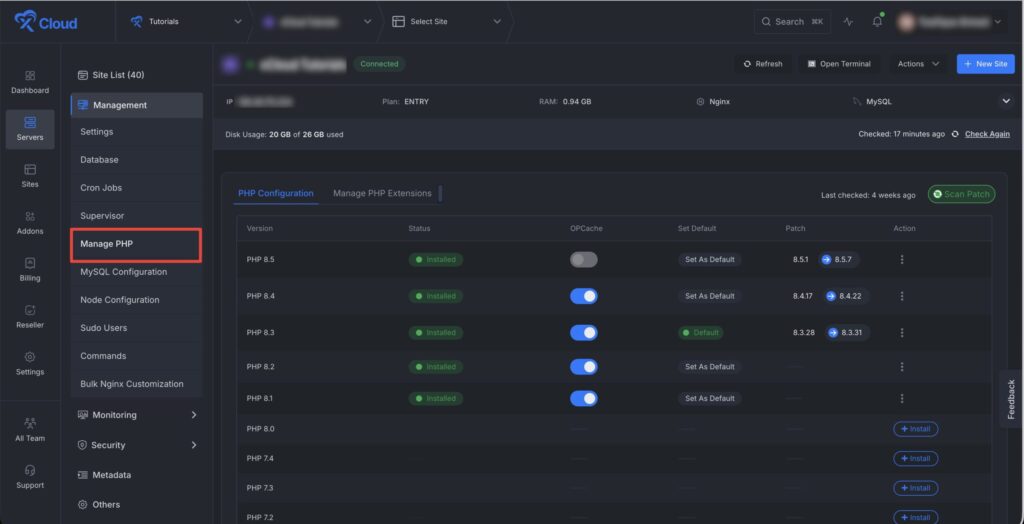
Step 2: Enable OPCache #
Once you are on the PHP Configuration page, scroll down to access the ‘PHP OPcache’ option. To enable OPcache, simply toggle the corresponding switch. This action activates OPcache on your server, and no further configuration is needed. You can enable/ disable for your preferred PHP versions.
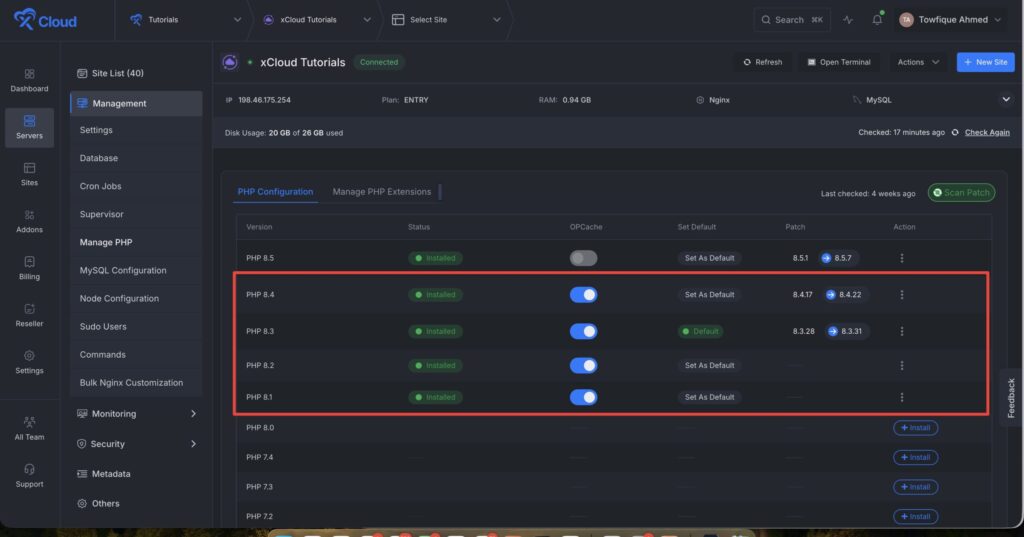
Step 3: Configure PHP Settings Of Your Site #
You can now easily customize your OPCache as well for any specific site as well. Just go to the site, then navigate to the ‘Site Settings’. Find the ‘PHP Configuration’ section then click on the ‘Manage’ button and choose OPCache option from the menu.
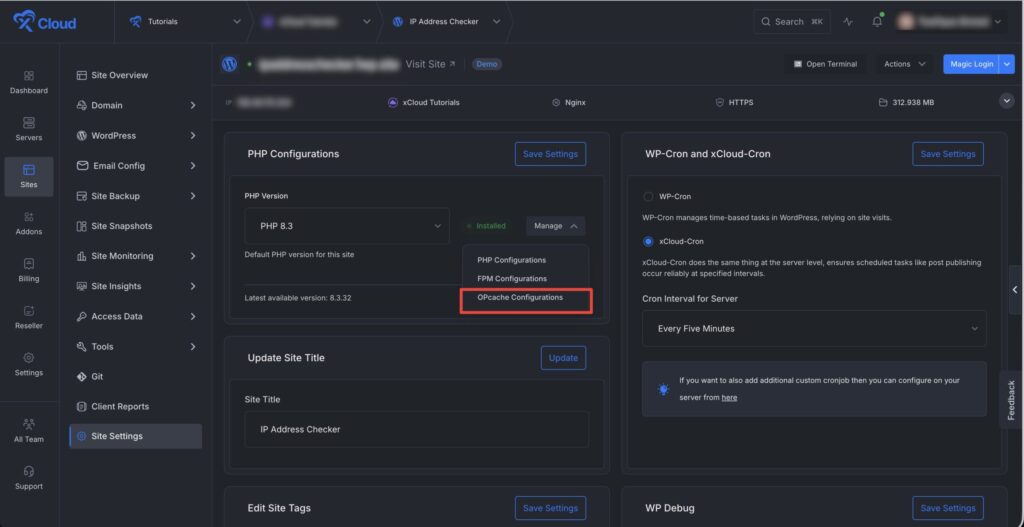
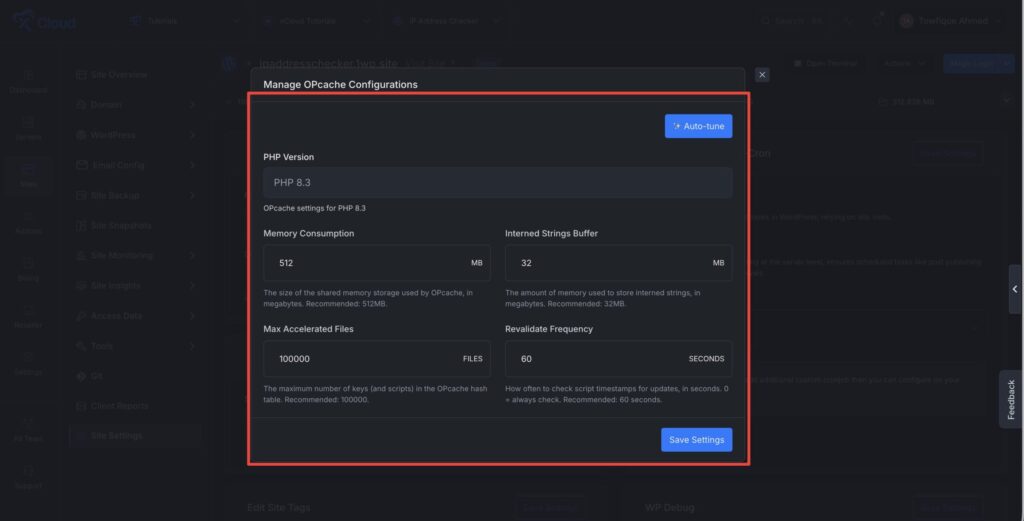
Then it will show a popup dashboard with all the configuration options . The following options can be adjusted according to your preferences:
- Memory Consumption
- Interned Strings Buffer
- Max Accelerated Files
- Revalidate Frequency
If you are not sure about the values, you can use the ‘Auto Tune’ option. Click on the button, and configuration values have been automatically calculated based on your server’s available RAM. Please review the suggested values below and click Save Settings to apply them.
And that’s it. This is how easily you can enable OPCache with xCloud and ensure faster script execution and enhanced overall application efficiency.
Still stuck? Contact our support team for any of your queries.


