

How to Install and Use xCloud AI Agent Skills
Updated October 4, 2026 · 7 min read
xCloud AI Agent Skills teach your AI assistant how xCloud works. Paste a GitHub URL and say “deploy this”, ask “install Ghost on my Frankfurt server”, “renew SSL for example.com” or “why did my last deploy fail?”, and the agent picks the right skill, previews what it will do, asks once, then finishes the job: it provisions, polls, checks the live URL, and diagnoses and retries failures. No endpoints to memorise, no SDK to wire up.
The skills pair with the xCloud MCP server, which gives the agent one tool per xCloud Public API operation. MCP is the connection; the skills are the know-how on top of it. If your agent cannot use MCP, the plugin carries a REST fallback that works with an API token.
The current release is v4.4.2 with nine skills. It is open source on GitHub under the MIT licence and free to use.
📸 Watch A Quick Walkthrough
The nine skills
You never name them. The agent picks the right one from what you ask.
| Skill | What it owns |
|---|---|
xcloud:deploy |
Deploy anything: a GitHub, GitLab or Bitbucket URL, Docker Compose or Dockerfile apps, one-click apps, Git staging environments, new WordPress sites. Detect, dry run, approve, provision, verify, and diagnose and retry failures |
xcloud:troubleshoot |
Why a site is erroring: a 500, 502 or 503, a critical error or a site that stopped answering, investigated from status, recent events, bounded web-server logs, WordPress health and services, with a handoff for the logs only the dashboard can show |
xcloud:performance |
Why a site is slow: monitoring history, which cache layers are on, the latest PageSpeed result, traffic and bots in the access log, and the PHP version, then a named cause and the dashboard switches it cannot flip itself |
xcloud:servers |
Servers: buy a server (plans, prices, provisioning), services install, enable and restart, Node.js and PHP versions, verified reboots, cron, firewall and Fail2Ban, sudo users, DNS checks |
xcloud:sites |
Site lifecycle: status, backups (including Docker apps), staging, domains, cache, SSH, site cron, monitoring, site deletion |
xcloud:wordpress |
Plugins, themes and updates, WP_DEBUG, magic login, site and team vulnerabilities, PageSpeed, broken links |
xcloud:ssl |
SSL certificates: view, install, renew, status, delete |
xcloud:billing |
Plan, invoices, bills, subscriptions, prices, paying an invoice, mailboxes and mail delivery |
xcloud:account |
Current user, teams (multi-team), incident alerts, API tokens, Git and Cloudflare integrations, blueprints, health |
Prerequisites
- An active xCloud account.
- Claude Code installed. For other agents, see Use the skills with other agents below.
- Recommended: the xCloud MCP connection, set up in Step 1. No API token is needed on this path.
Step 1: Connect xCloud MCP (recommended)
The MCP server is the fastest way to give any agent full xCloud control: OAuth sign-in in the browser, no token to paste, and built-in confirmation before risky operations. Run this in your terminal:
claude mcp add xcloud --transport http https://app.xcloud.host/mcpThen type /mcp inside Claude Code, choose Authenticate, and grant Read or Read & write on the xCloud approval screen. Since xCloud v2.8.8 you can tick several teams on that screen; the skills then pick the right team per request. Every client (Claude Desktop, Cursor, Codex, OpenCode, Hermes and others) is covered in How to Connect xCloud MCP to Your AI Agent.
Expected result: /mcp shows xcloud as connected, and “who am I on xCloud?” answers with your name, email and team.
Step 2: Install the skills plugin
Run these three commands inside Claude Code to add the xCloud marketplace, install the plugin and load it:
/plugin marketplace add xCloudDev/xcloud-agent-skills/plugin install xcloud@xcloud-agent-skills/reload-pluginsExpected result: Claude Code lists the xcloud plugin as installed. If you connected MCP in Step 1, you are done: no token to add.
Step 3: Check it works
Ask Claude:
Check my xCloud API connection.Expected result: A green light with your account and team. If xCloud finds no connection, the skills offer the MCP connector first and only then guide you through a scoped token.
Step 4: Start asking
You describe what you want; the agent chains the steps.
Deploy https://github.com/acme/shop to my Frankfurt server.Install Uptime Kuma on my Docker server and give me the URL.Update all plugins on example.com, but back up first.The last deploy of the API site failed. Diagnose it, fix the build command, and retry.Audit example.com: is it up, is SSL healthy, any vulnerabilities, and how is performance?If the agent ever reaches for the wrong area, name it: “Using xcloud:ssl, renew the cert for example.com.”
For a longer tour of what to ask, and how to write a prompt that works, read What You Can Ask xCloud MCP to Do.
Fallback: use an API token instead of MCP
Only needed when your agent has no MCP support, or for the two REST-only reads the skills make through their bundled curl wrapper even when MCP is connected: listing your API tokens and the /health probe. Revoking a token is a write, which the wrapper cannot send, so revoke in the dashboard under Settings → Developers → API Tokens or from code that calls the Public API directly.
Since v4.4.2 the bundled wrapper is read-only: it only sends GET requests and has no write override. Checks and reports work on a token alone; anything that creates, deploys, updates or deletes goes through a connected MCP tool after your confirmation, or through the dashboard. A read-scoped token is all the wrapper needs.
Create the token
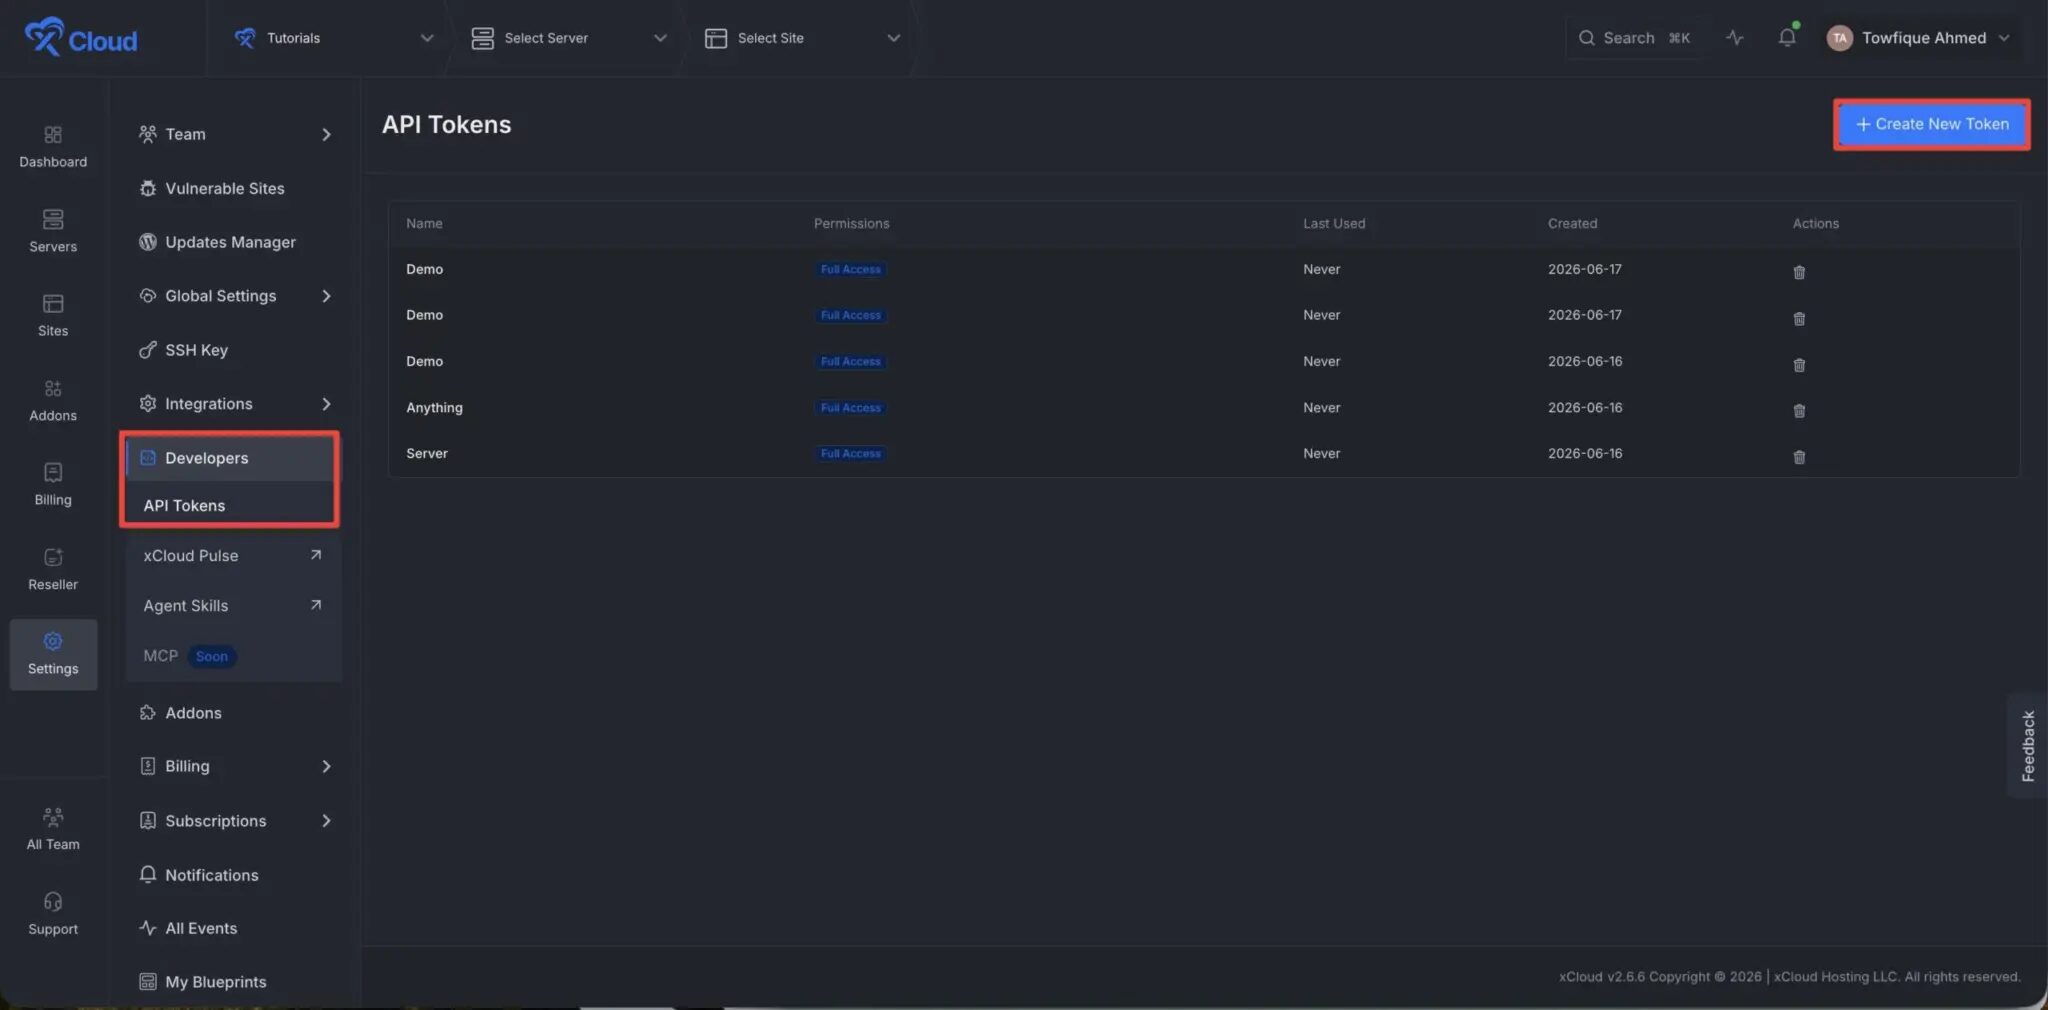
In the xCloud dashboard open Settings → Developers → API Tokens and select Create New Token.
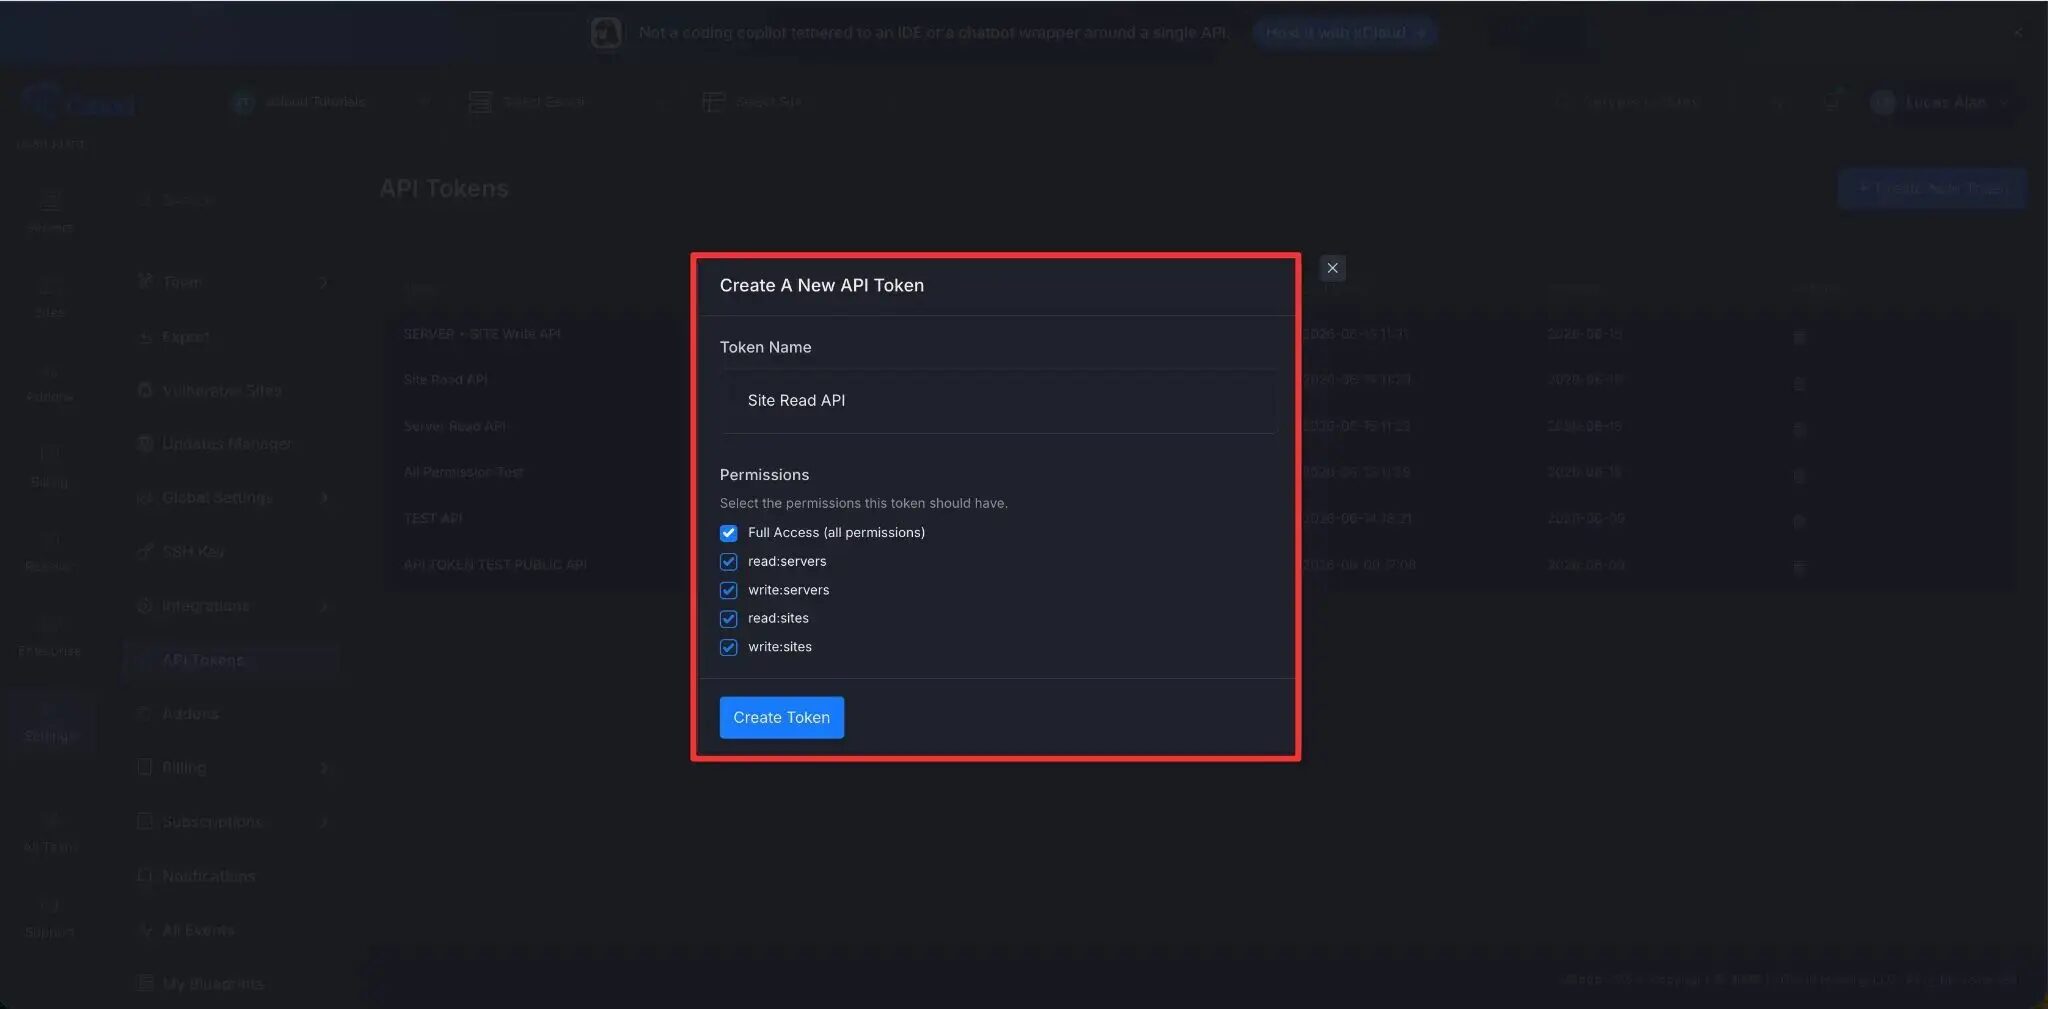
Name the token and give it read scopes only: read:servers and read:sites to look at servers and sites, read:billing and read:addons for billing and add-ons. The wrapper never sends a write, so write:* scopes add risk to a long-lived credential without adding any capability; changes go through a connected MCP tool or the dashboard. Avoid full access: the wrapper only lists tokens, it cannot create or revoke them. You can also grant the token several teams; see multi-team access.
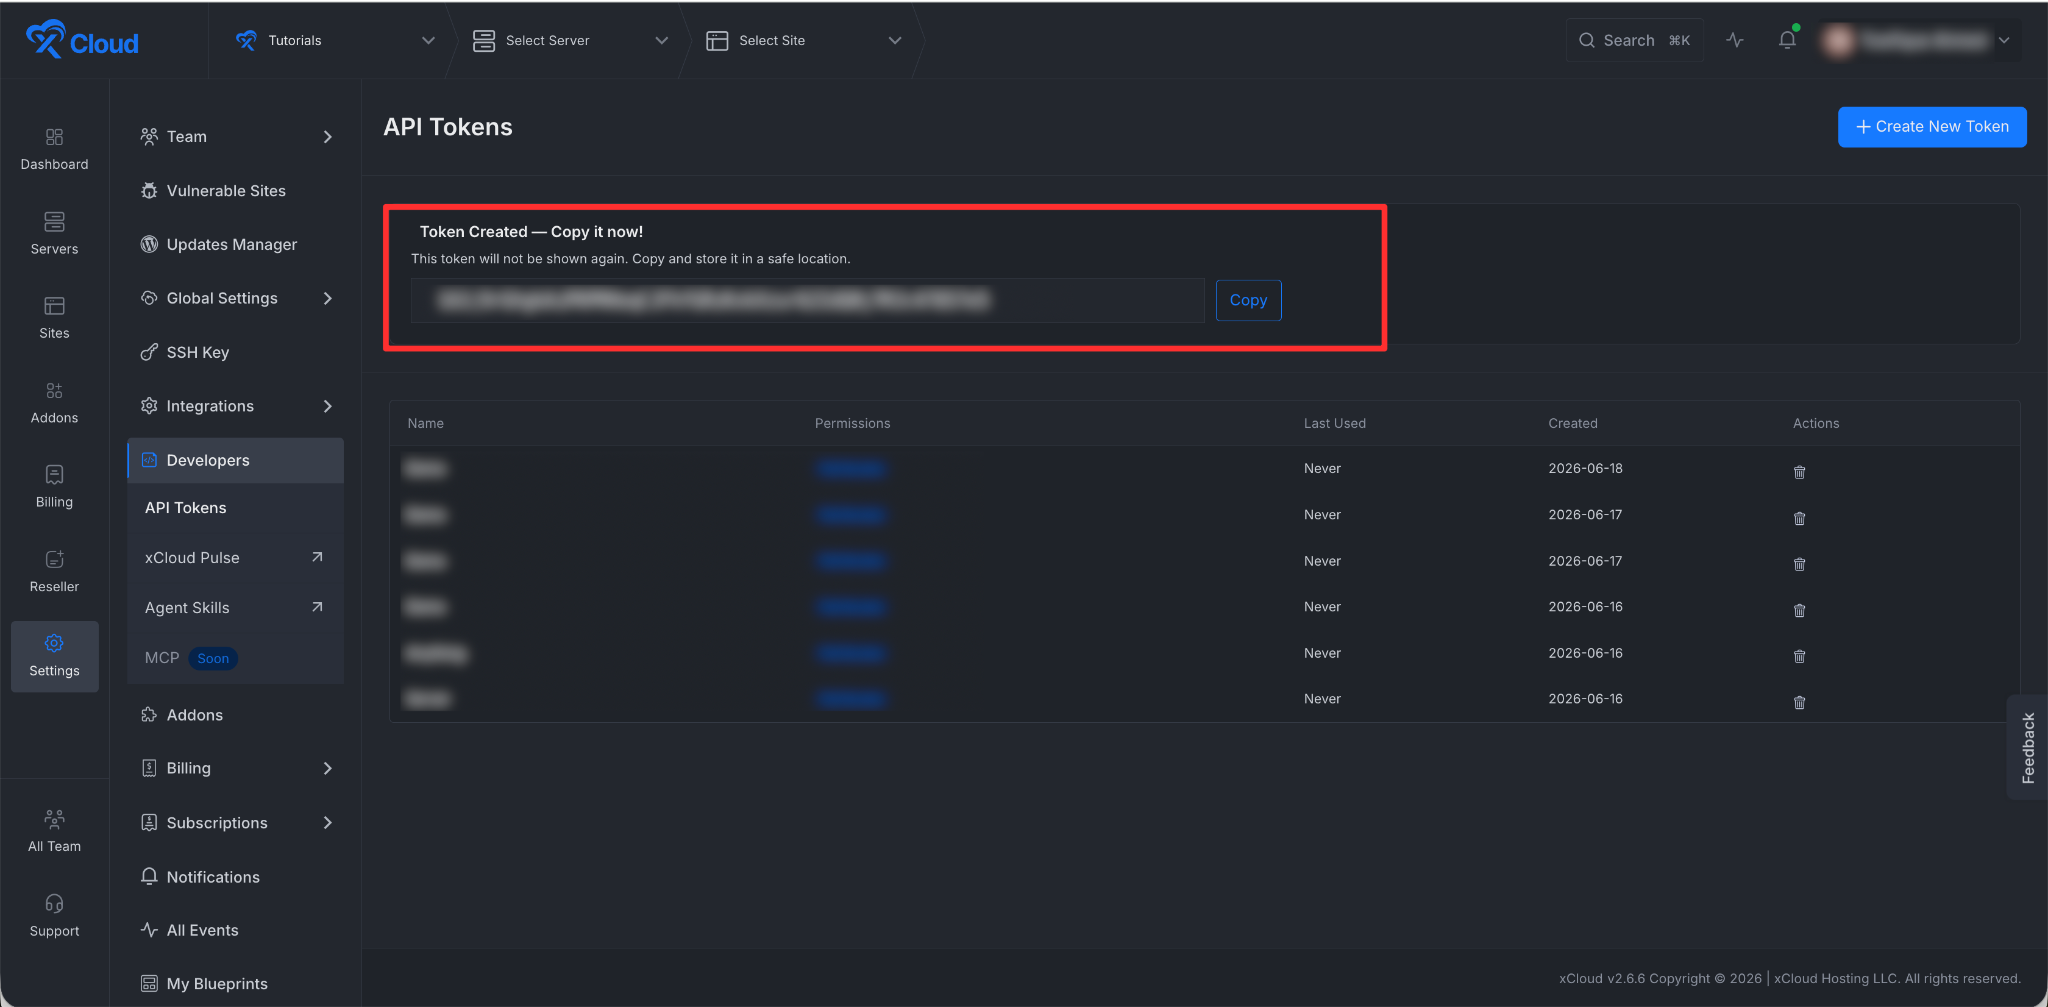
Copy the token when it is shown. xCloud displays it only once.
Add it to Claude Code settings
Put the token in ~/.claude/settings.json (global) or a project-local .claude/settings.local.json that stays out of git, then restart Claude Code:
{ "env": { "XCLOUD_API_TOKEN": "your-token-here" } }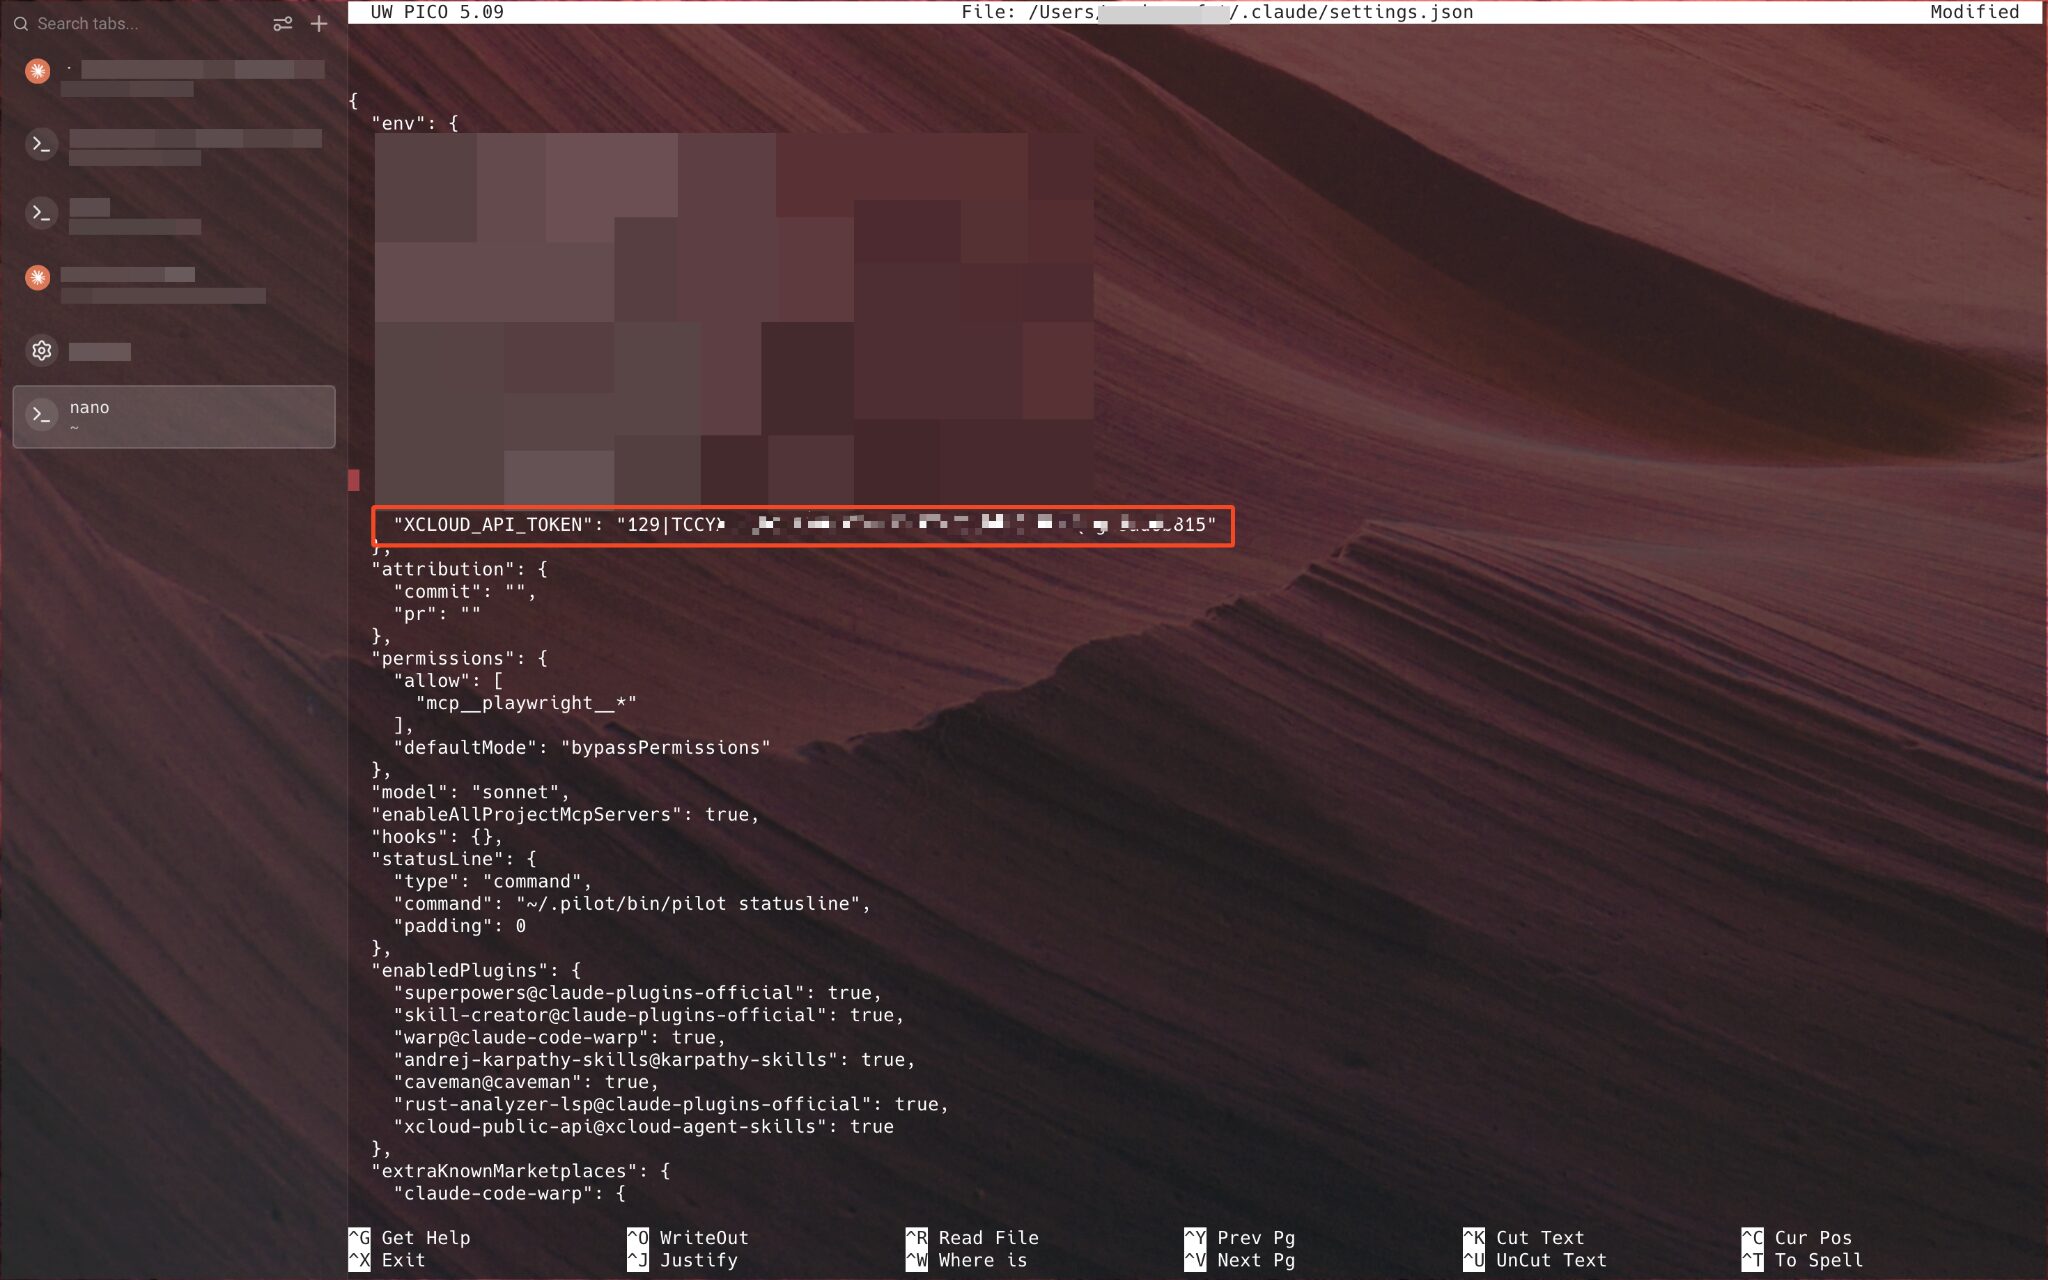
Do not paste a production token into a chat message: anything in a conversation can persist in history. Rotate tokens regularly and revoke any that were exposed.
Use the skills with other agents
- Agent Plugins package. The repository ships a portable package of the same nine skills plus the xCloud MCP connection in the standard layout (
plugin.json,mcp.json,skills/). Compatible clients today include ChatGPT and Codex, Cursor, GitHub Copilot, Kiro and VS Code; the client manages the OAuth sign-in. See the repository’s install guide. - Any agent with a skills directory. The skills are plain Markdown plus a skill-local
bash/curlwrapper. Clone the repository, build the package and copyskills/*into your agent’s skills folder. Agents that support MCP load the rootmcp.json; others use the REST wrapper withXCLOUD_API_TOKEN. - OpenClaw. Install from ClawHub with
clawhub install xcloudoropenclaw skills install @asif2bd/xcloud, then connect the MCP server from OpenClaw’s MCP settings so the skills can change things; see How to connect OpenClaw to xCloud and OpenClaw skills and ClawHub on xCloud.
What the skills add on top of MCP
MCP alone already exposes every xCloud operation as a tool. The skills add the judgement around them:
- Routing. Each skill declares what it owns and what it does not, so “renew the cert” lands on
xcloud:ssland not on a site tool. - Preview, then ask. A deploy is detected and dry-run first, the plan is shown, and the agent asks once before it provisions.
- Polling and verification. Long jobs are polled to completion and the live URL is checked, rather than reported as “started”.
- Diagnosis and retry. A failed deploy gets a diagnosis of the failing step and a corrected retry on the same site.
- Safety guardrails. Backups before updates, no secrets echoed into summaries, scoped tokens on the REST path.
Frequently asked questions
Do I need the skills to use xCloud MCP?
No. The MCP connection alone gives your assistant every xCloud tool. The skills are an optional layer on top that teach the agent xCloud’s workflows: which tool to reach for, how to preview and confirm, how to poll a long job, and how to diagnose and retry a failed deploy.
Do I need an API token?
Not if you connect through xCloud MCP: sign in once in the browser and the skills use that connection. An API token is only the fallback for agents without MCP support, or for the two REST-only reads (listing your API tokens and the health probe); revoking a token happens in the dashboard.
Which AI assistants do the skills work with?
The plugin installs into Claude Code. A portable Agent Plugins package of the same nine skills loads into ChatGPT and Codex, Cursor, GitHub Copilot, Kiro and VS Code, and the skills are plain Markdown, so any agent with a skills directory can use them.
Do AI Agent Skills cost extra?
No. The skills are open source under MIT and run on the xCloud MCP server or Public API that comes with your account. Your AI assistant may have its own usage cost from its provider.
Is it safe to let the assistant act on my account?
The skills act only with the access you granted: Read or Read and write on the MCP connection, or the scopes on a token. Risky operations such as creating, deploying, updating, rebooting, deleting and buying stop for your confirmation, and the skills preview a change before asking.
Next steps
- Connect xCloud MCP to your AI agent for every client’s setup.
- What You Can Ask xCloud MCP to Do for prompts and the prompt formula.
- xCloud AI Agent Skills overview page, and the GitHub repository for the changelog.
If you have any questions or run into issues, feel free to reach out to our support team.