

How to Clone a Laravel App with xCloud
Updated July 14, 2026 · 7 min read
With xCloud, you can quickly clone a Laravel app into a new, ready-to-use copy.
Whether you need a staging environment for testing, want to move an app to another server or create a safe copy before making changes, the Clone Site feature makes the process simple.
It copies your application files and database automatically. It also configures SSL, Nginx, and deployment settings for the new site. Follow this guide to get started.
Prerequisites
Before you begin cloning your Laravel app, make sure you have the following in place:
- An active xCloud account with access to the xCloud dashboard.
- An existing Laravel app already deployed and running on xCloud (this is the site you will clone).
- A destination server available in your account where the cloned app will live. You can clone onto the same server or a different one.
How to Clone A Laravel App in xCloud
Cloning a Laravel app with xCloud involves a few easy steps. The guide below walks you through the complete flow, from locating your site to watching the clone build in real time. Follow the steps below to clone your Laravel app.
Step 1: Open Your Laravel App
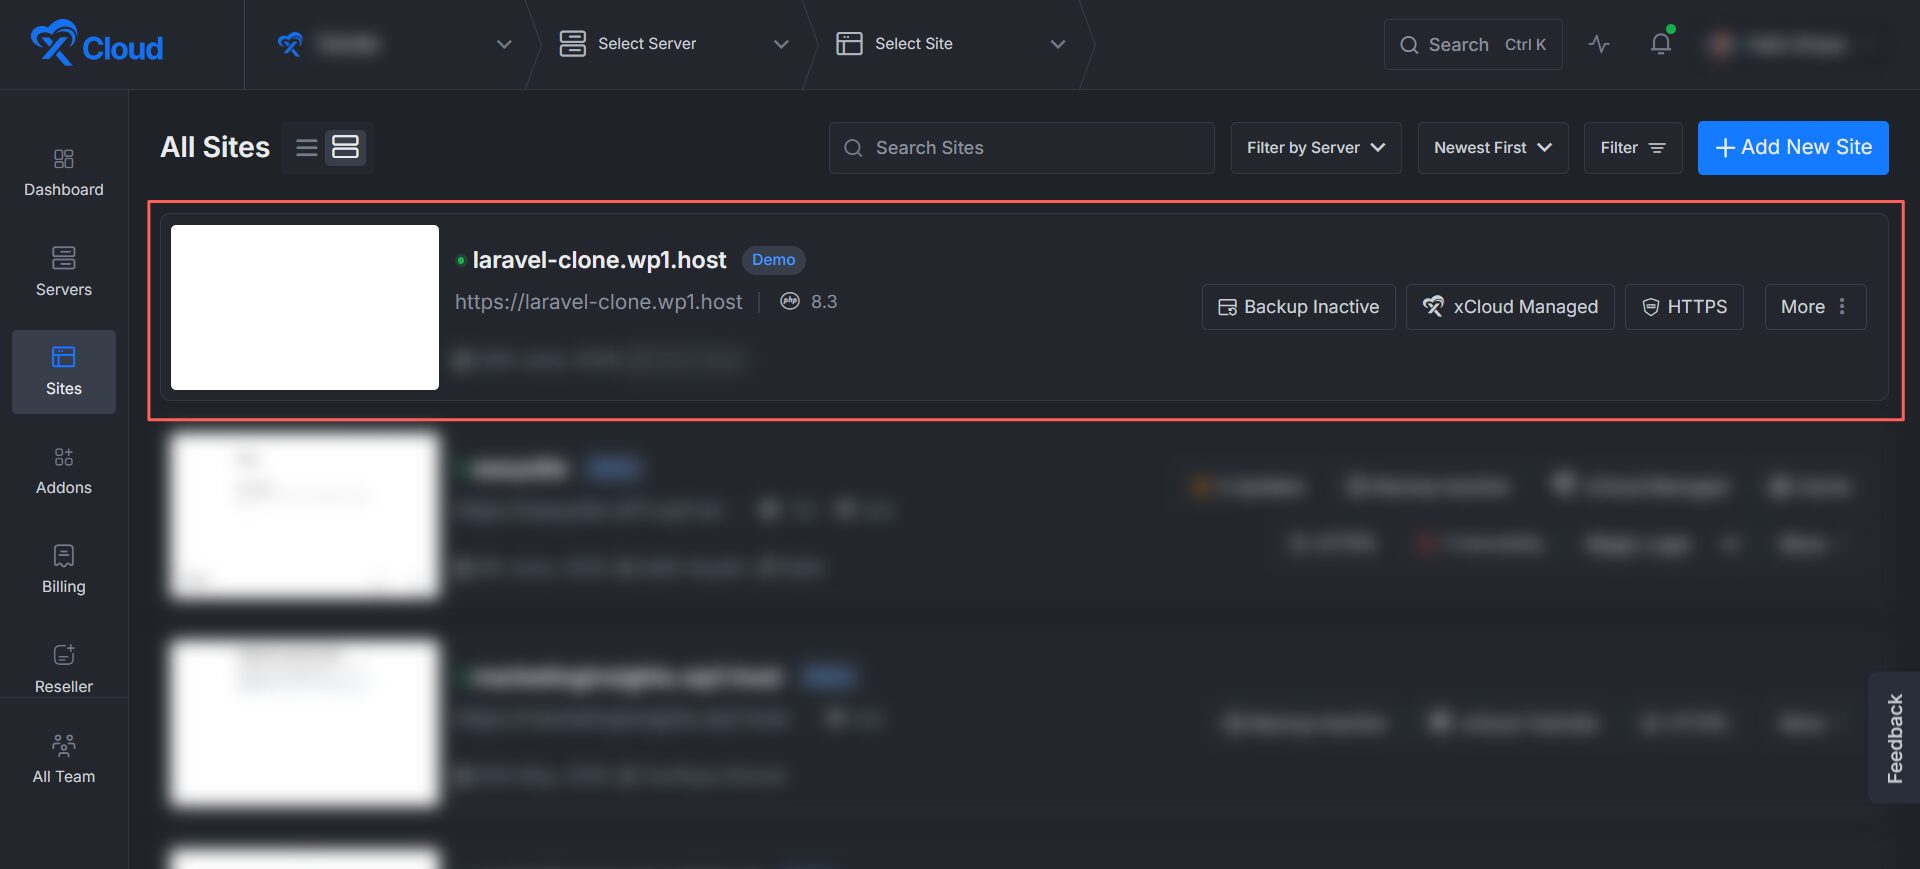
First, log into your xCloud account. From the left navigation menu, click on ‘Sites‘ to open the ‘All Sites‘ page. Locate the Laravel app you want to clone, then click on its name to open it.
Step 2: Initiate the Clone Site Action
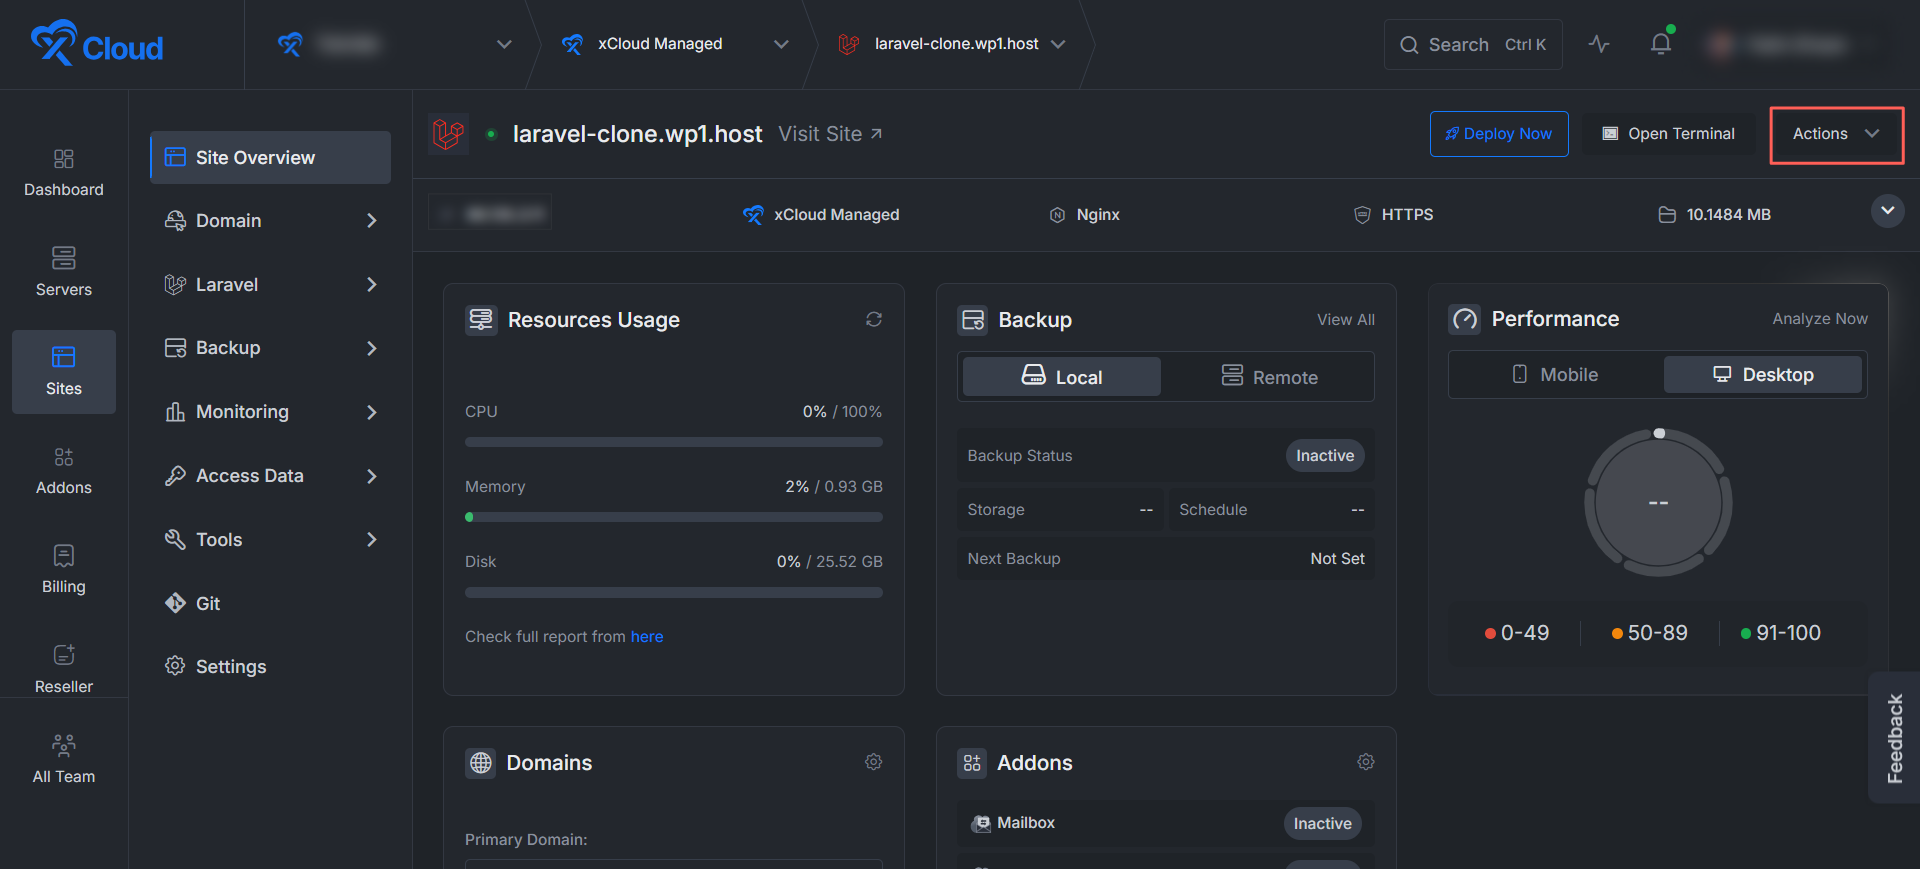
Once the ‘Site Overview‘ page loads, look at the top-right corner of the screen. Click on the ‘Actions‘ dropdown button to reveal the available site operations.
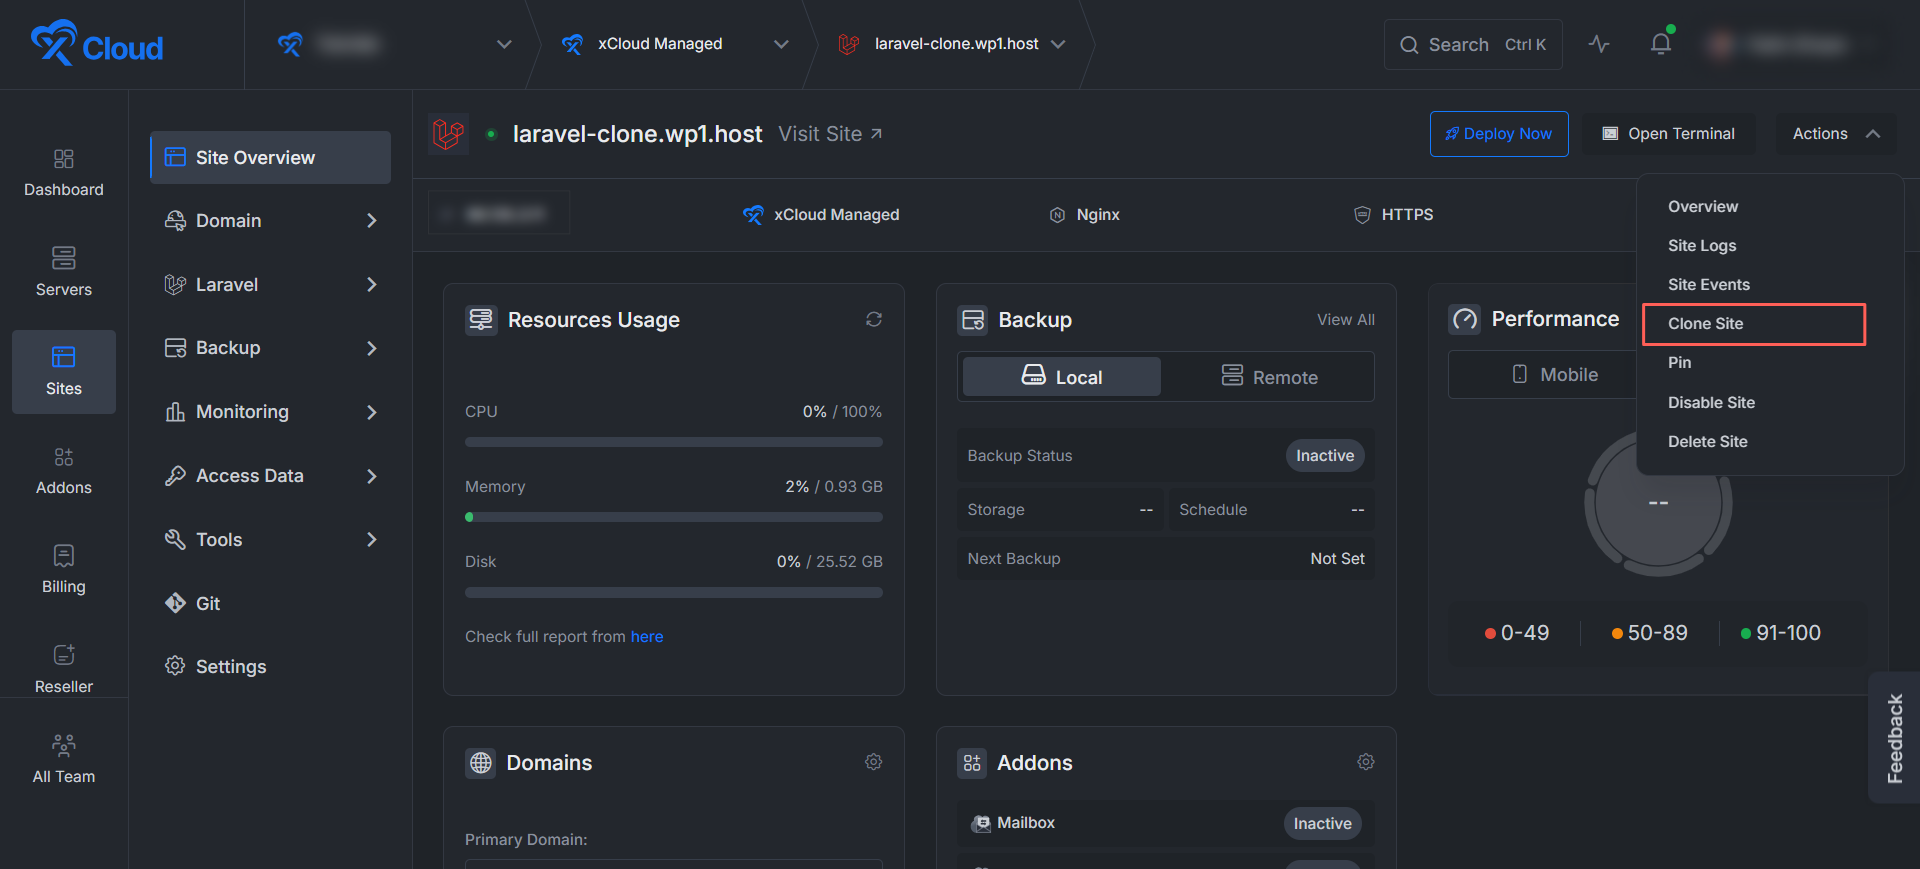
From the dropdown menu that appears, click on the ‘Clone Site‘ option. This launches the five-step cloning wizard.
Step 3: Select Destination Server
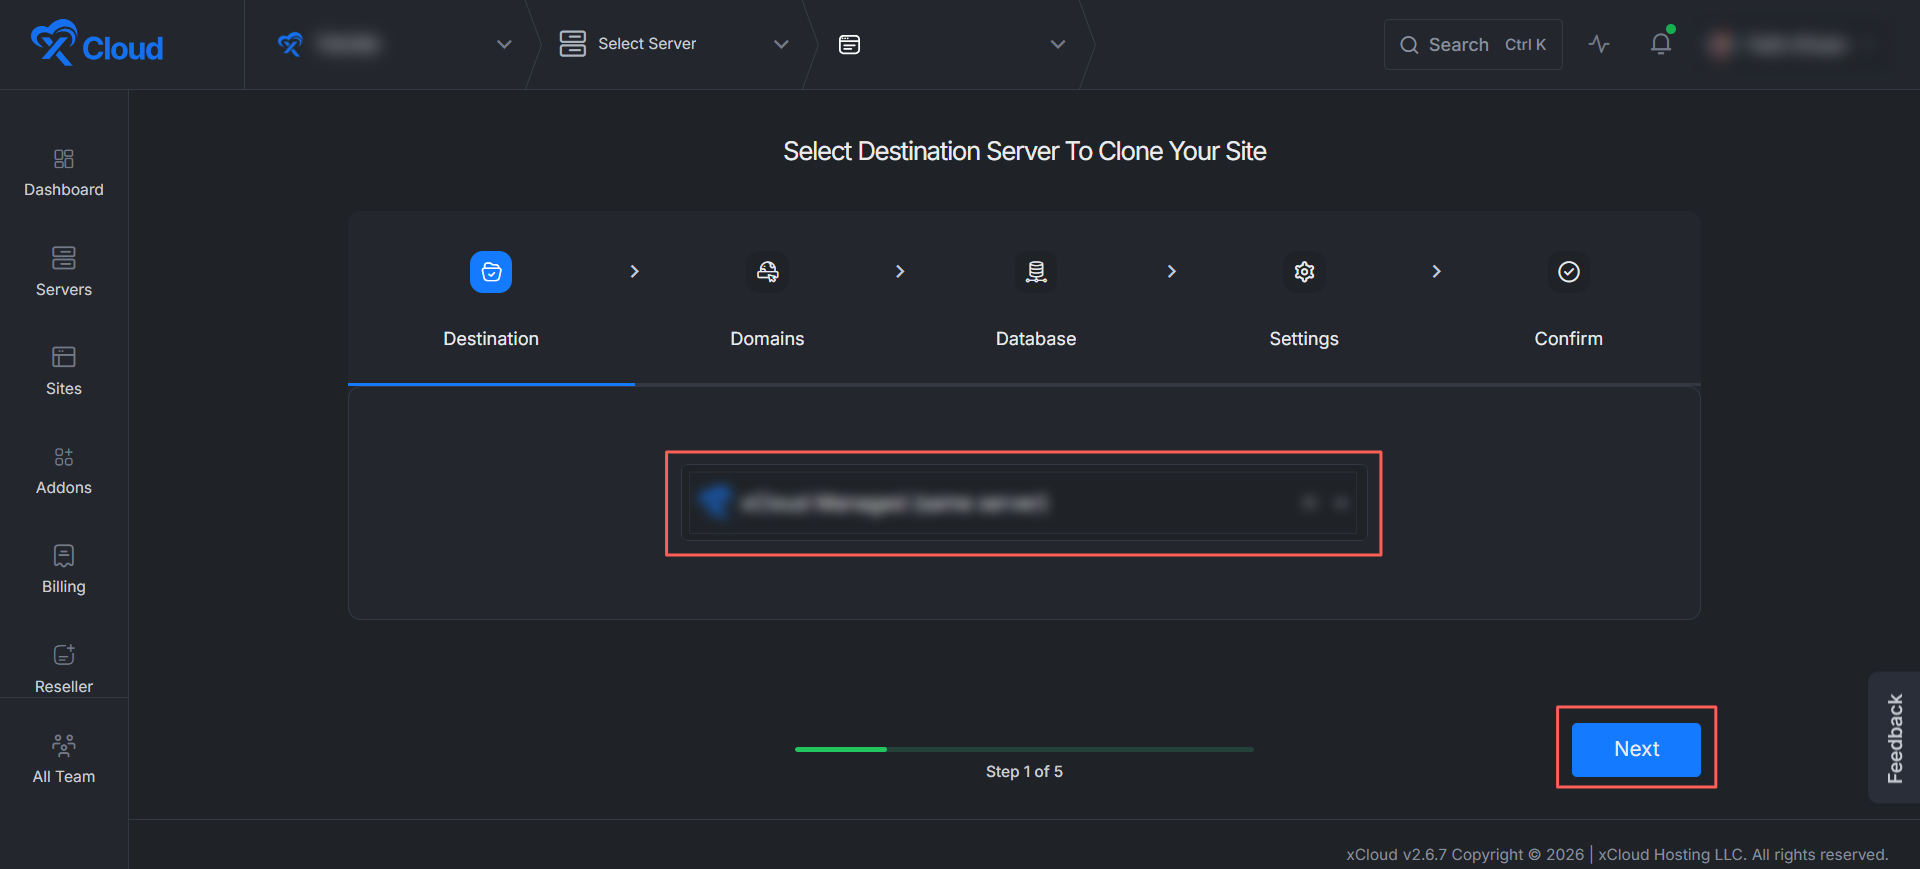
You are now on the ‘Destination‘ tab of the wizard, which is Step 1 of 5. Here, you choose the server where your cloned Laravel app will be created.
You can keep the server that is already selected, or pick a different one from the list to clone onto another server. After selecting your destination server, click on ‘Next‘ to continue.
Step 4: Set Up Domains, DNS & SSL
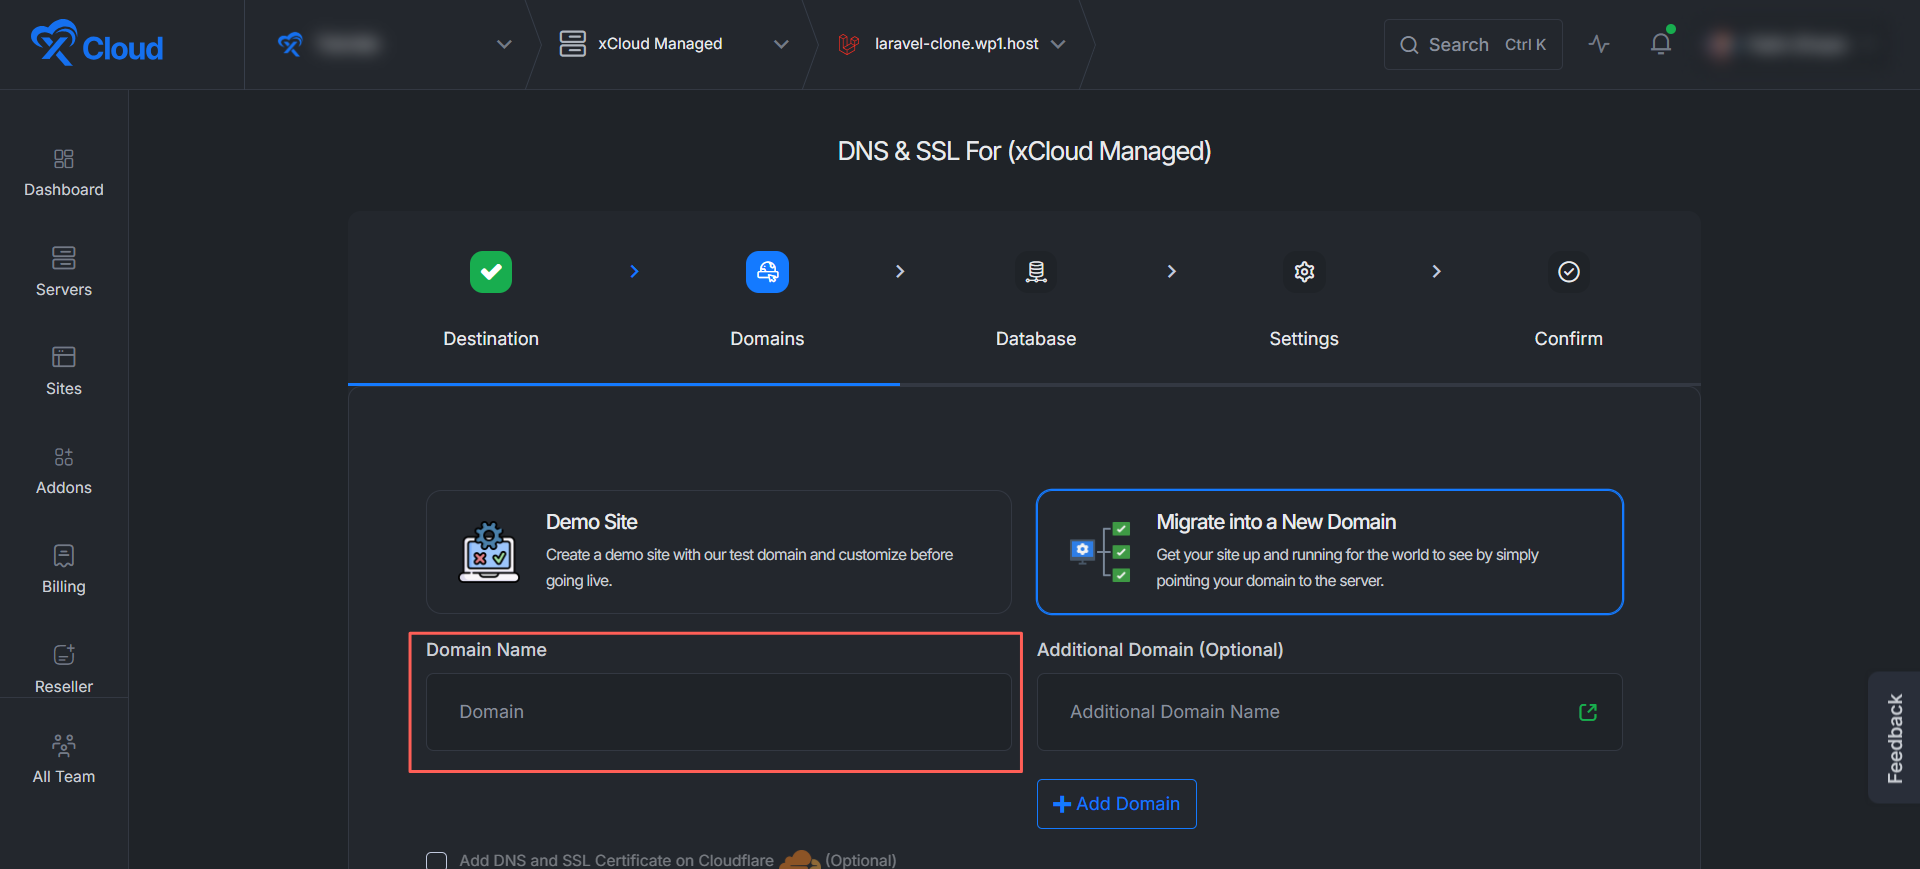
On the ‘Domains‘ tab (Step 2 of 5), titled ‘DNS & SSL For (xCloud Managed)‘, you decide how the cloned app will be accessed. You will get two options:
Demo Site
Choose ‘Demo Site‘ to create a clone using a temporary xCloud test domain. This is ideal when you simply want to test or refine the cloned app before taking it live.
Migrate into a New Domain
Choose ‘Migrate into a New Domain‘ to point a live domain at your cloned app right away. After selecting this option, enter your ‘Domain Name‘ in the field provided. If you need to serve the app on more than one domain, enter an ‘Additional Domain (Optional)‘ and click ‘Add Domain‘. You may also tick the ‘Add DNS and SSL Certificate on Cloudflare (Optional)‘ checkbox if you manage your DNS through Cloudflare.
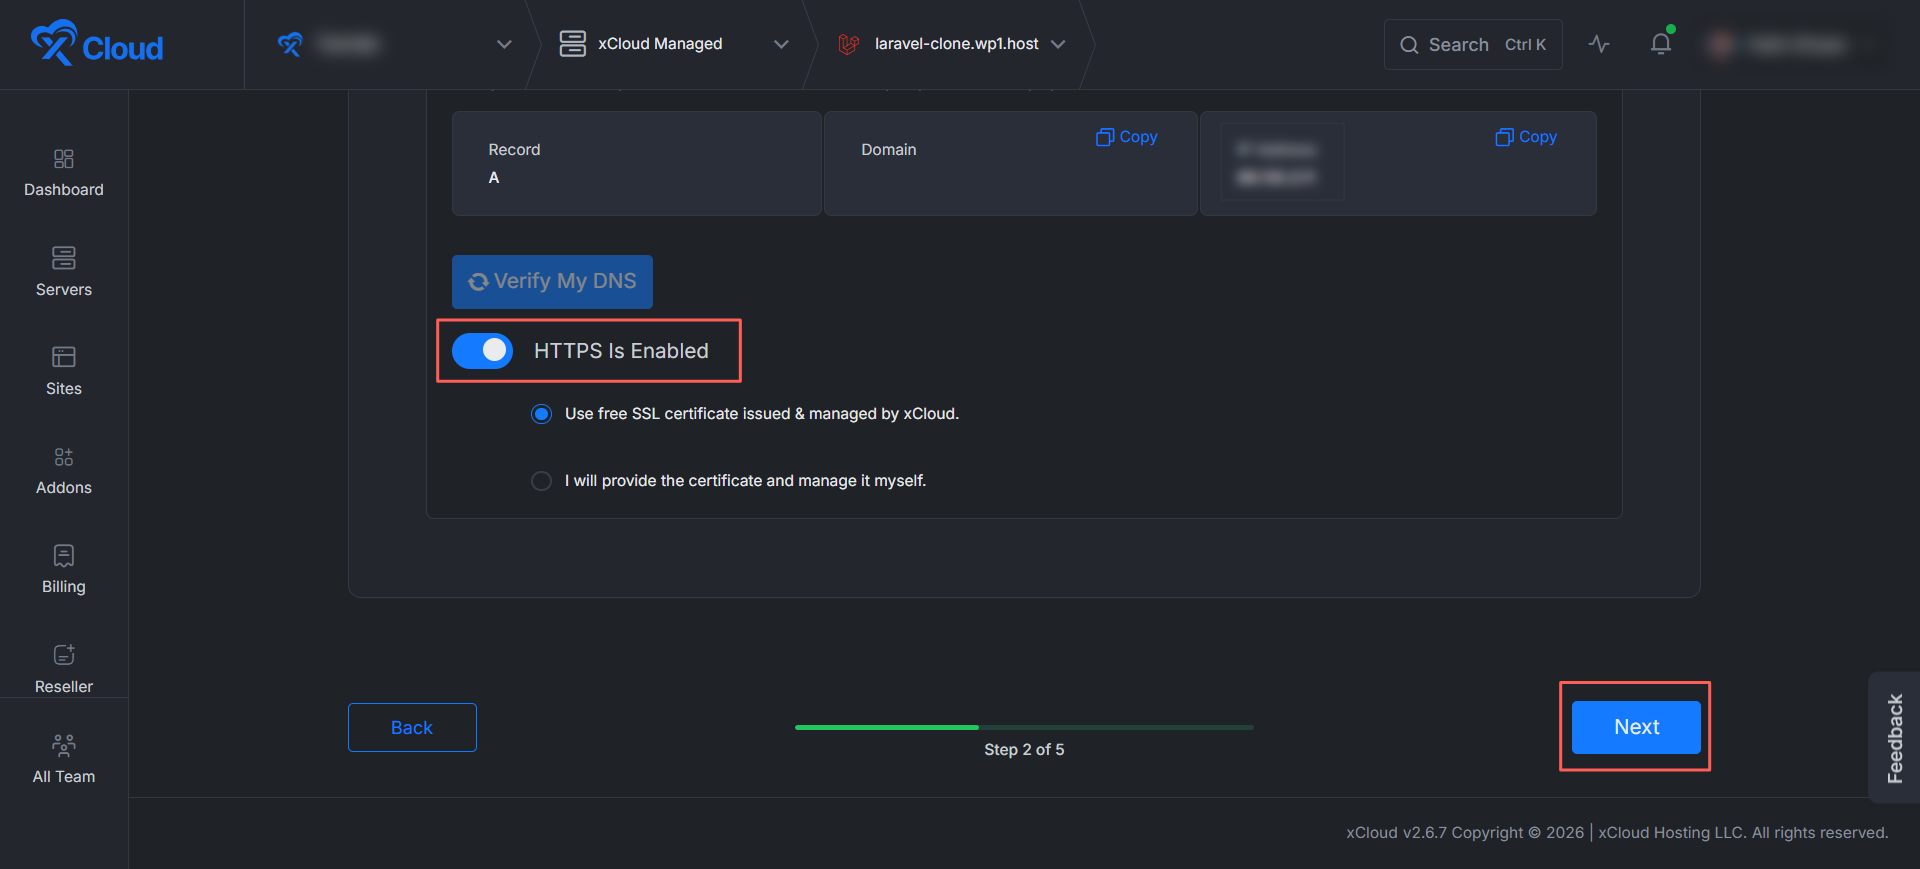
Next, scroll down to point your domain to the server. xCloud displays the DNS record you need to add, including the ‘Record‘ type (A) and the target value, each with a convenient ‘Copy‘ button. After adding the record at your DNS provider, click ‘Verify My DNS‘ to confirm the connection.
To keep your Laravel app secure, make sure the ‘HTTPS Is Enabled‘ toggle is switched on. Once enabled, you will get two SSL options to choose from:
- ‘Use free SSL certificate issued & managed by xCloud‘, the recommended option, where xCloud issues and auto-renews the certificate for you.
- ‘I will provide the certificate and manage it myself‘, choose this if you prefer to upload and maintain your own certificate.
Select the option that suits your needs, then click ‘Next‘.
Step 5: Configure the Database Connection
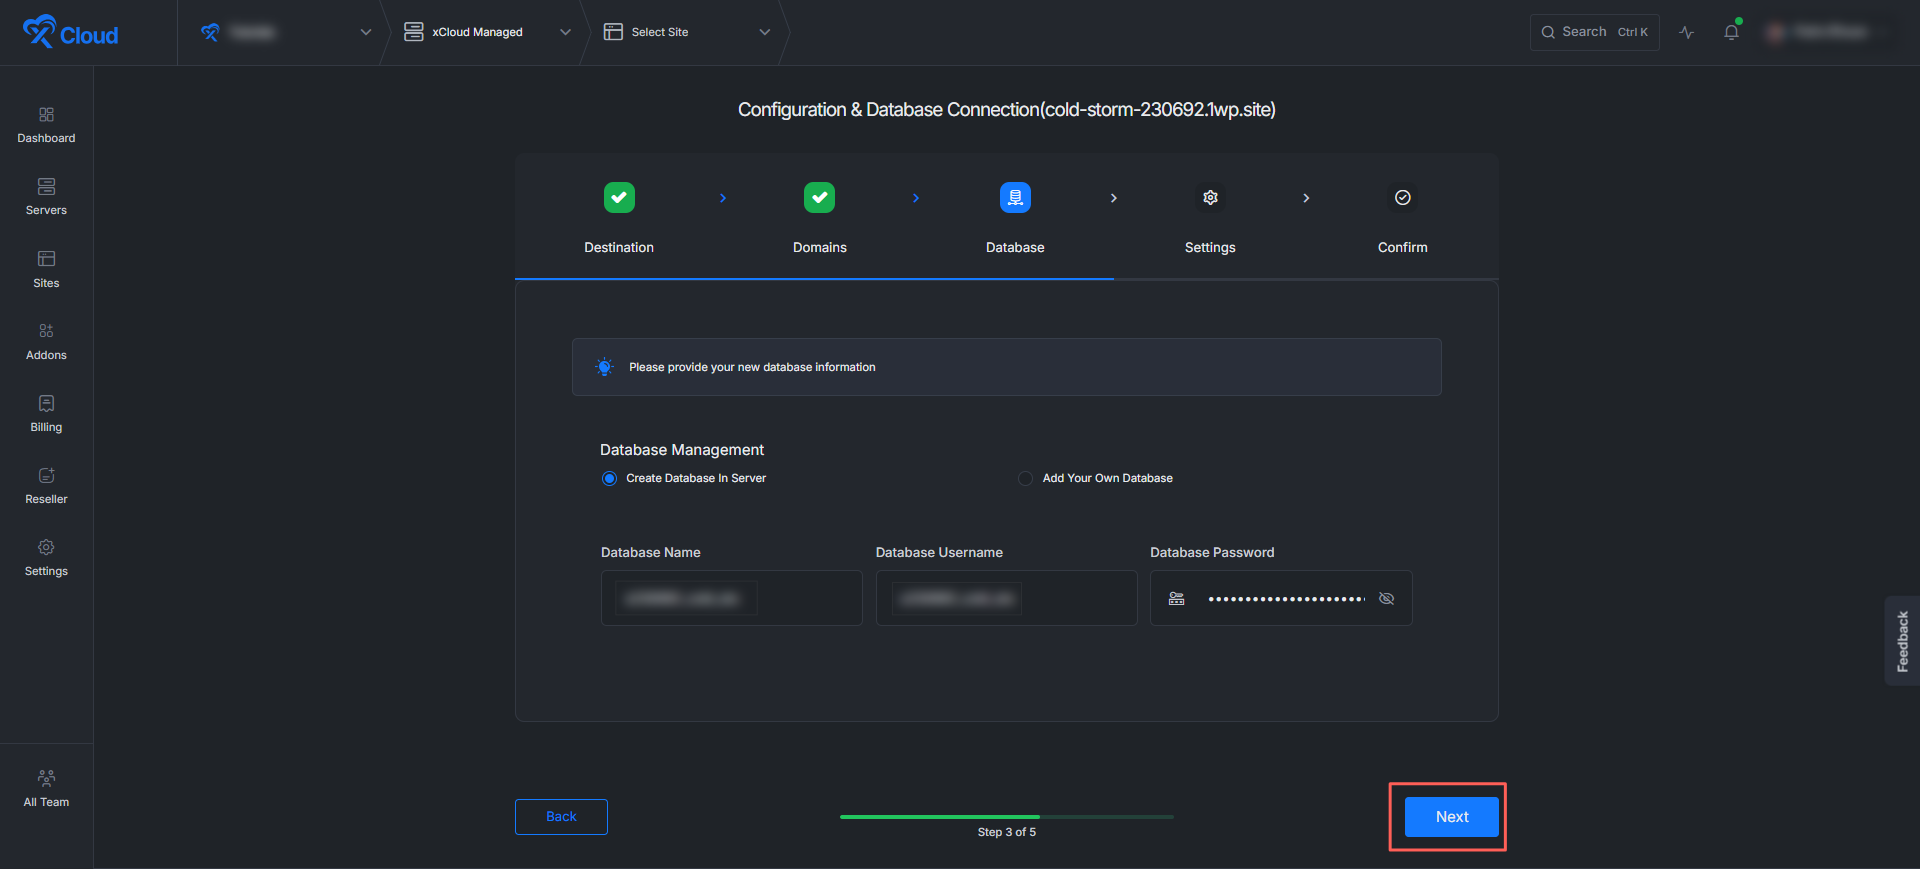
On the ‘Database‘ tab (Step 3 of 5), titled ‘Configuration & Database Connection‘, you set up the database for your cloned Laravel app. Under ‘Database Management‘, you will get two options:
Create a Database in a Server
Select ‘Create Database In Server‘ to let xCloud automatically provision a new database on the destination server. xCloud auto-fills the ‘Database Name‘, ‘Database Username‘, and ‘Database Password‘ for you. You can keep these auto-generated credentials or modify them according to your choice.
Add Your Own Database
Select ‘Add Your Own Database‘ if you would rather connect an existing database that is hosted elsewhere. In that case, provide the required connection details and make sure the configuration is correct.
After choosing an option and confirming the credentials, click ‘Next‘.
Step 6: Adjust Settings & Deploy Script
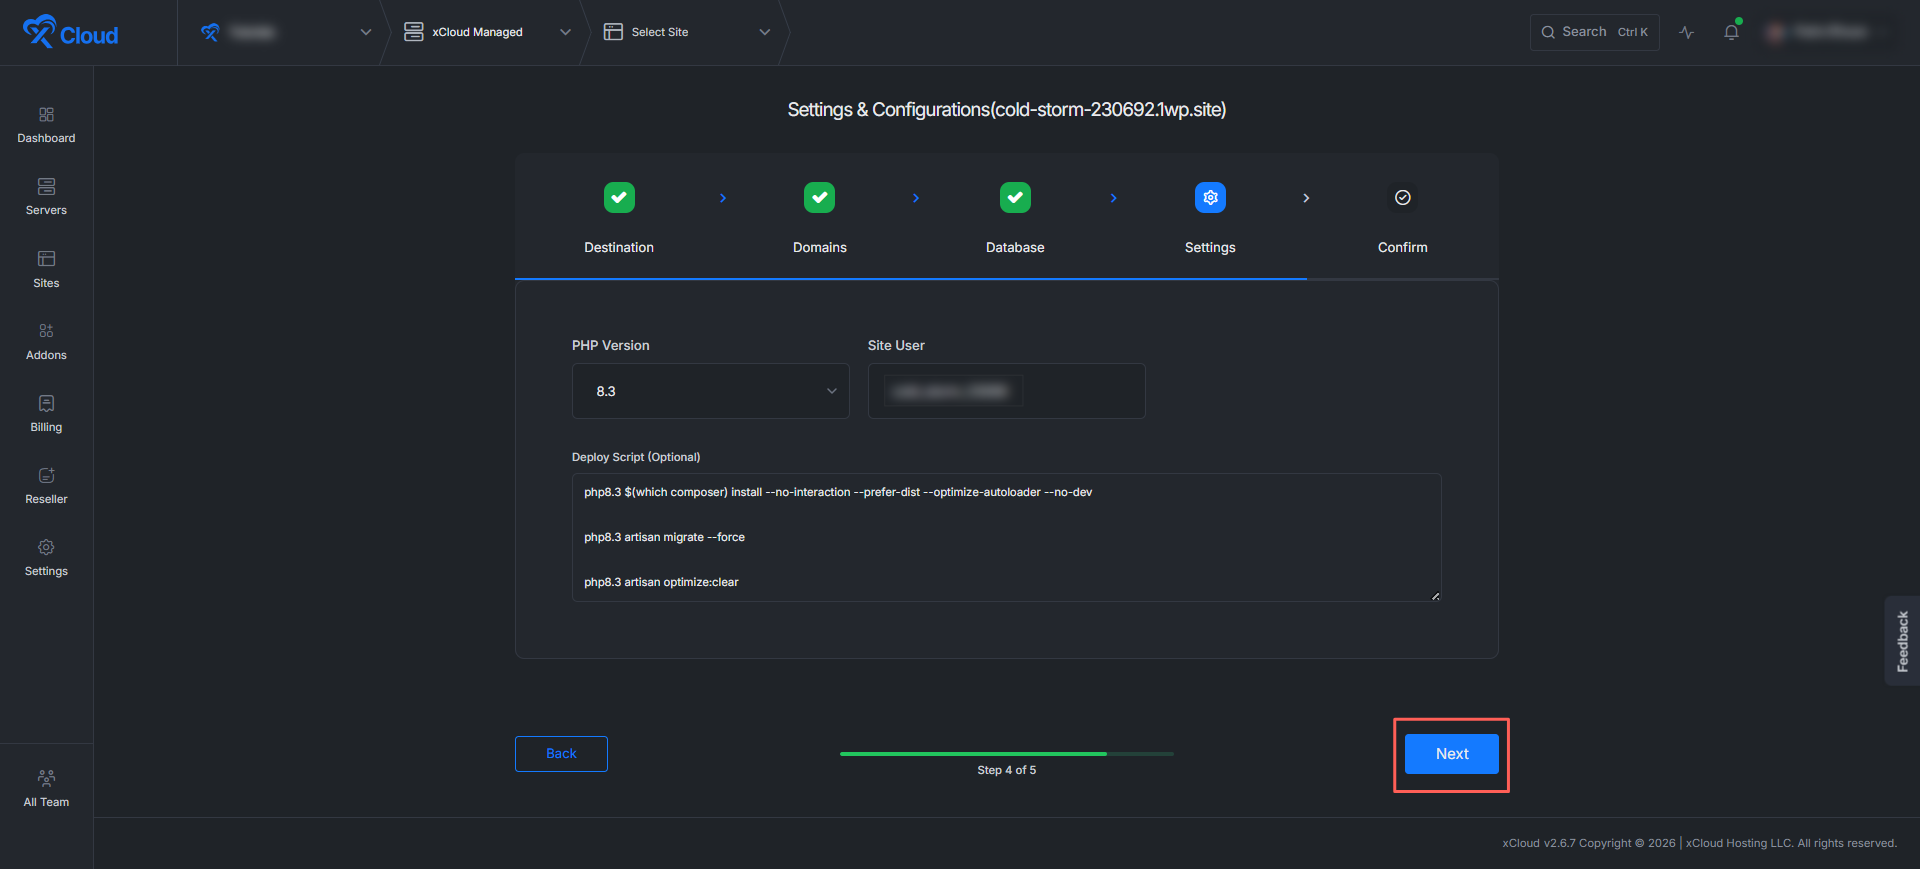
On the ‘Settings‘ tab (Step 4 of 5), titled ‘Settings & Configurations‘, you fine-tune how your cloned Laravel app runs.
- PHP Version: Choose the PHP version for the cloned app from the dropdown (set to 8.3 in this example). Matching the PHP version of your original app is recommended for compatibility.
- Site User: The system user that will own the cloned app’s files, shown here for reference.
- Deploy Script (Optional): The commands xCloud runs automatically after the clone is created. For a Laravel app, the default script installs dependencies, runs database migrations and clears cached configuration:
You can keep the default deploy script or edit it to match your app’s specific build steps. When you are satisfied with the settings, click ‘Next‘.
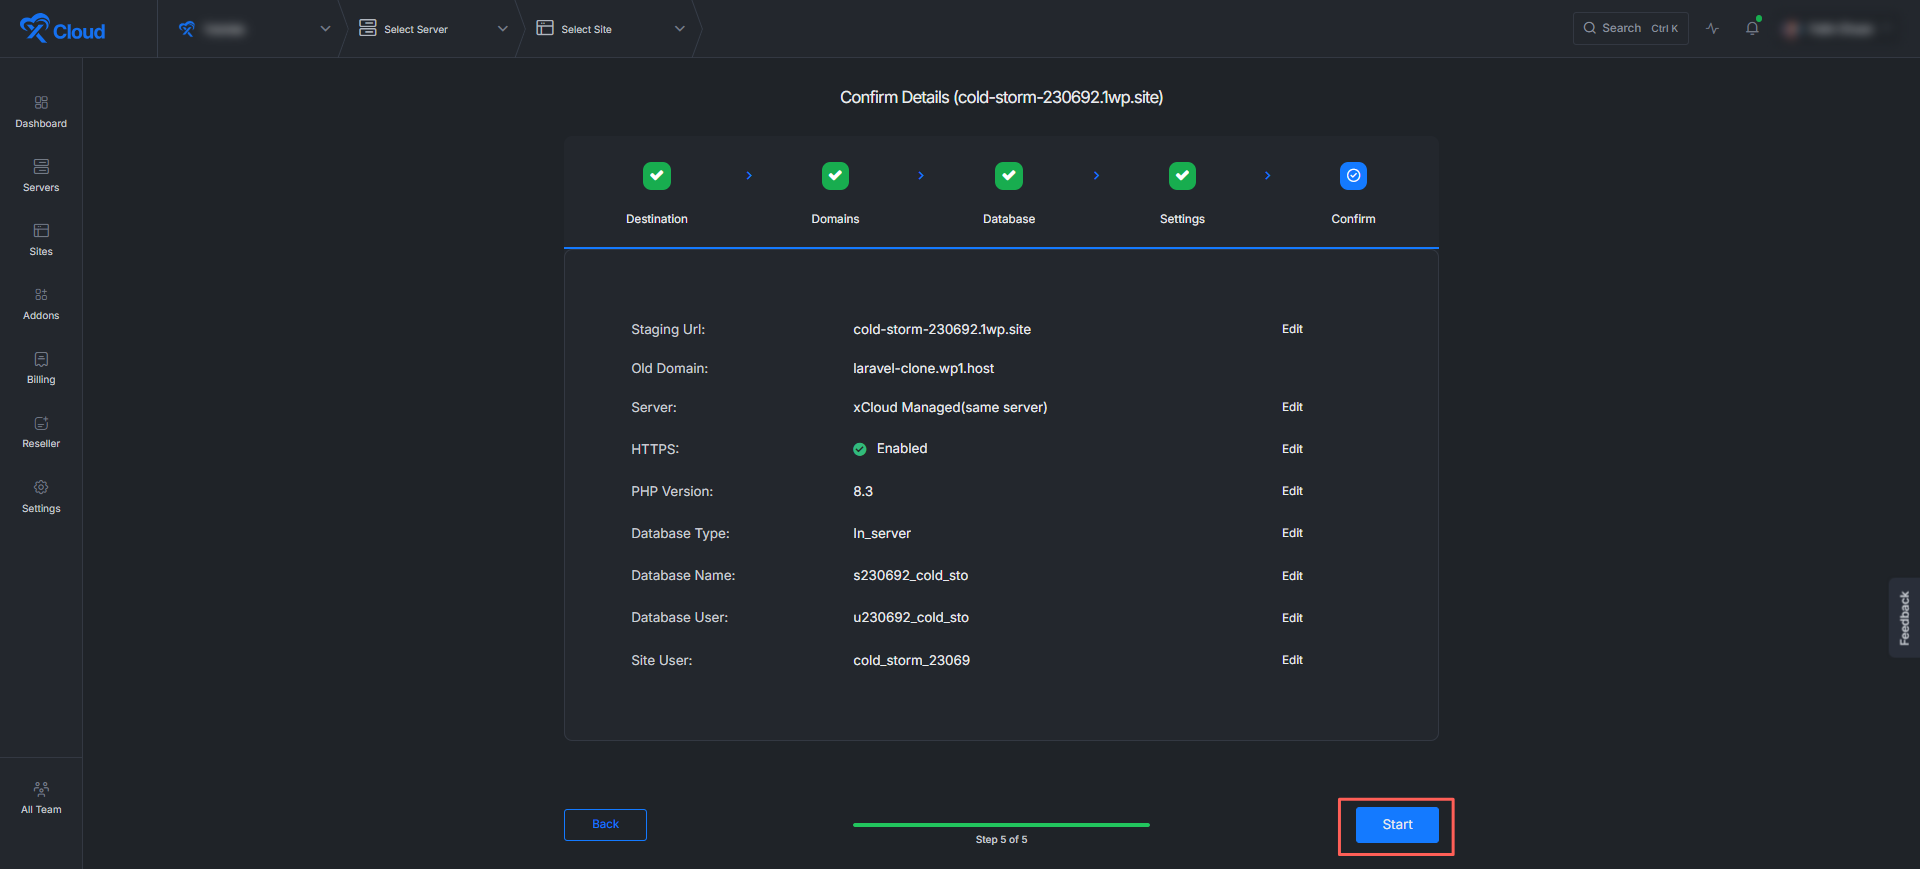
Step 7: Confirm the Clone Details
On the ‘Confirm‘ tab (Step 5 of 5), titled ‘Confirm Details‘, xCloud presents a complete summary of your selections so you can review everything before the clone begins. The summary includes:
- Staging Url: The address where the cloned app will be available.
- Old Domain: The source app you are cloning from.
- Server: The destination server (and whether it is the same server).
- HTTPS: Confirms SSL is enabled.
- PHP Version: The PHP version applied to the clone.
- Database Type, Database Name, Database User and Site User: The database and ownership details.
If anything needs changing, click the ‘Edit‘ link beside the relevant row to jump back to that step. Once every detail is correct, click the ‘Start‘ button to begin cloning.
Step 8: Start the Cloning Process
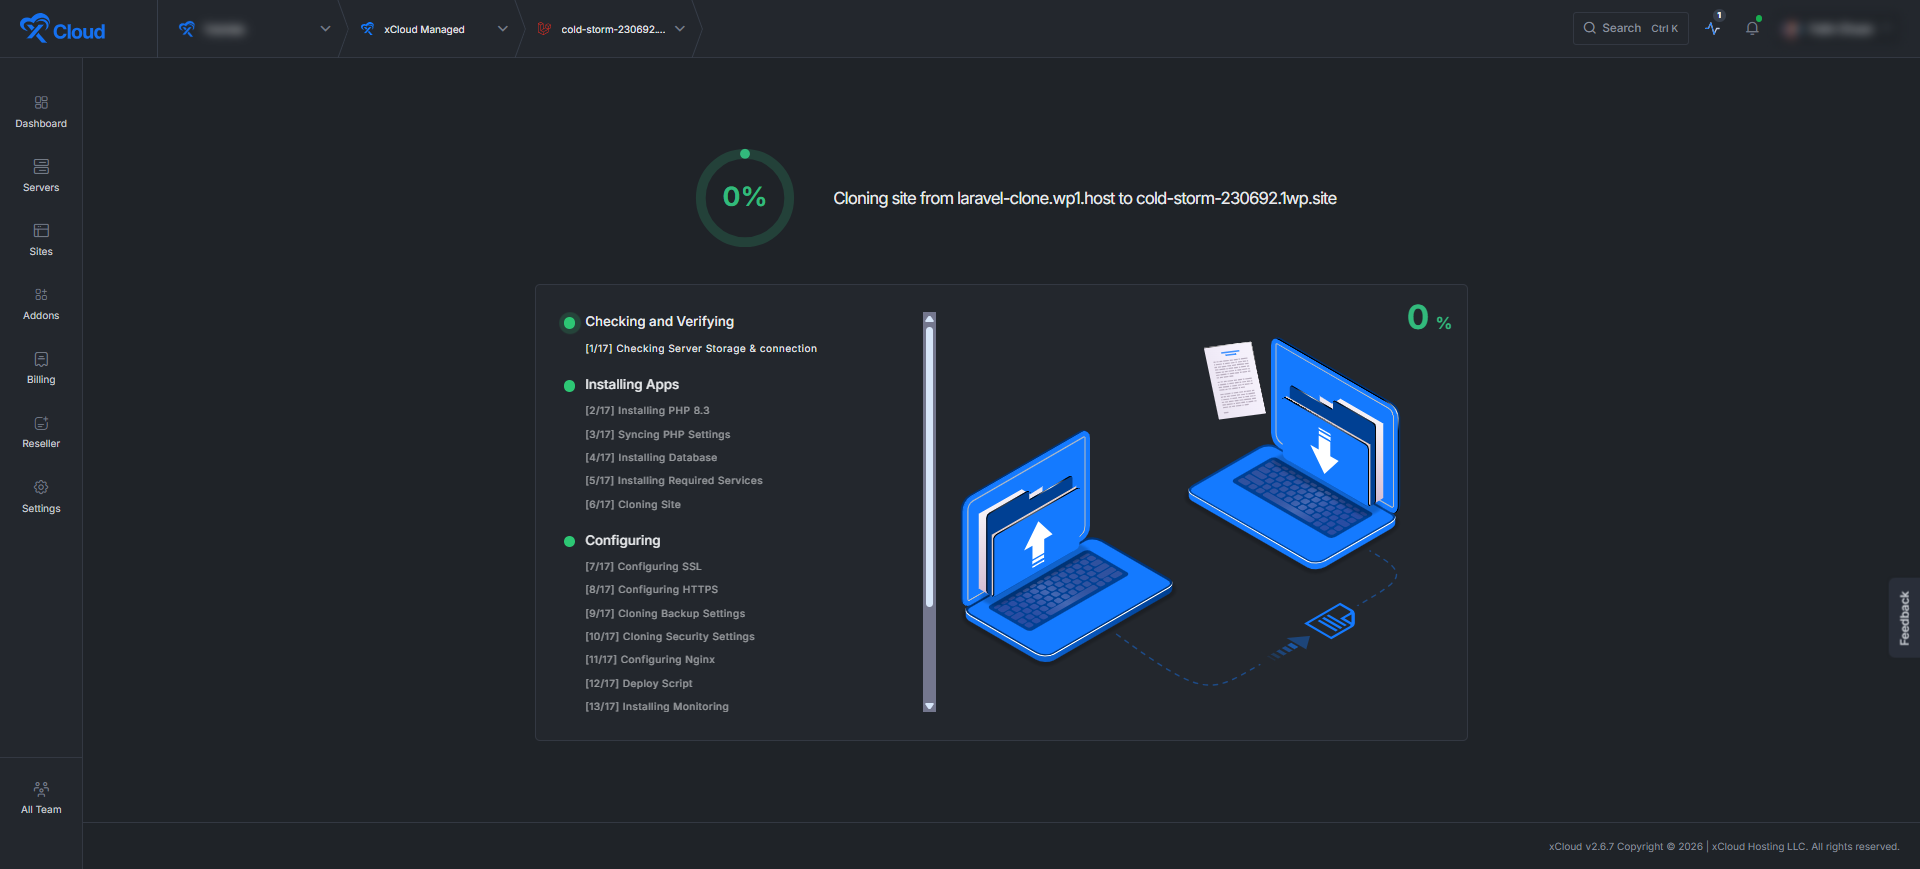
After you click ‘Start‘, the cloning process begins immediately, and a live progress screen appears. You can watch the overall completion percentage at the top while xCloud works through each stage of the clone in real time.
The process moves through three phases, broken into individual tasks such as:
- Checking and Verifying: Verifying server storage and connection.
- Installing Apps: installing PHP 8.3, syncing PHP settings, installing the database, installing required services, and cloning the site.
- Configuring: Configuring SSL and HTTPS, cloning backup and security settings, configuring Nginx, running the deploy script, and installing monitoring.
There is no need to refresh or interact with the page; xCloud completes each task automatically. Once the progress screen reaches 100%, your cloned app is ready to use.
Note: Cloning time depends on the size of your app and database. Larger Laravel apps with bigger databases will take longer to finish.
That’s it! You have successfully cloned a Laravel app with xCloud. You can visit it at the staging or live URL you configured, then continue refining it, point a custom domain to it or push it live whenever you are ready.
Still stuck? Contact our dedicated support team for any of your queries.