


OpenAI Codex lets you use your existing ChatGPT Plus or Pro subscription as the AI provider for your OpenClaw agent — no separate API key or billing required. xCloud includes a built-in Codex OAuth token generator that handles the authentication flow securely inside the dashboard.
Follow the steps below to connect OpenAI Codex to xCloud easily.
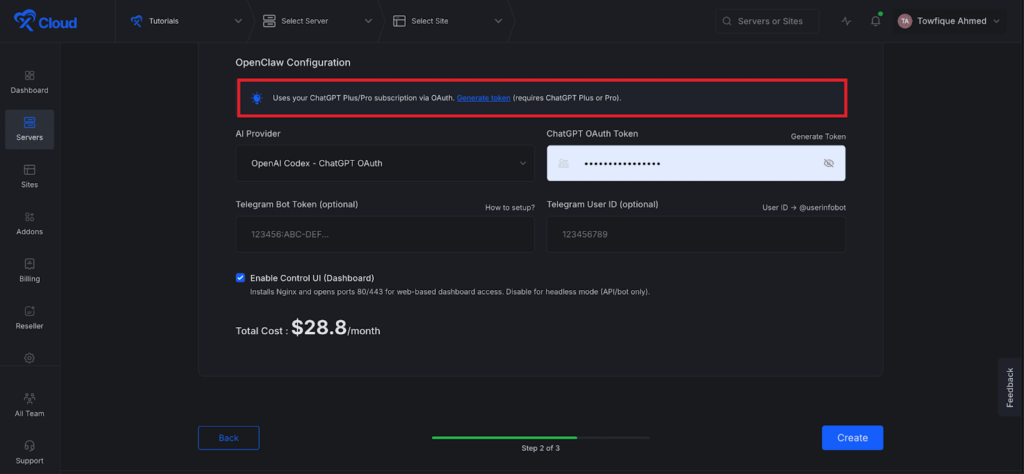
Step 1: Open the OpenClaw Provider Settings #
Log in to your xCloud OpenClaw dashboard. Navigate to your Site → OpenClaw → Providers. In the OpenClaw Configuration panel, look for the AI provider selector.
If you are creating the new OpenClaw instance, just choose the ‘OpenAI Codex – CHATGPT OAuth’ from the ‘AI Provider dropdown menu.
Step 2: Set up Your OAuth Token #
Next, you can to set up OpenAI Codex in just a few clicks. Click on the ‘Generate Token’ link to proceed.
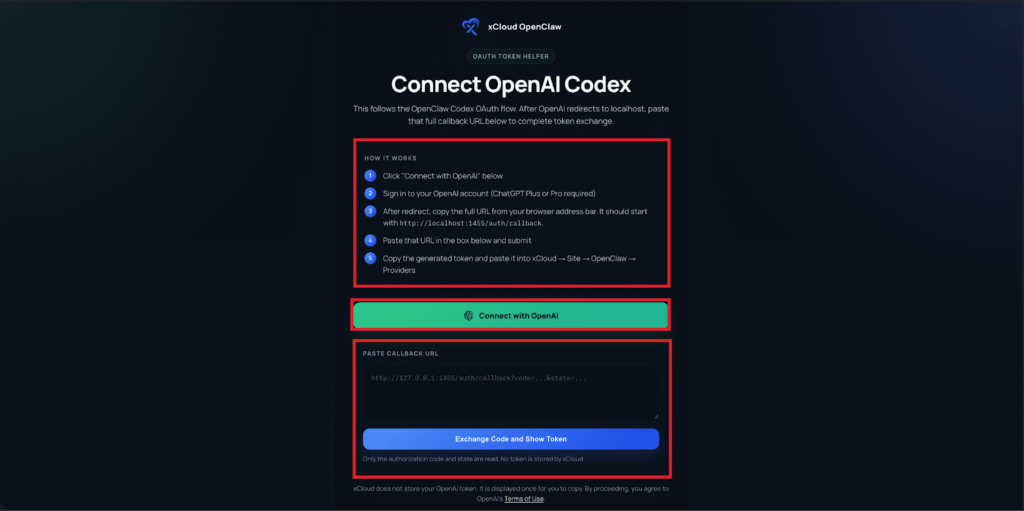
Step 3: Set up OpenAI Account #
You will be redirected to the integration page of OpenAI Codex page.
Read the ‘How It Works’ information’ carefully. And click on the ‘Connect with OpenAI’ button.
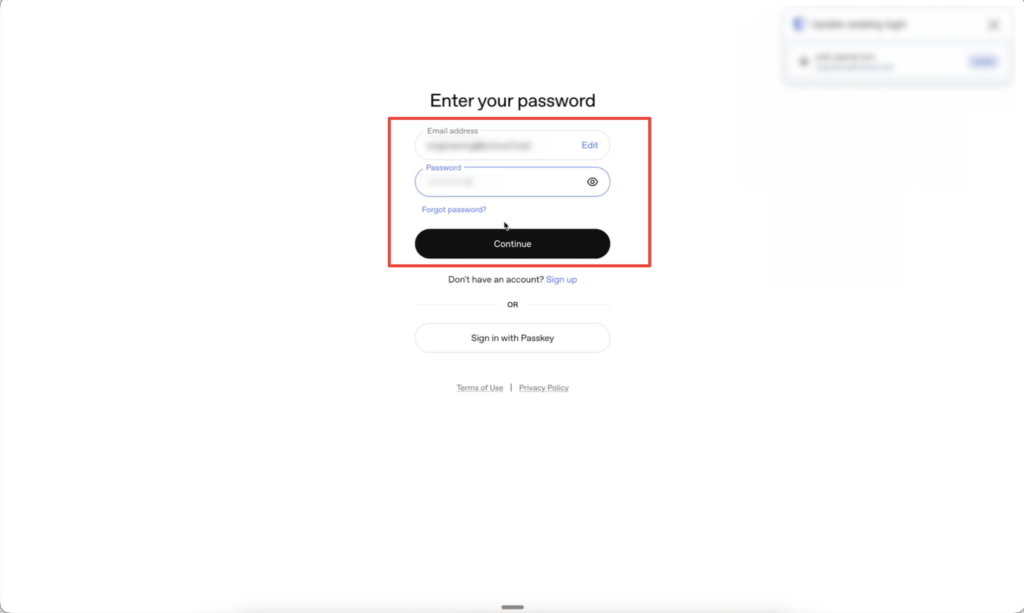
Next, you will be redirected to the OpenAI login page. Here, sign in to your OpenAI account (ChatGPT Plus or Pro required) using your credentials.
Then, you will see an error page after the login process has been completed. Copy the URL from the browser’s Address bar from that page.
Next, go back to the OpenAI Codex setup page and paste that URL in the box below and click on the ‘Exchange Code and Show Token’.
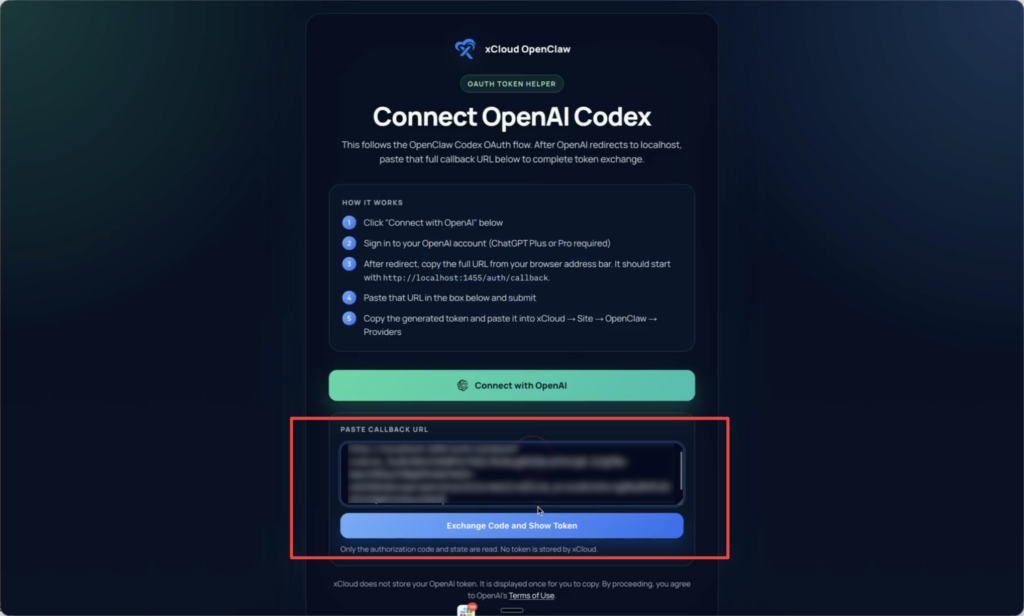
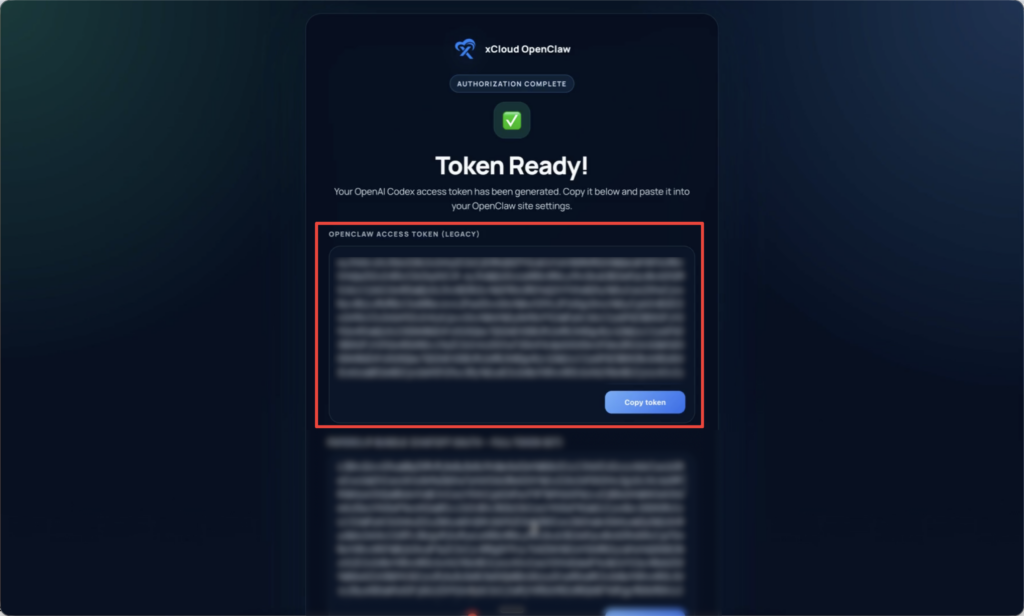
Then you will get a token. Click on the ‘Copy Token’ button to proceed.
Step 4: Paste the Callback URL and Get Your Token #
Return to the xCloud tab with the OpenClaw configuration. Paste the full callback URL into the input field provided. Click Submit. xCloud will process the OAuth exchange and display your generated token

The generated token will be automatically populated into the Codex provider field. Confirm your provider configuration looks correct. Click Create (or Save) to apply the configuration to your OpenClaw server
Your OpenClaw agent will now use OpenAI Codex (backed by your ChatGPT Plus/Pro subscription) as its AI provider.
Troubleshooting #
- The redirect URL doesn’t start with http://localhost:1455/auth/callback Make sure you clicked Connect with OpenAI from inside the xCloud dashboard — do not navigate to the OAuth URL manually. If the URL looks different, try the process again from the beginning.
- “ChatGPT Plus or Pro required” error OpenAI Codex OAuth requires an active paid ChatGPT subscription. Free accounts do not have access to the Codex API. Upgrade your OpenAI plan or use a different provider (e.g., Anthropic Claude, Gemini).
- Signed in with the wrong OpenAI account Log out of your OpenAI account in the browser tab that opened, then sign in with the correct account. Restart from Step 3.
- Token was generated but agent isn’t responding Check that the token was saved correctly by revisiting Site → OpenClaw → Providers. If the field is empty, repeat Steps 3–5. Also verify your OpenClaw server is running and connected.
- Browser blocks the localhost redirect Some strict browser configurations block localhost redirects. Switch to a standard Chrome, Firefox, or Edge browser without strict security extensions, or temporarily disable HTTPS-only mode.


