


xCloud lets you control which notifications you receive and which channels xCloud can use to send them. If you manage many websites or servers, you can reduce unnecessary alerts by updating your notification settings.
Use this guide to turn off xCloud notifications, disable email alerts, or keep only the notification channels your team needs.
⚠️ Important: Disabling notifications does not disable the action that created the notification. For example, if you turn off update notification emails, xCloud will stop sending those emails, but your sites and servers can still be updated or managed based on your normal settings.
What This Setting Controls #
The xCloud notification page controls notification delivery from xCloud. Depending on your account and integrations, you may see channels such as:
- Slack
- Telegram
- xCloud dashboard notifications
You can disable one channel and keep another channel enabled. For example, you can turn off Email while keeping Slack or dashboard notifications active.
Prerequisites #
- Access to your xCloud account
- Permission to manage your profile settings
- Access to the team or account where the notifications are generated
Step 1: Open Notification Settings #
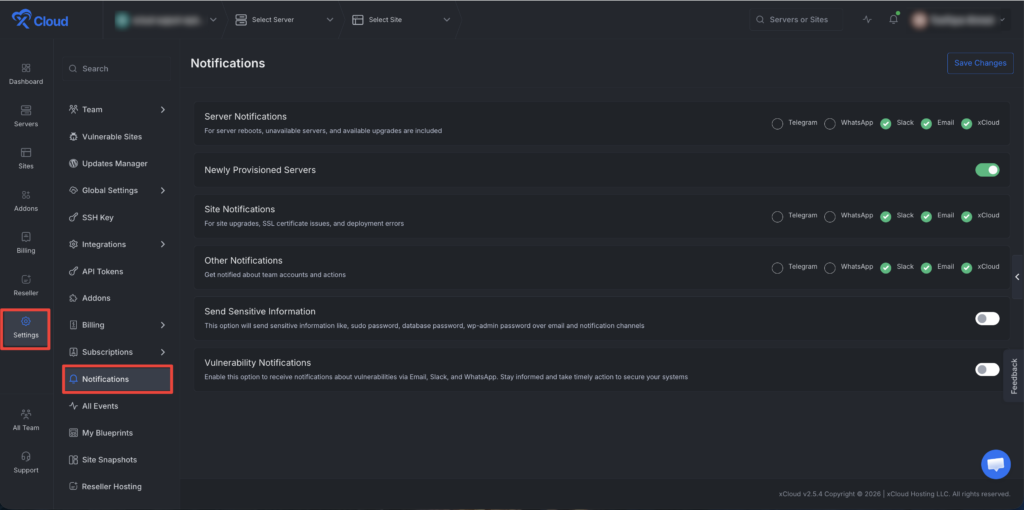
First, log in to your xCloud Dashboard and visit the Settings → Notifications from the dashboard or directly visit the link. You can also open your user profile menu and select Notifications.
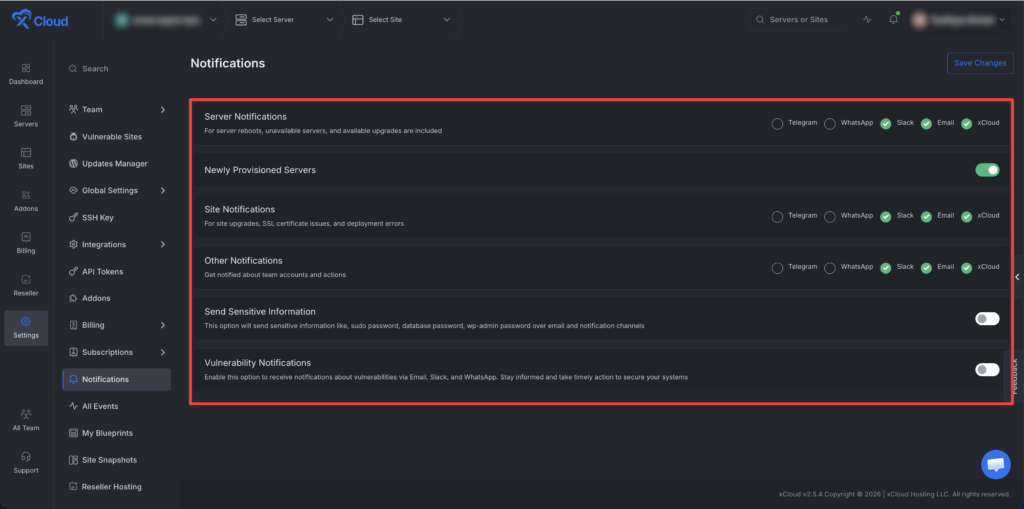
Step 2: Review Each Notification Section #
On the notification page, review the available sections. You may see sections such as:
- Site Notifications
- Server Notifications
- Other Notifications
- Vulnerability Notifications
Each section controls a different group of xCloud alerts.
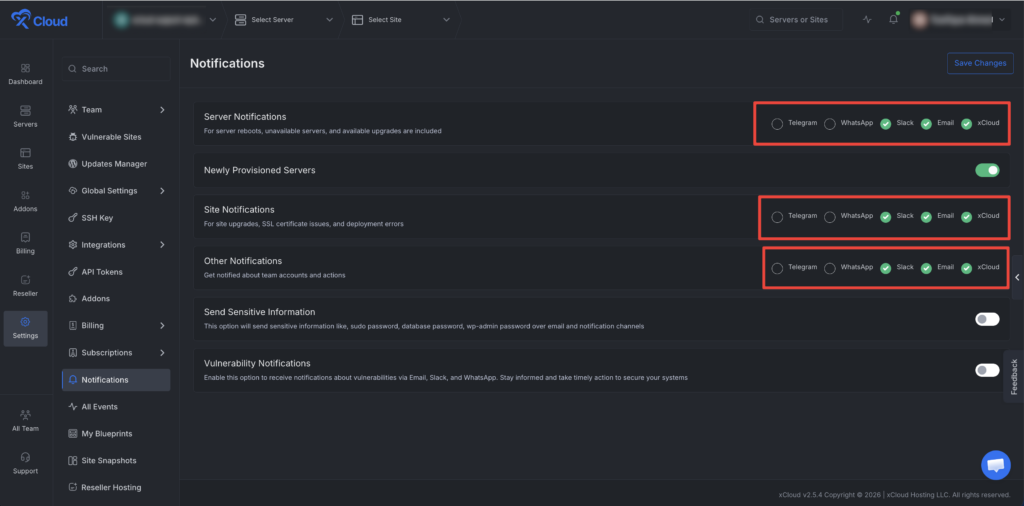
Step 3: Disable The Notification Channels You Do Not Want #
Uncheck the channel you want to disable in each section.
For example:
- Uncheck Email to stop email notifications.
- Uncheck Slack to stop Slack notifications.
- Uncheck Telegram to stop Telegram notifications.
- Uncheck WhatsApp to stop WhatsApp notifications.
If you only want fewer emails, turn off Email and leave your preferred channel enabled.
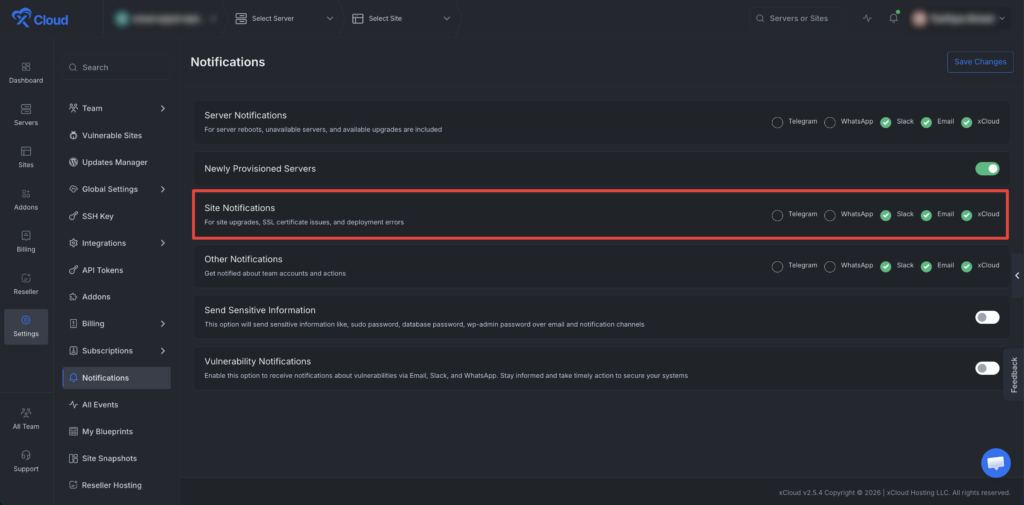
Step 4: Disable Site Notifications If Needed #
Use Site Notifications to control alerts related to your websites. These can include site upgrades, SSL certificate issues, deployment errors, and similar site-level events.
Turn off the channels you do not want under Site Notifications.
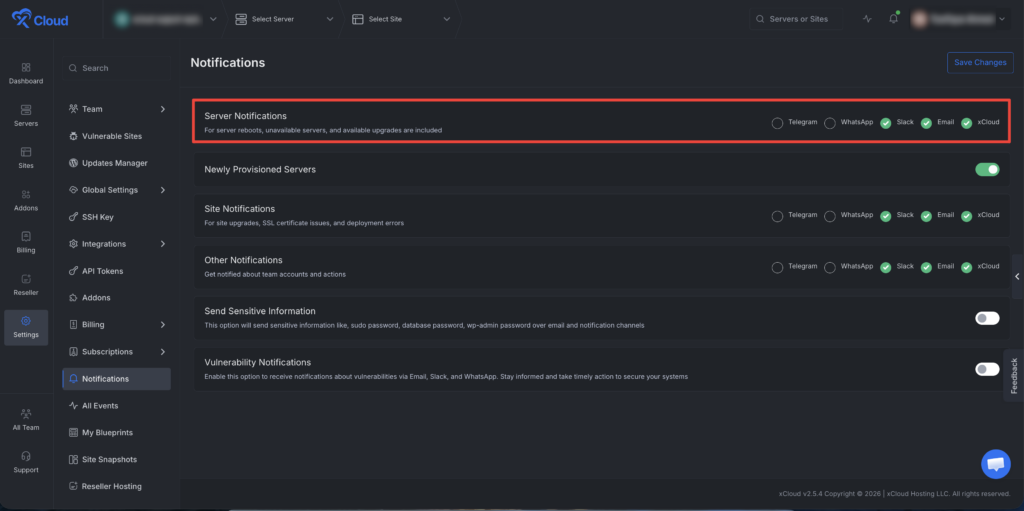
Step 5: Disable Server Notifications If Needed #
Use Server Notifications to control server-level alerts. These can include server reboots, unavailable servers, available upgrades, and similar server events.
Turn off the channels you do not want under Server Notifications.
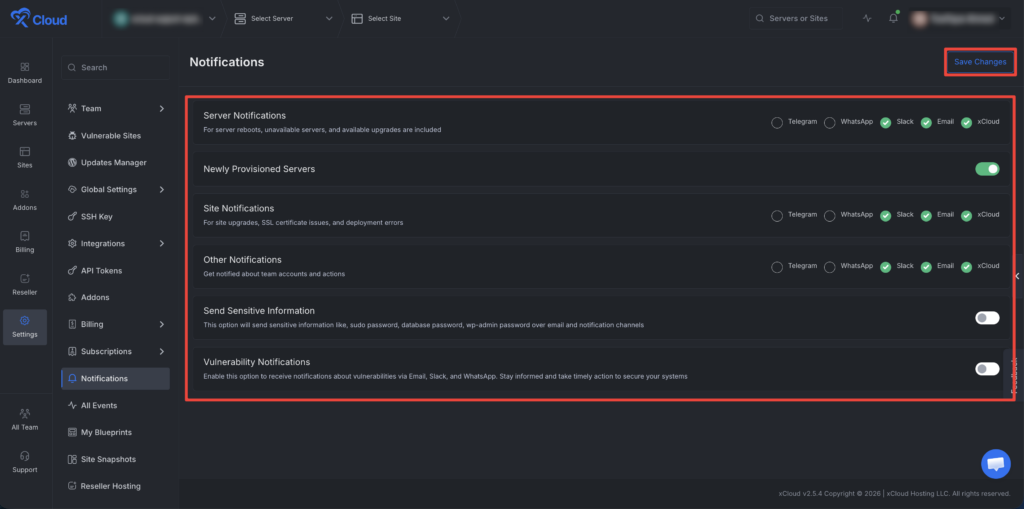
Step 6: Review Other And Vulnerability Notifications #
If you want to stop all xCloud notifications through a specific channel, review Other Notifications and Vulnerability Notifications as well.
➡️ For security-related alerts, keep at least one channel enabled if your team depends on xCloud to notify you about important issues.
Step 7: Save Your Changes #
Click Save Changes.
After saving, xCloud will update your notification preferences.
Expected Result #
After saving your settings:
- xCloud stops sending notifications through the channels you disabled.
- xCloud keeps sending notifications through any channels that remain enabled.
- Site and server workflows continue normally.
- Updates are not disabled by changing notification settings.
Recommended Setup #
If you manage many websites and want fewer messages, use one of these setups.
Reduce Email Noise #
- Turn off Email under Site Notifications.
- Turn off Email under Server Notifications if you do not want server alert emails.
- Keep one preferred channel enabled for important alerts.
Stop All xCloud Emails #
- Turn off Email in every notification section where it appears.
- Click Save Changes.
- Keep another channel enabled if your team still needs operational alerts.
Keep Only Important Security Alerts #
- Turn off nonessential channels under Site Notifications and Server Notifications.
- Keep Vulnerability Notifications enabled in your preferred channel.
- Click Save Changes.
Troubleshooting #
I still receive emails after turning off Site Notifications
Check Server Notifications, Other Notifications, and Vulnerability Notifications. Some emails may come from a different notification group.
I want no xCloud emails at all
Open the notification page and turn off Email everywhere it appears. Then click Save Changes.
I do not see the Notifications page
Your role may not allow you to manage notification preferences. Ask the team owner or an admin to review your access.
My team still needs important alerts
Keep one shared channel enabled, such as Slack or dashboard notifications, while disabling personal email alerts.
FAQ #
Can I disable notifications for all my websites from one place?
Yes. The notification page controls your xCloud notification delivery preferences, so you can reduce notification emails without opening each website individually.
Can I disable only Email and keep Slack enabled?
Yes. Notification channels are controlled separately. Turn off Email and keep Slack enabled if that is your preferred workflow.
Does this stop WordPress update emails sent directly by WordPress?
No. This only controls xCloud notifications. WordPress can also send its own automatic update emails from inside each WordPress site. To disable those emails, follow the WordPress update email notification guide.


