

How to Install & Set Up xCloud Pulse macOS Menubar
Updated June 18, 2026 · 5 min read
xCloud Pulse is the macOS companion app for xCloud. It lives in the menu bar at the top of your Mac and keeps the health of your sites and servers one click away, so you can check on everything without opening a browser. xCloud Pulse monitors site health, SSL, backups, vulnerabilities, and server status, and it can notify you when something needs attention.
Follow the step-by-step guide to download and install the xCloud Pulse app, create an xCloud API token, connect the app to your account, set your refresh schedule, and read your dashboard. The whole process takes only a few minutes.
Before You Begin
xCloud Pulse runs on:
- macOS 14.0 (Sonoma) or later
- An Apple Silicon (M-series) Mac
You will also need:
- An active xCloud account
- Permission to create an API token in that account
Collect the xCloud API Token
Step 1: Generate an API Token
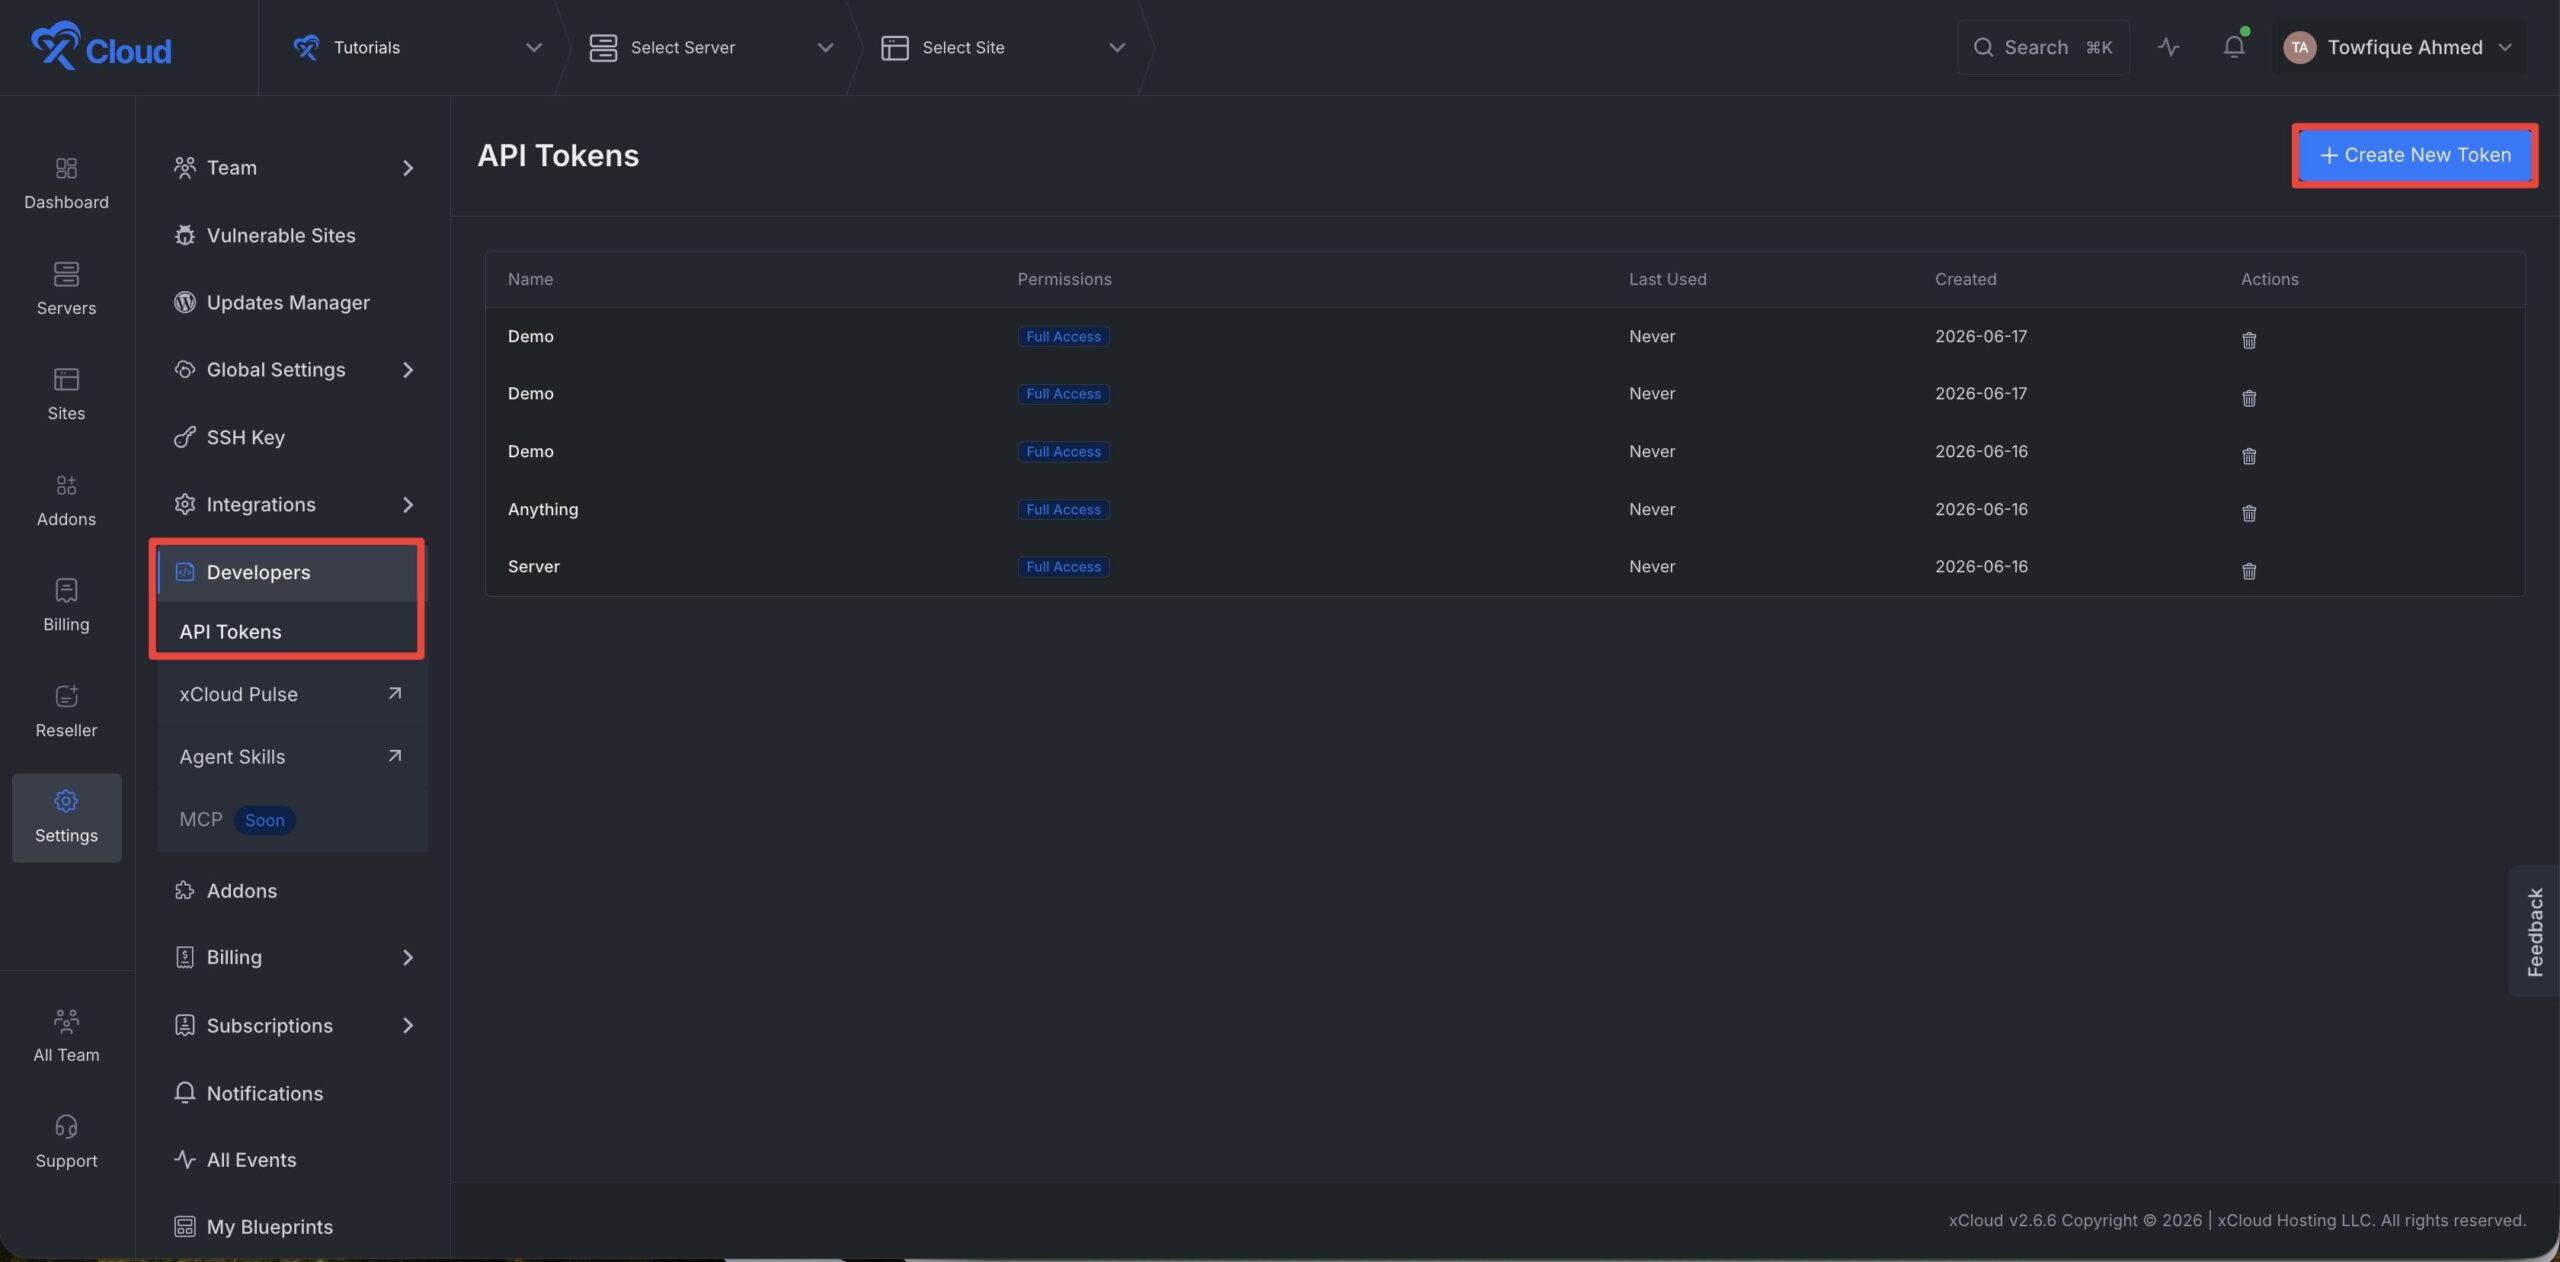
First, go to your xCloud dashboard. Navigate to the left-hand sidebar menu, select Settings, and then click on the ‘Developers’ option from the left side menu and click on the ‘API Tokens’ option. Within the API tokens interface, click the Create New Token button.
Step 2: Configure Token Name and Permissions
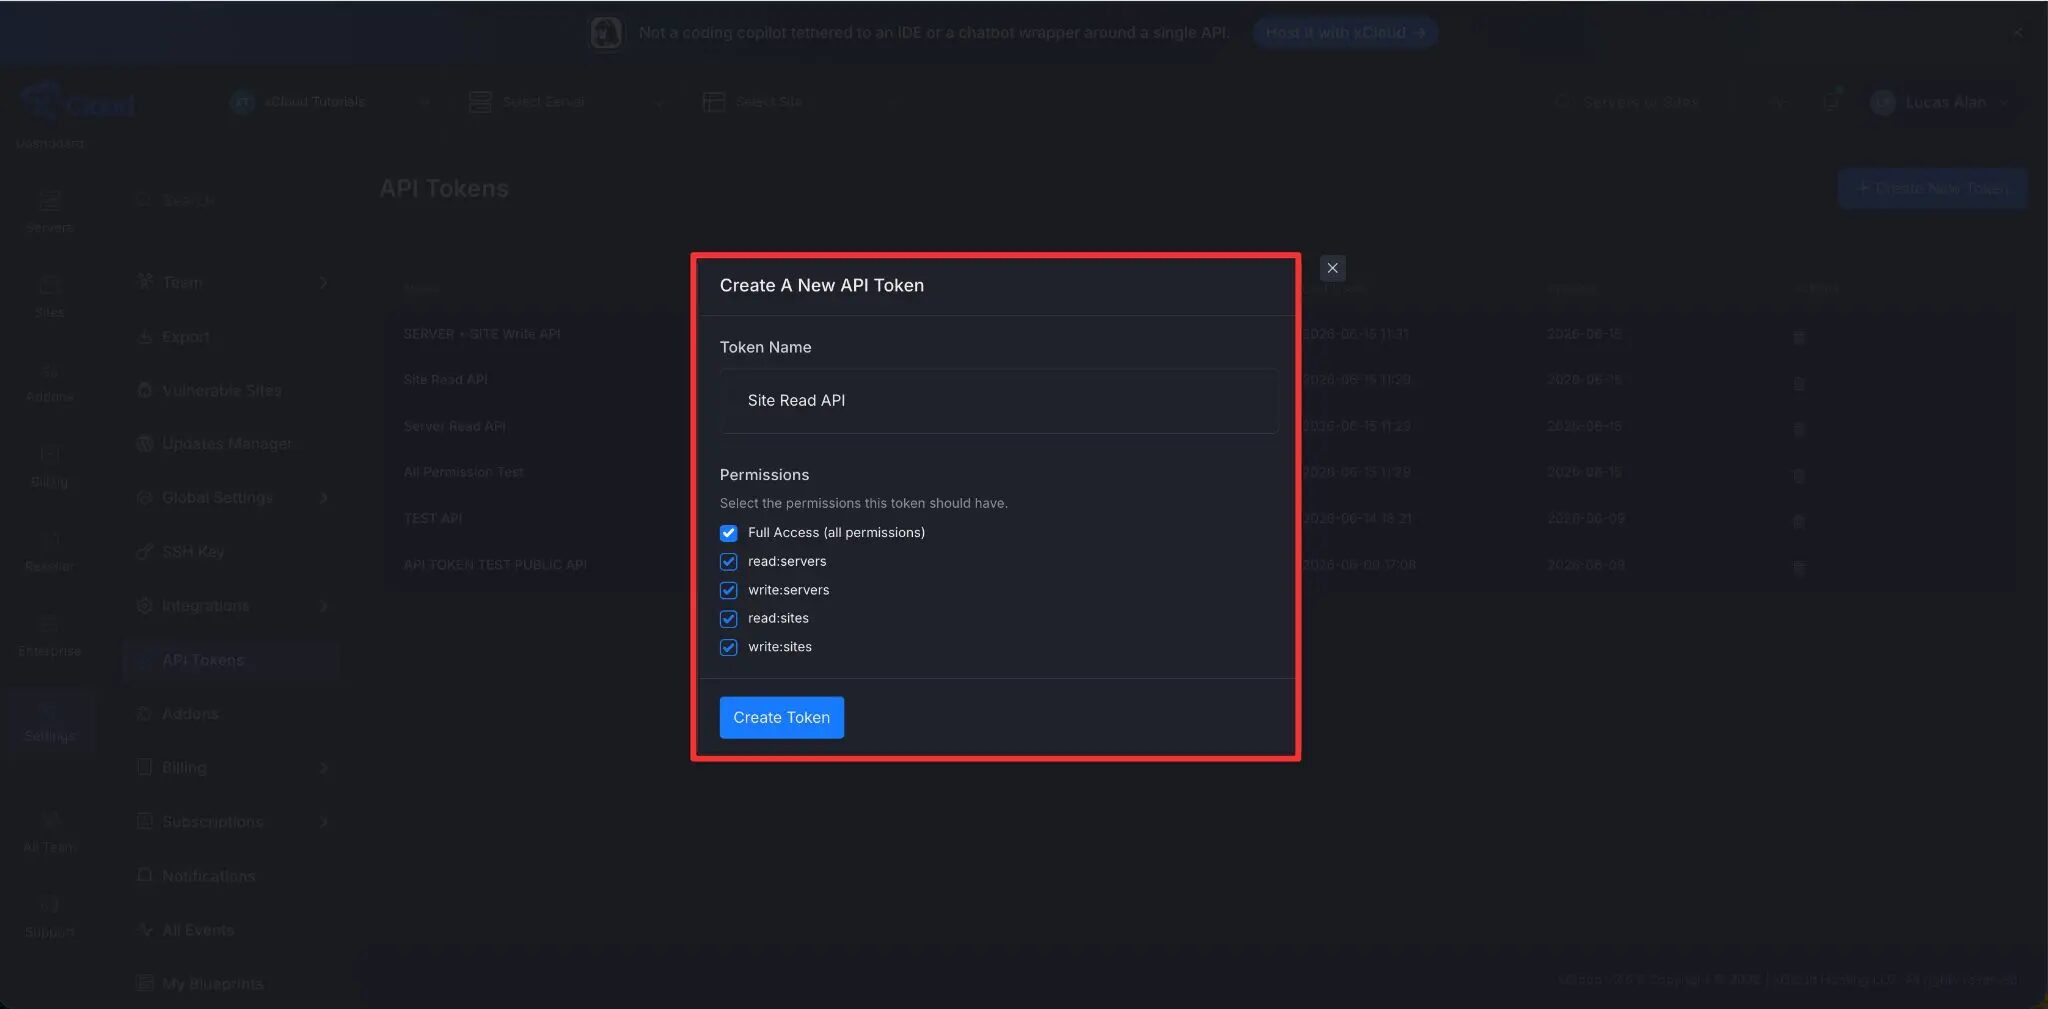
A pop-up will appear. Enter a descriptive name for your token and select the appropriate permissions:
- Full Access (all permissions)
- read:servers
- write:servers
- read:sites
- write:sites
Once configured, click Create Token. After creation, your token will be displayed. Copy and store it in a secure location immediately, as you will need it for future authentication.
Set up Your MacOS Menubar
Step 1: Download the MacOS Menubar
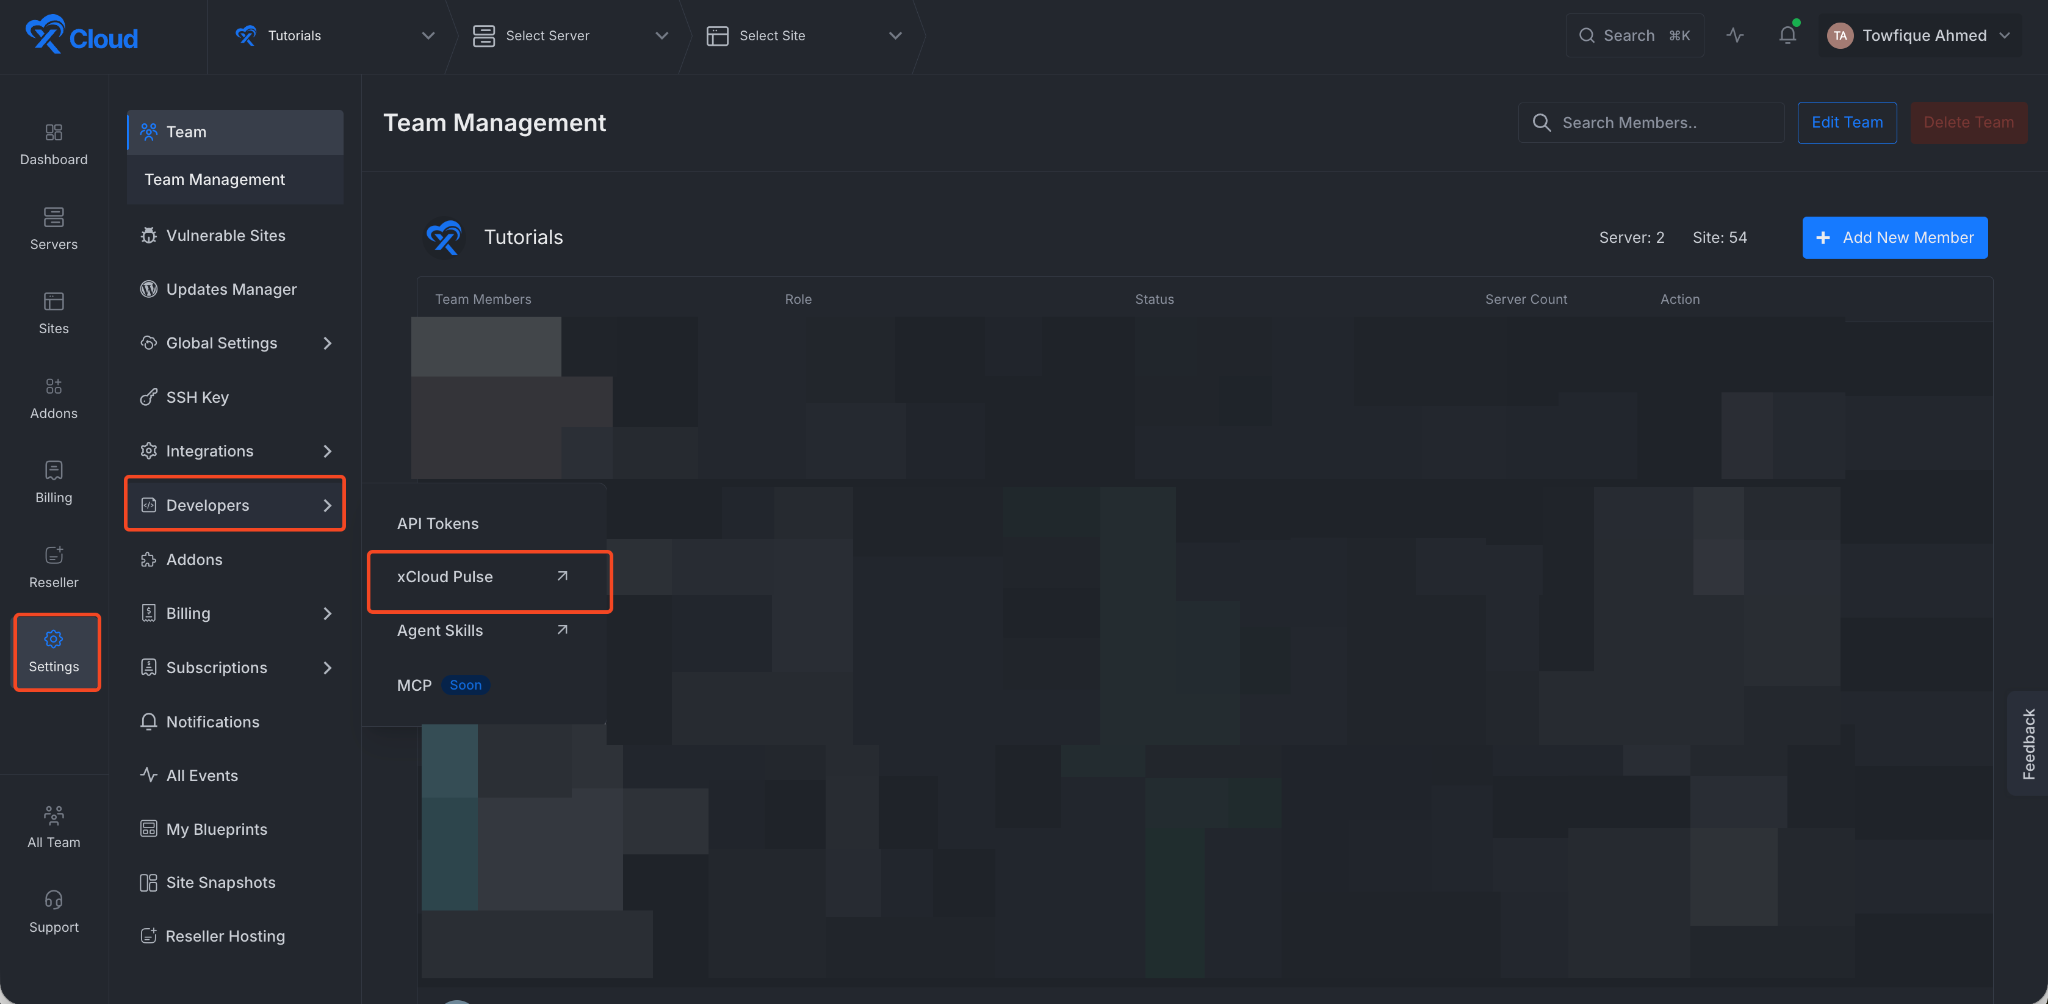
Then go to the Settings → Developers option from the xCloud dashboard. Now click on the xCloud Pulse from the menu.
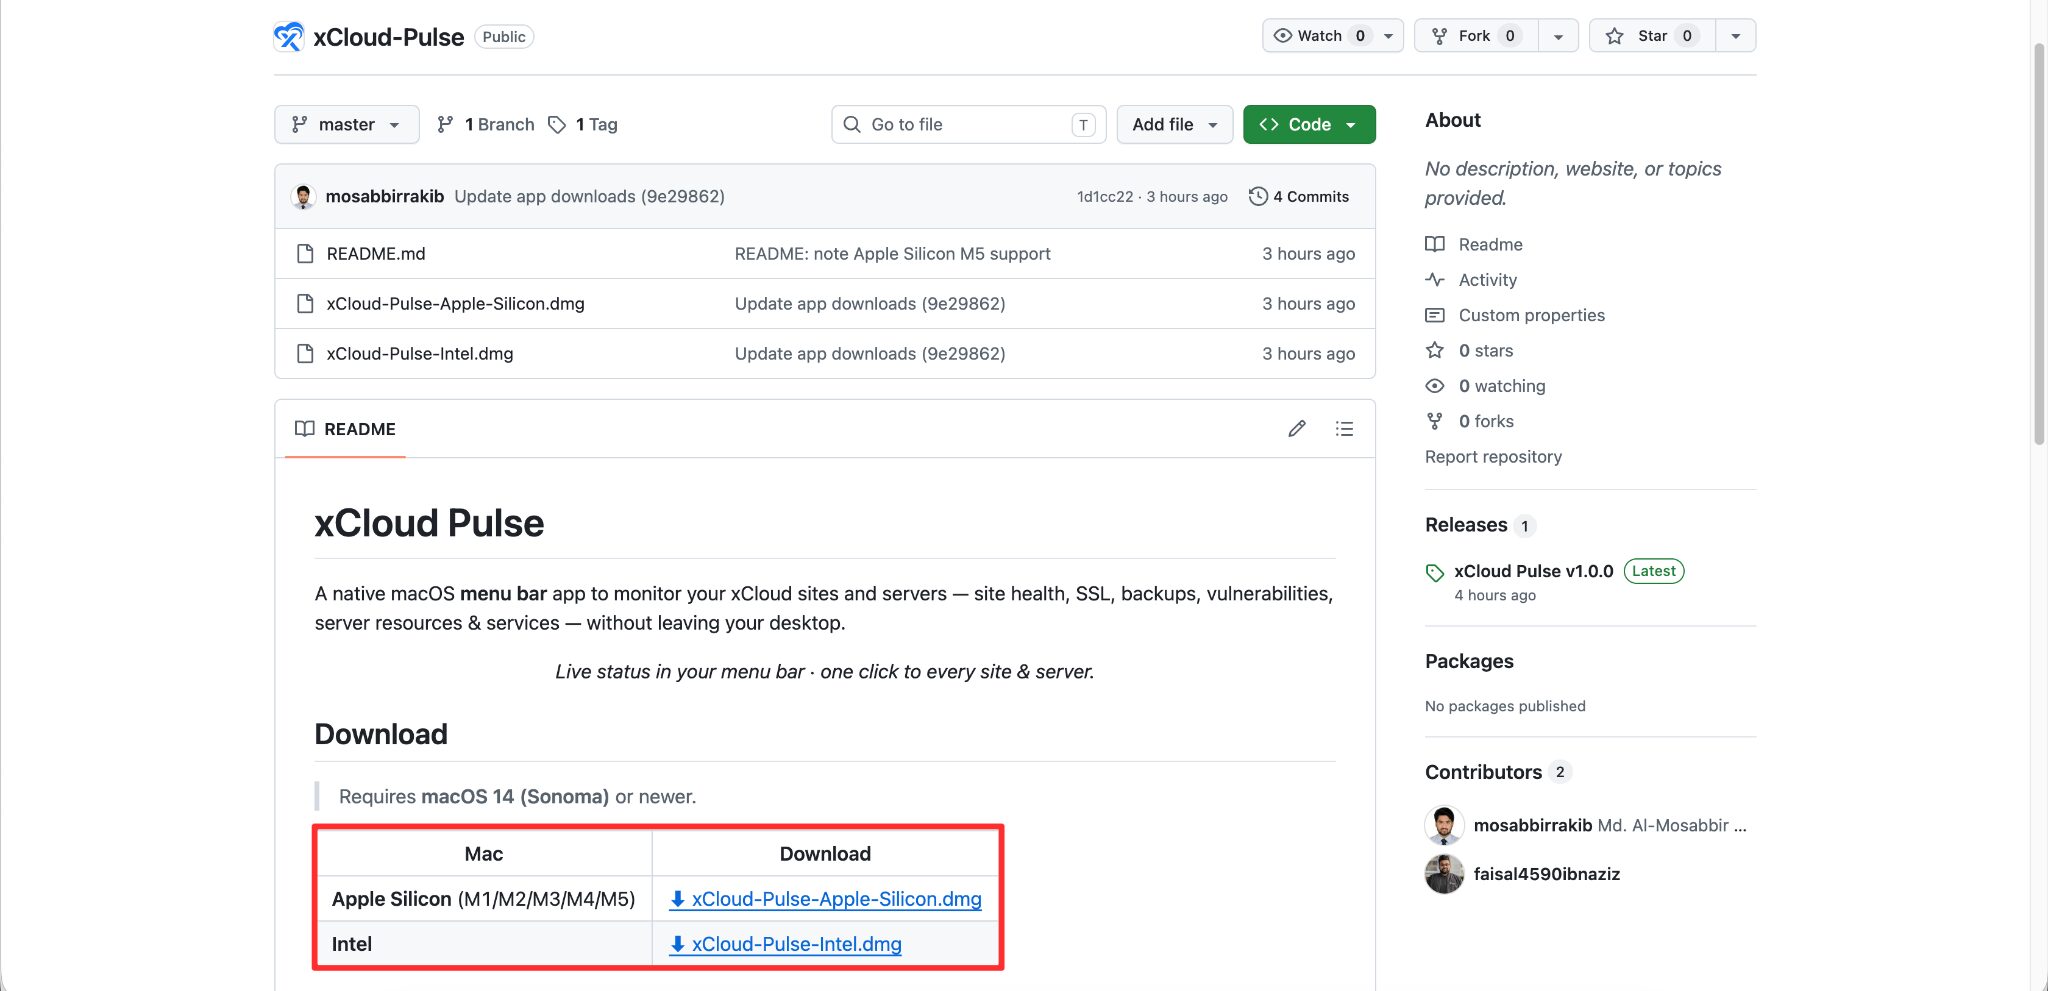
You will be redirected to the Git repository, then download xCloud Pulse for macOS according to your device OS version.
Open the downloaded .dmg file, then drag the xCloud Pulse icon into your Applications folder. Open xCloud Pulse from your Applications folder. Once the app is running, the xCloud Pulse icon appears in the macOS menu bar at the top-right of your screen.
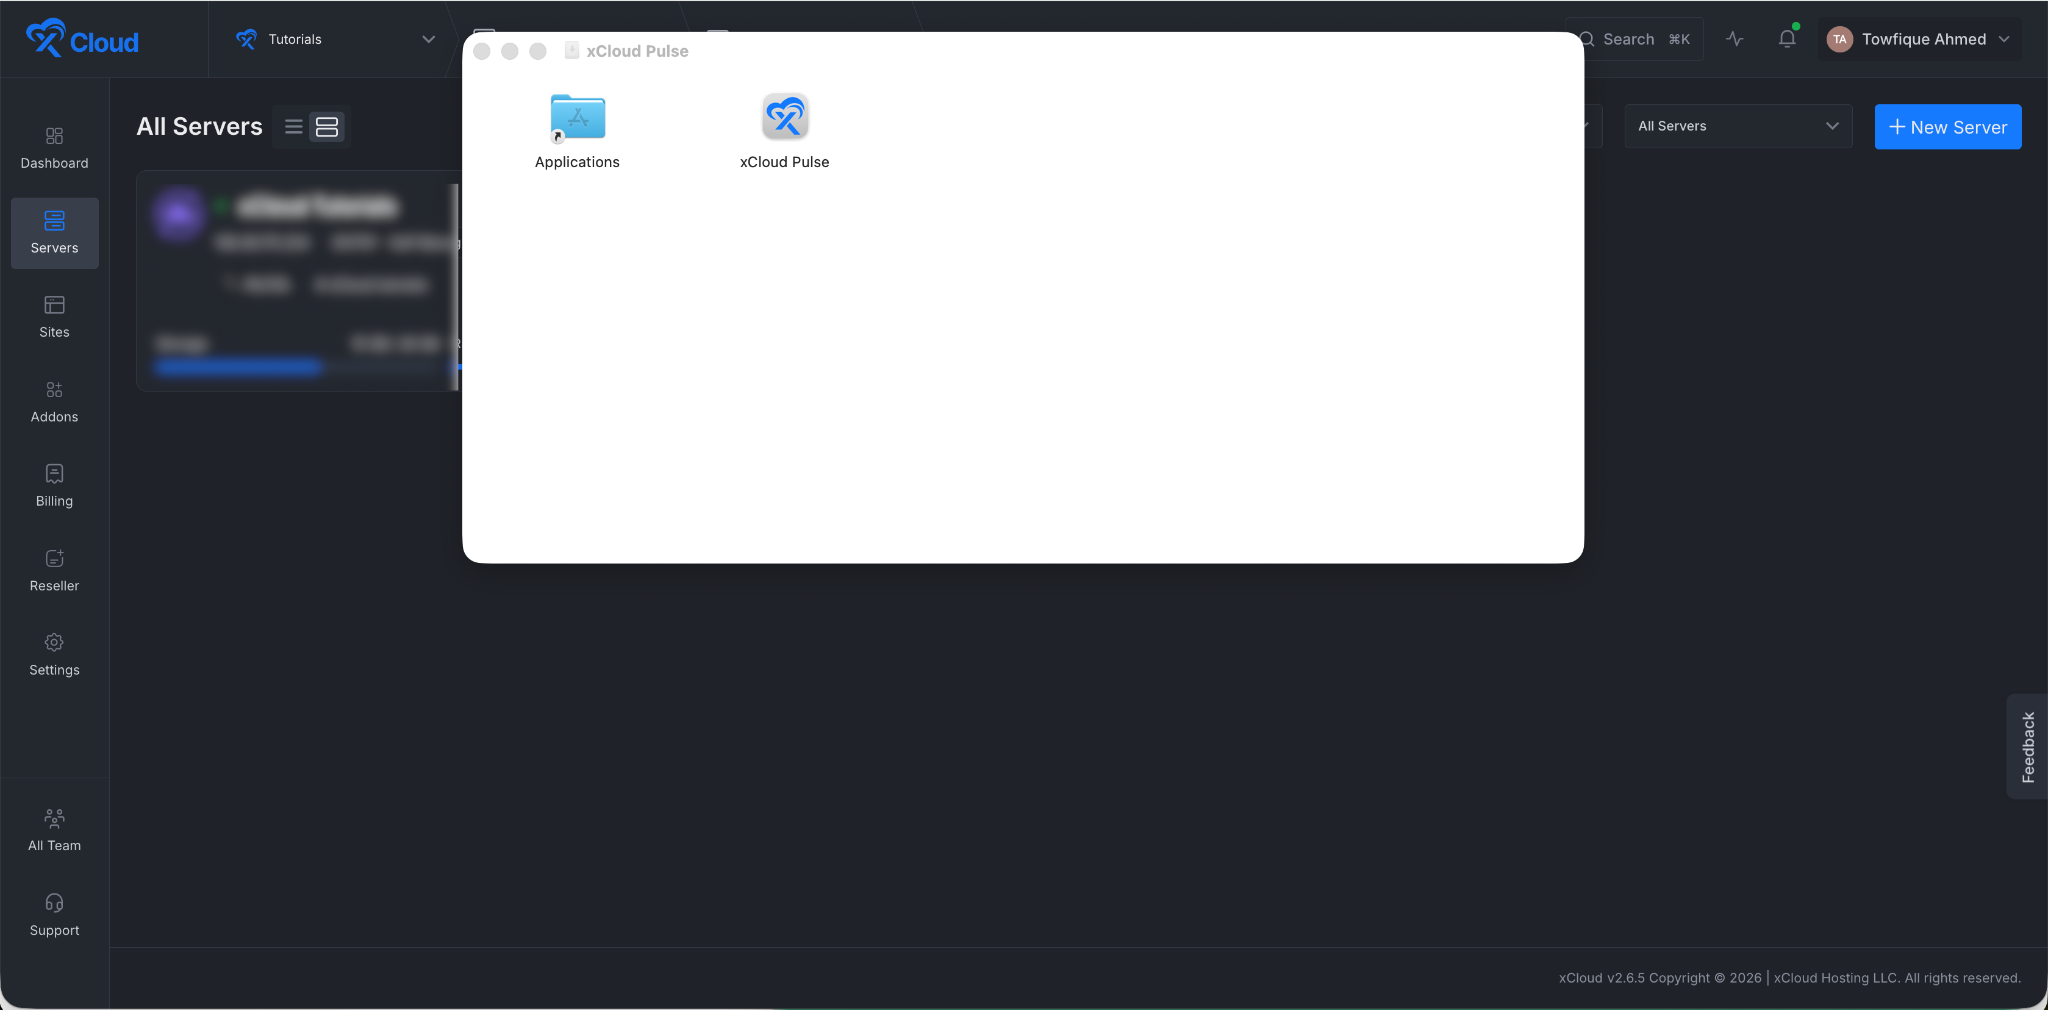
🔖 Allow Security Settings Permissions From Your macOS Device
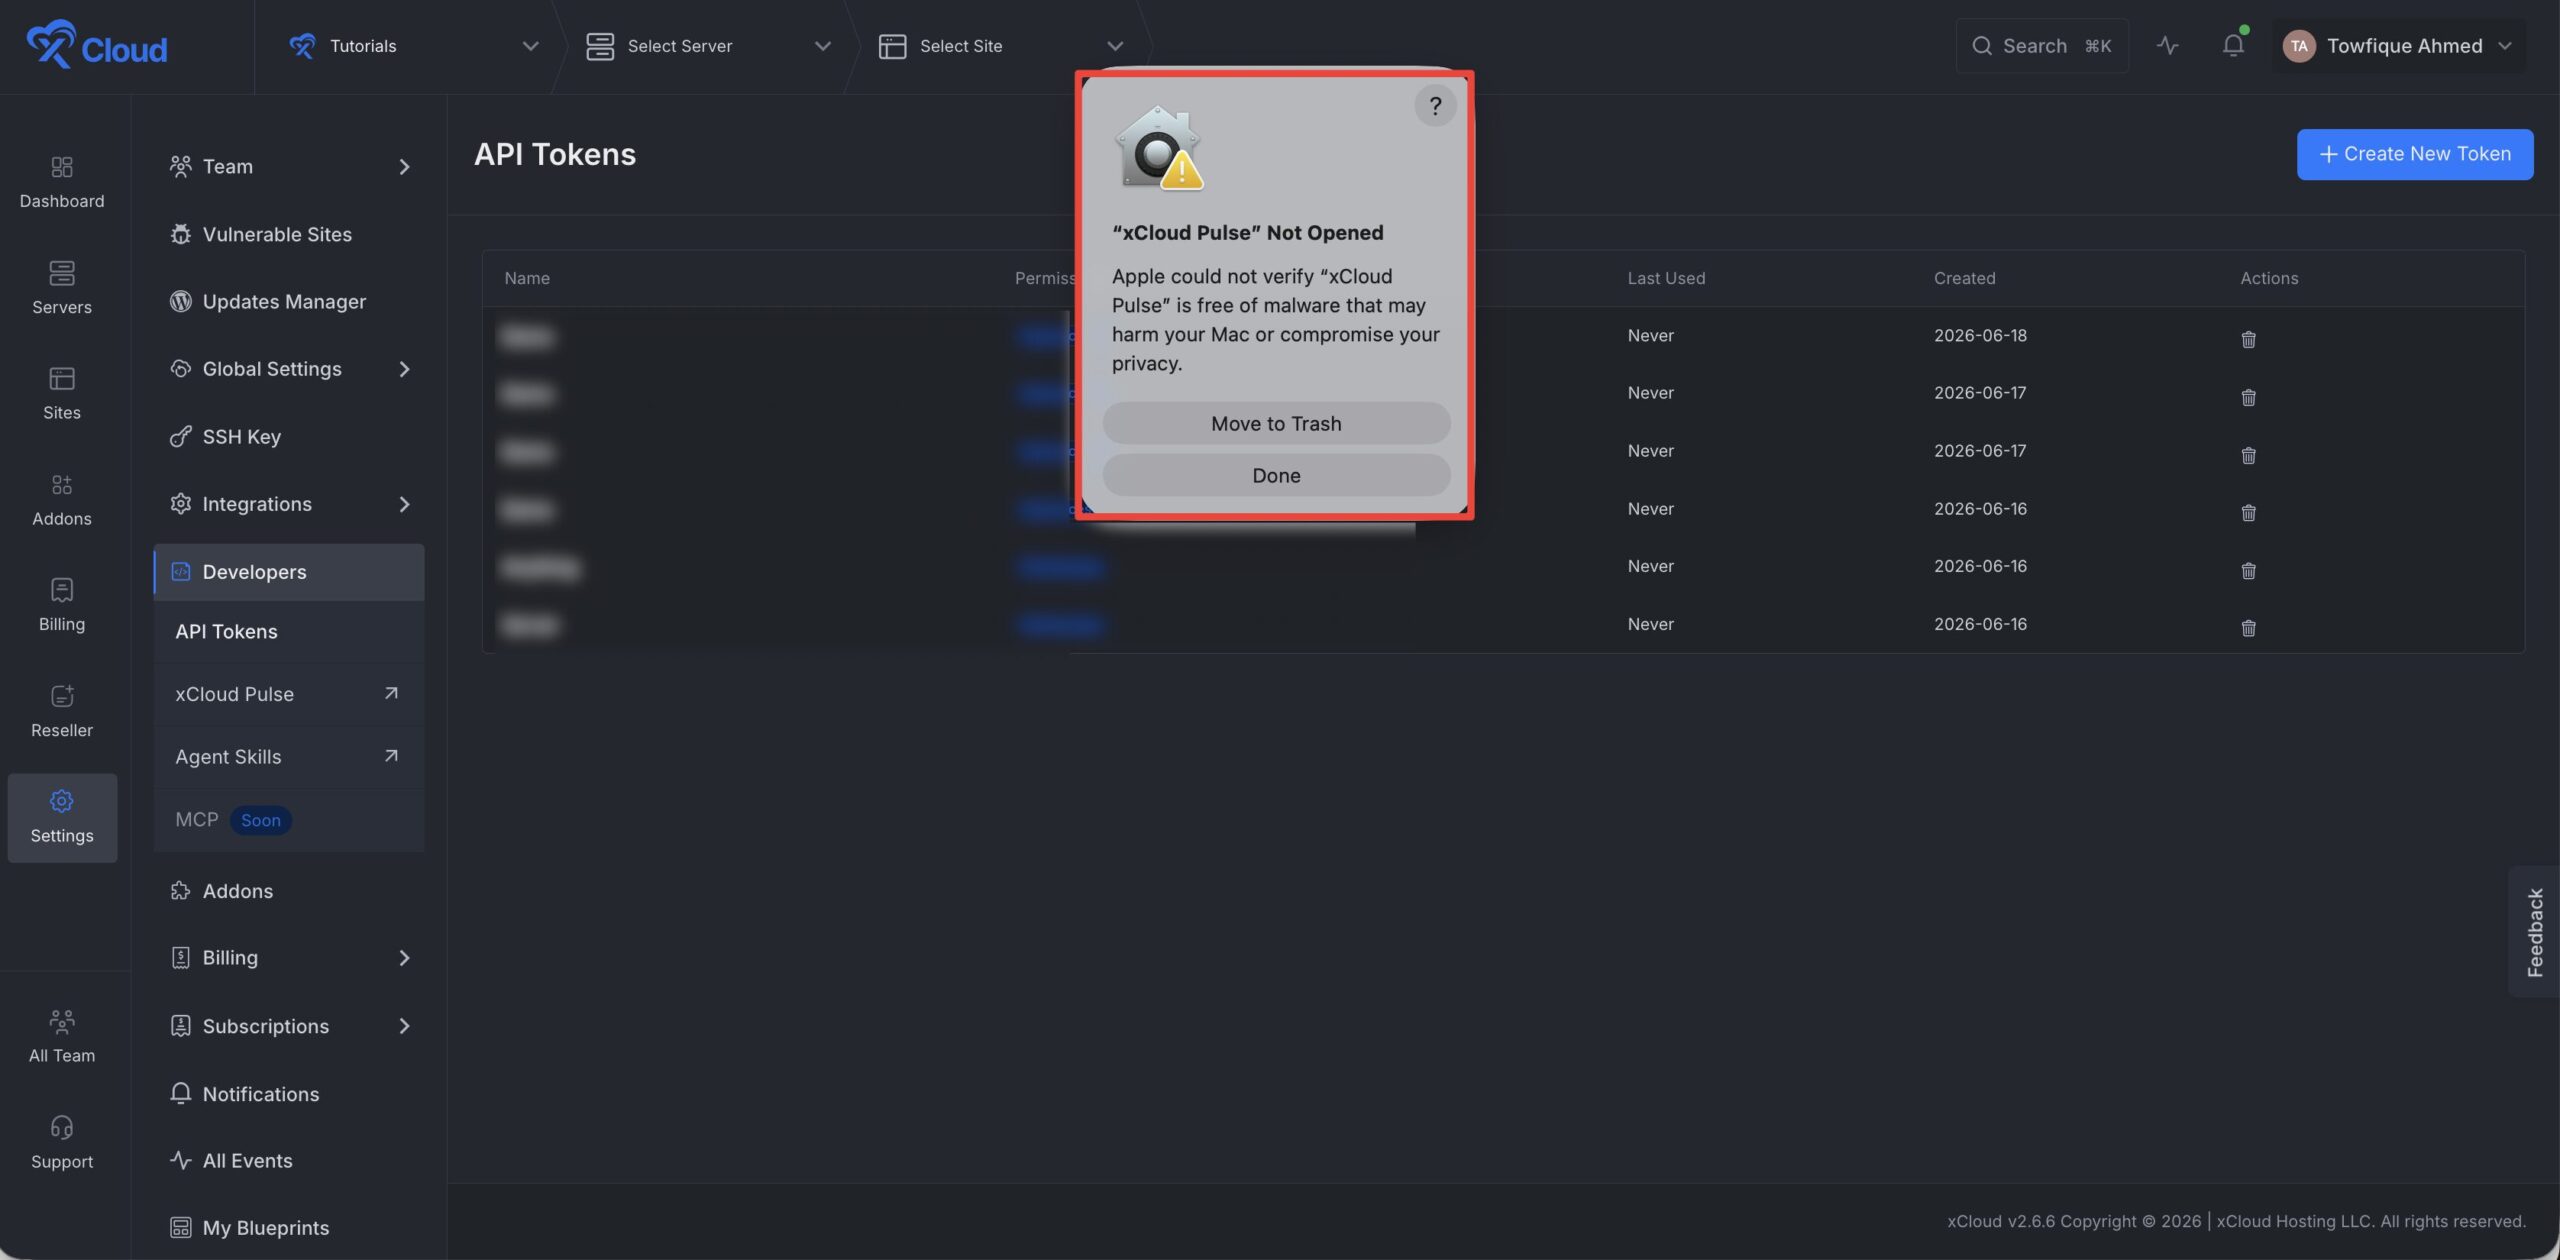
After installing xCloud Pulse and opening it for the first time, you may find that the application does not immediately appear in your macOS menu bar, but rather shows a security concern.
This is a macOS security feature that requires manual approval for applications downloaded outside of the App Store. To proceed, click the Done button in the warning pop-up.
Note: You must click Done before approving the application manually. If you close the pop-up without clicking Done, the approval option will not appear in your Mac’s Security Settings, and you will not be able to grant permission to the application manually.
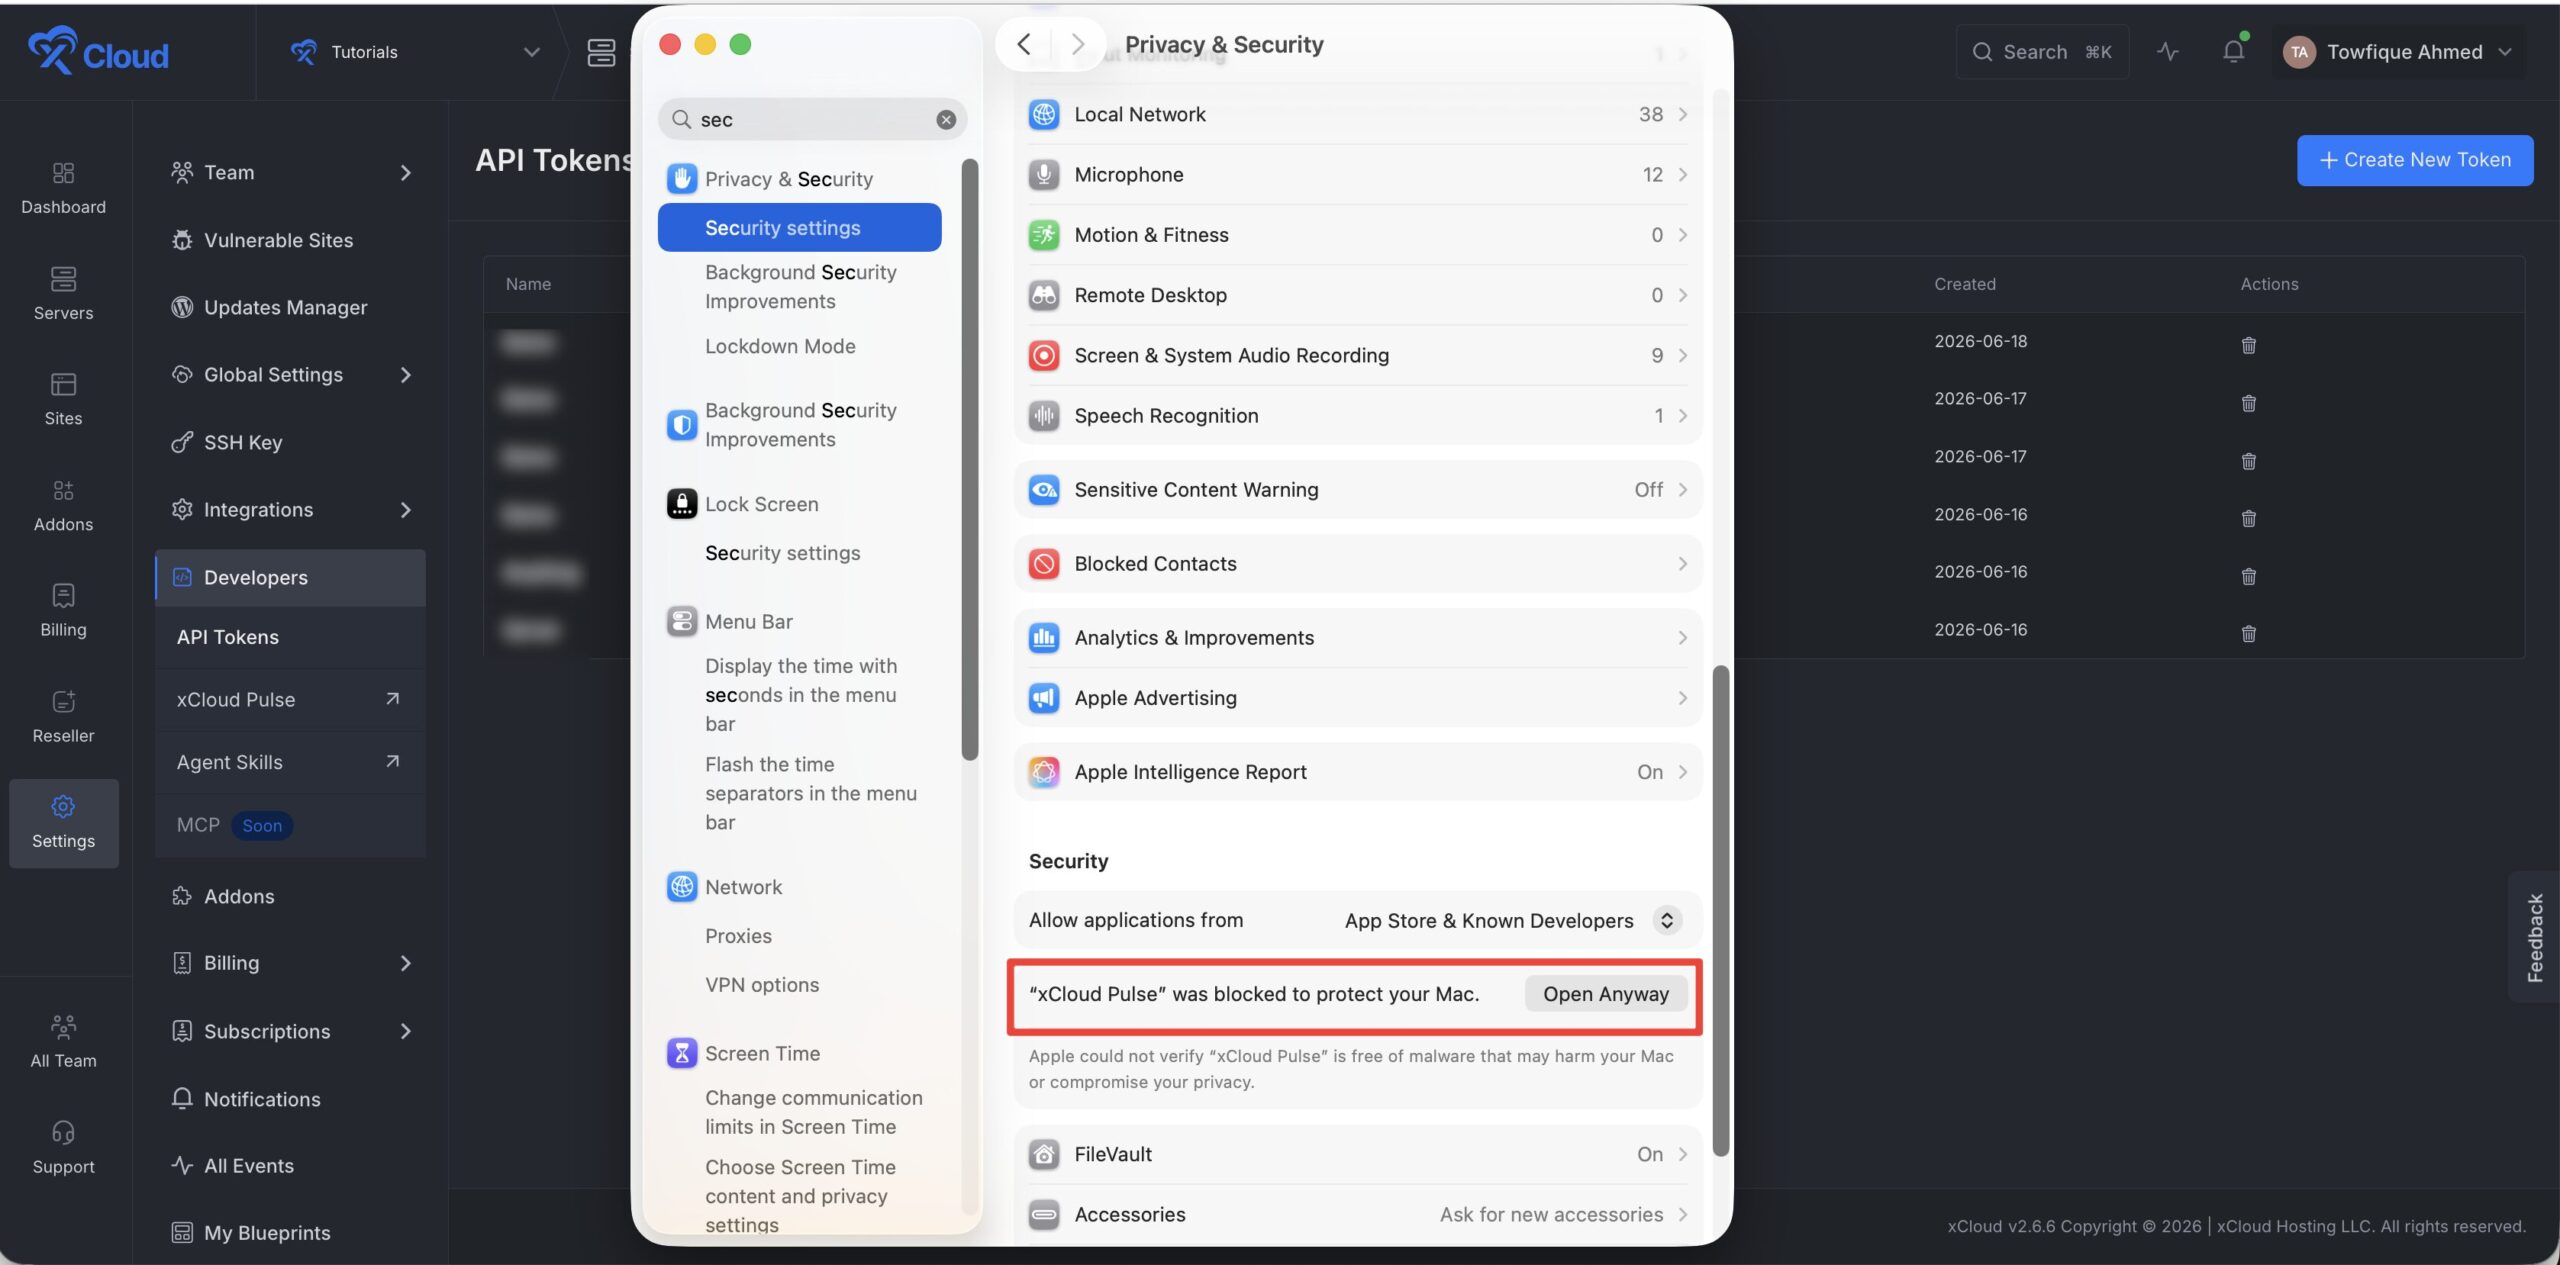
Next, go to allow xCloud Pulse, open System Settings on your Mac, and search for the Privacy & Security option. Then scroll down to the Security section, where you may see a message indicating that xCloud Pulse was blocked from opening. Click Open Anyway to approve the application.
Mac will ask you to authenticate using your password or Touch ID. Follow the on-screen prompts to confirm that you want to allow the application to run. Once the approval process is complete, launch xCloud Pulse again from your Applications folder.
After the application starts successfully, the xCloud Pulse icon will appear in the macOS menu bar at the top-right corner of your screen. You can then continue with the setup process by connecting your xCloud account using your API token.
Step 2: Configure the Menubar
Then click on the xCloud icon from your dashboard menu bar. It will instantly open the xCloud Pulse Menu bar.
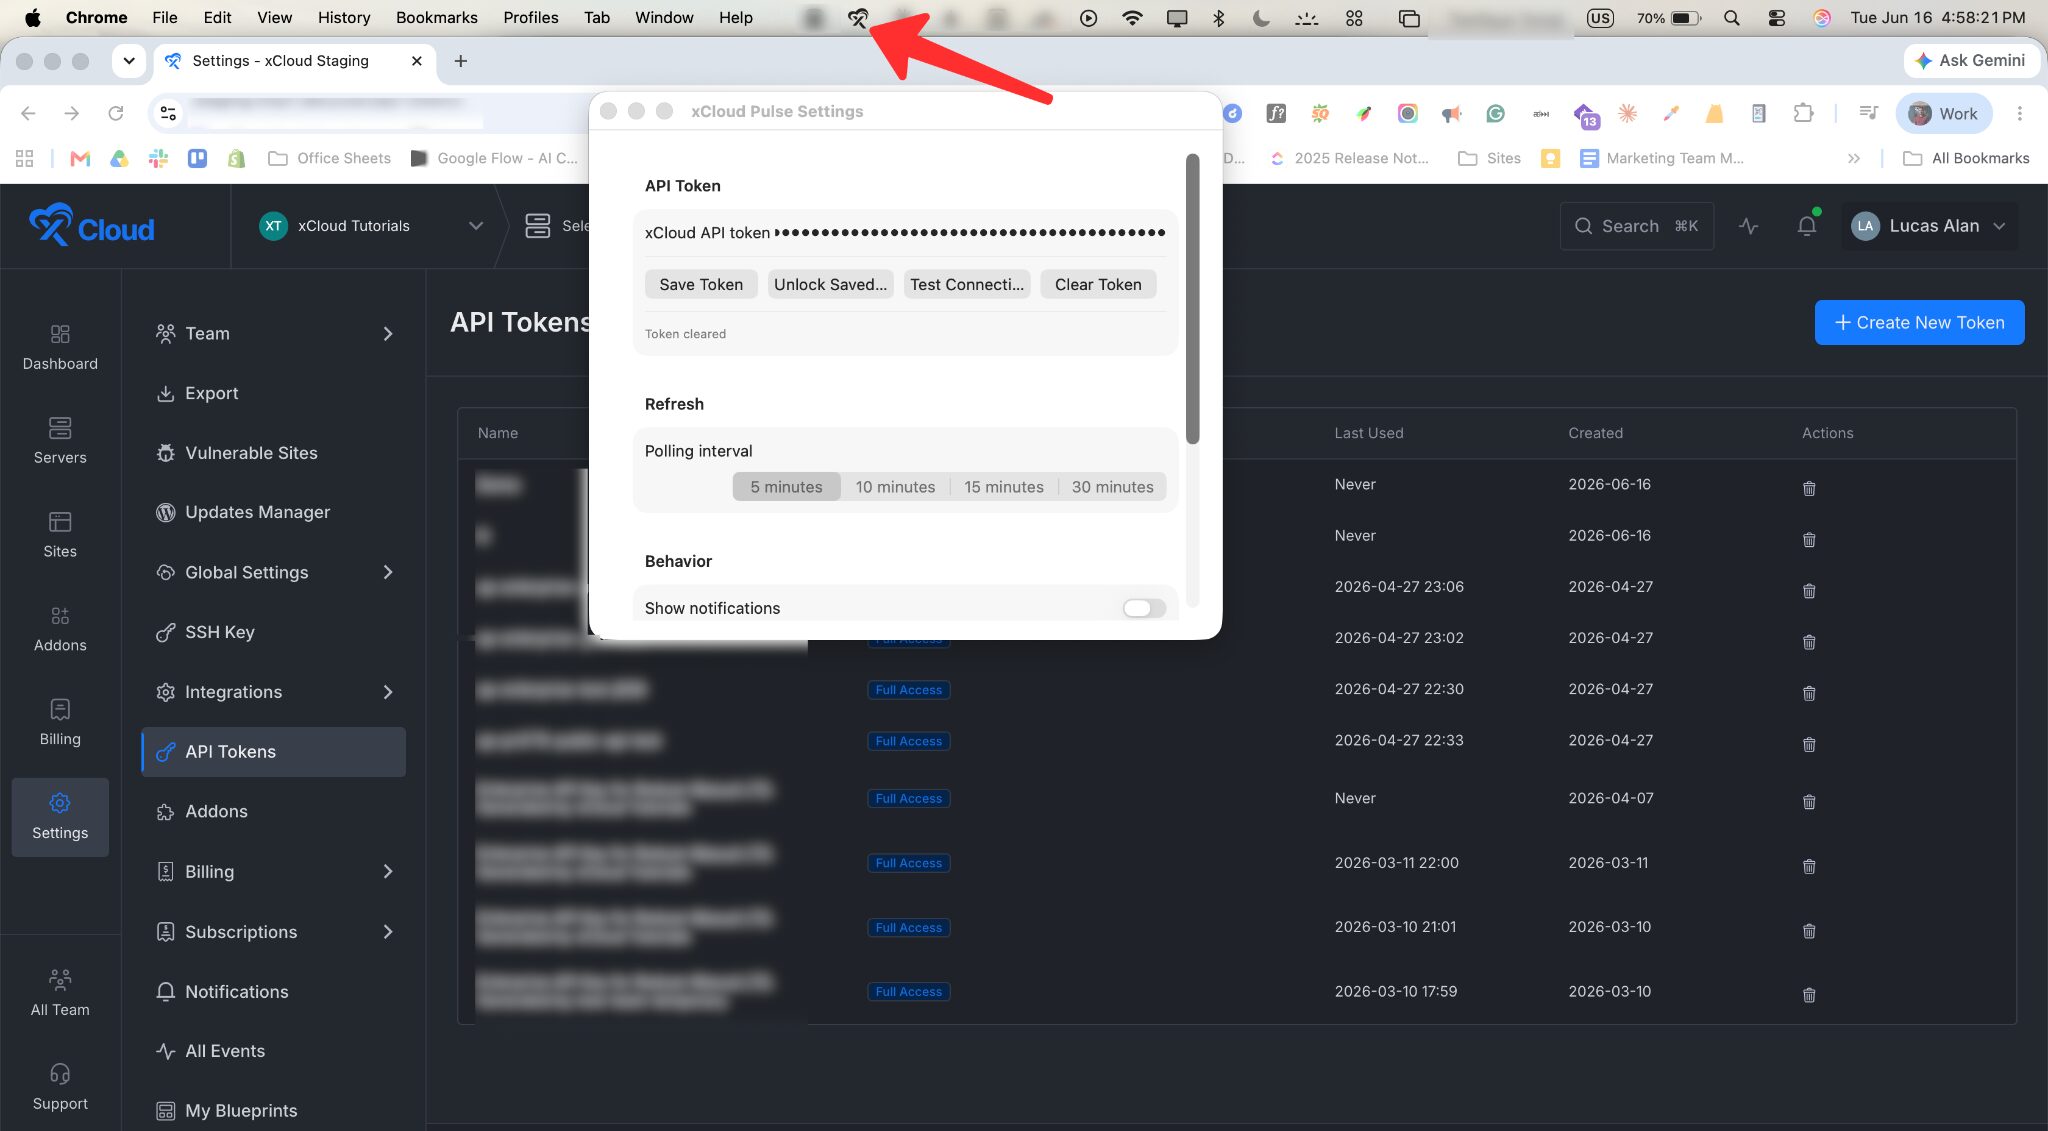
Then enter the xCloud API token in the dedicated field. Click on the ‘Save Token’ button and click on the ‘Test Connection’ button.
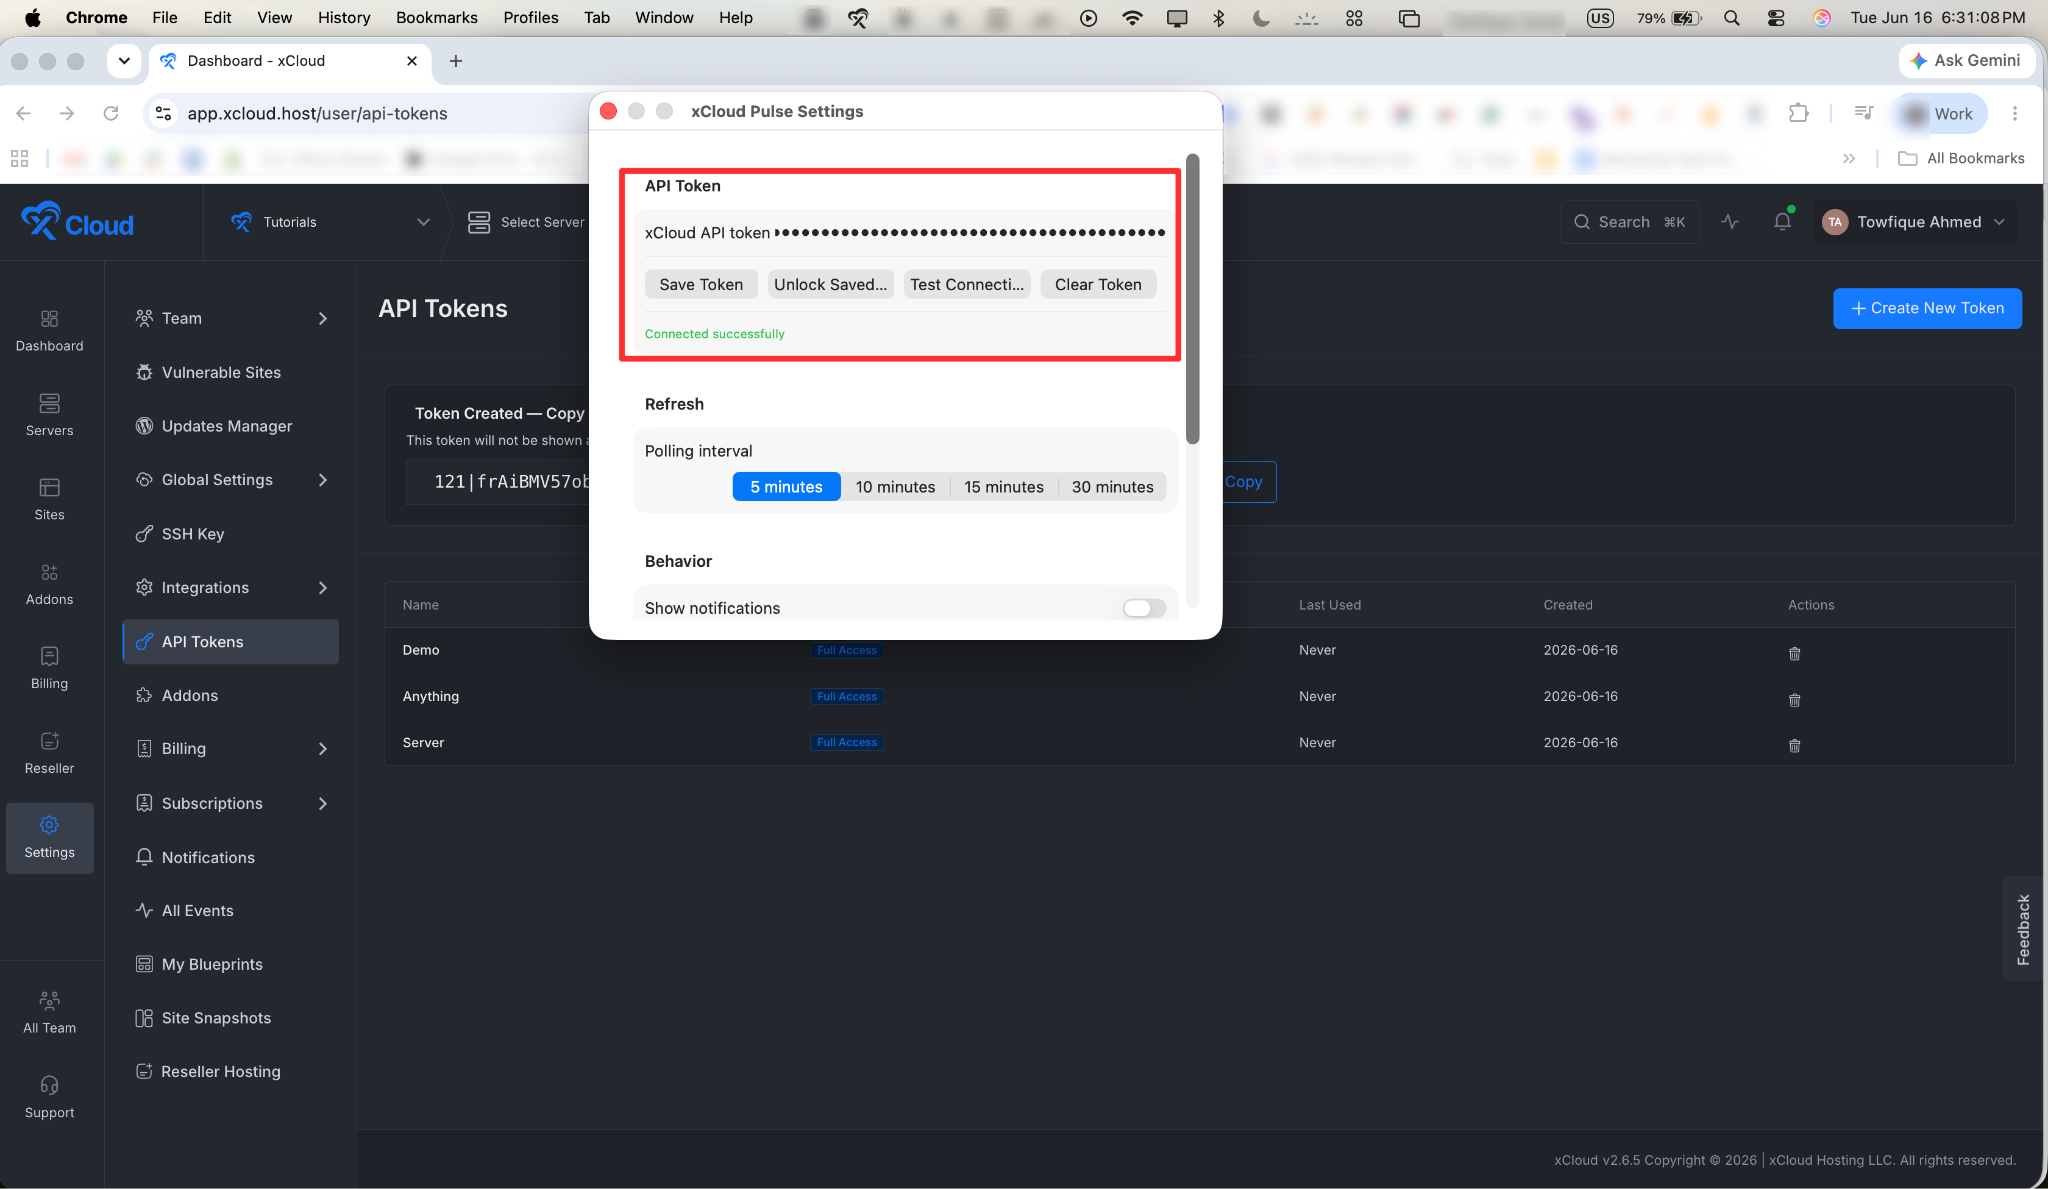
Step 4: Set Your Refresh Schedule and Behavior
Under Polling Interval, choose how often the app refreshes your data. The options are 5, 10, 15, or 30 minutes. Adjust the notification and behavior settings to match your preferences.
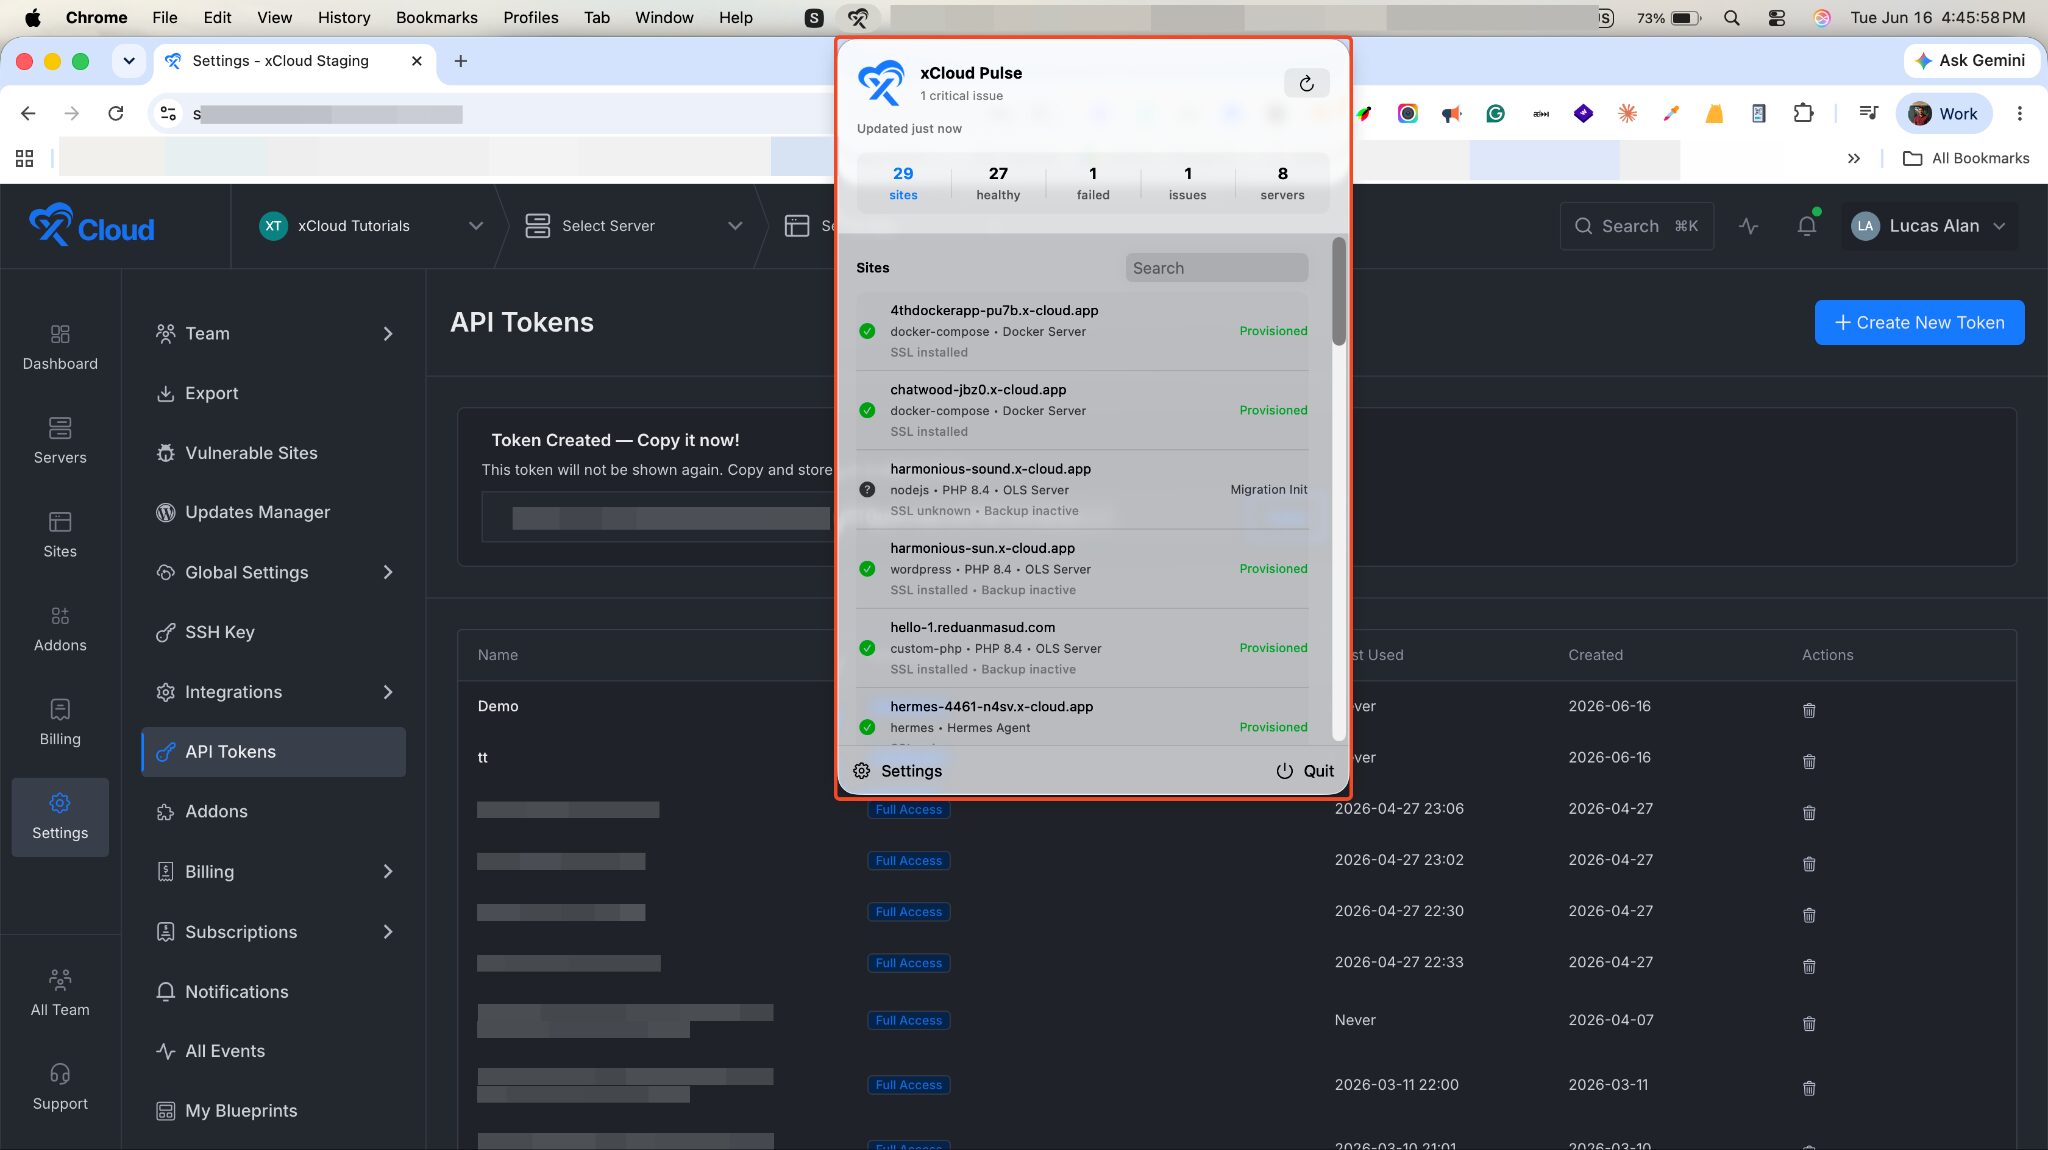
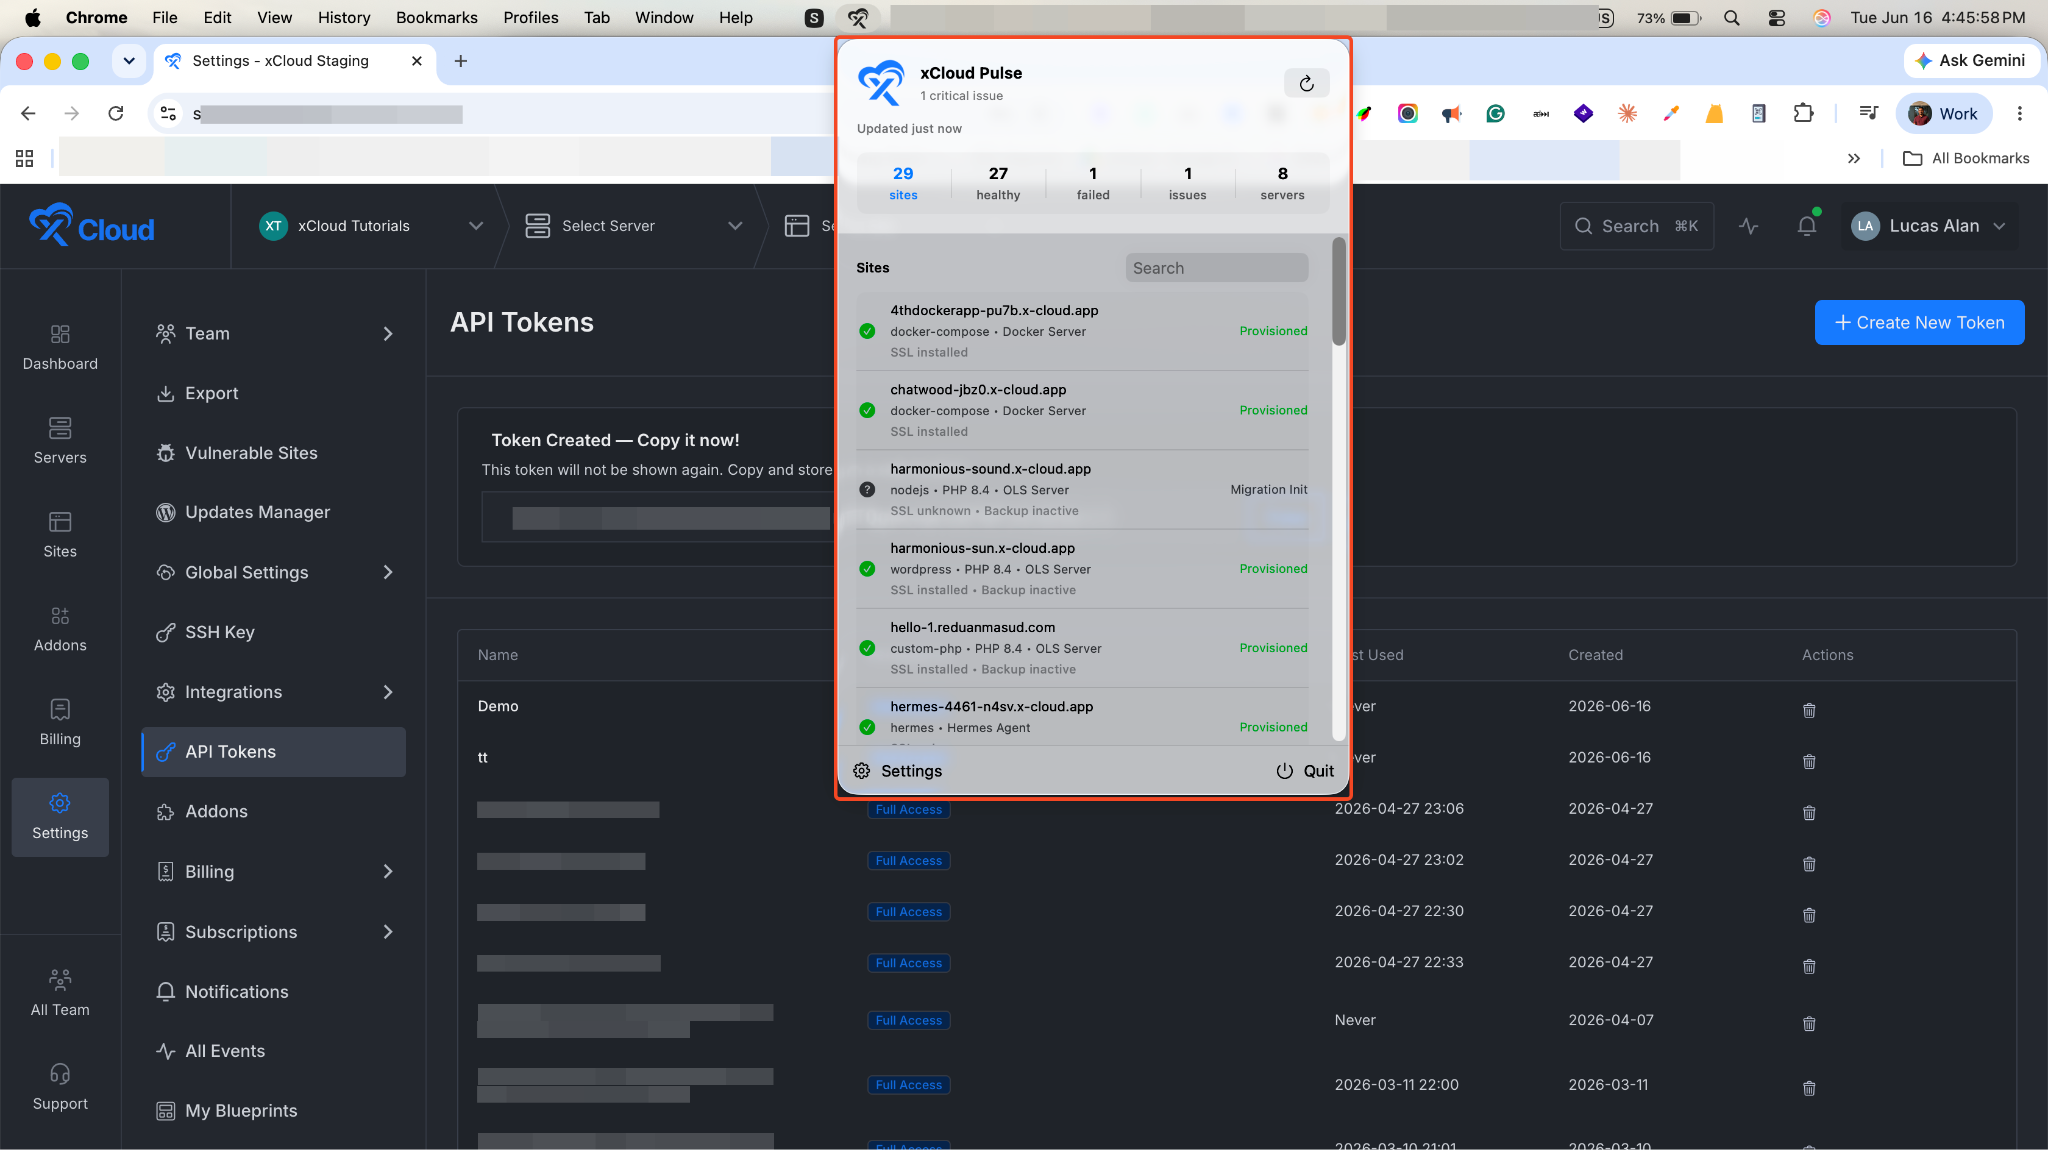
Click the xCloud Pulse icon to open the menu. The Overview shows your totals at a glance: the number of sites, the number of servers, overall health, and any open issues.
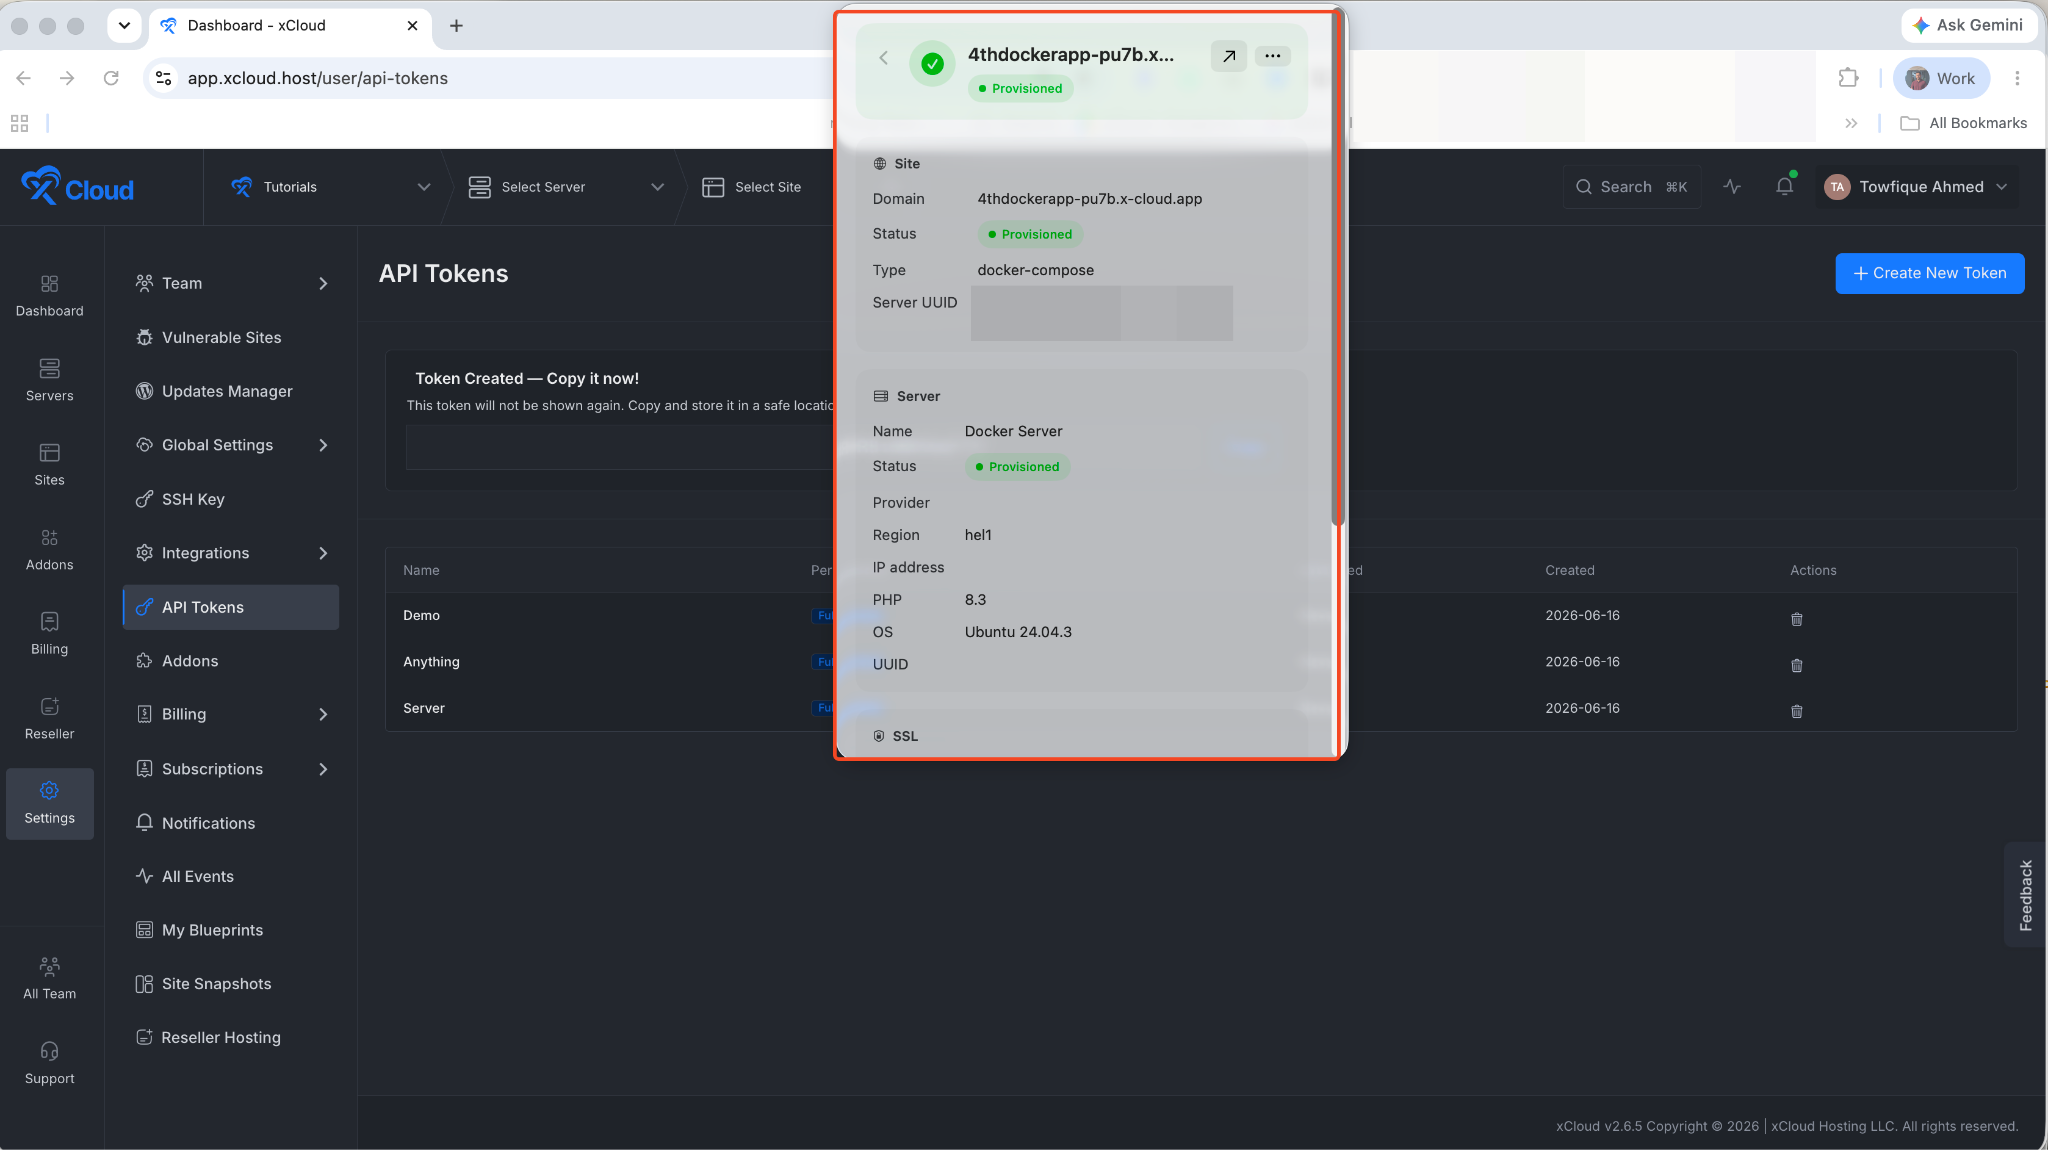
For example, go to the Sites, Issues tab for more details. Click any site to see its full details, or click the arrow next to a site to open it in xCloud directly from the app.
And that’s it; this is how easily you can download and configure the xCloud Pulse app in just a few clicks.
That is all it takes. In just a few minutes, xCloud Pulse puts your sites and servers in your menu bar and keeps them one click away.
From here, xCloud Pulse watches site health, SSL, backups, vulnerabilities, and server status for you, and it lets you know when something needs attention. You can change your settings at any time by opening the app and selecting Settings. Welcome to a simpler way to keep an eye on everything you run on xCloud.