

How to Install Ghost with xCloud (One Click Apps)
Updated September 27, 2026 · 3 min read
Ghost is an open-source publishing platform built for blogs, newsletters, memberships, and creator websites. It is fast, clean, and focused on writing rather than page building, which makes it a strong choice for anyone who wants to publish and grow an audience without the overhead of a general-purpose CMS.
With xCloud’s One Click Apps, you can deploy Ghost without touching the server. xCloud provisions the container, configures Nginx, and issues the SSL certificate for you.
Follow the guide to install Ghost with xCloud with One Click Apps. Let’s get started.
Step 1: Create a Docker+ NGINX Server
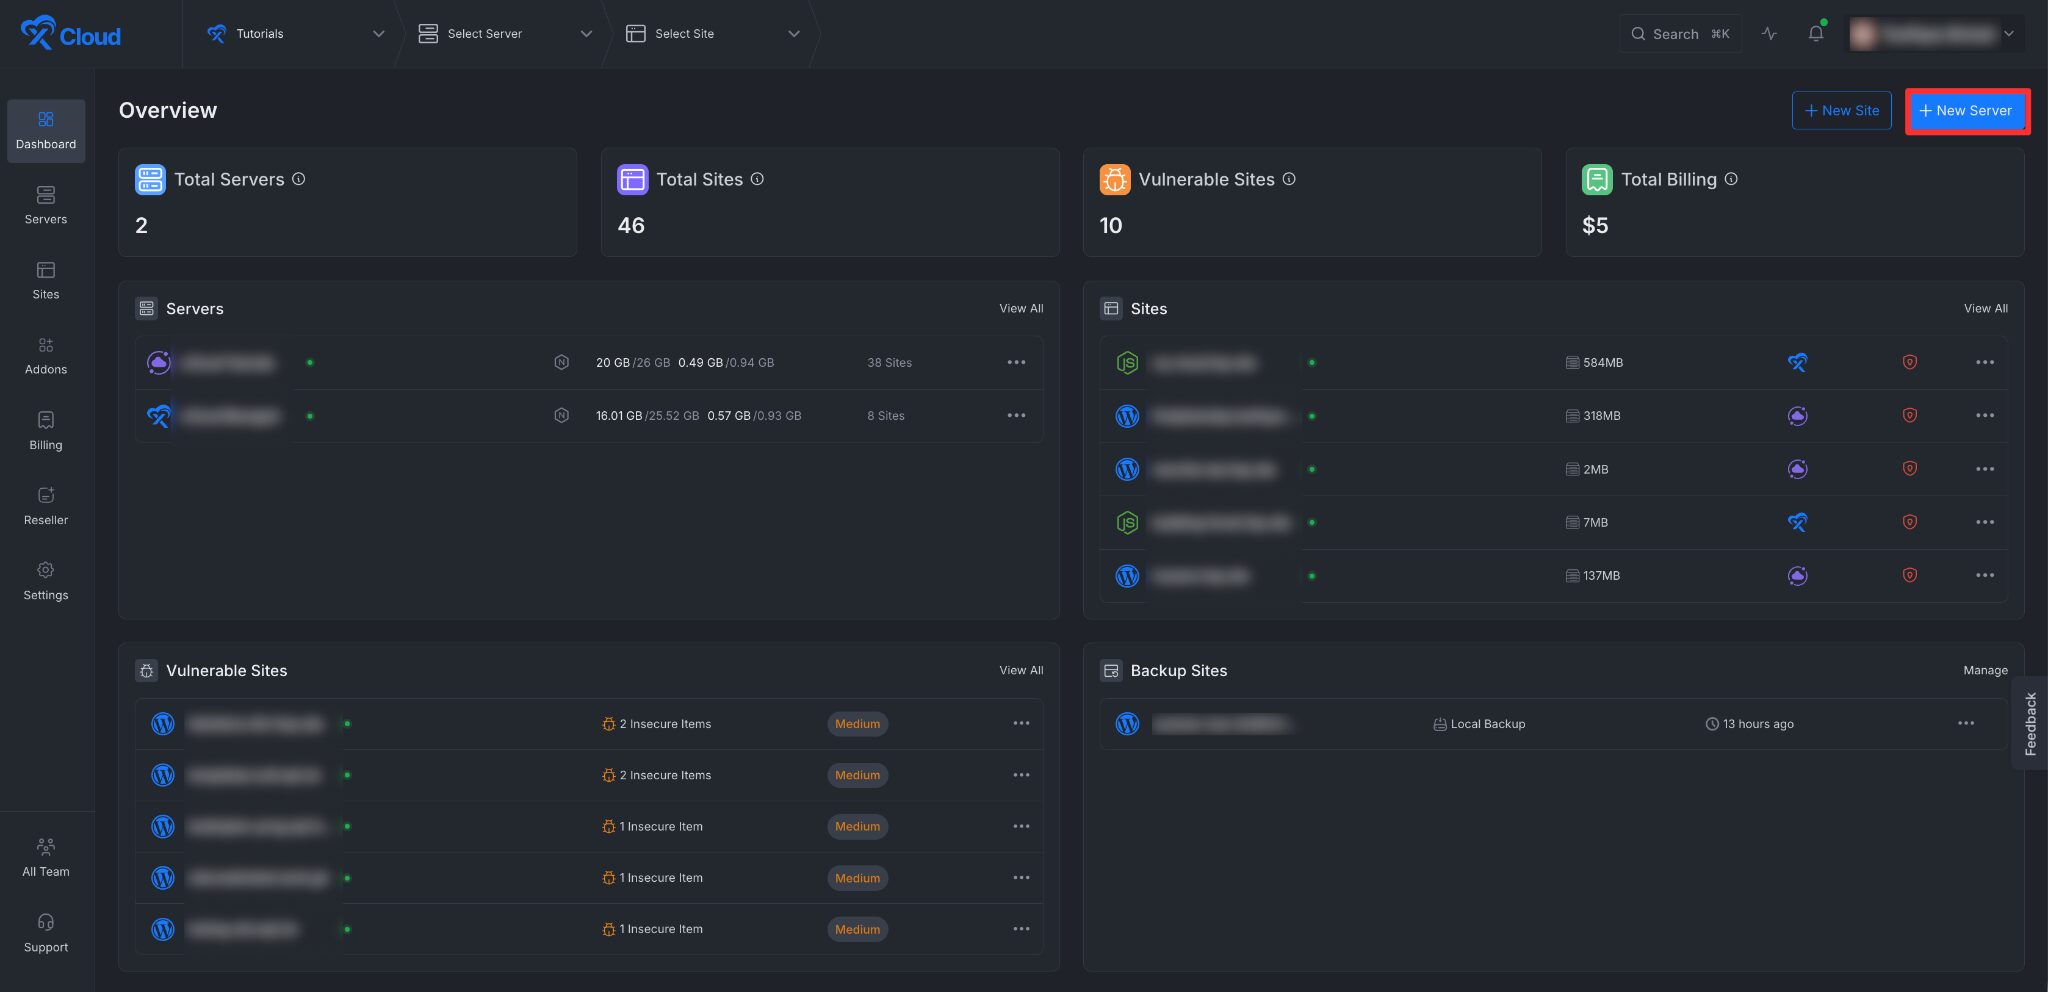
First, create a Docker server to deploy Ghost. Click the ‘New Server’ button on the dashboard and enter all the necessary credentials to connect your server. You can deploy Ghost either on your own server or on an xCloud server.
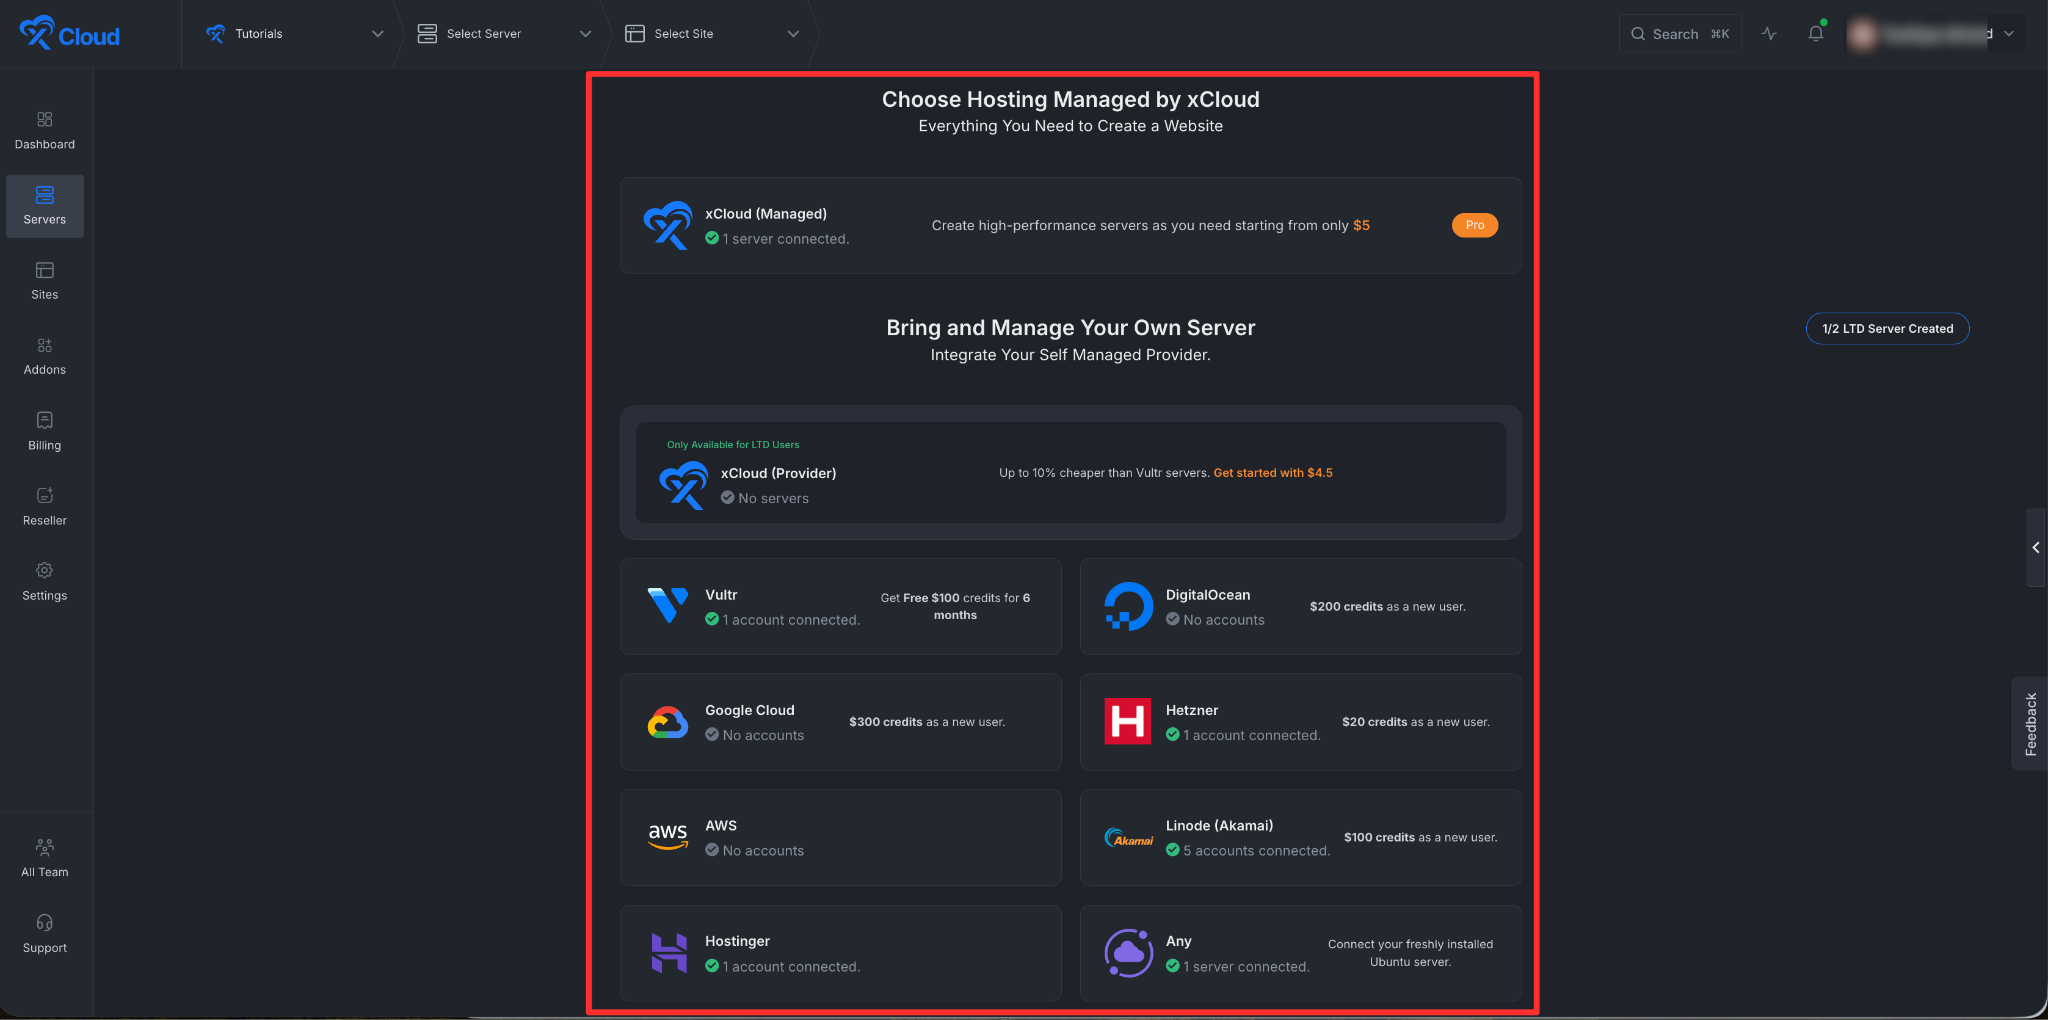
Next, choose your server provider to deploy the server with xCloud. You can either use an xCloud Managed Server or select your preferred provider. In this guide, we’ll use the xCloud Managed Server.
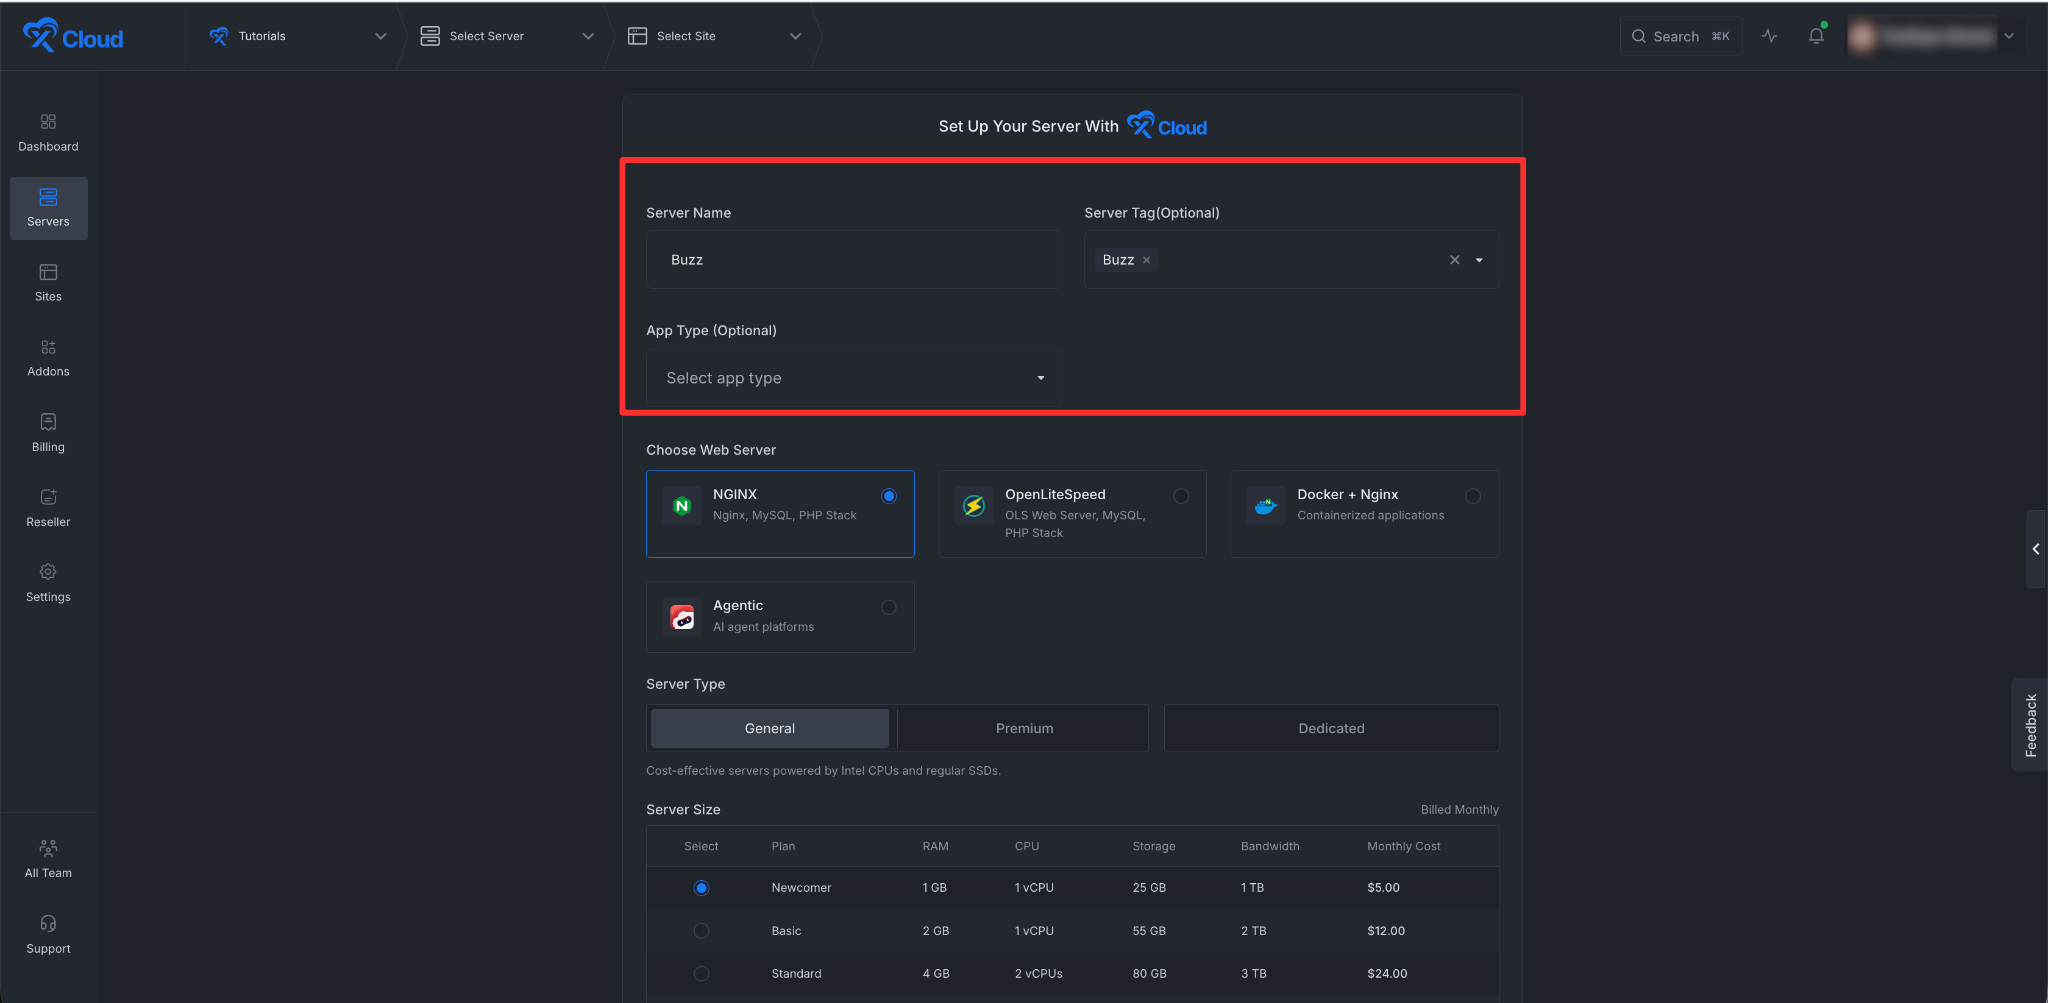
Afterward, enter the ‘Server Name’, set the ‘App Type’ to Ghost(it is optional to select), and add any relevant ‘Tags’ to help identify your server later.
Next, you can see the ‘Docker + NGINX’ stack is already selected, which is mandatory for deploying the Ghost application.
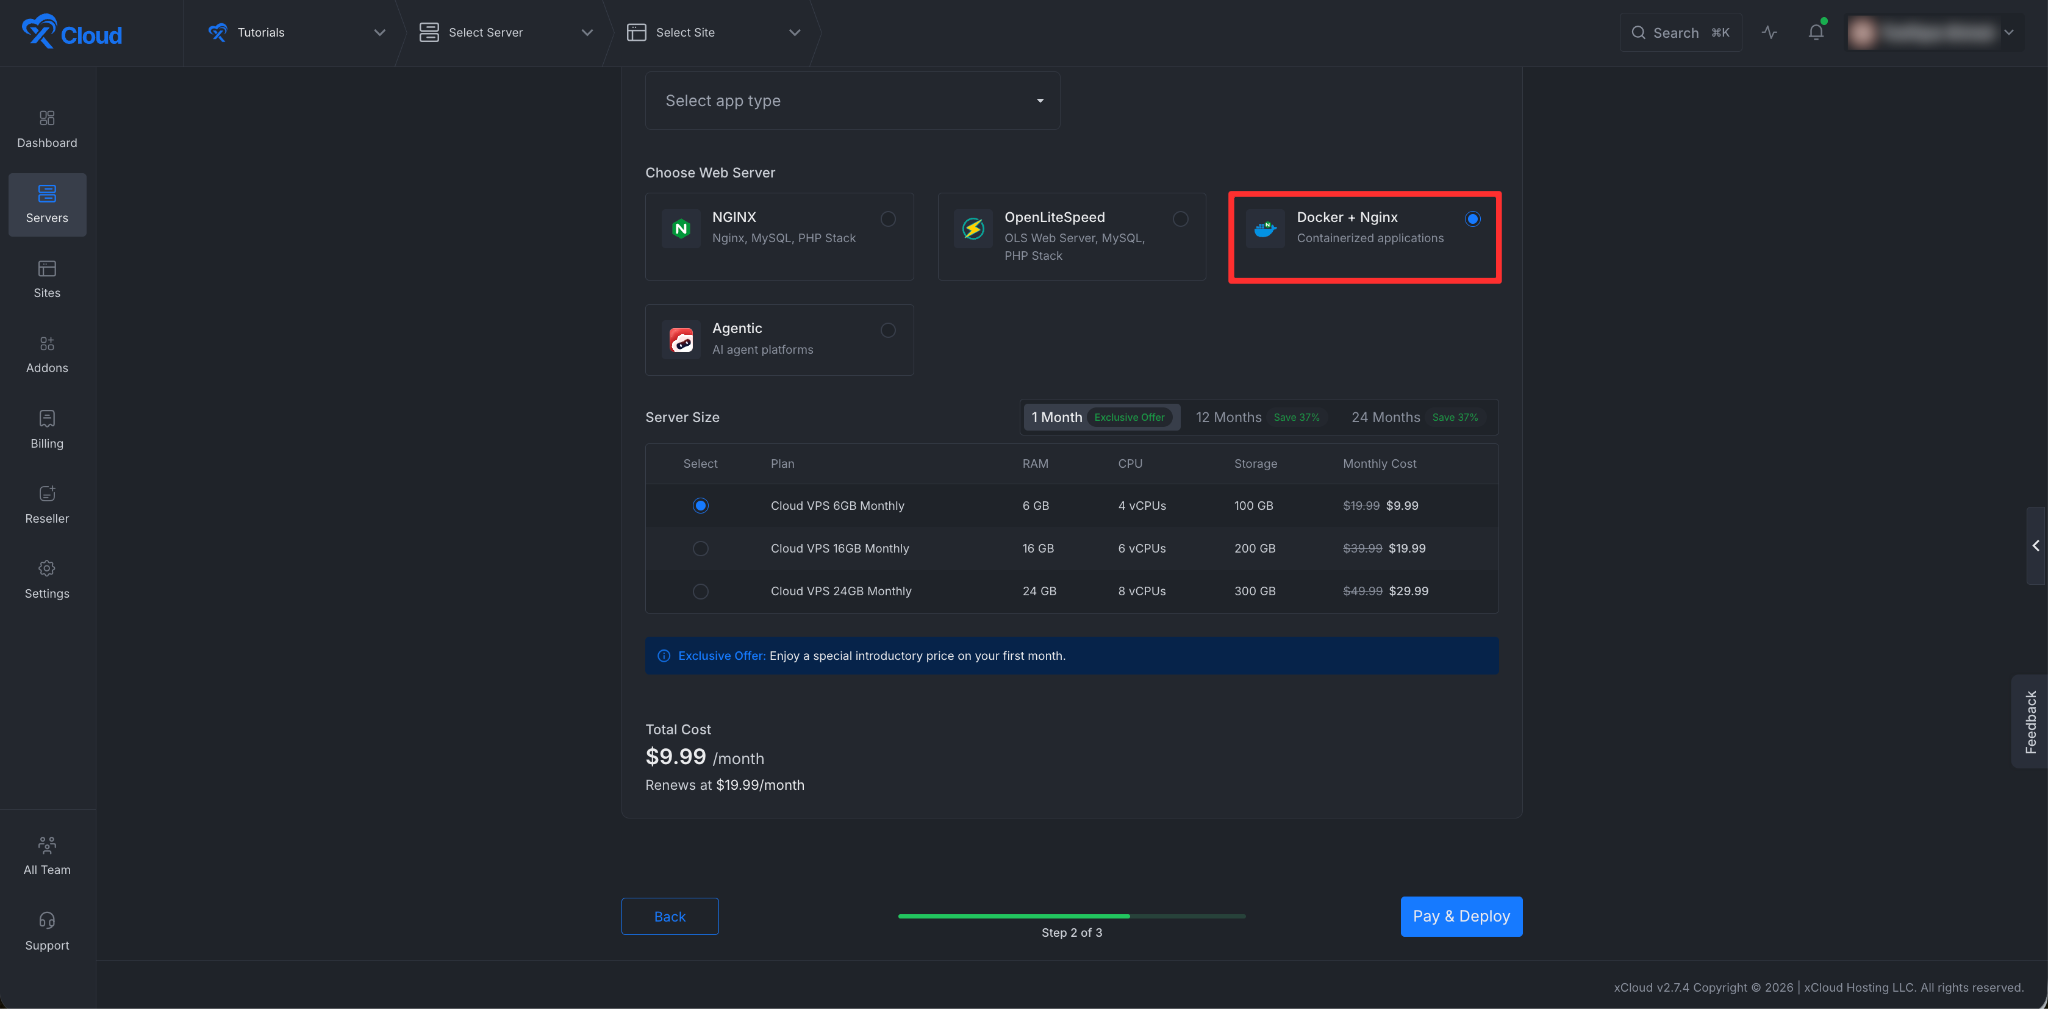
Next, choose the server options based on your requirements. Then, select a plan that best fits your needs, then click the ‘Create’ button to proceed.
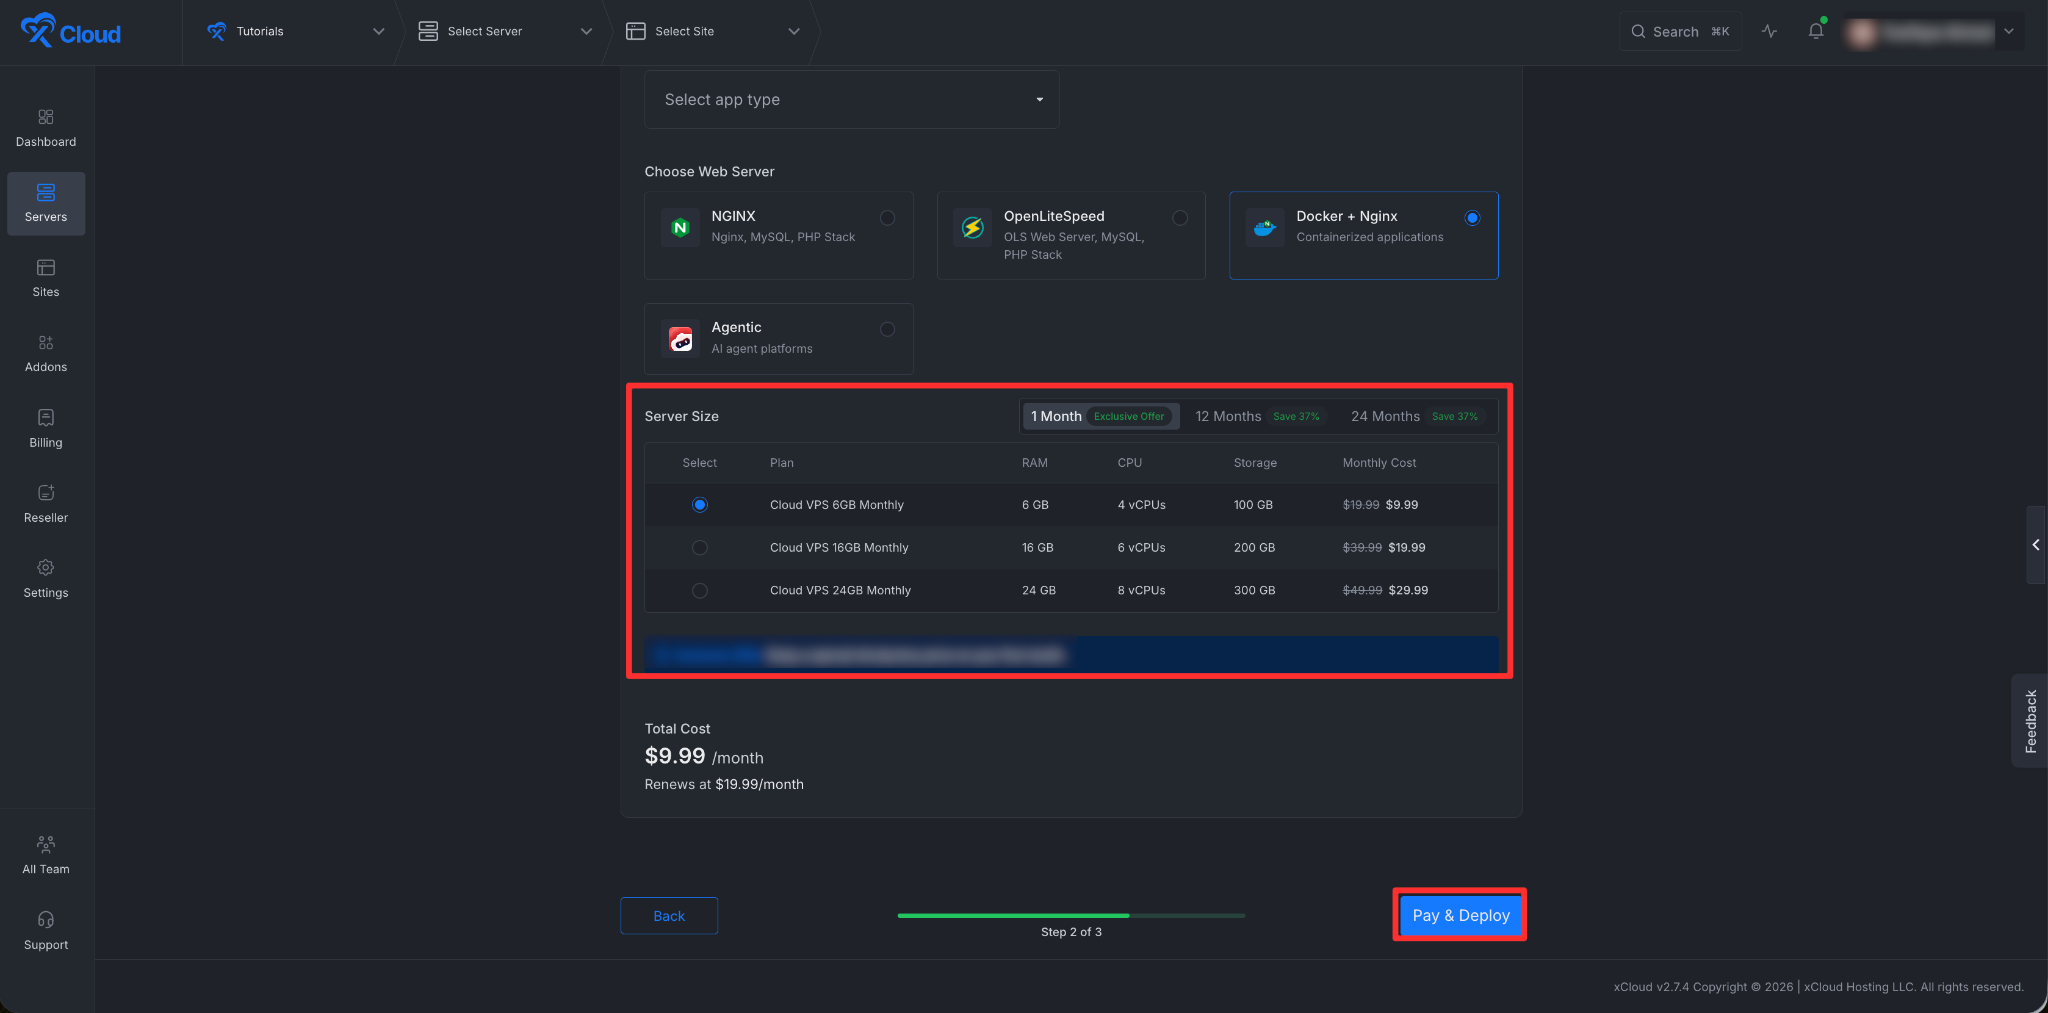
Once the server is created, you will be able to deploy your Ghost Application on this server.
After creating a server, it may take a while to become fully operational. Wait a few minutes before deploying your applications to ensure everything starts correctly.
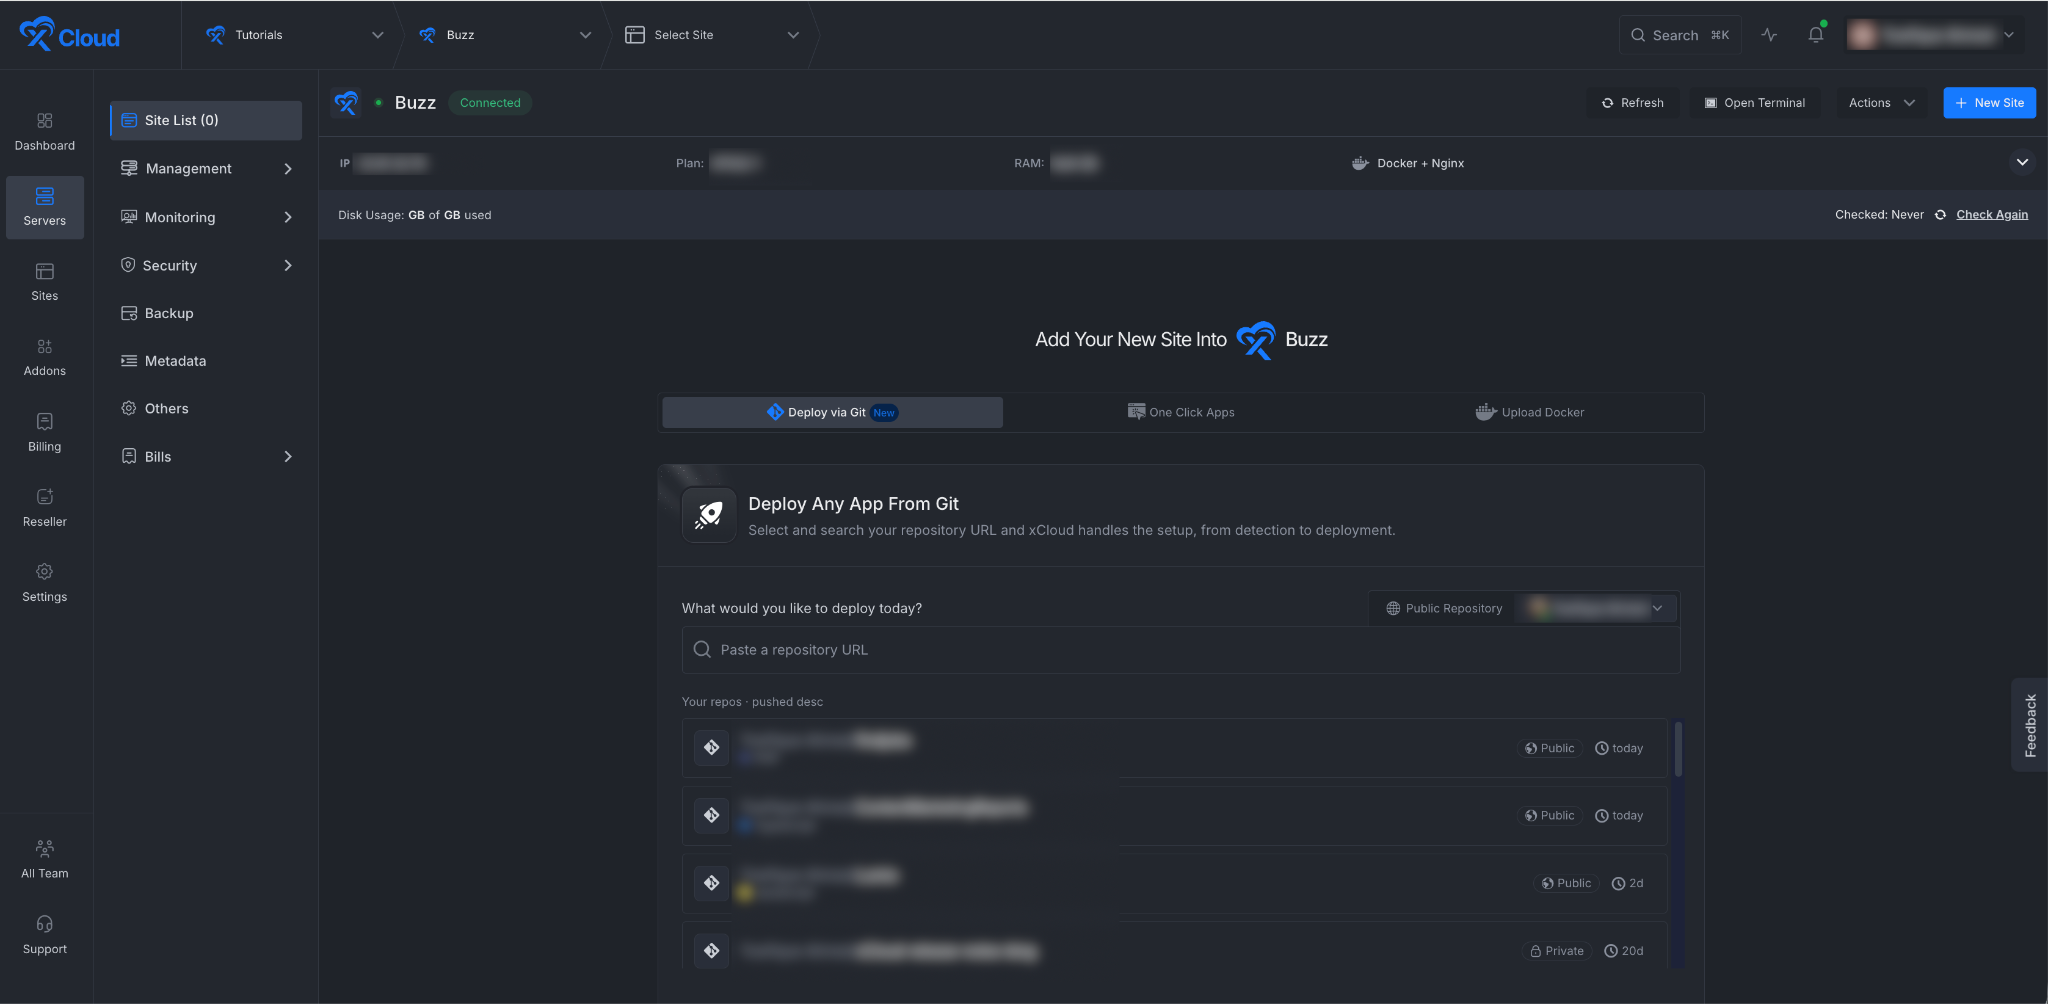
Step 2: Go to One Click Apps & Choose Ghost
Next, from your dashboard, click the ‘One Click Apps’ button and choose ‘Ghost’.
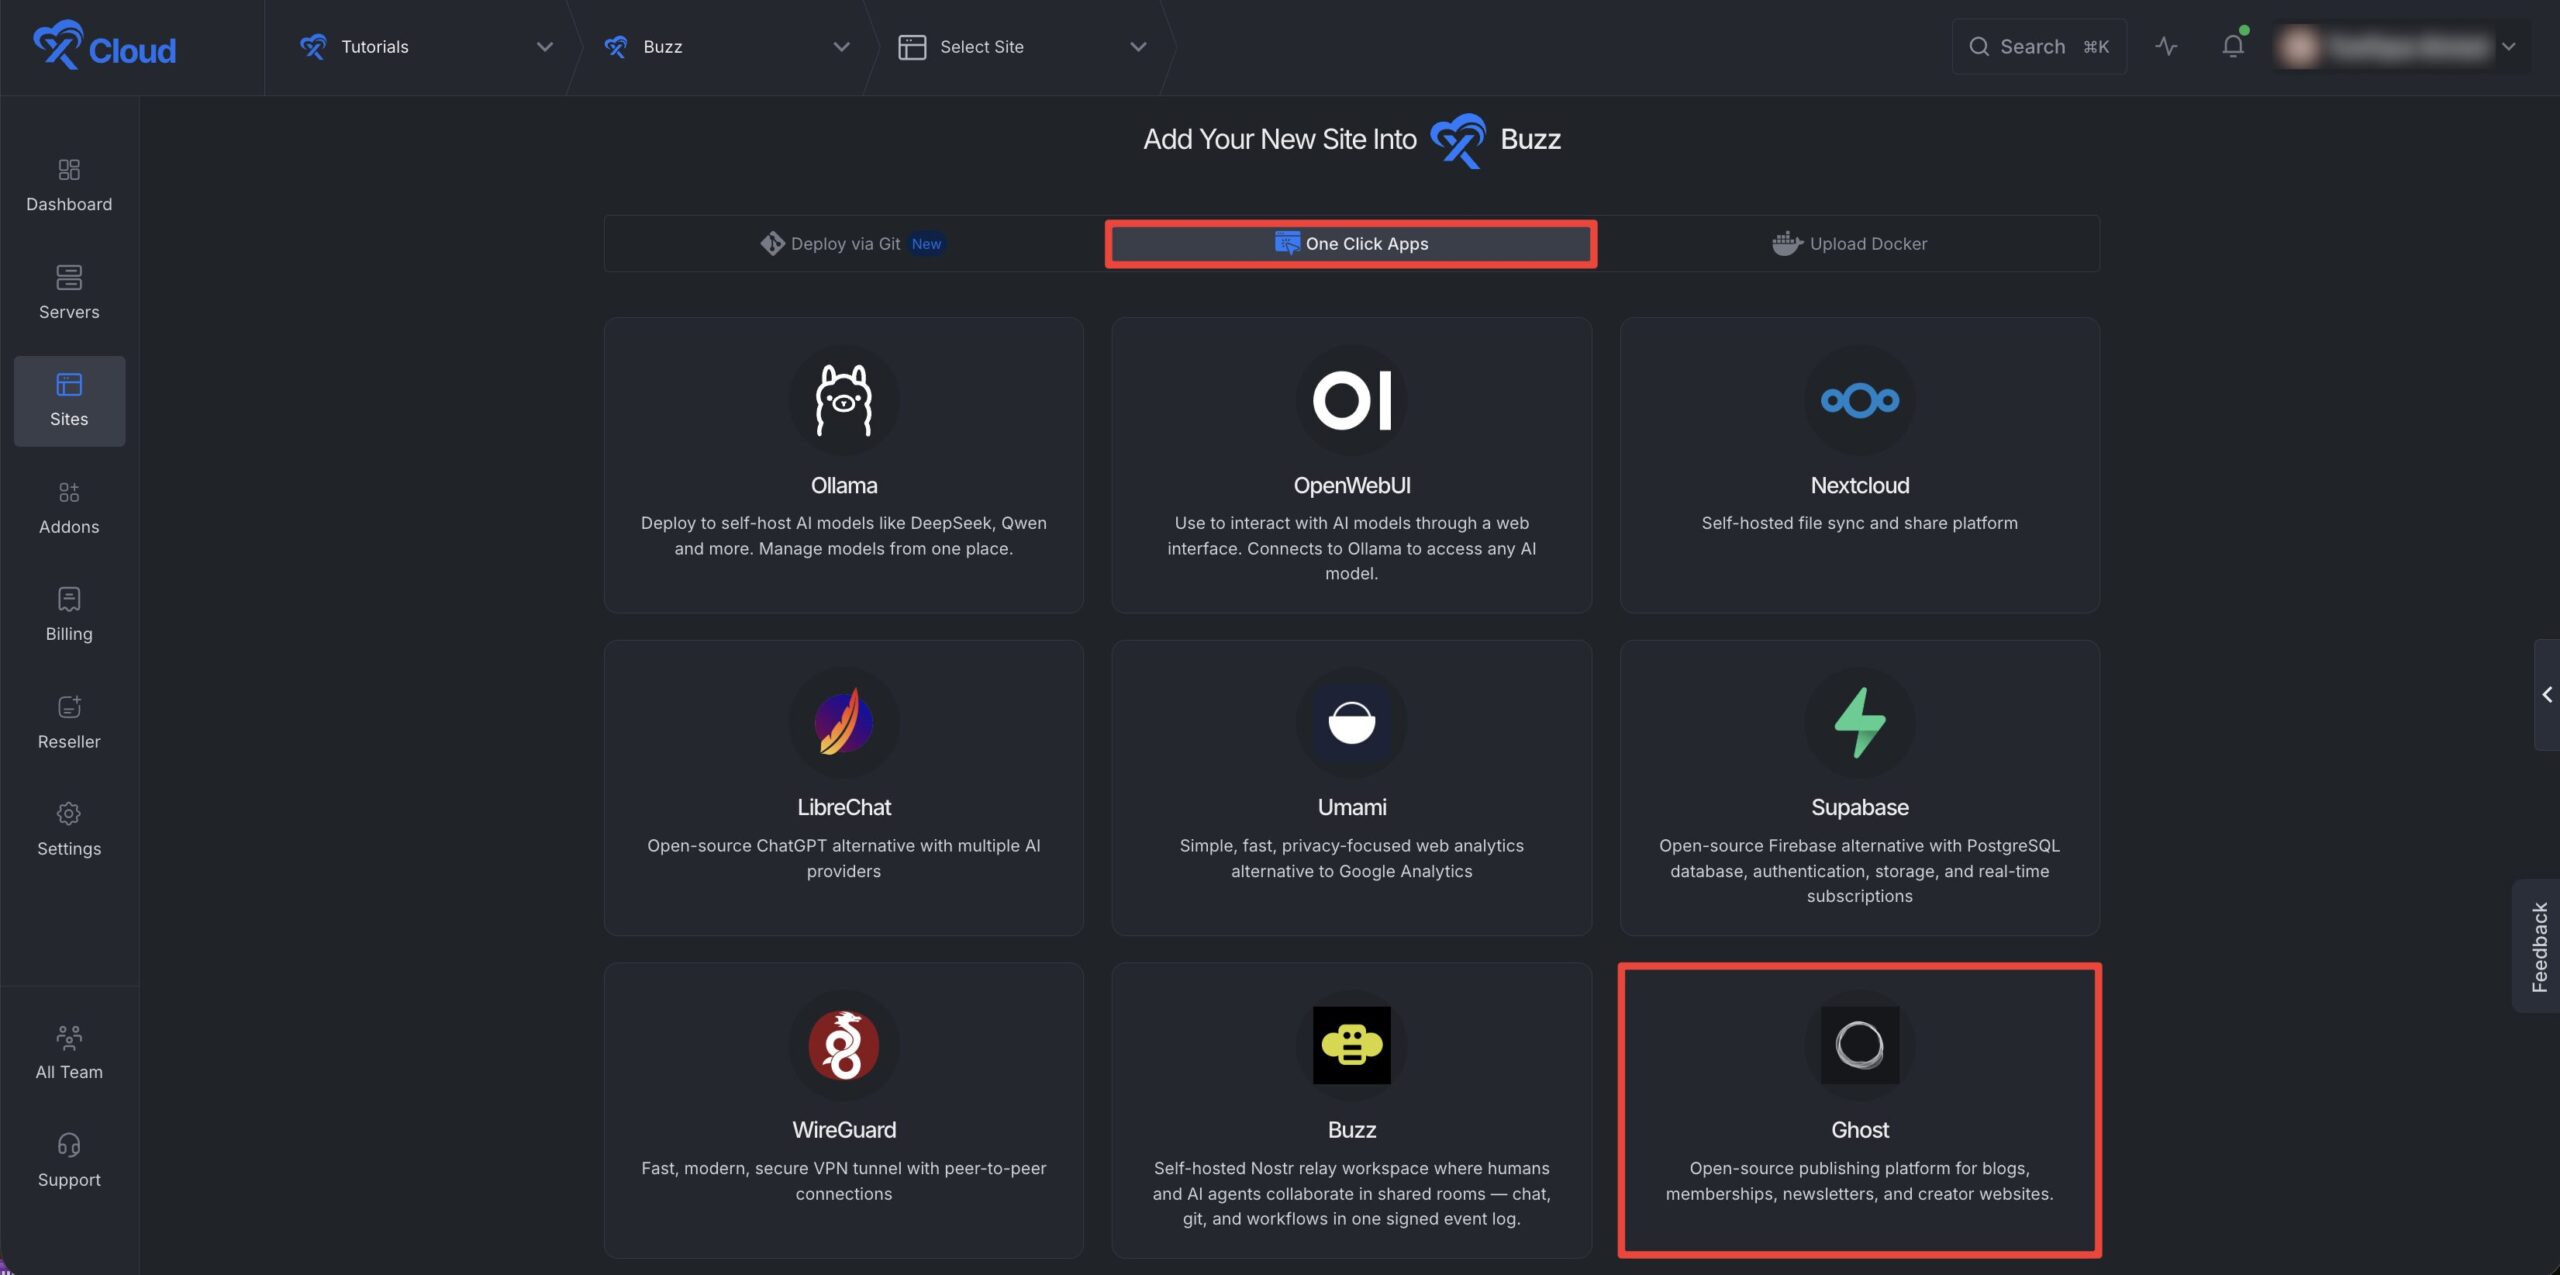
Step 3: Set Up the Ghost Application
In the site setup screen, you will be prompted to enter basic site information. Provide a ‘Site Title’ and add relevant ‘Tags’ to help organize your deployment.
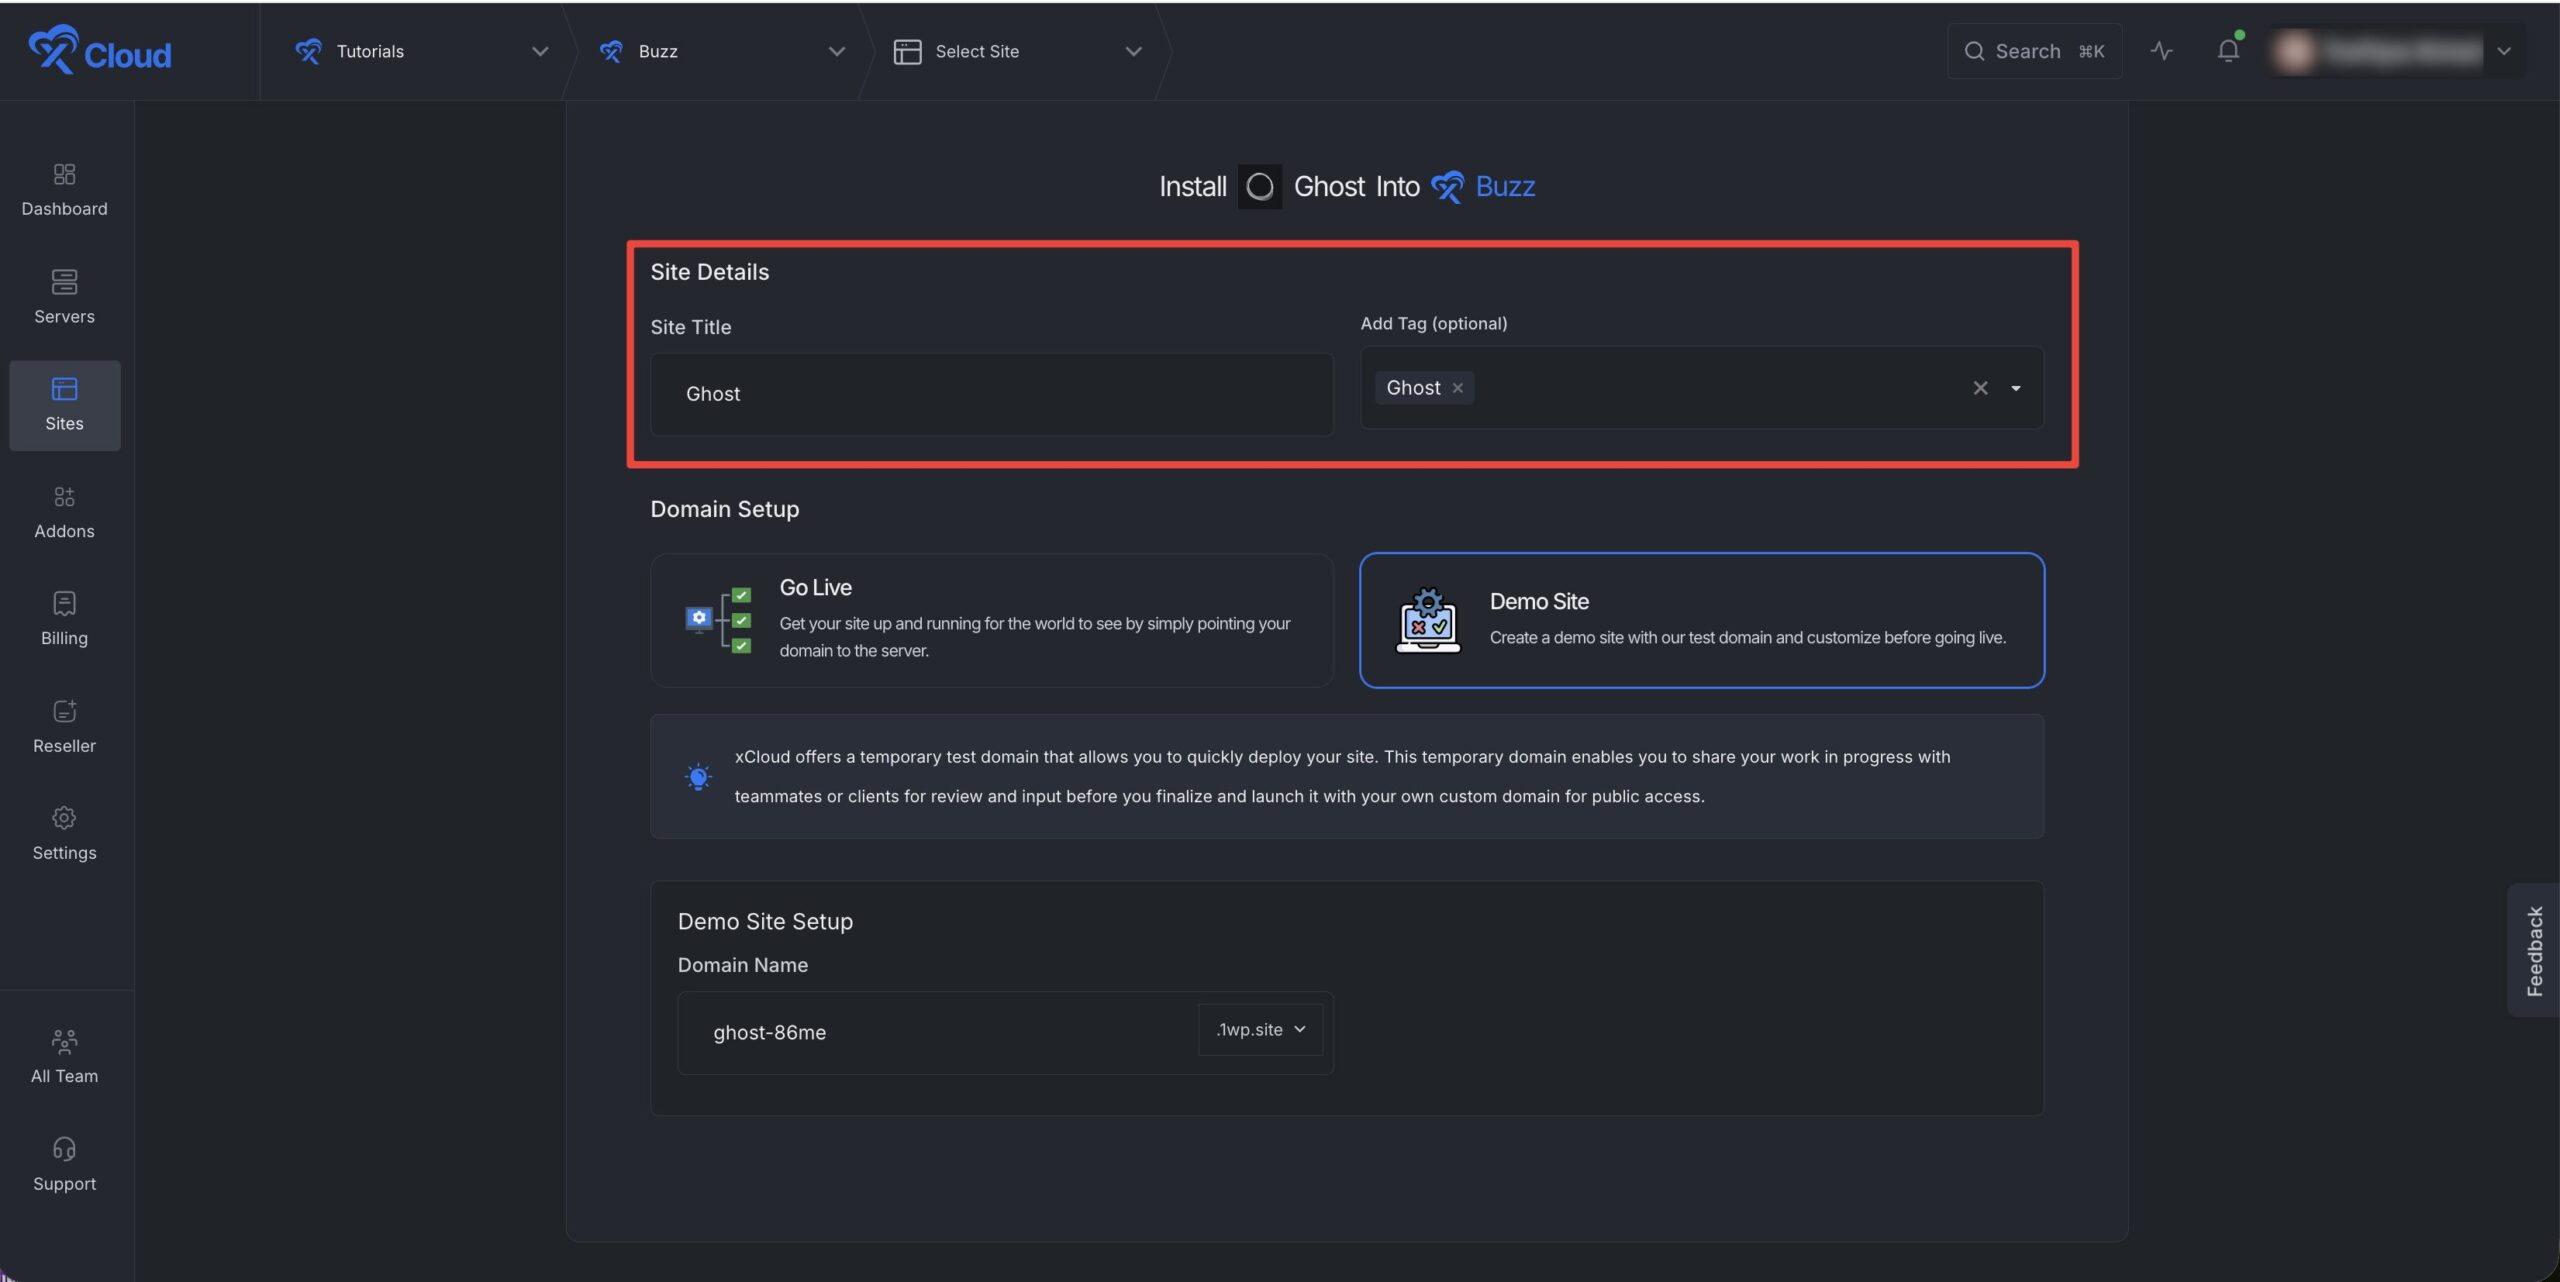
Here, you will see site deployment options. From here, proceed with the ‘Go Live’ option or the ‘Demo Site’ option. For Go Live you need to have a custom domain. For this tutorial we are going with the demo domain that is free from xCloud.
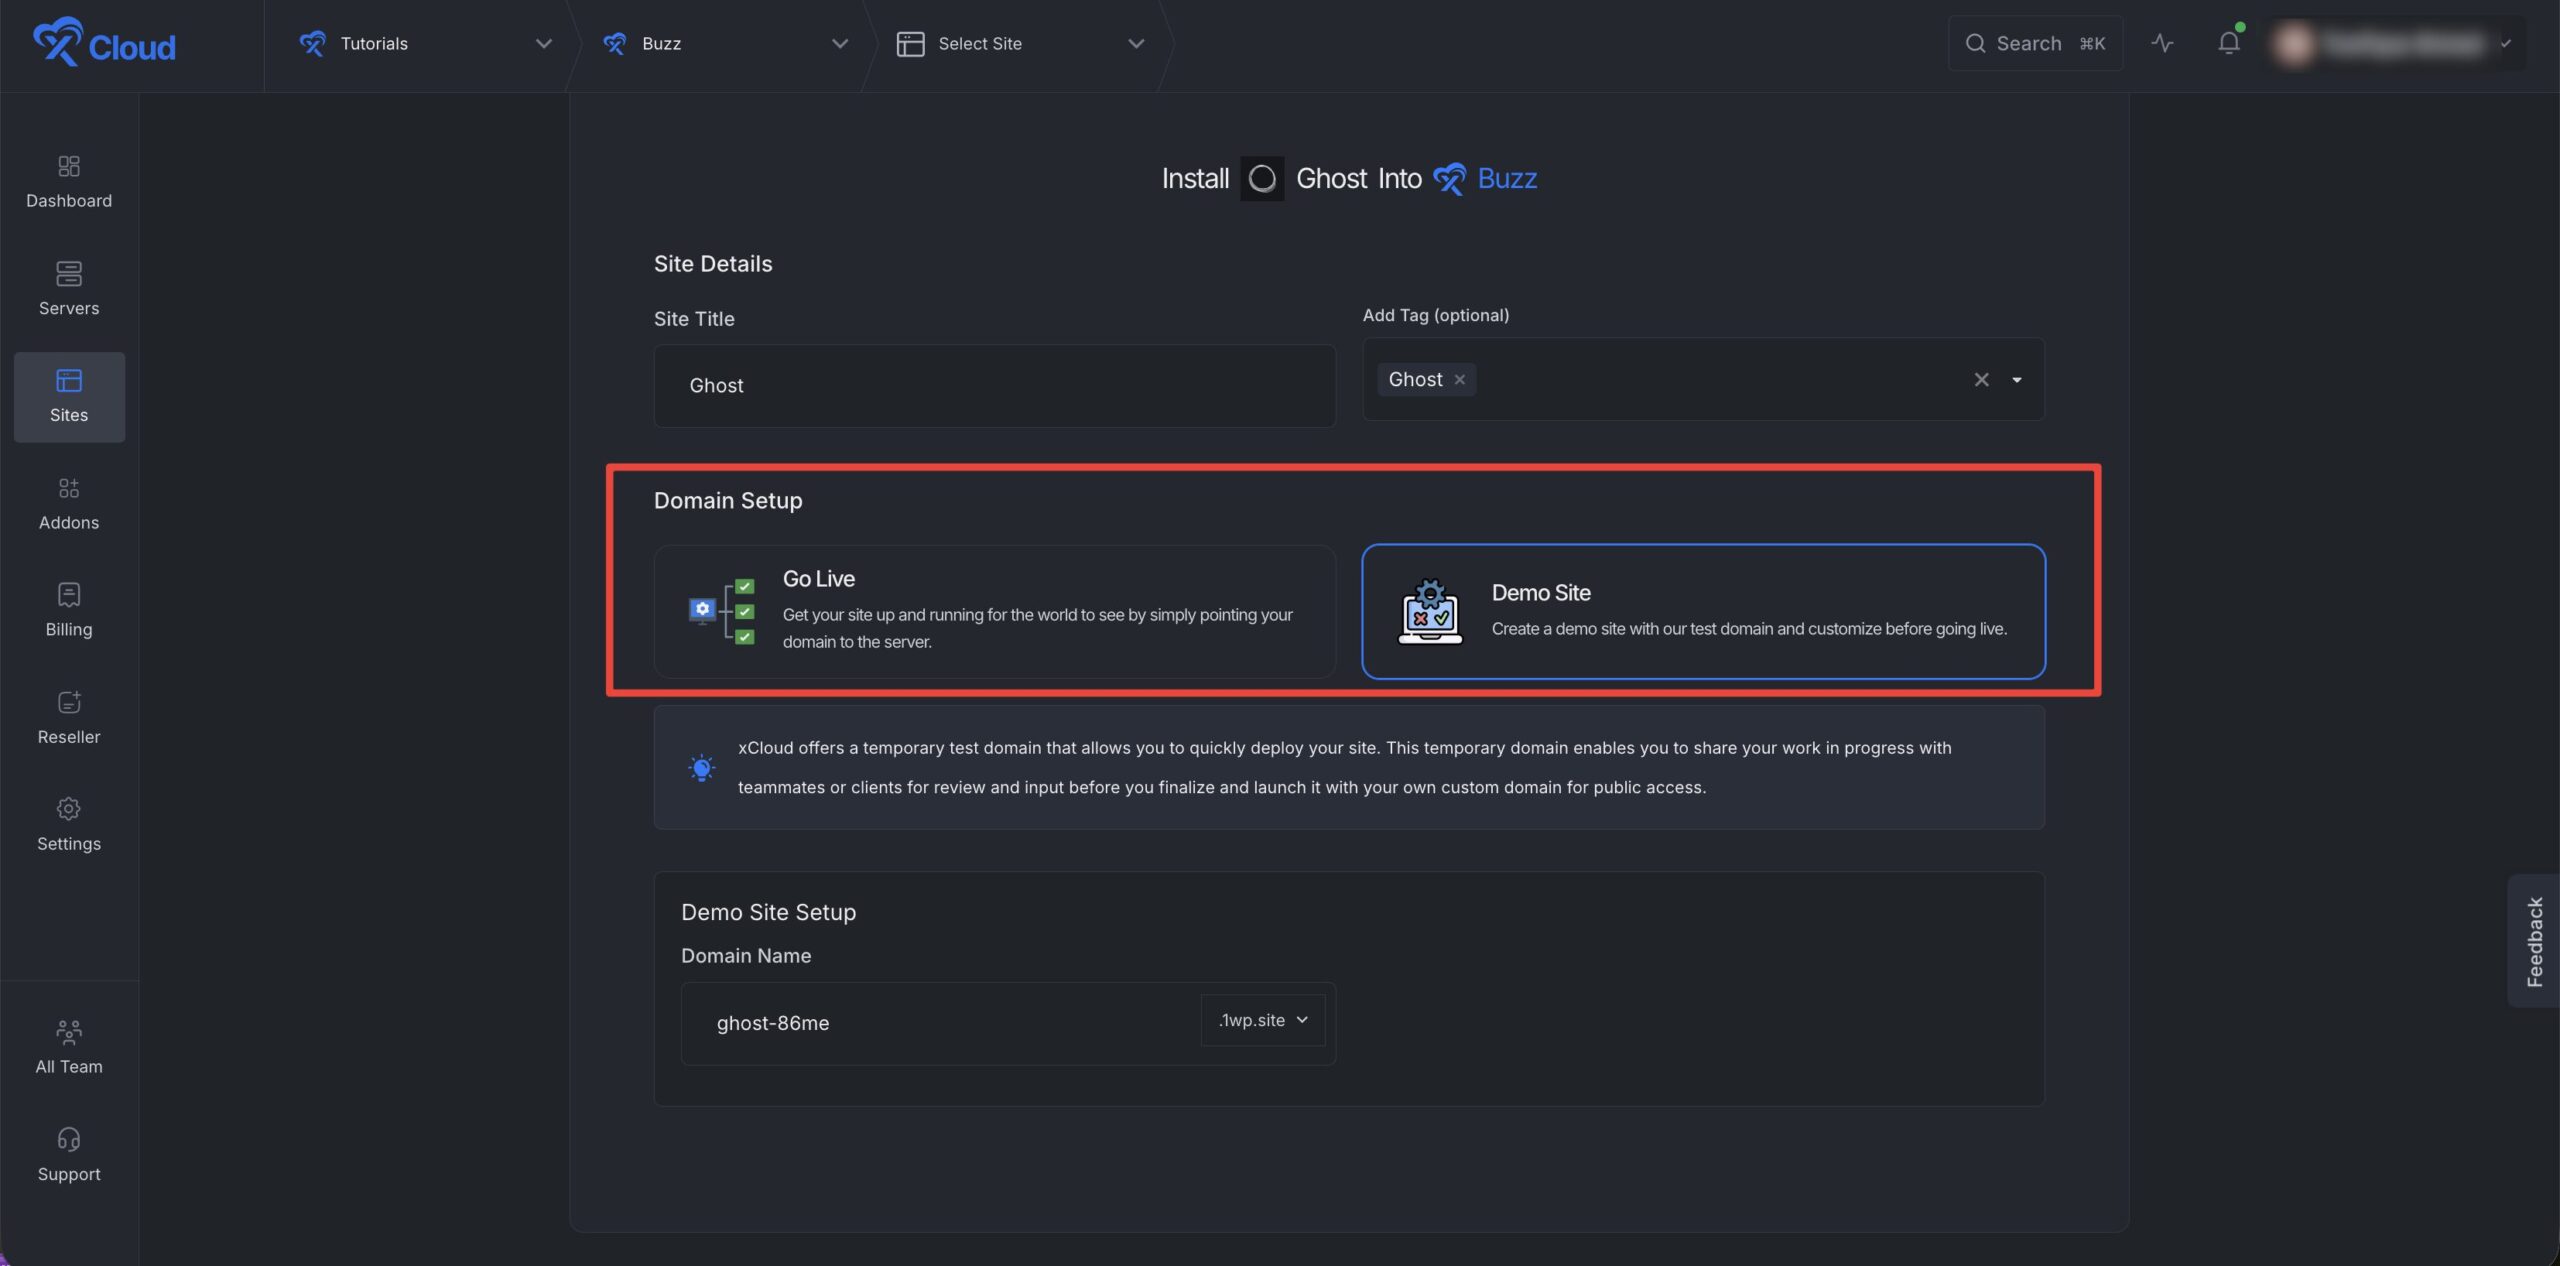
Once you choose the Demo site, you will see that xCloud assigns you a free demo domain. Then click on the ‘Next’ button to start deploying the application.
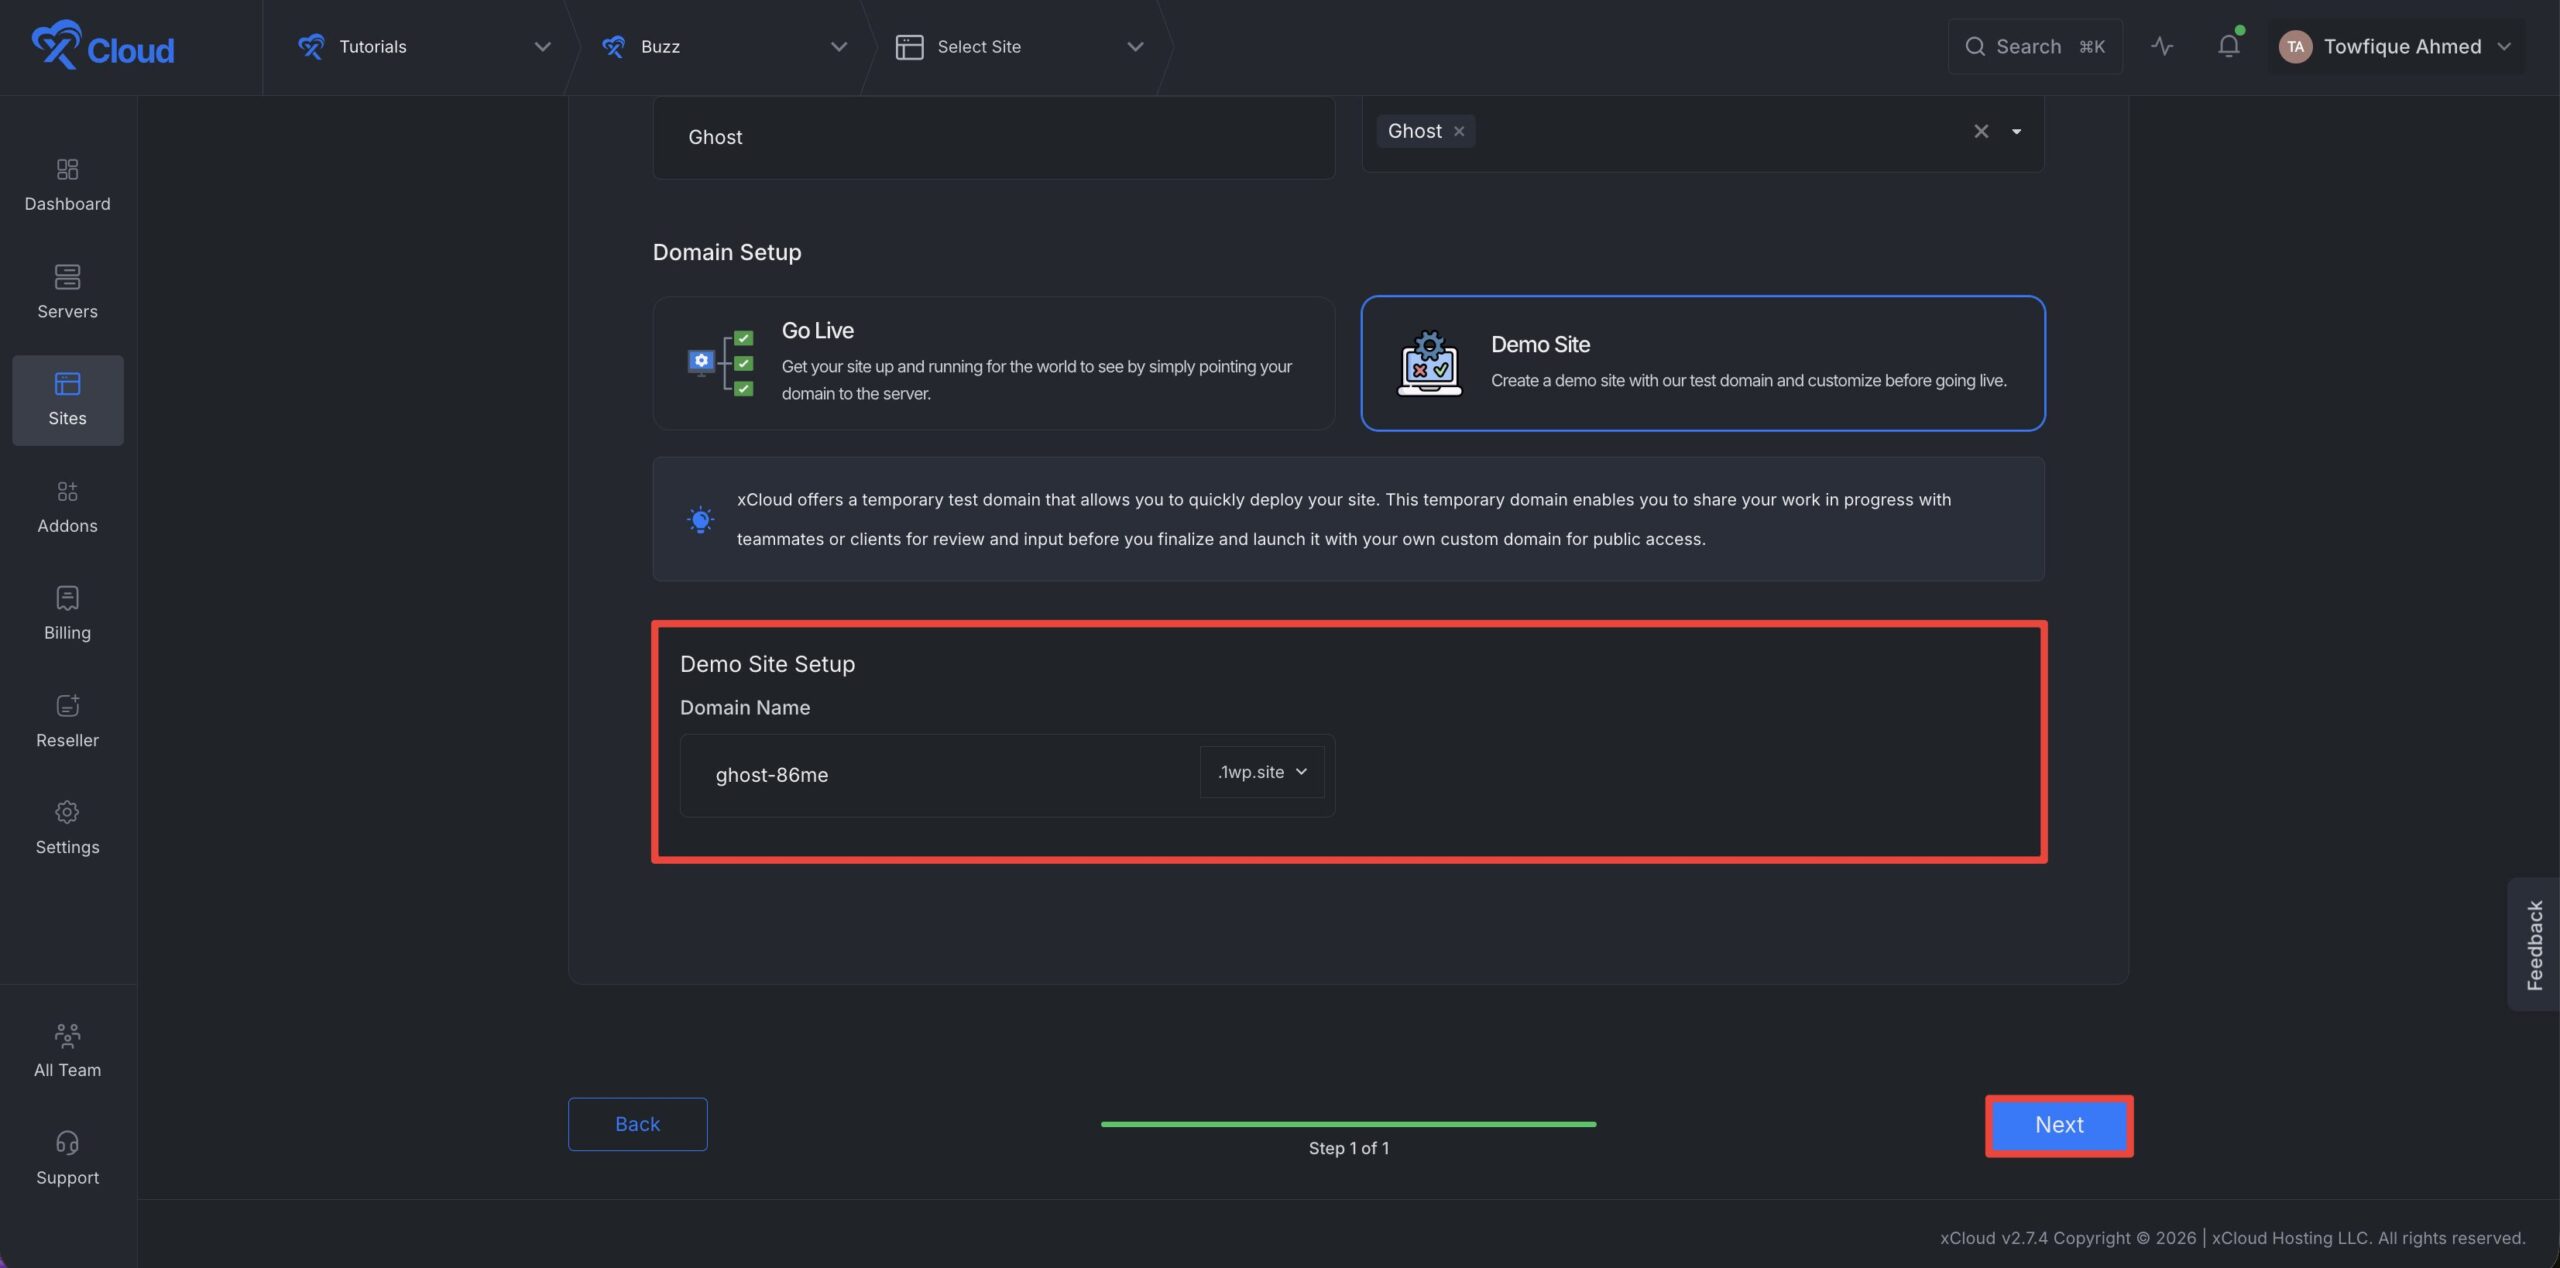
Step 5: Visit the Application
After completing the setup, you will be able to visit your Ghost app. From the dashboard, click the ‘Visit Site’ button to access your Ghost site.
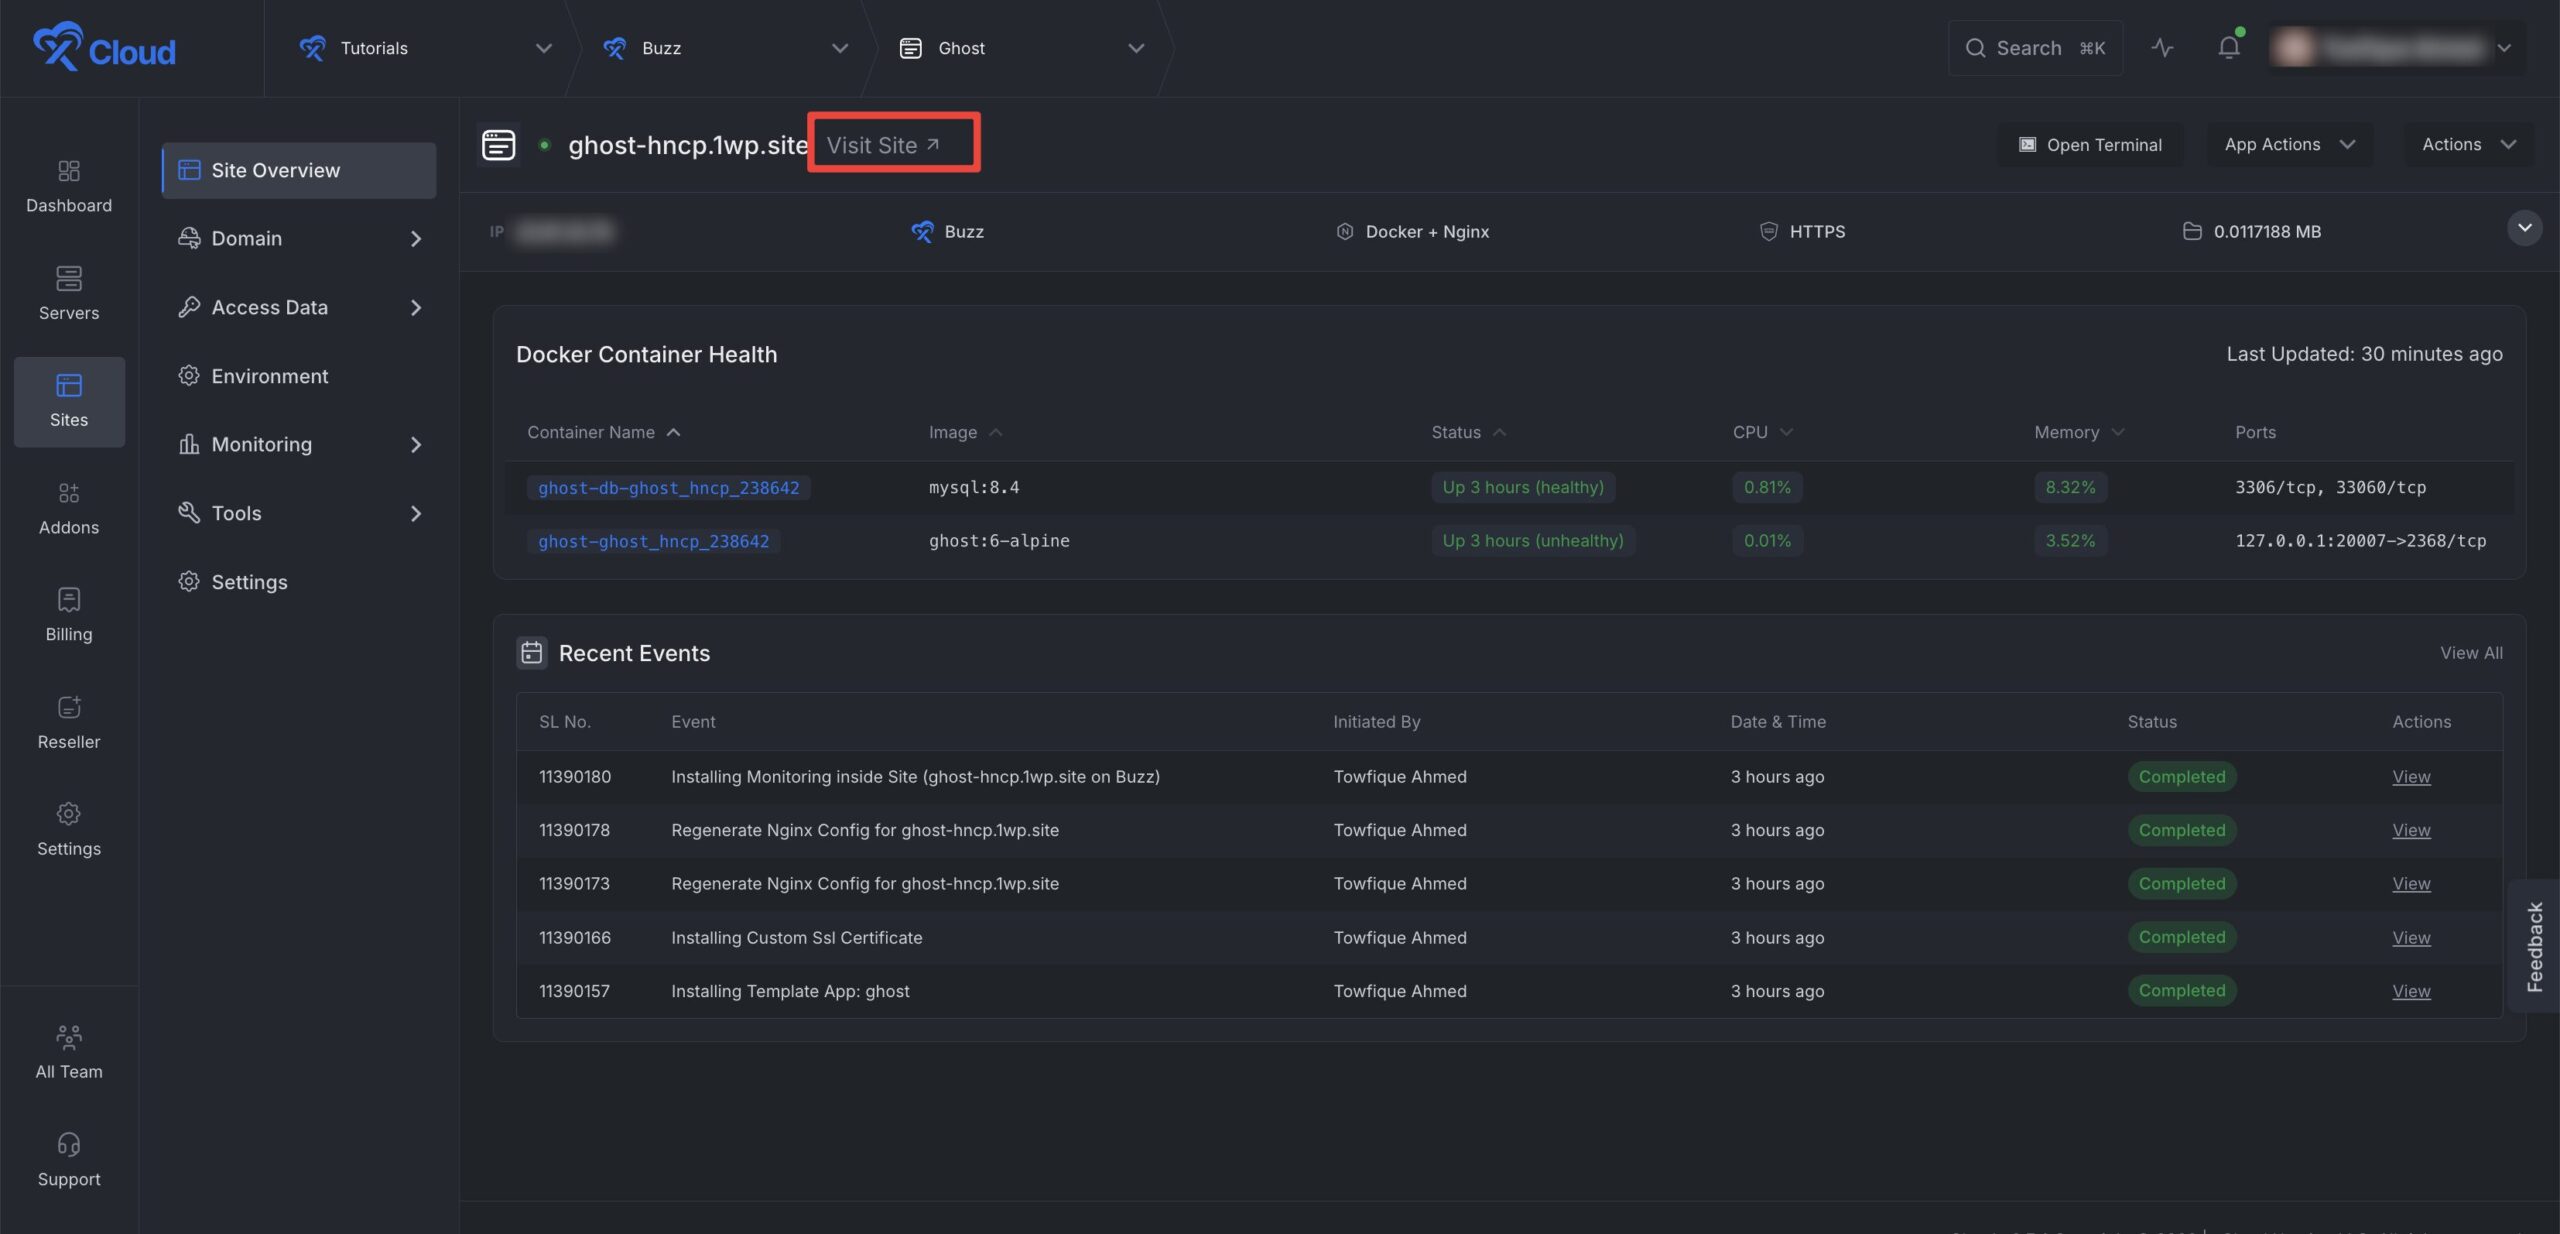
Step 6: Complete the Ghost Setup
Once you visit the site, go to the address field and add “/ghost” at the end of your domain.
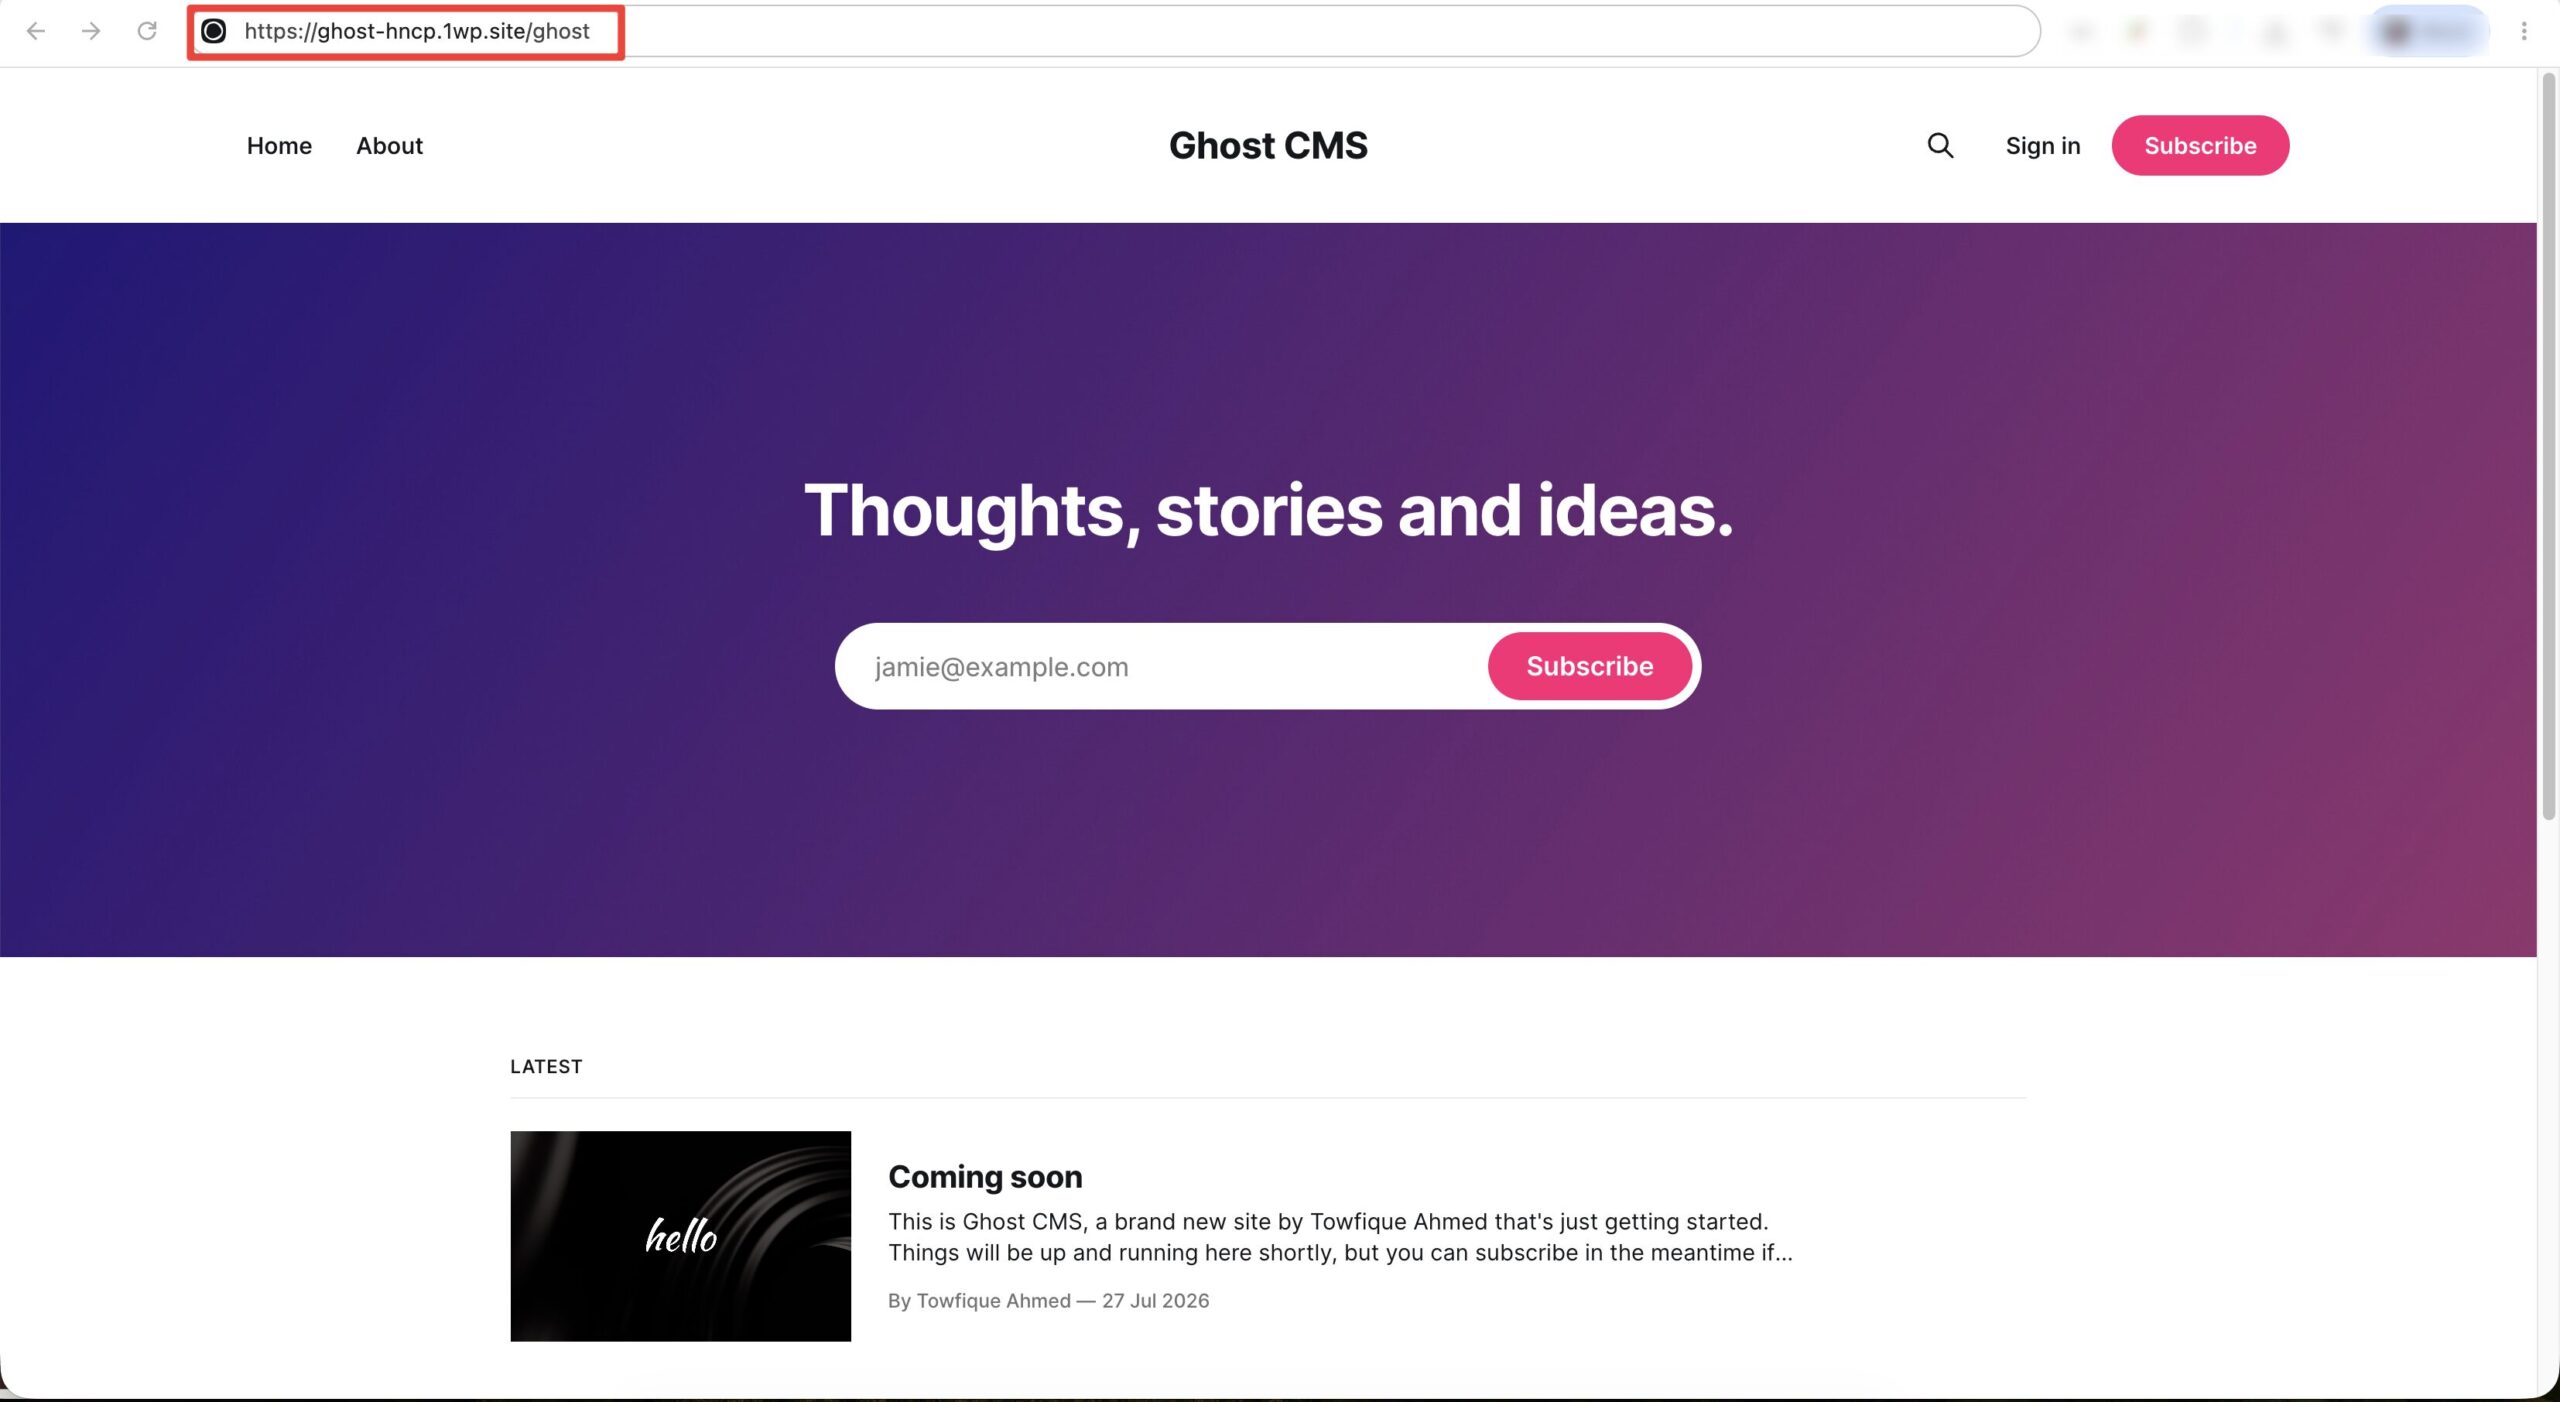
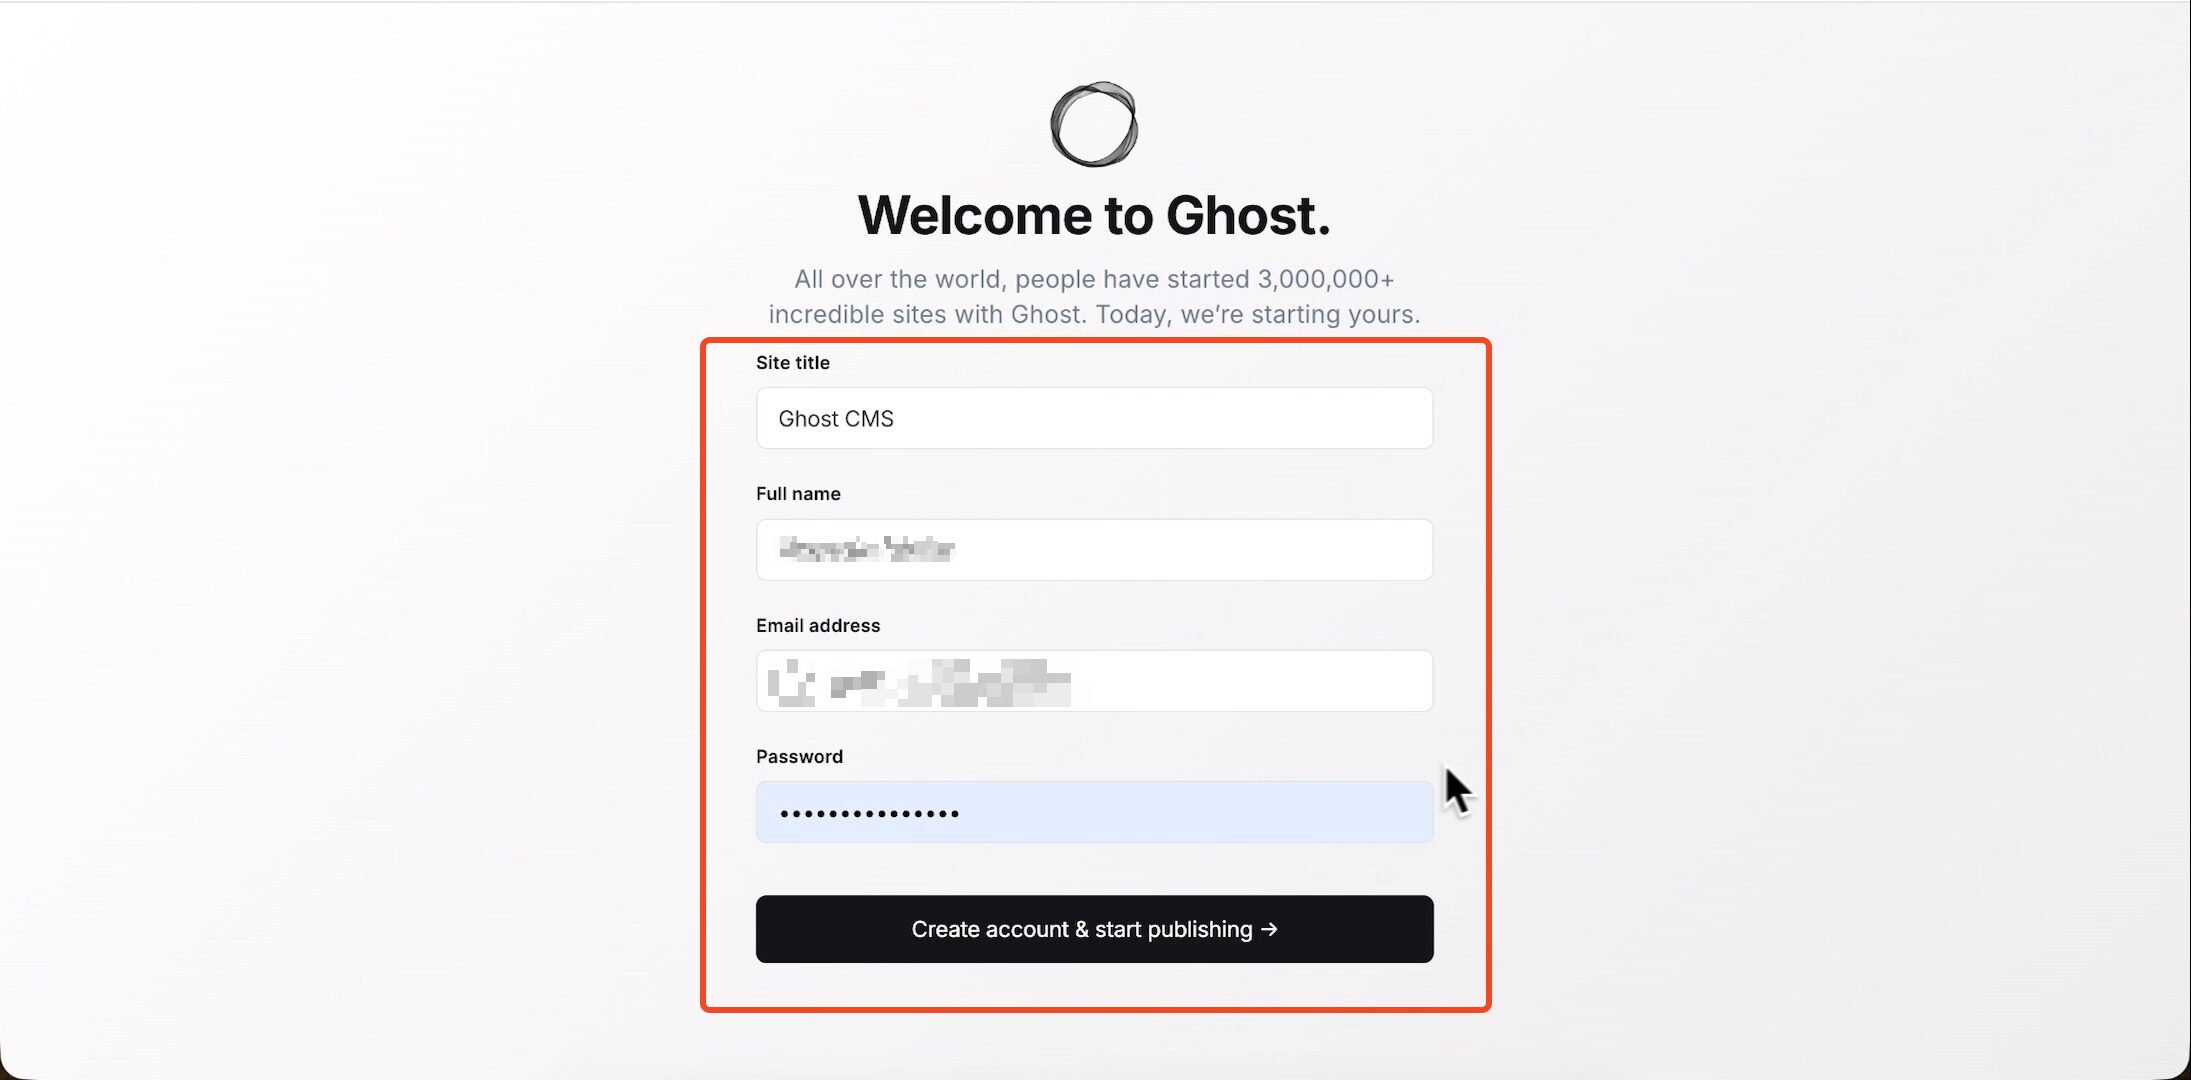
Now you get an account creation page. Enter your ‘Site title’, ‘Full name’, ‘Email address’, and a ‘Password’ and then click on the ‘Create account & start publishing’ button to proceed.
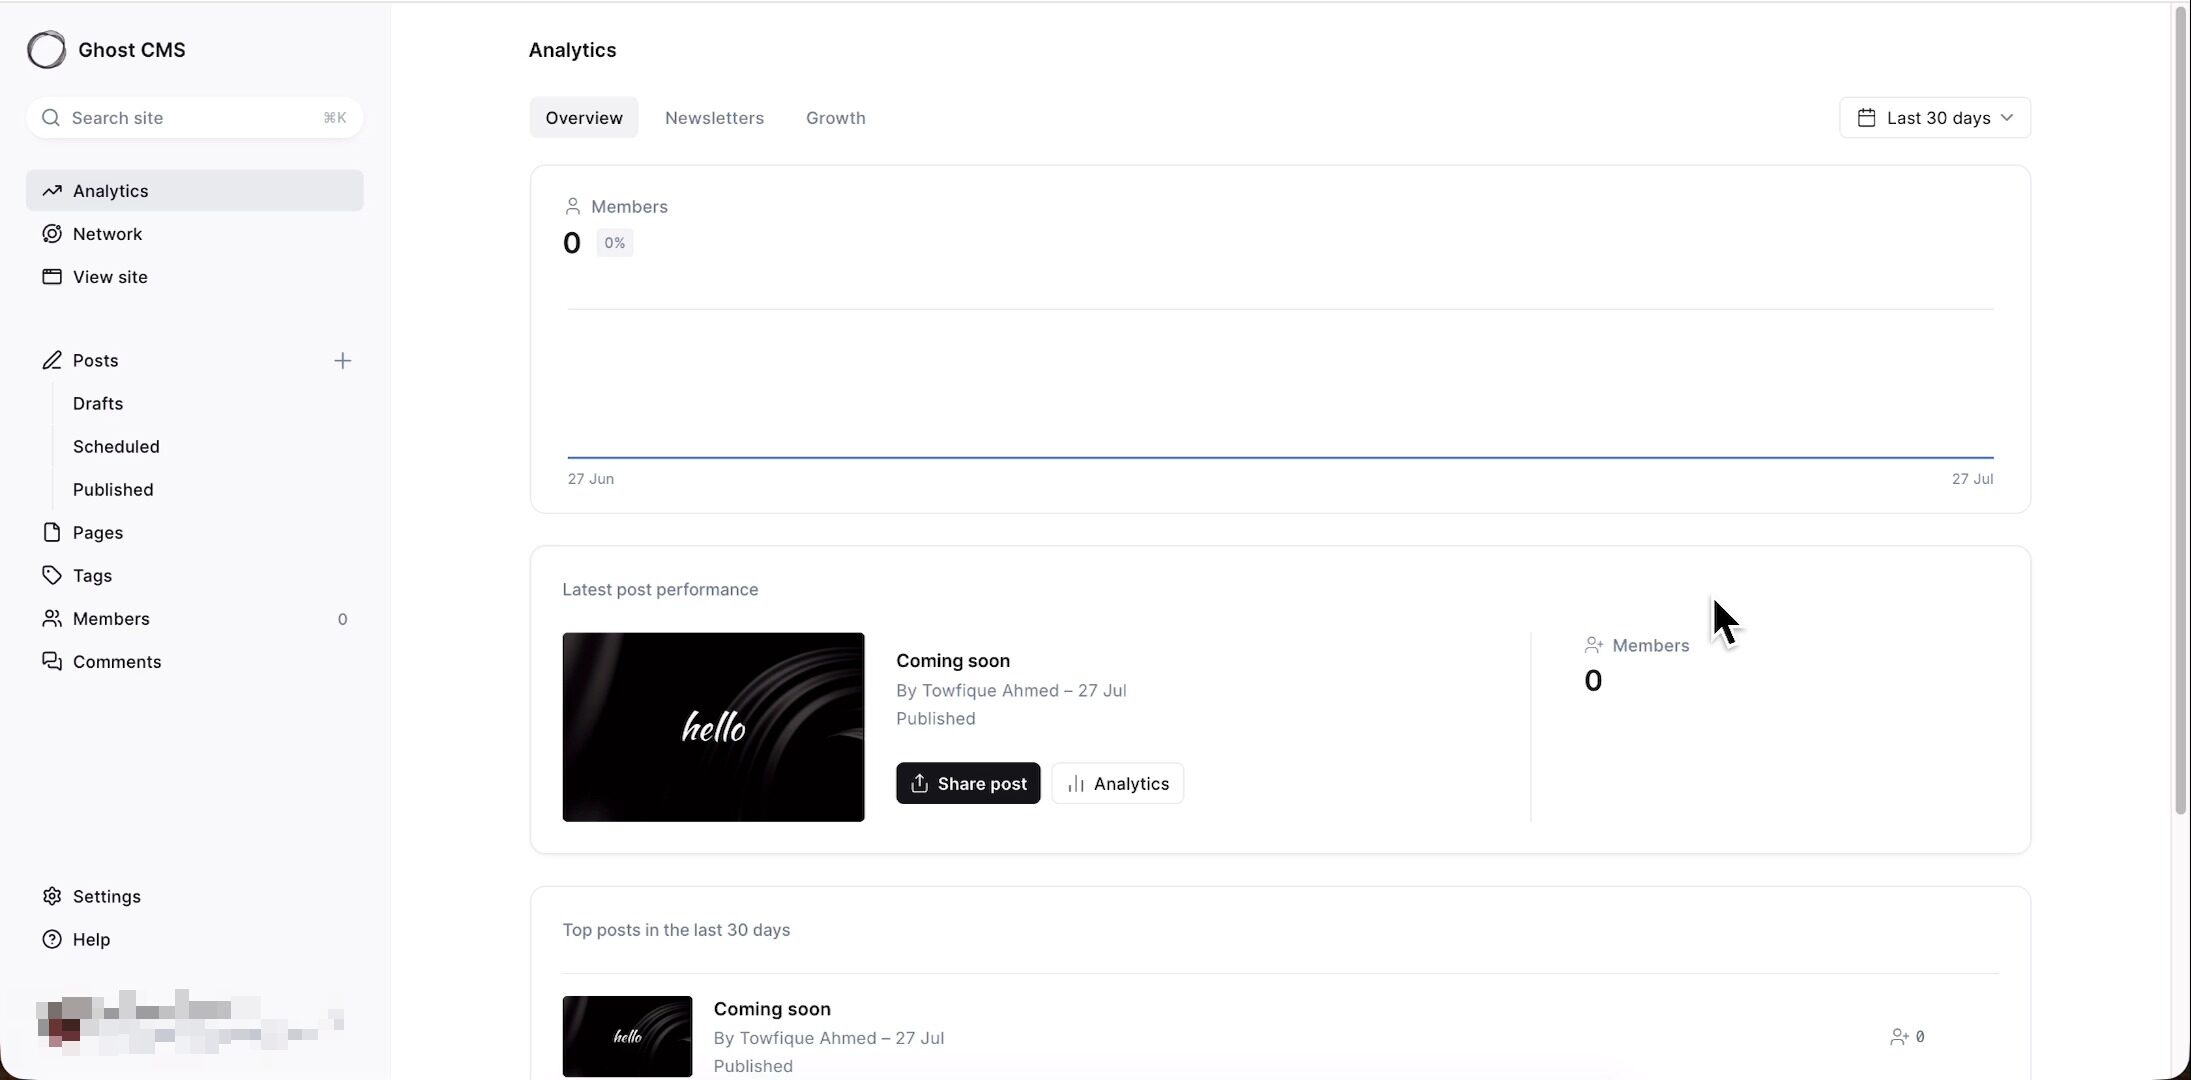
After a while you will see the account has been created. You will land in the Ghost admin dashboard, where you can see your members count, post performance, and newsletter and growth analytics. From here you can write your first post, customize your theme, and configure your newsletter.
And that’s it. This is how easily you can install and launch Ghost using xCloud’s One Click Apps. With just a few guided steps, your publication is live, fully configured, and secured with SSL. xCloud takes care of the server provisioning, Docker configuration, and deployment, so you can focus on writing and growing your audience.
Still stuck? Contact our support team for any of your queries.