

How to Set Up Hermes Workspace with xCloud
Updated June 24, 2026 · 3 min read
Hermes Workspace is a dedicated web command center for your Hermes Agent. It connects to the agent over an authenticated HTTP API, so you can manage and interact with your agent from a single browser-based dashboard instead of juggling separate tools.
This guide walks you through the full setup inside xCloud: enabling the API server, generating a secure access token, pointing your own domain at the Workspace, securing it with SSL, and deploying it. By the end, you will have a live Hermes Workspace ready to open and use. The entire process takes only a few minutes, and most settings come preconfigured with safe defaults.
Before You Begin
Make sure you have an active xCloud account with a Hermes Agent already running. If you plan to use a custom domain, have access to your domain provider’s DNS settings, or a connected Cloudflare account, ready to go.
Step 1: Open the Hermes Dashboard
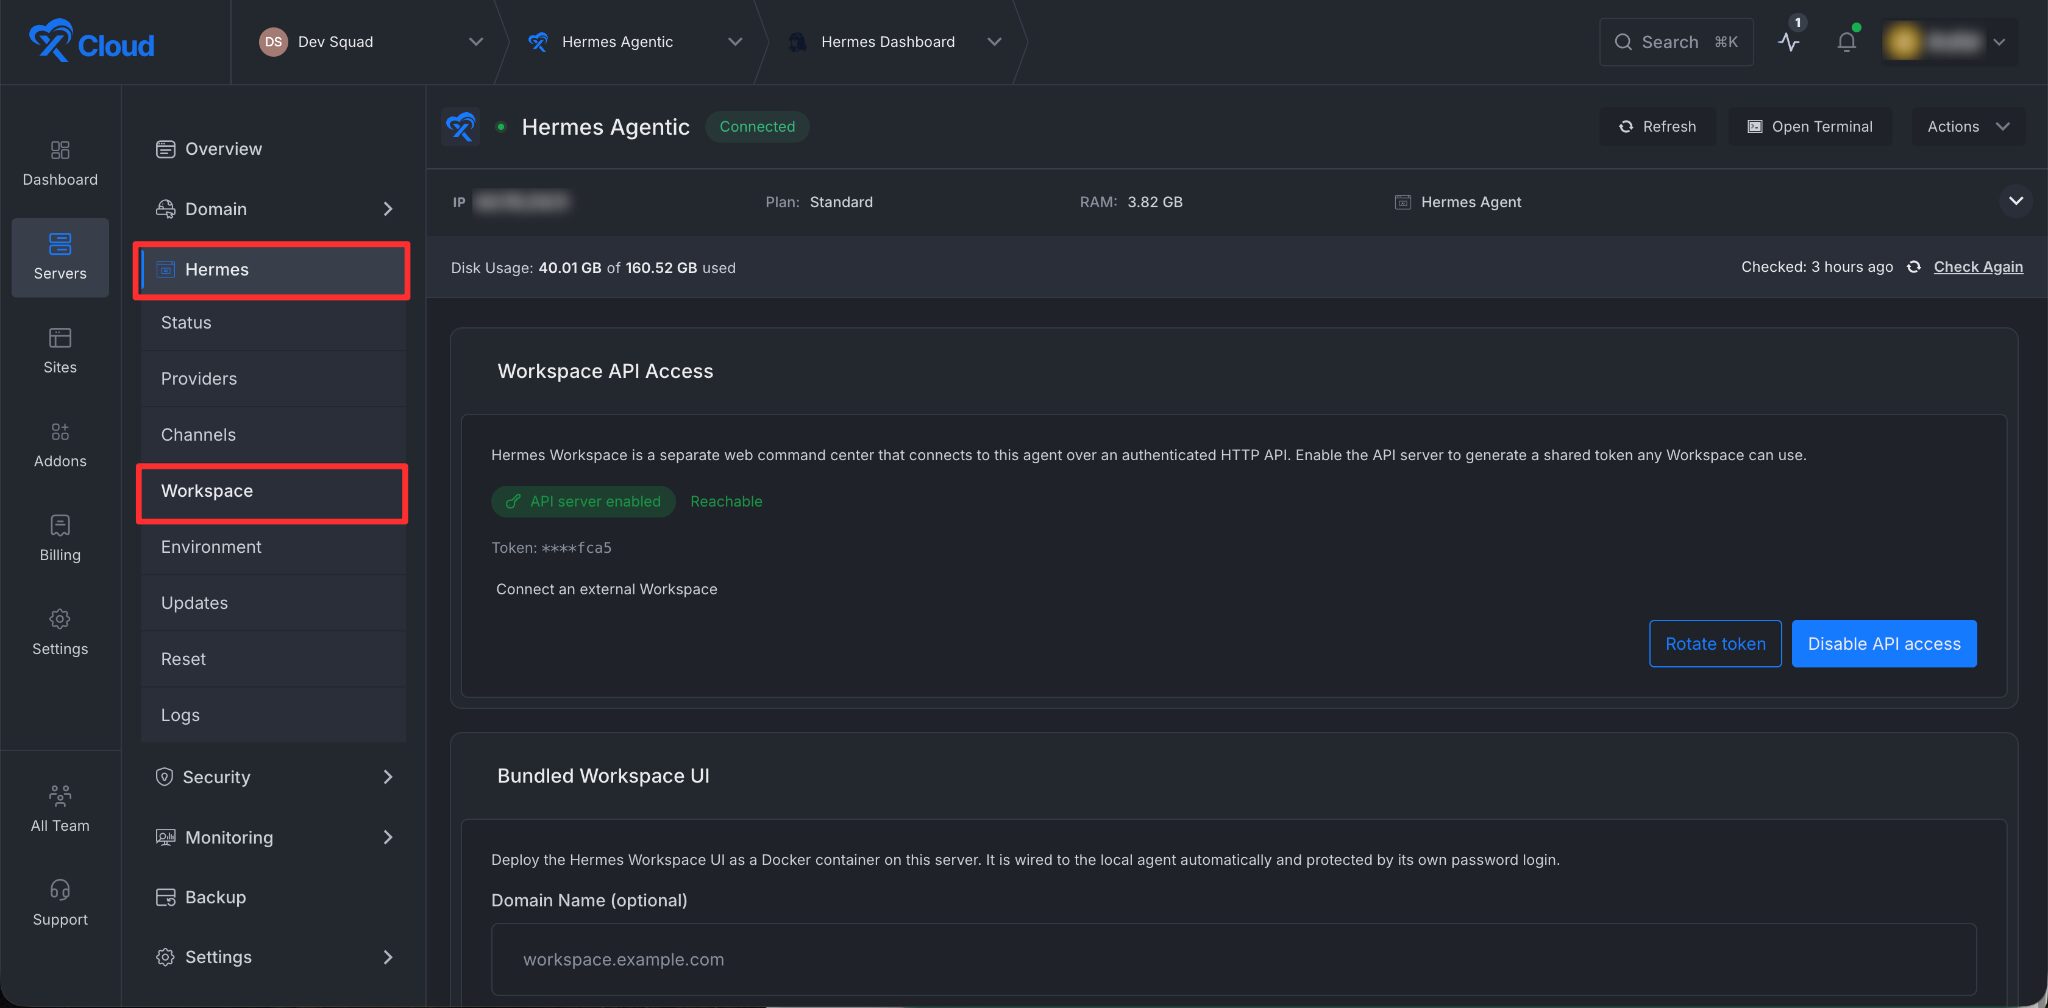
From your xCloud dashboard, go to the Hermes Agent page. Select Hermes from the sidebar menu, then click the Workspace option from the menu.
Step 2: Enable the API Server
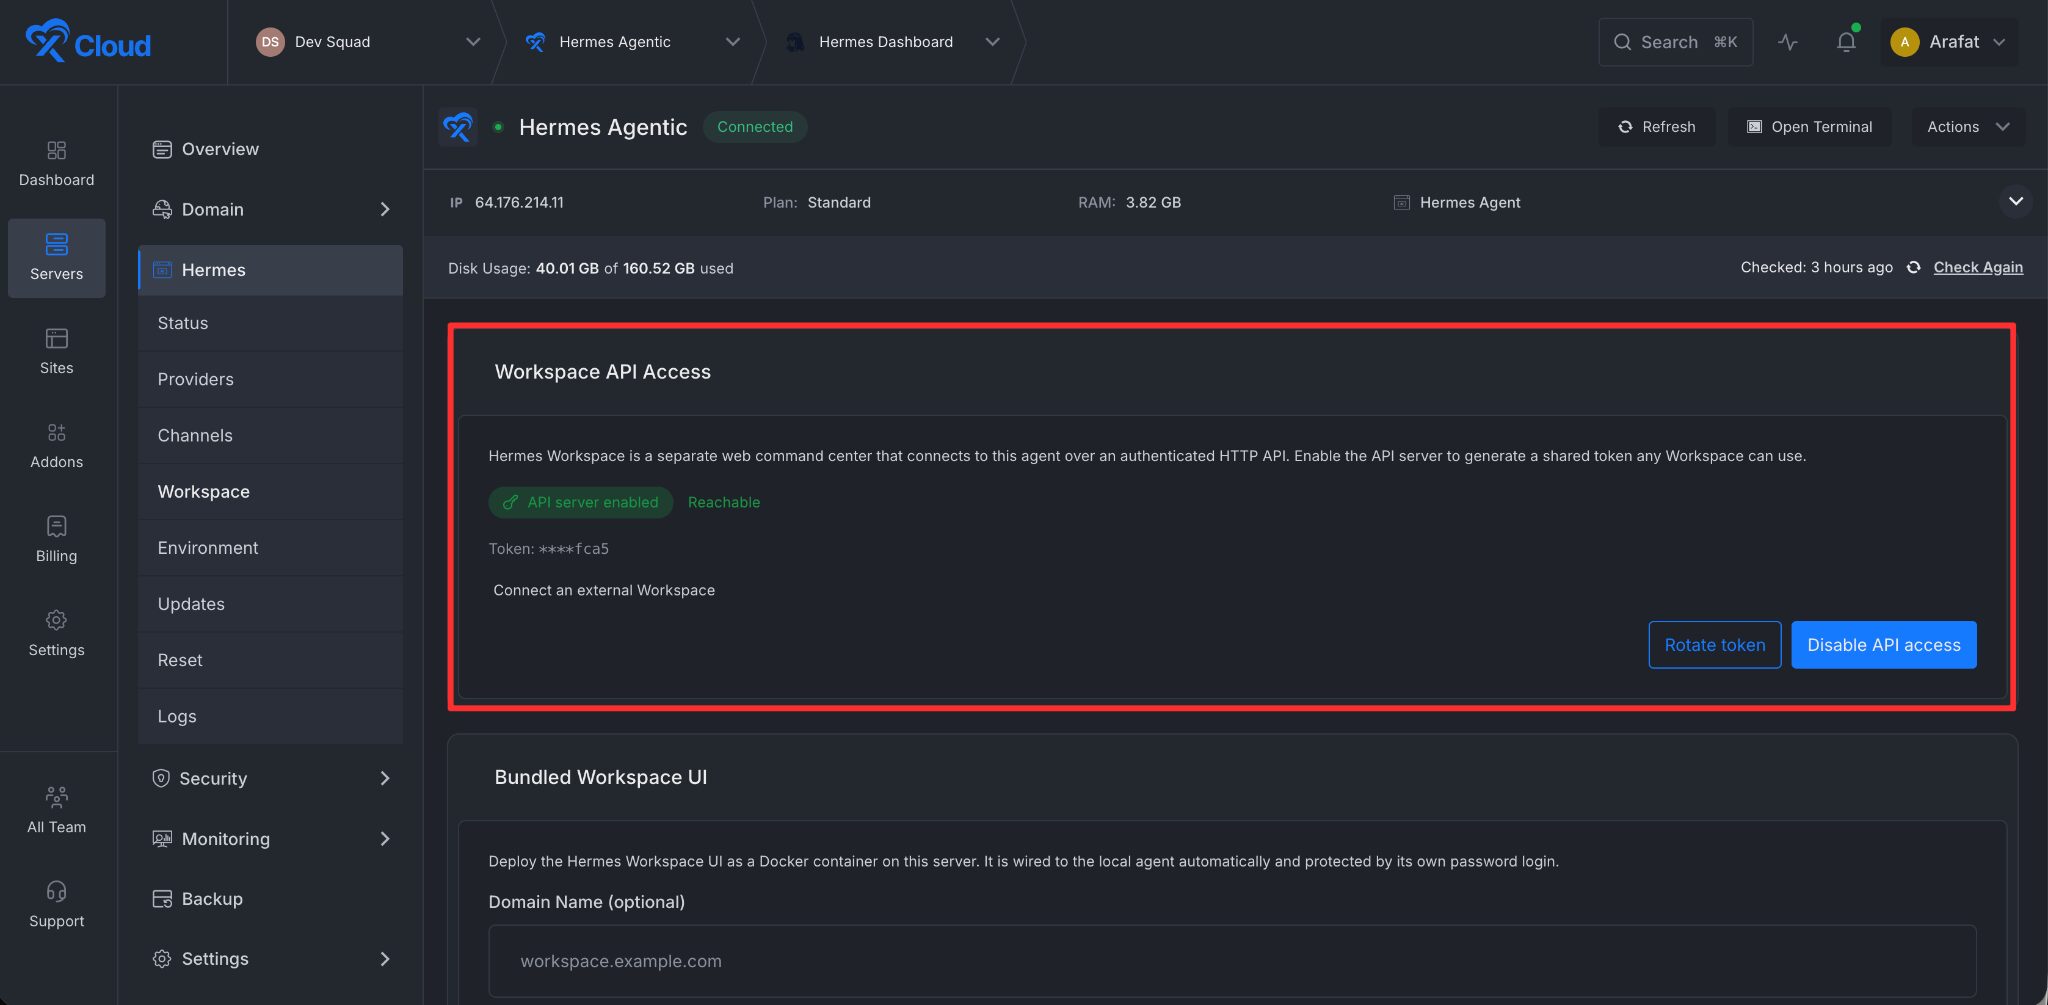
The Workspace connects to your agent over an authenticated HTTP API. Enable the API server to generate a shared token that any Workspace can use to connect.
Step 3: Generate the API Token
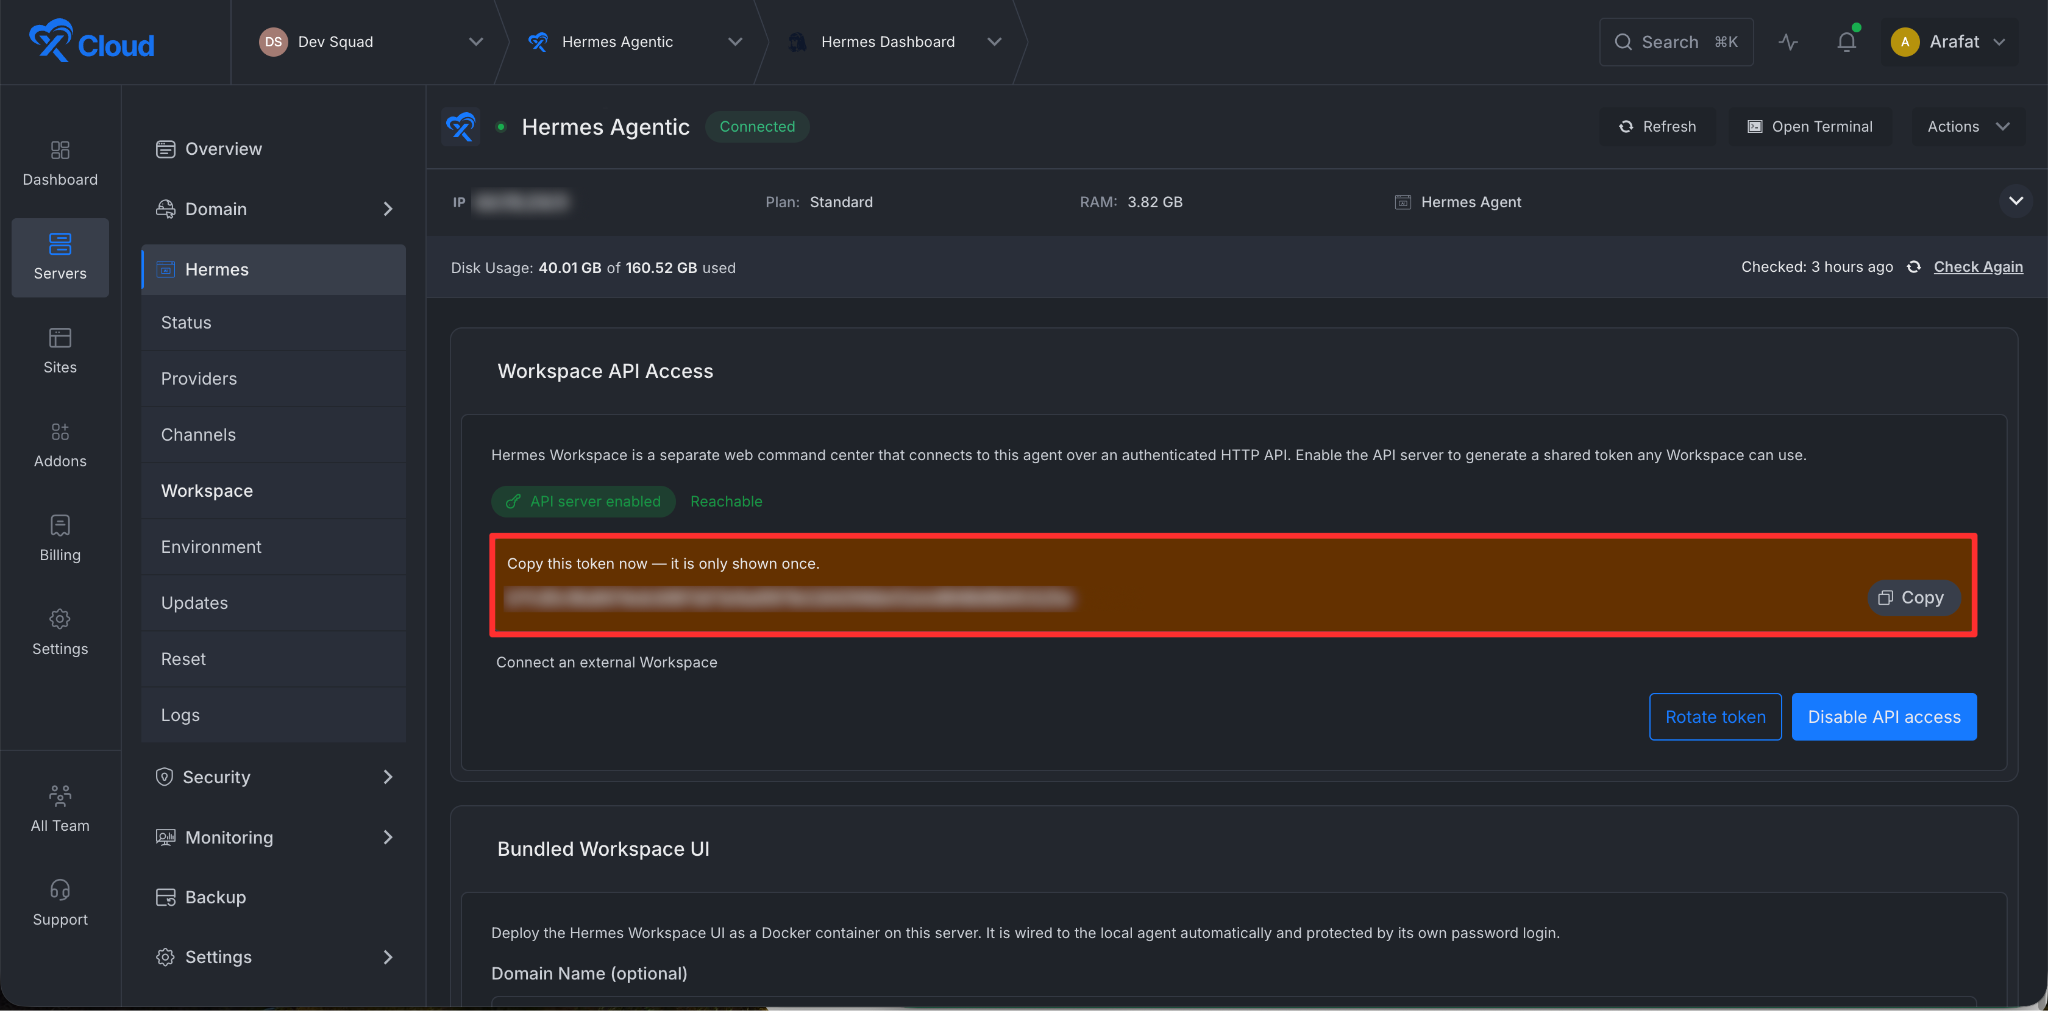
Click the Rotate token button to generate your API key. Once the token appears, copy it and store it somewhere safe. You will need it to authenticate the connection, and it will not be shown again in full.
Step 4: Add a Domain & Set Up SSL
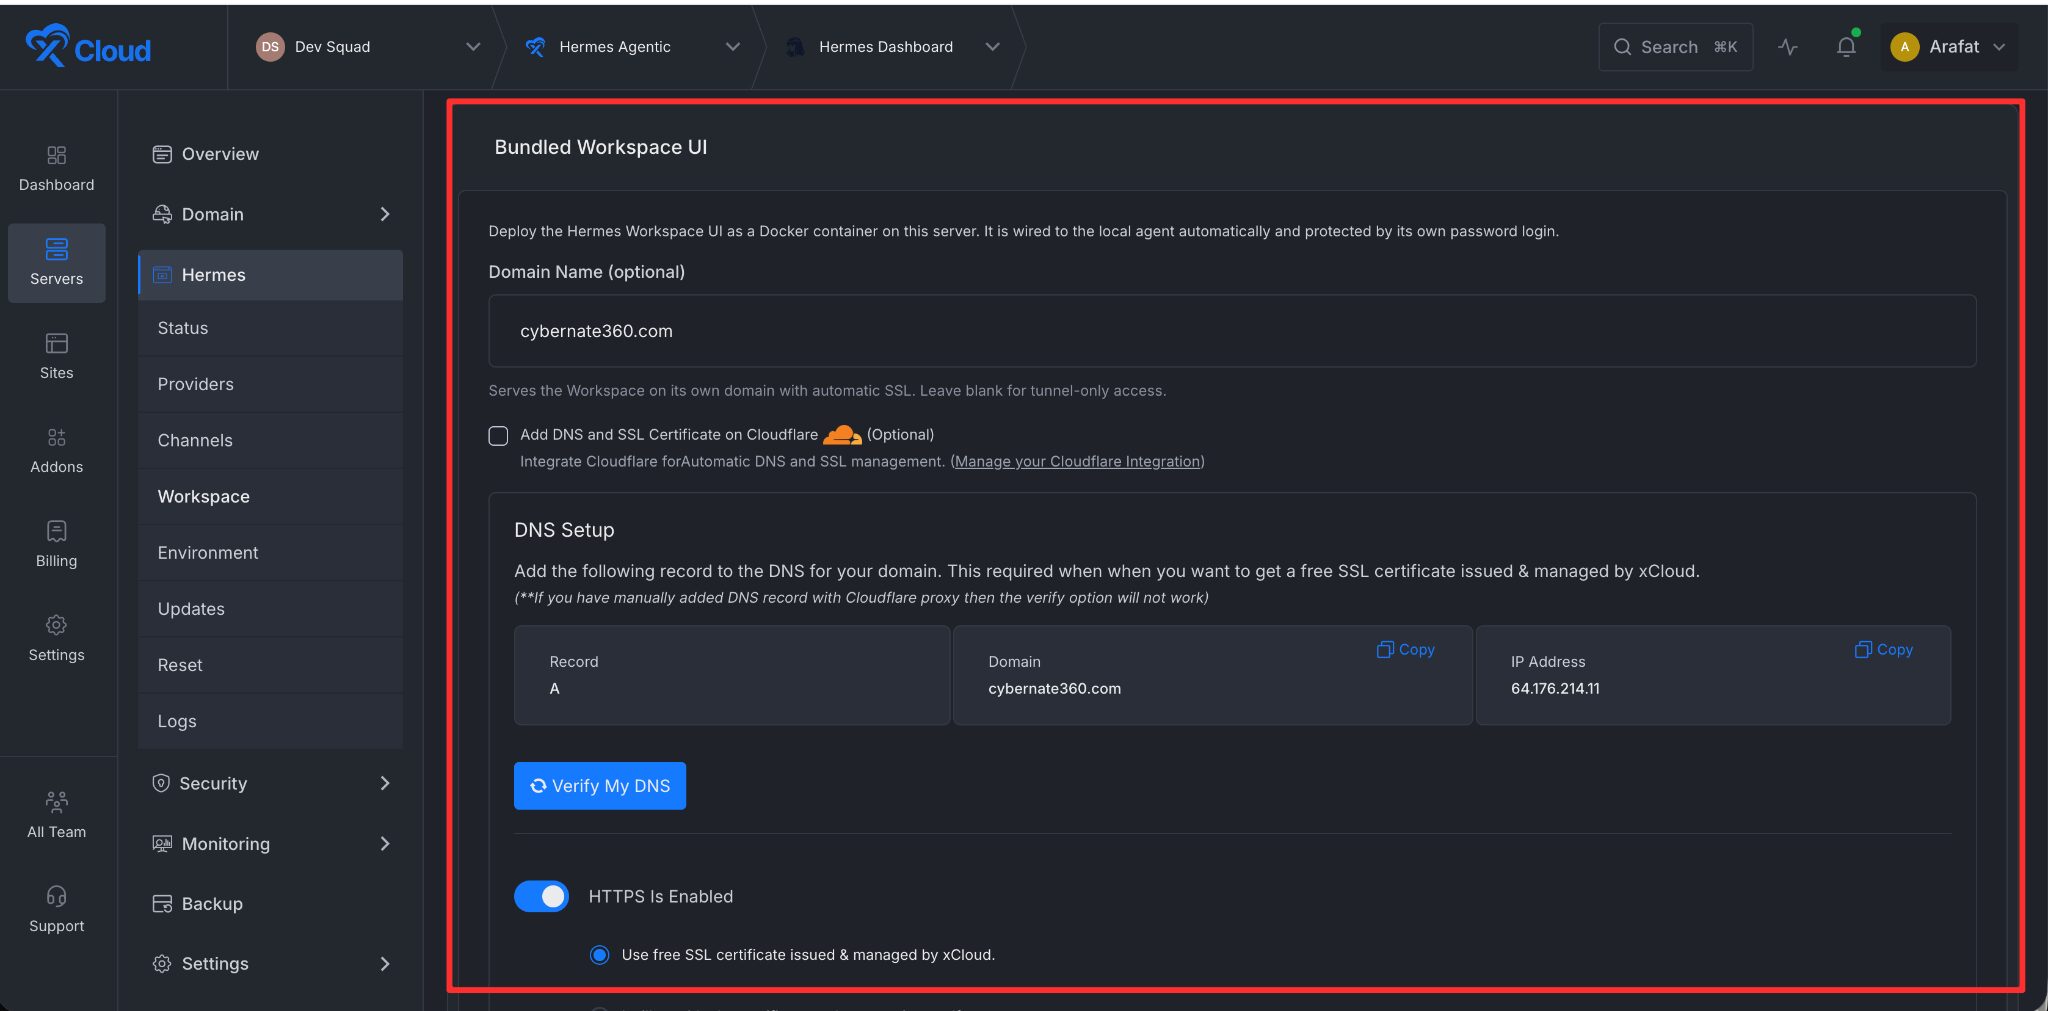
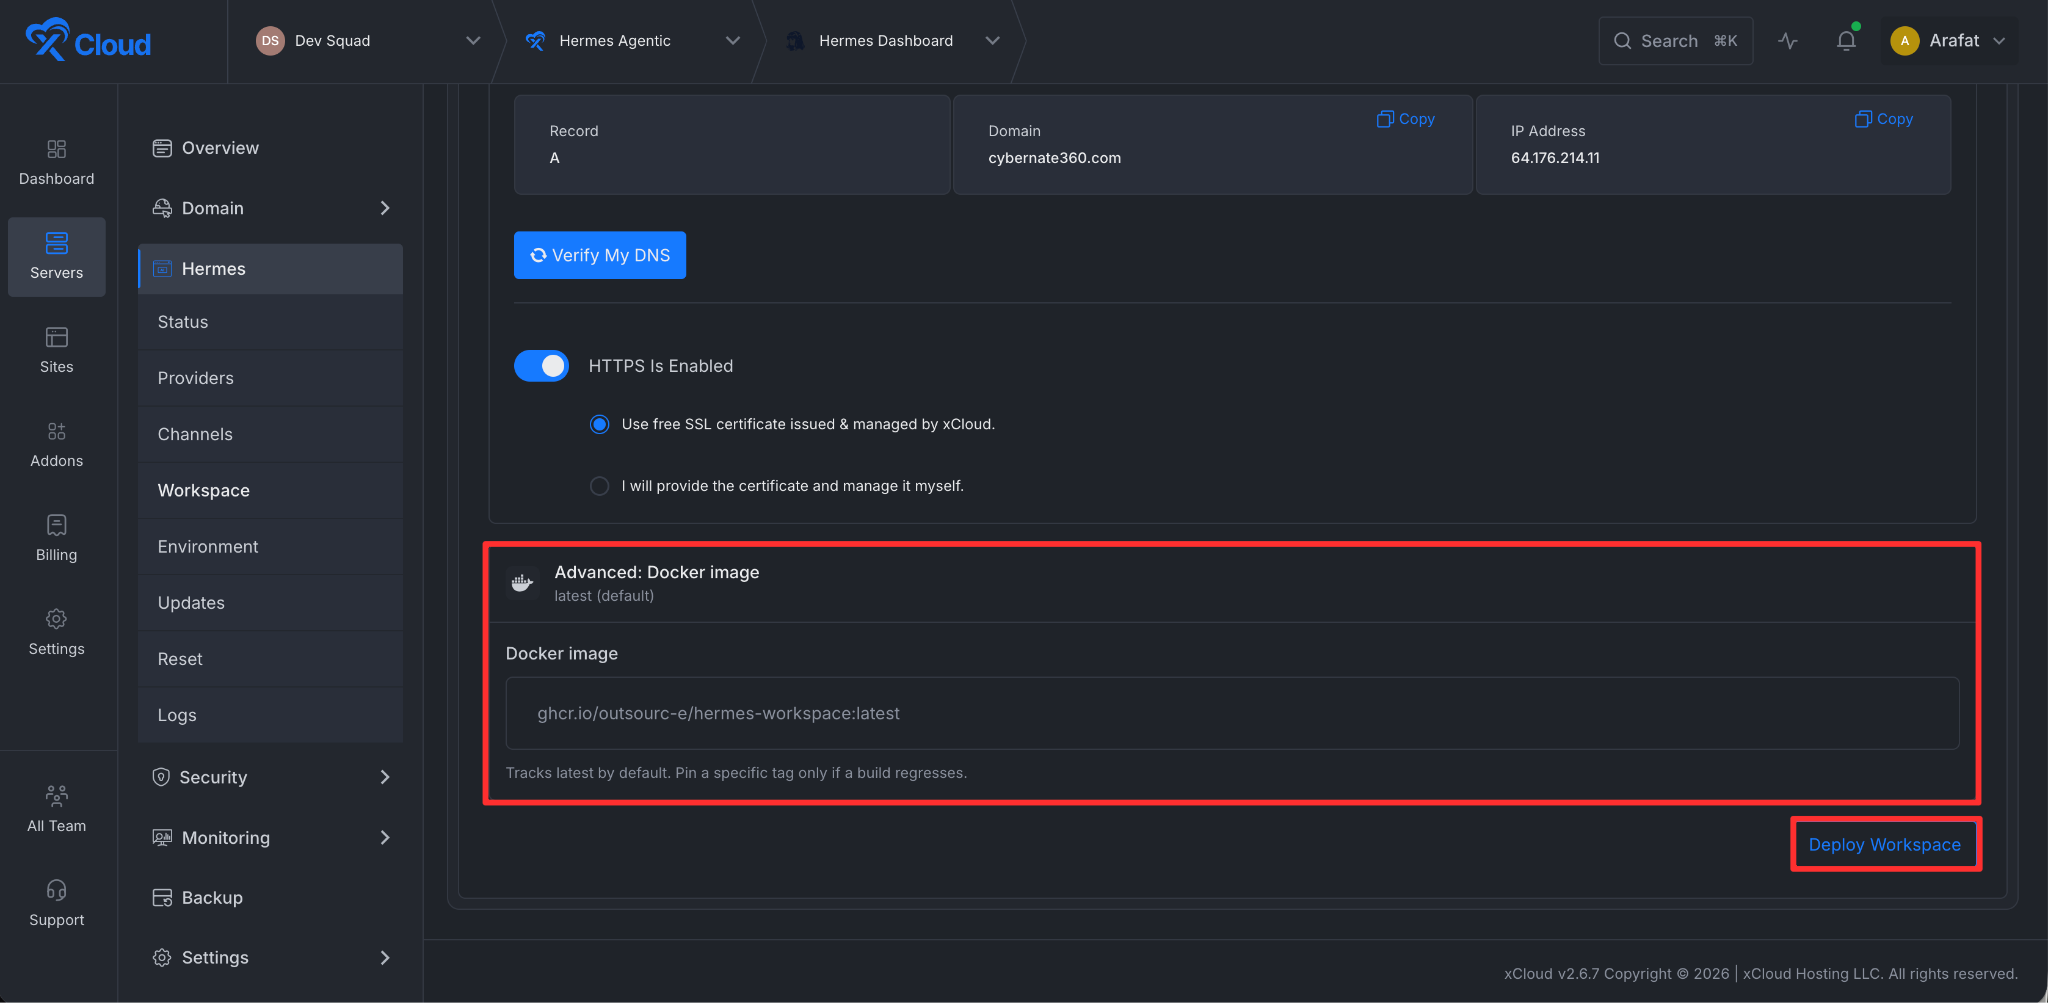
Enter a custom domain for your Workspace. You have two options to verify it. Add the provided records with your domain provider and verify the DNS manually, or connect your domain through Cloudflare and verify the DNS on xCloud with a single click. A free SSL certificate is enabled by default, so your Workspace is secured automatically. If you prefer, you can use your own SSL certificate instead.
Step 5: Configure a Docker Image (Optional)
If your setup requires it, you can also configure a Docker image for the Workspace at this stage.
Once all your settings are in place, click Deploy Workspace to begin configuration. xCloud will provision everything for you.
Step 6: Open Your Workspace
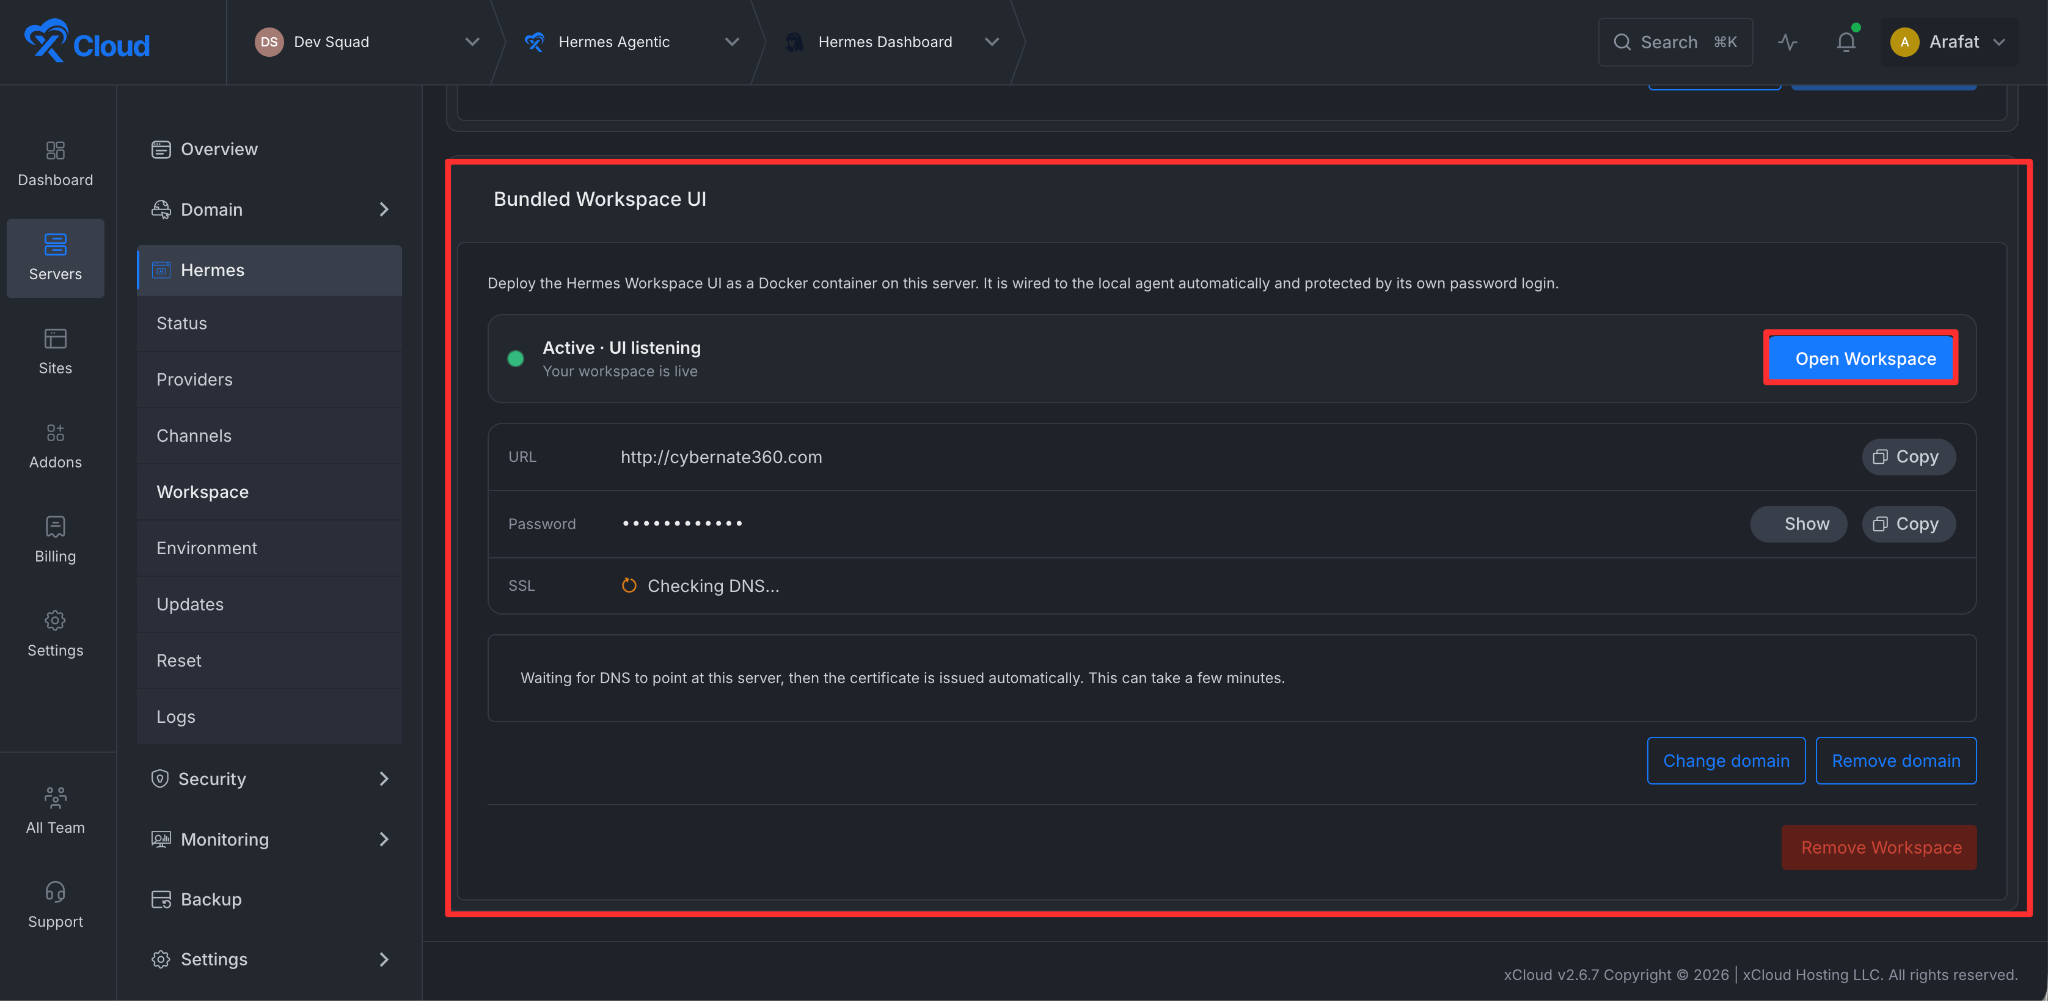
After a short wait, you will see that the Hermes Workspace has been deployed. Copy the password, then click the Open Workspace button to go straight to your Hermes Workspace dashboard.
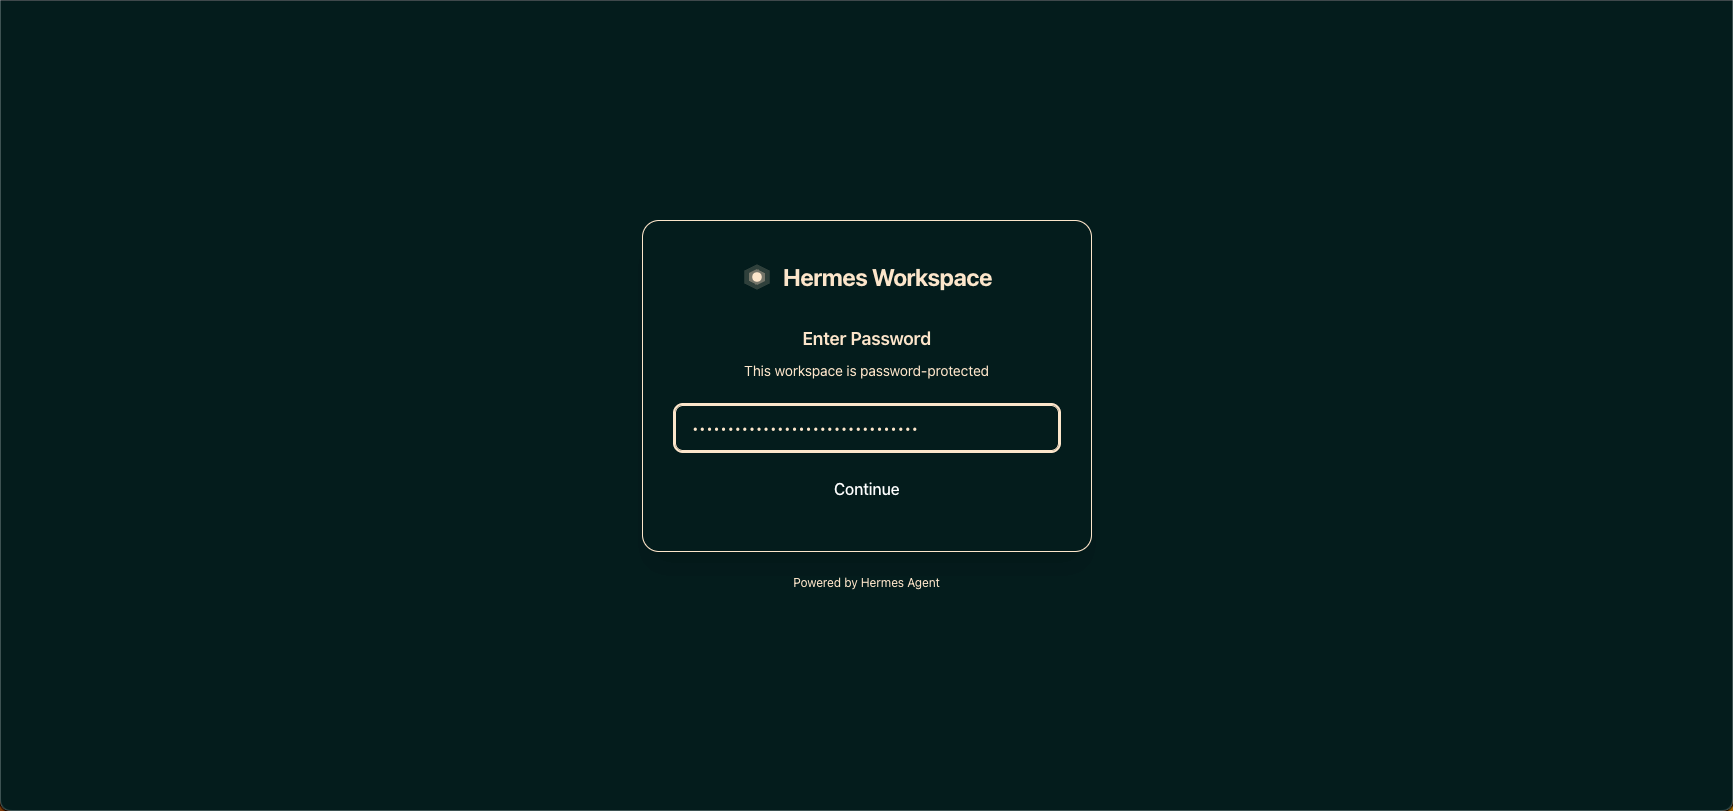
Next, you will be redirected to the Hermes Workspace’s login page, enter the password you have copied and click on the ‘Continue’ button.
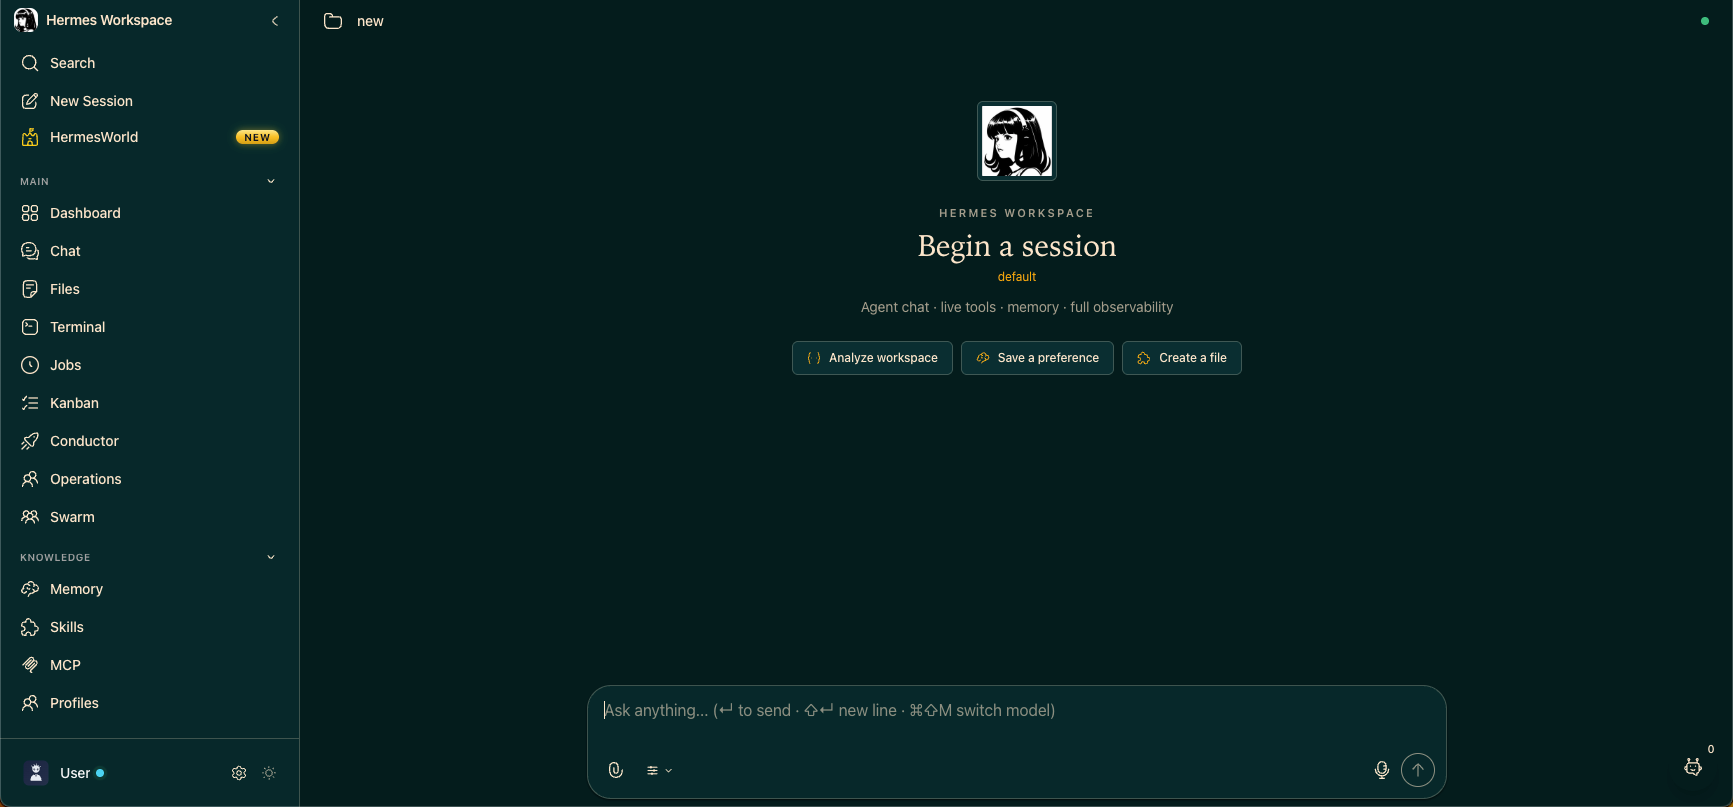
Your Hermes Workspace is now live and connected to your Hermes Agent through a secure, authenticated API. From the Workspace dashboard, you can manage your agent, run tasks, and monitor activity, all from one place in the browser.
Keep your API token and Workspace password stored securely, and rotate the token whenever you need to refresh access. With the setup complete, you are ready to put Hermes Workspace to work.
Still stuck? Please contact our support team.