

How to Auto Deploy a Static Website From GitHub on xCloud
Updated September 27, 2026 · 4 min read
This guide explains how to auto deploy static website GitHub projects on xCloud. After setup, every push to your selected branch can trigger xCloud to pull the latest code, run your deployment script, and update the live site.
Before you start
- An xCloud account with a server ready for the site.
- A GitHub repository containing the static website source or final files.
- Permission to authorize the repository for xCloud.
- A known build command and output folder if the repository requires a build step.
Connect GitHub so xCloud can access the repository for deployment.
Step-by-step Auto-Deploy Setup Of A Static Website From GitHub On xCloud
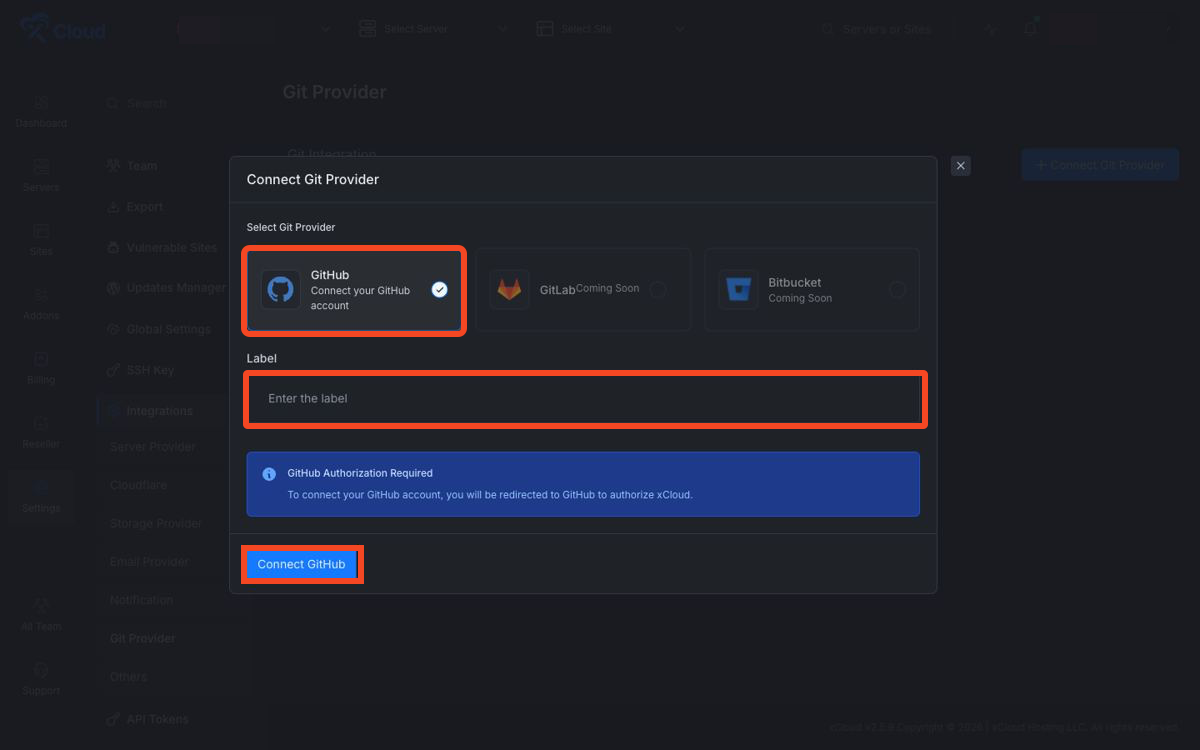
Step 1: Connect GitHub to xCloud
Open your xCloud settings or site creation flow and connect your GitHub account. Give the connection a clear label if you manage multiple GitHub accounts. Authorize GitHub so repositories can be selected from xCloud.
Step 2: Create a site from the repository
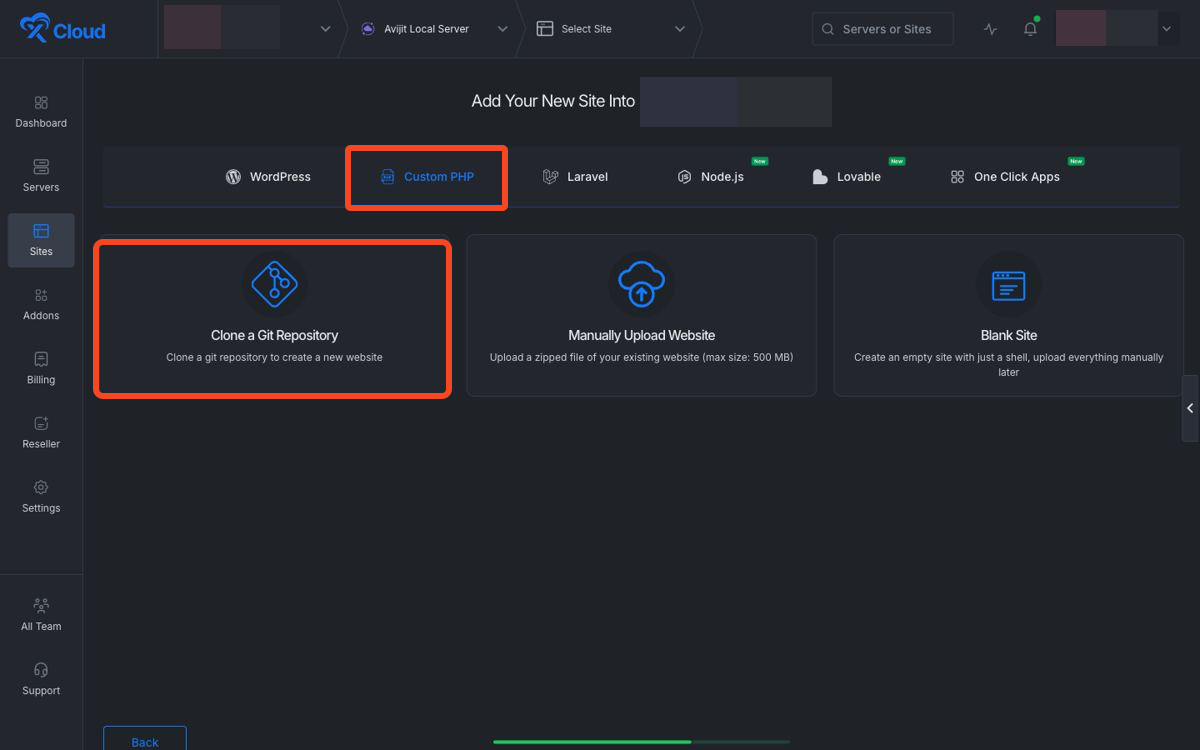
Open the target server, create a new site, and choose the Git repository option. Select the repository and branch xCloud should deploy. Choose the repository and production branch for the static site.
Step 3: Enable push-to-deploy
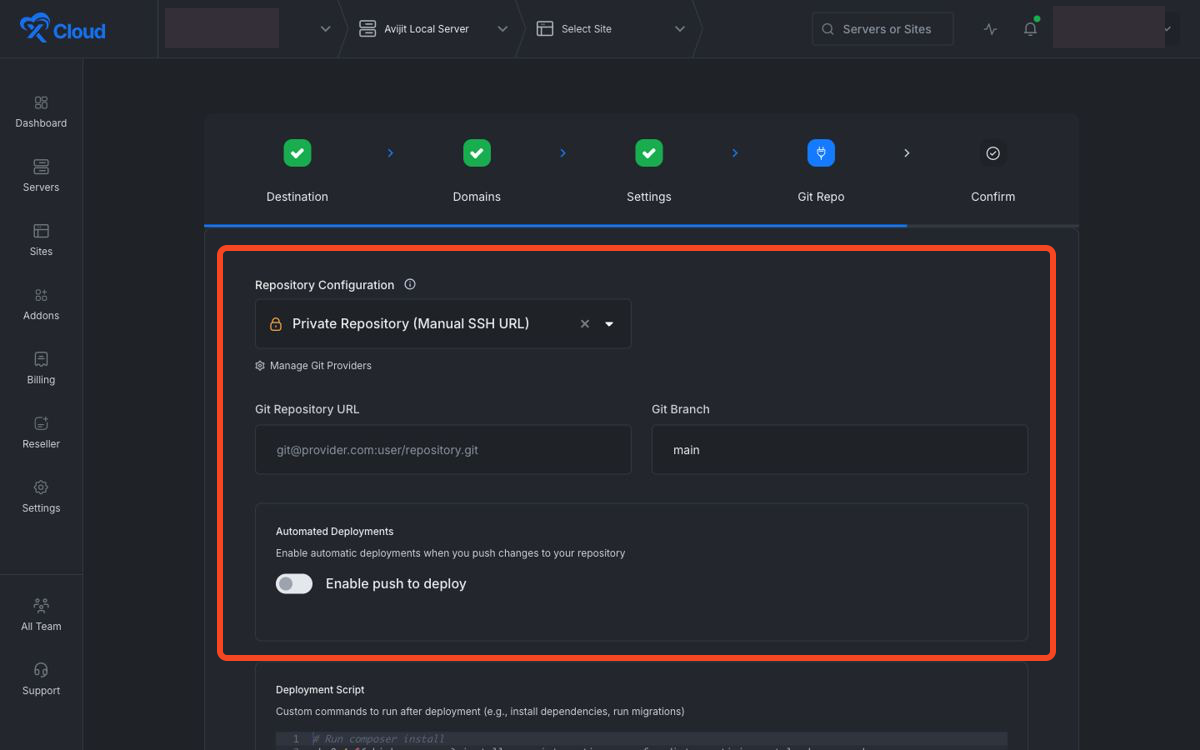
Turn on push-to-deploy so GitHub sends a webhook event to xCloud after pushes to the configured branch. Only pushes to that branch should trigger the deployment. Enable push-to-deploy for automatic deployments from GitHub.
Step 4: Add the deployment script
If the repository already contains final static files, the deployment script may be minimal. If it needs a build, install dependencies, build, and copy the output folder into the web root.
cd /var/www/your-site
npm ci
npm run build
rsync -a --delete dist/ ./
Set the commands xCloud should run on each deployment.
Step 5: Add domain, SSL, and backups
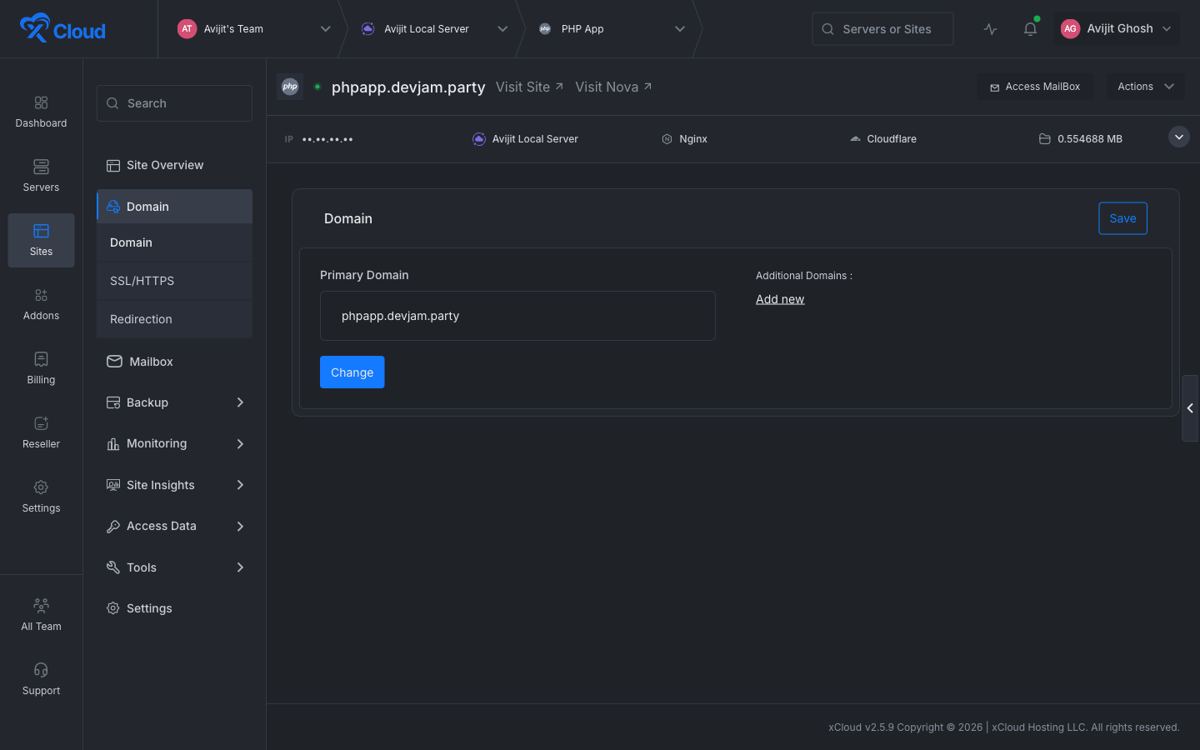
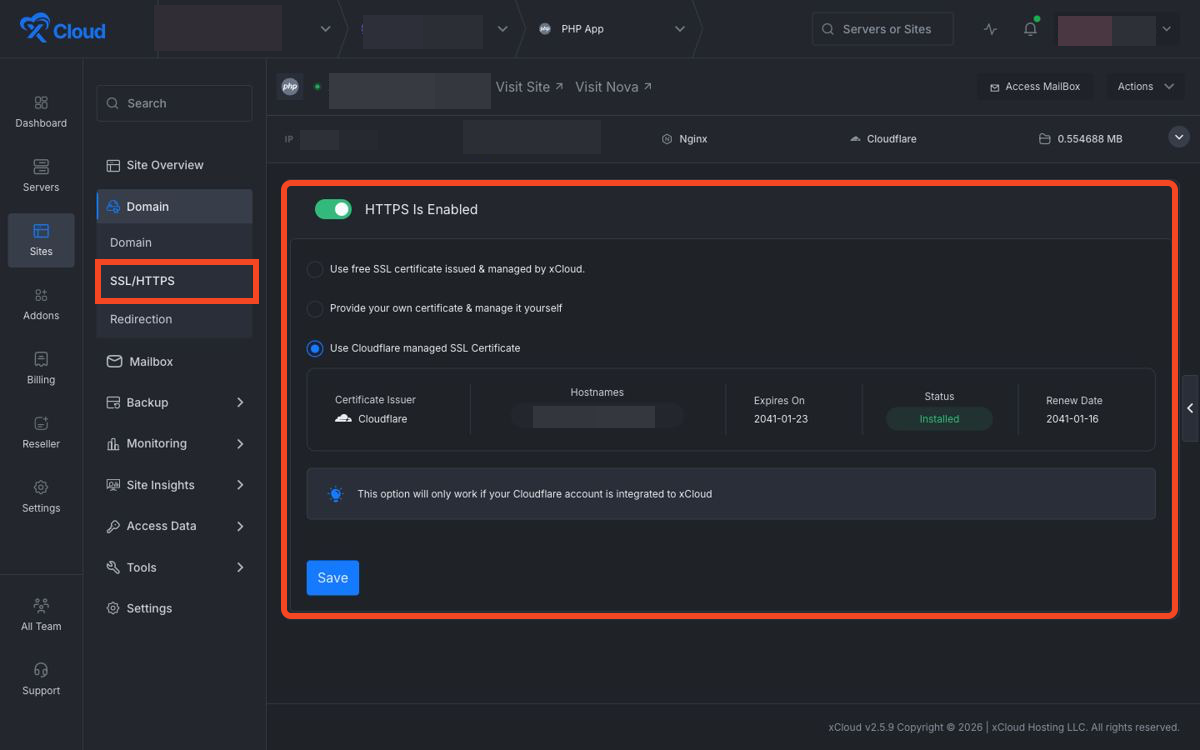
Attach the domain, enable HTTPS, and configure backups before relying on automatic deployments. A backup gives you a rollback point if a bad commit ships to production. Finish the setup with domain, SSL, and backups.
Verify auto-deploy
- Make a small visible change in the repository.
- Push to the configured branch.
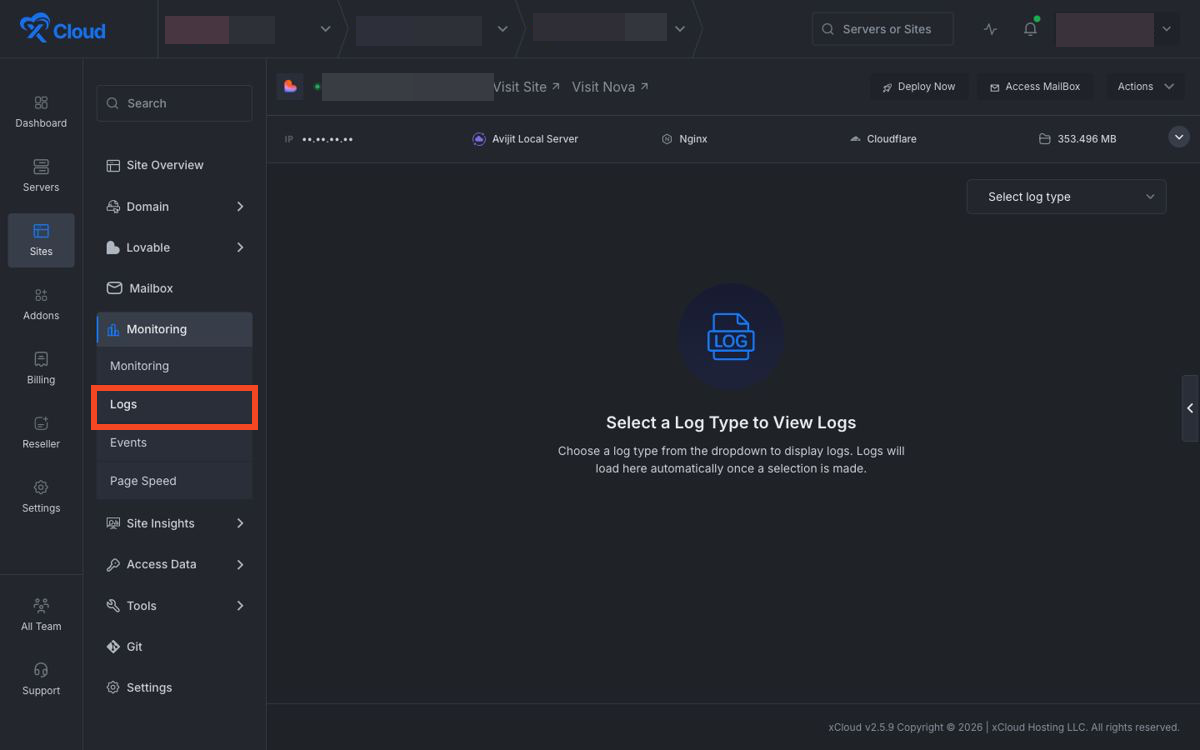
- Open xCloud deployment logs and confirm the webhook triggered a new deployment.
- Visit the site and verify the change appears.
- Use deployment logs to verify every push-to-deploy run.
Rollback or pause deployments
If a deployment ships the wrong version, revert the commit and push again, or restore the site from a known-good xCloud backup. To pause automatic deployments while investigating, disable push-to-deploy in the site Git settings.
Troubleshooting
- If Git pushes do not trigger deployment, confirm push-to-deploy is enabled and the push went to the configured branch.
- If GitHub webhooks were removed or changed, re-save the Git settings in xCloud so the webhook can be recreated where supported.
- If the build succeeds but old content remains, verify the script copies the correct output directory into the web root.
- If environment variable changes do not appear, run a new deployment after saving them.
- If SSL fails after deploy, debug DNS/SSL separately; deployment and DNS propagation are different parts of the launch.
Frequently Asked Questions
Can I switch the deployed branch later?
Yes. Change the configured branch in the xCloud Git settings, save, and run the next deployment from that branch.
Can I manually redeploy without a Git push?
Yes. Use the manual deployment option in xCloud when you want to rerun the deployment script without changing the repository.
Does auto-deploy replace backups?
No. Auto-deploy updates the site, while backups give you rollback protection. Use both for safer releases.
Related docs and resources
- xCloud documentation
- xCloud Dashboard
- GitHub webhooks documentation for push-to-deploy workflows
How the auto-deploy loop works
- You push a commit to the selected GitHub branch.
- GitHub sends a webhook event to xCloud.
- xCloud pulls the latest code from the repository.
- xCloud runs the configured deployment script.
- The script copies the final output to the web root.
- The next browser request loads the updated version after cache clears.
Deployment script patterns
The deployment script should be repeatable. A good script can run many times without leaving old build files, nested folders, or partial output behind.
# Static repository with files already in the root
cd /var/www/your-site
echo "No build step required"

# Static project with a build output folder
cd /var/www/your-site
npm ci
npm run build
rsync -a --delete dist/ ./
Release safety tips
- Use a production branch for live deployments.
- Review changes before merging into the deployment branch.
- Create backups before major redesigns or build-system changes.
- Keep deployment logs available when asking for support.
- Pause push-to-deploy if a bad commit is repeatedly deploying while you investigate.
What to send to xCloud Support
- The xCloud site name and public domain.
- The GitHub repository/branch label, without private tokens.
- The time of the last push and whether GitHub shows webhook delivery.
- The deployment log output from xCloud.
- Whether manual Deploy Now works while GitHub push-to-deploy does not.
For deployments that are stuck, failing, or not triggering at all, see Troubleshooting Git Deployments.
Still stuck? Feel free to contact our support team.