

How To Monitor And Fix Broken Links In xCloud
Updated August 10, 2026 · 4 min read
Broken links can hurt your visitors’ experience and make it harder for search engines to crawl your WordPress site properly. xCloud’s Broken Link Monitoring helps you scan a site, review broken pages, links, images, and redirects, and create redirects directly from the findings screen.
In this guide, you will learn how to enable Broken Link Monitoring, start a scan, follow live scan progress, review detected issues, and create a redirect for a broken page.
Prerequisites
Before you begin, make sure you have:
- A WordPress site connected to xCloud.
- Permission to manage the site’s monitoring tools.
- Access to Sites from the xCloud dashboard.
Step 1: Open Broken Link Monitoring
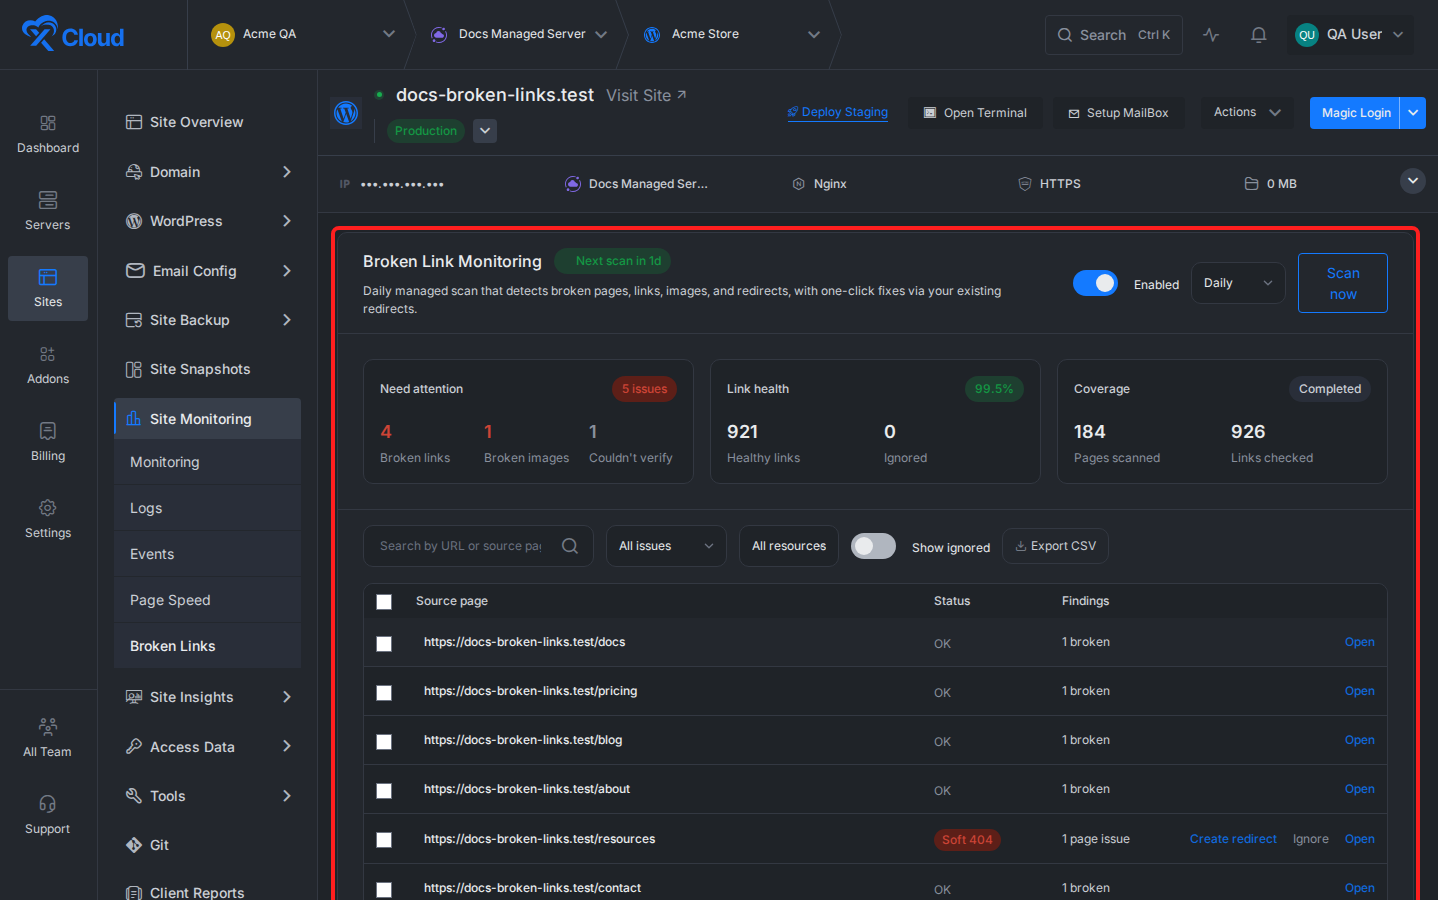
From your xCloud dashboard, open the WordPress site you want to check. Go to Site Monitoring and select Broken Links.
The Broken Link Monitoring page shows the scan status, issue counts, link health, coverage, filters, and the findings table in one place.
Step 2: Enable scheduled scans and choose a frequency
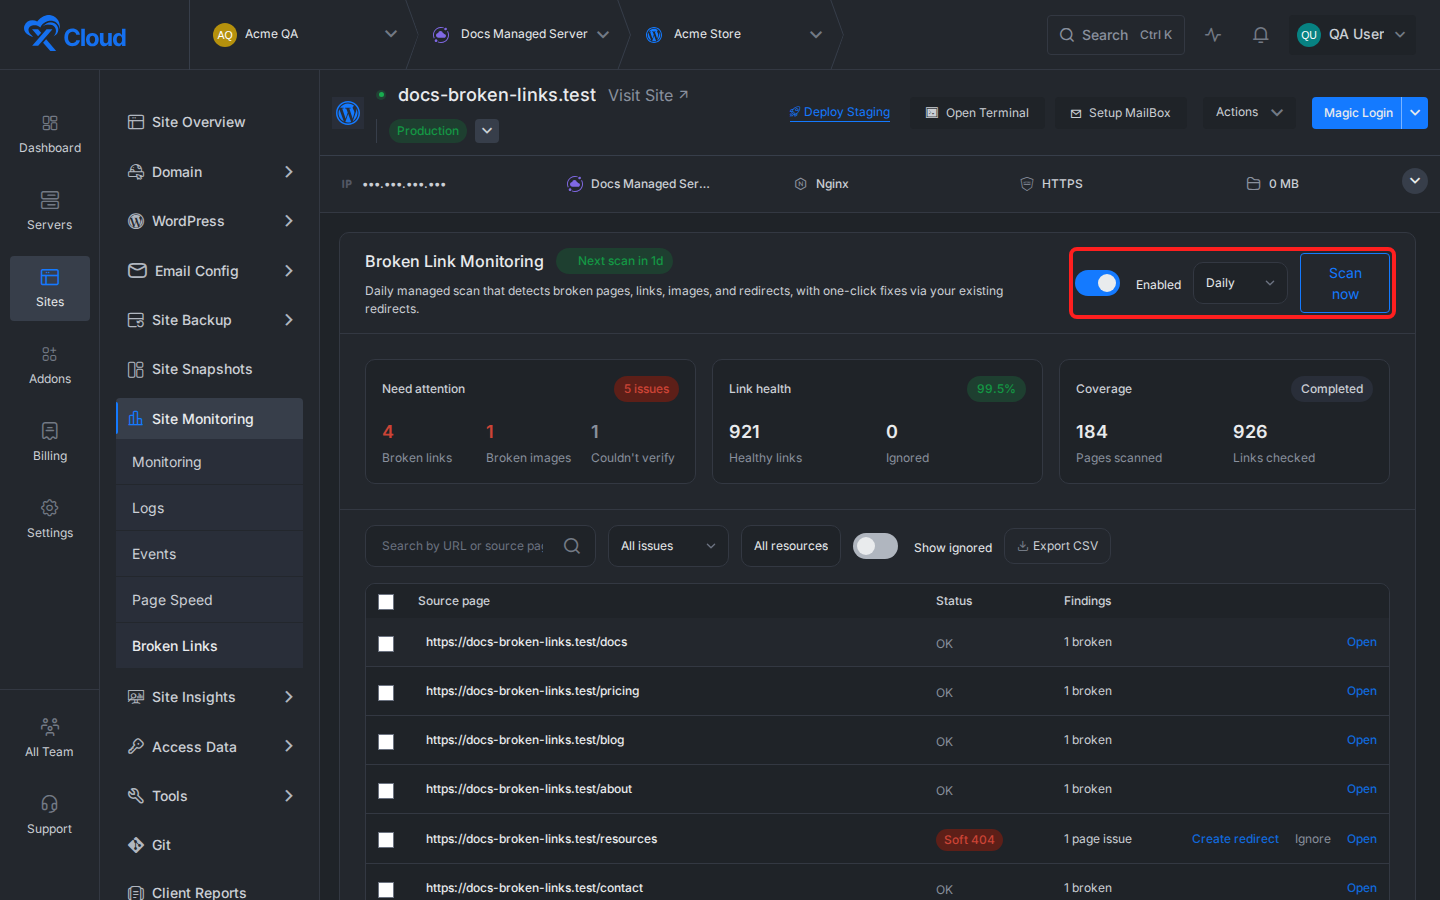
At the top-right of the Broken Link Monitoring panel, turn on the Enabled toggle. Then choose how often xCloud should run the managed scan.
Use the Scan now button when you want to run a scan immediately instead of waiting for the next scheduled scan.
Step 3: Run a scan and watch the live progress
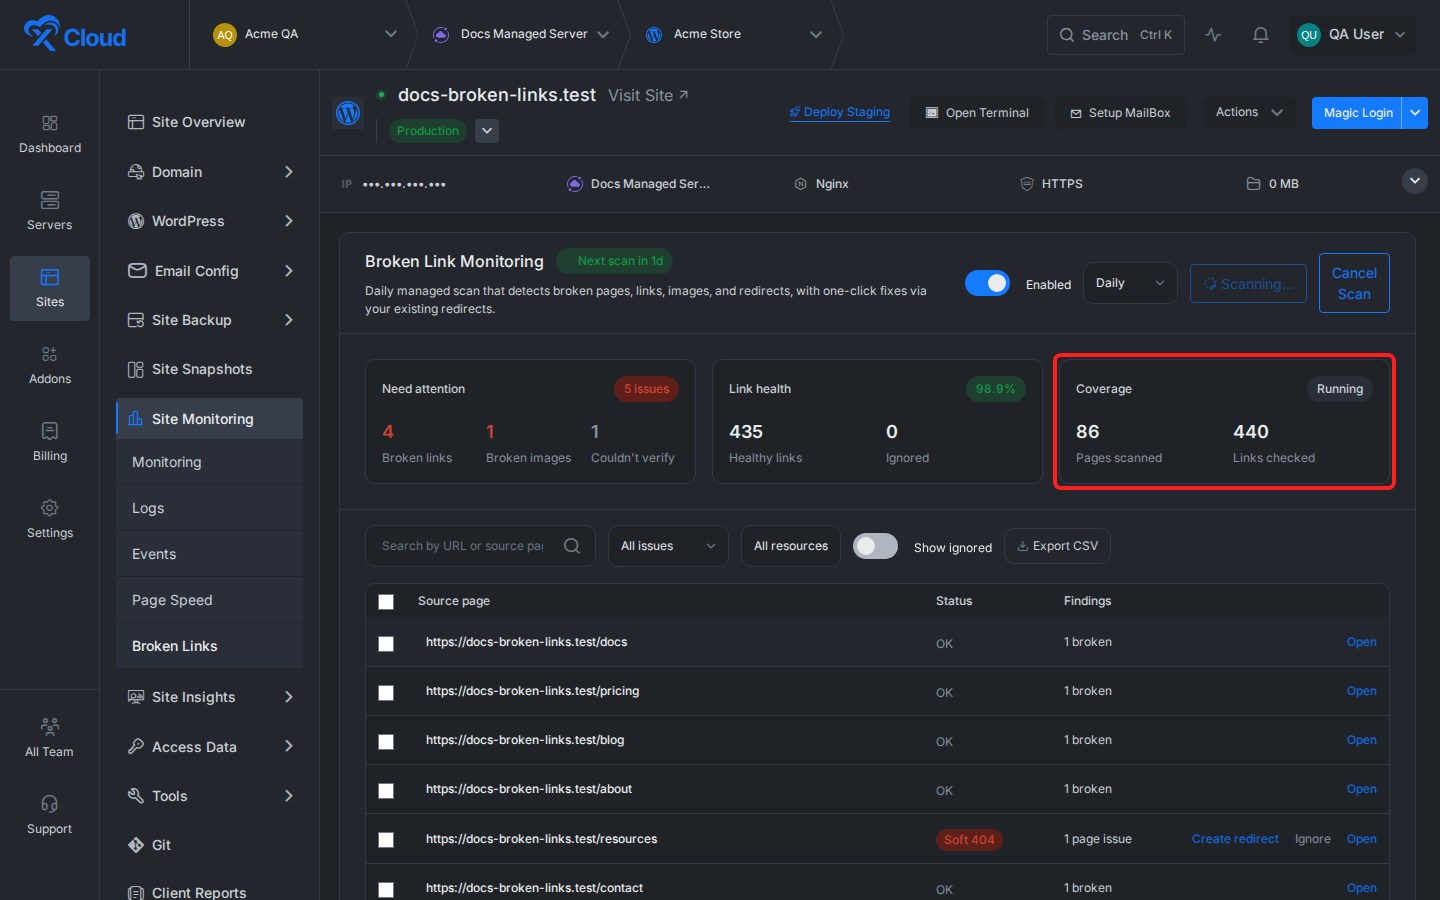
After you start a scan, xCloud updates the scan progress while the scan is running. The Coverage card shows how many pages have been scanned and how many links have been checked.
If you started the scan by mistake or need to stop it, use Cancel Scan while the scan is still running.
Step 4: Review the scan results
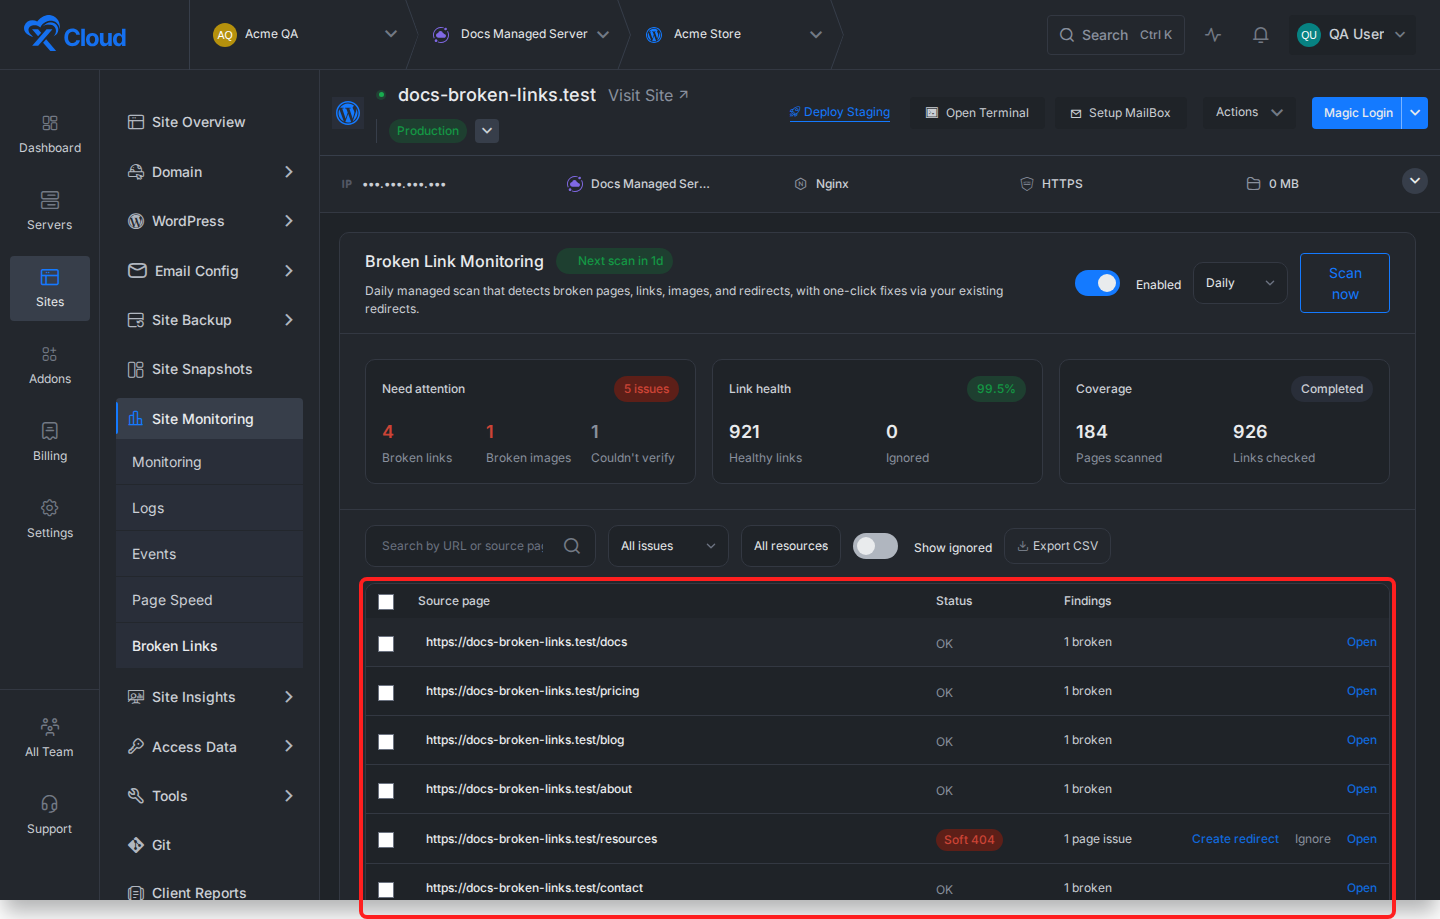
When the scan finishes, review the results in the findings table. Each row shows:
| Column | What it means |
|---|---|
| Source page | The page where xCloud found the issue. |
| Status | The detected issue type, such as a soft 404. |
| Findings | The number or type of broken-link findings on that page. |
| Open | Opens the finding details for closer review. |
| Create redirect | Starts the redirect flow when the finding can be fixed with a redirect. |
| Ignore | Hides a finding you do not want to act on. |
Use the search box and filters to narrow the results by URL, issue type, or resource type. You can also enable Show ignored to include ignored findings in the table, or use Export CSV when you need to share the scan data outside xCloud.
Step 5: Create a redirect from a broken page finding
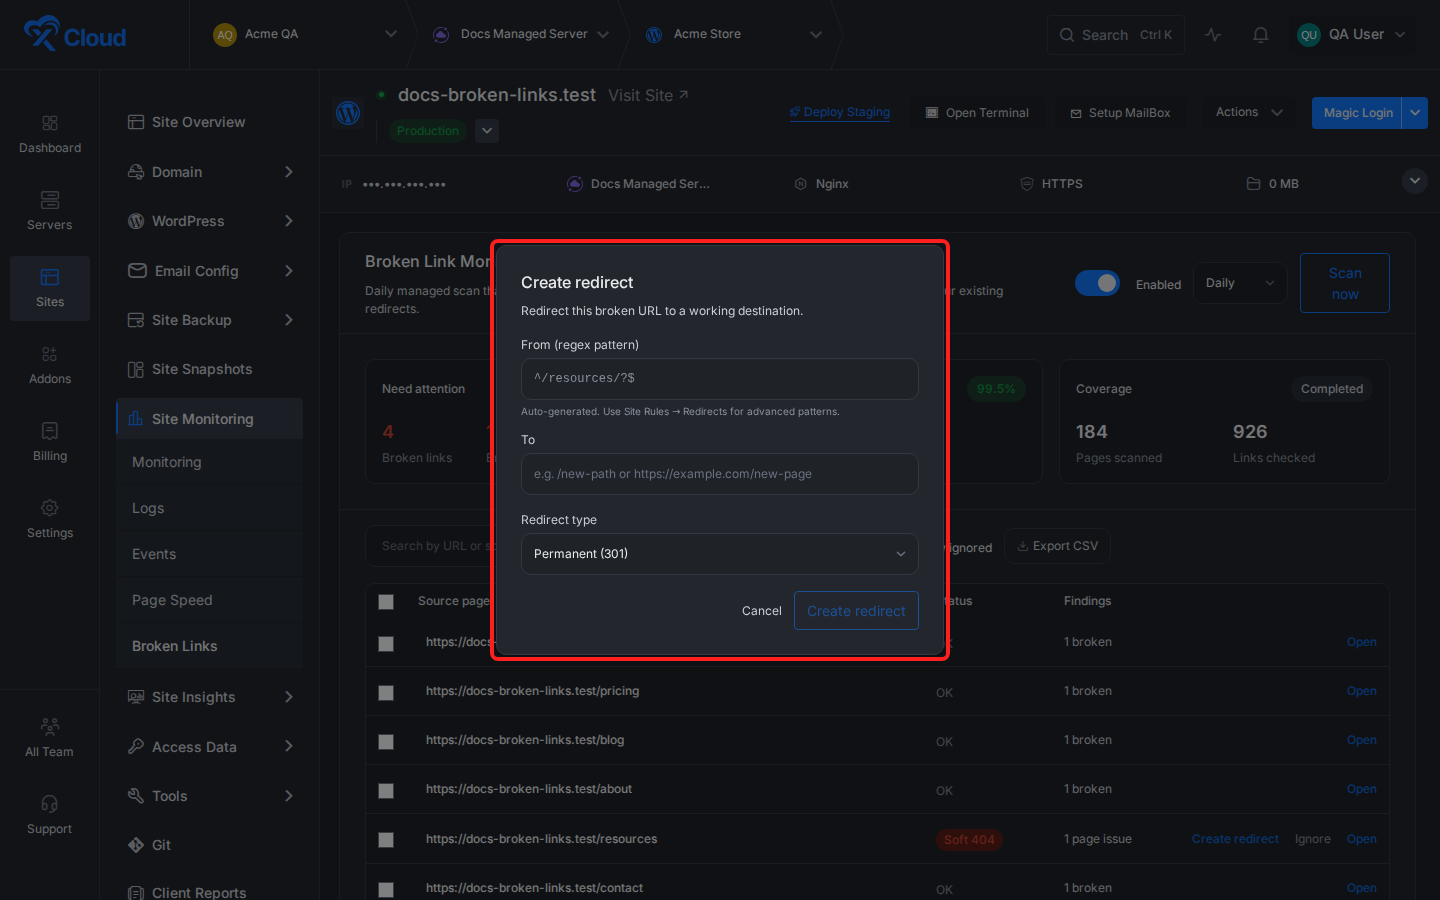
For eligible page issues, click Create redirect from the findings table. xCloud opens a redirect form with the broken URL pattern already filled in.
Enter the working destination in the To field, choose the redirect type, and click Create redirect.
Options and settings
| Option | Use it when |
|---|---|
| Enabled | You want xCloud to run scheduled broken-link scans for the site. |
| Frequency | You want to control how often scheduled scans run, such as daily. |
| Scan now | You want to start a scan manually. |
| Cancel Scan | A scan is running and you need to stop it. |
| Search | You want to find results for a specific URL or source page. |
| All issues | You want to filter by issue category. |
| All resources | You want to filter by resource type. |
| Show ignored | You want ignored findings to appear in the results. |
| Export CSV | You want to download the scan results. |
Notes and limits
- Broken Link Monitoring is available from the site’s Site Monitoring → Broken Links section.
- xCloud keeps scan counters visible while the scan runs, so you can see progress without refreshing the page.
- The scan can report broken links, broken images, pages that could not be verified, and page-level issues such as soft 404s.
- Redirect creation is available only for findings that xCloud can safely convert into a redirect pattern.
FAQ
Do I need to keep the page open while the scan runs?
No. The scan runs in the background. If you stay on the page, xCloud shows live progress as the scan updates.
Can I run a scan manually even if scheduled scans are enabled?
Yes. Use Scan now whenever you want to start a scan immediately.
Can I hide findings that I do not want to fix?
Yes. Use Ignore on findings that should not be included in your active review list. Use Show ignored if you need to view them later.
Can I export the findings?
Yes. Use Export CSV from the Broken Link Monitoring page to download the current scan results.