

How to Deploy DeepSeek Harness with xCloud (Fully Managed Hosting)
Updated August 17, 2026 · 3 min read
DeepSeek Harness is a powerful Claude Code alternative designed for building and running AI-powered workflows in a flexible, browser-based environment. With xCloud Fully Managed Hosting, you can deploy DeepSeek Harness on dedicated infrastructure without manually configuring the server, application stack, security, or authentication.
xCloud handles the underlying infrastructure so you can focus on connecting your preferred AI model providers and getting started. Follow this guide to deploy DeepSeek Harness with xCloud in just a few clicks.
Step 1: Create an xCloud Managed Server
First, start creating an xCloud managed server. Go to the ‘Server Name’ field and enter your server name. Then add a tag for the server. This step is optional and not mandatory. Then from the App type choose the ‘DeepSeek Harness’.
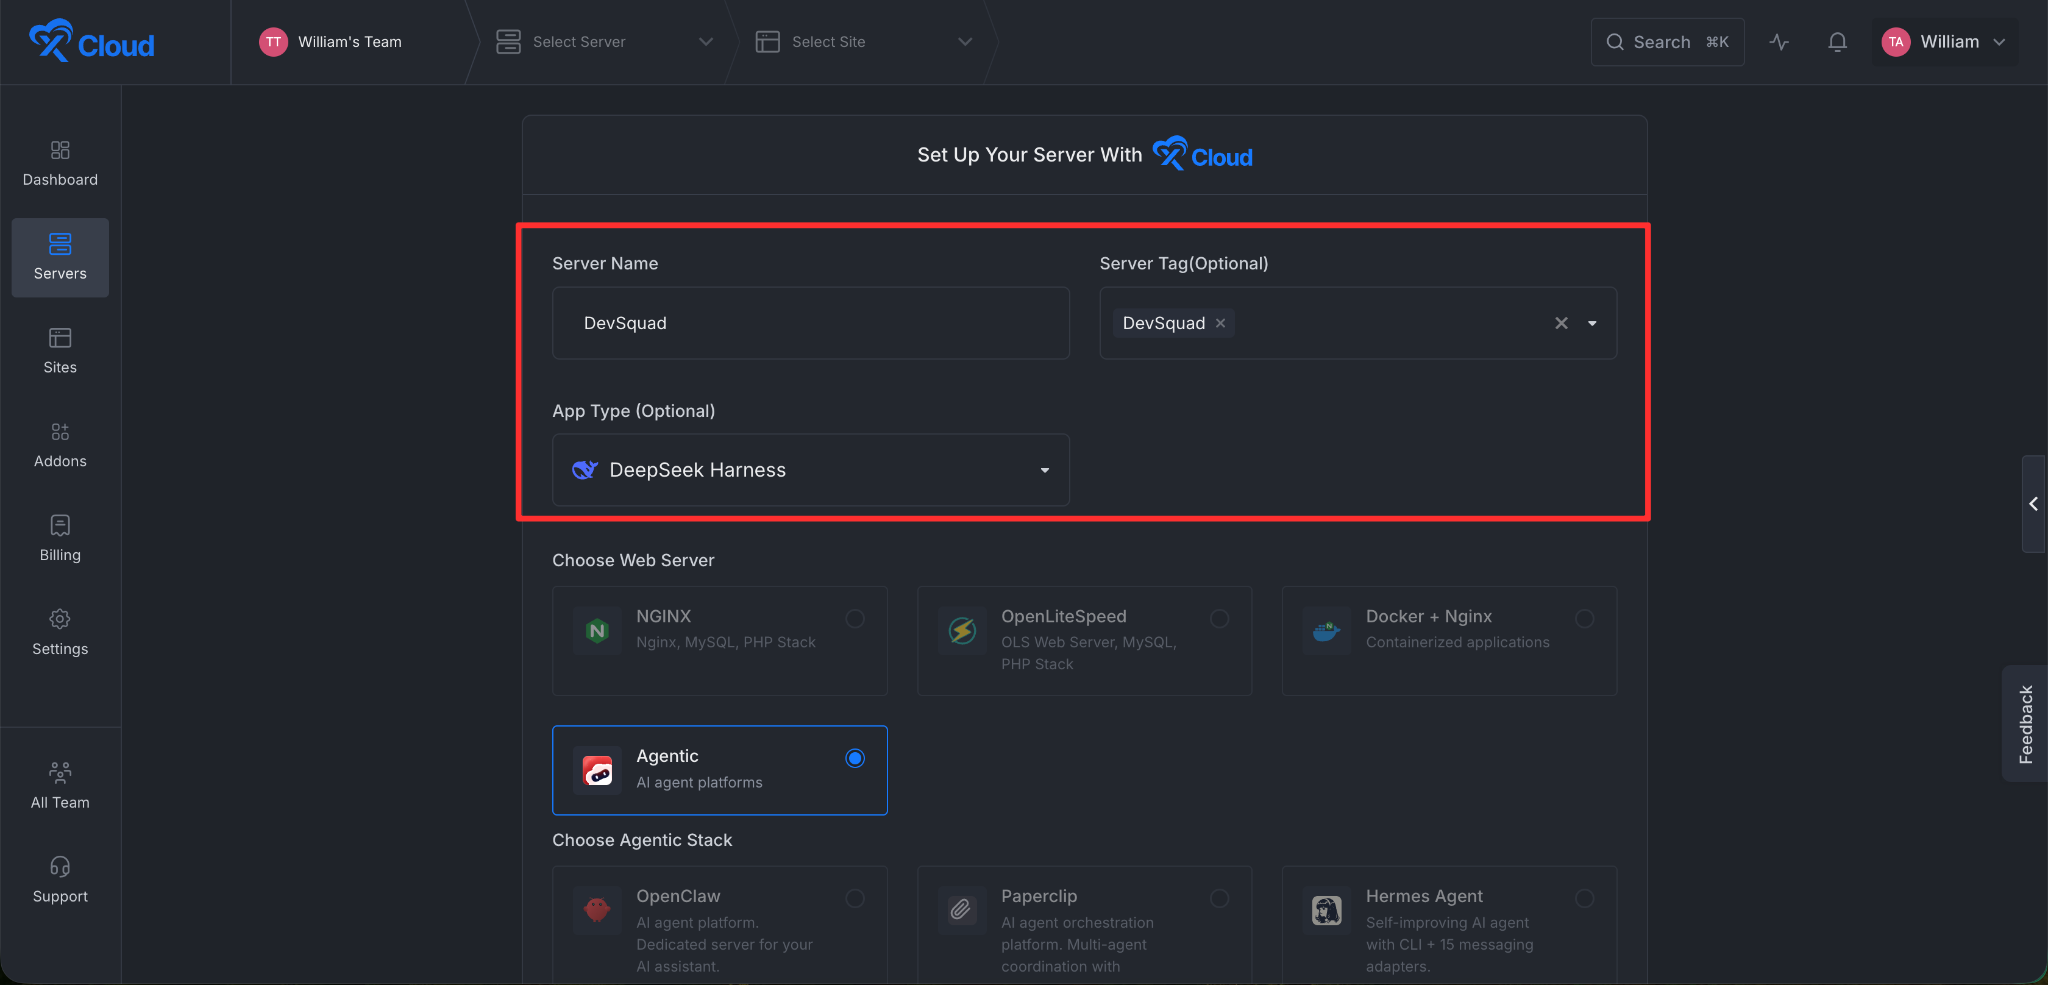
xCloud provides a separate stack for this application. Once you selected the App type as DeepSeek Harness you will see the ‘Agentic’ stack already selected.
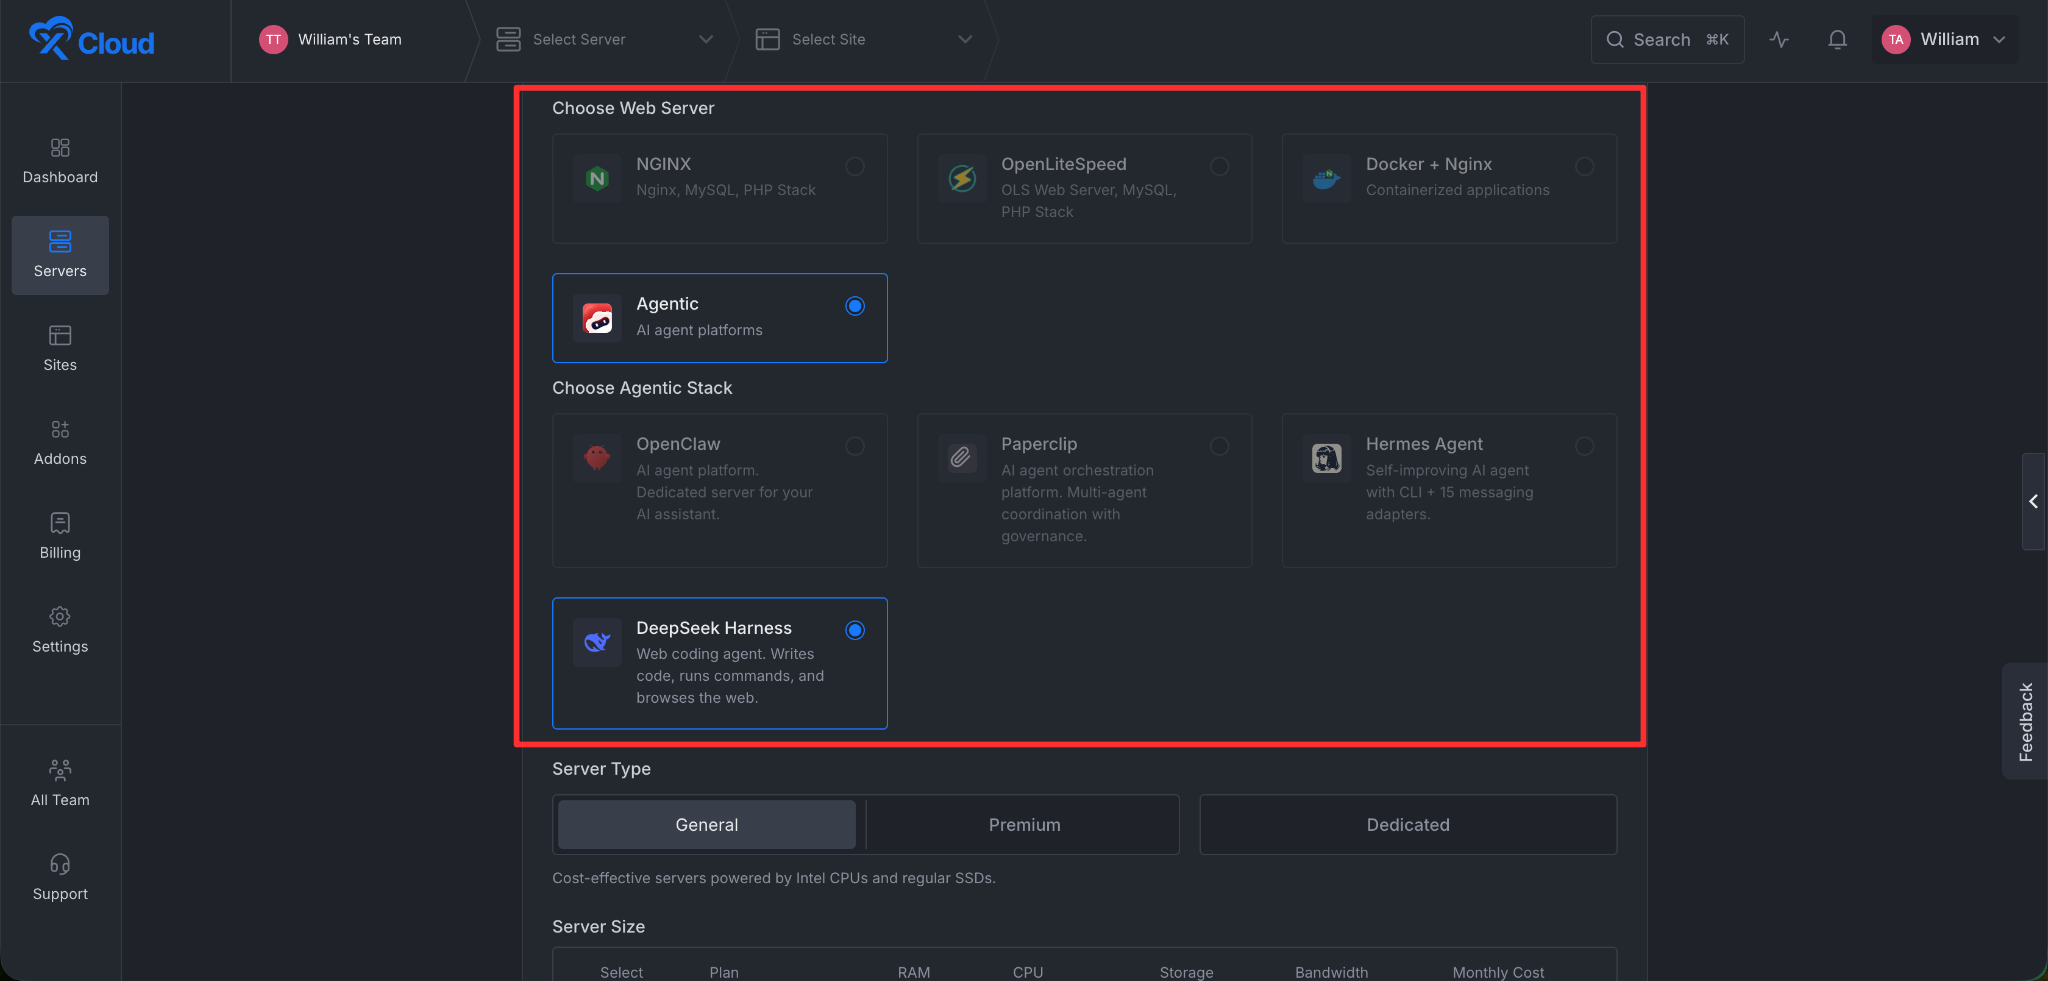
Next, go to the ‘Server Type’ option. Here, xCloud provides two types of servers. One is ‘General’, and the other one is ‘Premium’.
- General servers are cost-effective servers powered by Intel CPUs and regular SSDs.
- On the other hand, premium servers are blazing fast with quicker 3 GHz+ Intel Xeon CPUs, faster memory, and NVMe storage.
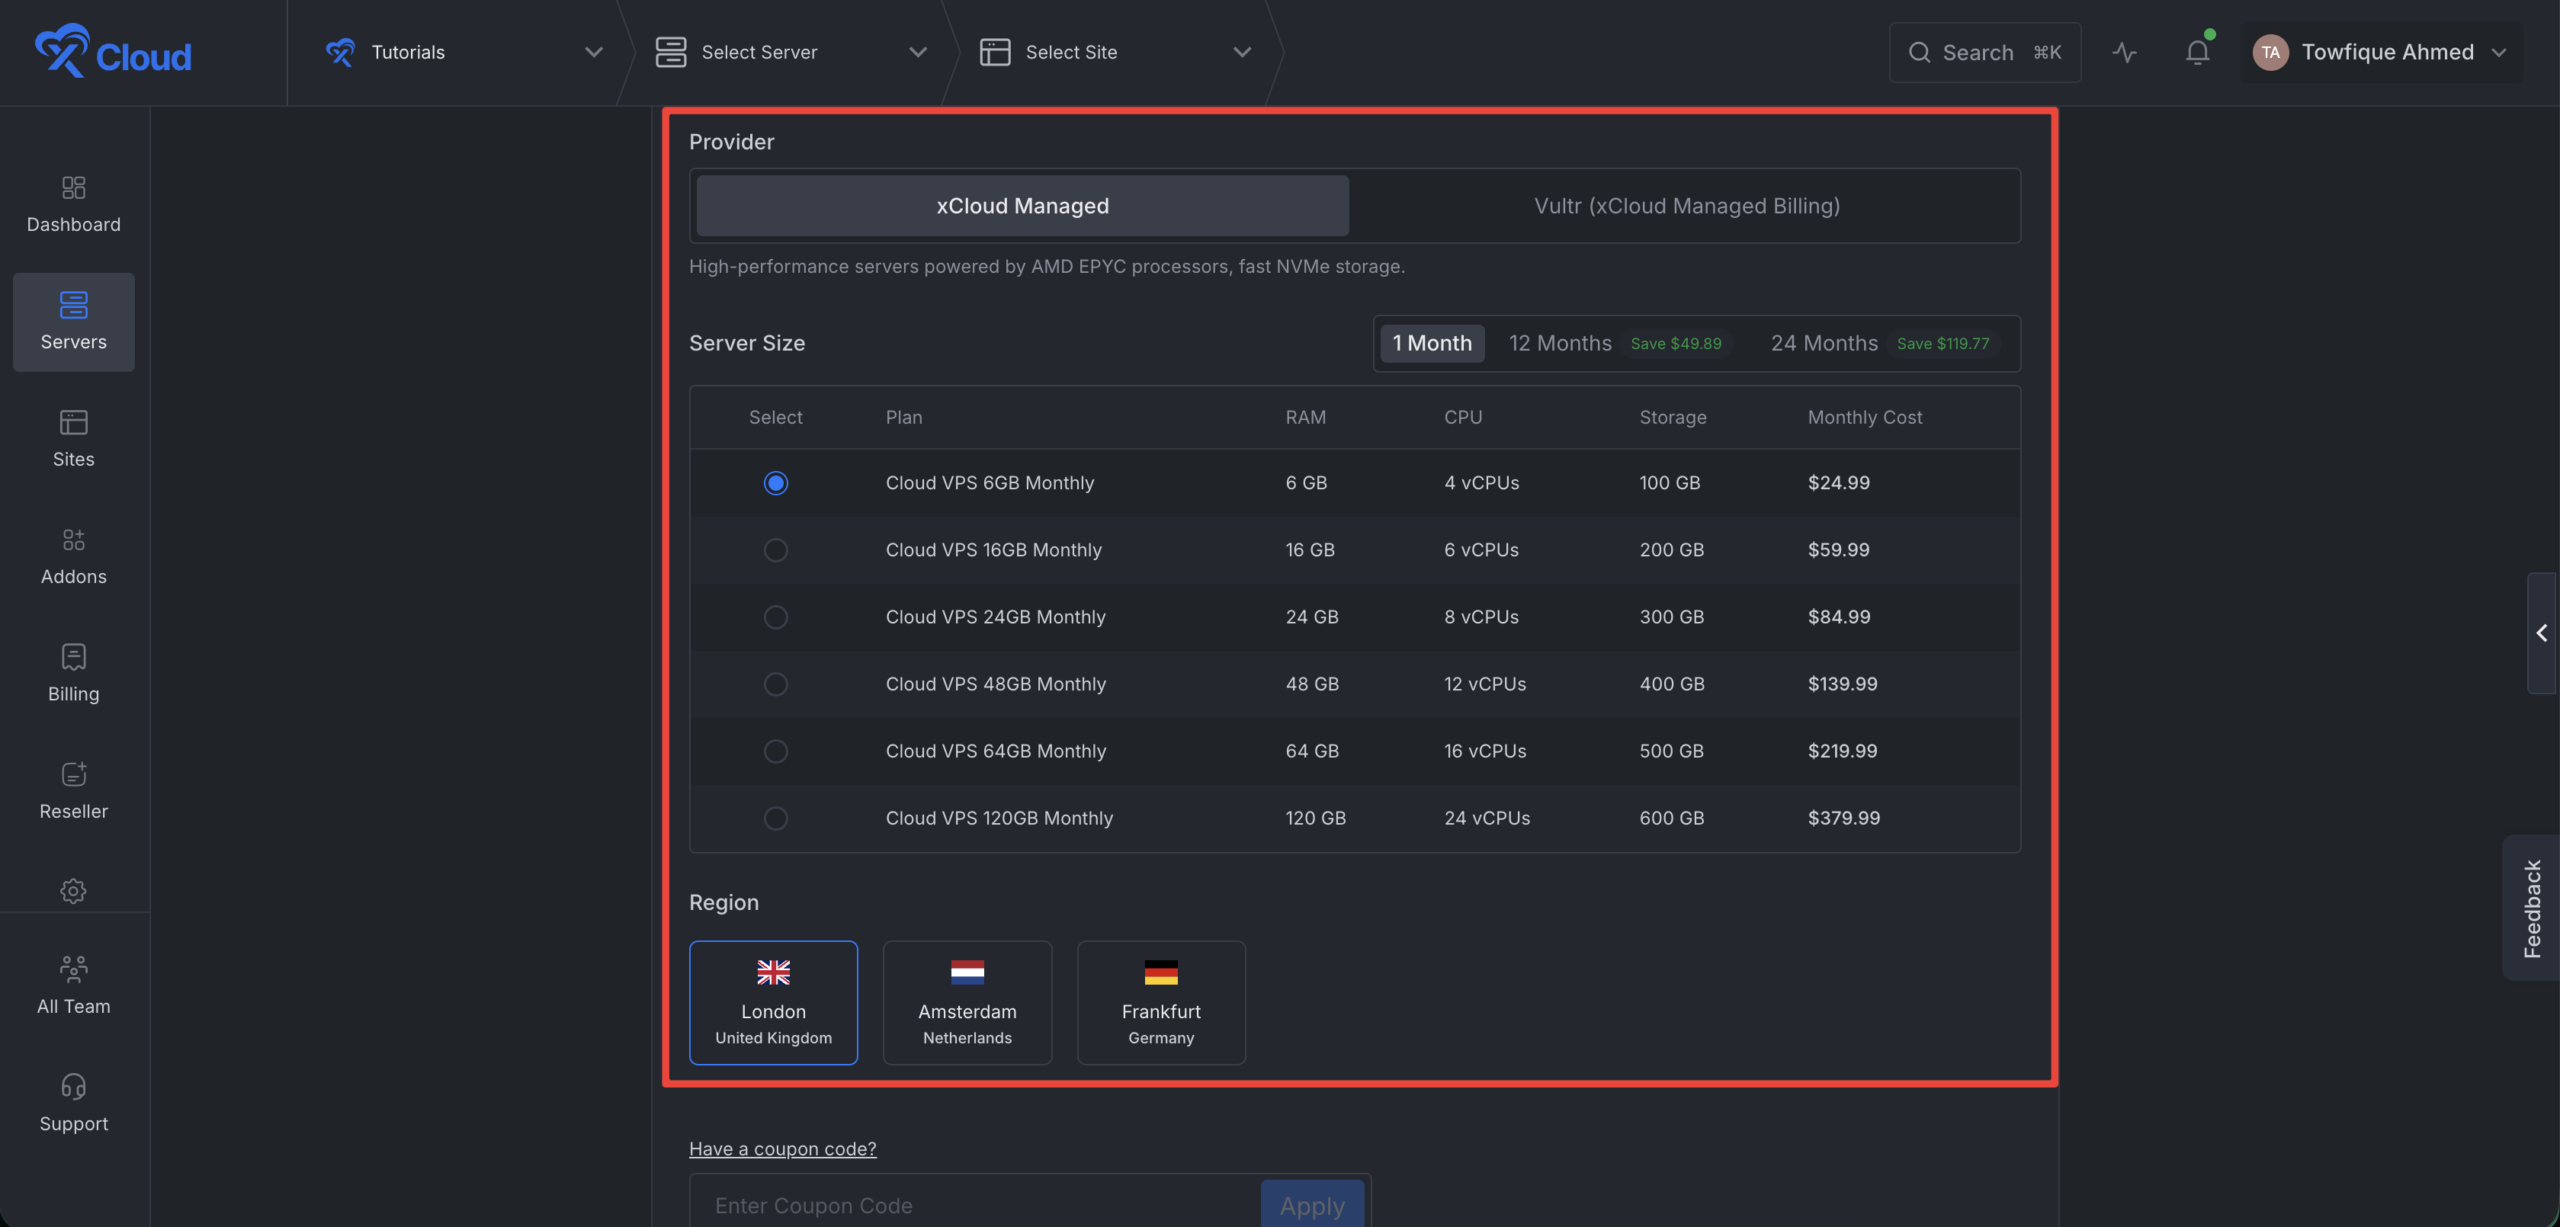
After that, go to the ‘Server Size’ option and choose your preferred server size. Please note that deploying a DeepSeek Harness instance requires a minimum 4 GB RAM server.
Next, choose your preferred continent from the dropdown menu. Then select the server location within that region.
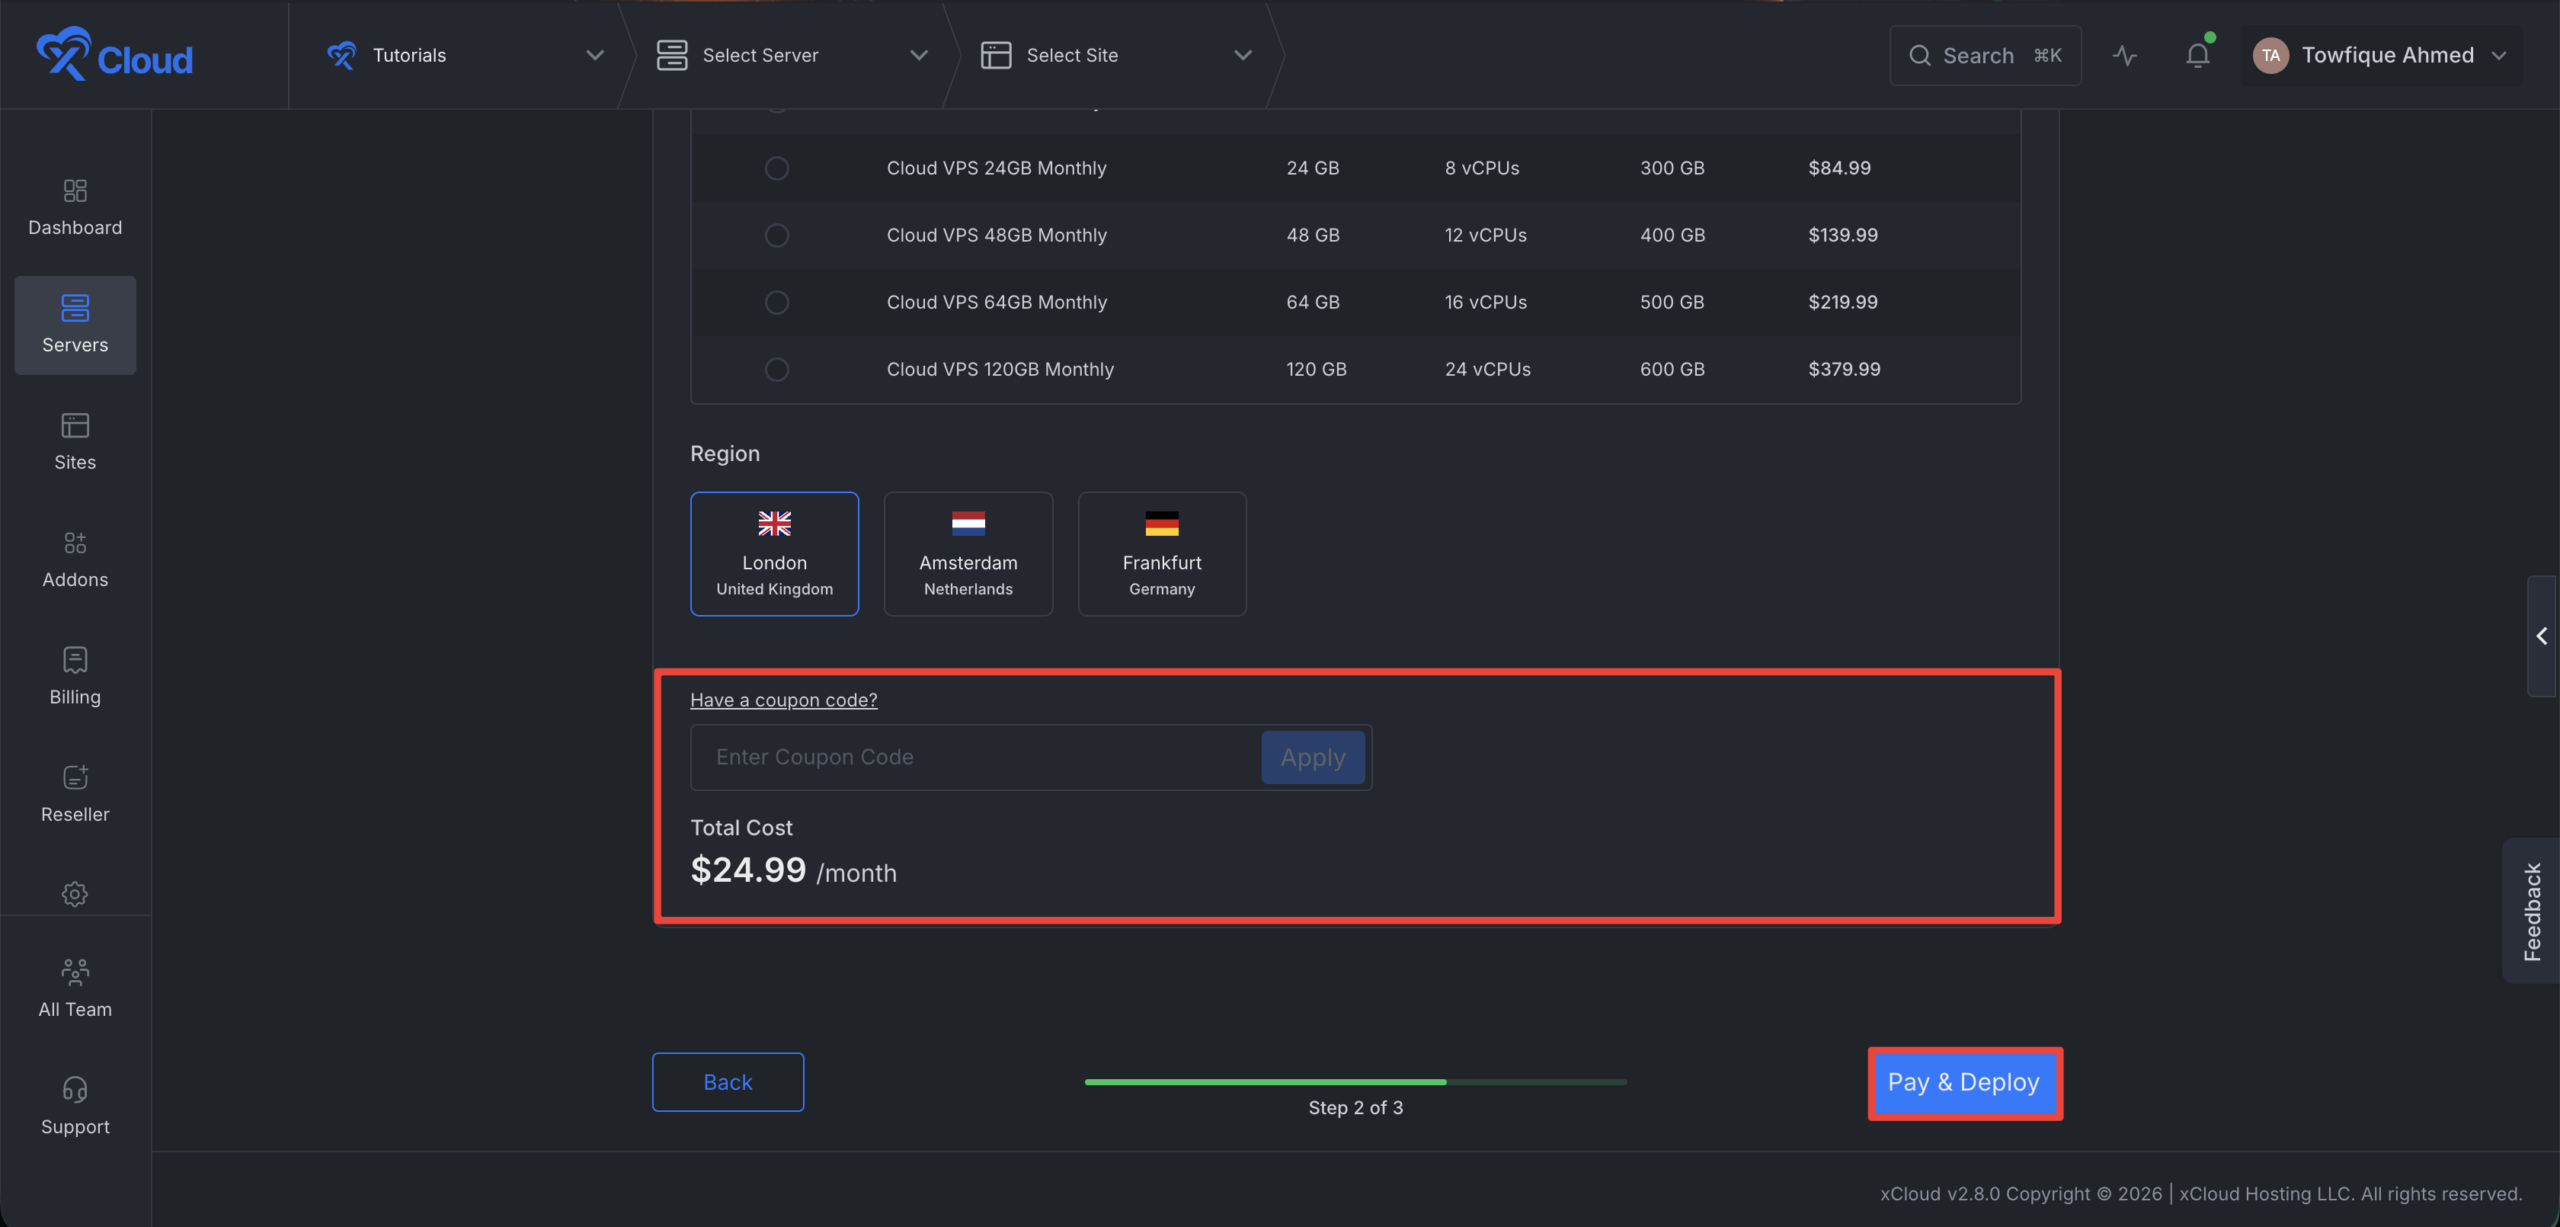
If you have a coupon code, you can enter in the coupon box. Afterwards click on the ‘Pay & Deploy’ button to proceed.
Your fully managed DeepSeek Harness server is now ready to use. Once the deployment is complete, you can access the application directly from your xCloud dashboard and sign in using the provided basic authentication credentials.
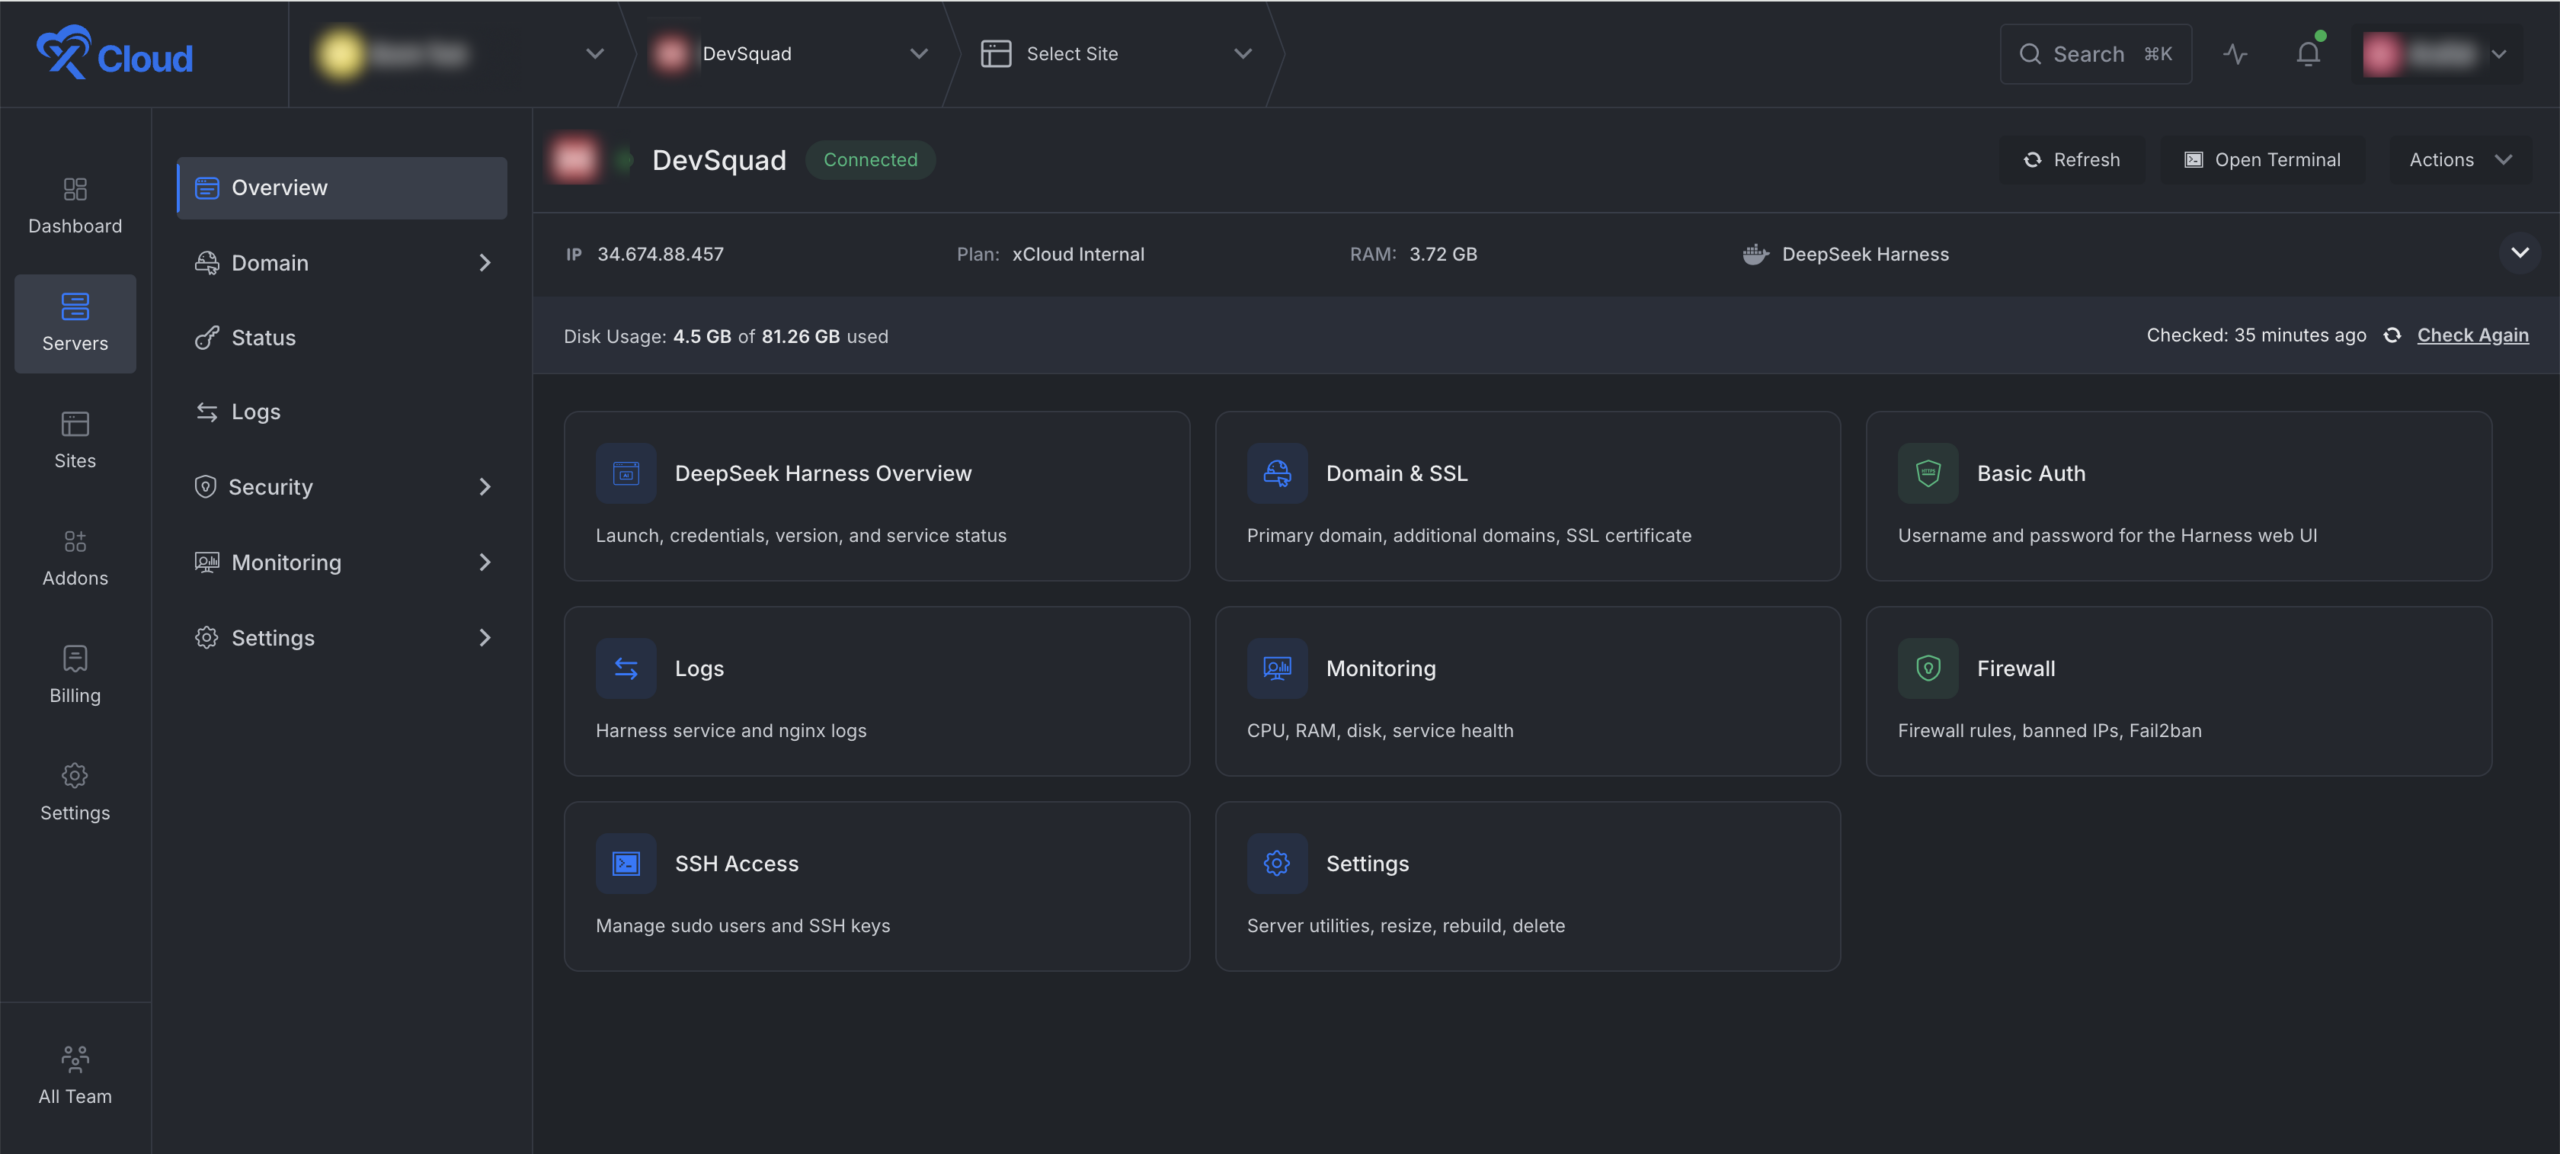
Now you can then begin building and running your AI workflows while xCloud takes care of the server infrastructure, security, monitoring, and your selected backup configuration.
Log in to DeepSeek Harness
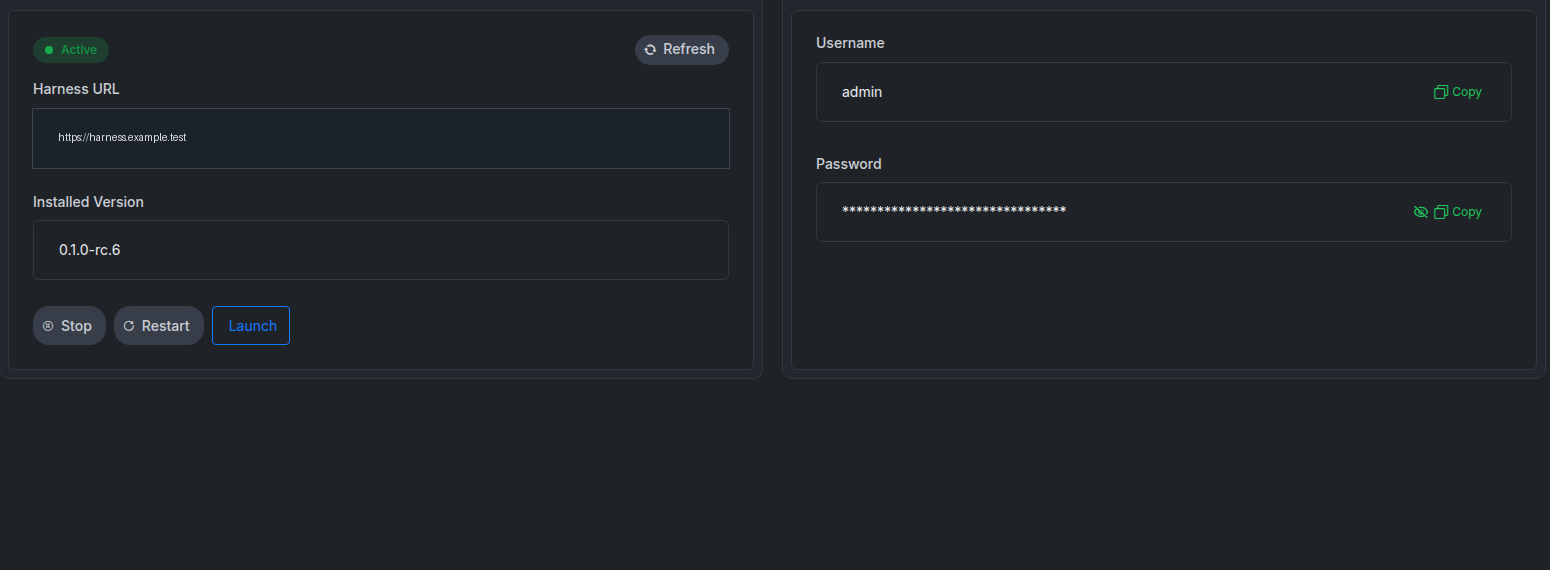
Go to the Basic Auth option from the dashboard. Next, collect the DeepSeek Harness URL, username, and password. Then log in to the board using these credentials.
Enter Your LLM Provider Credentials
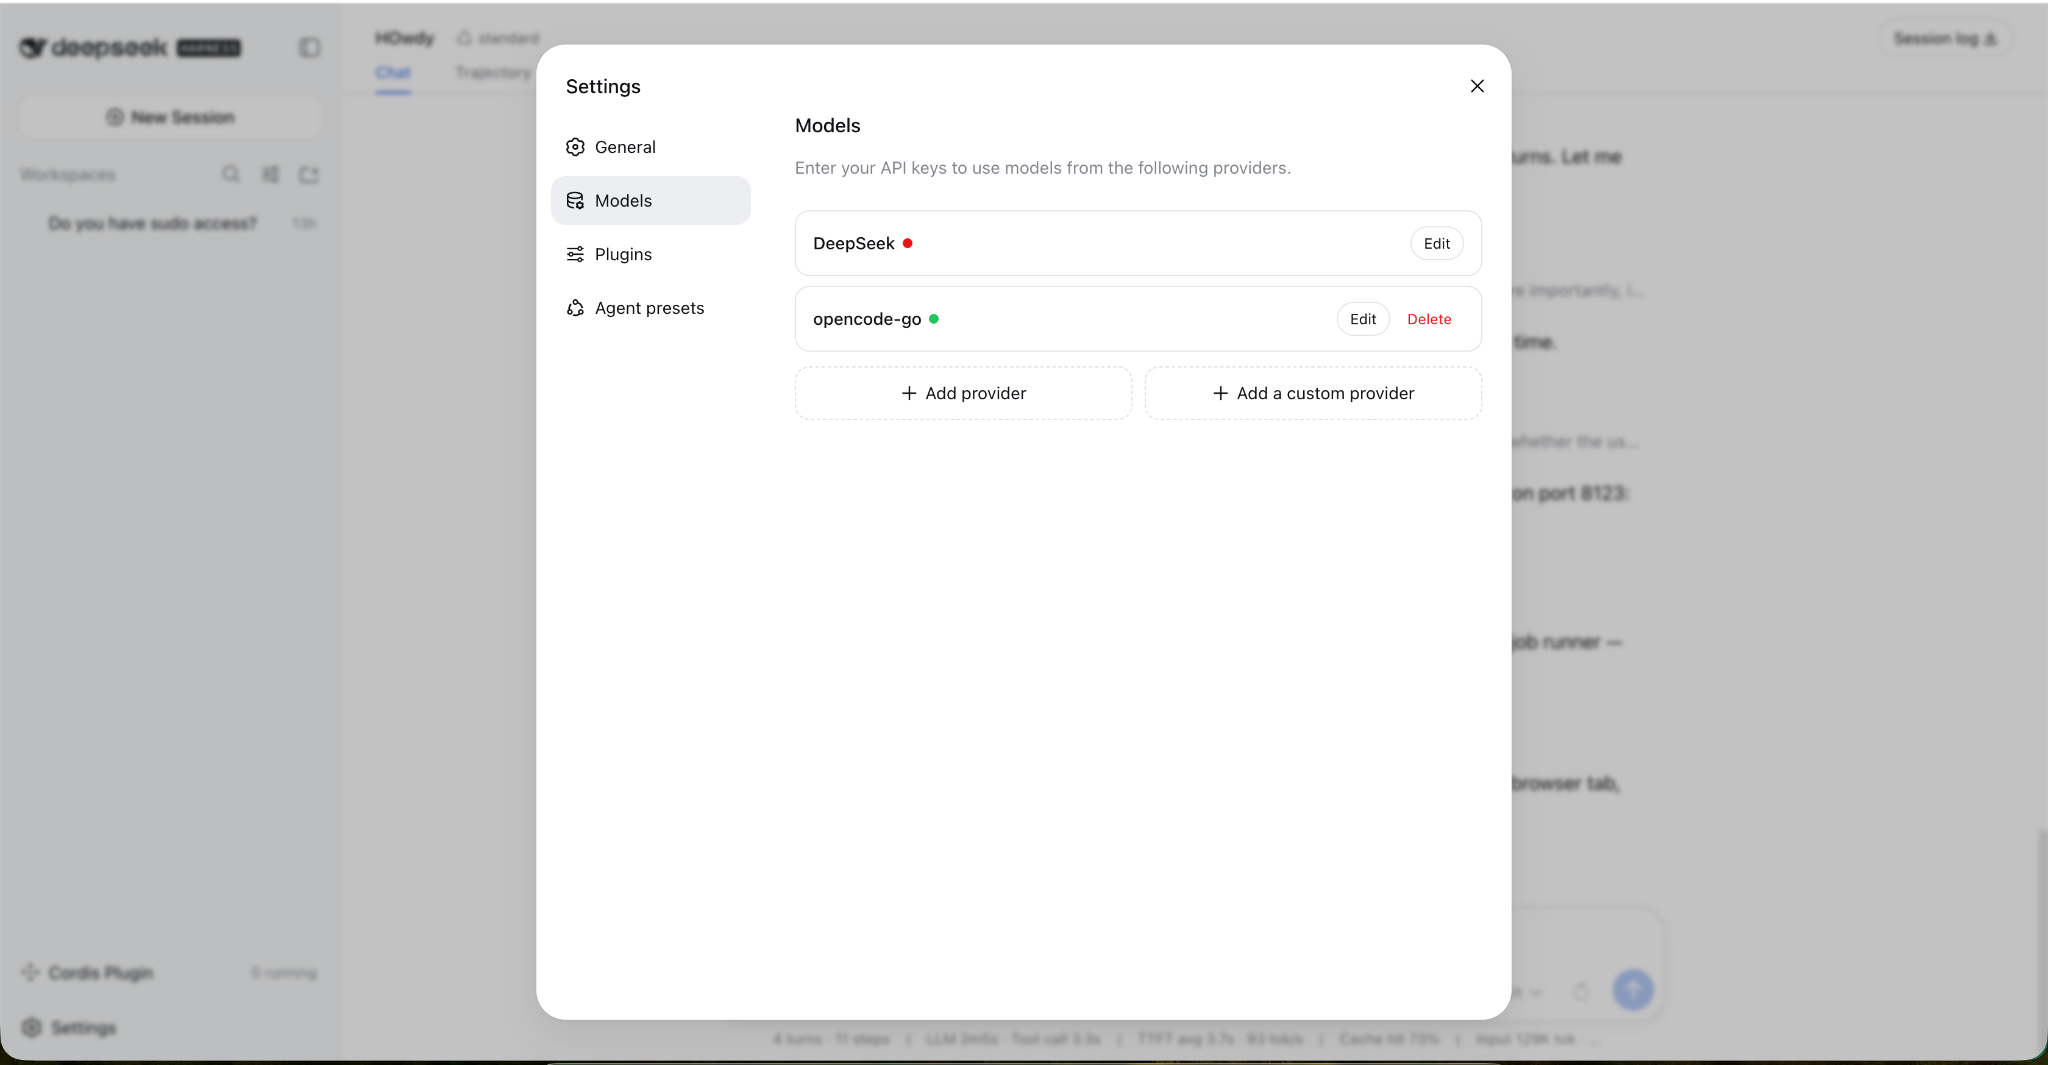
To add your preferred AI models, go to the DeepSeek Harness dashboard and click on the settings menu. From here, go to ‘Models’ and add your preferred AI models.
Then enter the API token for the selected AI model.
Here are the supported AI models of DeepSeek Harness:
amazon-bedrock, ant-ling, anthropic, azure-openai-responses, cerebras, cloudflare-ai-gateway, cloudflare-workers-ai, deepseek, fireworks, github-copilot, Google, google-vertex, groq, huggingface, kimi-coding, minimax, minimax-cn, mistral, moonshotai, moonshotai-cn, Nvidia, openai, opencode, openrouter, qwen-token-plan, qwen-token-plan-cn, together, vercel-ai-gateway, xai, Xiaomi, xiaomi-token-plan-ams, xiaomi-token-plan-cn, xiaomi-token-plan-sgp, zai, zai-coding-cn
And that’s it. This is how easily you can deploy DeepSeek Harness on xCloud. DeepSeek Harness deployment on xCloud removes the complexity of self-managed hosting and lets you focus on what matters most.
If you run into any issues during the deployment process, feel free to reach out to our support team.