

How to Deploy Instatic on xCloud
Updated September 9, 2026 · 3 min read
Instatic is a beta self-hosted visual CMS with an integrated editor, application-level authentication, SQLite storage, and persistent uploads. This guide shows you how to select Instatic from the xCloud application catalog, choose a compatible server, configure a domain, and finish the first-owner setup.
Prerequisites
Before you begin, make sure you have:
- An active xCloud account.
- Access to create sites on your xCloud team.
- A server that uses the Docker + Nginx stack, or permission to deploy a new compatible server.
- At least 1 vCPU and 2 GB of free disk space. The xCloud catalog recommends 4 GB RAM for this application.
- A custom domain with DNS access if you plan to choose Go Live instead of an xCloud demo domain.
Note: Instatic is currently marked as beta. Review your backup and recovery requirements before using it for production content.
Step 1: Select Instatic from the app catalog
From the xCloud dashboard, start the Add New Site flow and open the application catalog. Search for Instatic, then select the Instatic application card.
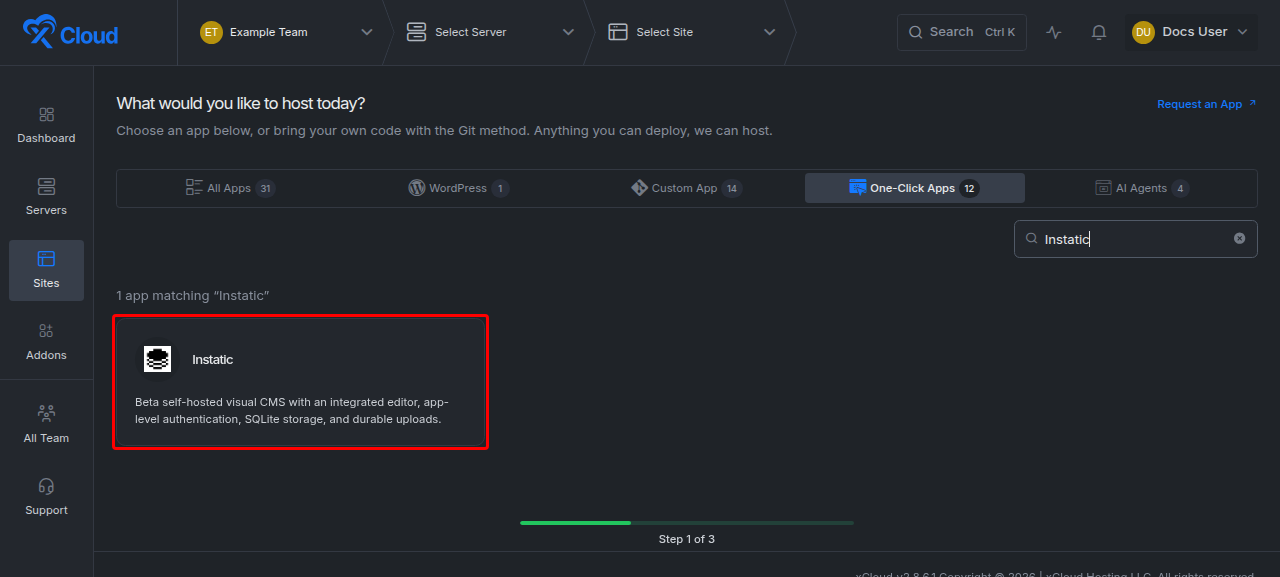
Select Instatic from the xCloud application catalog.
Step 2: Choose where Instatic will run
Choose one of the available deployment options:
- Deploy on a new server: Provision dedicated resources for Instatic.
- Use an existing server: Select a compatible server running Docker + Nginx.
For an existing server, confirm that the card shows enough available resources. Select the server, then click Continue.
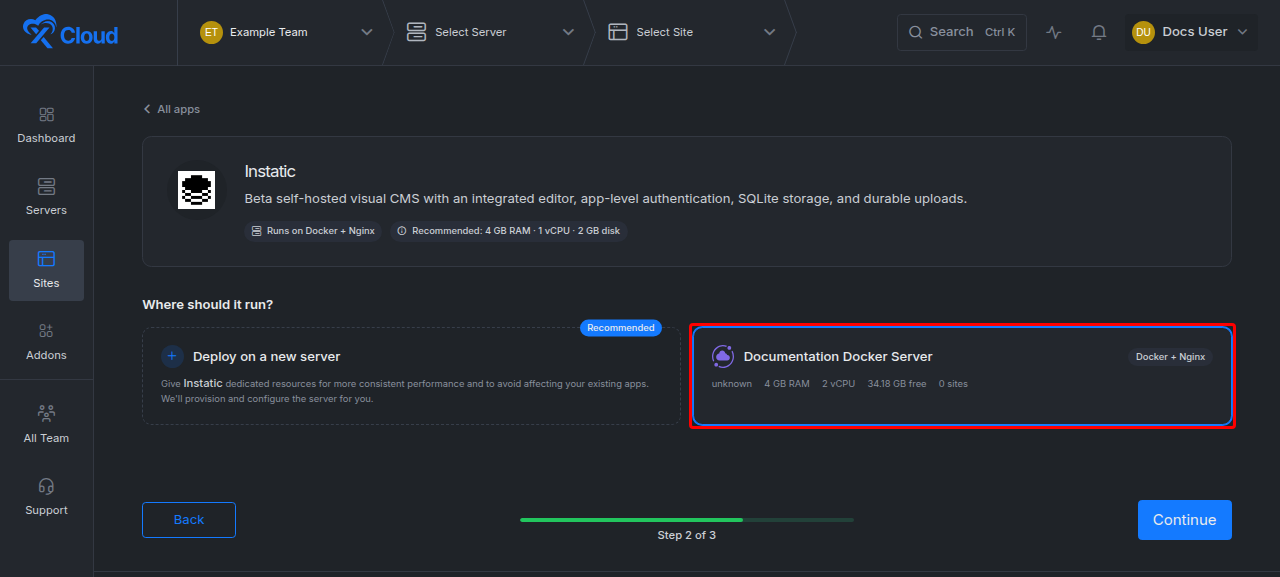
Choose a compatible server for the Instatic deployment.
Step 3: Configure the site and domain
Enter a descriptive Site Title. You can also add an optional tag to organize the site in xCloud.
Under Domain Setup, choose one of the following:
- Go Live: Use your own domain and point its DNS records to the server as instructed by xCloud.
- Demo Site: Use a temporary
x-cloud.appdomain while you configure and review the CMS.
For a demo site, enter the desired subdomain, confirm the complete domain shown in the form, and click Next. Review the installation details and start the deployment.
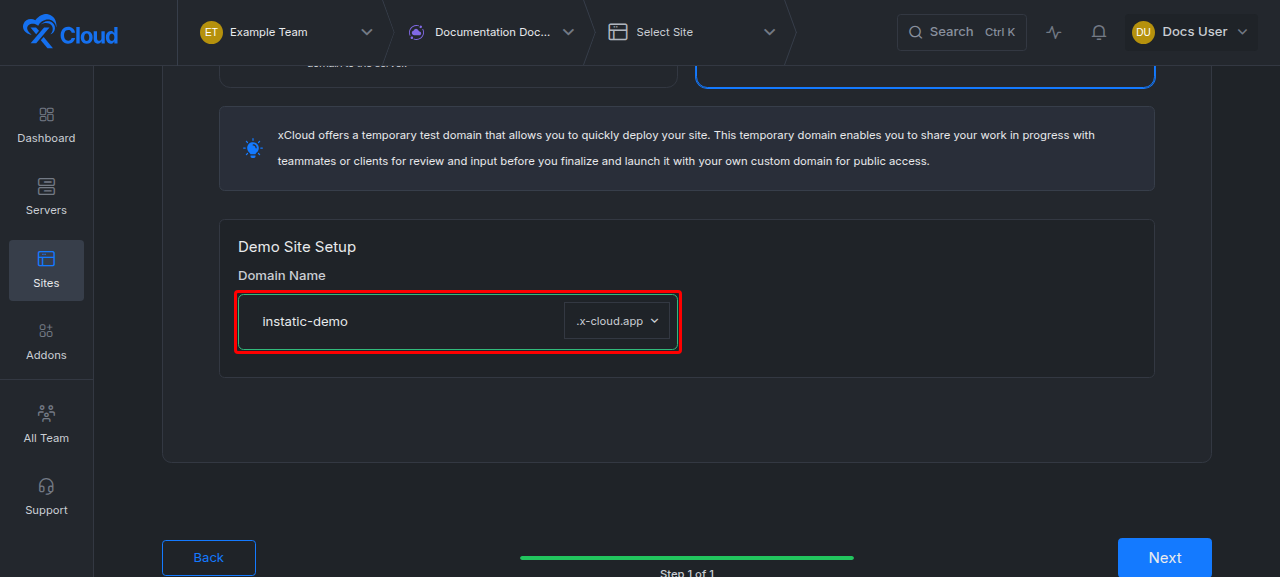
Configure a temporary xCloud demo domain.
Expected result: xCloud validates the site details and prepares the Instatic installation on the selected server.
Complete the first-owner setup
After deployment finishes, open:
https://your-domain.example/adminComplete the first-owner setup immediately by entering:
- The site name.
- The owner email address.
- A password with at least 12 characters.
Important: Until the first-owner setup is complete, anyone who can reach the setup page may be able to claim the owner account.
Backup and configuration notes
Instatic stores application data and uploads in persistent volumes. Back up both the application data and uploads together.
Keep the generated INSTATIC_SECRET_KEY stable. Changing it makes previously saved provider credentials and TOTP MFA seeds unreadable. If the key must change, re-enter encrypted provider credentials and re-enroll TOTP MFA after redeployment.
Your Instatic CMS is now deployed through xCloud on either a temporary demo domain or your custom domain. You can continue configuration from the /admin page, then add content and prepare the site for your intended audience.