

How to Create a Plain Server with xCloud
Updated October 18, 2026 · 7 min read
A Plain server is an Ubuntu VPS that xCloud sets up and secures, without a web server, PHP, a database or Redis. You get a clean server for your own software, such as a Go or Rust service, a game server, a VPN, a build runner or anything you prefer to install yourself. xCloud still manages its users, SSH keys, firewall and security updates, so you do not give up any protection to get a clean machine.
When you later want to host websites on it, you can install Nginx or OpenLiteSpeed from the dashboard in a few minutes, without rebuilding the server.
Note: A Plain server is not a weaker server. It skips the software that serves websites and keeps every security layer xCloud puts on its other servers. See what is installed on a Plain server for the full list.
When to choose Plain
Choose Plain when you will not host PHP or WordPress sites on the server, or when you want to choose the web server later. Choose NGINX or OpenLiteSpeed when you plan to host sites straight away, since those stacks also install PHP, MySQL and Redis for you.
| You want to | Choose |
|---|---|
| Run your own application, worker, VPN or tool on a clean Ubuntu server | Plain |
| Keep the server free of a web server and database until you need them | Plain |
| Host WordPress, Laravel or PHP sites right away | NGINX or OpenLiteSpeed |
| Run AI agent platforms | Agentic |
What is installed on a Plain server
xCloud runs the same operating system setup on a Plain server as on its web server stacks. Only the application layer is left out. The table below shows what you get.
| Area | On a Plain server |
|---|---|
| Firewall | UFW is enabled. It allows SSH (port 22, or your custom SSH port), HTTP (80) and HTTPS (443), plus the xCloud infrastructure IPs on the SSH port so xCloud can keep managing the server. |
| Brute-force protection | Fail2Ban is installed and enabled for SSH. You can ban and unban IP addresses from Firewall Management. |
| SSH | Password login is turned off. The root user can log in with an SSH key only, and xCloud creates the xcloud user with your keys. |
| Kernel and OS security | Known local privilege-escalation fixes are applied, all packages are upgraded during setup and Ubuntu installs security patches automatically. |
| System setup | Hostname, timezone, a 1 GB swap file, Cloudflare and Google DNS resolvers and a cleanup job that removes old xCloud task files and trims large logs. |
| Base tools | git, curl, zip, unzip, supervisor, python3, build-essential, acl, zsh, ncdu and other common utilities. |
The following software is not installed on a Plain server:
- Web server: no Nginx and no OpenLiteSpeed.
- PHP and its tools: no PHP, Composer or WP-CLI.
- Data services: no MySQL, MariaDB or Redis.
- Containers and agents: no Docker and no xCloud monitoring agent.
For the full package list on the Nginx and OpenLiteSpeed stacks, see What Is Installed on Your xCloud Server?.
Before you start
You need an xCloud account with permission to create servers. To connect a server from another provider, it must be a fresh Ubuntu 24.04 or 26.04 LTS x64 server and you need root access to it. See How to Set up a Server with Other Providers if you have not connected one before.
Step 1: Choose Plain when you create the server
Click Servers in the left menu, then add a new server with xCloud or with your own provider. Enter a Server Name, leave App Type empty and select Plain under Choose Web Server. Then pick your provider, plan and region as usual and create the server.
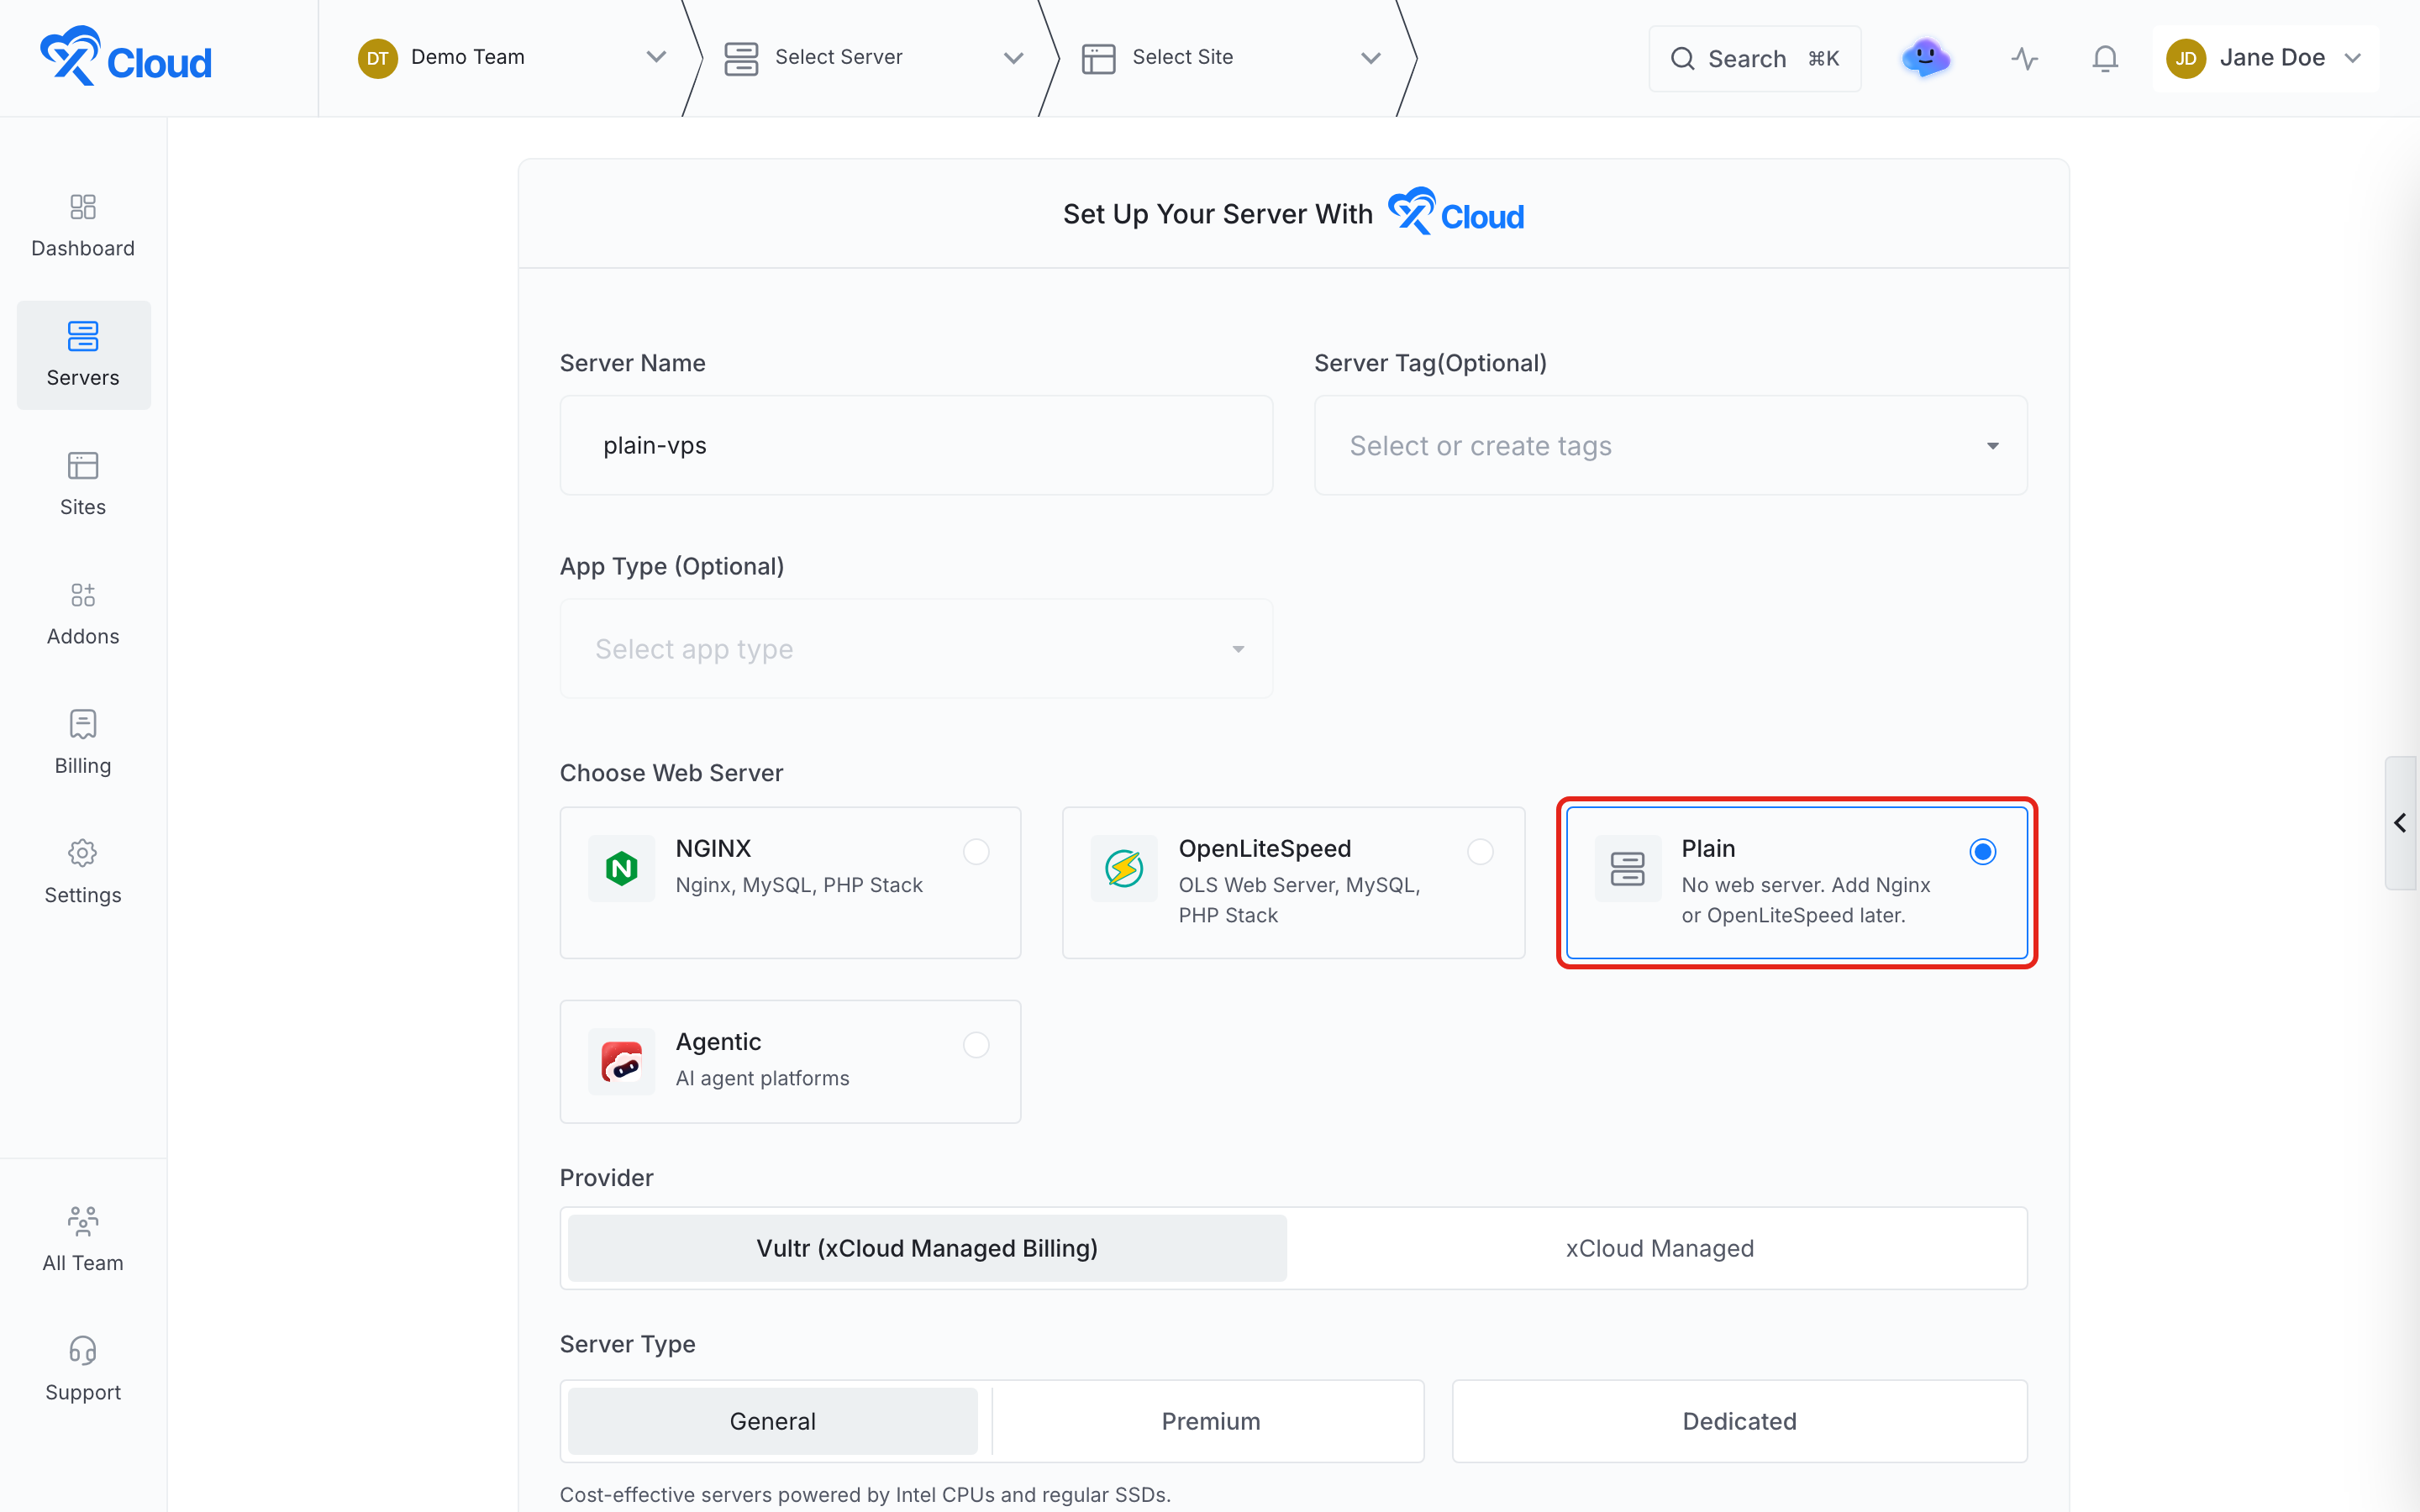
The Plain tile is greyed out while an App Type is selected, because a Plain server cannot host an app until it has a web server. Clear the app type to make it available.
Step 2: Or connect your existing server as Plain
To use a VPS you already have, open Connect Your Existing Server. Fill in the Server Name, select Plain, then enter the IP Address, SSH Port and SSH Username of your server. The database and app type fields are disabled while Plain is selected, since nothing will be installed for them.
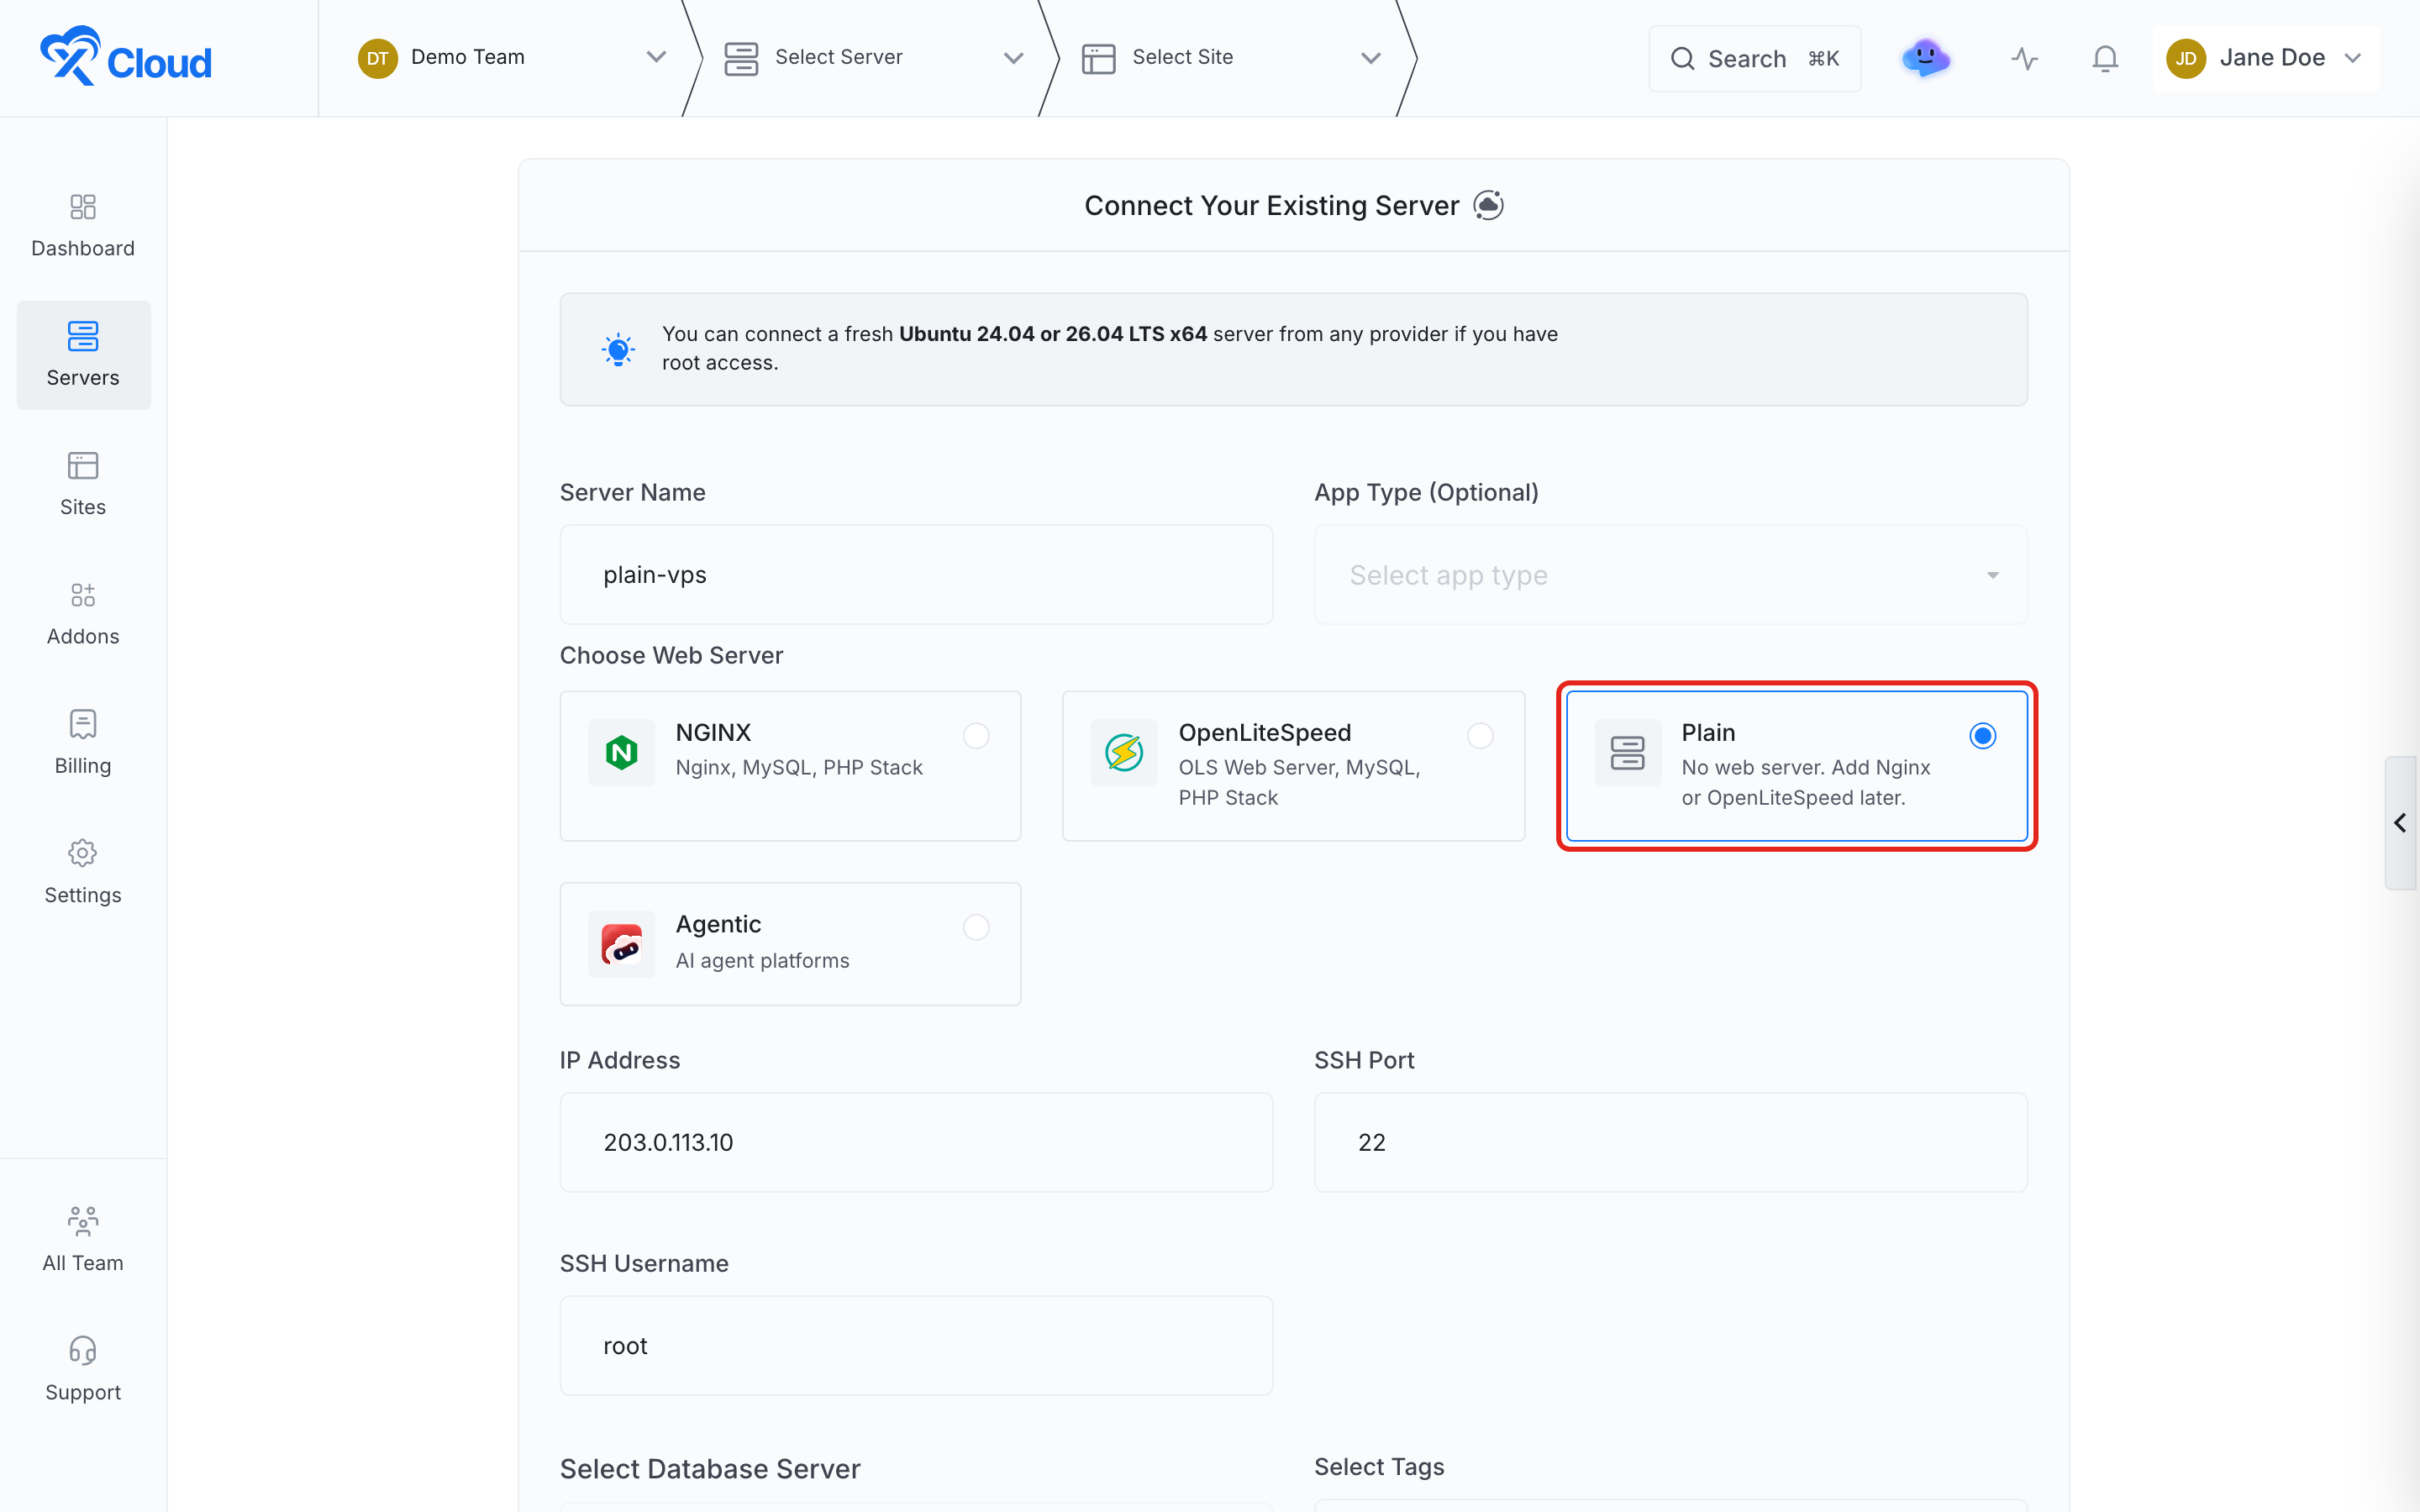
xCloud then connects to the server and runs the operating system setup described above, with the same security steps as a web server stack.
Step 3: Check the server and its security
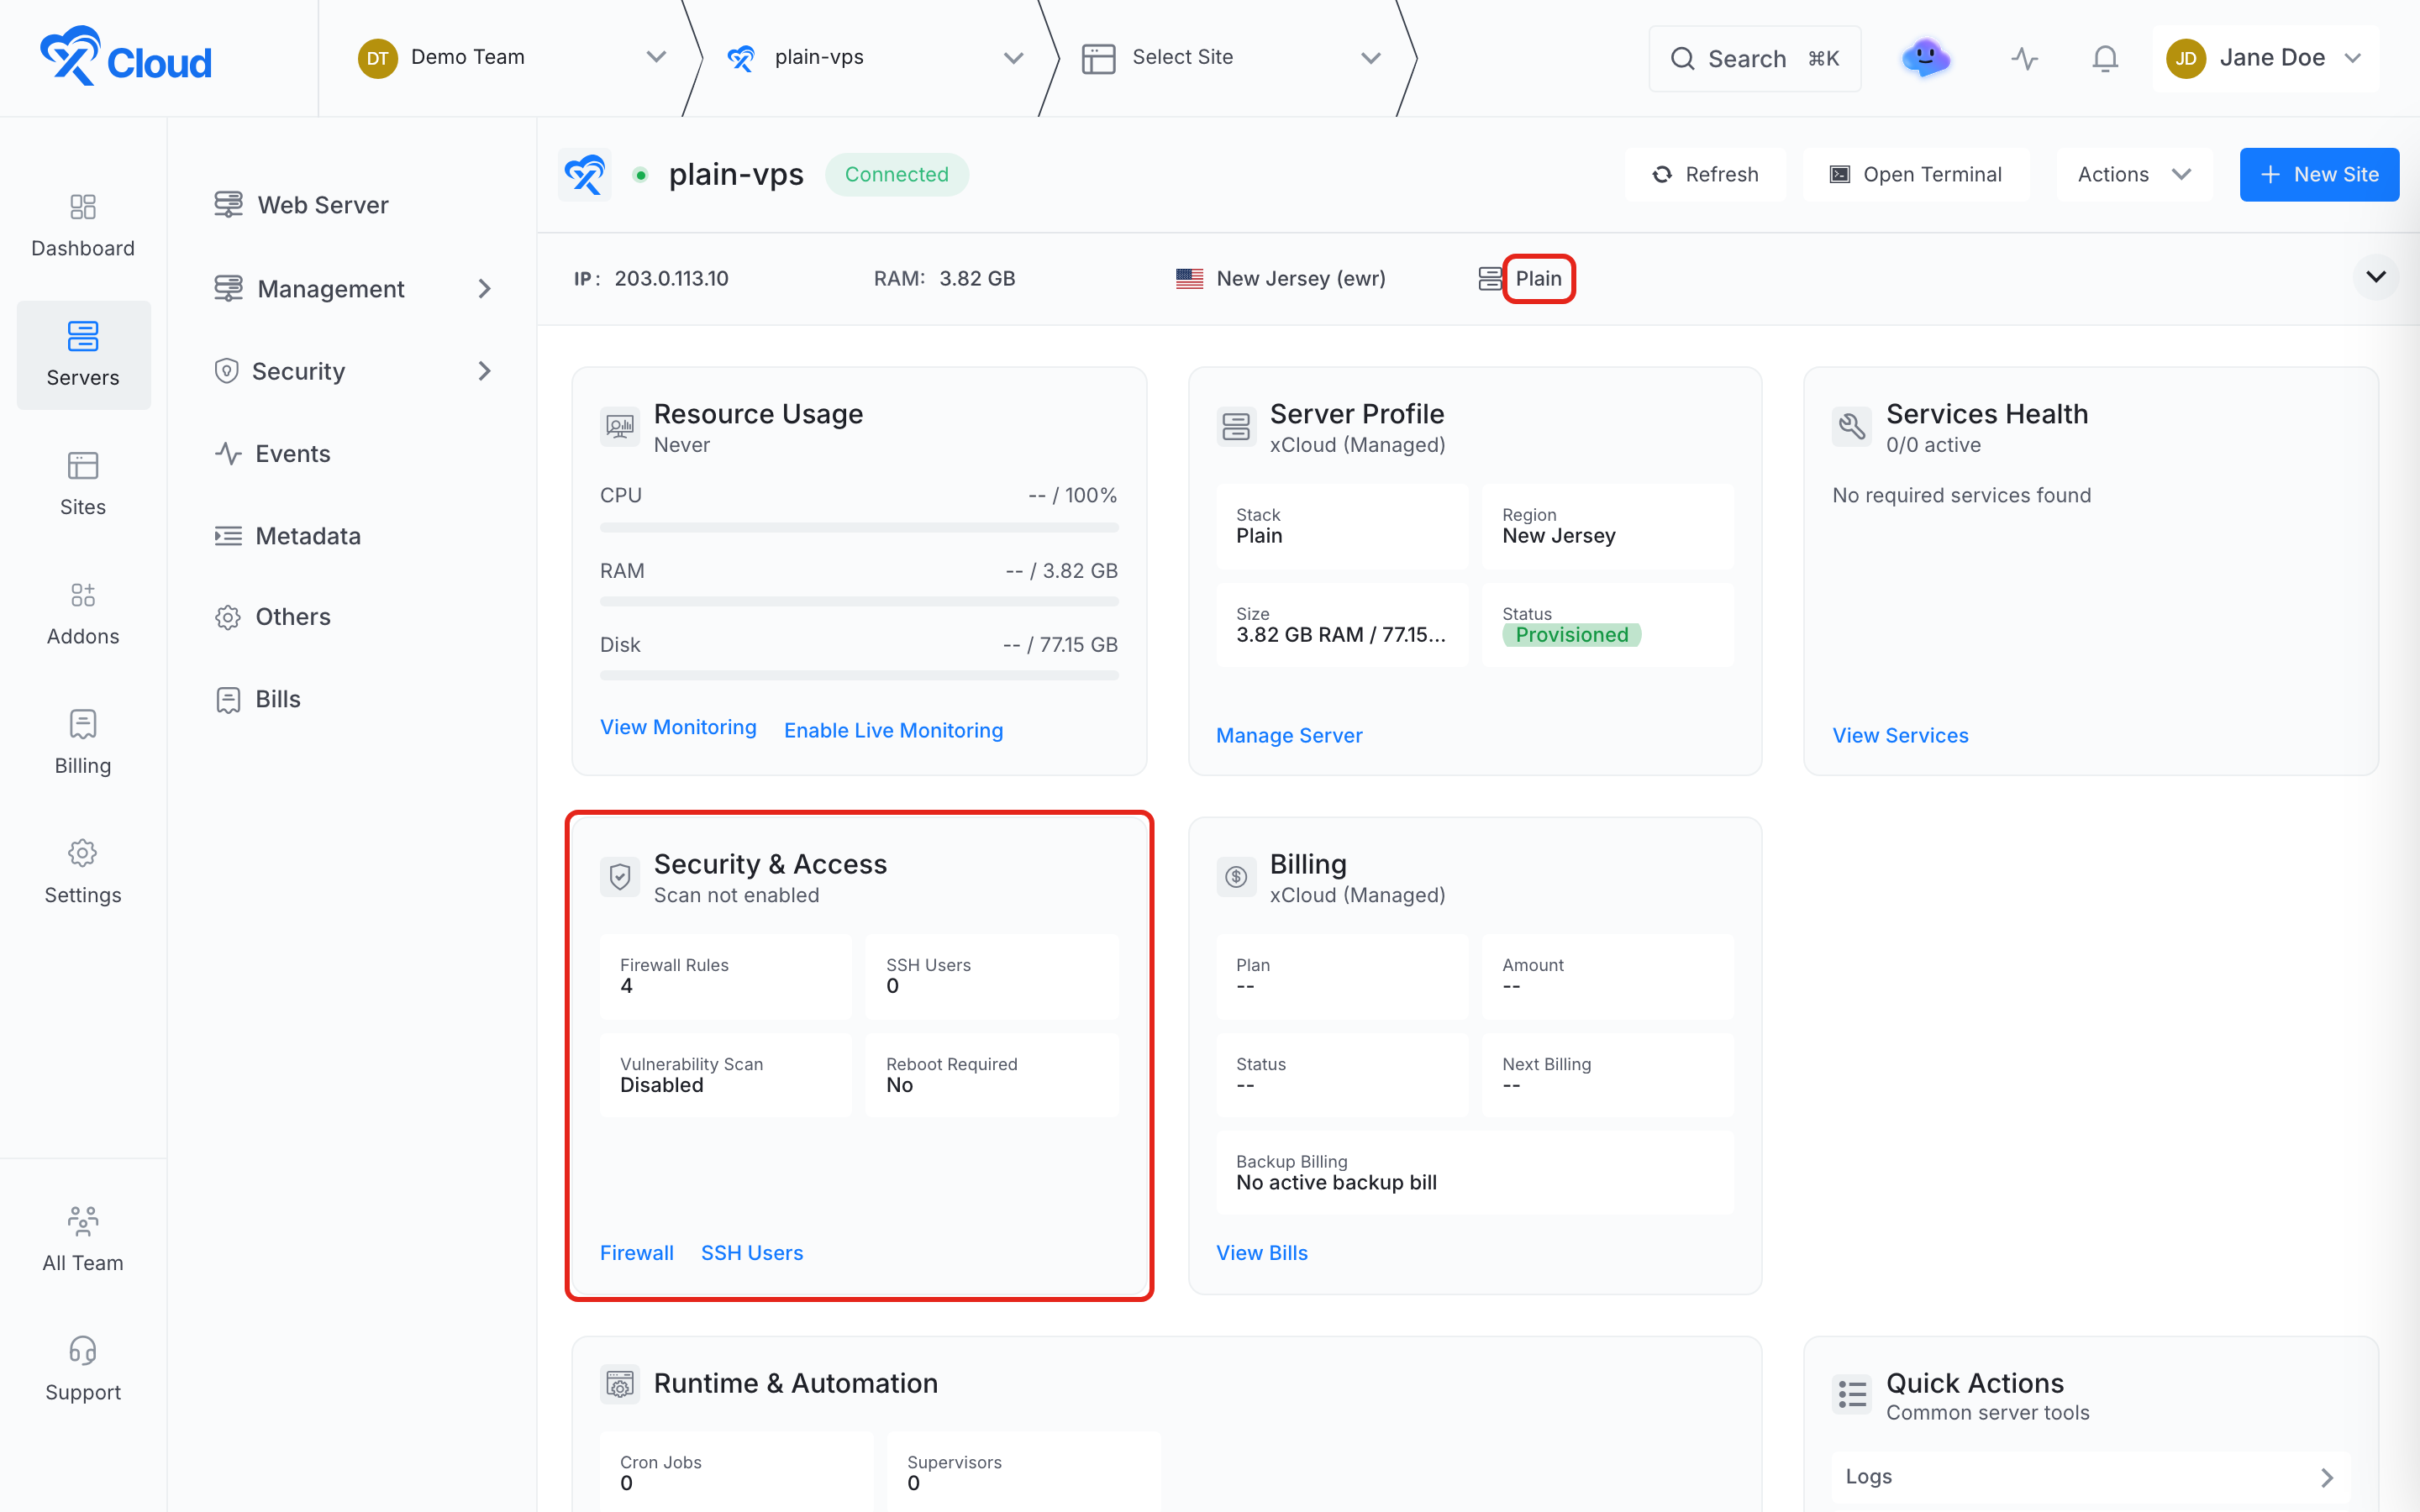
When setup finishes, open the server. The header shows the stack as Plain along with the IP address, RAM and region. The Security & Access card on the Overview page shows the firewall rules xCloud created.
Open Security, then Firewall Management, to see the rules. You will find SSH, HTTP and HTTPS, and an xCloud Infrastructure rule that lets xCloud reach your server over SSH. You can add your own rules here and manage Fail2Ban bans on the same page, exactly as on any other xCloud server.
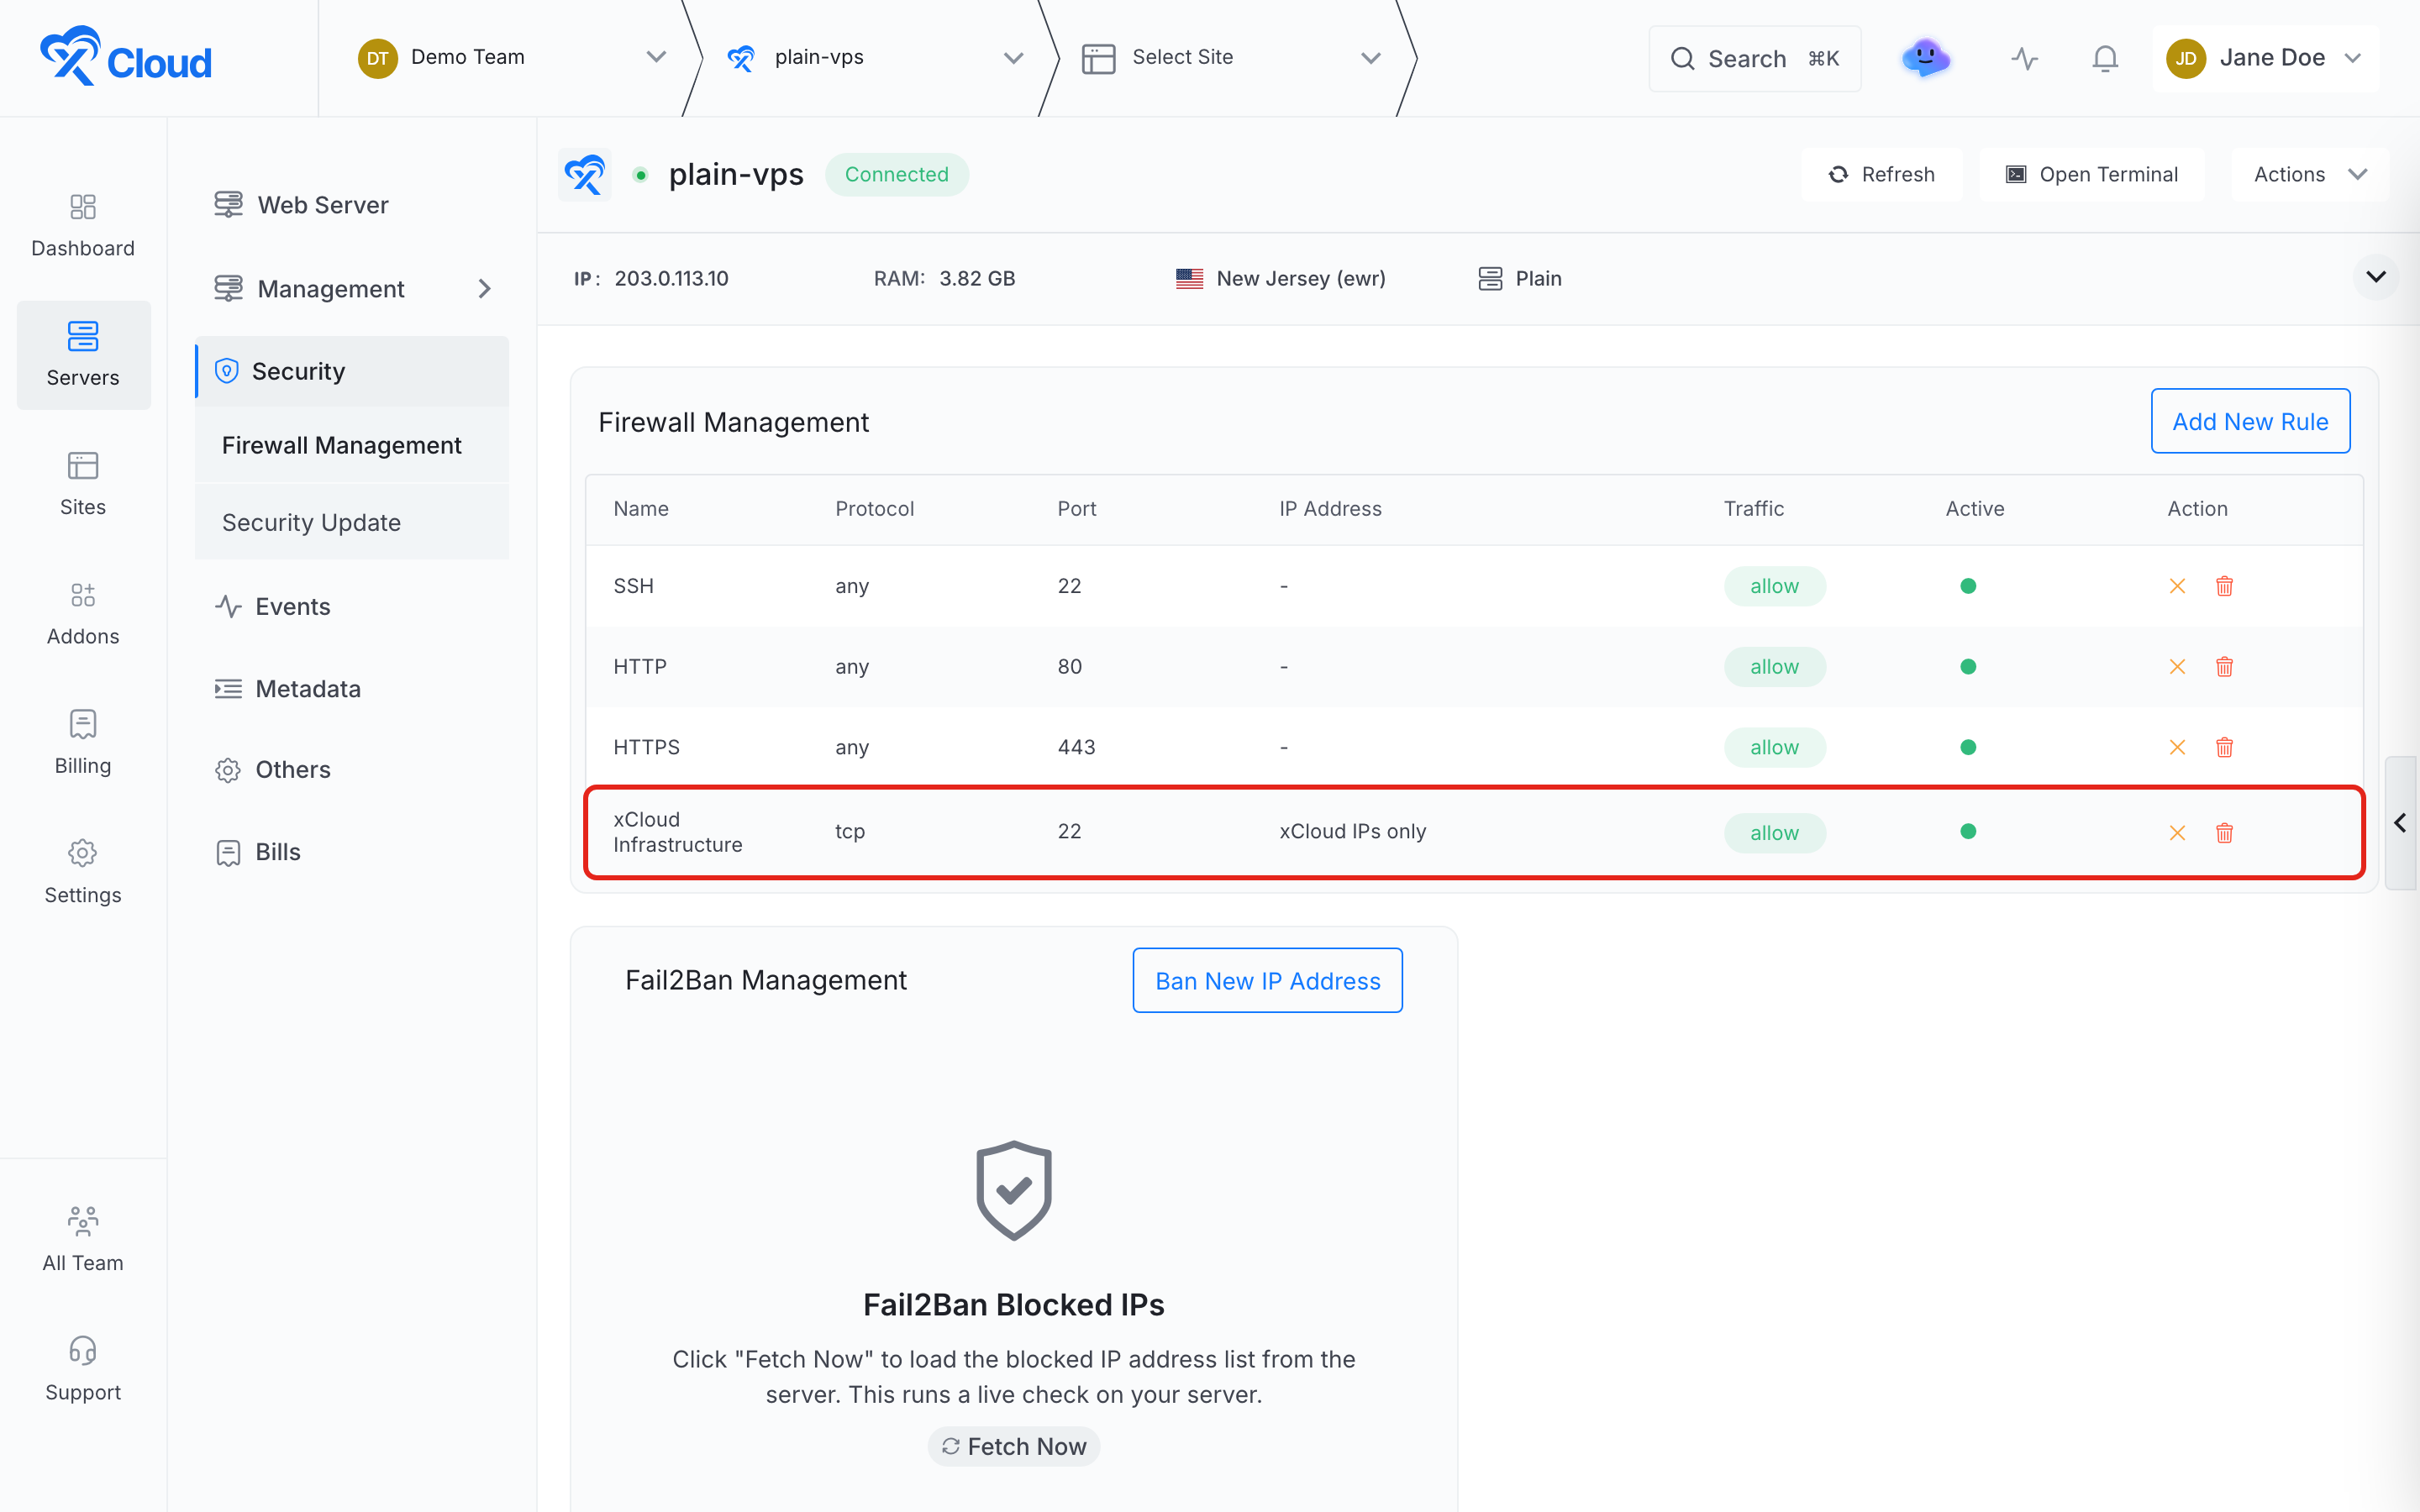
Warning: Do not delete the xCloud Infrastructure rule. Without it, xCloud cannot connect to your server to manage users, keys, updates or a later web server install. See How to Configure Firewall Management in xCloud.
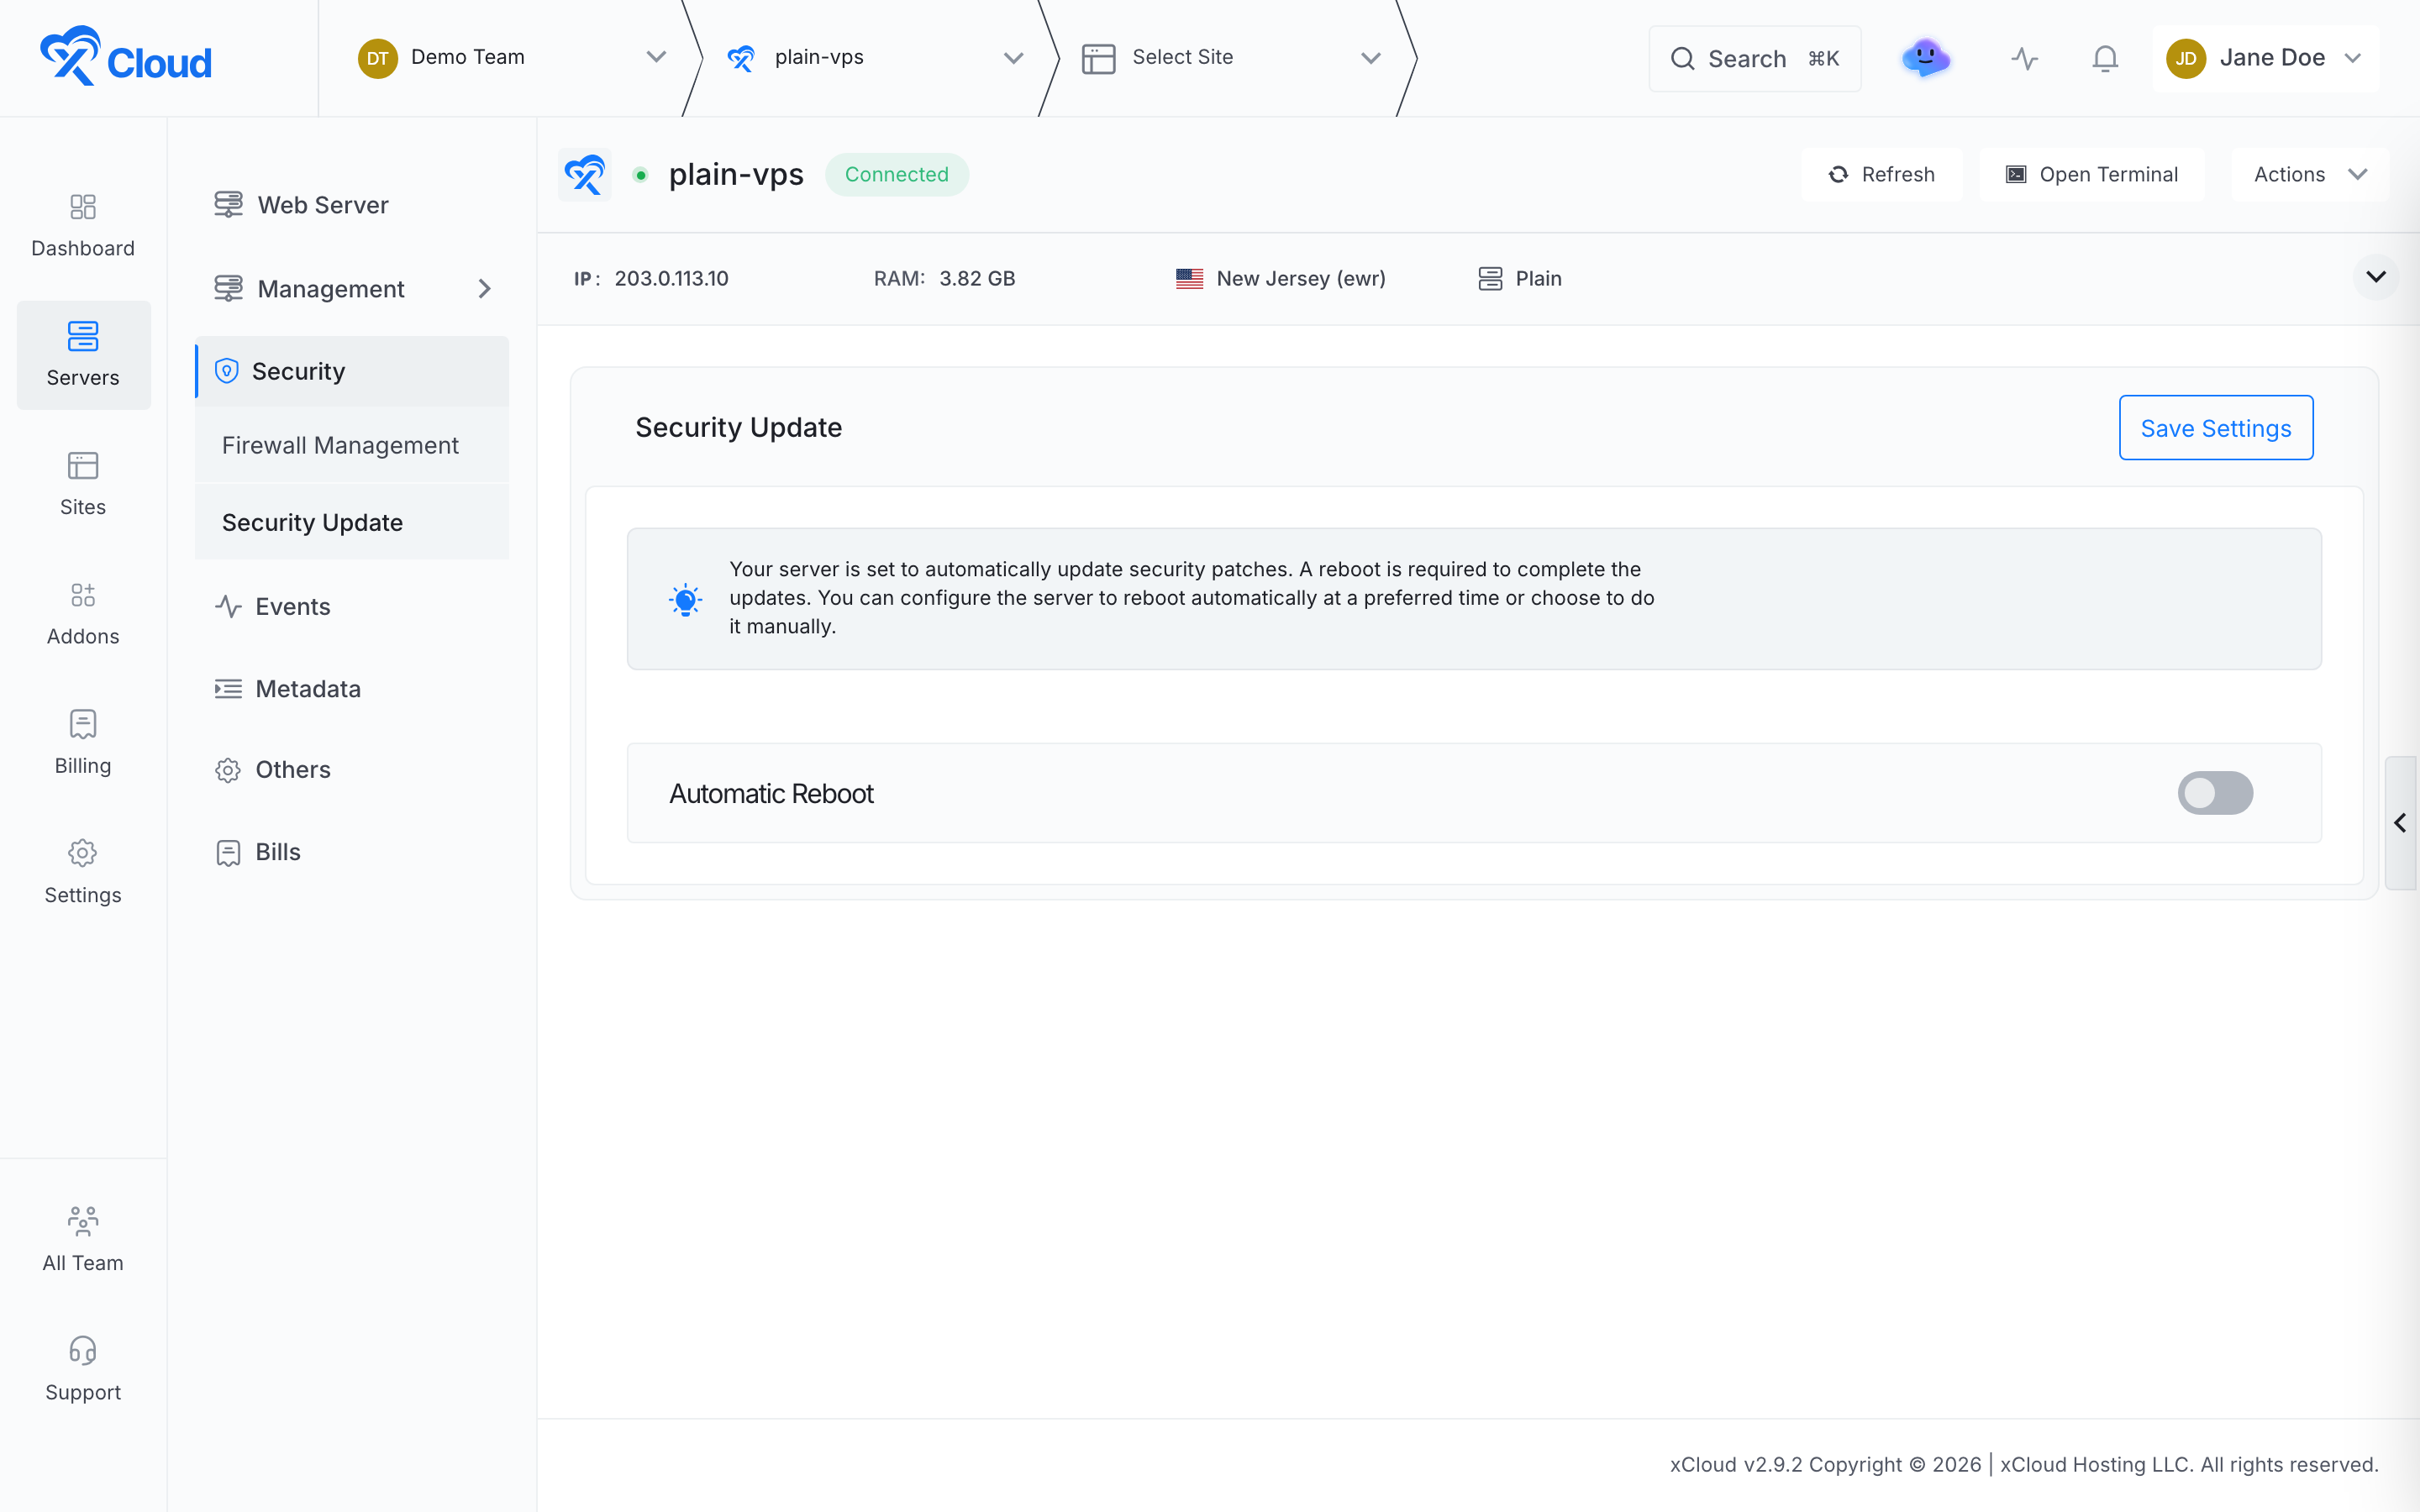
Under Security, the Security Update page confirms that the server installs security patches automatically. You can turn on Automatic Reboot so the server restarts at a time you choose when an update needs it. How Automated Security Updates and Auto Reboot Work in xCloud explains both settings.
Step 4: Use the server for your own software
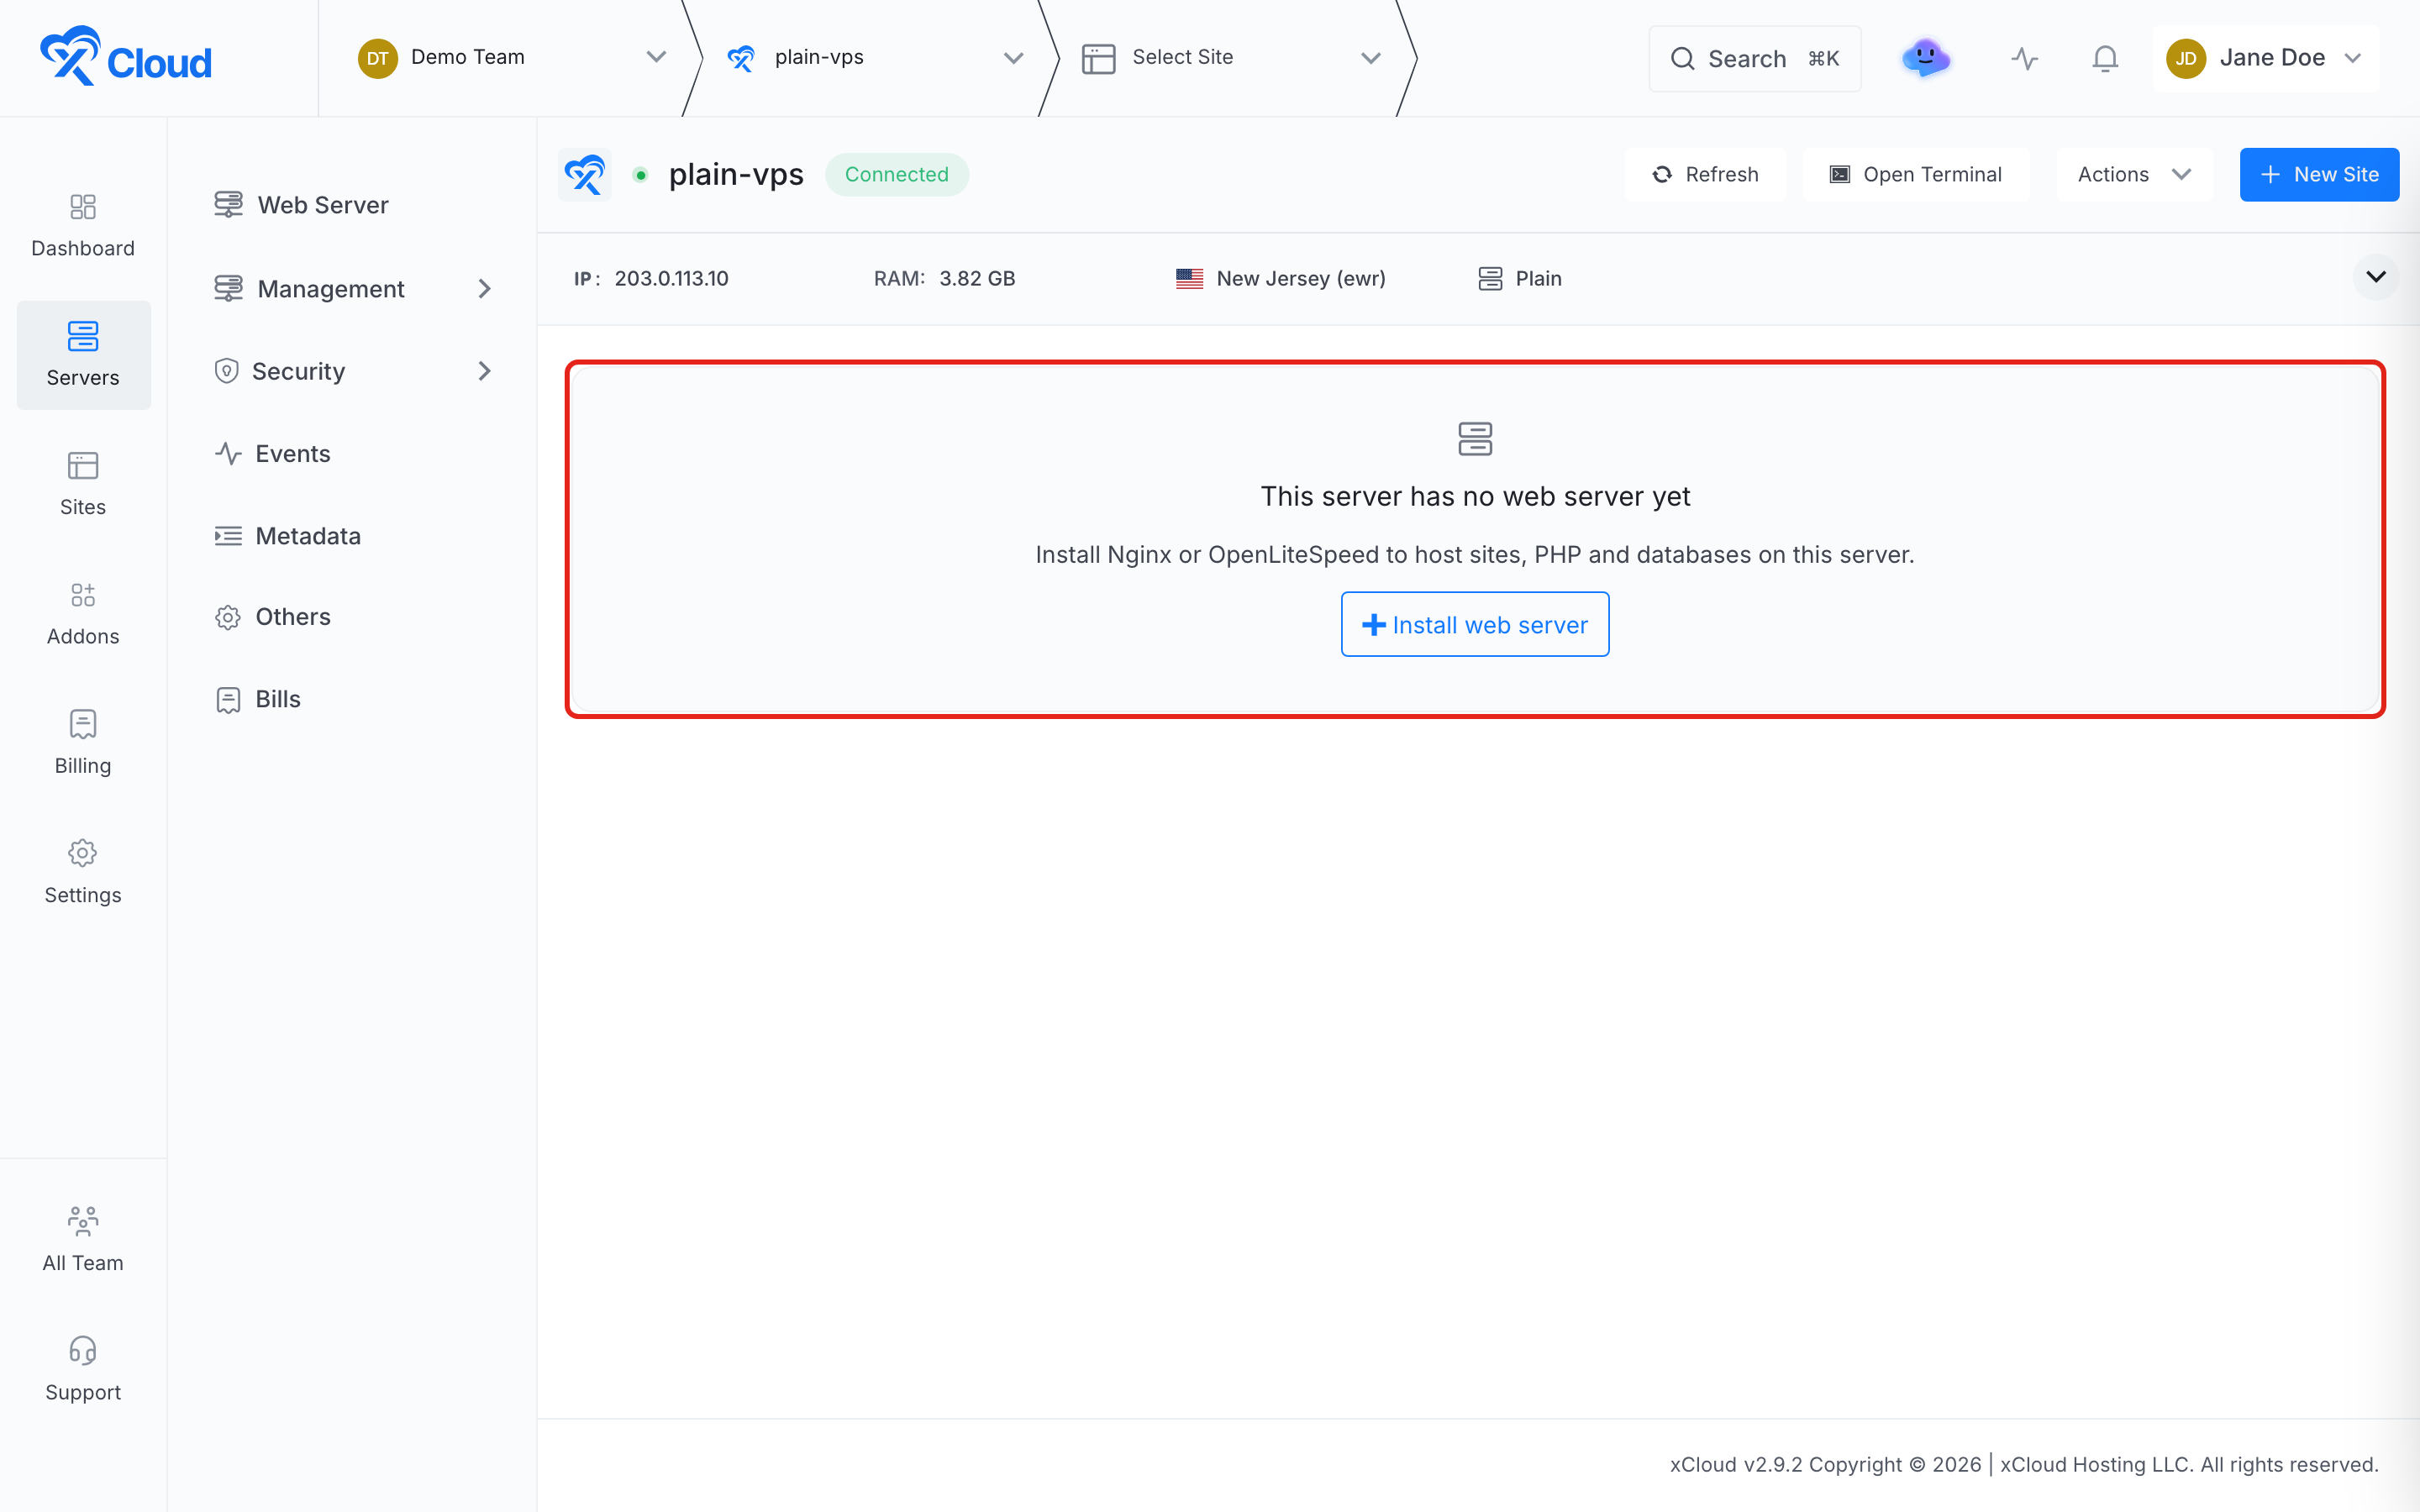
You can now log in over SSH as the xcloud user or as a sudo user and install what you need. Sudo Users, Commands, Events and Open Terminal all work on a Plain server. Pages that need a web server, such as Sites, show a notice with an Install web server button instead of an empty list.
If your software listens on a port other than 80 or 443, add a rule for that port in Firewall Management. The firewall blocks every other incoming port by default.
Tip: Run long-lived processes under
supervisor, which is already installed, so they restart after a crash or a reboot.
Step 5: Install a web server when you need one
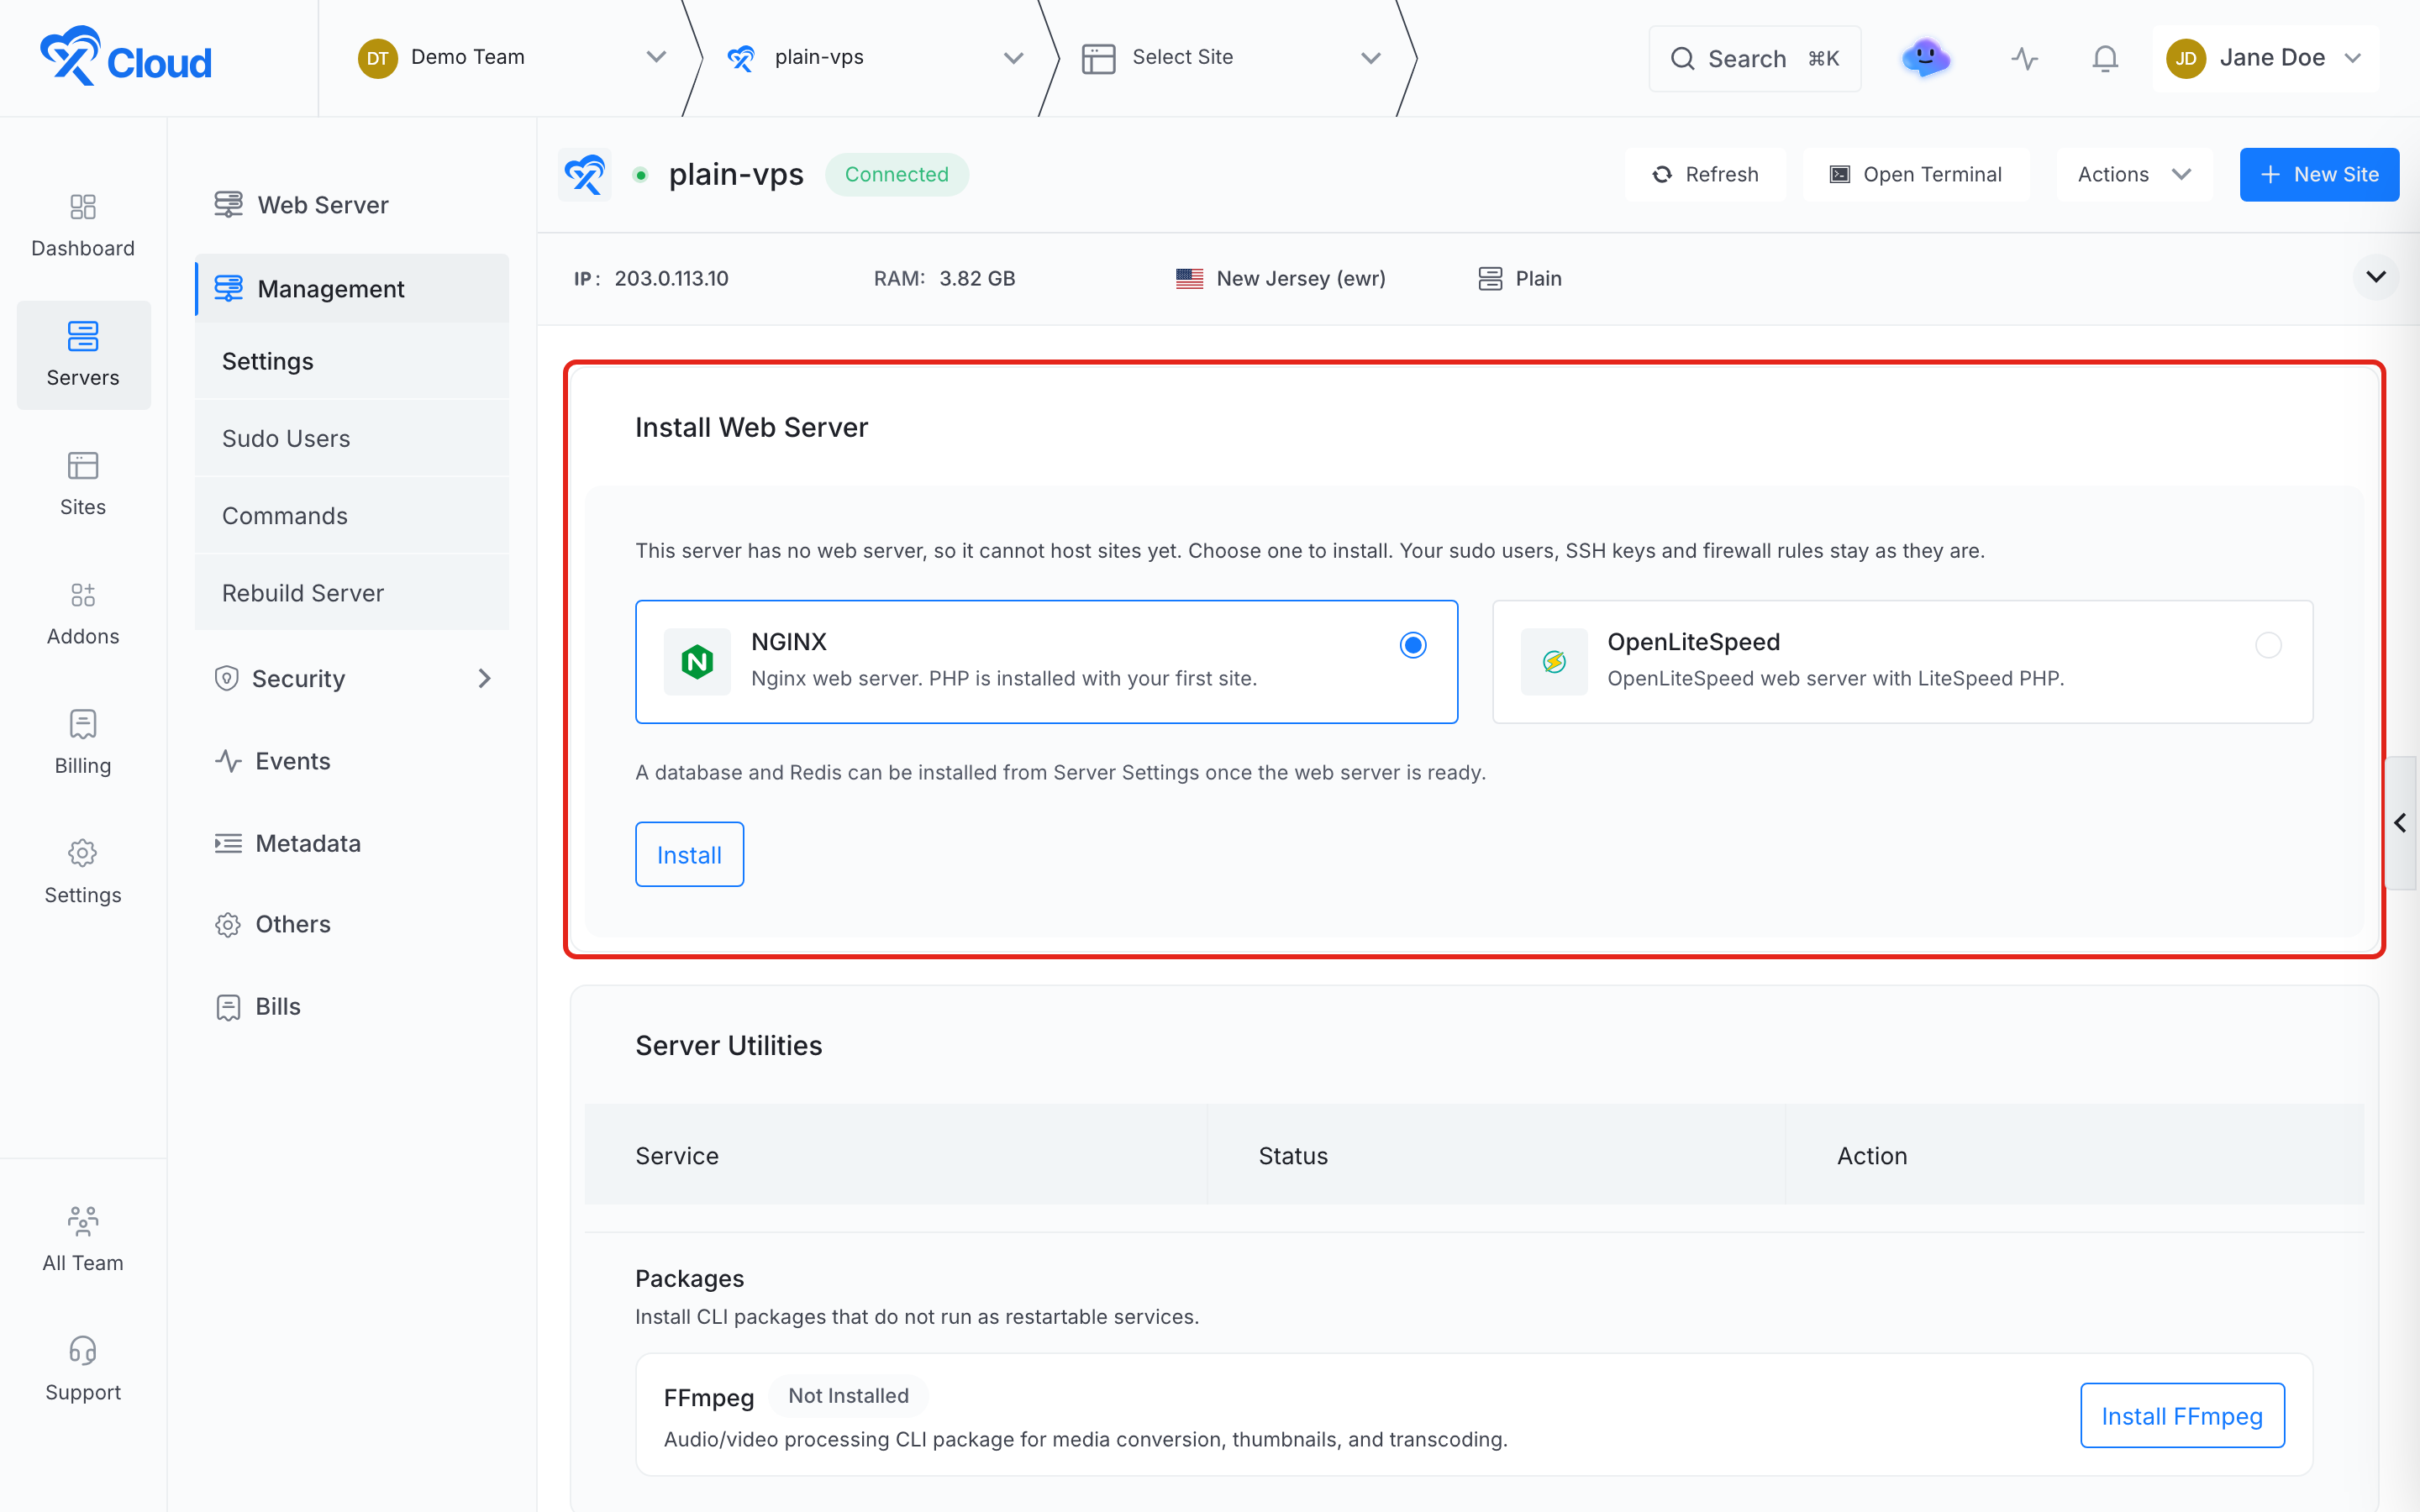
When you want to host sites on the server, open Management in the server menu. The Install Web Server card lists two choices:
- NGINX: the Nginx web server. PHP is installed when you create your first site.
- OpenLiteSpeed: the OpenLiteSpeed web server with LiteSpeed PHP.
Select one and click Install. Your sudo users, SSH keys and firewall rules stay as they are.
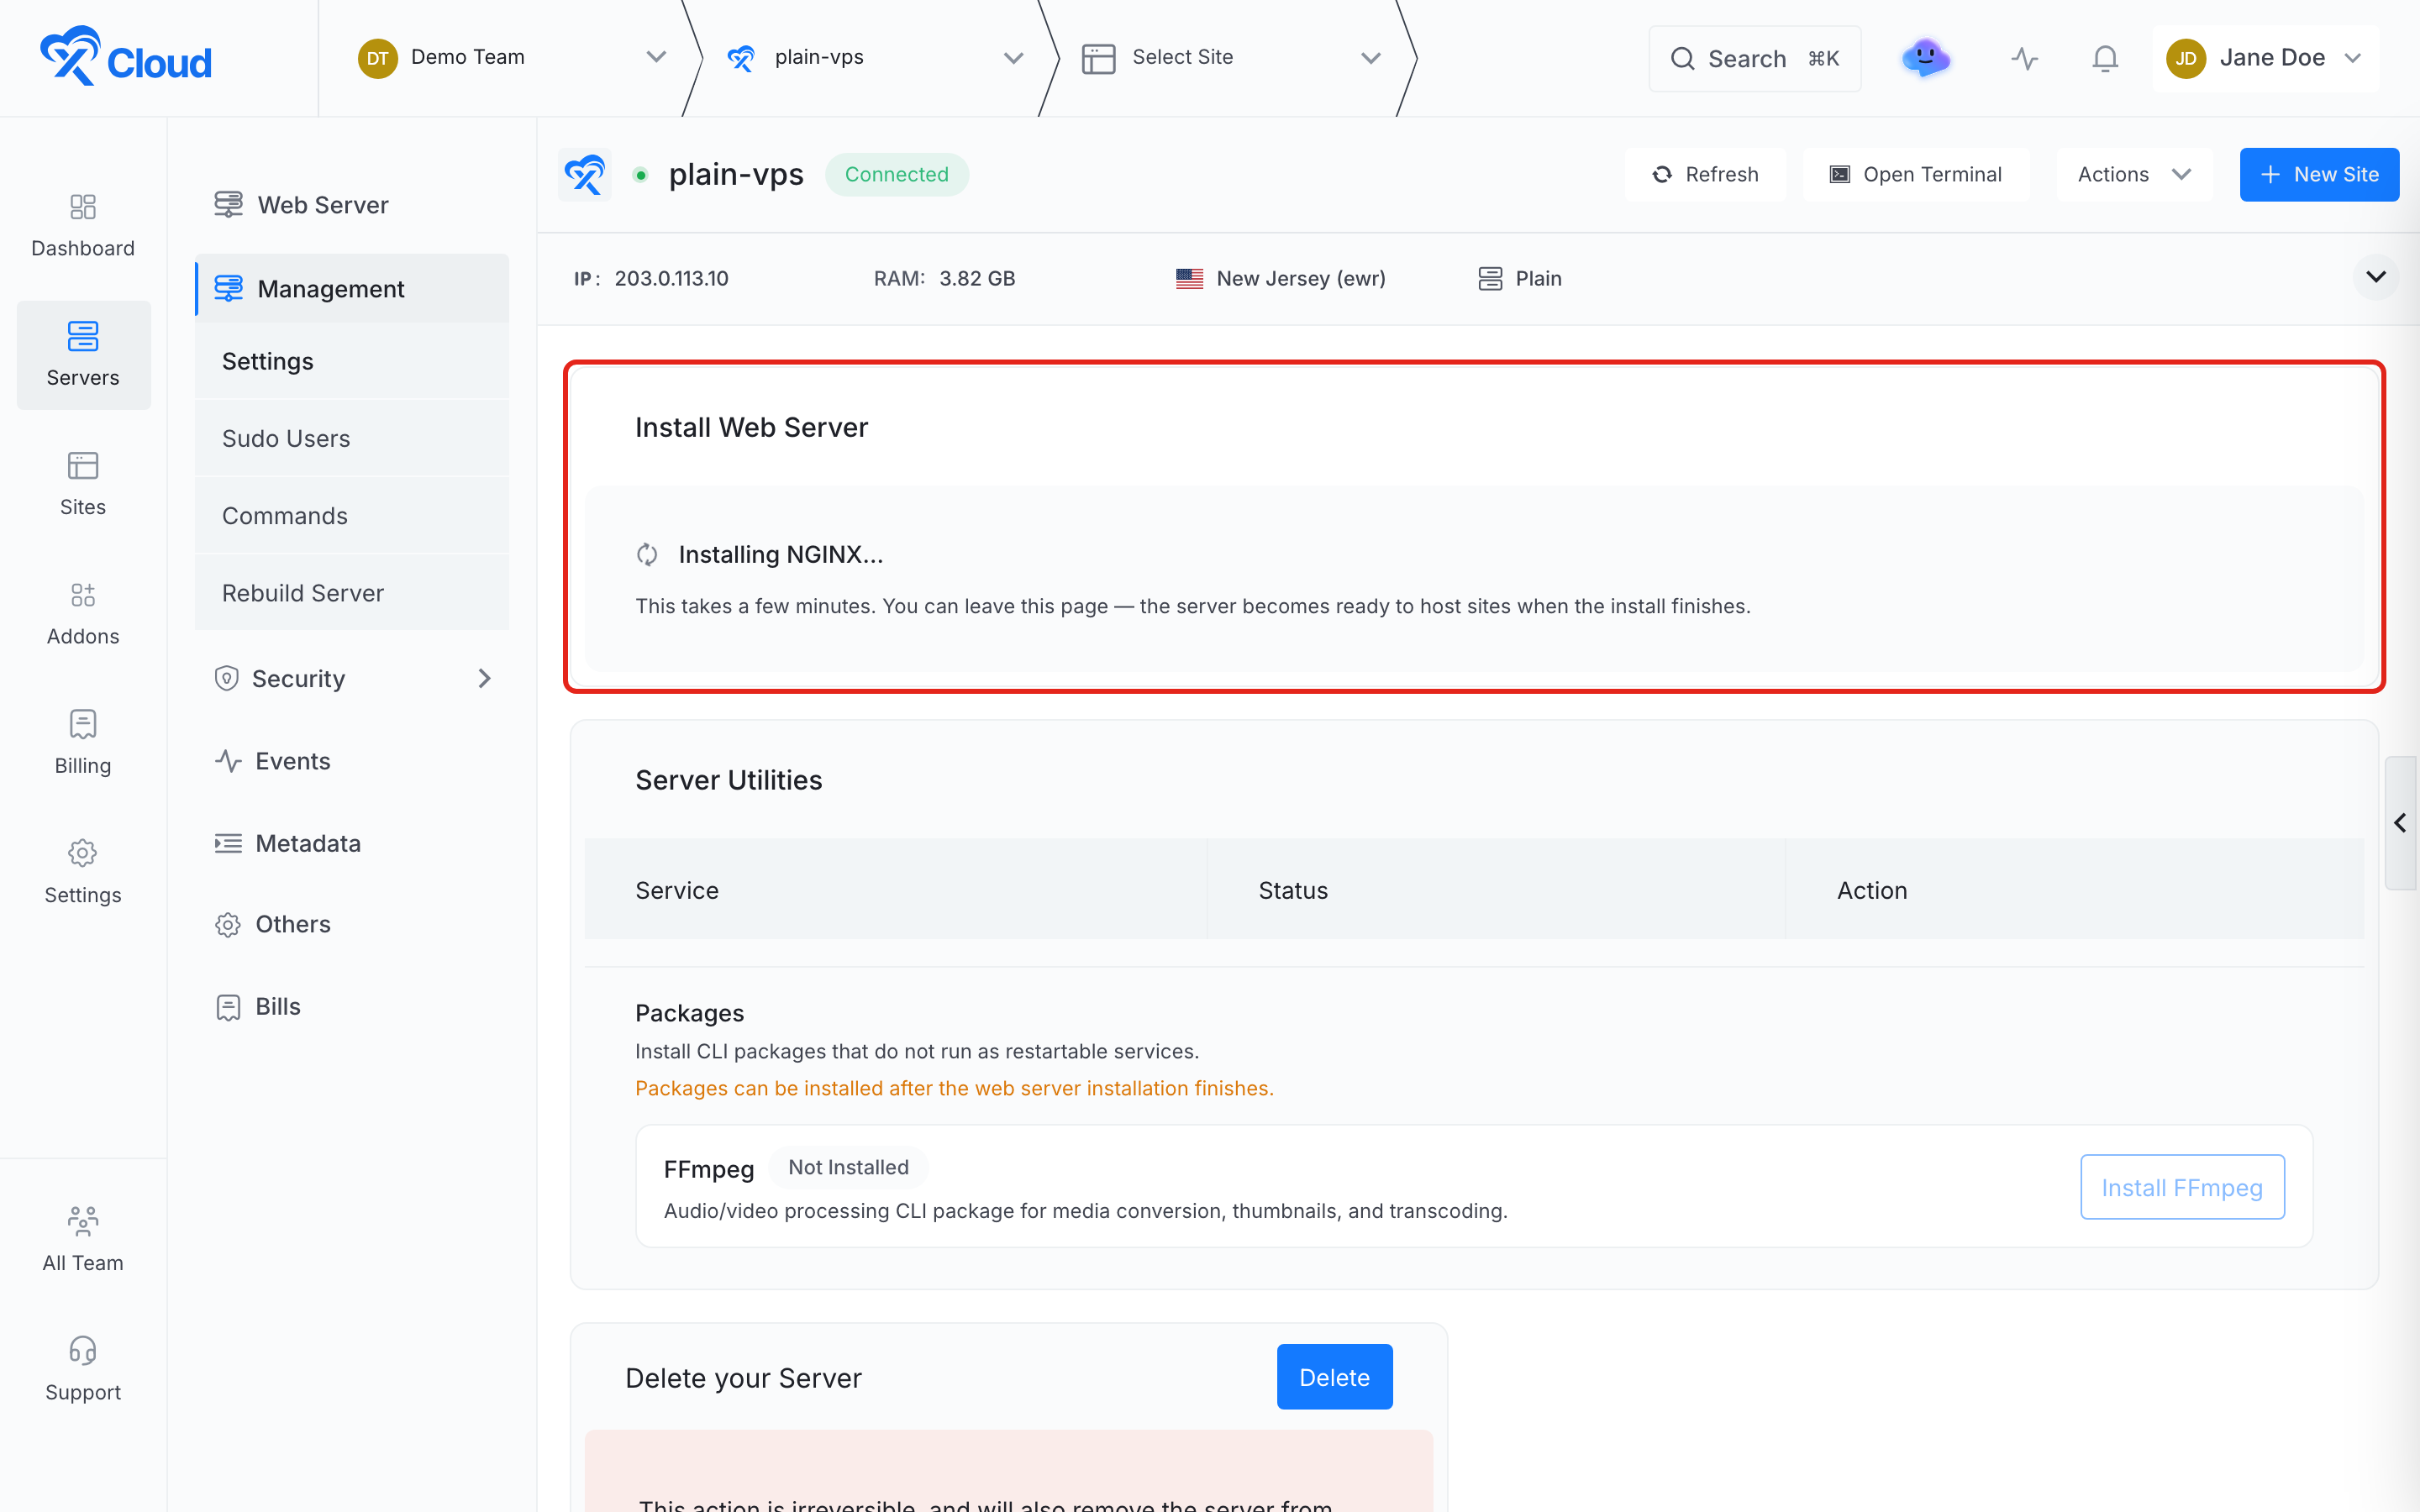
The install takes a few minutes and you can leave the page while it runs. Package installs such as FFmpeg are paused until it finishes, so two installs do not compete for the package manager.
When the install succeeds, the stack changes to NGINX or OpenLiteSpeed, xCloud starts monitoring the server and you can add sites. A database and Redis are not part of this step. Install them from the server’s settings when you need them, for example with How to Install MariaDB with xCloud.
Important: Installing a web server is one way. The server cannot be turned back into a Plain server afterwards.
If the web server install fails
If the install does not finish, the server is left unchanged. It stays Plain, with no half-installed web server, and the card shows which install failed.
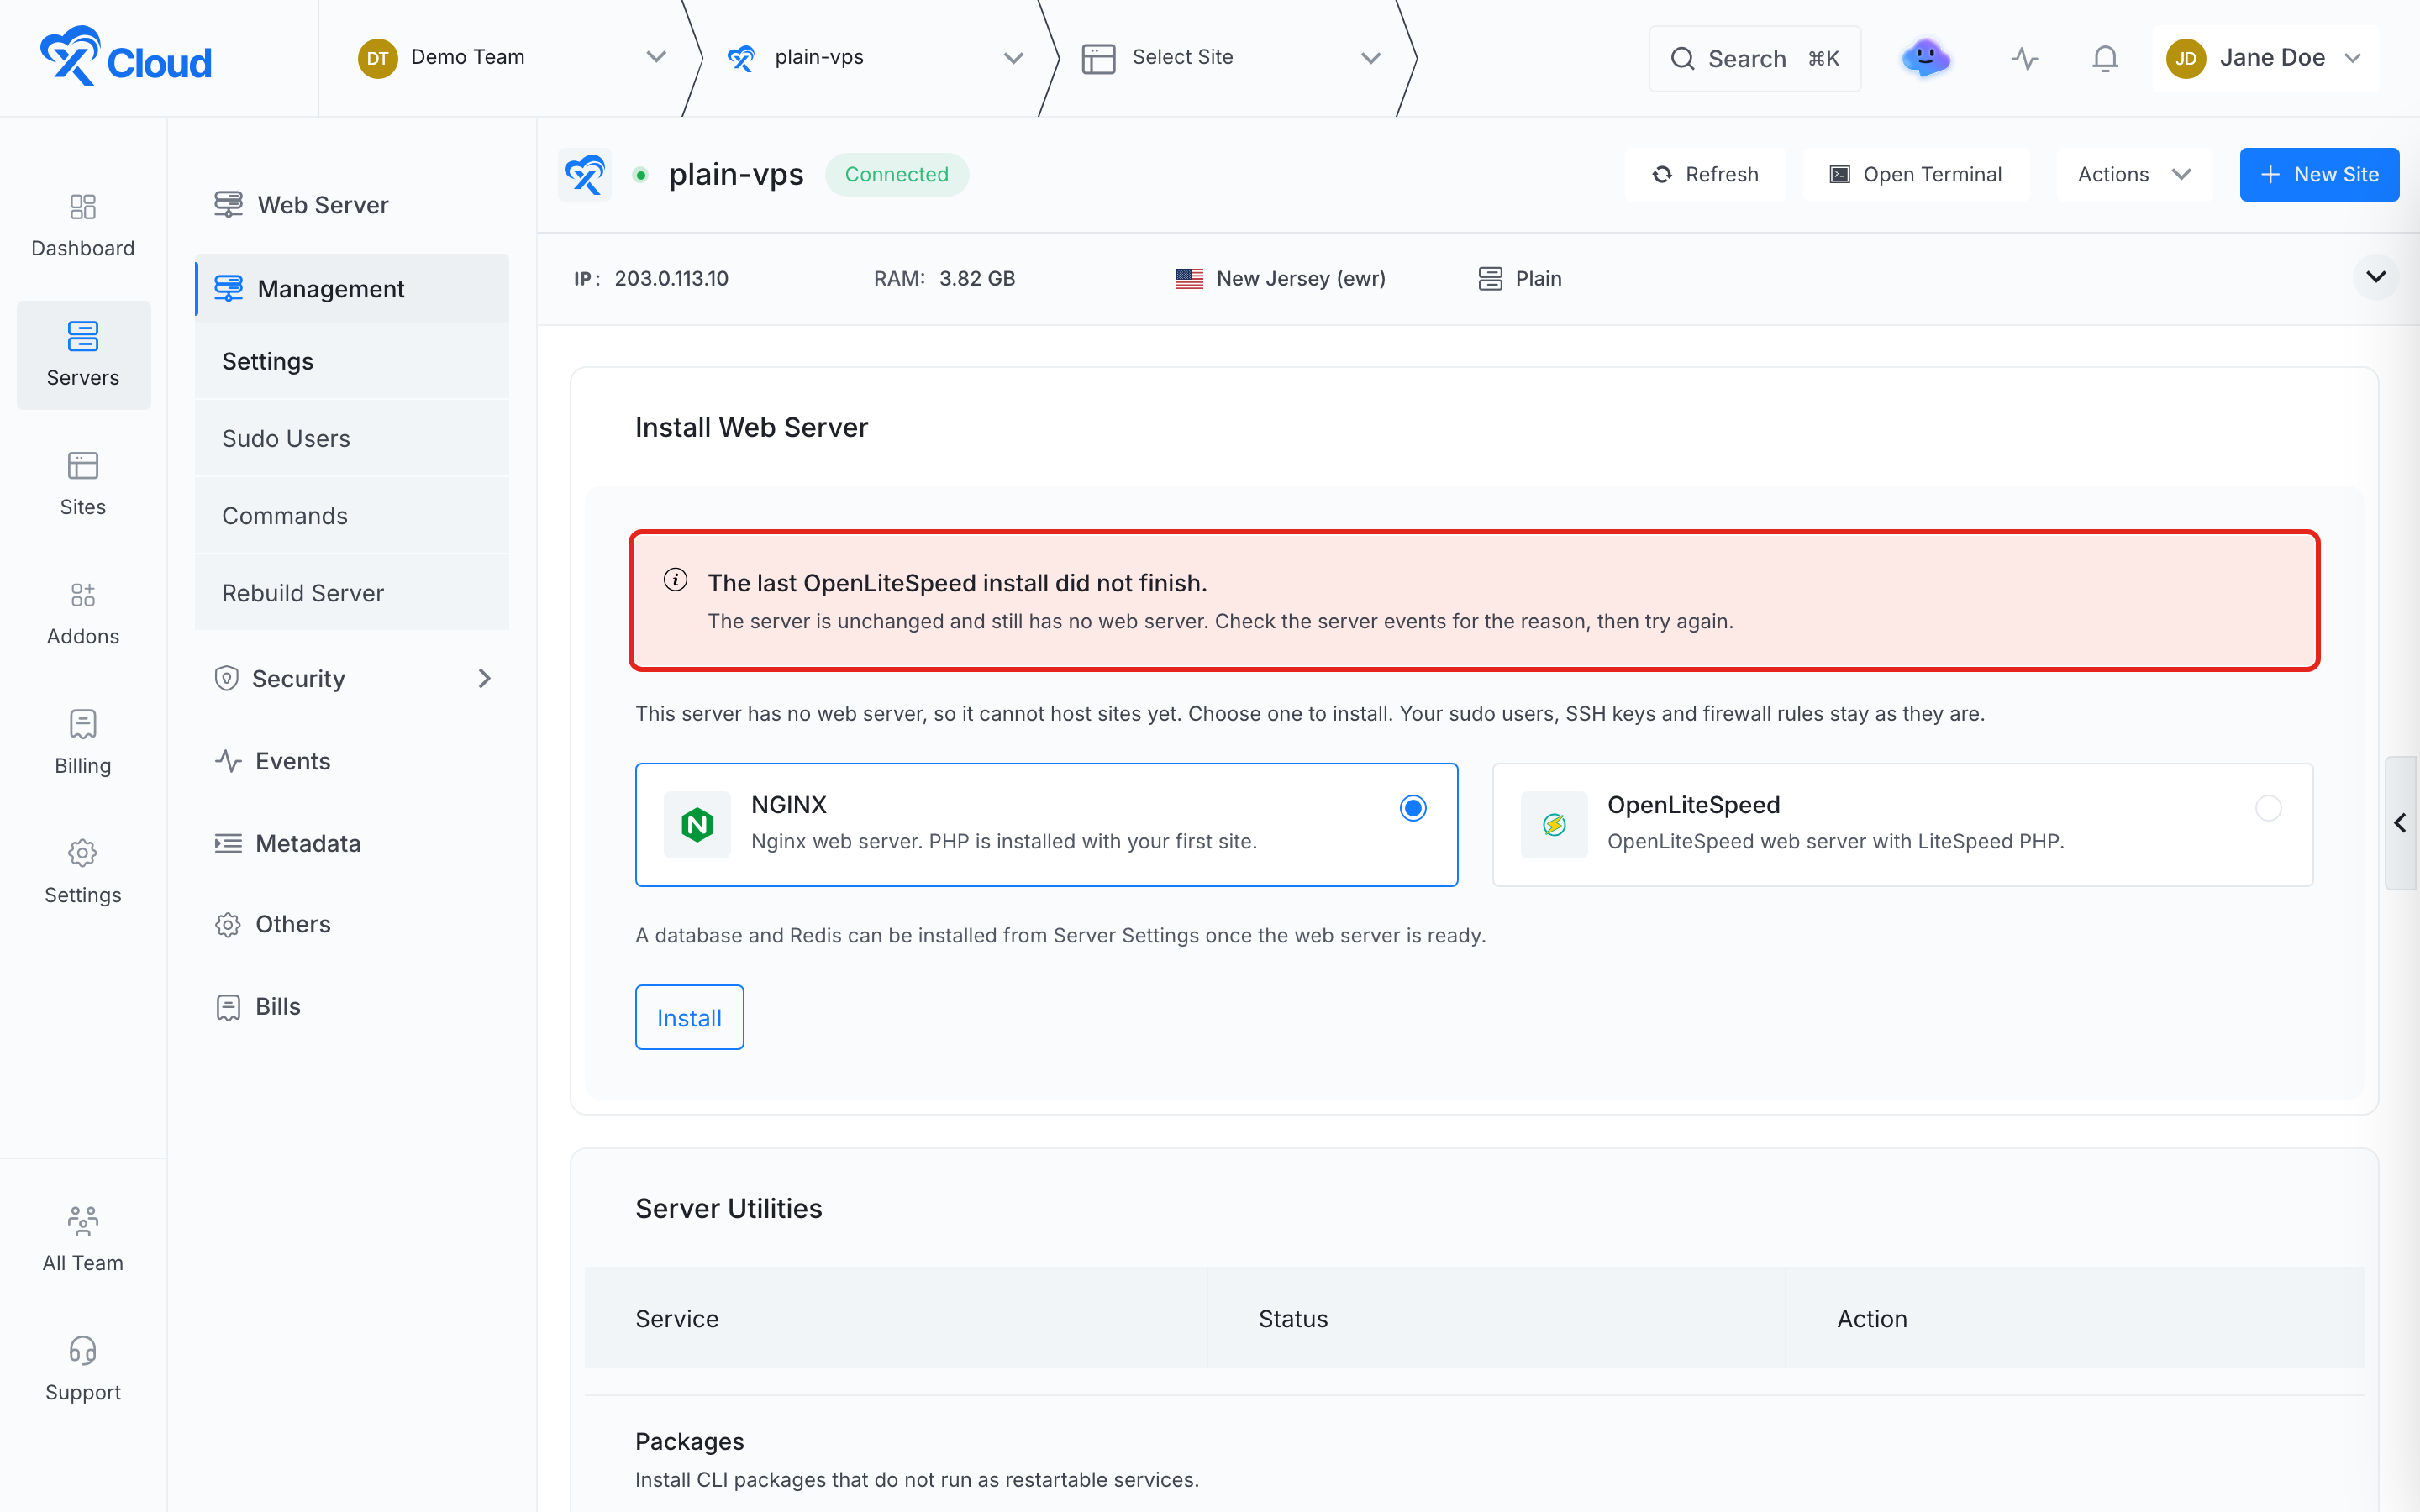
Open Events to read the reason. A common cause is another program holding the package manager lock, for example a manual apt upgrade you started over SSH. Wait for it to finish, then click Install again.
Install a web server with the API or MCP
You can run the same install from the xCloud Public API. Use a token with the write:servers scope and send the target stack:
curl -X POST "https://app.xcloud.host/api/v1/servers/{server_uuid}/install-web-server" \
  -H "Authorization: Bearer xc_live_xxxxxxxxxxxx" \
  -H "Content-Type: application/json" \
  -d '{"stack": "nginx"}'
The API answers 202 once the install starts. Poll GET /api/v1/servers/{server_uuid}: installing_web_server holds the target stack while it runs. On success, stack becomes nginx or openlitespeed. On failure, stack stays plain and web_server_install_failure is set, so you can retry. AI agents connected through the xCloud MCP can run the same action.
Frequently asked questions
Is a Plain server less secure than an Nginx or OpenLiteSpeed server?
No. A Plain server gets the same operating system hardening as every xCloud server: the UFW firewall, Fail2Ban for SSH, key-only SSH login, kernel security mitigations and automatic security updates. It only skips the software that serves websites, so there are fewer services listening for attacks.
Can I host a WordPress or PHP site on a Plain server?
Not until you install a web server. Open Management on the server, choose Nginx or OpenLiteSpeed in the Install Web Server card and click Install. Once it finishes, you can add sites as usual.
Can I go back to Plain after installing a web server?
No. Installing a web server permanently changes the server’s stack to Nginx or OpenLiteSpeed. If you need a Plain server again, create a new one.
Can I install a web server through the API?
Yes. Send POST /api/v1/servers/{uuid}/install-web-server with a stack of nginx or openlitespeed, using a token with the write:servers scope. The same action is available as an xCloud MCP tool.
That’s it! You have successfully created a Plain server with xCloud and know how to add a web server to it later.
Still stuck? Contact our dedicated support team for any of your queries.