

How to Deploy EmDash CMS in One Click on xCloud
Updated October 4, 2026 · 7 min read
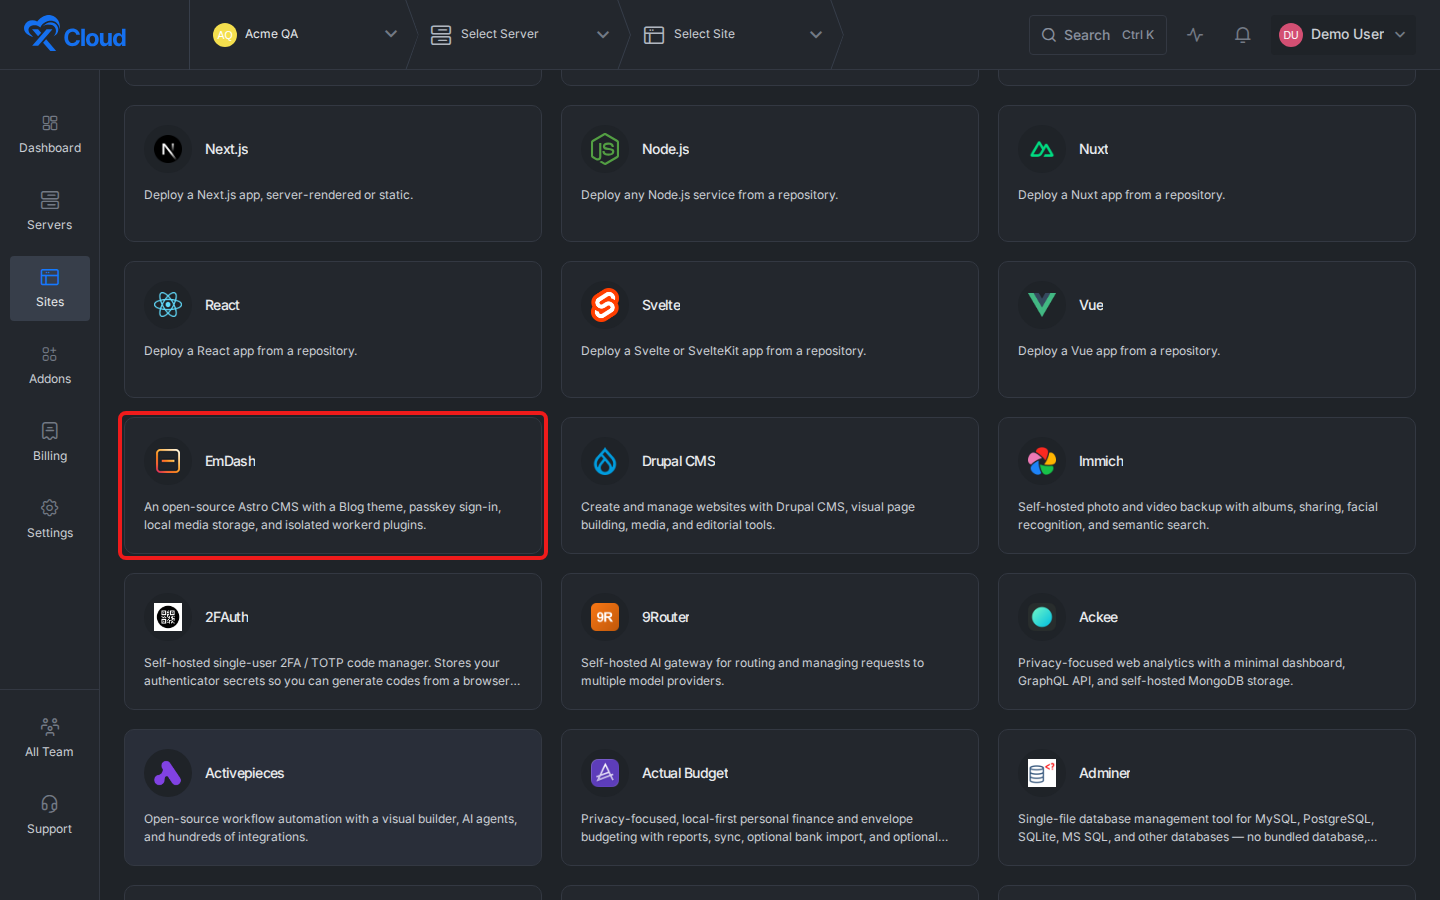
EmDash CMS hosting on xCloud lets you deploy the Astro-based content management system from the xCloud app-create flow: Sites → New Site → One Click Apps → EmDash → Docker + NGINX server → Demo Site or Go Live → Next. You do not need to write a custom docker-compose.yml for this flow. xCloud provides the guided site setup while EmDash supplies the CMS, admin interface, authentication, media library, and plugin system.
What you will accomplish
By the end of this guide, you will have:
- selected EmDash from the xCloud One Click Apps catalog;
- chosen a compatible Docker + NGINX server;
- configured a Demo Site or production domain;
- started the EmDash installation from xCloud; and
- identified the first post-deployment checks for the CMS.
Prerequisites
Before you start, make sure you have:
- an active xCloud account with permission to create sites;
- either an existing Docker + NGINX server or permission to create a new server;
- at least 4 GB RAM, 1 vCPU, and 5 GB free disk, as shown by the current EmDash app screen; and
- a domain you can point to the server if you plan to use Go Live immediately.
EmDash 1.0 is a stable, free, and open-source CMS built on Astro. The upstream project announced the stable 1.0 release on September 28, 2026, after production use and testing at scale. Keep current backups before updating any production CMS.
What the EmDash deployment includes
EmDash is a full-stack TypeScript CMS built on Astro. Its upstream project includes an admin panel, REST API, authentication, a media library, structured content, and a plugin system. On Node.js deployments, EmDash can use SQLite and local file storage; plugins run in a sandboxed workerd child process.
The xCloud flow places the app on a Docker + NGINX server and gives you the normal xCloud site operations around it, including domain setup, HTTPS, logs, backups, and deployment management.
| Area | What to expect |
|---|---|
| Application | EmDash 1.0 CMS with the Blog starter experience |
| Runtime | Docker + NGINX on xCloud |
| Recommended resources | 4 GB RAM, 1 vCPU, 5 GB disk |
| Authentication | Passkey-first authentication, with upstream OAuth and magic-link support |
| Content | Posts, pages, custom content types, drafts, revisions, and scheduled publishing |
| Media | Media library backed by persistent application storage |
| Plugins | Sandboxed execution through workerd on Node.js |
Deploy EmDash in one click
1. Select EmDash from One Click Apps
In xCloud, open Sites, start a new site, and choose One Click Apps. Find EmDash in the application catalog and select it.
Expected result: xCloud opens the EmDash app screen and shows its Docker + NGINX stack and recommended server resources.
2. Choose where EmDash should run
Select a compatible existing Docker + NGINX server, or choose Deploy on a new server if you want dedicated resources. After selecting an existing server, click Continue.
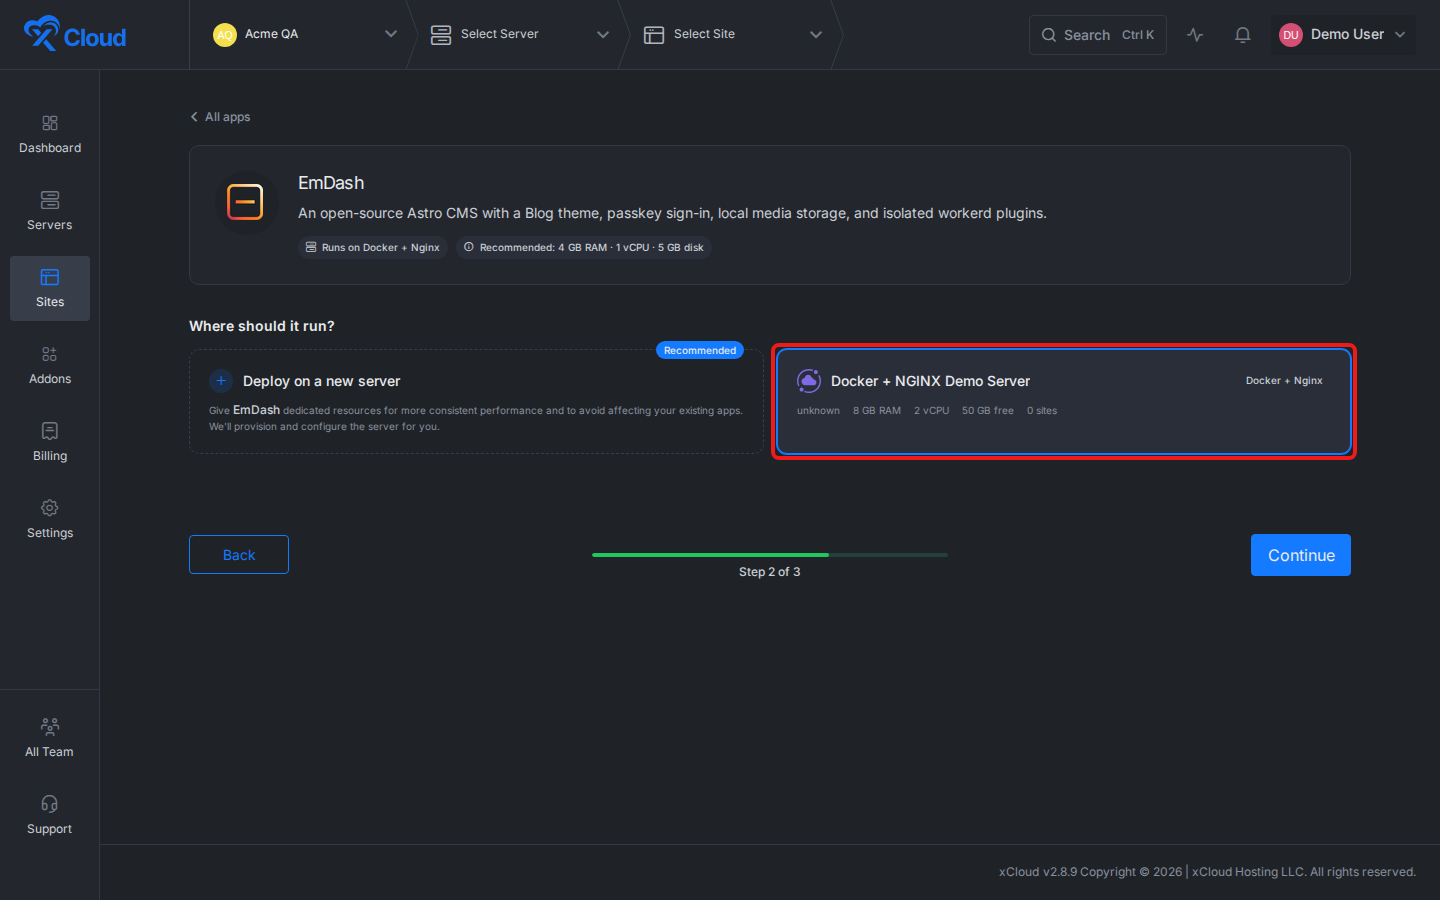
Expected result: xCloud opens the EmDash installation form for the selected server.
3. Configure and start the installation
Enter a recognizable Site Title. Add tags if your team uses them for filtering.
Under Domain Setup, choose one of these options:
- Demo Site creates a temporary xCloud test domain. Use it to review EmDash before connecting a production domain.
- Go Live lets you enter a production domain that you control.
Review the generated domain, then click Next to start the installation.
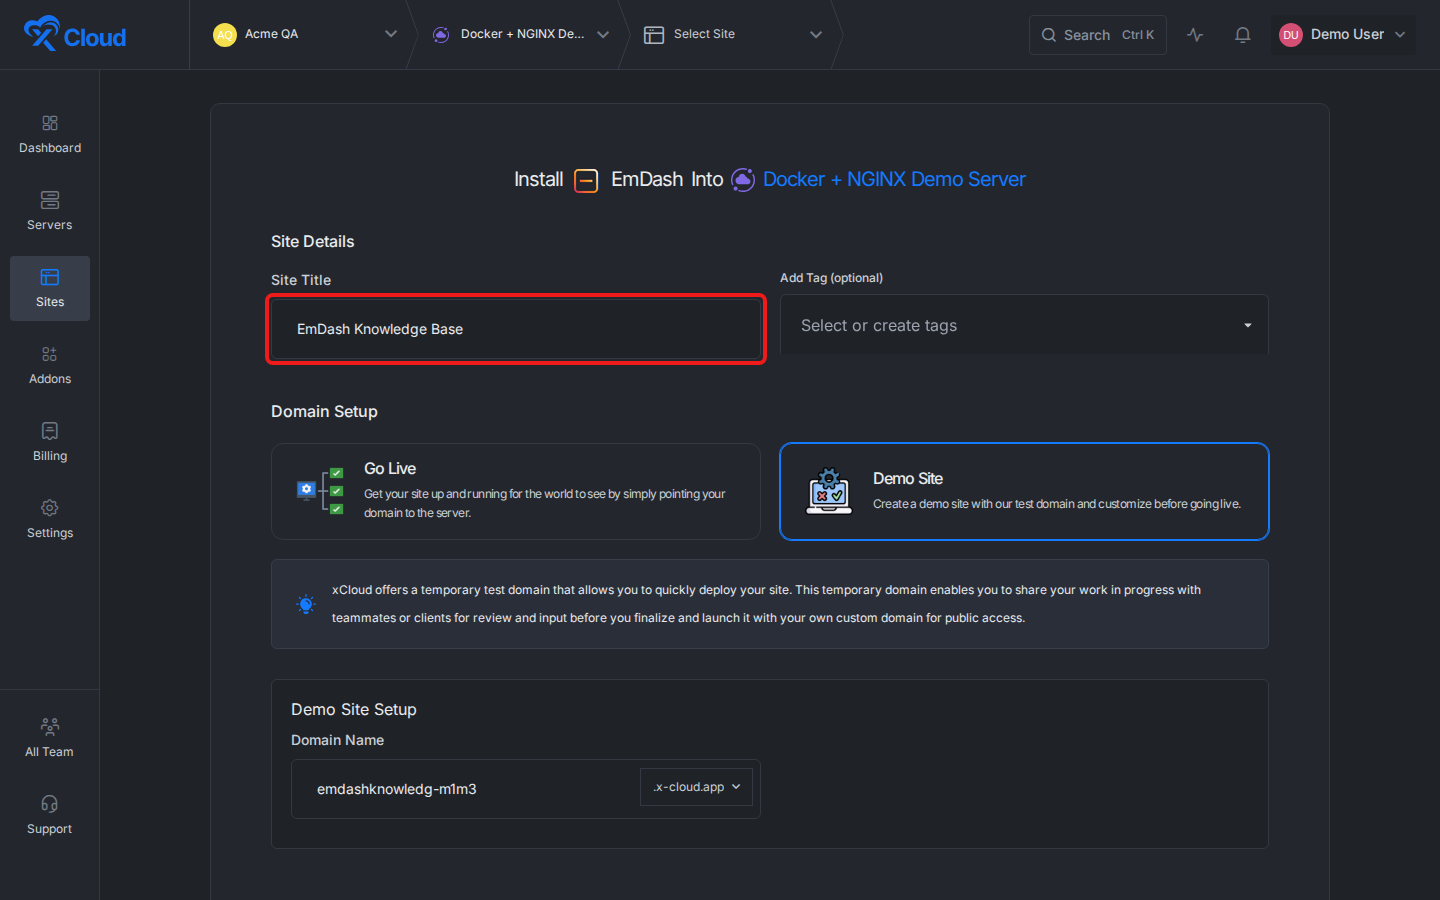
Expected result: xCloud starts creating the Docker-based EmDash site and takes you to deployment progress or the site overview when installation is ready.
Post-deployment setup
Complete these checks before you publish content or invite editors.
| Setup area | What to do | Success check |
|---|---|---|
| Site access | Open the generated Demo Site or production URL. | The EmDash site loads without a server or routing error. |
| HTTPS | If you used Go Live, finish DNS setup and wait for SSL provisioning. | The site loads over HTTPS without a certificate warning. |
| Administrator access | Open the EmDash admin area and complete its passkey-first sign-in flow. | An authorized administrator reaches the dashboard. |
| Content | Create a draft post, add a category or tag, and preview it. | The preview shows the saved content and the public site remains unchanged until publication. |
| Media | Upload a disposable image through the media library. | The image remains available after a page refresh. |
| Backups | Configure an xCloud backup that includes the site’s persistent data. | A recent backup is visible and your team knows the restore path. |
| Updates | Review EmDash release notes before updating the application image. | The site, admin area, media, and published content work after the update. |
EmDash storage and backup considerations
EmDash stores structured content in a database and media in its configured storage backend. In the xCloud Node.js deployment path, that typically means SQLite plus local persistent storage unless you have configured another supported backend.
Back up the complete persistent application data required by your deployment. Before an update, confirm that the backup includes both the content database and uploaded media. A database-only backup is not sufficient if media files are stored separately.
Troubleshooting
| Symptom | Likely cause | What to check |
|---|---|---|
| EmDash is not listed | The app catalog has not refreshed or the account is in a different site-creation path. | Return to Sites → New Site → One Click Apps and reload the catalog. |
| No compatible server appears | The account has no provisioned Docker + NGINX server that meets the app requirements. | Create a new compatible server or verify the stack and available resources on an existing server. |
| Continue is disabled | No server card is selected. | Select the server card and confirm it shows the active selection border. |
| Next is disabled | A required site field or domain choice is incomplete. | Enter a Site Title and complete either Demo Site or Go Live setup. |
| The site does not load after installation | Deployment is still running, the container is unhealthy, or the domain is not routed. | Check deployment progress, container status, logs, and domain/SSL state in xCloud. |
| Uploaded media disappears | The media directory is not using persistent storage or was not restored. | Confirm the application’s persistent storage and backup coverage. |
| Passkey registration fails | The site is not using a trusted HTTPS origin or the browser does not support the required WebAuthn flow. | Finish HTTPS setup and retry with a current supported browser. |
Frequently asked questions
Do I need to write Docker Compose for EmDash on xCloud?
No. Select One Click Apps and complete the guided xCloud site-creation flow.
Should I choose Demo Site or Go Live?
Use Demo Site for initial evaluation and internal review. Choose Go Live when your production domain and DNS access are ready.
Can EmDash run without Cloudflare?
Yes. The upstream EmDash project supports Node.js deployments with SQLite and local files in addition to its Cloudflare deployment model. The xCloud one-click path uses the Docker + NGINX server flow.
How should I protect EmDash content?
Use HTTPS, limit dashboard and CMS administrator access, keep the application updated, and maintain tested backups of both the database and media storage.
Next steps
After deployment, create a disposable draft, upload a test image, verify the public preview, and configure backups before adding production content or inviting other editors.
If you run into any issues during setup, feel free to reach out to our support team.