

How to Deploy Zulip with xCloud One Click Apps
Updated November 2, 2026 · 6 min read
Zulip is an open-source team chat app that keeps every conversation in a channel and a topic, so people can catch up without reading everything. In xCloud, you install it from One Click Apps. You choose the organization name and owner, and xCloud creates both, generates the passwords and puts Zulip on a domain with HTTPS.
Zulip has one domain and no public ports. Its supporting services run alongside it and stay private to the app, so you don’t need a firewall rule or extra domains.
This install doesn’t set up outgoing email, so Zulip can’t send invitations or password resets until email is set up. This guide doesn’t cover that setup. See Inviting your team.
Before you start
You need:
- An xCloud server that uses Nginx, with at least 4 GB of RAM, 2 CPU cores and 20 GB of free disk. Plan for more disk as uploads and message history grow.
- An email address for the first organization owner. You sign in with it.
If you don’t have your domain ready, start with a Demo Site and move to your own domain later.
Step 1: Choose Zulip
Open Servers, open the menu for your server and click Add New Site. Click the One Click Apps tab, type Zulip in the search box and click its card.
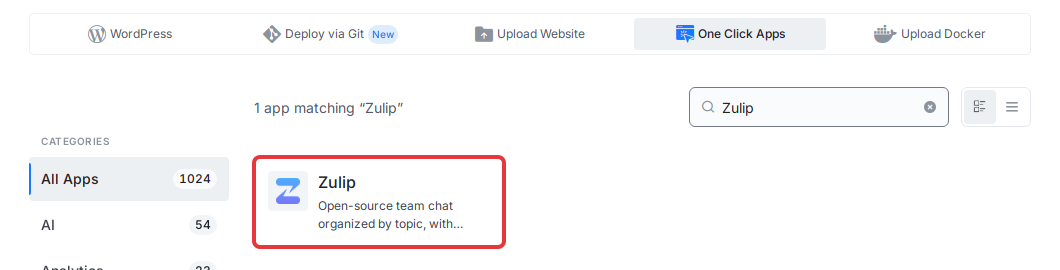
Expected result: The Install Zulip page opens for your server.
Step 2: Set the site and first owner
Enter a Site Title. Under Domain Setup, choose Demo Site to use a generated test domain, or Go Live to use your own. Then fill in Initial Organization Owner:
| Field | What to enter |
|---|---|
| Organization Name | The name your team sees in Zulip |
| Owner Full Name | The display name of the first owner |
| Owner Email | The address the first owner signs in with |
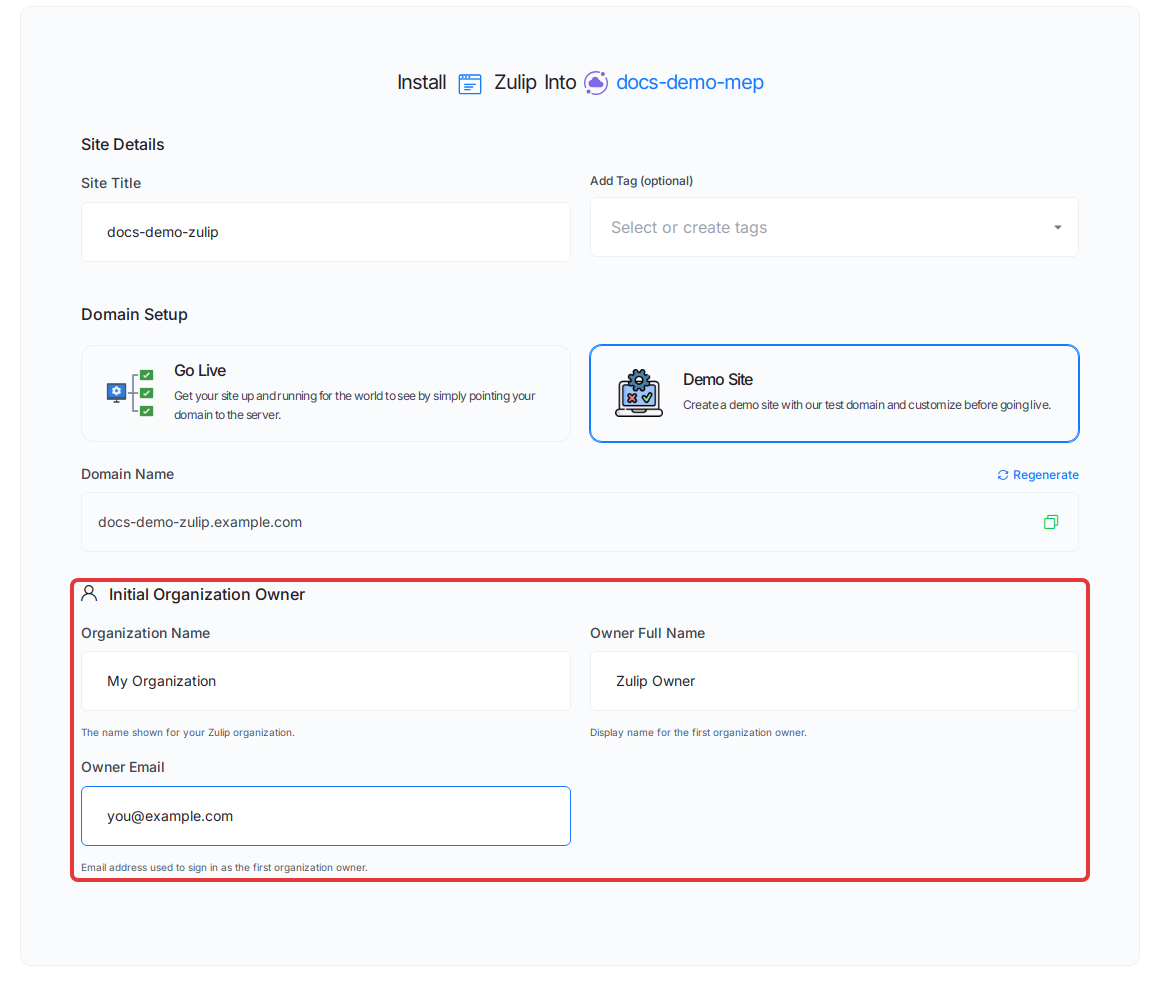
Click Next.
Expected result: xCloud shows the install progress. Zulip starts several services, so it can take longer than a smaller app. When it finishes, the site is ready to open.
Step 3: Find your login
Open the site and go to Access Data → Credentials. The Zulip Credentials card lists the Zulip URL, Owner Email and Initial Owner Password. Click the eye icon to show the password.
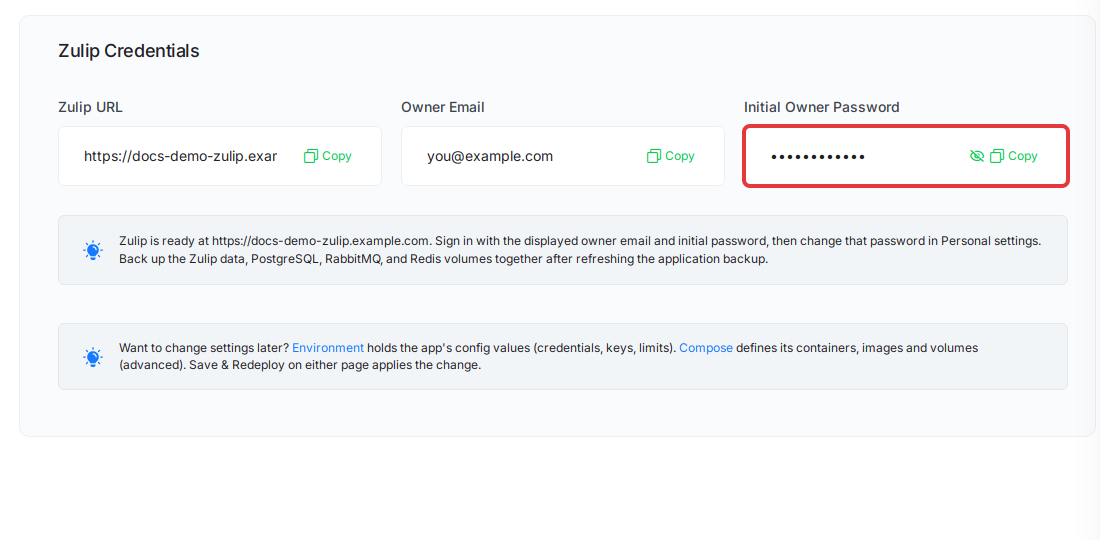
Expected result: The Zulip Credentials card shows your login details.
Step 4: Sign in and change the password
Open the Zulip URL and sign in with the owner email and initial password. Zulip shows a Welcome to Zulip page the first time. Make sure the email address shown is yours, then click Continue.
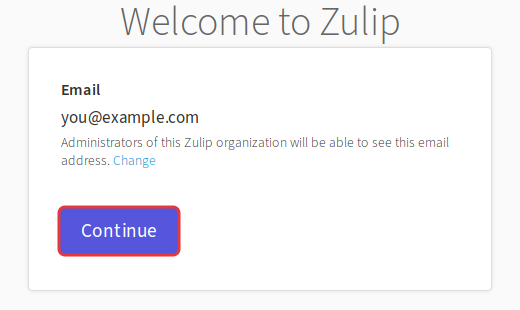
Then change the password. Click the gear icon at the top right and open Personal settings.
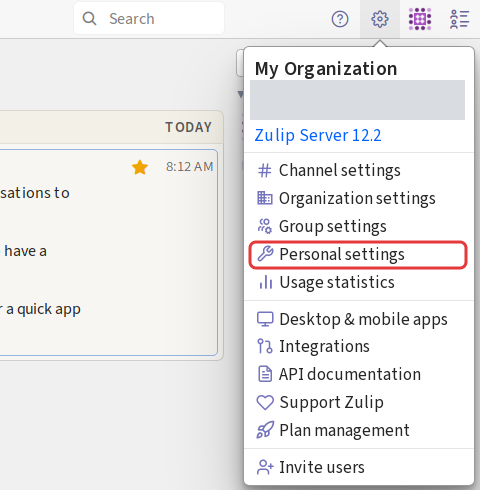
On the Account & privacy tab, click Change your password. Enter your Old password and New password, then click Change.
Expected result: You can sign in with the new password. The value on the Credentials card doesn’t change with it, and it won’t work once you’ve changed your password.
Move from a demo domain to your own
If you installed on a Demo Site, do this before your team starts using Zulip, so that everyone starts on the final address.
- Open the site and go to Domain → Domain.
- On the Demo Site Domain card, click Go Live.
- Enter your domain and point an A record for it to your server.
- Click Verify My DNS, then click Go Live.
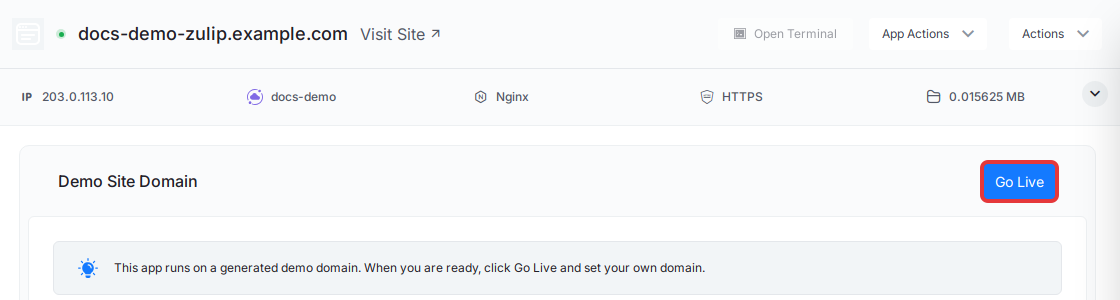
Expected result: xCloud shows Domain update request is sent for processing. When the move finishes, open Access Data → Credentials and check that Zulip URL shows your domain. Open that address and confirm you can sign in.
For more detail, see how to manage One Click App domains and public endpoints.
Inviting your team
Invitations and password resets need email setup that this guide doesn’t cover. This install has no outgoing email, so until it’s set up, those emails won’t be sent.
An Invitation link doesn’t avoid this, because Zulip sends each new person a confirmation email when they sign up through the link.
Keep your new owner password somewhere safe, because a password reset email won’t reach you either.
Backups and updates
Backups: Zulip keeps its data in four volumes: zulip_data, zulip_postgres, zulip_rabbitmq and zulip_redis. xCloud backs up all four together. xCloud stops the app while it takes the backup and starts it again afterwards. Refresh Zulip’s own backup first, so that zulip_data holds an up-to-date copy of the database.
Connect to your server over SSH, run docker ps to find the name of the Zulip container, and run:
docker exec ZULIP_CONTAINER_NAME /sbin/entrypoint.sh app:backupExpected result: The command ends with Backup process succeeded. Then take the backup in xCloud. See how to back up and restore Docker apps.
Updates: Your app stays on its current version. App Actions → Update alone reinstalls that same version. To move to a newer one, change the version in the Compose page first. On the image line, change both the version and the sha256 value after it, because that value fixes the exact image. Back up first, because database changes in a new version may not be reversible. See how to update a One Click App and Zulip’s Docker documentation.
Frequently asked questions
Does Zulip need a firewall rule or extra domains?
No. Zulip uses one domain with HTTPS and no public ports of its own. Its supporting services run alongside it and stay private to the app.
Can I change the first owner password from the Environment page?
No. xCloud uses that value only when it creates the organization. Change the password inside Zulip, under Personal settings.
What is the largest file my team can upload?
100 MB per file. Larger files are rejected before they reach Zulip, and changing Zulip’s own upload setting does not raise this limit.
If you run into any issues with Zulip, feel free to reach out to our support team.