

How to Deploy Rybbit Analytics with xCloud
Updated November 4, 2026 · 6 min read
Rybbit is an open-source, cookieless web analytics app with real-time dashboards, funnels, user journeys, retention and session replay. On xCloud you deploy it as a One Click App: open New Site, pick Rybbit, choose a server, set the domain and click Next. You do not write a docker-compose.yml, and xCloud creates the database passwords and app secret for you.
This guide covers the deploy, the first login, adding the tracking script to your website, and keeping Rybbit updated and backed up. For the plan, pricing and what Rybbit is good at, see Rybbit hosting on xCloud.
What you need
| Requirement | What xCloud shows or does |
|---|---|
| Server | An xCloud server with the Nginx stack. Rybbit runs in Docker, and xCloud installs Docker with the first app that needs it. OpenLiteSpeed servers cannot run Docker apps. |
| Size | The app page recommends 4 GB RAM · 2 vCPU · 20 GB disk. Rybbit stores events in ClickHouse, which needs memory as traffic grows. |
| Domain | A domain or subdomain you can point at the server, such as analytics.example.com. Or start on a Demo Site domain and go live later. |
Your Rybbit domain needs SSL (https://). Browsers block a tracking script that loads over plain http:// on a secure website. xCloud sets up the SSL certificate during the install.
If you have no server yet, choose Deploy on a new server in Step 3. If your Nginx server does not have Docker yet, xCloud installs it with Rybbit, or see how to enable Docker on an Nginx server.
Step 1: Open New Site
From your xCloud dashboard, click New Site.

Expected result: the app catalog opens with the heading What would you like to host today?
Step 2: Find Rybbit in the app catalog
Type Rybbit in the search box, then click the Rybbit card.
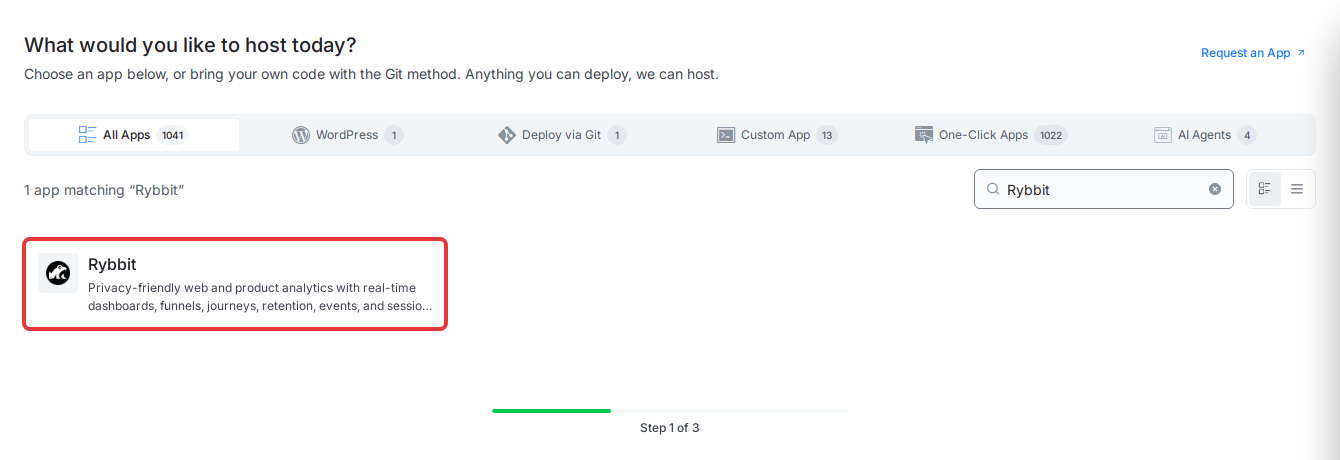
Expected result: the Rybbit app page opens. It shows Runs on Nginx, Docker and the recommended server size.
Step 3: Choose the server
Under Where should it run?, click the server you want to use, then click Continue.
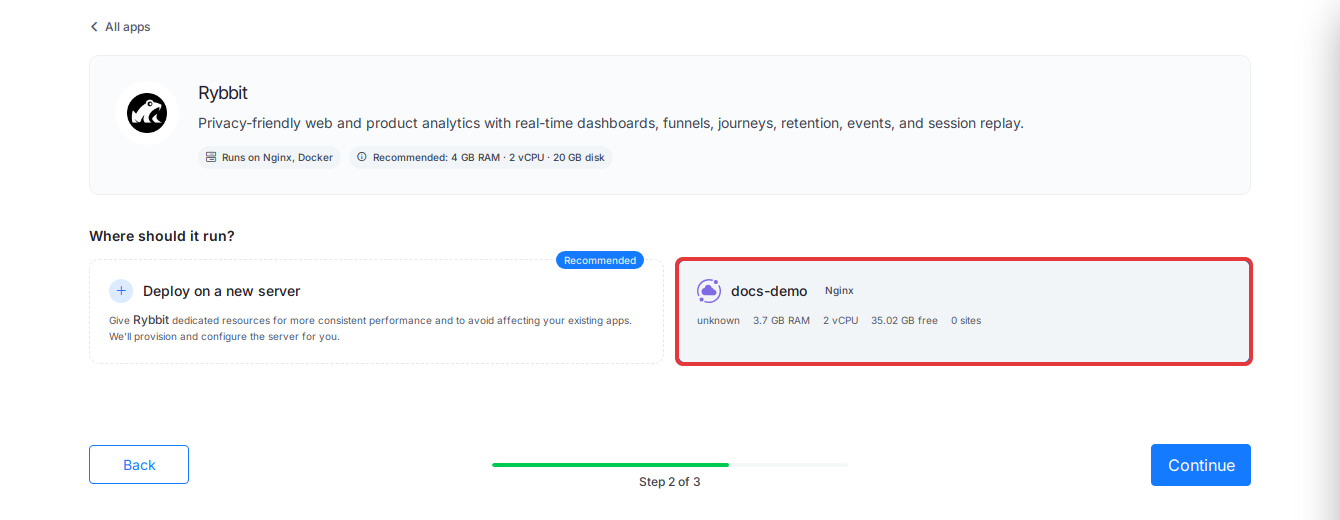
Each server card shows its free RAM, vCPU, free disk and site count, so you can check it meets the recommended size. To give Rybbit a server of its own, choose Deploy on a new server instead. xCloud then creates and configures the server for you before the install.
Expected result: the Install Rybbit Into page opens for the server you chose.
Step 4: Name the site and set the domain
- Enter a Site Title, for example
Rybbit Analytics. Add Tag (optional) helps you find the site later. - Under Domain Setup, choose one:
- Go Live: enter your own domain, for example
analytics.example.com, and point its DNS A record at the server’s IP address. - Demo Site: xCloud fills in a test domain so you can try Rybbit first. Click Regenerate for a different name.
- Go Live: enter your own domain, for example
- Click Next.
Expected result: the Setting Up Your Site progress page opens.
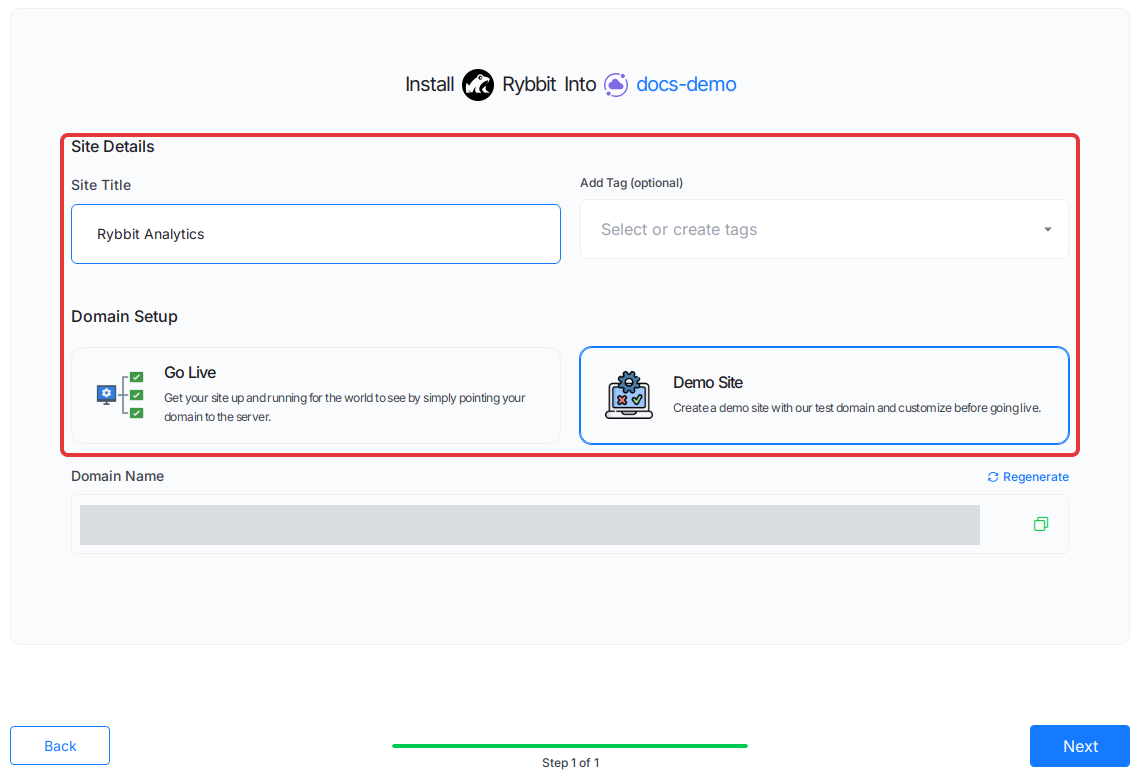
Rybbit has no extra install fields. xCloud generates the app secret and the PostgreSQL, ClickHouse and Redis passwords for you.
Step 5: Wait for the install to finish
xCloud shows Setting Up Your Site with the progress of each step: checking the server, verifying DNS, installing Docker, setting up the app, then SSL, HTTPS and Nginx. You can leave the page; the install keeps running.
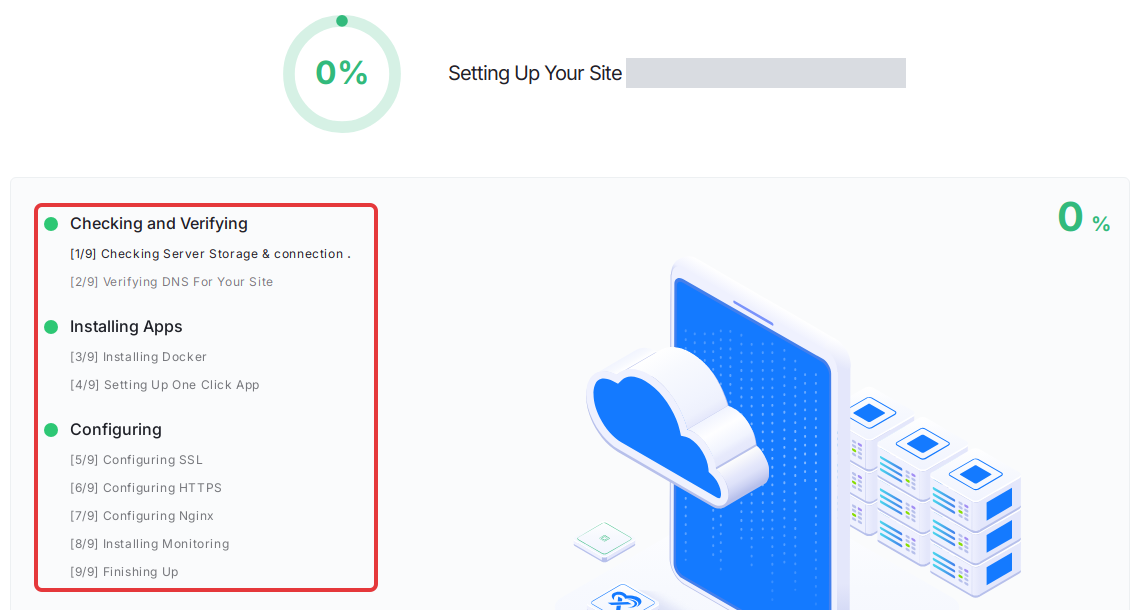
The first install downloads several container images (the Rybbit app, PostgreSQL, ClickHouse and Redis), so it takes longer than a WordPress site.
Expected result: the progress reaches 100%, the site page opens, and Rybbit opens at https://<your domain>.
If the install fails: Check that your domain’s A record points at the server (Go Live) and that the server has enough free memory and disk. If the install still does not finish, contact support with the site name.
Step 6: Create your Rybbit account right away
Open https://<your domain>/signup and create your account. Do this as soon as the install finishes. Until you close sign-up in Step 7, anyone who opens /signup can create an account on your Rybbit.
Expected result: you are logged in to your Rybbit dashboard.
Step 7: Close sign-up
Sign-up stays open after the install so that you can create the first account. Close it once your team has its accounts:
- Open the Rybbit site in xCloud and select Environment in the site sidebar.
- In Environment (.env), change the line
DISABLE_SIGNUP=falsetoDISABLE_SIGNUP=true. - Click Save & Redeploy. The containers restart briefly.
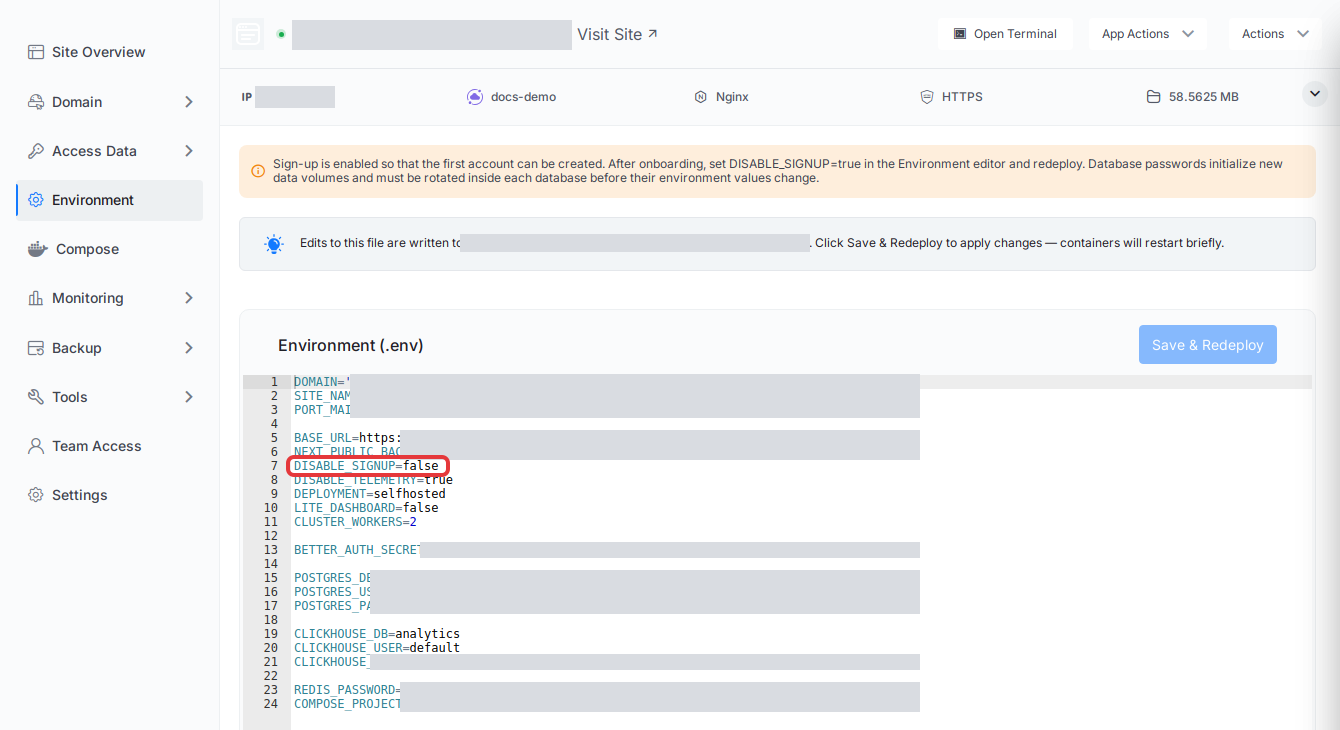
Expected result: new visitors can no longer sign up.
Do not change the database passwords on the Environment page. Changing a password here does not change it inside the database, so Rybbit would stop working.
Step 8: Add your website and the tracking script
- Log in to Rybbit and add the website you want to measure.
- Rybbit shows the tracking script for that website. It looks like this, with your Rybbit domain and the site ID Rybbit gives you:
<script src="https://analytics.example.com/api/script.js?siteId=YOUR_SITE_ID" defer></script>- Paste it into the
<head>of every page you want to track. On WordPress, use your theme’s header settings or a plugin that adds code to the header.
Expected result: open your website in a new browser tab, and the visit appears in Rybbit’s real-time view. If nothing shows, check that the script loads over https:// and that an ad blocker is not blocking it.
The script tag format comes from Rybbit’s tracking script docs (checked November 2026).
Keep Rybbit updated and backed up
- Update: to update Rybbit, follow how to update a One Click App.
- Back up: Rybbit stores its data in PostgreSQL (accounts and settings), ClickHouse (visits and events) and Redis. Take a backup before every update. See how to back up and restore Docker apps.
- Move from demo to your own domain: see how to manage One Click App domains. Update the domain in your tracking script afterwards.
Frequently asked questions
Do I need to write a docker-compose.yml to run Rybbit on xCloud?
No. The Rybbit One Click App comes with its Docker Compose file and settings. xCloud also creates the database passwords and the app secret for you.
How much server does Rybbit need?
xCloud recommends 4 GB RAM, 2 vCPU and 20 GB of disk for Rybbit. It runs on an Nginx server with Docker, and xCloud installs Docker with the app if the server does not have it yet.
Can anyone sign up on my Rybbit instance?
Sign-up is open after the install so you can create the first account. Create it right away, then set DISABLE_SIGNUP to true on the app’s Environment page and click Save & Redeploy to close sign-up.
If you run into any issues while deploying Rybbit, feel free to reach out to our support team.