

Fix Outlook and Hotmail Rejecting Your Email: Add a DMARC Record
Updated November 8, 2026 · 7 min read
When emails from your site or mailbox to Outlook.com, Hotmail, Live or MSN addresses bounce or never arrive, the usual cause is a missing DMARC record on your sending domain. The fix is one TXT record at your DNS host: name _dmarc, value v=DMARC1; p=none;. This guide shows how to check for the record, add it, and confirm that Outlook accepts your mail.
Symptoms
You may see one or more of these:
- A bounce message with
550 5.7.1 Message rejected: Message lacks SPF/DKIM/DMARC Auth Records. - A bounce with
550 5.7.515 Access denied, sending domain [domain] doesn't meet the required authentication level. - Messages to Outlook or Hotmail addresses land in Junk or disappear, while Gmail and other inboxes get them.
- It happens even though xCloud shows your SPF and DKIM records as verified.
Why it happens
Outlook checks three records on the domain in your From address:
| Record | What it proves |
|---|---|
| SPF | The server that sent the message is allowed to send for your domain. |
| DKIM | The message was signed by your domain and was not changed on the way. |
| DMARC | Tells the receiving server what to do when SPF or DKIM fail, and requires that at least one of them passes for the same domain as your From address. |
Microsoft announced in April 2025 that domains sending more than 5,000 emails a day to outlook.com, hotmail.com and live.com addresses must pass SPF and DKIM and publish a DMARC record of at least p=none. Some smaller senders also report the 550 5.7.1 ... lacks SPF/DKIM/DMARC Auth Records rejection (see this Microsoft Q&A thread); Microsoft has not announced a change. Gmail’s sender guidelines also ask bulk senders for a DMARC record. A DMARC record is now the safe default for any domain that sends email.
Step 1: Check whether your domain has a DMARC record
Run one of these commands from your computer’s terminal. Replace yourdomain.com with the domain in your From address.
dig TXT _dmarc.yourdomain.com +shortOn Windows:
nslookup -type=TXT _dmarc.yourdomain.comExpected result: a line that starts with v=DMARC1 means you already have a record. Skip to Step 4. No answer means the record is missing; continue with Step 2.
If you see two lines that start with v=DMARC1, delete one of them at your DNS host. Two DMARC records count as none.
Step 2: Add the DMARC record at your DNS host
Add one TXT record wherever your domain’s DNS is managed:
| Field | Value |
|---|---|
| Type | TXT |
| Name / Host | _dmarc |
| Value / Content | v=DMARC1; p=none; |
| TTL | Auto, or the default |
Most DNS hosts add your domain to the name for you, so enter only _dmarc. If yours asks for the full name, enter _dmarc.yourdomain.com.
Where to add it at common DNS hosts:
- Cloudflare: select your domain, go to DNS → Records, click Add record, choose TXT, enter the name and content, then Save.
- GoDaddy: open your domain’s DNS page, click Add New Record, choose TXT, enter
_dmarcas the host and the value, then save. - Namecheap: open Domain List → Manage → Advanced DNS, click Add New Record, choose TXT Record, enter
_dmarcas the host and the value, then save. - Any other DNS host: find the DNS or zone editor for your domain, add a TXT record with the values in the table, and save.
Keep these rules in mind:
- Start with
p=none. p=none asks receiving servers not to block or junk your mail because of DMARC, so adding it cannot stop mail that is delivered today. Mail can still be refused if SPF and DKIM both fail, so finish Step 4. Never start atp=reject: any service that sends for your domain without proper SPF or DKIM would have its mail refused. - One record only. If a DMARC record already exists, edit it.
- Optional reports: to receive daily summaries of who sends mail as your domain, add a
ruaaddress, for examplev=DMARC1; p=none; rua=mailto:[email protected].
Expected result: after a few minutes (sometimes up to a few hours), the command from Step 1 returns v=DMARC1; p=none;.
Step 3: If you use xCloud Mail Delivery, check the DMARC row
The xCloud Mail Delivery addon lists a DMARC record with the DNS records it needs for your own sending domain. Use it to confirm the record.
In the xCloud dashboard, open your site and go to Email Config → Mail Delivery.
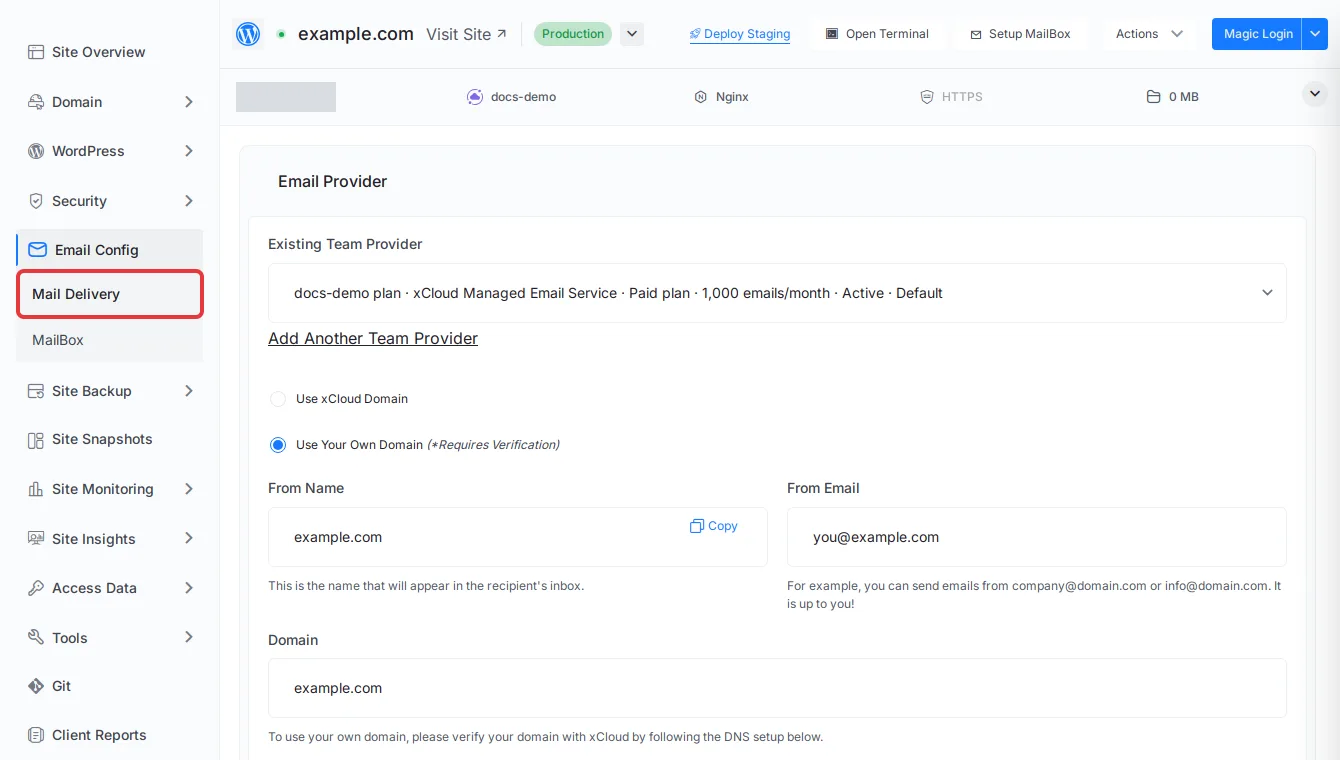
With Use Your Own Domain selected, scroll to DNS Setup. The DMARC row shows a TXT record named _dmarc.yourdomain.com with the value v=DMARC1;p=none;. Click Verify Records.

Expected result: a green tick next to the name, with the tooltip Your DMARC record is added properly. A red cross means xCloud cannot find the record yet. Check the name and value at your DNS host, wait for DNS to update, and click Verify Records again.
If your Cloudflare account is connected to xCloud, you can turn on Auto Manage DNS Records on Cloudflare instead of adding the records by hand.

xCloud then adds the DMARC record with v=DMARC1;p=none;. If your domain already has a DMARC record, xCloud replaces its value with v=DMARC1;p=none;, so a stricter policy (p=quarantine or p=reject) or a rua reporting address is removed. If you had one, open Cloudflare’s DNS → Records afterwards and put your own values back.
For the full Mail Delivery setup, see how to set up the xCloud Mail Delivery addon.
If you use xCloud MailBox
The MailBox addon’s DNS Settings list does not include a DMARC record. If you send from a MailBox address, add the _dmarc record yourself at your DNS host, as in Step 2. See how to set up the xCloud MailBox addon for the records MailBox needs.
Step 4: Make sure SPF and DKIM pass for your From domain
DMARC passes only when SPF or DKIM passes for the same domain as your From address. Check these:
- One SPF record per domain. It must include every service that sends for the domain, for example
include:xcloud.emailfor Mail Delivery next to the include of your mailbox provider. Two SPF records make SPF fail. - DKIM verified for the From domain. In Mail Delivery, the DKIM row must show a green tick for the domain you send from.
- The From address uses that domain. If your site sends as
[email protected]but you verifiedotherdomain.com, the domains do not match. Set From Email on the Mail Delivery page to an address on the verified domain.
Step 5: Send a test and read the headers
- Send a new message from your site or mailbox to an Outlook.com or Hotmail address you can read.
- In Outlook.com, open the message and view its source (More actions → View → View message source).
- Find the
Authentication-Resultsline.
Expected result: you see dmarc=pass, together with spf=pass or dkim=pass. If you see dmarc=fail or dmarc=none, recheck Steps 1 to 4. Messages that bounced earlier are not resent; send them again after the test passes.
Frequently asked questions
My SPF and DKIM already pass. Why does Outlook still reject my email?
Outlook also looks for a DMARC record on your domain. SPF and DKIM prove who sent the message, and DMARC tells the receiving server what to do when those checks fail. Without a TXT record at _dmarc.yourdomain.com, Outlook treats your domain as unauthenticated and can reject the mail, even when SPF and DKIM pass. Add v=DMARC1; p=none; and send a new test message.
Is p=none safe? Will it block my own email?
Yes, p=none is safe to add. It asks receiving servers not to block or junk your mail because of DMARC, so adding it cannot stop mail that is delivered today. Mail can still be refused if SPF and DKIM both fail, so make sure they pass (Step 4). It is the minimum that Outlook.com and Gmail ask bulk senders for. Move to p=quarantine or p=reject only after you have checked that every service that sends for your domain passes SPF or DKIM.
Can I have two DMARC records?
No. A domain can have only one DMARC record. With two TXT records at _dmarc.yourdomain.com, receiving servers treat your domain as having no DMARC record, so Outlook can still reject your mail. If you already have one, edit it instead of adding a second.
If you run into any issues with email delivery, feel free to reach out to our support team.