

How to Deploy AnythingLLM With xCloud One Click Apps
Updated November 8, 2026 · 6 min read
You can run AnythingLLM on your own server with xCloud without writing a Docker Compose file. Click New Site, pick AnythingLLM in the app catalog, choose a server, enter a site title, choose Demo Site or Go Live, and click Next. xCloud starts AnythingLLM with a password, keeps its data on the server and serves it over HTTPS. Then you sign in and connect the AI provider you want to use. This guide walks through each screen.
Who this is for: teams who want a private AI workspace to chat with their own documents, build knowledge bases and run AI agents, on a server they control. For server sizes and prices, see AnythingLLM hosting on xCloud.
What the AnythingLLM app includes
| Part | What you get |
|---|---|
| AnythingLLM | AnythingLLM 1.16.2, from the official AnythingLLM image, in one container. |
| Search over your documents | AnythingLLM searches your uploaded documents by itself, so you don’t need any extra service. |
| AI model | Not included. You connect a provider (OpenAI, Anthropic, Azure, an Ollama server you run elsewhere, any OpenAI-compatible service and more) after the install. |
| Web address | AnythingLLM is only reachable through your domain, with an SSL certificate, not by server IP and port. |
| Password | The whole instance is protected by a password from the first start. |
| Saved data | Workspaces, chats, users, uploaded documents, search indexes and the settings you save in AnythingLLM, including provider API keys, are kept on the server, so they survive restarts and redeploys. |
AnythingLLM is open source under the MIT licence.
Before you start
- An xCloud account that can create sites.
- An Nginx server with Docker and at least 2 GB RAM, 2 CPU cores and 10 GB disk. You can also create a new server during setup.
- An API key from the AI provider you want to use. Its usage is billed to your provider account.
- For Go Live: a domain you can point at the server. For a first try, Demo Site needs no domain.
Step 1: Find AnythingLLM in the app catalog
From the xCloud dashboard, click New Site. On What would you like to host today?, type AnythingLLM in the search box, then click the AnythingLLM card.
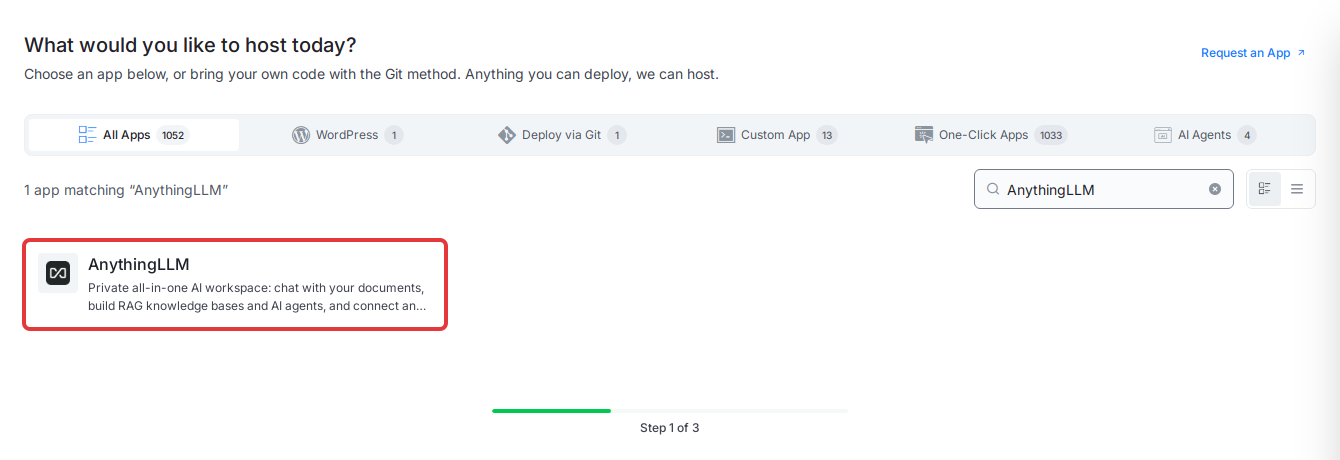
The AnythingLLM page opens. It shows Runs on Nginx, Docker and the recommended size: 2 GB RAM · 2 vCPU · 10 GB disk.
Step 2: Choose where AnythingLLM will run
Under Where should it run?, pick one option:
- Deploy on a new server: xCloud creates and sets up a server only for AnythingLLM.
- An existing server: click its card. Each card shows the server’s RAM, CPU and free disk.
Click Continue.
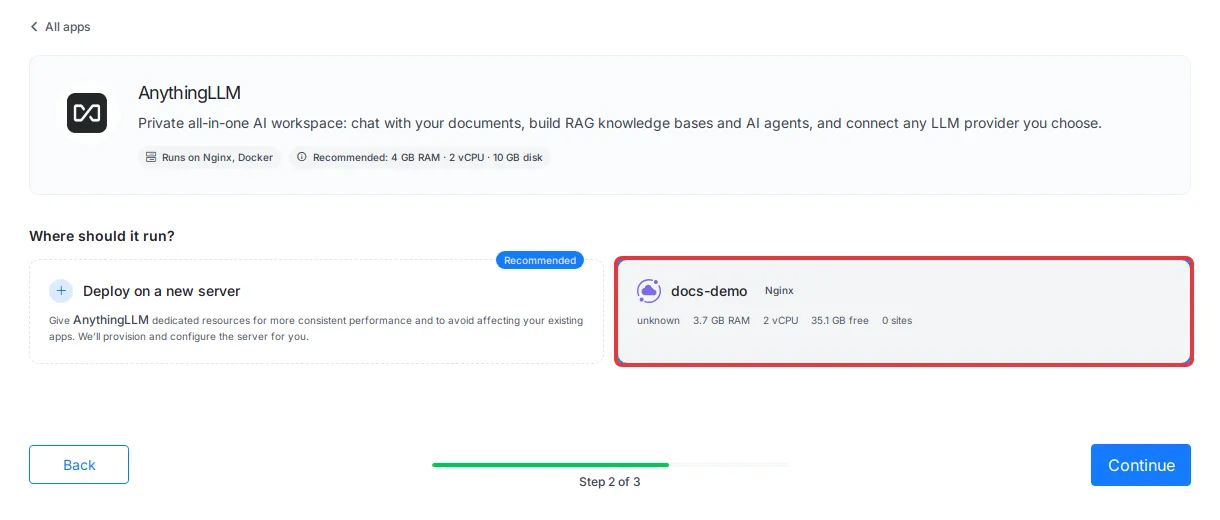
A server with less than 2 GB of RAM, or on the wrong stack, is listed under server cannot run this app. Open that list to see why.
Step 3: Add the site title, domain and password, then install
The Install AnythingLLM Into form opens.
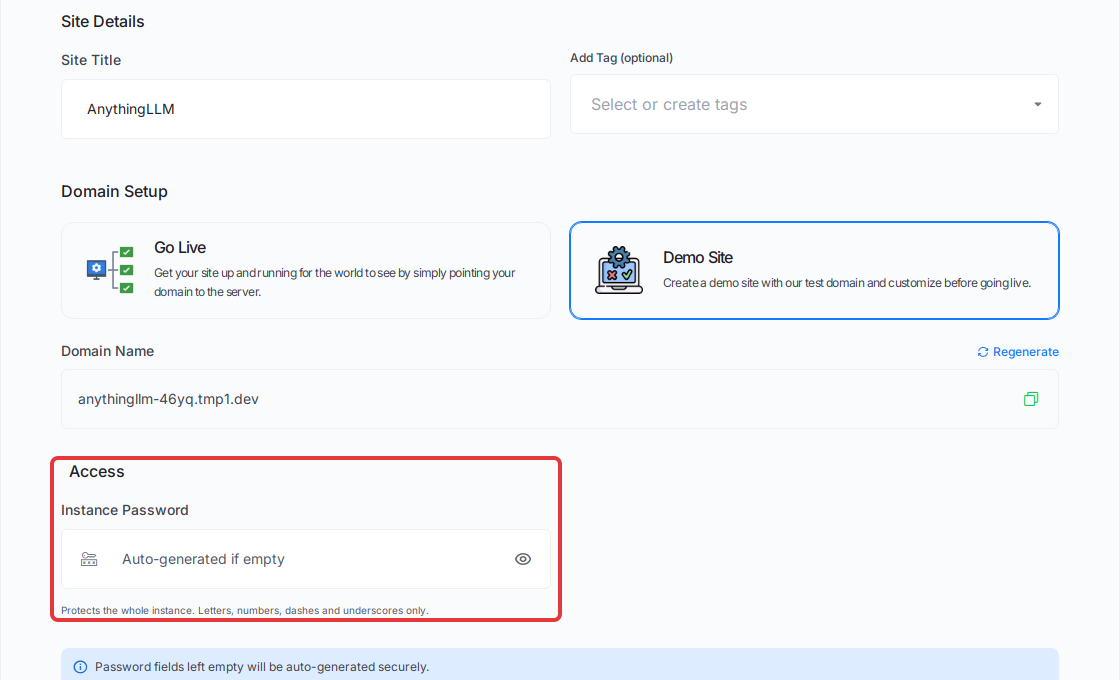
- Enter a Site Title, for example
AnythingLLM. Add Tag (optional) helps you group sites. - Under Domain Setup, choose one:
- Demo Site: xCloud gives you a test domain, shown under Domain Name. Click Regenerate for a different one. Use this to try AnythingLLM first.
- Go Live: enter your own domain and point its DNS at the server.
- Under Access, enter an Instance Password, or leave it empty and xCloud creates a strong one. Use 12 to 64 characters: letters, numbers, dashes and underscores only.
- Click Next.
Step 4: Wait for the setup to finish
xCloud shows a progress page with each stage: checking the server and DNS, installing Docker, setting up the app, SSL, HTTPS, Nginx and monitoring. You can leave this page; the setup keeps running.
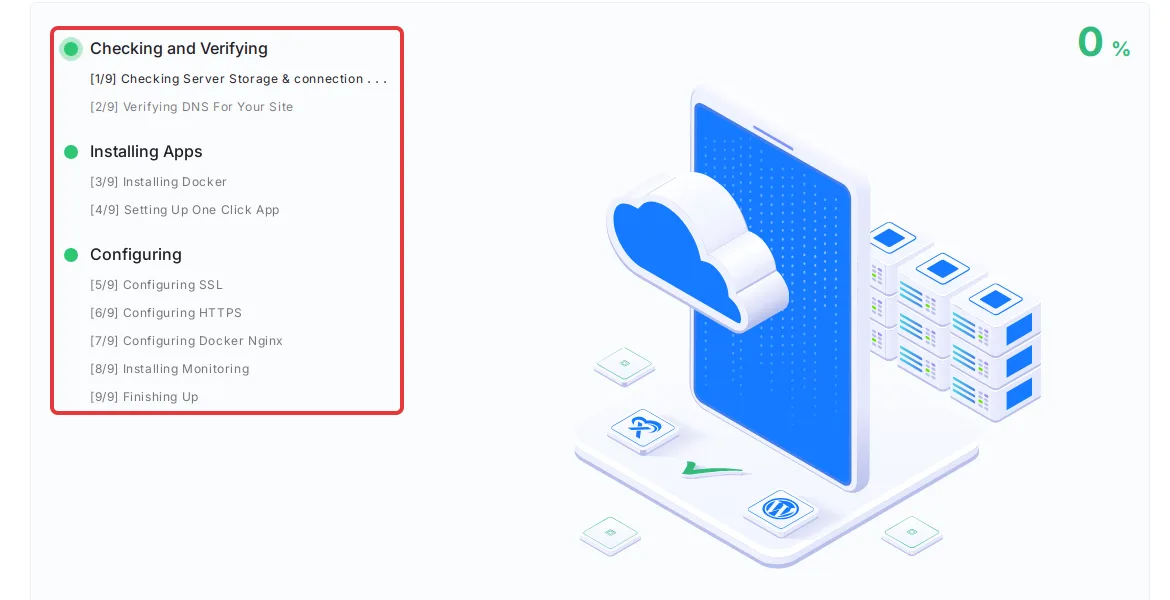
When it finishes, the site’s Site Overview page opens.
If a stage fails, open Recent Events on the site, click View on the failed event, and fix what it reports (often DNS for Go Live). Then try again, or contact support with the event output.
Step 5: Copy your AnythingLLM address and password
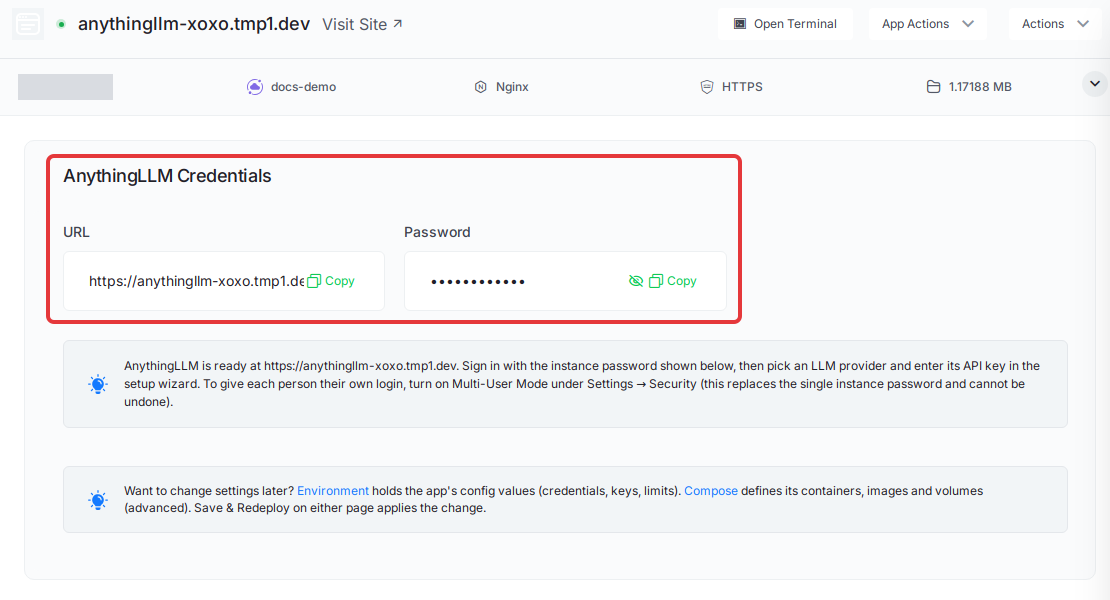
On Site Overview, the AnythingLLM Credentials card shows the URL and the Password. Click Copy next to each one. Click the eye icon to show the password.
Step 6: Sign in and connect your AI provider
Open the URL. AnythingLLM shows Welcome with a Password field. Paste the password and click Login.
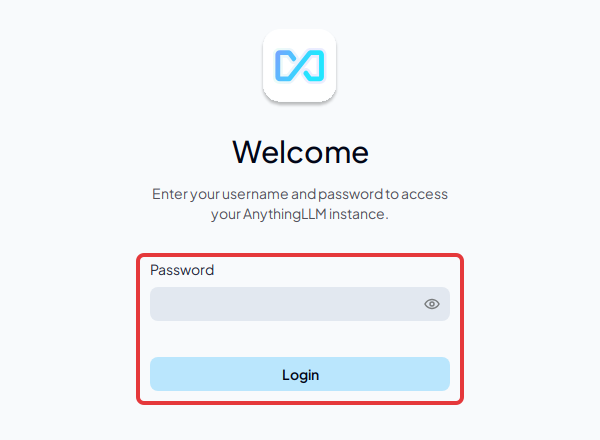
On its first start AnythingLLM can take a minute or two to be ready. If the page doesn’t load yet, wait a minute and reload.
AnythingLLM then opens its setup wizard:
- Choose your LLM provider and enter its API key.
- Create your first workspace.
- Upload documents or add web pages to the workspace, then start a chat.
The AnythingLLM documentation covers providers, workspaces, agents and the API.
After the install
Change the password
The instance password lives in the site’s settings in xCloud, and AnythingLLM applies it on every start. To change it:
- Open the site in xCloud and click Environment in the site menu.
- Change
AUTH_TOKENto the new password. - Click Save & Redeploy.
A password changed inside AnythingLLM works only until the next restart, then goes back to the value in Environment. For the same reason, if you turn off password protection under Settings → Security in AnythingLLM, it comes back on at the next restart.
Never change SIG_KEY or SIG_SALT in Environment. AnythingLLM uses them to protect sign-in sessions and some saved secrets.
Give each person their own login
By default everyone shares one password. To give each person their own account, open Settings → Security in AnythingLLM, turn on Multi-User Mode and create an admin user. This replaces the shared password with personal logins, and you can’t switch it back.
Keep usage under control
- Anyone who can sign in can use your AI provider, and the cost goes to your provider account. Share the password, or create accounts, only for people who need it.
- Agent skills, MCP servers and web browsing let the AI reach other systems. Turn them on only when you need them.
Upload size
AnythingLLM accepts one document up to 512 MB through your domain. If your domain goes through Cloudflare’s proxy, Cloudflare limits one upload to about 100 MB.
Server size
The minimum of 2 GB RAM suits a few users and a modest document library. Large document collections and many users at once need more. Running an AI model on the same server needs far more RAM; see Self-host LLMs with xCloud for that setup.
Update and back up AnythingLLM
- Update: your site stays on the AnythingLLM version it was installed with. Back up first, read the AnythingLLM release notes, then follow Update a One Click App and edit its Docker Compose. AnythingLLM updates its own database when it starts. Never remove the data volume during an update.
- Back up: one data volume holds everything: workspaces, chats, users, documents, search indexes and the saved settings with your provider API keys. Keep backups private. See Back up and restore Docker apps for what xCloud backs up and how to restore it.
Common mistakes
- Expecting a built-in AI model. Connect a provider and enter its API key after you sign in.
- Changing the password inside AnythingLLM. It goes back at the next restart; change
AUTH_TOKENin Environment instead. - Turning on Multi-User Mode to test it. It can’t be turned off again.
- Choosing Go Live before the domain’s DNS points at the server. Start with Demo Site, then go live from the demo site.
Frequently asked questions
Do I need to write a Docker Compose file to deploy AnythingLLM on xCloud?
No. The AnythingLLM One Click App already defines the AnythingLLM container and its storage. You pick AnythingLLM in the app catalog, choose a server, enter a site title, choose Demo Site or Go Live, and click Next.
What server does AnythingLLM need on xCloud?
An Nginx server with Docker and at least 2 GB of RAM, 2 CPU cores and 10 GB of disk. Large document collections and many users need more.
Does the AnythingLLM app include an AI model?
No. It includes AnythingLLM with built-in document search, but no language model. After the install you connect a provider such as OpenAI, Anthropic, Azure or an Ollama server you run elsewhere, and enter its API key in AnythingLLM.
How do I change the AnythingLLM password?
Open the site in xCloud, click Environment, change AUTH_TOKEN and click Save & Redeploy. A password changed inside AnythingLLM goes back to the Environment value at the next restart.
Related guides
- Deploy LibreChat with xCloud
- Use One Click App templates in xCloud
- Back up and restore Docker apps
- Go live from a demo site
If you run into any issues while deploying AnythingLLM, feel free to reach out to our support team.