

How to Deploy PocketBase With xCloud One Click Apps
Updated November 8, 2026 · 6 min read
You can run PocketBase on your own server with xCloud without writing a Docker Compose file. Click New Site, pick PocketBase in the app catalog, choose a server, enter a site title and the superuser email, choose Demo Site or Go Live, and click Next. xCloud starts PocketBase, keeps its data on the server and serves the dashboard and API over HTTPS. This guide walks through each screen up to your first sign-in.
Who this is for: developers who want a ready backend for a web or mobile app (a database, user sign-up and login, file uploads, realtime updates and a REST API) in one small app on a server they control. For server sizes and prices, see PocketBase hosting on xCloud.
What the PocketBase app includes
| Part | What you get |
|---|---|
| PocketBase | PocketBase 0.40.4, the official release, packaged in a community Docker image (muchobien/pocketbase-docker), because PocketBase does not publish its own image. |
| Database | SQLite, built into PocketBase. There is no separate database server to run. |
| Web address | The admin dashboard at /_/ and the API at /api/ on your domain, behind xCloud’s Nginx with an SSL certificate. |
| Saved data | The database, uploaded files, migrations, hooks and public files are kept on the server, so they survive restarts and redeploys. |
| Superuser account | You enter the superuser email. Leave the password empty and xCloud generates one. |
PocketBase is open source under the MIT licence.
Before you start
- An xCloud account that can create sites.
- An Nginx server with Docker. PocketBase is light: an existing server needs at least 256 MB RAM, 1 CPU core and 2 GB disk. You can also create a new server during setup.
- For Go Live: a domain you can point at the server. For a first try, Demo Site needs no domain.
Step 1: Find PocketBase in the app catalog
From the xCloud dashboard, click New Site. On What would you like to host today?, type PocketBase in the search box, then click the PocketBase card.
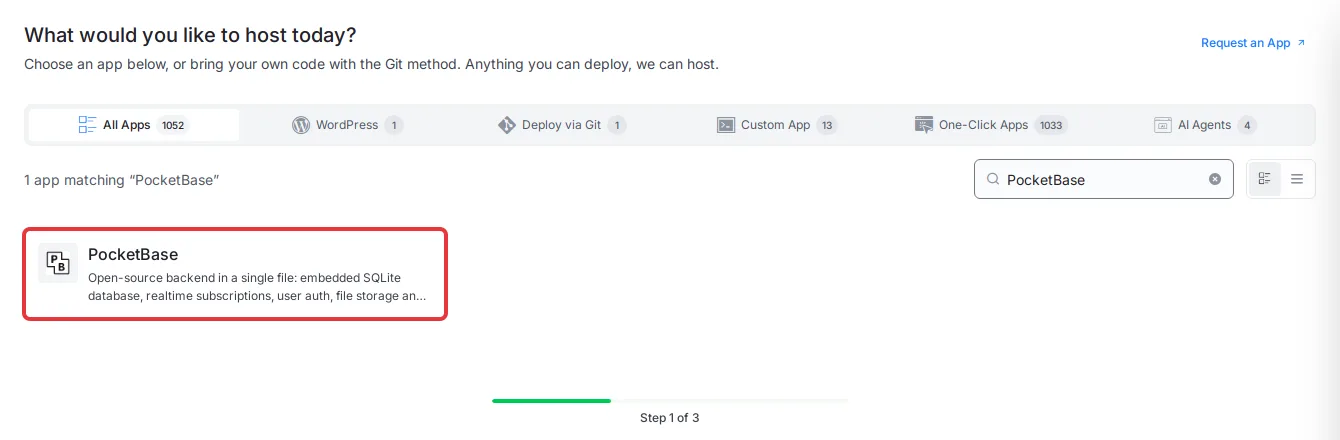
The PocketBase page opens. It shows Runs on Nginx, Docker and the recommended size: 4 GB RAM · 1 vCPU · 2 GB disk.
Step 2: Choose where PocketBase will run
Under Where should it run?, pick one option:
- Deploy on a new server: xCloud creates and sets up a server only for PocketBase.
- An existing server: click its card. Each card shows the server’s RAM, CPU and free disk.
Click Continue.
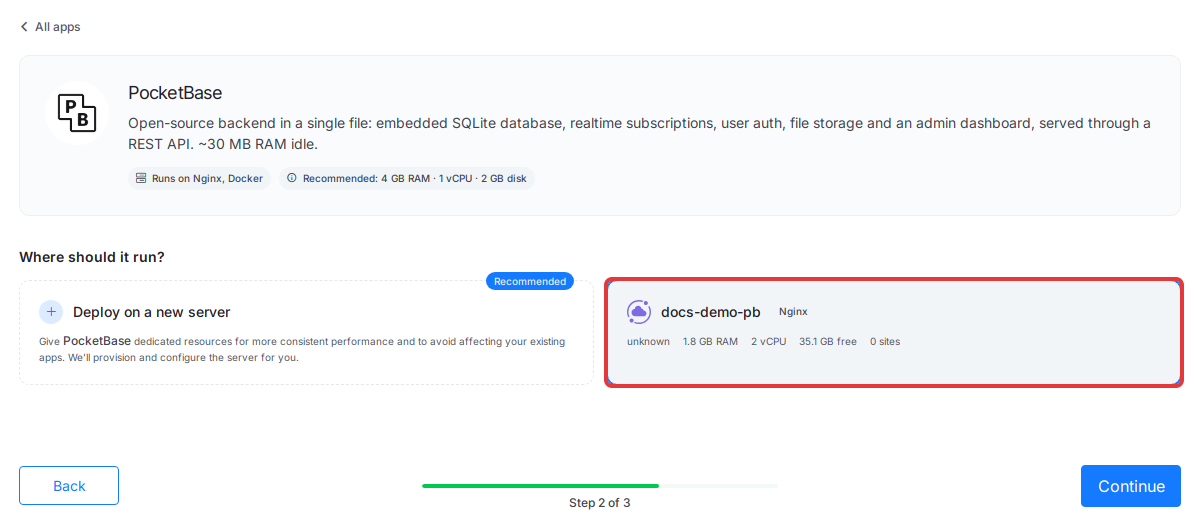
A server that is too small or on the wrong stack is listed under server cannot run this app. Open that list to see why.
Step 3: Add the site title and choose a domain
The Install PocketBase Into form opens.
- Enter a Site Title, for example
PocketBase. Add Tag (optional) helps you group sites. - Under Domain Setup, choose one:
- Demo Site: xCloud gives you a test domain, shown under Domain Name. Click Regenerate for a different one. Use this to try PocketBase first.
- Go Live: enter your own domain and point its DNS at the server.
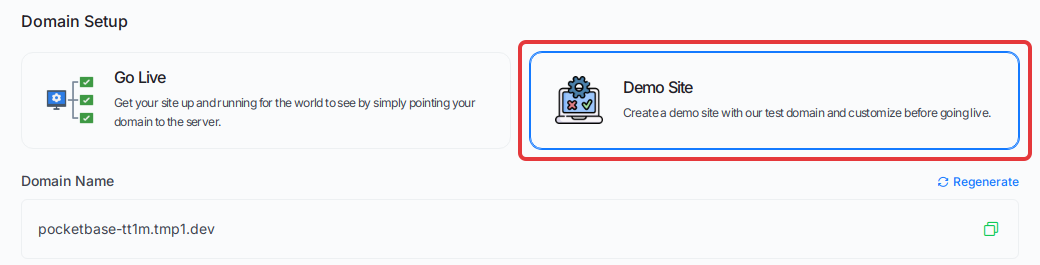
Step 4: Enter the superuser email and install
Under Superuser Credentials:
- In Superuser Email, enter an email address you control. This is the login for the PocketBase dashboard.
- Leave Superuser Password empty to let xCloud generate a strong one, or enter your own (10 to 64 characters).
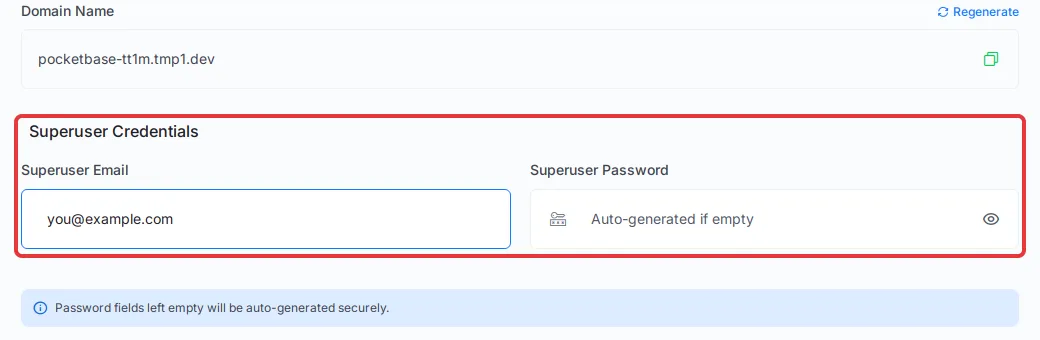
Click Next at the bottom of the form.
Step 5: Wait for the setup to finish
xCloud shows a progress page with each stage: checking the server and DNS, installing Docker, setting up the app, SSL, HTTPS, Nginx and monitoring. You can leave this page; the setup keeps running.
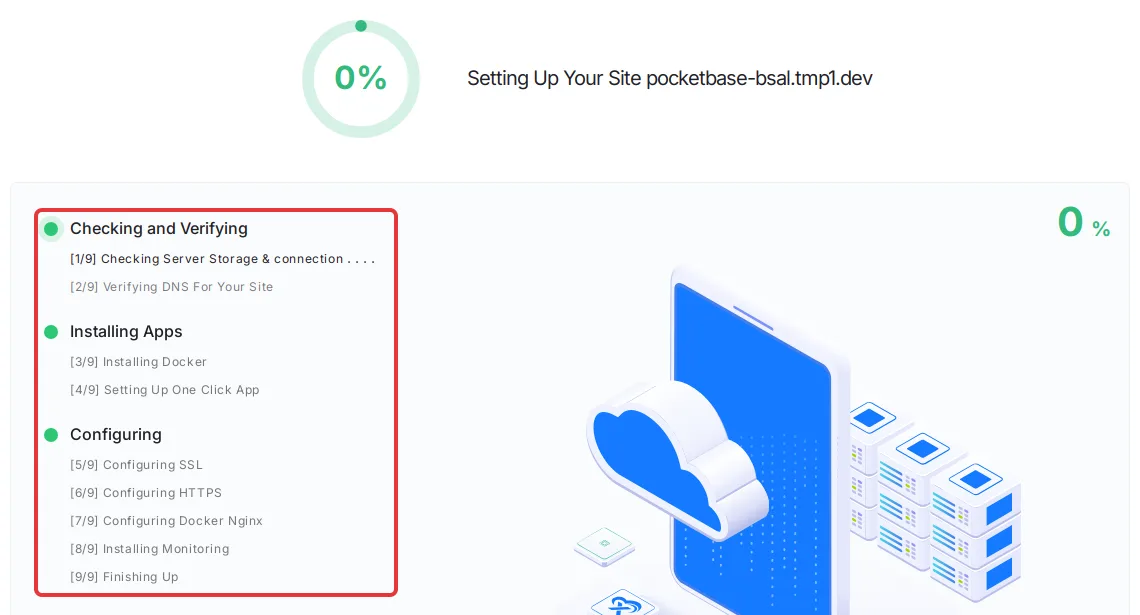
When it finishes, the site’s Site Overview page opens.
If a stage fails, open Recent Events on the site, click View on the failed event, and fix what it reports (often DNS for Go Live). Then try again, or contact support with the event output.
Step 6: Copy the PocketBase login
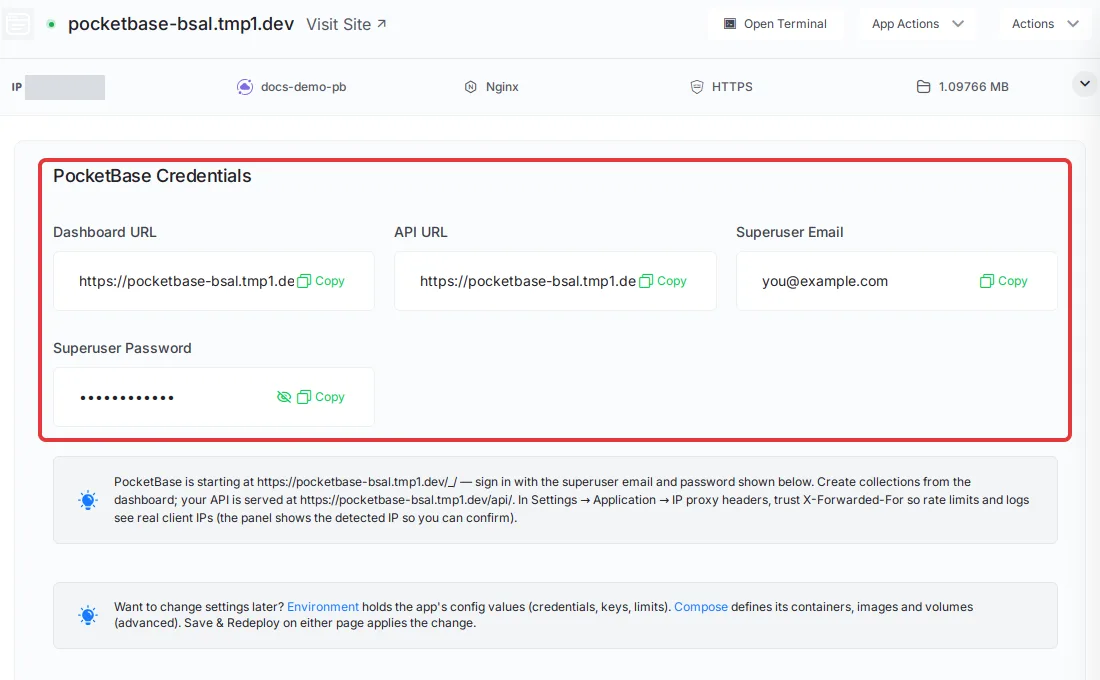
On Site Overview, the PocketBase Credentials card shows the Dashboard URL, the API URL, the Superuser Email and the Superuser Password. Click the eye icon to show the password, or click Copy next to each value.
Step 7: Sign in to the PocketBase dashboard
Open the Dashboard URL (your domain followed by /_/). On Superuser login, enter the superuser email in Email and the password in Password, then click Login.
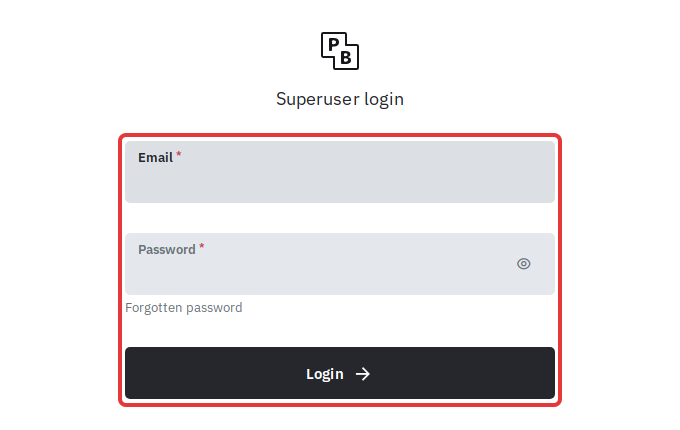
The PocketBase dashboard opens, and your backend is ready. Create your first collection there, then point your app at your domain. To learn collections, API rules and the client SDKs, follow the PocketBase documentation.
After your first sign-in
| Task | Where | Why |
|---|---|---|
| Trust the proxy header | Settings → Application → IP proxy headers in PocketBase: trust X-Forwarded-For |
PocketBase runs behind xCloud’s Nginx. Without this, rate limits and request logs show the proxy’s address instead of each visitor’s. The panel shows the address it detects, so you can confirm. |
| Turn on email | Settings → Mail settings in PocketBase | Verification and password reset emails need your SMTP details. |
| Store files elsewhere (optional) | Settings → Files storage in PocketBase | Keep uploads on S3-compatible storage instead of the server’s disk. |
| Add social login (optional) | The auth providers of a users collection in PocketBase | Let your app’s users sign in with OAuth2 providers. |
Change the superuser password
xCloud applies the superuser email and password every time PocketBase starts. So:
- To change the password, open the site in xCloud, click Environment in the site menu, change
PB_ADMIN_PASSWORD, and click Save & Redeploy. - A password you change inside the PocketBase dashboard for that email goes back to the Environment value at the next restart.
- Changing
PB_ADMIN_EMAILadds a second superuser; it does not rename the first one. Delete the old one in PocketBase if you no longer need it.
Other superusers you create in the PocketBase dashboard are not affected.
Upload size
Requests through your domain can be up to 100 MB. A file field in PocketBase allows 5 MB by default; you can raise it per field up to that limit. Uploading a backup through the dashboard to restore it also works only for backups under 100 MB.
Update and back up PocketBase
- Update: your site stays on the PocketBase version it was installed with. PocketBase is still before version 1.0, so a newer release can change how things work. Back up first, read the PocketBase changelog, then follow Update a One Click App and edit its Docker Compose. Don’t run
pocketbase updateinside the container, and never remove the storage volumes during an update. - Back up: the data volume holds the database and uploaded files; keep the migrations (and hooks, if you use them) with it. See Back up and restore Docker apps for what xCloud backs up and how to restore it. PocketBase also has its own backups under Settings → Backups, manual or on a schedule, saved on the server or on S3-compatible storage.
Common mistakes
- Choosing Go Live before the domain’s DNS points at the server. Start with Demo Site, then go live from the demo site.
- Opening the domain without
/_/and expecting the dashboard. The dashboard is at/_/; the API is at/api/. - Changing the superuser password only inside PocketBase. It resets at the next restart; change it in Environment instead.
Frequently asked questions
Do I need to write a Docker Compose file to deploy PocketBase on xCloud?
No. The PocketBase One Click App already defines the PocketBase container and its storage. You pick PocketBase in the app catalog, choose a server, enter a site title and the superuser email, and click Next.
What server does PocketBase need on xCloud?
An Nginx server with Docker. An existing server needs at least 256 MB of RAM, 1 CPU core and 2 GB of disk. The install page shows 4 GB RAM, 1 vCPU and 2 GB disk as the recommended size, which is what a new server from xCloud starts at.
Where do I find the PocketBase superuser password?
If you leave Superuser Password empty, xCloud generates one. Open the site in xCloud: the Site Overview page shows a PocketBase Credentials card with the Dashboard URL, API URL, Superuser Email and Superuser Password.
Why did my new superuser password stop working after a restart?
xCloud applies the superuser email and password from the site’s Environment page every time PocketBase starts. A password you change inside the PocketBase dashboard for that email goes back to the Environment value. Change PB_ADMIN_PASSWORD in Environment and click Save & Redeploy instead.
Related guides
- Deploy Directus with xCloud
- Use One Click App templates in xCloud
- Back up and restore Docker apps
- Go live from a demo site
If you run into any issues while deploying PocketBase, feel free to reach out to our support team.