

Zero-Downtime Deployments for Node.js Apps in xCloud
Updated November 10, 2026 · 6 min read
A normal Node.js deploy stops your app and starts it again, so visitors can get 502 errors for a moment. With Release mode in xCloud, each release starts next to the live one, and traffic moves to it only when it is healthy.
This guide covers what is specific to Node.js. Read How to use zero-downtime deployments for the basics.
Requirements
- A Node.js site deployed from Git on an nginx server. On OpenLiteSpeed the card shows “Node.js release mode needs an nginx server.”
- No
.envfile in the repository. - No PM2 commands in the deploy script and no custom
ecosystem.config.jsorecosystem.config.cjsfile. - The Manage deploy scripts permission to turn Release mode on.
How a Node.js deploy works
For SSR and Hybrid apps:
- xCloud builds the new release in its own folder (install and build).
- It starts the release with your start command on a second port. The live release keeps running on the first.
- It sends requests to the new release on
127.0.0.1until it answers with a status below 500. The log shows, for example, “Node health check passed on 127.0.0.1:3003 (HTTP 200).” - nginx reloads gracefully and sends new requests to the new release.
- The old process gets 30 seconds to finish the requests it is serving, then xCloud stops it.
If the health check fails, nothing switches and the old process keeps serving. The next deploy uses the other port, so the two ports take turns.
Static builds don’t run a process: the build goes into a new release folder and the site switches to it in one step.
Step 1: Turn Release mode on
Open the site, click Git, and scroll to the Release mode card. On a Node.js site the card also says: “Turn release mode off, change the serving mode, then turn it on again.”

Click the switch and confirm with Turn on.
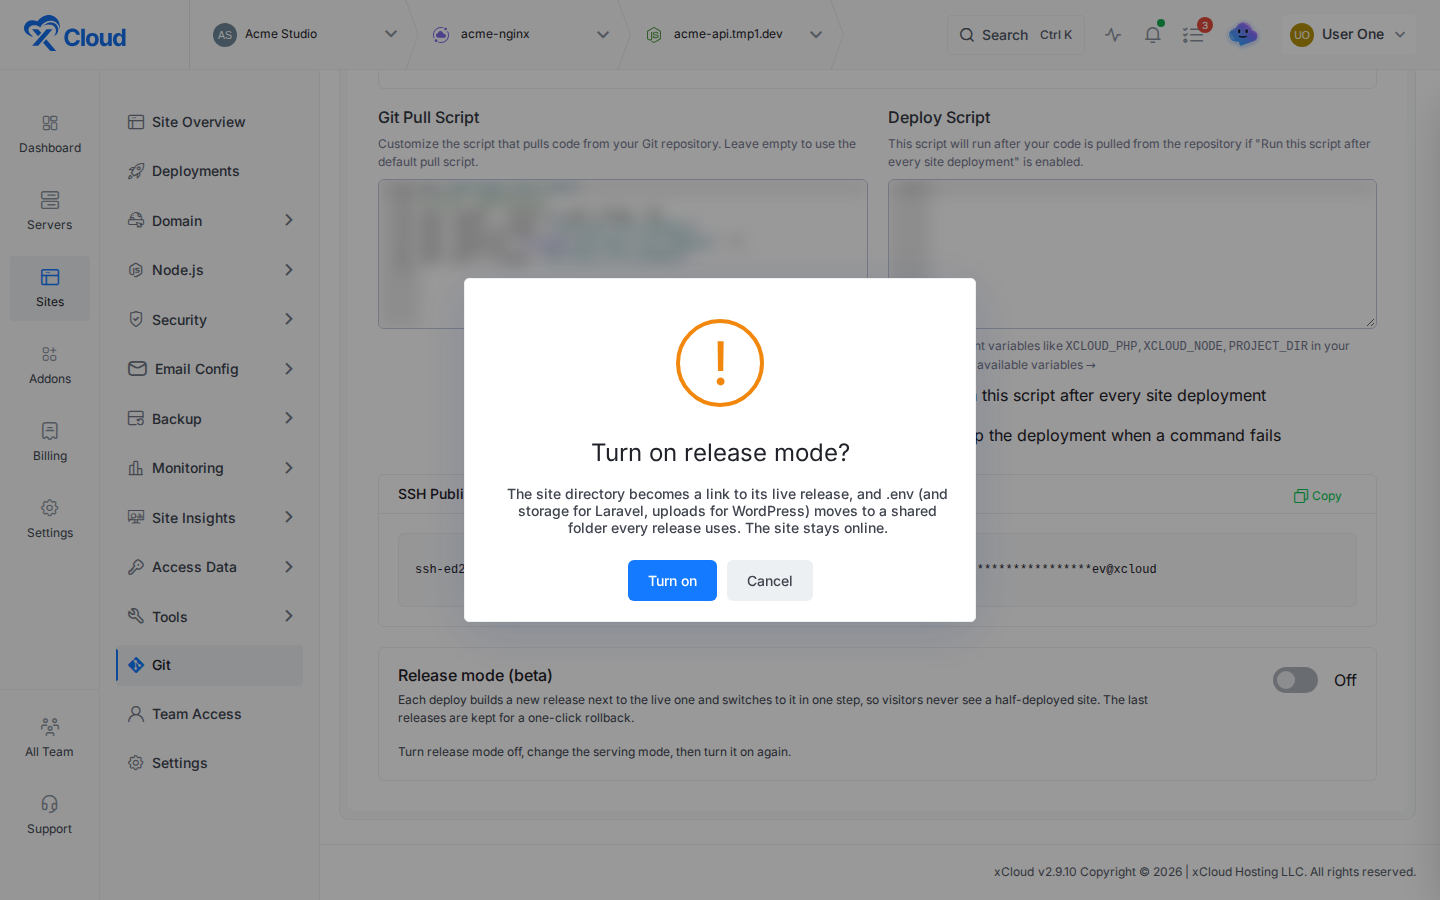
When it is on, .env is shared between releases.
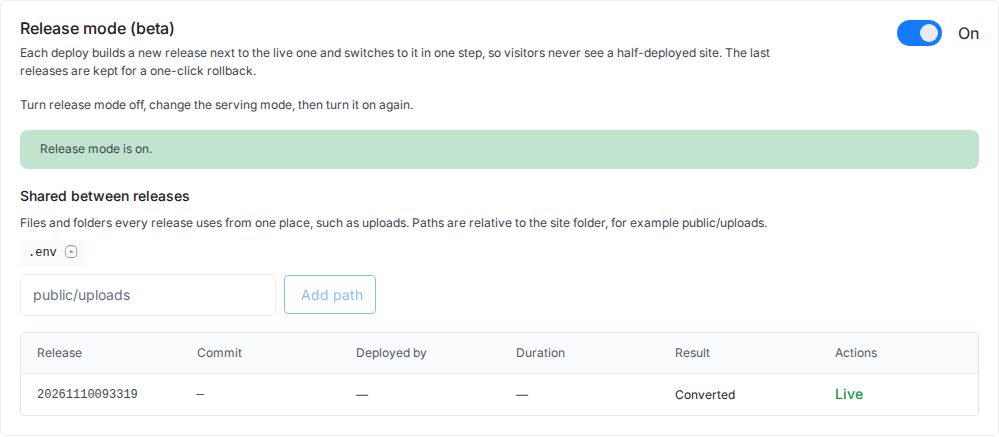
You can also choose Release mode (zero-downtime deploys) when you create a Node.js site with Deploy via Git; see How to deploy a Node.js application.
Step 2: Make your app ready for two ports
Your app runs on a different port in each release, so it must take the port from the environment:
const port = process.env.PORT || 3000;
const host = process.env.HOST || '127.0.0.1';
const server = app.listen(port, host);- PORT: xCloud sets it for each release, after loading your
.env, so aPORTin.envdoes not move the release to the other port. - HOST: xCloud sets it to
127.0.0.1. Listen on that address. An app that listens only onlocalhostcan bind to the IPv6 address and fail the health check. - Health check: xCloud requests
/on the new release (for a Hybrid app, its API path). Any answer below 500 passes, so a redirect or a 404 is fine. A 500 or no answer fails it.
Step 3: Shut down gracefully
When the old release stops, let it finish what it is doing. Close the server when the process gets a stop signal:
for (const signal of ['SIGTERM', 'SIGINT']) {
  process.on(signal, () => server.close(() => process.exit(0)));
}
nginx already sends new requests to the new release before the old one stops, so this only affects requests and jobs that are still running.
Step 4: Deploy and check the releases
Deploy as usual. The card lists each release with its commit. The newest one that passed its check is Live.
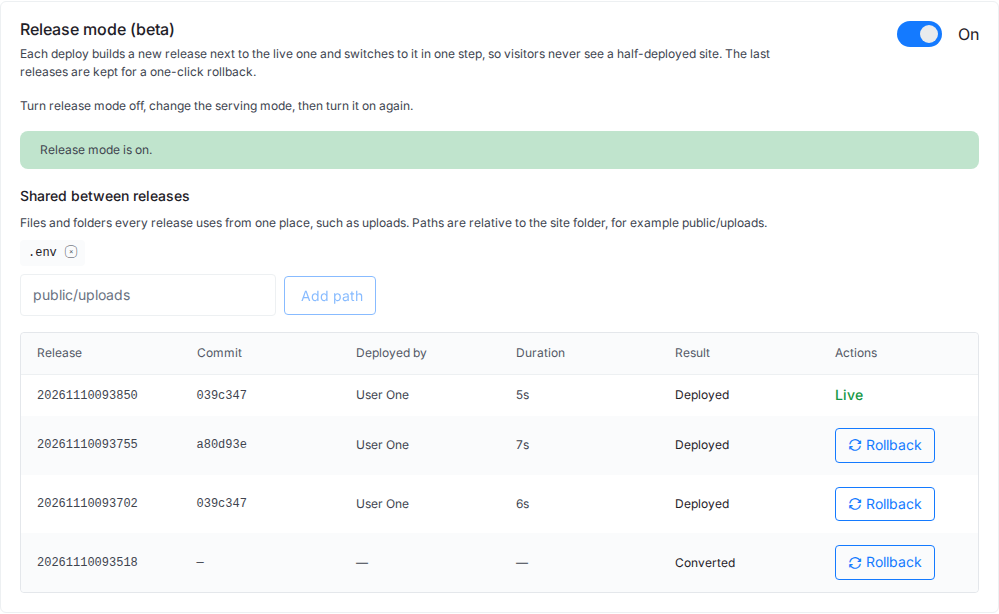
A Node.js rollback starts the kept release on the idle port, checks it and then switches, so it can take up to a minute. See How to roll back a deployment.
A repository that commits .env is refused
Release mode keeps .env in a shared folder. If your repository tracks a .env file, every deploy is refused and the card shows a red Failed row while the previous release stays Live:
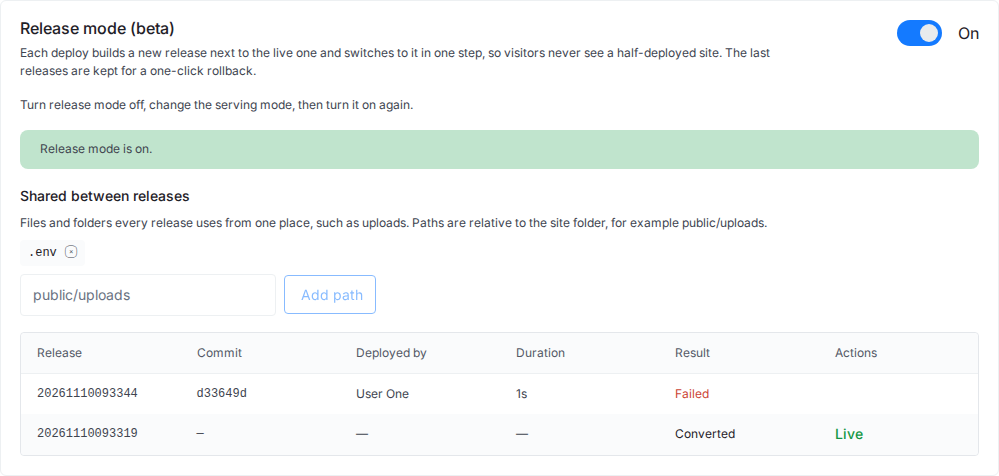
The reason is in the deployment log on the Deployments page: “The commit tracks .env; release mode keeps it in … Remove it from the repository, then deploy again.” Remove .env from the repository, add it to .gitignore, and manage the values in xCloud instead (Environment variables and Git deployments).
Serving mode and other limits
- Serving mode: you can’t change it while Release mode is on. Turn release mode off, change the serving mode, then turn it on again.
- PM2: a deploy script line that changes PM2 processes (for example
pm2 restart) is refused with its line number. Use the start command setting. - Ecosystem file: “A custom ecosystem.config.js file is not supported in release mode. Use the start command setting instead.”
Frequently asked questions
Which port does my app listen on in Release mode?
xCloud sets the PORT environment variable for each release, alternating between two ports, and sets HOST to 127.0.0.1. Read the port from process.env.PORT instead of hard-coding it.
Why was my deploy refused with ‘The commit tracks .env’?
Release mode keeps .env in a shared folder and links it into every release, so the repository must not contain a .env file. Remove .env from the repository (and add it to .gitignore), then deploy again.
Can I use pm2 commands in my deploy script?
No. Release mode starts and stops the app processes itself. A deploy script that changes PM2 processes, or a custom ecosystem.config.js file, is refused. Set how the app starts in the start command setting instead.
Can I change the serving mode while Release mode is on?
No. Turn release mode off, change the serving mode, then turn it on again.
Related guides
- How to use zero-downtime deployments (Release mode)
- How to deploy a Node.js application
- Release mode messages and fixes
- How to update Node.js
If you run into any issues with zero-downtime deployments for your Node.js app, feel free to reach out to our support team.